Motic-显微镜说明书
- 格式:pdf
- 大小:3.62 MB
- 文档页数:22
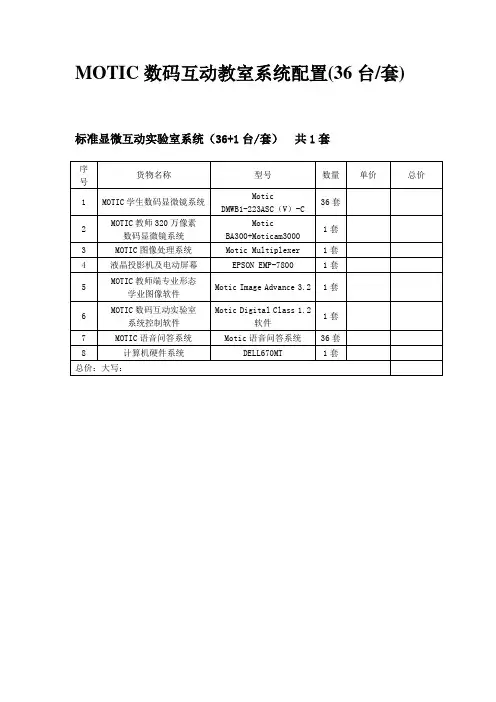
MOTIC数码互动教室系统配置(36台/套)标准显微互动实验室系统(36+1台/套)共1套产品主要技术数据和性能详细说明:方案:标准版显微互动教室配置及技术要求(36+1台/套)共1套一、学生用内置式数码一体化显微镜系统型号:DMWB1-223ASC(V)-C内置一体化数码显微镜数量:36套摄像系统:内置一体化高分辨率数码摄像系统,可显示90% 目视视场的图像,1/3''CCD,480TV LINES、超过45万像素的高分辨率数码摄像系统,具RCA、S-VIDEO双口输出,自动/手动白平衡(色彩保证)。
*保证学生目镜下和电脑屏幕的显微镜图象同步清晰。
光标指示系统:具有光标指示系统,绿色LED可移动光标指针,LED指针亮度可调节。
且在目镜下与教师电脑上同时显示以实现师生间在同一时间实现点对点互动沟通。
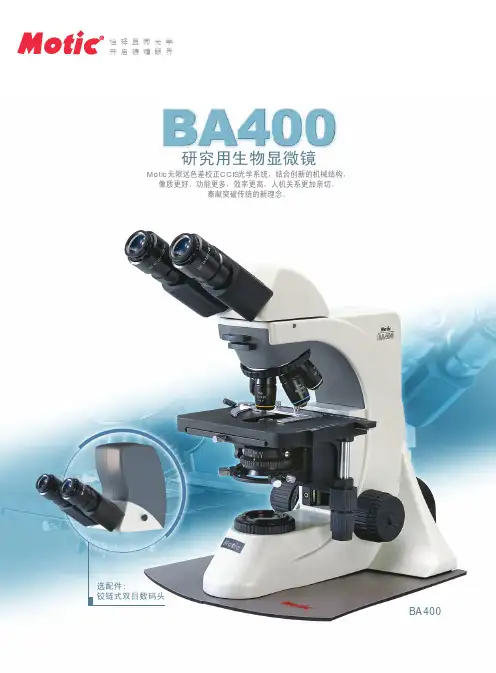
目镜: 10×/18mm,视度可调,带护眼罩;镜筒:双目镜筒;物镜:平场4X、10X、40X(弹簧)、100X(弹簧、油),防霉;转换器:四孔转换器;聚光镜:阿贝式聚光镜,N.A.1.25;载物台:机械移动载物台,采用进口三角钢丝导轨,台面145×35(mm);移动范围:76mmX50mm,最小读数0.1mm.限位装置防打切片;焦距调节:粗微调同轴,带上限位装置,行程25mm,微调最小读数值2um;光源:稳压开关电源6V/20W卤素灯,亮度可调;其他:防霉,防尘罩,兰色滤色片、护眼罩、防尘罩;二、教师用320万像素数码一体化显微镜系统型号:Motic BA300+Moticam3000数量:1套Motic BA300研究用生物显微镜中的无限远色差校正CCIS光学系统,在光学性能提高和功能拓展上具有重大意义。
完美地结合了多种功能,使用频率高,并有极大的扩展性。
宽阔的机身增强了整体刚性,Y形设计提供了稳定的基座。
采用人性化的设计,结构紧凑,节省现代化实验室有限的空间。
操作更加简便。
工作台的低位调节手柄、低位亮度调节旋钮和低位粗微调焦手轮。

诠释显微光学宝石显微镜GM143/GM168宝石显微镜是对宝石进行观察、鉴定的专用显微镜,具有高清晰和高分辨率的立体图像质量,多功能、人性化的结构设计使操作者的工作效率大大地提高,减轻操作者的疲劳感。
完备的附件能满足各种不同的需求。
GM168 GM143GM143/GM168宝石显微镜,提供优良的光学质量和便利的操作。
GM143GM168暗场效果图暗场效果图物镜体GM143采用greenough光学系统的1:4头部,提供高清晰和高分辨率的立体图像,三目镜体的结构为连接摄影、摄像配件提供了专用出口。
变倍范围:连续变倍10X-40X工作距离:80mm最大视场范围:20mm(10X)目镜广角目镜:WF10X/20mm,双目视度可调。
瞳距调节范围:55-76mm物镜体GM168采用greenough光学系统的1:6.7头部,提供高清晰和高分辨率的立体图像,三目镜体的结构为连接摄影、摄像配件提供了专用出口。
变倍范围:连续变倍7.5X—50X工作距离:113mm最大视场范围:30.7mm(7.5X)目镜大视场广角目镜:WF10X/23mm,双目视度可调。
瞳距调节范围:52-79mm明、暗场照明器提供暗场照明和明场照明两种不同的照明方式,光孔从 41mm- 2mm的可变光栏,可以对照明光束进行调节。
明暗场照明转换方便。
上照明使用7W 日光型荧光灯(色温:6000K ,显色指数:85),该灯符合钻石灯照明要求。
蛇形管的连接方式更便于调节照明角度。
调焦行程125mm 调焦行程,可对大小不同的宝玉石及样品进行观察。
钢丝宝石夹钢性适中的钢丝宝石夹夹持牢靠、方便,由于减少宝石腰部的光线遮挡,可以对宝石全方位地观察。
工作台两边都有宝石夹的安装孔,操作者可以根据自己的习惯选择。
弯臂弯臂可作0-45°转动,从而可以调节观察眼点的高度和角度,使操作更加方便舒适。
换灯设计有换灯装置,换灯方便快捷。
底座可以360°转动,以便多人之间的交流。

诠释显微光学视频数码显微检测系统高达1:14的光学连续变倍比,可用时连接普通监视器和计算机,是工业质量控制的良好工具。
Z14视频数码显微系统的模块化设计为您提供多种选择1:14光学连续变倍体+物镜[SW01094P]物镜倍率0.5X 工作距离172 mm[SG01T01204] 1X 工作距离75 mm[SG01T03206A]1.5X 工作距离40 mm [SG01T11203]变倍比 1:14 全部光学变倍,在光学连续变倍行程内自动对焦和自动齐焦。
底座两种可选底座:1. 平底座组 [SW01909Z]2. 手动式移动工作台[SW0123BJ]台板面积 450 mm x 350 mm ;台板X 向行程 400 mm ;台板Y 向行程 210 mm ;变倍体支承架可以做前后左右摆动,以满足从不同的侧面观察物体的要求。
控制图像连续从小变大,或连续从大变小到你需要的倍数。
Z14视频数码显微检测系统应用实例Z14视频数码显微检测系统总放大倍率(在监视器上)线路板检查表面质量检查-1表面质量检查-2照像底片检测笔迹鉴定1X5X10X14X Z14视频数码显微检测系统总放大倍率(在计算机上) 2、此表仅用做参考。
Z14视频数码显微检测系统视场范围Z14视频数码显微检测系统配置表Z14视频数码显微检测系统技术指标Motic Quality Standard 1.0图像处理具有强大的图像处理功能,包括滤波、边缘检测、形态分析、放大、色度,亮度和对比度调节、算术和代数运算、ROI(感兴趣区)编辑等比较通用的图像处理方法,另外包括伽马校正、分水岭、图像登记等比较专用的图像处理方法。
图像分析具有较为完整的分析和测量功能,包括点分析(用鼠标选取点进行分析)、ROI手工分析(利用系统提供的ROI绘图工具进行分析)、单目标分析(选取图像上任一目标进行分析)、形态分析(对图像进行分割处理后统计分割目标)、区域亮度分析(利用系统提供的ROI绘图工具选取区域,分析区域的光密度),所有的分析结果均由系统自动计算并存入结果信息窗中,可以另存为文件和打印。

MZDR0850三维旋转连续变倍视频显微系统使用说明书桂林市迈特光学仪器有限公司使用前请注意:1. 操作:(1) 本仪器是一种精密仪器,在操作或运输过程中要轻拿轻放,避免碰撞。
(2) 避免阳光直接暴晒、高温、灰尘和震动。
(3) 镜片表面不应留有污物和手指印,以免降低本仪器成像清晰度。
2. 清洁和保管(1) 清洁光学零件表面应用脱脂纱布或棉花轻轻擦拭,如有手指印和油污,应用70%乙醚和30%酒精混合液沾湿脱脂纱布或棉花后轻轻擦拭。
!由于酒精和乙醚是高度易燃的溶剂,必须小心使用,一定要离开明火和可能产生电弧的地方,如电子设备的开和关。
同时也要记住应在有良好通风的房间使用这些化学试剂。
(2) 不要用有机溶剂擦拭其它元件表面,可用中性的清洁剂擦拭。
(3) 不要试图拆卸本仪器,以免降低精度。
(4) 在不使用仪器时请用防尘罩将仪器盖好,存放在干燥、无灰尘的地方。
3. 供电网络应有良好的接地。
目录:1. 简介 (1)2. 仪器清单 (1)3. 技术参数 (1)4. 各部件名称 (3)5. 仪器的安装 (3)6. 操作 (4)7. 故障维修指南 (5)1.简介MZDR0850三维旋转连续变倍视频显微系统,采用先进的光学技术和精密机械电子技术,使人们观察微观世界的角度从单一的正面观察扩展到三维全方位多角度观察,极大地提高了观察样品的细节程度。
无需倾斜就能360°全方位、大景深观察样品各个侧面的实时高分辨率动态图像,具有强烈的立体感和层次感,并且可以改变镜头的旋转速度,观察到传统镜头无法显示的位置,例如PCB贴片元器件下方、金属孔内部、侧壁等。
广泛应用于SMT、PCB、BGA等表面贴装工业。
为适合观察不同的物体,底端光轴与水平方向夹角有45°(标准型)、30°、60°、15°四种规格,此夹角越大,景深越大。
2.仪器清单本仪器标准配置包括下列部件:序号部件名称数量备注1 主机 12 底座 13 载物台 14 控制电源箱 15 输入电源线 16 内六角扳手 1 安装调整用7 CCD摄像头、视频线、CCD电源 1 选购件3. 技术参数总放大倍率=光学放大倍率×数字放大倍率数字放大倍率=显示器的显示屏对角线尺寸/CCD摄像头靶面对角线尺寸CCD摄像头靶面对角线尺寸:1/3” CCD:6mm;1/2”CCD:8mm;2/3” CCD:11mm.例如:14”监视器配1/3”CCD摄像头的数字放大倍率=64.2514×=59.2717”监视器配1/3”CCD摄像头的数字放大倍率=64.2517×=71.97 (1). 光学性能参数:CCD接头光学放大倍率总放大倍率视场范围(mm) 工作距离(mm)观察角度(与水平方向)0.3X 0.169X~1.125X 9.9X~66.6X 21.3X28.4~3.2X4.270.5X(标准配置)0.28X~1.875X 16.65X~111X 12.9X17.1~1.92X2.561X 0.56X~3.75X 33.3X~222X 6.4X8.6~0.96X1.281.5X 0.84X~5.625X 49.95X~333X 4.3X5.7~0.64X0.8520 45°注:总放大倍率、视场范围是以1/3”CCD摄像头、14”监视器计算CCD接头光学放大倍率总放大倍率视场范围(mm) 工作距离(mm)观察角度(与水平方向)0.3X 0.169X~1.125X 9.9X~66.6X 21.3X28.4~3.2X4.270.5X(标准配置)0.28X~1.875X 16.65X~111X 12.9X17.1~1.92X2.561X 0.56X~3.75X 33.3X~222X 6.4X8.6~0.96X1.281.5X 0.84X~5.625X 49.95X~333X 4.3X5.7~0.64X0.8511 30°注:总放大倍率、视场范围是以1/3”CCD摄像头、14”监视器计算(2). 输入电压:AC90~264V ,50Hz/60Hz(3). 保险管规格:2A(4). 载物台移动范围:X 方向100mmY 方向86mmCCD 接头 光学放大倍率 总放大倍率 视场范围(mm)工作距离(mm)观察角度(与水平方向) 0.5X(标准配置)0.1875X ~1.25X 11.1X ~74X 19.2X25.6~2.88X3.841X 0.375X ~2.5X 22.2X ~148.2X 9.6X12.8~1.44X1.92 1.5X 0.5625X ~3.75X 33.3X ~222.3X 6.4X8.5~0.96X1.28 6560°注:总放大倍率、视场范围是以1/3” CCD 摄像头、14” 监视器计算CCD 接头光学放大倍率总放大倍率视场范围(mm)工作距离(mm)观察角度(与水平方向) 0.5X(标准配置)0.1875X ~1.25X 11.1X ~74X 19.2X25.6~2.88X3.841X 0.375X ~2.5X 22.2X ~148.2X 9.6X12.8~1.44X1.92 1.5X 0.5625X ~3.75X 33.3X ~222.3X 6.4X8.5~0.96X1.28 815°注:总放大倍率、视场范围是以1/3” CCD 摄像头、14” 监视器计算4. 各部件名称5. 仪器的安装仪器的安装请看图1、图2a. 物镜主体与支架连接(图2)将托圈12从物镜主体9上旋下后,让主机自下往上从支架7中穿过,再将托圈12旋紧并拧紧止紧螺钉6。

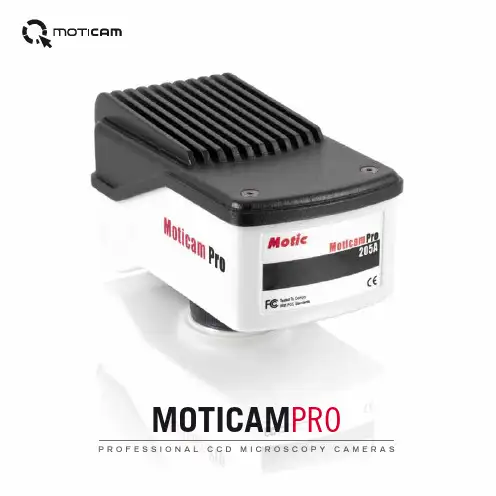
诠释显微光学开启磅礴眼界Moticam ProCCD为核心的全新数码显微成像系统1摄像装置辅助功能Moticams Pro系列,与其它Moticams一样,带有启用摄像装置的便捷工具。
MI Devices 专业图像采集浏览软件,界面友好,你可轻松浏览或捕捉静态、动态图像, 并能对图像颜色、曝光以及白平衡等加以控制。
其它功能包括:动态图像叠加,以及可被校准的水平、垂直比例尺。
Moticam Pro 还提供驱动程序,使摄像装置可兼容其它接受Twain 设备的第三方软件。
当要制作个性化程序,或使摄像装置直接集成到复杂的应用软件系统中时,只需注册你的设备并免费下载相关SDK即可。
如果你目前没有任何应用程序,也不必着急,Moticam Pro 数码成像系统已含用于Windows系统的Motic高级成像处理软件Motic Images Advanced 3.2 。
高品质成像与优惠价格的完美结合多年来,Moticam因其独特的“从机盒到图像”模式而拥有着广阔的市场空间,让大家首次走近曾因价格昂贵而令人望而却步的数码显微成像系统。
全新Moticam Pro系列在延用此模式的同时,通过CCD提供更高品质的图像,是Motic公司目前功能最强大,运用最广泛的摄像装置系列。
Moticam Pro 型号2More Than Microscopy 成像质量Moticam Pro 系列是以各种高质量CCD为基础的摄像装置,信噪比高,可提供超高分辨率、高深度的显微彩色全真图像。
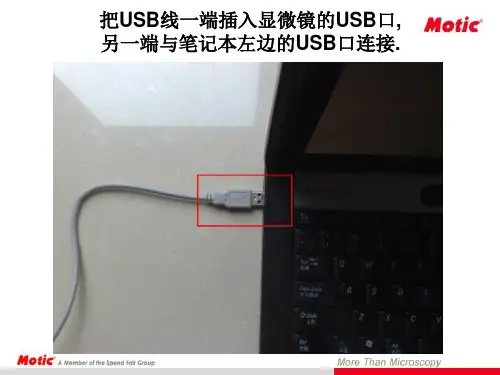
联通性与兼容性通过一根USB联接线即可联接计算机,并为摄像头提供充足电源。
USB接口是最通用的电脑接口,你不再需要其它外部设备或转换卡。
Moticam Pro 系列兼容Windows XP, Vista 或 Mac OSX系统,可与Motic任一专业软件同时使用,如:Motic Trace, Motic Net, Multi Focus 或 Image Assembly。
MOTICAM PROP R O F E S S I O N A L C C D M I C R O S C O P Y C A M E R A S2MOTICAM PROThe Moticam PRO series contains 12 models with different SONY ICX sensor resolutions and technical characteristics, providing users with a wide varietyof options to choose from.It includes Colour CCD imaging sensors for conventional microscopy techniques, Monochrome CCD imaging sensors for low luminosity micros-copy and Peltier cooled CCD Colour and Mono-chrome imaging sensors for fluorescence micros-copy. The cameras are assembled and tested to the highest standards in the clean room at our factory.All Moticam PRO cameras come with the univer-sal c-mount thread and are connected to the PC via a USB 2.0 port. The Moticam PRO Series comes with the well known and user-friendly Motic Images Plus 2.0 analyzing software (multi-language). Additionally with any Moticam PRO, the sophisticated Motic Images Advanced 3.2 is supplied free of charge. Furthermore the Motic TWAI N drivers, Direct Show drivers (via our website) and the SDK are included with the software package of the Moticam PRO.3Peltier Cooling deviceWhen using a camera for a long time, the sensor gets warmer and warmer. When using long exposure times, it becomes more sensitive to noise and this can be seen in the captured image. With our Peltier mechanism, the sensor is cooled down up to 10°C below ambient temperature (ambient = the temperature inside the camera case). Peltier Cooled cameras are therefore recommended for fluorescence applications.Live readoutThe cooled version of the Moticam PRO features a built-in sensor arrays that allows the user to see live updated information on the Sensor and Ambient Temperature, as well as the Relative Humidity inside the casing. Thus eliminating the possibility of condensation brought on by rapid cooling. Additionally the user can set a “Target Temperature”.Colour and MonochromeColour cameras use a RGB primary colour mosaic filter on the chip. The distribution is standard; 25% Red, 50% Green and 25% Blue. Most of the time when working in fluorescence only one colour is revealed; therefore not allowing all available pixels to receive information. Just imagine seeing a blue image through the eyepieces, this means that only 25% of the total pixels are receiving and distributing information.The Monochrome cameras do not have any colour filter and therefore each pixel records the amount of light it sees. It does not transmit any information on the colour of the sample to the computer. For these reasons mono-chrome cameras can definitely be considered when working with fluorescence. You will have better chances of capturing low light samples when using the full capacity of the pixels in the chip. Of course colour is important in fluorescence, but this can be added at a later stage with software.5MODELSONY SENSOR SENSOR SIZE PIXEL SIZE RESOLUTIONICX205AKICX205AL1/2”4,65 x 4,651360 x 1024MOTICAM PRO205ABCDICX285AQICX285AL2/3”6,45 x 6,451360 x 1024MOTICAM PRO285ABCDICX252AQ1/1.8”3,45 x 3,452080 x 1542MOTICAM PRO252ABICX282AQ2/3”3,40 x 3,402580 x 1944MOTICAM PRO282ABNOMENCLATUREMonochrome Colour Peltier cooled High speed6Motic Images Plus 3.2This software contains all functions of our well-known Motic Images Plus 2.0 software plus much more. Its main features are:CaptureAuto Capture Video recording Measurements What makes Motic Images Advanced 3.2 software a more sophisticated version are the following features: segmentation, multi-focus and assembly.SegmentationThe superior counting module allows you to perform manual segmentations by using a histogram (colour), grey scale or by selecting the size. You can create in one sample different groups, which will be highlighted in different colours. After the segmentation has been performed, you will have information about the area in square µm, perimeter, width, height and much more details. The results of the segmentation can be exported in an excel file for further analysis.AssemblyThis module can be used for creating a single overview image out of multiple separate images . The software recognizes any overlapping and corrects this automatically. This software is specially designed for users who wish to have an overview of the complete sample, while working at a higher magnification.Multi FocusThe multi-focus module can be used to capture up to 100 images taken at different focusing levels. The software will automatically recognize the parts that are in focus in each image and assemble them into a new file. The result is a single image that is completely in focus.* Motic Images Advanced 3.2 is available in English language and is only compatible with PC.Automated counting Creating reports Image comparison AmalgamationMotic Images Advanced 3.2 - SegmentationMotic Images Advanced 3.2 - SelectionMotic Images Advanced 3.2 - AssemblyMotic Images Advanced 3.2 - Counting• Sony ICX CCD imaging sensor• Motic control, processing & imaging boards• Built-in 4 frame buffer*• Built-in FPGA processor*• TTL trigger port*• Schott BG-40 filter• CS/C mount (c-ring provided)• USB2.0 data mini port (usb cable provided)• Universal power supply (for cooled cameras only)• Peltier cooling device (for cooled cameras only)• Cooling up to 10 degrees below ambient with temperature readout* Unlockable with SDK integrationSoftware• Motic Images Plus application software• Motic Images Advanced application software for Windows computer only*• Twain drivers• Motic SDK• Motic Direct Show drivers• Motic MI Devices live imaging module with live calibration grid,scale cross and scale bars* Available through free downloadMinimum computer specifications• Intel 1GHZ• 1GB RAM• USB 2.0• Windows XP (SP3)• Macintosh OSXMoticam Pro 205A & 205BMoticam Pro 282A & 282BMoticam Pro 285C & 285DMoticam Pro 205C &205DMoticam Pro 285A & 285BMoticam Pro 252A & 252BConnection of multiple devices at the same time (Selection of the active device)Region Object Interest (manual selection)Manual / Automatic AutomaticSet Method, color balance ajustment Gain / Offset / Enhance / GammaSFC / JPG / BMP / TIFF / DCM (Available on Motic Advanced 3.2)Manual +/- 10 (RGB)Live window in real timeInvert / Gray / Emboss / Red / Green / Blue / Red reverse / Green reverse / Blue reverse 0 /10+/- 104 LevelsLive Images, Horizontal and Vertical (user configurable)User configurableX e Y distances (select position)Single capture / Auto capture / Video Capture Only avalaible with cooled camerasInternal Sensor with target window (Sensor temp / Ambient temp / Ambient humidity / Dow point)Available options Video Device ROI function Exposure time Full screen White Balace Image adjustments Storage Format Background Balance Color correction Histogram Filters Live Image Edge detection Sharpness Remove Noise Scale Grid Scale Cross Record parameters Cooled Enable Cooled Cameras9Colour 10Peltier Monochrome Monochrome Peltier11DE | EN | ES | FR | IT | PT | RUM o t i c I n c o r p o r a t i o n L i m i t e d C o p y r i g h t © 2002-2012. A l l R i g h t s R e s e r v e d . M a y 2012M o t i c i s a c e r t i f i e d I S O 9001, I S O 14001 a n d I S O 13485 c o m p a n y . D e s i g n e d i n B a r c e l o n a (S p a i n )。
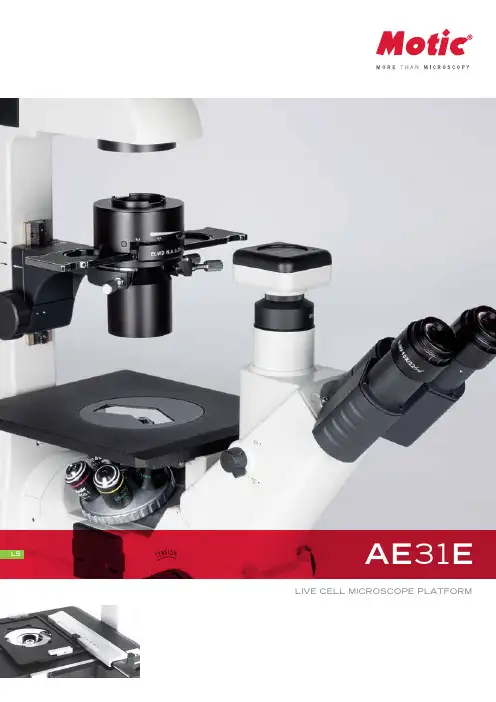
AE31E LSLIVE CELL MICROSCOPE PLATFORMThe AE31E stand carries an encoded 5-fold nosepiece with a light memory function. The illumination intensity for each objective position is memorized and replicated once the respective objective is swung in again. Rich illumination power is given by the 30 Watt Halogen light source in a Full-Koehler configura-tion, simply interchangeable with 3W LED modules of different color tempera-tures. For maximum power requests, a 100W Halogen version is available.The Auto ON/OFF function, based on a built-in IR-sensor, deactivates the microscope in case it is left by the user; no need for a final instrument check when work is finished.An upgrade with fluorescence is offered for the entry level of research applica-tions. Documentation is facilitated by the 100:0/0:100 light split option for shortest possible exposure times.The complete AE31E microscope is manufactured in compliance with European RoHS standards to avoid contact with lead-containing materials. An anti-fungus treatment is applied to all parts of the microscope to protect the system in humid environments.03 AE31ELIVE CELL MICROSCOPE PLATFORM04THE MECHANICS STAND & STAGE | EYEPIECE TUBES05Motic’s AE31E displays maximum functionality and ergonomics in all its mechanical aspects. Elegant and robust, the microscope stand follows all needs for an intense daily use. The fixed stage plate with optional lateral extensions carries a glass or metal insert for quick overview and comfortable change of objectives. An attachable x/y object guide for a convenient sample evaluation under high magnifications is available.The fine focus with a step size of 2 microns allows a smooth drive through cell cultures by theLong-Working-Distance objectives. For best possible documentation of fluorescence images, a 100:0/0:100 trinocular light split for maximum luminous efficiency can be supplied.The AE31E eyepiece tubes guarantee a fatigue-free work in terms of viewing angle and improved interpupillary distance, while the “butterfly” movement may increase the viewing height by 60mm for individual positioning.SMART FUNCTIONALITY WITH ERGONOMIC BASIS EYEPIECE TUBES | Extended “Butterfly” adjustment METAL STAGE INSERTGLASS STAGE INSERT06THE OPTICSOBJECTIVES | EYEPIECES07Motic’s new LWD Plan Achromatic objectives for inverted microscopes carry a clever concept for Phase contrast. One illumination ring (Ph1) covers the objective magnifications from 10X up to 40X: no need to move the Phase ring slider. The optional 4X Phase lens needs Phase ring Ph0 and is dedicated toquick and efficient sample screening.An optimized multi-layer coating for improved contrast as well as carefully selected glass quality forbetter transmission leads to significantly brighter images. Motic is pleased to offer this newly developed optics following the RoHS standard for lead-free manufacturing.All optical components cooperate for a perfect image: condenser, objectives, tube lens and eyepieces.Since the intermediate image is already fully corrected, no colored fringes will affect professional digital results.NEW LWD PLAN ACHROMATSFOR EFFICIENT WORKPLAN ACHROMAT PHASE OBJECTIVES (PL & LWD PL)08THE ILLUMINATION LIGHT SOURCES | LIGHT MEMORY FUNCTION09To utilize the potentials of Motic’s new developments, the illumination concept has to take care of power and quality. All stand versions carry the Full-Koehler setup. The 30 Watt Halogen light source is standard in the AE31E and displays a full interchangeability with 3 Watt LED modules of different color temperatures(4500K, 6000K). The 100 Watt Halogen version is recommended for maximum illumination power.The light memory function of the AE31E is based on an encoded 5-fold nosepiece which memorizes thelight intensity setting for each nosepiece position. The system replicates this intensity setting once the respective position is swung in again. Any new adjustment is taken as an overwriting of the former setup.The built-in IR-sensor activates the Auto ON/OFF function in case the microscope is left for more than 15 minutes and reactivates the microscope by return of the user. From an environmental perspective, this feature saves energy and increases lab safety.A CLEVER AND POWERFULLIGHT MANAGEMENT100 WATT HALOGEN VERSION10THE ACCESSORIES CONTRAST METHODS | FLUORESCENCE11The basic packages of the AE31E already offer the full functionality of a microbiology working platform. An immediate start of work is possible, keeping further add-on options in mind. Phase contrast from 10X to 40X objective magnification is an integral part of all standard packages. The easy upgrade with fluorescence rests upon the established fluorescence attachment with slider mechanism.This device may carry up to 3 filter cubes. A complete range of filter combinations is available, covering routine applications from UV up to NIR. Equipped with band pass barrier filters, multi color stainings can also be treated.The 100 Watt HBO lamp house with integrated mirror for increased light intensity offers a powerful excitation for brighter signals. In combination with a Moticam digital camera, excellent image results are ensured.NEW TECHNOLOGIESAND WELL-KNOWN TRADITIONFIL TER CUBES SLIDER MECHANISM3-POSITION PHASE SLIDERMECHANICAL STAGE12DOCUMENT ATIONSTANDARD PHOTOMICROGRAPHY | DIGITAL DOCUMENTATION13Documentation is a key issue in every aspect of microscopy, with special importance in biomedical applications like microbiology. The AE31E allows to follow this requirement by traditional photomicrogra-phy or more flexible C-mount solutions. Traditional photomicrography requires the trinocular version of the AE31E, offering a 100:0/0:100 trinocular light split for shortest possible exposure times. This setup delivers high resolution images of small fields. Live images for presentation and discussion may be supplied by the software of the SLR camera manufacturer.A more convenient approach is provided by Motic’s philosophy of easy digitization. The combination ofthe AE31E with a member of Motic’s camera series delivers excellent live images which can easily be presented to a larger public and saved for future analysis. All Moticams come equipped with a proprie-tary software package to transform the AE31E into an analysis and documentation station. For limited bench-top space, the model Moticam 580 is ideal for the presentation of High Definition images on an HDMI screen without a computer. Motic’s new tablet cameras allow a quick sample inspection without having a look through the eyepieces.REPRODUCIBLE DOCUMENTATION RESUL TS WITH HIGH RELIABILITYMOTICAM T ABLET SOLUTIONS20General SpecificationsOptional Configuration14SPECIFICATIONSAE31ESTANDARD CONFIGURATION& OPTIONAL ACCESSORIES15SPECIFICATIONSAE31ESCHEMATIC DIAGRAMS (units: mm) & HBO FLUORESCENCE DIAGRAMLamp centering toolStarter unit HBO 100WFluorescence filter modules100W mercury lamp housingFluorescence attachmentUV protection screenFluorescence light filter operation slideSPECIFICATIONSAE31ESYSTEM DIAGRAMCCIS® Plan Achromat Phase PL Ph1 10XCCIS® Plan Achromat Phase LWD PL Ph1 20XCCIS® Plan Achromat Phase LWD PL Ph1 40X*Tube version (binocular; trinocular) as well a illumination (30W Hal/3W LED; 100W) are integral part of the respective microscope model and not interchangeable.HIGHLIGHTSOBJECTIVES | PHASE CONTRAST | ILLUMINATIONOBJECTIVESNew LWD Plan Achromatic objectivesSignificantly brighter images thanks to anoptimized multi-layer coating as well ascarefully selected glass quality.PHASE CONTRASTNew Phase Contrast conceptNo need to move the phase ring slider, oneillumination ring (Ph1) covers the objectivemagnifications from 10X up to 40X.ILLUMINATIONLight memory functionThe encoded 5-fold nosepiece memorizesthe illumination intensity for each objectiveposition, no need to adjust it again.Motic Instruments , Inc. (Canada)130-4611 Viking Way, Richmond, BC V6V 2K9 Canada Tel: 1-877-977-4717 | Fax: 1-604-303 9043**********************Motic Instruments USA Inc.6508 Tri-County Parkway Schertz, TX 78154 USA Tel: 1-800-275-3716Motic Europe (Spain)C. Les Corts 12, Pol. Ind. Les Corts. 08349 Cabrera de Mar, Barcelona, Spain Tel: 34-93-756 6286 | Fax: 34-93-756 6287Mot i c Incorporation Ltd. (Hong Kong )Unit 2002, L20, Tower 2, Enterprise Sq. 5, 38 Wang Chiu Rd, Kowloon Bay, Kowloon Tel:852-2837 0888 | Fax: 852-2882 2792Canada | USA | Europe | ChinaDesign Change: The manufacturer reserves the right to make changes in instrument design in accordance with scientific and mechanical progress, without notice and without obligation.Motic Incorporation Limited Copyright © 2002-2019. All Rights Reserved.Updated: October 2019。
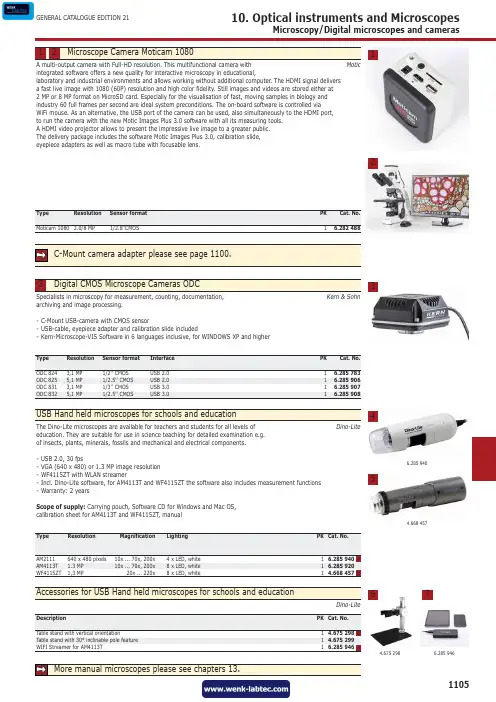
110510. Optical instruments and MicroscopesMicroscopy/Digital microscopes and camerasGENERAL CATALOGUE EDITION 21E & OE.integrated software offers a new quality for interactive microscopy in educational,laboratory and industrial environments and allows working without additional computer. The HDMI signal delivers a fast live image with 1080 (60P) resolution and high color fidelity. Still images and videos are stored either at 2 MP or 8 MP format on MicroSD card. Especially for the visualisation of fast, moving samples in biology and industry 60 full frames per second are ideal system preconditions. The on-board software is controlled via WiFi mouse. As an alternative, the USB port of the camera can be used, also simultaneously to the HDMI port, to run the camera with the new Motic Images Plus 3.0 software with all its measuring tools. A HDMI video projector allows to present the impressive live image to a greater public. The delivery package includes the software Motic Images Plus 3.0, calibration slide, eyepiece adapters as well as macro tube with focusable lens.Moticam 1080 2.0/8 MP1/2.8''CMOS16.282 48812archiving and image processing.-C-Mount USB-camera with CMOS sensor-USB-cable, eyepiece adapter and calibration slide included-Kern-Microscope-VIS Software in 6 languages inclusive, for WINDOWS XP and higherODC 824 ODC 825 ODC 831 3,1 MP 5,1 MP 3,1 MP 1/2'' CMOS 1/2.5'' CMOS 1/3'' CMOS USB 2.0 USB 2.0 USB 3.0 1 1 1 6.285 783 6.285 906 6.285 907 3education. They are suitable for use in science teaching for detailed examination e.g. of insects, plants, minerals, fossils and mechanical and electrical components.-USB 2.0, 30 fps-VGA (640 x 480) or 1.3 MP image resolution -WF4115ZT with WLAN streamer-Incl. Dino-Lite software, for AM4113T and WF4115ZT the software also includes measurement functions -Warranty: 2 yearsScope of supply: Carrying pouch, Software CD for Windows and Mac OS, calibration sheet for AM4113T and WF4115ZT, manual46.285 94054.668 4576 4.675 29876.285 946。
3B SCIENTIFIC ®PHYSICS1Stereo Microscope, 40x, Transmitted-Light Illumination, LED115 V, 50/60 Hz: 1013369 / 230 V, 50/60 Hz: 1013128Instruction Manual07/13 ALF1 Eyepiece with eye-shields2 Tube3 Lock-screw4 Adjustment knob for focusing5 Top-light housing6 Pillar7 Toggle switch for illumination 8 Specimen clips 9 Stand 10 Object plate 11 Mains switch 12 Objective1. Description, technical dataThe stereo microscope allows three-dimensional viewing of objects in 20x and 40x magnification. The microscope 1013369 is for operation with a mains voltage of 115 V (±10%), and the 1013128 unit is for operation with 230 V (±10%). Stand: Metal stand, column firmly connected with base, pinion knobs attached on both sides of the stand for coarse and fine focusingTube: Binocular inclined 45°, interocular dis-tance adjustable between 55 and 75 mm, head rotatable by 360°Eyepieces: Pair of wide field eyepieces WF 10x 20 mm with eyepiece lock and rubber eyepiece cups, diopter compensation ±5 on the left eyepiece Objectives: Revolving nosepiece with objective 2x / 4x Enlargement: 20x / 40xObject Plate: Base with detachable object plates (plastic, black/white and glass) 95 mm diam. and 2 specimen clipsIllumination: LED, top and transmitted light illumination, toggle switch to select light combi-nation, power supplied by rechargeable battery, 6 V DC, 500 mA, battery charger 115 V or 230 V Power supply: 1013369: 115 V, 50/60 Hz 1013128: 230 V, 50/60 HzDimensions: 190 x 300 x 115 mm³ approx. Weight: 2.9 kg approx.2. Unpacking and assemblyThe microscope is packed in a molded styro-foam container.• Take the container out of the carton removethe tape and carefully lift the top half off the container. Be careful not to let the optical items (objectives and eyepieces) drop down. • To avoid condensation on the optical compo-nents, leave the microscope in the original pack-ing to allow it to adjust to room temperature.3B Scientific GmbH • Rudorffweg 8 • 21031 Hamburg • Germany • Subject to technical amendments © Copyright 2013 3B Scientific GmbH•Using both hands (one around the pillar and one around the base), lift the microscope from the container and put it on a stable desk. The microscope is fully assembled except for the eye-shields. Position them over the eyepieces for viewing comfort and to block out any ambient light. In addition, the object plate must be inserted into the stage opening in the base.3. Operation•Set the microscope on a level table.• Place the object to be observed in the centerof the object plate. Use the clips to fasten it into place.• Connect the mains adaptor, and switch onthe illumination.Alternatively, the microscope can also be oper-ated without being connected to the mains.• When using transmitted-light illuminationreplace black and white plate with the glass plate.• Turn the objective to get the desired magnification. • On the toggle switch position I is for trans-mitted light and position II is for top-light.• Adjust the interpupillary distance betweenthe eyepieces by grasping the two prism-housings with both hands and moving them until one circle of light can be seen.• Focus the object by turning the side knobs. • It might be necessary to loosen the lock-screw and raise or lower the entire stereo head-bracket until the outline of the object is found in the field of view. Be sure to tighten the lock-screw to fix the height of the stereo head on the pillar.• Always turn off the light immediately after use. • Be careful not to spill any liquids on the mi-croscope.• Do not mishandle or impose unnecessaryforce on the microscope.• Do not wipe the optics with your hands.• Do not attempt to service the microscope yourself.4. Storage, cleaning, disposal• Keep the microscope in a clean, dry and dust free place.• When not in use always cover the micro-scope with the dust cover.•Do not expose it to temperatures below 0°C and above 40°C and a max. relative humid-ity of over 85%.• Always unplug the mains plug before clean-ing or maintenance.• Do not clean the unit with volatile solvents or abrasive cleaners.• Do not disassemble objective or eyepieces to attempt to clean them.• Use a soft linen cloth and some ethanol to clean the microscope.• Use a soft lens tissue to clean the optics.• The packaging should be disposed of at local recycling points. •Should you need to dis-pose of the equipment it-self, never throw it away in normal domestic waste. Local regulations for the disposal of electri-cal equipment will apply.•Do not dispose of the battery in the regular household garbage. Follow the local regula-tions (In Germany: BattG; EU: 2006/66/EG).。
Using the Motic CameraImportant Points:•Do not wipe/touch any of the lenses with anything except lens paper. Kimwipes are NOT lens paper!•Turn the eyepiece head so the word “Nikon” is right side up, then remove the right eyepiece from the microscope and set it down on the table on the end that goes into the microscope, NOT the end you look into. This could scratch the lens.•When removing the eyepiece, grip the polished black ring that is beneath the plastic cap.•Put the camera in the eyepiece socket so that you can read the label “Moticam”.Fasten the camera with the set screw.•Put all camera/eyepiece equipment BETWEEN the computer and the microscope, not near the edge of the table! You run the risk of knocking the eyepiece off the table if it is set near the edge!•Turn the focusing knob (front side) up to move the microscope stage closer to the objective.•Turn the focusing knob (front side) down to move microscope stage farther from the objective.Focusing between your eyes and the camera display:4x Objective (RED):When this is focused for your eyes, you need to turn the knob (front part) DOWN to focus the camera display10x Objective (YELLOW):Same as for 4´.40x Objective (BLUE):When focused for your eyes, it should be close to the correct focus for the camera display, make small adjustments.Step-by-Step Guide to Taking a Photo:1.Attach the camera to the RIGHT eyepiece and plug it into a USB port on the back ofthe Mac.2.Click the Motic Images Plus icon on the desktop to open the program.3.Go to File > New4.Choose “Live Video” and click “Ok.” The window will open to show what thecamera sees in the microscope.5.Go to File > Video Settings to open up the camera adjustment controls.a.To adjust the exposure (lighting) for the camera, click “Auto Exposure” andwait about 5 seconds. If you want the computer to do this automatically fromnow on, check off “Full Auto.” “White balance” will correct for theyellowness of the light. If you want to adjust the settings manually, turn off“Full Auto” and move the sliders to tweak the various lighting/color functions.b.Set the size of the image to its maximum (probably 1280 x 1024). After youclick OK, maximize the live video window with the green button in the upperleft corner.6.The image on the computer screen will probably not be in focus, because the cameraand your eyes are at different “distances” from the slide.7.To adjust the focus for the computer image, SLOWLY turn the focus knob on themicroscope in the correct direction for the objective you are using (4´, 10´, or 40´).It is IMPORTANT to turn the knob VERY SLOWLY, because it takes time for the camera image on the computer to refresh. By focusing too quickly, you may go right past the point where the image is focused.8.To make a photo, look at the top of the window at the three icons. Click the middleicon (it looks like a small digital camera with a clock next to it).9.Change the ‘save’ location to the desktop.10.To the right of where “File Name” appears in the dialog box, click the drop down boxto save the image in the jpg format and NOT in the “.mix” format.11.Leave the capture interval settings alone for now, but change the number of TotalImages to “1” instead of “5.” You don’t need five copies of the same picture, right?12.Click “OK” and the new file will appear on the desktop.Putting a Scale Bar on your ImageTo begin this task, take some nice images of cells. Now you will calibrate your microscope so you can determine the sizes of cells and structures within them. To do this, you will use a calibrated stage micrometer, a slide that has a very fine ruler etched into it (Figure 1).Figure 1. Stage micrometer from Ward’s Science (part # 949910)1.Return the 40× objective as the active lens. Remove the cell slide and replace it withthe calibrated stage micrometer slide. Notice which side the stage micrometer is on.That side faces the objective lens.2.Locate the stage micrometer by eye, center it, and get it into focus. If you are havingtrouble locating the micrometer, look at it from above the microscope stage. You should be able to make it out with your eyes. Move it to near the center of the objective lens and then try to find it in the microscope again.3.Get the camera image of the stage micrometer, optimize it and be sure it is in goodfocus.4.Take a single image of the stage micrometer and save it.5.Open your micrometer image in ImageJ. Click on the line symbol and draw a straightline from one stage micrometer hash mark to another. It will be most accurate if you draw the line from hash marks as far apart as possible. (Why?)6.From the “Analyze” pull down menu select “Set scale…”. The window that pops upwill show you the distance in pixels of your line. You need to type in the actual distance between the two hash marks that you used. If you can’t figure this out, ask for help. Be sure to use the correct units of measurement in the “Set Scale” box. (1 cm = 104µm.) Leave the aspect ratio set at 1. Your camera has square pixels, so the aspect ratio (height:width) is 1.7.Put a scale bar on one of your yeast images. Use “Analyze > Tools > Scale Bar”.Save this in a separate file, appropriately named, using the “Save as” button. Make another Word or Open Office file with this image and an appropriate caption. Whena scale bar appears in an image you should always give the dimensions of the scalebar, in the caption instead of adding that number to the image. The scale bar is usually positioned in one corner of the image where it will not obscure any important image detail.8.Determine the size that a camera pixel represents when the 40× lens is used. You cando this by dividing the known distance between hash marks in part 6 by the distance in pixel units from part 6. This value is the number of µm per pixel (or cm per pixel if you prefer). This tells you how much of the specimen area falls on each pixel in the camera. This value will remain the same for any future use of this objective lens and camera in this microscope. The value will be different for different lenses (and for different cameras, if you happened to use a different one).。
诠释数码光学可观察不同性质标本,适于电子、纺织、印刷、工业、医疗、教学、刑侦和动植物研究。
Moticam2206摄像装置可接于Classica显微镜直筒目镜。
Moticam2206摄像装置可接于Motic 显微镜斜筒目镜。
Moticam2206摄像装置可接于Motic 生物显微镜第三筒上。
Moticam2206摄像装置可接于Motic 体视显微镜第三筒上。
接三脚架,适用于实时场景观察和拍摄静态、动态图像。
接鹅颈连座和COMS 镜头,可捕捉多种实物图像。
直接接上16mm 通用接头,可用于宏观观察。
套在不同规格显微镜目镜筒内,安装随机软件后,标本图像即可显示于电脑屏幕。
可观察不同性质标本,适于电子、纺织、印刷、工业、医疗、教学、刑侦和动植物研究。
普通视频分辨率: 768 x 576(PAL)或640 x 480(NTSC)moticam2206Moticam2206分辨率: 1600 x 1200Moticam2306摄像装置可接于Motic 显微镜斜筒目镜。
Moticam2306摄像装置可接于Motic生物显微镜第三筒上。
Moticam2306摄像装置可接于Motic 体视显微镜第三筒上。
可观察不同性质标本,适于电子、纺织、印刷、工业、医疗、教学、刑侦和动植物研究。
接三脚架,适用于实时场景观察和拍摄静态、动态图像。
套在不同规格显微镜目镜筒内,安装随机软件后,标本图像即可显示于电脑屏幕。
接鹅颈连座和COMS 镜头,可捕捉多种实物图像。
直接接上16mm 通用接头,可用于宏观观察。
普通视频分辨率: 768 x 576(PAL)或640 x 480(NTSC)弹壳检测鉴定纤维辨别测量公章审核鉴定Moticam2306分辨率: 2048 x 1536Moticam2206 连接图Moticam2306 连接图Moticam2206及Moticam2306 最低系统配置建议用于Moticam2206和M o t i c a m 2306的Motic Images Advanced 3.2 高级图像处理软件是Motic 图像处理系列软件的最新产品,支持多种国际语言。
Moticam X3Start GuideThis camera is a delicate instrument and should be handled with care. When not in use, please store the camera in a safe place with the dust cap attached. Do not let the camera get in contact with water or expose it to extreme temperatures (below 0 or above 50 degrees Celsius). In order to receive the highest level of service, please retain your receipt as proof of purchase.Included PartsMoticamX3 Camera SpecificationUsing the Camera On the eyepiece1.Install the Motic Images Plus application program from the CDincluded.2.Remove the Dust Cap from the camera and attach the focusable lens3.Choose the right size eyepiece adapter and attach this to thefocusable lens4.Attach the assembly to your mic roscope’s eyepiece by tightening thecentering screws on the eyepiece adapter.5.Connect the USB power adapter to the camera. The blue light will flash and turn solid when the camera is inoperation.6.Connect to the Moticam X3 WiFi signal. Please see the instructions on page 3Using the camera as a Macro Camera1.Install the Motic Images application program from the CD included.2.Remove the Dust Cap from the camera and attach the focusable lens3.Attach the Macro Tube onto the lens4.Place the assembly over the item you wish to view and ensure there is adequate lighting. Ifnecessary, a desk lamp is a good solution5.Connect the USB power supply to the camera. The blue light will flash and turn solid whenthe camera is in operation.6.Connect to the Moticam X3 WiFi signal. Please see the instructions on Page 3Using the Camera on a Trinocular Microscope1.Install the Moticam Images Plus application program from the CDincluded.2.Remove the Dust Cap from the camera and attach the microscope’s C-Mount adapter (*Please note that the C-Mount adapter is specific toyour microscope. Depending on the type of adapter and microscope,the C-Ring may be necessary between the camera and the C-Mountadapter).3.Connect the USB power supply to the camera. The blue light will flashand turn solid when the camera is in operation.4.Connect to the Moticam X3 WiFi signal. Please see the instructions onPage 3Camera RegistrationIt is important to make sure you have registered your device on the Motic Images website:Connect to the Moticam X3 WiFi signal1.Each Moticam X3 transmits its own WiFi signal to which you can directly connect your WiFi Device.2.The Moticam X3’s S SID signal is printed on a label on the camera. To log into your camera, simply connect yourWiFi device to that signal. The password for the network by default is 12345678.Using a WiFi device that operates with Android or IOS1.For best performance, we recommend to use WiFi devices, such as tablets, with a screen not smaller than 7inches. For iOS devices we suggest using iOS 5 or higher while for Android Devices we suggest using Version 4.0 or Higher.2.To operate and use the camera on your tablet, please download our free App called MotiConnect. For iPad youcan find this on the AppStore, for Android devices you can find this on Google Play.3.You can also use certain web browsers such as Chrome, Firefox, or Safari to view, measure, and capture withoutthe need of the App. To view the camera stream on the browser, please type in the IP number also shown on the label on the camera. For example 192.168.1.151:8080 and you will be connected straight to the camera. Use the Moticam X3 on your WiFi enabled computerThe Moticam X3 can also be used with Motic Images Plus software for Windows computers. If you use a WiFi enabled laptop you can install Motic Images Plus from the CD provided. To view the camera in our product’s MI Devices interface, simply connect your computer to the Moticam X3 WiFi signal. Then open the MI Devices interface by clicking on the camera icon within Motic Images Plus. From the MI interface select Moticam X3 in the device box and click Open.Switching the Moticam X3 between 2.4Ghz and 5GhzFirst, always make sure you have installed the latest version of the MotiConnect App or Motic Images software. Secondly make sure you are using a device with confirmed 5Ghz capability. Failure to use a 5Ghz device will render the camera unusable until a 5Ghz device is connected. The Moticam X3 SSID will not be visible to any 2.4Ghz devices in 5Ghz mode. Please not this step. 5Ghz mode will allow for faster frame rates for improved video and screen resolution.1.With your 5Ghz ready device open the IP app using any HTML5 browser.2.When the browser opens, type in the following in the address bar:http://192.168.1.151:80803.When the MotiConnect webpage opens, select the configure tab.4.Under Access Point, locate Channel.5.By default the Channel will be either 1 or 6: See picture below∙6.When using either Channel 1 or 6, the camera can be used in 2.4Ghz mode. Typically Channel 6 works best.7.If you wish to change the camera mode to 5Ghz, change the Channel to 149 or 157∙8.Once changed, you will need to click on Save first, then Apply. Make sure to write down any and all changesyou make on this tab. Any changes made here will affect how you connect to the camera later.9.Once you click Apply, the camera will disconnect and no longer be available for detection on any 2.4Ghzdevices.10.With your 5Ghz device, locate the camera on your available WiFi devices. The SSID and Password willremain the same unless you changed it on the Configure Tab.11.Open the MotiConnect app, select image adjustment icon, select H264, close and re-open the app.12.There should be a noticeable increase in frames per second. (FPS rate will vary by device)MOTICAM X3 Information:∙The Moticam X3 by default operates in 2.4Ghz mode.1.Allows for connection to devices without 5Ghz compatibility.∙In 2.4GHz mode, frame rates will be much slower, comparable to the Moticam X and X2.∙When the X3 is switched on (first time) it resets to JPG mode.∙JPG mode is the default mode at 2.4Ghz.∙In order switch the camera into 5Ghz mode, end user tablets / phones must have H264 hardware decoding.1.End user is responsible for finding this information from device manufacture.2.White BTX tablet has H264 hardware and is 5Ghz compatible.∙Whenever the X3 is used with an HTML browser, the X3 will automatically switch to jpg mode. The JPG mode will remain for both browser and app, until the X3 is reset again (off and on).∙Normally the app should provide much faster (up to 30 fps) frame rates when it is in H264 mode, but is still subject to the device’s H264 chip.∙H264 mode must be selected, in 5Ghz mode and found under the image settings tab of MotiConnect app, to achieve faster frame rates. Once selected the app must be reopened.∙In the event of a reset, the X3, will keep the original default SSID, password, 2.4GHz settings∙In browser mode, the X3 will not be able to provide 30 fps, in either 2.4Ghz or 5Ghz mode.∙In browser mode, the best the X3 can only achieve is 15 fps at 1280X720 or lower resolution. However, this can vary from device to device.HTML BROWSER:∙Browsers will only support the camera in JPG mode∙Will average 2-7fps in full HD mode.∙Most devices, such as Chromebooks, older laptops, older PCs (with WiFi), and older tablets will require the Moticam X3 to operate in 2.4GHz mode∙Operation and frame rates comparable to the Moticam X and X2.MOTICONNECT:∙The app supports both jpg mode and H264 mode.∙Can be used at both 2.4Ghz and 5Ghz.∙Fast frame rate can only be achieved if:1.The tablet/device is 5Ghz compatible2.The table/device is using the MotiConnect app。