电子显微镜入门手册(FEI)
- 格式:pdf
- 大小:3.22 MB
- 文档页数:40
电子显微镜操作规程
1、将测试用粉煤灰样品置于干燥箱中,于105±5℃下烘至恒重,取出放在干燥器中冷却至室温。
2、准确称取试样2g,置于载玻片上用玻璃板压平(呈圆形),测量压平后样品直径,准确至1mm,取两个垂直方向尺寸平均值,控制在20±2mm。
3、接通显微镜电源,将制好的样品载玻片置于显微镜载物台上,调节显微镜物镜将视野调至最清晰状态。
4、通过显微镜USB接口连接电脑,打开试验信息管理系统,在相应试验项目中点击玻璃微珠试验,对当前视野进行抓图。
5、通过抓拍到的图片初步判断该批样品是否含有玻璃微珠,如不含玻璃微珠则直接判定为不合格。
6、对含有玻璃微珠的样品利用图像分析软件对图像进行后期处理,直至能清晰界定玻璃珠和杂质界面并自动计算出当前图像中杂质总面积,利用软件测量功能,测量当前图像总面积。
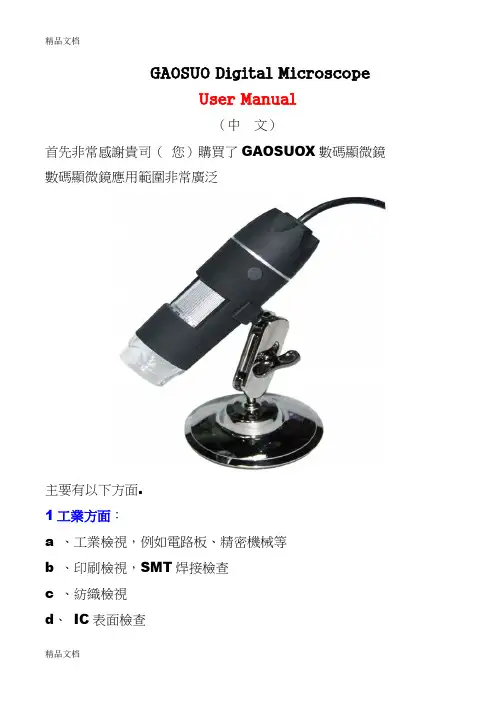
GAOSUO Digital MicroscopeUser Manual(中文)首先非常感謝貴司(您)購買了GAOSUOX數碼顯微鏡數碼顯微鏡應用範圍非常廣泛主要有以下方面.1工業方面:a 、工業檢視,例如電路板、精密機械等b 、印刷檢視,SMT焊接檢查c 、紡織檢視d、IC表面檢查2美容方面A、皮膚檢視B、發根檢視C、紅外理療(特定產品)3生物應用A、微生物觀察B、動物切片觀察4其他A、擴視器,協助視障人士閱讀B、寶石鑒定GAOSUO數碼顯微鏡使用簡單,只需要同電腦USB介面連接就可以使用,本產品還配備測量軟體,可做簡單的量測,非常的方便。
為了更詳細的介紹本產品,敬請耐心的閱讀產下面的產品介紹,使用方法,注意事項。
規格:傳感器:高性能感光晶片主控晶片:專用主控16Bit DSP放大倍率:1X ~ 500X拍照/錄影:內置輔助光源:8顆白光LED燈靜態解析度:640x480 最高可達1600x1200(可按需定制)數碼變焦:多段式成像距離:手動調節0~無限遠影像解析度:標準640*480固定底座:萬向金屬底座(可選配用升降支架)光盤:內含驅動,測量軟體,說明書支援系統:WIN XP/VISTA;WIN 7 32位和64位電源:USB(5V DC)電腦介面:USB 2.0 & USB 1.1 相容動態幀數: 30f/s Under 600 LUX Brightness照度範圍:0 ~ 30000LUX線控可調硬體需求:奔騰主頻700M Hz或以上;1G硬碟CD ROM 光碟機;64MB 記憶體支援語言:中文(簡)中文(繁體)英(其他語言需要定制)產品顏色:磨砂黑色,其他顏色可定制主體尺寸112 mm ( 長) 33 mm ( 外徑)單機包裝重量380g安全警告及注意事項1. 勿自行拆解本產品,以避免靜電擊穿精密晶片。
2. 勿用酒精等有機溶劑清潔產品。
3. 勿用手指觸摸鏡頭,以免表面造成刮痕和贓汙。
物理实验技术中的电子显微镜使用方法引言:电子显微镜(Electron Microscope)是现代科学领域中非常重要的一种实验技术。
通过利用电子束替代传统的光线来观察和研究物质的微观结构,电子显微镜在材料科学、生物学、物理学等领域都有着广泛的应用。
本文将详细介绍电子显微镜的使用方法,包括仪器的操作、样品的准备以及结果的分析。
一、电子显微镜的操作1. 准备工作:在使用电子显微镜之前,需要先进行一系列的准备工作。
首先,要检查仪器是否正常工作,并及时排除任何故障。
其次,要进行样品台的清洁和真空泵的检查。
最后,将待观察的样品放入样品台,确认样品与样品台之间的接触牢固。
2. 参数设定:在操作电子显微镜之前,需要设定一些参数以确保观察结果的准确性。
首先是加速电压(Acceleration Voltage),它决定了所使用的电子束的能量。
加速电压一般在1000至30000伏之间,视样品的性质和所需观察的细节而定。
其次是聚焦(Focus)和孔径(Aperture)的设定,可以帮助获得清晰度和深度的观察图像。
3. 调整对焦与降噪:调整电子显微镜的对焦是确保观察图像清晰度的重要步骤。
光学系统通常具有三个以上的调整螺旋(Knobs),分别用于调整垂直方向、水平方向和其他方向的对焦。
通过微调这些螺旋,可以获得清晰的图像。
此外,电子显微镜通常配备有降噪(Noise Reduction)功能,可以减少背景噪声对图像质量的干扰,提高观察的准确性。
二、样品的准备1. 固态材料的准备:对于固态材料的观察,需要将样品切割成适当的大小,并进行表面的抛光、清洗和脱污处理。
之后,将样品固定在金属台上,并使用导电胶将样品与台面连接。
最后,用金属蒸发镀层覆盖样品表面,以提供较好的导电性。
2. 生物样品的制备:对于生物样品的观察,需要进行更加复杂的处理。
首先,需要将样品进行固定和冻结,以保持其原始结构。
然后,使用超薄切片机将样品切成厚度约为50至100纳米的薄片。
电子显微镜操作步骤
一、开机:打开空气开关,打开主机钥匙开关,启动电脑软件。
二、放样:按压AIR键解除真空,轻轻拉出样品仓放入样品(取出样品或查看样品),关上样品仓后按压EVAC键抽真空。
三、选择真空模式和观测探头:真空模式可选择高真空和低真空模式;观测探头可选择二次电子探头或背反射探头。
不能选择在低真空模式下的背反射探头。
四、观测及图像调节:首先设定样品台高度、选择电压;选择合适的放大倍数观察样品。
首先进行合轴调节:包括机械合轴和电器合轴。
然后聚焦,消除像散,选一个区域,调整至最佳状态。
最后调整亮度和对比度。
五、图像搜集:选择拍照模式,捕获照片。
结束后关掉高压。
六、记录存储:把最终捕获的图像记录名称、日期等存入已建好的文件夹中。
七、关机:首先把样品台降低,按压AIR键解除真空,轻轻拉出样品仓取出样品,关上样品仓后按压EVAC键抽真空。
最后退出软件,关掉电脑,关掉钥匙开关和空气开关。

电子显微分析 电子显微分析是利用聚焦电子束与试样物质相互作用产生的各种物理信号,分析试样物质的微区形貌、晶体结构和化学组成。
包括:用透射电子显微镜TEM 进行的透射电子显微分析用扫描电子显微镜SEM 进行的扫描电子显微分析用电子探针仪EPMS 进行的X 射线显微分析电子显微分析是材料科学的重要分析方法之一,与其它的形貌、结构和化学组成分析方法相比具有以下特点:1)具有在极高放大倍率下直接观察试样的形貌、晶体结构和化学成分。
2) 为一种微区分析方法,具有很高的分辨率,成像分辨率达到0.2~0.3nm (TEM ),可直接分辨原子,能进行纳米尺度的晶体结构及化学组成分析。
一、电子光学基础磁场中运动,特别是在电场和磁场中偏转、聚焦和成像规律的一门科学。
它与几何光学有很多相似之处:(1)几何光学是利用透镜使光线聚焦成像,而电子光学则利用电、磁场使电子束聚焦成像,电、磁场起着透镜的作用。
(2)几何光学中,利用旋转对称面作为折射面,而电子光学系统中,是利用旋转对称的电、磁场产生的等位面作为折射面。
因此涉及的电子光学主要是研究电子在旋转对称电、磁场中的运动规律。
(3)电子光学可仿照几何光学把电子运动轨迹看成射线,并由此引入一系列的集合光学参数来表征电子透镜对于电子射线的聚焦成像作用。
电镜中,用静电透镜作电子枪,发射电子束;用磁透镜做会聚透镜,起成像和放大作用。
静电透镜和磁透镜统称电子透镜1. 电子在静电场中的运动电子在静电场中受到电场力的作用将产生加速度。
初速度为0的自由电子从零电位到达V 电位时,电子的运动速度v 为:(10) 2m eV v当电子的初速度不为零、运动方向与电场力方向不一致时,电场力不仅改变电子运动的能量,而且也改变电子的运动方向。
2、静电透镜与玻璃的凸透镜可以使光线聚焦成像相似,一定形状的等电位曲面簇 也可以使电子束聚焦成像。
产生这种旋转对称等三电位曲面簇的电极装置即为静电透镜。
它有二极式和三极式之分。
JEOL JSM-6460LVScanning Electron MicroscopeAppendix I: Back Scatter DetectorAppendix I I: Low Vacuum ModeAppendix III: Filament ReplacementBasic SEM procedure/Imaging Instructions:Login:SEM Imaging Computer (left monitor): no passwordEDS Computer (right monitor): username: Labuser password: Abc123 Sample Preparation, Mounting, and SEM startup:1.Only clean samples are allowed inside the analysis chamber. Use ethanol or isopropyl alcohol to clean oils and grease off of samples.2.Sample holders are located in blue tool box.a.Mount sample to holder. (ask AAF staff if unsure of which holder to use)b.Measure length that sample extends beyond the sample holder. Thisvalue must be entered into software in next step so as to avoid damageto SEM.3.Open SEM software. (SEM main menu)a.Check in the software that the Z-height value (bottom of black screen) isapproximately 45mm. If not, click on Z-value, type in 45, press enterkey. Or user can Go to: “STAGE”-> “FILE” -> “EXCHANGE” (highlighted)-> “GO”b.Go to SETUP → FUNDAMENTAL SETUP → AUTO FUNCTION (tab)•Input z-height value of your sample above the sample holder(specimen height).•Click okay and close the stage control window.c.On the main software window click the STAGE icon HOLDER• Choose the type of holder you are using.•In stage centered window blue line is sample height position,green line is sample holder position (blue line should be abovegreen line).•Close window.d.Go to desktop and open “IRCamera” software. Double click.4.Press VENT CHAMBER button on front of SEM (remove sample door clamp before).5.After VENT CHAMBER light stops blinking, open the chamber door.•Do you need to use the Backscatter Detector (BSE)?o If yes, see that the backscatter detector is properly positioned belowthe pole piece (if unsure, see Appendix II and AAF staff).o If no, see that the backscatter detector is lifted away from the polepiece (if unsure, see AAF staff).6.Insert sample with the special black handle tongs or carefully by hand. NOTE: the sample holder can only be inserted one way (make sure sample is fully inserted). If it doesn’t seem to fit, do not force it!7.Close the chamber door and clamp down.8.Press EVAC button on front of SEM and allow to pump down for7 minutes.9.After 7 minutes, the high voltage “HT” icon at the top left of the JEOL SEM software should say “ready”.a.If it does, click the icon.SEM Imaging and Saving Image Files:10.Move sample to location under electron beam. Check sample (xy) position via stage icon (move Z to ~25mm or sample to at least 15mm below pole piece—see IR image).11.Focus on sample at about 50X (coarse focus, then fine focus) and click “ABC” (Auto Brightness & Contrast)12.Check working distance of focused sample.13.Choose an accelerating voltage. To adjust, click on the “acc. volt” value near bottom of the screen and double click on the value you desire, 15kV normal (Higher kV sharpens image, but possible damage to sample. Lower kV more surface detail).14. Choose a spot size (generally 35). To adjust, click on the spot size value and adjust the slider bar.15. Now that the sample is focused, working distance (WD) can be adjusted.***Make sure the WD (when focused on highest point on sample) is NEVER below 10mm. If it is, catastrophic damage to backscatter detector can occur** •Based on the current WD value, adjust the Z-value so that WD will be13mm after refocusing.•Emergency stop for stage movement is to push down on black joystick.•For example:If currently Z-value = 45mm, WD = 22mmAdjust Z-value to 36mm, refocus and check that WD now = 13mm16. Sample should now be in focus and WD= 13mm.a.Magnification can be adjusted as desiredb.Fine focus with knobs on control board.c.Adjust X & Y stigmators with knobs on control board.17. At top of screen there are four options for image scan rate (scan 1, 2, 3, 4)a.Scan rate 2 is generally chosen for focusing on sample.b.Scan rate 3 or 4 (slower) are chosen for image capture.18. To capture an image, click the “Freeze” button. Then, save the image to your folder.19. If image moves (up/down or left/right) while focusing, adjust wobble.20. Should be able to get ≥20,000x magnification image s.SEM Procedures After Imaging is Complete:21. Return sample WD to 45mm.22.R eturn sample to exchange position “Stage”->”File”->”Exchange” (highlighted) -> “GO”23. Adjust magnification to 50,000X24. Turn off electron beam by clicking “HT” button at top left of screen.25. Press “VENT” on front of instrument. Wait until “VENT” button stops blinking and then can open chamber door.26. Remove sample using special black handle tongs or carefully by hand.27. Close chamber door and press “EVAC” again. (Chamber must always be under vacuum except when installing or removing sample.)28. Fill out JEOL SEM Logbook with user’s name, PI’s name, sample type,time/date.Promptly report any issues to AAF StaffAppendix I: Back Scatter Detector (BEIW)Under typical SEM imaging, a secondary electron detector is used. Secondary electron detectors require high vacuum and provide surface topography contrast for imaging. Image formation is due to inelastic collision of high energy electrons which impact the sample surface (data from top 5-50nm). Other high energy electrons from the electron beam do not interact with the sample surface. These elastically scattered electrons (data from top 50-300nm) are scattered at large angles to the sample surface and are useful for elemental contrast (z-contrast). BSE detectors do not require high vacuum and therefore in additional to providing z-contrast, are used for imaging under low-vacuum mode (appendix II).3-segment detector (segments A,B, and C)Topo = surface topography (A-B)Compo = Z contrast (A+B)Shadow = Enhances Topo mode1.Only one detector can be used simultaneously, either secondary electrondetector (SEI), or backscatter electron detector (BEIW).2.To use the BEIW, make sure that the detector is properly positionedunderneath the pole piece.3.Follow same steps outlined in main procedure through step #8.4.Then, click on “Signal” at the bottom of the JEOL SEM software window.5.Select BEIW and double click.6.When finished, set the detector type back to SEI and follow same steps asoutlined in main procedure to turn off beam, remove sample, etc.Appendix II: Low Vacuum ModeLow vacuum mode allows for imaging of non-conductive samples without the need for sputter coating. Low vacuum mode can also be used for samples with moderate vapor pressure (see AAF staff for more information). Only the back scatter electron detector (BEIW) can be used when in low vacuum mode.1.Follow steps outline in main procedure through step 7 EXCEPT thatelectrical isolation sample holder must be used.**Do not press EVAC until low vacuum mode AND BEIW is set up!**2.On JEOL SEM software click “Signal” and change to BEIW.3.On JEOL SEM software click “Vac. Mode” at bottom of screen.4.Will be prompted: “Are you sure you want to change to Low Vacuummode?”•Click Yes.5.Start low vacuum mode at about 30-40Pa. (conversion: 1Pa = 7.5mTorr)6.Now, press “Evac” button on front of instrument.7.Once Evac button stops blinking, the high voltage “HT” icon at the topleft of the JEOL SEM software should say “ready”.If it does, click the icon.8.Now, main procedure guidelines for imaging and SEM shutdown can befollowed.9.As a final step, once you are done and sample is removed from chamberadjust the “Signal” back to SEI and “Vac. Mode” back to High Vacuum.Appendix III:JEOL JSM-6460LV Filament Replacement:Filament replacement is necessary every few months of regular use or when system vacuum is poor. JEOL SEM software will indicate filament burnt out with an error message. Additionally, “LC current” (load current) display value will be low or near zero mA. Load current (mA) during regular use will be about five times the accelerating voltage (kV) value being used.1.If microscope was being used for imaging for any length of time before burn-out theelectron gun (filament and Wehnelt cap) will be very hot.•Allow the electron gun to cool for several minutes under vented conditions before attempting to replace the filament.ing nitrile inspection gloves, open the electron gun on top of the column and removethe Wehnelt by pulling it straight out.3.Disassemble the Wehnelt by loosening the external set screws that hold the ceramicbase of the filament in place and pull the filament out by the electrode prongs.4.Visually inspect the filament using a stereo microscope to verify the mode of failure (SeeJEOL manual page 5-7 for more information).5.Clean the Wehnelt cap with metal polish followed by isopropyl alcohol rinse.6.Install a new filament in the reverse procedure:a.Important: Make certain that the spacer is seated all the way down in theWehnelt cap and that scribe mark is facing the correct direction.b.Insert the new filament with the guide groove facing the correct direction.c.Visually check the filament position using a stereo microscope. The Filament tipshould automatically be centered and positioned slightly below the cone tip holein the Wehnelt cap.7.Open the electron gun on the top of the column.8.Align the guide groove on the Wehnelt with the guide pin on the electron gun and thenpush in the Wehnelt until it clicks into position.9.Close the electron gun cap making sure that the o-ring is seated properly.10.Press EVAC on the front of the system.11.Once the EVAC button stops flashing and the “HT ready” icon appears on the mainsoftware window, click the icon to turn HT on (accelerating voltage).12.Perform gun alignment (use semi-auto gun align, NOT auto).a.Manually move scroll bars to fine tune the gun alignment.。
透射电子显微镜的使用教程透射电子显微镜(Transmission Electron Microscope,简称TEM)是一种高分辨率的显微镜,它能够通过电子束穿透样品,观察样品内部的结构和成分。
本文将介绍透射电子显微镜的使用教程,让读者了解如何正确操作这一仪器。
1. 仪器准备使用透射电子显微镜前,首先需要进行仪器的准备工作。
确保仪器处于良好的工作状态,例如检查电源、真空系统等。
同时,还应检查样品台、样品支架等配件是否完好。
此外,为了获得更好的成像效果,还需准备适当尺寸的透射电镜样品。
2. 样品制备将待观察的样品制备成符合要求的样品是使用透射电子显微镜的重要一步。
通常情况下,需要将样品制备成薄片,以保证电子束能够穿透样品。
这可以通过机械剥离、石墨化学剥离等方式实现。
制备好的样品应该放置在电镜网格上,并确保样品无尘、无气泡等。
同时,样品可以根据需要进行涂覆、染色等处理,以突出样品的特定结构。
3. 调试仪器参数在开始观察之前,需要根据样品的特点和使用需求调试透射电子显微镜的参数。
首先,根据样品的特性选择合适的加速电压和操作模式。
其次,通过调整透射电子显微镜的对焦系统和磁镜,确保电子束可以准确地聚焦在样品上。
此外,还需要适当调整透射电镜的亮度和对比度,以获得清晰的图像。
4. 开始观察调试好仪器参数后,就可以开始观察样品了。
将样品放置在样品台上,确保样品与电子束之间的距离适当。
随后,可以通过透射电子显微镜的视野调整系统选择感兴趣区域进行观察。
可以使用不同的放大倍数和透射电子干涉仪等设备来进一步细分样品,探寻内部结构和成分。
观察过程中,可以使用仪器自带的捕捉功能,记录感兴趣区域的图像和视频。
5. 数据处理和分析观察完成后,可以进行数据处理和分析。
透射电子显微镜通常配备了一些图像处理工具,可以进行图像的增强、滤波等操作。
此外,还可以使用电子衍射、原子能谱等技术,对样品进行更深入的分析。
通过数据处理和分析,可以得到关于样品结构、成分和性质的详细信息。
电子显微镜S-3000N操作手册SEM开机请依照下列程序开启电子枪体及操作系统,我们可由以下整理齐全的开机程序来进行开机。
(1) 开起冷却循环水,确认水流量设定在1至1.5公升/分钟的流量,水流量计在电子枪体之左侧。
(2) 打开NFB(在配电盘上)主电源开关。
(3) 打开EVAC POWER真空系统电源开关,打开后RP会开始运转,真空操作面板上的LOW指示灯及WAIT指示灯会亮。
(4) 将真空控制板上的EVAC/AIR按键,押至EVAC位置。
NOTICE:大概约20分钟左右WARM UP灯会熄灭,自动真空系统启动,抽至高真空时HIGH的指示灯会亮。
(5) 将DISPLAY POWER开关打开。
(6) PC进入操作系统。
(7) 上步骤(6)做完之后,下一步会进入user name及Password,输入正确的使用者名称及密码注册后,随及进入操作画面。
使用者名称:PC-SEM密码:没有设定user name和passward设完成后将OK按下即可进入(请不要设定Administrator的密码)。
SEM样品置换(1)请确认HV是否关掉,若无将HV OFF。
在取出样品之前样品轴五轴要归位(Tilt:0,Z轴:白点对白点,X轴:30,Y轴:20,Rotation:随意)(2)在关掉高压等待5-10分钟之后,将真空控制板上EVAC/AIR按键, AIR,此时LOW的指示灯亮,真空室内进入空气,样品室将会破真空。
(3) 等待2-3分钟,样品台与样品室有明显缝隙后,顺着样品台轨慢慢轻柔的将样品座拉出(在等待时间内,请不要用力向外拉样品台)。
(4) 将样品放置于样品座上面顺时针旋紧至固定牢靠,使样品的上表面与标尺的中间刻线齐平,后把样品轻轻的放入样品台,使样品固定环的上表面与样品固定槽座的上表面齐平。
请再此确认样品轴五轴归位.(5) 将放置好样品的样品台,轻轻推回主体之样品室内,用手推样品台,使样品台与样品室门压在一齐.后将EVAC/AIR之开关切至EVAC,直到机台后马达声响起后,把手松开。
扫描电子显微镜(ScanningElectronMicroscope)基础知识一、扫描电子显微镜的工作原理扫描电镜是用聚焦电子束在试样表面逐点扫描成像。
试样为块状或粉末颗粒,成像信号可以是二次电子、背散射电子或吸收电子。
其中二次电子是最主要的成像信号。
由电子枪发射的能量为5 ~35keV 的电子,以其交叉斑作为电子源,经二级聚光镜及物镜的缩小形成具有一定能量、一定束流强度和束斑直径的微细电子束,在扫描线圈驱动下,于试样表面按一定时间、空间顺序作栅网式扫描。
聚焦电子束与试样相互作用,产生二次电子发射(以及其它物理信号),二次电子发射量随试样表面形貌而变化。
二次电子信号被探测器收集转换成电讯号,经视频放大后输入到显像管栅极,调制与入射电子束同步扫描的显像管亮度,得到反映试样表面形貌的二次电子像。
二、扫描电镜具有以下的特点(1) 可以观察直径为0 ~30mm的大块试样(在半导体工业可以观察更大直径),制样方法简单。
(2) 场深大、三百倍于光学显微镜,适用于粗糙表面和断口的分析观察;图像富有立体感、真实感、易于识别和解释。
(3) 放大倍数变化范围大,一般为15 ~200000 倍,对于多相、多组成的非均匀材料便于低倍下的普查和高倍下的观察分析。
(4) 具有相当高的分辨率,一般为3.5 ~6nm。
(5) 可以通过电子学方法有效地控制和改善图像的质量,如通过调制可改善图像反差的宽容度,使图像各部分亮暗适中。
采用双放大倍数装置或图像选择器,可在荧光屏上同时观察不同放大倍数的图像或不同形式的图像。
(6) 可进行多种功能的分析。
与X 射线谱仪配接,可在观察形貌的同时进行微区成分分析;配有光学显微镜和单色仪等附件时,可观察阴极荧光图像和进行阴极荧光光谱分析等。
(7) 可使用加热、冷却和拉伸等样品台进行动态试验,观察在不同环境条件下的相变及形态变化等。
三、扫描电镜的主要结构1.电子光学系统:电子枪;聚光镜(第一、第二聚光镜和物镜);物镜光阑。
透射电子显微镜简易操作指南Tecnai G2 20 S-TWIN透射电子显微镜简易操作指南说明:●本文件的目的在于帮助用户记忆培训的内容,不能代替培训。
有意自己操作透射电镜的用户请到现场参加培训。
●为了把此文件的篇幅限制在一个合理程度,文件内容难于面面俱到。
●欢迎各位对本文件的内容提出宝贵意见!简介:一.Tecnai G2 20 ST透射电镜二.Tecnai G2 20 ST透射电镜操作注意事项三.检查实验室安全及仪器运行状况四.Tecnai G2 20 ST透射电镜基本操作步骤1.登陆计算机2.打开操作软件3.检查电镜状态4.装液氮5.装载样品6.插入样品杆7.加灯丝电流8.开始操作9.结束操作10.取出样品杆11.卸载样品12.真空低温(Cryo Cycle)13.数据刻录、转化和输出14.关闭操作软件15.退出计算机16.实验记录(注意:其中4,5,6,10,11等操作是必须由TEM室的高老师进行操作。
遇到任何异常的情况都应停止操作,并询问高老师。
)一.Tecnai G2 20 ST透射电镜●生产厂家:美国FEI公司●主要附件:美国Gatan公司1k×1k CCD相机美国EDAX公司X射线能谱仪最高加速电压200KV或W灯丝电子枪LaB6点分辨率0.24nm晶格分辨率0.14nm最小束斑尺寸 1.5nm放大倍数25×-1030K×样品台最大倾转角A:±40°,B:±40°X射线能谱分辨率136ev分析范围Be-U主要功能及应用范围观察各种材料的微观结构并对样品进行纳米尺度的微区分析,如:形貌观察;高分辨电子显微像;电子衍射;会聚束电子衍射;衍射衬度成像;X射线能谱分析等仪器工作条件工作温度:15℃~25℃工作湿度: <80%电力供应:220v(±10%), 50Hz主要测试项目:明场像(BF)、暗场像(DF)高分辨像(HRTEM)能谱分析(EDX)选区电子衍射(SAED)二.Tecnai G2 20 ST透射电镜操作注意事项1.透射电镜及其附属设备中有高压电、低温、高压气流、电离辐射等危险因素,因此不正确的使用有可能造成仪器损坏,甚至人身伤亡。
电子显微镜操作流程1. 准备工作电子显微镜是一种精密的仪器,操作前需要进行一些准备工作:- 确保电子显微镜所处环境干净无尘,以避免影响观察结果。
- 将样本或待观察物品准备妥当,确保其表面平整,并避免任何可能对显微镜造成损坏的物质附着其上。
- 戴上合适的手套,以避免手指直接接触样本。
2. 打开电子显微镜- 打开电子显微镜主机,并等待其初始化。
- 确认样本台是否已经安装好,准备放置待观察的样本。
- 根据需要,选择所需的电子显微镜模式,如透射电子显微镜(TEM)或扫描电子显微镜(SEM)。
3. 样本装载- 将待观察的样本放置在样本台上,并确保其牢固且正确定位。
- 确保样本台处于水平位置,以避免样本滑动或移位。
4. 初步聚焦- 使用显微镜上的控制按钮或旋钮,初步调整目镜和物镜的位置,以将样本图像带入视野。
- 根据需要,调整放大倍率以适应对样本的初步观察。
5. 对焦和调整- 使用显微镜上的调焦旋钮,逐渐对焦图像,使其清晰可见。
- 如果需要进一步调整聚焦深度或样本的不同区域,可以使用显微镜上的其他调节功能,如光源亮度、对比度和放大倍率。
6. 观察和记录- 在对焦和调整完毕后,进行观察并记录感兴趣的讯息或现象。
- 可以使用电子显微镜的图像捕获功能,将观察到的图像保存为数字文件或打印出来。
7. 关闭电子显微镜- 观察完成后,先关闭图像捕获功能(如果有的话),然后关闭电子显微镜主机。
- 等待电子显微镜主机完全关闭后,小心地将样本从样本台上取下。
8. 清理工作区- 清理样本周围可能产生的任何残留物或污垢,确保下次使用时工作区干净整洁。
请留意,以上只是大致的电子显微镜操作流程,不同型号的电子显微镜在操作细节上可能会有所不同。
在操作前应仔细阅读电子显微镜的用户手册,并根据实际情况进行相应的调整和操作。
操作时请小心谨慎,以免对仪器造成损坏或个人受伤。
MSE 595TBasic Transmission Electron MicroscopyLaboratory ITEM Construction and ControlsPurposeThe purpose of this lab is to acquaint beginners with general TEM construction and a particular instrument – in this case the JEOL 2000FX. Please refer to the operation manual or your instructor for more information.You will also learn how to insert and remove specimens, under the guidance of your instructor. Know your microscope: Identify the parts of the TEMStudents are required to familiarize themselves with the basic construction and controls of the TEM. Although this description is pertinent to the JEOL 2000FX microscope, it could be extended to any TEM, since the basic construction and operation is similar.Students are required to check and acquaint themselves with the controls listed on the following pages. Consult the operation manual and your instructor to understand the location and basic functions of each control.Report RequirementsLab reports are required individually, within seven days. Your report should describe, in your own words, each of the listed controls and where it is located, explain what it does and how it does it. (For example, the focus control is used to focus the microscope. It achieves this by varying the current in the objective lens coils, and changing the strength of the objective lens.) Your report should be written using a word-processor, and should be updated throughout the course, as your understanding improves. Your initial submission will be returned to you with comments; your final version will be graded, after all of the labs are completed.Microscope ComponentsAny TEM comprises two major components:1.The column and vacuum unit2.The control panels or consolesVarious other equipment may be attached to the TEM, and it is now very common to find a computer interfaced with the microscope.Part 1: The Column and Vacuum Unit•Gun Chamber•Condenser Lens Assembly•Specimen Selector•Goniometero Tilt controlo Z-control•Objective lens aperture assembly•Field limiting, or “selector” aperture assembly•Fluorescent screen•Specimen shift controls•Beam stop•Viewing chamber & binoculars•Camera chamber door handles•Pedal switches•TV/digital camera unitPart 2: The Control ConsolesSee the attached “Description of Column and Control Panels” provided by the manufacturer. Safety Checks1.The column vacuum gauge should read less than 2 x 10⁻⁶ torr (i.e. within the green safetyzone.)2.The “R EADY” light should be on.3.If the high voltage tank pressure gauge falls below 0.13 kg/cm2, please make a note in thelogbook.4.If the electron gun insulating gas pressure gauge reads below 0.32 kg/cm2, make a note inthe log book (if it falls below 0.30, you will not be able to operate the TEM).5.The compressed air gauge should read between 3.0 and 4.5 kg/cm2.。
1.光学显微镜以可见光为介质,电子显微镜以电子束为介质,由于电子束波长远较可见光小,故电子显微镜分辨率远比光学显微镜高。
光学显微镜放大倍率最高只有约1500倍,扫描式显微镜可放大到10000倍以上。
2. 根据de Broglie波动理论,电子的波长仅与加速电压有关:λe=h / mv= h / (2qmV)1/2=12.2 / (V)1/2 (Å)在 10 KV 的加速电压之下,电子的波长仅为0.12Å,远低于可见光的4000 ‐ 7000Å,所以电子显微镜分辨率自然比光学显微镜优越许多,但是扫描式电子显微镜的电子束直径大多在50‐100Å之间,电子与原子核的弹性散射 (Elastic Scattering) 与非弹性散射 (Inelastic Scattering) 的反应体积又会比原有的电子束直径增大,因此一般穿透式电子显微镜的分辨率比扫描式电子显微镜高。
3. 扫描式显微镜有一重要特色是具有超大的景深(depth of field),约为光学显微镜的300倍,使得扫描式显微镜比光学显微镜更适合观察表面起伏程度较大的样品。
4. 扫描式电子显微镜,其系统设计由上而下,由电子枪 (Electron Gun) 发射电子束,经过一组磁透镜聚焦 (Condenser Lens) 聚焦后,用遮蔽孔径 (Condenser Aperture) 选择电子束的尺寸(Beam Size)后,通过一组控制电子束的扫描线圈,再透过物镜 (Objective Lens) 聚焦,打在样品上,在样品的上侧装有讯号接收器,用以择取二次电子 (Secondary Electron) 或背向散射电子 (Backscattered Electron) 成像。
5. 电子枪的必要特性是亮度要高、电子能量散布 (Energy Spread) 要小,目前常用的种类计有三种,钨(W)灯丝、六硼化镧(LaB6)灯丝、场发射 (Field Emission),不同的灯丝在电子源大小、电流量、电流稳定度及电子源寿命等均有差异。