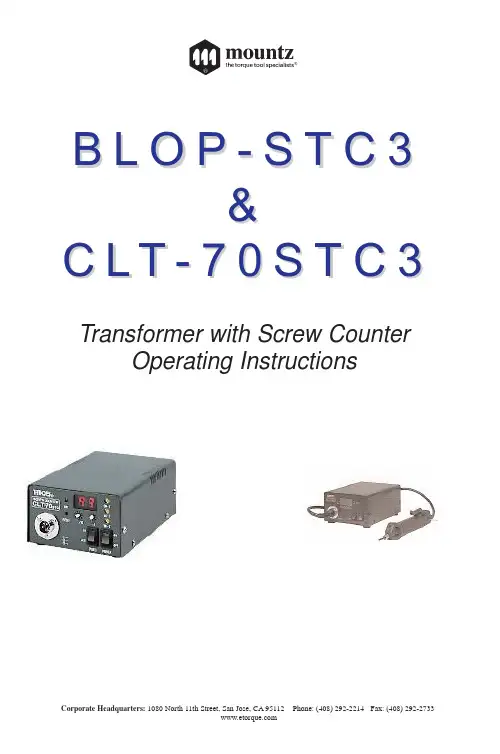
Corporate Headquarters: 1080 North 11th Street, San Jose, CA 95112 Phone: (408) 292-2214 Fax: (408) 292-2733B L O P -S TC 3&C L T -70S T C 3Transformer with Screw CounterOperating Instructions–––– Table of Contents ––––Introduction (2)s Summary (2)s Counting function (2)s Other functions (2)s Precautions concerning installation location (3)s Precautions during use (3)s Specification (4)s Compatible screwdriver (4)s Primary functions and description of terms (5)s Description of name and function for each section (7)Front panel (7)Rear panel (10)Function setting table (12)s Initial settings (13)s Quick installation (16)1.Normal power mode (16)2.Continuous counter mode (16)3.Counter mode (17)4.Multiple counter mode (18)s Timing chart (20)s Troubleshooting (23)- 1 -IntroductionThank you for purchasing the BLOP-STC 3, CLT-70STC 3 screw counter. Prior to use, please read through this operating manual to enable proper use of the equipment. After use, keep this manual in a safe place.s SummaryWhen tightening screws, it is necessary to verify that the operator has tightened the stipulated number of screws for 1 work piece to prevent forgetting to tighten screws. The Screw counter has been developed as a power supply unit with a screw counting function to relieve the burden on operators, to improve operating efficiency and to prevent careless mistakes.s Counting function1.This device can be set to tighten between 1 and 99 screws, depending on the work piece, and for eachscrew tightened, the display of the number of screws remaining is reduced by one.2.When the final screw is tightened, a buzzer sounds to prevent forgetting to tightening a screw. This alsopermits confirmation of completion of work.3.After completion of tightening screw, the display of the number of screws is automatically renewed usingan auto reset function, and the electric screwdriver will not operate until the set signal for confirmation of the work piece is received.* Screwdriver operation in standby mode can be prevented.4.Prevents counting of confirmation tightening and additional tightening (tightening screws a second time).5.The equipment can be set not to count cases where a screw is not fully seated, obliquely tightened orwhere tightening is insufficient*.* Depends on type of work being performed.s Other functions1.The external device control function enables solenoid valve control of a jig to fix work in place, andutilization of a commercially available total counter to count the total number of work pieces completed.2.In multiple counter mode using the external connection function, careless mistakes can be preventedindependently of the operator by operating several electric screwdrivers for different numbers of screws or with different output torques in order of the work being performed, for example in cell manufacturing, etc.3.This equipment also has a normal power mode, where the counter function is disabled and it functionsas a normal power supply unit.- 2 -s Precautions concerning installation locationq Install a short circuit breaker or safety breaker in conjunction with commercial power supply.q Install the equipment where it is not exposed to dust, dirt and pieces of metal.q Install in a location where it will not come into contact with water and oil.q Do not place or stack heavy objects on top of this equipment.q Install this equipment in a stable location that will not cause vibration.q For installation in a high location, fix the equipment firmly to exclude the risk of falling.q Do not install near high voltage equipment or in noisy environments.q Do not make input or output wires longer than necessary, and do not bundle with power supply wiring.This may cause a malfunction.s Precautions during useq Connect the equipment to ground and operate at the rated power supply voltage.q When connecting loads to the output terminals on the terminal block on the rear panel, do not exceed the rated load. Exceeding the rated load may cause a failure.q If an external device connected to the +24V DC output or other input or output terminals on the terminal block on the rear panel is affected by electromagnetic induction effects, such as a relay or a coil for an electromagnetic valve, use noise countermeasures such as diodes for absorbing reverse voltage. Ifnoise countermeasures are not used, this may be the cause of malfunction or failure.q Do not connect the +24V DC terminal to any of the output terminals (COMP, VALVE, BZ, ER BZ) or ground terminals on the terminal block on the rear panel. This connection will cause failure of the unit.q Do not connect the +24V DC terminal to any of the input terminals (RESET, SET) of the terminal block on the rear panel. This connection will cause failure of the unit.q When using the functions of the equipment for external equipment with an external power supply, make the ground terminals common. If ground terminals are not common, this may cause malfunction orfailure.q Do not apply voltage to the input terminals or output terminals. Connection to voltage may cause a failure.q Use in a temperature range from 5°C ~ 40°C and at a humidity of less than 80% (free from condensa-tion).q Hold the plug when attaching or removing a power cord or screwdriver cord.q Do not drag the cords or allow them to come into contact with oil or sharp edges, etc., or to come underneath heavy objects. This may cause a break or failure.q If the electric screwdriver locks up, or if there is an overload, the overload protection function operates. If the overload protection operates several times, it may be because the work exceeds the load capability of this equipment or the electric screwdriver. If it is being used correctly and the overload protection is actuated frequently, immediately stop use, turn off the main power switch, remove the power supply cord from the outlet and return the equipment to the supplying dealer.q If overheating occurs, turn off the main power switch, remove the power supply cord from the outlet and allow the equipment to cool naturally. After cooling, if the unit overheats while being used again, immedi-ately stop use, turn off the main power switch, remove the power supply cord from the AC outlet and return the equipment to the supplying dealer.q When tightening screws in plastics and other materials that store static electricity easily, discharge any static electricity prior to starting work. If static electricity is not discharged, it may cause a malfunction due to static electricity flowing from the tip of the bit.q Do not expose to severe shock such as dropping.q Do not connect other makers' electric screwdrivers, except for HIOS inc., . This may cause a failure.q When equipment will not be used for a long period, turn off the main power switch and remove the plug from the power outlet.q Do not disassemble or modify the design of the equipment. This may cause a failure. In this case, the warranty may be voided and you may not be able to get the equipment repaired.- 3 -s Specifications Compatible screwdriver*External dimensions do not include protruding points such as screws and terminal block.- 4 -s Primary functions and description of terms1. Confirmation of tightening•To confirm that a screw is reliably tight and to perform additional tightening, tighten for a 2nd and 3rd time after tightening for the first time. This is also referred to as second tightening and additional tightening. 2. Torque-up•Refers to final tightening of the screw where the torque reaches the torque tightening setting and the electric screwdriver clutch disengages.•This device defines the first torque-up after the normal rotation* count timer stops as the torque- up for the finish of screw tightening. Set the count timer so that it does not count down for torque-ups used for confirmation tightening.*Normal rotation count timer is abbreviated to count timer in the rest of this document.3. Input type•The signal input method for this equipment is a photo coupler input. The maximum input current is of 10 mA.•When connecting an open collector, connect the collector to the input terminal and the emitter to the GND terminal.<Caution>Do not apply voltage to the input terminals.Add a diode or equivalent to relay coils that are connected to inputs to absorb reverse voltage.Provide some type of noise reduction measures when using external devices. (See Fig. 1, p. 18)4. Output type•The signal output type for this equipment is an open collector output with a maximum rated load of 30V DC/80 mA.<Caution>Do not apply voltage to the output terminals.For use of external equipment with relays or solenoid valve coils, add a diode, etc., to absorb reverse voltage.5. Overload protection function•The overload protection unit of this equipment interrupts the output if a high current caused by overload, for example due to locking of the electric screwdriver, flows for longer than a stipulated period and is intended to protect this unit and the electric screwdriver.•If the overload protection function operates, turn the power off and let the unit rest for one minute or longer, and then turn the unit back on.<Caution>If the overload protection function operates several times, it may be because the work exceeds the load capability of this equipment or the electric screwdriver.6. Finish of screw tightening vs. completion of screw tightening•In this operator's manual, "finish of screw tightening" refers to normal tightening of one screw.•In this operator's manual "completion of screw tightening" refers to normal tightening work that is per-formed for 1 work piece.- 5 -7. Electric screwdriver operation control function•The counter mode and multiple counter mode for this equipment are functions that permit or prohibit operation of the electric screwdriver based on a set signal.8. Counter mode•Operating mode where the set number of screws to be tightened is displayed, and this display is reduced by 1 each time a screw is tightened.9. Multiple counter mode•In addition to the counter mode function, this is an operating mode for using relays for multiple electric screwdrivers that are set at different torques or use different bits for 1 work piece.•Connect an equivalent number of electric screwdrivers and main units using a daisy chain method. (See Fig. 2, p. 19).<Caution>When using an electric screwdriver in its order of operation, the other electric screwdrivers will not work and their operation is prevented.- 6 -<Description of front panel>q Main power switch (POWER)•Turns the power supply on and off.•When the power supply is “on”, the LED inside the switch lights.•The protection circuit automatically operates and turns off the power supply if the electric screwdriver locks and causes an overload.In this case, turn off the main power switch and turn it back on after one minute.If this measure fails, please check the fuse.If the fuse has failed, fit a replacement fuse.Spare fuses are stored inside the AC inlet (rear panel).q HI/LOW switch (switching of rotational speed) (HI/LOW)•Sets the output voltage to high or low.•This switch changes the rotational speed of the electric screwdriver.q Metal connector (DRIVER)•Connects the driver cord.•BLOP-STC 3 uses a 6P (pin) connector type and CLT-70STC 3 uses a 5P (pin).s Description of name and function for each section<Front Panel>(Rear panel)Function switch (F3)- 7 -q Operating display LED•Lights green when the power is switched on.•Lights orange when operation of the electric screwdriver is enabled.q Number of screws display•Displays the set number of screws to be tightened initially and displays the remaining number of screws to be tightened after counting starts.•Each time a screw is tightened, the remaining number of screws to be tightened is reduced by one.q Reset switch (RESET)•This resets the counter functions, interrupts output of the valve signal and releases the work piece held by an external device.•If operated during or after setting the set switch, the display returns to the number that was set.•Performs the same function as the reset on the terminal block on the rear panel.q Function switch (F1)••Pressing the button for longer than 1 second while in Change Function Mode will cause a buzzer to sound, shutting down the Change Function Mode.q Function switch (F2, F3) (x10, x1 Setting Switch)•Numbers increase in increments of 1 as the button is pressed.A limit may be imposed depending on the setting being changed.1)•Set the number of screws to be tightened from 1 to 99.•Set the position for 10 and 1 .A setting of 00 cannot be entered (warning buzzer will sound).2)•Setting range from 0.01 second to 0.99 second.•This SW setting prevents counting the second tightening of a screw due to confirmation or additional tightening.•The buzzer will sound for a short time while countdown is possible.Use the buzzer while confirming the tightness of screws that have been tightened as a guide to setting the count timer operating time.(The screwdriver will only operate while the count timer is running, regardless of other settings)3)•Setting range from 0.1 second to 3.9 seconds.•This setting changes the time allotted until the screwdriver is operational, as well as generating a valve signal when the set signal is received by the terminal block.•Use the time taken for the LED to light after receiving the set signal as a guide to setting the Work Set Timer.4)•Setting range from 0.1 second to 3.9 seconds.•Set the time between the end of the valve signal after work has been completed, and the time for which the screwdriver is not operational.- 8 -•Use the time taken between the start and end of the buzzer sound after work has been completed, as a guide to setting the Work Reset Timer.5)•Setting range from 0.1 second to 1.0 second.•Set the time taken until reverse counting starts.•Use the time taken to the start reverse counting as a guide to setting the Work Reset Timer.6)•Settings for the following features are available.a)Controls display of remaining number of screws, see page 12 : ON=display, OFF=no displayb)Controls buzzer sound: ON=buzzer noise, OFF=no buzzer noisec)Controls reverse count: ON=on, OFF=offd)Controls the normal counter operating mode with a signal on set terminal, see page 10 : ON=on,OFF=offe)Controls buzzer sound during torque-up: ON=on, OFF=offf)Stops all counting features: power supply only<Caution>•Note: Even the slightest reverse rotation will be considered as loosening and result in a count-up from the last screw of the operation with a count of 00, regardless of the time set for the reverse count timer.•The reverse count feature cancels the countdown of the preceding torque-up operation.Once reverse count-up has started, further count-up will not occur until count-down from a normal rotation torque-up operation has occurred.- 9 -<Rear Panel>+24V DC Valve Buzzer Error buzzer<Description of rear panel>q Ground terminal (GND)•Ground terminalq Set terminal (SET)•Input terminal for work set signal.•After the period set for the work set timer elapses from input of the set signal, the operation LED is turned on and operation permission is provided for the electric screwdriver. The VALVE signal is generated at the same time.•Connect the detection switch so that there is a set signal input when there is no voltage between the set terminal and the ground terminal.<Caution>In order to prevent incorrect operation, operation of the electric screwdriver is not permitted until after the operating display LED lights orange.q Reset terminal (RESET)•Input terminal for reset signal.•This resets the counter functions, interrupts generation of the valve signal and releases the work piece being held by an external device.•Display is renewed when reset terminal and ground terminal are connected during or after setting of the count set switch.•Performs the same function as the reset on the front panel.•Connect the reset switch so that there is an input on the reset signal when there is no voltage between the reset terminal and the ground terminal.q COMP terminal (COMP)•Output terminal for the completion of work COMP signal (completion of work).•Output for 0.1 second after work reset timer stops.•The output type is open collector output, and the maximum rated load is 30V DC/80 mA.•Connects the total counter to permit counting of the number of work pieces completed.q+ 24V DC terminal•Power supply terminal for external devices. The power supply capability has a maximum rated output of 24V DC/0.2A.q Valve terminal (VALVE)•Output terminal for control signal of external devices.•Use this to control a solenoid valve (24V DC) for an external device used to fix work pieces in place.•Connect the (+) terminal of the solenoid valve for the external device to the +24V DC terminal, and the solenoid valve ground terminal to the valve terminal.•When an external device operates at a different voltage, connect the devices to a common ground and use an external power supply.•Add a diode to the solenoid valve of external devices to absorb reverse voltage.•The output type is open collector output, and the maximum rated load is 30V DC/80 mA.q Buzzer terminal (BZ)•Similar to the completion of work buzzer, signal output is synchronized with the work reset timer.•The output of the BZ terminal is provided regardless of the setting of the mode switch.•When a separate power supply is used for the external device, connect the devices to a common ground and use an external power supply.•Add a diode to the solenoid valve of external devices to absorb reverse voltage.•The output type is open collector output, and the maximum rated load is 30V DC/80 mA.q Error buzzer terminal (ER BZ)•Generated if the work set signal is interrupted, even for an instant, prior to completion of screw tighten-ing.•However, operation of this device can be actuated normally by the number of screws remaining to be tightened for completion.•ER BZ output does not stop until there is a reset or count-down is completed.•When a separate power supply is used for the external device, connect the devices to a common ground and use an external power supply.•Add a diode to the solenoid valve of external devices to absorb reverse voltage.•The output type is open collector output, and the maximum rated load is 30V DC/80 mA.<Function Setting Table>s Initial settings*Initial settings use the counter mode as an example, however settings other than MODE are performed in the same manner. Set the initial settings prior to use for the first time, and perform MODE settings to suit any following work.1. Connections1)Connect the screwdriver cord to the metal connector of the main unit.2)Connect the unit's power supply cord to an outlet that supplies the rated power (AC power outlet), andthen connect to ground.2. Setup instructions1)Confirm MODE settings (factory settings)•Turn the main power switch on while pressing the F1 switch.(If the unit is already switched on, press the F1 and Reset switches together, before releasing the Reset switch only)A buzzer (beeping sound) will sound with the F1 switch. Continue pressing the switch (for 1 second or2)•Confirm that "00" is shown in the settings display.3)Press the Reset switch.3. Work instructions1)Turn the main power switch on.2)Settings for the Work Set Timer•Press the F1 and Reset switches together, before releasing the Reset switch only. A buzzer (beepingshown in the F1 display.•settings with the x10, x1 switches.(Setting range from 0.1 second to 3.9 seconds)•After the Work Set Timer operation has completed (time up), the valve signal will be generated.(The signal will continue to be generated until the unit is reset or counting is completed)•When settings have been completed, press the F1 switch to move to the next setting.•When all settings have been completed, press the F1 switch for 1 second or more. The buzzer will sound twice, and the setting mode will close.3)(Setting range from 0.01 second to 0.99 second)The buzzer will sound for a short time if a torque-up operation is performed after the count timer has expired.While variations between different operators may exist, perform continuous confirmation tightening before setting the time required for work without using a count-down.(The factory setting for the count timer is 0.15 second)•When settings have been completed, press the F1 switch to move to the next setting.•When all settings have been completed, press the F1 switch for 1 second or more. The buzzer will sound twice, and the setting mode will close.<Caution>•Countdown will not be performed if a count timer operating time longer than the actual time required for tightening has been set. Take note of this when tightening screws with a short thread.4)Reverse Counter Timer Settings - for BL•determined to be removed.(Setting range is from 0.1 second to 1.0 second. The factory setting for the reverse counter timer is 0.2 second)•When settings have been completed, press the F1 switch to move to the next setting.•When all settings have been completed, press the F1 switch for 1 second or more. The buzzer will sound twice and the setting mode will close.<Caution>•Releasing the start lever after 0.1 second has elapsed for short threaded screws that are removed in less than 0.1 second of starting reverse rotation can increase the count-up by 1.•Using the screwdriver in the reverse rotation for longer than the time set in the reverse counter timer will increase the count-up by 1, even if the screw is not actually loosened.5)Settings for the Work Reset Timer•time using the x10, x1 switches.•After the torque-up operation is complete for the final screw on the current work piece, set the Work Reset Timer to the time taken for the DRV LED (operating display) to change from orange to green for the current work piece.•The output of the VALVE signal is stopped when the Work Reset Timer operation is complete.•After the Work Reset Timer operation has stopped, the COMP signal will be generated for 0.1 second.•When settings have been completed, press the F1 switch to move to the next setting.•When all settings have been completed, press the F1 switch for 1 second or more. The buzzer will sound twice, and the setting mode will close.6)Settings for the Count Set••When settings have been completed, press the F1 switch to move to the next setting.•When all settings have been completed, press the F1 switch for 1 second or more. The buzzer will sound twice, and the setting mode will close.7)System Settings•switches.•Settings for the following features are available.a)DSP (Controls the display of remaining number of screws: ON=display, OFF=not displayed)b)BUZZ (Controls the buzzer sound: ON=buzzer noise, OFF=no buzzer noise)c)RCN-T (Controls the reverse count: ON=on, OFF=off)d)EVERON (Controls the normal counter operating mode: ON=on, OFF=off)e)TUP BUZZ (Controls the buzzer sound during torque-up: ON=on, OFF=off)f)COUNTER OFF (Stops all counting features: power supply only)•See page 12.•When settings have been completed, press the F1 switch to move to the next setting.•When all settings have been completed, press the F1 switch for 1 second or more. The buzzer will sound twice, and the setting mode will close.<Caution>•Press the Reset switch if you wish to cancel the process at any time. All changes will be lost.This completes the initial settings. Next, determine the operating mode for the actual work and proceed according to the operator's manual.s Quick installation1.Normal power mode✽When performing tightening of screws using the equipment as a normal power supply for an electric screwdriver without using the external device control or counter function.s Connections1)Connect the connector for the screwdriver cord to the metal connector of this equipment.2)Connect the power supply cord for this device to a power supply that supplies the rated power (ACoutlet), and connect to ground.s Setup and work instructions1)2)Exit the Setting Mode by pressing the F1 switch for longer than 1 second.3)After work preparations are complete, tighten screws as normal.2.Continuous counter mode✽When the external device control function of this equipment is not used and only the counting function is used for performing work.This mode is for cases where work pieces are not fixed and for use of a target count to prevent careless mistakes.s Connections1)Connect the connector for the screwdriver cord to the metal connector of this equipment.2)Connect the power supply cord for this device to a power supply that supplies the rated power (ACoutlet), and connect to ground.s Setup instructions1)up buzzer).Set F2 "0 – 7" depending on conditions of use.2)3)second to 0.99 second) while performing confirmation tightening.4)Exit the Setting Mode by pressing the F1 switch for longer than 1 second.5)Preparation settings are now complete.s Work instructions1)Turn on the main power switch.2)Tighten the first screw. The number of screws display is lowered by one.3)After tightening the set number of screws, tightening of screws is finished.•The number of screws display reaches “00” and the complete buzzer sounds.•Afterwards, it is automatically reset and the initial setting for the number of screws to tighten is displayed.•This work can be repeated.3.Counter mode✽Use this mode when controlling an electric screwdriver for each piece of work and fixing of work piece using the external device function.✽The total number of work pieces completed can be counted by connecting a commercially available total counter.s Connections1)Connect the connector for the screwdriver cord to the metal connector of this equipment.2)Connect the power supply cord for this device to a power supply that supplies the rated power (AC outlet)and connect to ground.3)Make connections for each control signal with reference to Fig. 1.s Setup instructions1)Turn on the main power switch.2)3)4)Set the Work Set Timer operating time to suit the work piece using the WS-T Setting Mode (F1 Display5)second to 0.99 second) while performing confirmation tightening.6)Set the Work Reset Timer operating time to suit the work piece using the WR-T Setting Mode (F1 Display7)Exit the Setting Mode by pressing the F1 switch for longer than 1 second.8)Preparation settings are now complete.s Work instructions1)Turn on the main power switch.2)Input the set signal•The work set timer starts operation.•The work set timer stops operation.•The valve signal is generated at the same time.•Simultaneously, the operating display LED (DRV) is turned on and electric screwdriver operation is permitted.3)Finishing of tightening of the first screw.•Tighten the first screw. The number of screws display is lowered by one.4)After tightening the set number of screws, tightening of screws is finished.•The number of screws display changes to “00” and the work reset timer operation starts.•Next the work reset timer operation stops.•The valve signal output stops at the same time.•Simultaneously, the operating display LED (DRV) is turned off and electric screwdriver operation is prevented.•The completion buzzer turns off at the same time.•The COMP signal is generated for 0.1 second.。