EhLib使用说明
- 格式:doc
- 大小:236.50 KB
- 文档页数:76

—APPLICATION NOTEABB Ability ODM zenon 8.20Quick Installation GuideBefore installing ABB zenon 8.20:1.All current operating system updates must be installedNote: If you always use the latest version (Service Pack) of your operating system, you not only avoid compatibility issues but also security problems.2.There must not be a restart pending.3.The system requirements are checked before installation. If the requirements are not met, you areshown these on a separate page with notices on how to rectify this.4.Automatic Windows updates influence the installation. If an update of the Windows operatingsystem is carried out while the zenon setup is running, it can cause problems during the zenon installation.To prevent this: Deactivate the automatic Windows update during the time of installation and carry out the Windows update before starting the zenon installation5.With Windows 7 Embedded Standard, zenon is installed using the normal installation routine. Youcan find the hardware requirements in the Runtime under Windows Embedded Standard chapter.6.During the installation of zenon, the ABB Multiple Network Protocol Driver (cdprotdrv.sys) isinstalled. To start the driver, the operating system must be restarted after installation.7.Activate Windows feature - .NET framework 3.5 before installation.Frequent sources of error during installation:1.The virus scanner is active and blocks the installtion because the scanner thinks it´s a virus.Solution: Seperate the system from the network, disable the virus scanner, execute the installation again.2.The firewall was not configured correctly. Solution: Seperate the system from the network, disablethe firewall, execute the installation again.3.Erroneous SQL-installation on the system. Solution: Create project backups; if possible, deinstallSQL server, rename the SQL folder, and restart installation.Get started with download:1.Download ABB zenon 8.20 setup from ABB website (use direct link as mentioned below):ABB zenon 8.20 download link2.Run installer as administrator.3.Select the language for the installation.4.Read and agree to the license terms. Print button will print the EULA and previous button go back tothe language selection page.5.Select options for download:a.Main Release – ABB zenon editor and runtime standard packageb.Zenon PDF Help Files - Besides the Online Help which is installed with zenon software bydefault, the same help content in PDF format can be downloaded and installed.c.ZEE600 - ABB zenon Electrification Edition for seamless integrator of diverse devices such asABB and 3rd party make protection relays, meters, substation equipment condition monitoring units, Programmable Logic Controllers (PLC) and Remote Terminal Units (RTUs),6.Download in progress.7.Downloaded package will be saved in selected target folder.Get started with installation:1.You can start installation on the same machine or download setup can be copied to anothermachine for installation.2.Right click on Start.exe and run as administrator.3.Select language again for installation:4.Also accept license terms again.5.Select options for installation (We suggest youto select all options during download and later youcan choose desired options for installation).a.Zenon 8.20 – You can select Editor (complete development package withruntime), or standalone runtime option. Additionally zenon web sevrer and clientcan be selected for installation.b.Zenon PDF Help Files – in English and German.c.ZEE600 package.6.You will get installation successful message once all selected components are installed properly.7.In case of failed installation please click Show logs link to collect logs and contact us via*********************.。
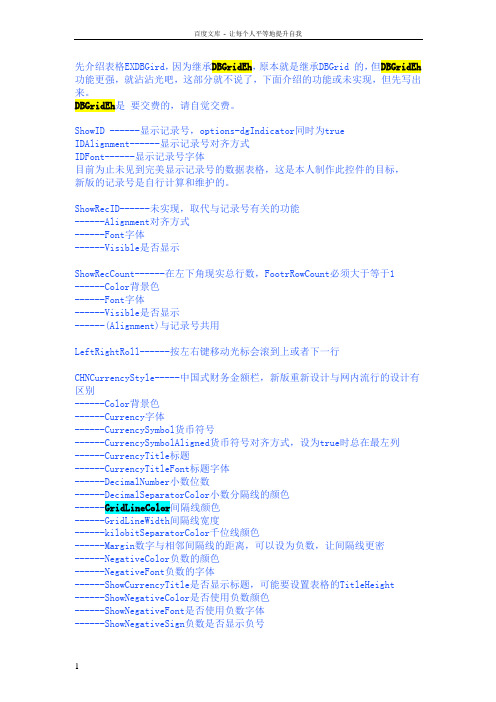
先介绍表格EXDBGird,因为继承DBGridEh,原本就是继承DBGrid 的,但DBGridEh 功能更强,就沾沾光吧,这部分就不说了,下面介绍的功能或未实现,但先写出来。
DBGridEh是要交费的,请自觉交费。
ShowID ------显示记录号,options-dgIndicator同时为trueIDAlignment------显示记录号对齐方式IDFont------显示记录号字体目前为止未见到完美显示记录号的数据表格,这是本人制作此控件的目标,新版的记录号是自行计算和维护的。
ShowRecID------未实现,取代与记录号有关的功能------Alignment对齐方式------Font字体------Visible是否显示ShowRecCount------在左下角现实总行数,FootrRowCount必须大于等于1------Color背景色------Font字体------Visible是否显示------(Alignment)与记录号共用LeftRightRoll------按左右键移动光标会滚到上或者下一行CHNCurrencyStyle-----中国式财务金额栏,新版重新设计与网内流行的设计有区别------Color背景色------Currency字体------CurrencySymbol货币符号------CurrencySymbolAligned货币符号对齐方式,设为true时总在最左列------CurrencyTitle标题------CurrencyTitleFont标题字体------DecimalNumber小数位数------DecimalSeparatorColor小数分隔线的颜色------GridLineColor间隔线颜色------GridLineWidth间隔线宽度------kilobitSeparatorColor千位线颜色------Margin数字与相邻间隔线的距离,可以设为负数,让间隔线更密------NegativeColor负数的颜色------NegativeFont负数的字体------ShowCurrencyTitle是否显示标题,可能要设置表格的TitleHeight------ShowNegativeColor是否使用负数颜色------ShowNegativeFont是否使用负数字体------ShowNegativeSign负数是否显示负号------TextLayout数字对齐方式------ZeroEmpty数据为0时是否显示要显示中国式财务金额栏,还需要在表格的Columns属性选择一个字段,将DisplayCHNCurrency设为真,把MaxWidth也设置一下,以限制宽度。

I/O 远程控制服务器EZI-10 使用者说明书Version 1.2Sollae Systems Co., Ltd.http://www.sollae.co.kr目录........................................................................................................................................................ - 1 -1产品概要........................................................................................................................................ - 3 -1.1概要......................................................................................................................................................................... - 3 -1.2构成品..................................................................................................................................................................... - 3 - 1.3产品应用构成图................................................................................................................................................ - 3 -1.4产品规格................................................................................................................................................................ - 5 -1.4.1硬件规格.......................................................................................................................................................... - 5 -1.4.2软件规格.......................................................................................................................................................... - 5 -1.4.3系统状态指示灯............................................................................................................................................. - 6 -1.4.4ISP 开关........................................................................................................................................................ - 6 -1.5接口......................................................................................................................................................................... - 7 -1.5.1输入端口.......................................................................................................................................................... - 7 -1.5.2输出端口.......................................................................................................................................................... - 7 -1.5.3以太网连接接口............................................................................................................................................ - 8 -1.5.4电源.................................................................................................................................................................. - 9 -2开始............................................................................................................................................. - 10 -2.1设定方法............................................................................................................................................................. - 10 -2.1.1通信环境检查.............................................................................................................................................. - 10 -2.1.2连接到网络.................................................................................................................................................. - 10 -2.1.3参数变更设定............................................................................................................................................. - 10 -2.2测试...................................................................................................................................................................... - 10 -2.2.1变更PC IP 地址.......................................................................................................................................... - 10 -2.2.2EZI-10 安装............................................................................................................................................... - 10 -2.2.3EZI-10 设定............................................................................................................................................... - 10 -2.2.1HTTP 测试................................................................................................................................................. - 11 -2.2.2Modbus/TCP 测试................................................................................................................................. - 12 -3设定............................................................................................................................................. - 14 -3.1IP 地址及参数值............................................................................................................................................. - 14 -3.2通过ezConfigIO的设定................................................................................................................................. - 14 -3.2.1ezConfigIO ................................................................................................................................................ - 14 -3.2.2ezConfigIO 按钮..................................................................................................................................... - 15 -3.2.3ezConfigIO ................................................................................................................................................ - 15 -3.3自动接收IP地址 (DHCP)............................................................................................................................... - 16 -3.4通过PPPoE设定IP地址................................................................................................................................... - 17 -4系统管理..................................................................................................................................... - 18 -4.1动作模式............................................................................................................................................................. - 18 -4.1.1一般模式........................................................................................................................................................ - 18 -4.1.2ISP 模式....................................................................................................................................................... - 18 -4.1.3网络诊断模式............................................................................................................................................. - 18 -4.1.4各动作模式比较....................................................................................................................................... - 18 -4.2固件升级............................................................................................................................................................. - 18 - 4.3查看当前状状态............................................................................................................................................... - 21 -4.3.1查看当前状态............................................................................................................................................. - 21 -5其他功能..................................................................................................................................... - 22 -5.1保安...................................................................................................................................................................... - 22 -5.1.1密码设定....................................................................................................................................................... - 22 -5.1.2设定允许连接的IP地址设定...................................................................................................................... - 22 -5.2初始化参数值.................................................................................................................................................... - 23 -5.2.1利用ISP按钮的参数值初始化.................................................................................................................... - 23 -6技术支援/质保期间/注意事项................................................................................................. - 24 -6.1技术支援............................................................................................................................................................. - 24 -6.2保证...................................................................................................................................................................... - 24 -6.2.1退货............................................................................................................................................................... - 24 -6.2.2无偿A/S ..................................................................................................................................................... - 24 -6.2.3有偿A/S ..................................................................................................................................................... - 24 -6.3注意事项............................................................................................................................................................. - 24 -7Revision History...................................................................................................................... - 25 -11.1概要随着互联网的不断发展,通过因特网通信的技能要求日趋增加成为趋势。

—I N FO M A R K E TI NG EL 2020-303Pasarela de conectividad Cloud para ABB Ability TM EDCS Ekip E-HubNos complace comunicar ellanzamiento de la nueva pasarela de comunicación Ekip E-Hub, que incluye la capacidad de digitalizar instalaciones nuevas o existentes e integrarlas en la solución ABB Ability TM EDCS o en sistemas digitales de terceros.FuncionalidadLa nueva pasarela Ekip E-Hub permite conectar instalaciones nuevas o existentes a la plataforma Cloud de gestión energética ABB ABility TM EDCS o a sistemas de control tipo SCADA o BMS, para optimizar sus costes operativos.Ekip E-Hub reconoce y conecta automáticamente con los dispositivos de ABB Electrification a través del puerto de conectividad Ethernet (protocolo Modbus TCP) y del puerto serie RS485 (protocoloModbus RTU). Adicionalmente, el módulo opcional de señales de entrada permite leer medidas de pulsos digitales o estados de la aparamenta (6 entradas digitales configurables) y señales analógicas (2 entradas 4…20mA y 2 entradas 0…36V).La conectividad aguas arriba, ya sea a la plataforma ABB Ablity TM o a un sistema de control tipo SCADA oBMS, se realiza mediante el puerto Ethernet.Módulos enchufables Ekip Com como alternativa Los módulos enchufables Ekip Com son unaalternativa en aquellos casos donde sea posible el uso de dispositivos como Emax 2, Tmax XT, Ekip UP o TruONE ATS. En este caso, Ekip Com Hub permite la conexión a ABB Ability TM EDCS y Ekip Com Modbus TCP (u otros módulos Ekip Com con protocolos de comunicación estándares) permite la conexión a sistemas de control tipo SCADA o BMS.Configuración y puesta en marchaLa herramienta de configuración de la nuevapasarela Ekip E-Hub es el software Ekip Connect, una herramienta gratuita de configuración, supervisión y diagnóstico para otras gamas de producto como Emax 2, Tmax XT, Ekip UP, M4M, TruONE ATS, etc.Ekip Connect reconoce automáticamente la pasarela Ekip E-Hub, conectando el PC al puerto Ethernet del dispositivo.Ekip Connect Ekip E-HubEn cuanto a dimensiones:Características técnicas Alimentación 9…36 V DCMontaje Carril DIN 35mm (DIN EN 60 715)IPIP40Temperatura de trabajo -20…+70ºCDimensiones 198,0 x 90,3 x 48,4 mm Norma IEC62368-1Antena 3G Opcional (necesarias 2uds)Memoria interna4GB eMMCConectividadPuertos y protocolos2x RJ45 Ethernet – Modbus TCP2x RS-485 - Modbus RTU 2x USB 2.02x MicroSIM – 3G (no suministrada)Módulo opcional E/S6x Entradas digitales 24 V DC 4x Entradas analógicasCaracterísticas principalesLas características técnicas principales de la nueva pasarela Ekip E-Hub son:—01Ejemplo conectividadcon los dispositivos deprotección, medida ygestión de la energía—01—(*) Únicamente se muestran los códigos incluidos en tarifa PDF 2020. Parael resto de códigos y precios consultar la tarifa electrónica o PDC.Códigos de pedido (*)Código pedido Descripción Precio unit. €GTV ABC Sum.mín./Embalaje Ud ConectividadI N F O M A R K E T I N G E L 2020-303Haga click en la imagen para acceder a la documentaciónHaga click en la imagen para acceder a la documentación—Manual técnico Ekip E-HubPresentación PDF de lanzamiento Ekip E-HubHaga click en la imagen para acceder a la webPágina web soluciones digitales de supervisión de la energíaHaga click en la imagen para acceder a la documentaciónManual usuario Ekip E-Hub Haga click en la imagen para acceder a la documentaciónFolleto ABB ABility TM EDCS—Pau MasgrauABB Ability™ Market Development ManagerAsea Brown Boveri, SA Low Voltage Products Tel.: 93 484 22 25Fax: 93 484 21 90www.abb.es/bajatension。

For Windows® and Linux®Worldwide WebSupport/Contents/Services/Technical-Support/Contact-Technical-Support.aspxDisclaimerThis documentation, as well as the software described in it, is furnished under license and may be used only in accordance with the terms of such license.MSC Software Corporation reserves the right to make changes in specifications and other information contained in this document without prior notice.The concepts, methods, and examples presented in this text are for illustrative and educational purposes only, and are not intended to be exhaustive or to apply to any particular engineering problem or design. MSC Software Corporation assumes no liability or responsibility to any person or company for direct or indirect damages resulting from the use of any information contained er Documentation: Copyright © 2021 MSC Software Corporation. Printed in U.S.A. All Rights Reserved.This notice shall be marked on any reproduction of this documentation, in whole or in part. Any reproduction or distribution of this document, in whole or in part, without the prior written consent of MSC Software Corporation is prohibited.This software may contain certain third-party software that is protected by copyright and licensed from MSC Software suppliers. Additional terms and conditions and/or notices may apply for certain third party software. Such additional third party software terms and conditions and/or notices may be set forth in documentation and/or at /thirdpartysoftware (or successor website designated by MSC from time to time). Portions of this software are owned by Siemens Product Lifecycle Management, Inc. © Copyright 2021The MSC Software logo, MSC, MSC Adams, MD Adams, Adams and Easy5 are trademarks or registered trademarks of MSC Software Corporation and/or its subsidiaries in the United States and other countries. Hexagon and the Hexagon logo are trademarks or registered trademarks of Hexagon AB and/or its subsidiaries. NASTRAN is a registered trademark of NASA. FLEXlm and FlexNet Publisher are trademarks or registered trademarks of Flexera Software. Parasolid is a registered trademark of Siemens Product Lifecycle Management, Inc. All other trademarks are the property of their respective owners.Use, duplicate, or disclosure by the U.S. Government is subjected to restrictions as set forth in FAR 12.212 (Commercial Computer Software) and DFARS 227.7202 (Commercial Computer Software and Commercial Computer Software Documentation), as applicable.May 28, 2021Corporate Europe, Middle East, AfricaMSC Software Corporation MSC Software GmbH 5161 California Ave, Suite 200Am Moosfeld 13University Research Park 81829 Munich, Germany Irvine, CA 92617 Telephone: (49) 89 431 98 70Telephone: (714) 540-8900Email :**********************Email :********************************Japan Asia-Pacific MSC Software Japan Ltd.MSC Software (S) Pte. Ltd.KANDA SQUARE 16F 100 Beach Road 2-2-1 Kanda Nishikicho, Chiyoda-ku #16-05 Shaw Tower Tokyo 101-0054, Japan Singapore 189702Telephone: (81)(3) 6275 0870Telephone: 65-6272-0082Email :***************************Email :****************************Documentation FeedbackAt MSC Software, we strive to produce the highest quality documentation and welcome your feedback. If you have comments or suggestions about our documentation, write to us at: documentation-************************.Please include the following information with your feedback:⏹Document name⏹Release/Version number⏹Chapter/Section name⏹Topic title (for Online Help)⏹Brief description of the content (for example, incomplete/incorrect information, grammaticalerrors, information that requires clarification or more details and so on).⏹Your suggestions for correcting/improving documentationYou may also provide your feedback about MSC Software documentation by taking a short 5-minute survey at:.The above mentioned e-mail address is only for providing documentation specificfeedback. If you have any technical problems, issues, or queries, please contact TechnicalSupport.C o n t e n t sReference ManualPrefaceConventions Used in This Guide . . . . . . . . . . . . . . . . . . . . . . . . . . . . . . . . . . . . . . . . . . . . . . . . . . . . . . . . . xviii1 Reference Manual TopicsOverview. . . . . . . . . . . . . . . . . . . . . . . . . . . . . . . . . . . . . . . . . . . . . . . . . . . . . . . . . . . . . . . . . . . . . . . . . . . . 5 Accelerator Keys . . . . . . . . . . . . . . . . . . . . . . . . . . . . . . . . . . . . . . . . . . . . . . . . . . . . . . . . . . . . . . . . . . . . . 5 Adding Components. . . . . . . . . . . . . . . . . . . . . . . . . . . . . . . . . . . . . . . . . . . . . . . . . . . . . . . . . . . . . . . . . . . 6 Add Components Window. . . . . . . . . . . . . . . . . . . . . . . . . . . . . . . . . . . . . . . . . . . . . . . . . . . . . . . . . . . . . 6Adding Components to the Schematic . . . . . . . . . . . . . . . . . . . . . . . . . . . . . . . . . . . . . . . . . . . . . . . . . . . 9Add Components by Name Reference. . . . . . . . . . . . . . . . . . . . . . . . . . . . . . . . . . . . . . . . . . . . . . . . . . . . 10 Analyses. . . . . . . . . . . . . . . . . . . . . . . . . . . . . . . . . . . . . . . . . . . . . . . . . . . . . . . . . . . . . . . . . . . . . . . . . . . . 11 Nonlinear Analyses. . . . . . . . . . . . . . . . . . . . . . . . . . . . . . . . . . . . . . . . . . . . . . . . . . . . . . . . . . . . . . . . . . 11Linear Analyses . . . . . . . . . . . . . . . . . . . . . . . . . . . . . . . . . . . . . . . . . . . . . . . . . . . . . . . . . . . . . . . . . . . . 12 Analysis Data Form . . . . . . . . . . . . . . . . . . . . . . . . . . . . . . . . . . . . . . . . . . . . . . . . . . . . . . . . . . . . . . . . . . . 12 Analysis Data Form Header. . . . . . . . . . . . . . . . . . . . . . . . . . . . . . . . . . . . . . . . . . . . . . . . . . . . . . . . . . . . 13Analysis Data Form. . . . . . . . . . . . . . . . . . . . . . . . . . . . . . . . . . . . . . . . . . . . . . . . . . . . . . . . . . . . . . . . . . 14 Auxiliary Input File. . . . . . . . . . . . . . . . . . . . . . . . . . . . . . . . . . . . . . . . . . . . . . . . . . . . . . . . . . . . . . . . . . . . 15 Analysis Title . . . . . . . . . . . . . . . . . . . . . . . . . . . . . . . . . . . . . . . . . . . . . . . . . . . . . . . . . . . . . . . . . . . . . . 15Time of the Analysis. . . . . . . . . . . . . . . . . . . . . . . . . . . . . . . . . . . . . . . . . . . . . . . . . . . . . . . . . . . . . . . . . 16Initial Operating Point. . . . . . . . . . . . . . . . . . . . . . . . . . . . . . . . . . . . . . . . . . . . . . . . . . . . . . . . . . . . . . . . 16Model Explorer “Pickable” Fields . . . . . . . . . . . . . . . . . . . . . . . . . . . . . . . . . . . . . . . . . . . . . . . . . . . . . . . 17Auxiliary Input File . . . . . . . . . . . . . . . . . . . . . . . . . . . . . . . . . . . . . . . . . . . . . . . . . . . . . . . . . . . . . . . . . . 18Creating an Auxiliary Input File. . . . . . . . . . . . . . . . . . . . . . . . . . . . . . . . . . . . . . . . . . . . . . . . . . . . . . . . . 18Using an “auxfile” To Enter Blocks of Data. . . . . . . . . . . . . . . . . . . . . . . . . . . . . . . . . . . . . . . . . . . . . . . . 19Specifying a Label in an Auxiliary Input File . . . . . . . . . . . . . . . . . . . . . . . . . . . . . . . . . . . . . . . . . . . . . . . 20 Auxiliary Input File Data Format . . . . . . . . . . . . . . . . . . . . . . . . . . . . . . . . . . . . . . . . . . . . . . . . . . . . . . . . . 21 PARAMETER VALUES Command. . . . . . . . . . . . . . . . . . . . . . . . . . . . . . . . . . . . . . . . . . . . . . . . . . . . . . . . 22Scalar Parameter Data . . . . . . . . . . . . . . . . . . . . . . . . . . . . . . . . . . . . . . . . . . . . . . . . . . . . . . . . . . . . . . . 22Array Parameter Data. . . . . . . . . . . . . . . . . . . . . . . . . . . . . . . . . . . . . . . . . . . . . . . . . . . . . . . . . . . . . . . . 23Expressions . . . . . . . . . . . . . . . . . . . . . . . . . . . . . . . . . . . . . . . . . . . . . . . . . . . . . . . . . . . . . . . . . . . . . . . 26Tabular Data. . . . . . . . . . . . . . . . . . . . . . . . . . . . . . . . . . . . . . . . . . . . . . . . . . . . . . . . . . . . . . . . . . . . . . . 26“Analysis Only” Mode . . . . . . . . . . . . . . . . . . . . . . . . . . . . . . . . . . . . . . . . . . . . . . . . . . . . . . . . . . . . . . . . . 29viReference ManualOperations Allowed . . . . . . . . . . . . . . . . . . . . . . . . . . . . . . . . . . . . . . . . . . . . . . . . . . . . . . . . . . . . . . . . . 30Disabled Functionality . . . . . . . . . . . . . . . . . . . . . . . . . . . . . . . . . . . . . . . . . . . . . . . . . . . . . . . . . . . . . . . 30Creating a “Locked Configuration” Model for Distribution Purposes . . . . . . . . . . . . . . . . . . . . . . . . . . . . . 31Using a Locked Configuration Easy5 Model . . . . . . . . . . . . . . . . . . . . . . . . . . . . . . . . . . . . . . . . . . . . . . . 32 Background Processes . . . . . . . . . . . . . . . . . . . . . . . . . . . . . . . . . . . . . . . . . . . . . . . . . . . . . . . . . . . . . . . . 32C Component . . . . . . . . . . . . . . . . . . . . . . . . . . . . . . . . . . . . . . . . . . . . . . . . . . . . . . . . . . . . . . . . . . . . . . . . 34Adding C Code. . . . . . . . . . . . . . . . . . . . . . . . . . . . . . . . . . . . . . . . . . . . . . . . . . . . . . . . . . . . . . . . . . . . . 35Example C Code Component . . . . . . . . . . . . . . . . . . . . . . . . . . . . . . . . . . . . . . . . . . . . . . . . . . . . . . . . . . 36Adding C Declarations . . . . . . . . . . . . . . . . . . . . . . . . . . . . . . . . . . . . . . . . . . . . . . . . . . . . . . . . . . . . . . . 38C Code Files and Structure. . . . . . . . . . . . . . . . . . . . . . . . . . . . . . . . . . . . . . . . . . . . . . . . . . . . . . . . . . . . 38Code Components . . . . . . . . . . . . . . . . . . . . . . . . . . . . . . . . . . . . . . . . . . . . . . . . . . . . . . . . . . . . . . . . . . . . 39Command Line Options . . . . . . . . . . . . . . . . . . . . . . . . . . . . . . . . . . . . . . . . . . . . . . . . . . . . . . . . . . . . . . . . 40 Option Examples . . . . . . . . . . . . . . . . . . . . . . . . . . . . . . . . . . . . . . . . . . . . . . . . . . . . . . . . . . . . . . . . . . . 43 Compiling External Code. . . . . . . . . . . . . . . . . . . . . . . . . . . . . . . . . . . . . . . . . . . . . . . . . . . . . . . . . . . . . . . 43 Default Compiler Options . . . . . . . . . . . . . . . . . . . . . . . . . . . . . . . . . . . . . . . . . . . . . . . . . . . . . . . . . . . . . 44Obtaining Current Compiler Options. . . . . . . . . . . . . . . . . . . . . . . . . . . . . . . . . . . . . . . . . . . . . . . . . . . . . 44Setting Debug Compiler Options. . . . . . . . . . . . . . . . . . . . . . . . . . . . . . . . . . . . . . . . . . . . . . . . . . . . . . . . 45User Specified Compiler Options . . . . . . . . . . . . . . . . . . . . . . . . . . . . . . . . . . . . . . . . . . . . . . . . . . . . . . . 45Examples of Compiling External Code. . . . . . . . . . . . . . . . . . . . . . . . . . . . . . . . . . . . . . . . . . . . . . . . . . . . 45Compiling and Linking Mixed Code. . . . . . . . . . . . . . . . . . . . . . . . . . . . . . . . . . . . . . . . . . . . . . . . . . . . . . 46 Components. . . . . . . . . . . . . . . . . . . . . . . . . . . . . . . . . . . . . . . . . . . . . . . . . . . . . . . . . . . . . . . . . . . . . . . . . 51 Component Basics. . . . . . . . . . . . . . . . . . . . . . . . . . . . . . . . . . . . . . . . . . . . . . . . . . . . . . . . . . . . . . . . . . 51Blocks . . . . . . . . . . . . . . . . . . . . . . . . . . . . . . . . . . . . . . . . . . . . . . . . . . . . . . . . . . . . . . . . . . . . . . . . . . . 54Standard Components . . . . . . . . . . . . . . . . . . . . . . . . . . . . . . . . . . . . . . . . . . . . . . . . . . . . . . . . . . . . . . . 54Code Components . . . . . . . . . . . . . . . . . . . . . . . . . . . . . . . . . . . . . . . . . . . . . . . . . . . . . . . . . . . . . . . . . . 55User-defined Library Components . . . . . . . . . . . . . . . . . . . . . . . . . . . . . . . . . . . . . . . . . . . . . . . . . . . . . . 56Extension Components. . . . . . . . . . . . . . . . . . . . . . . . . . . . . . . . . . . . . . . . . . . . . . . . . . . . . . . . . . . . . . . 57Dimensioned Components . . . . . . . . . . . . . . . . . . . . . . . . . . . . . . . . . . . . . . . . . . . . . . . . . . . . . . . . . . . . 58 Component Data Table . . . . . . . . . . . . . . . . . . . . . . . . . . . . . . . . . . . . . . . . . . . . . . . . . . . . . . . . . . . . . . . . 60 Documentation/Configuration Tab . . . . . . . . . . . . . . . . . . . . . . . . . . . . . . . . . . . . . . . . . . . . . . . . . . . . . . 60States Tab . . . . . . . . . . . . . . . . . . . . . . . . . . . . . . . . . . . . . . . . . . . . . . . . . . . . . . . . . . . . . . . . . . . . . . . . 65Variables Tab. . . . . . . . . . . . . . . . . . . . . . . . . . . . . . . . . . . . . . . . . . . . . . . . . . . . . . . . . . . . . . . . . . . . . . 66Version Tab . . . . . . . . . . . . . . . . . . . . . . . . . . . . . . . . . . . . . . . . . . . . . . . . . . . . . . . . . . . . . . . . . . . . . . . 67User-Comments Tab . . . . . . . . . . . . . . . . . . . . . . . . . . . . . . . . . . . . . . . . . . . . . . . . . . . . . . . . . . . . . . . . 67 Connecting Components . . . . . . . . . . . . . . . . . . . . . . . . . . . . . . . . . . . . . . . . . . . . . . . . . . . . . . . . . . . . . . . 67 Rules for Connecting Components . . . . . . . . . . . . . . . . . . . . . . . . . . . . . . . . . . . . . . . . . . . . . . . . . . . . . . 68Default Connections. . . . . . . . . . . . . . . . . . . . . . . . . . . . . . . . . . . . . . . . . . . . . . . . . . . . . . . . . . . . . . . . . 68Port Connections . . . . . . . . . . . . . . . . . . . . . . . . . . . . . . . . . . . . . . . . . . . . . . . . . . . . . . . . . . . . . . . . . . . 70Default Port Connection Points. . . . . . . . . . . . . . . . . . . . . . . . . . . . . . . . . . . . . . . . . . . . . . . . . . . . . . . . . 71Custom Connections . . . . . . . . . . . . . . . . . . . . . . . . . . . . . . . . . . . . . . . . . . . . . . . . . . . . . . . . . . . . . . . . 72Making a Branch Connection . . . . . . . . . . . . . . . . . . . . . . . . . . . . . . . . . . . . . . . . . . . . . . . . . . . . . . . . . . 74Connecting Incompatibly Vectorized Components. . . . . . . . . . . . . . . . . . . . . . . . . . . . . . . . . . . . . . . . . . . 75 Connection Lines . . . . . . . . . . . . . . . . . . . . . . . . . . . . . . . . . . . . . . . . . . . . . . . . . . . . . . . . . . . . . . . . . . . . . 76viiContentsMoving Connection Line Endpoints. . . . . . . . . . . . . . . . . . . . . . . . . . . . . . . . . . . . . . . . . . . . . . . . . . . . . . 76 Moving Connection Line Segments. . . . . . . . . . . . . . . . . . . . . . . . . . . . . . . . . . . . . . . . . . . . . . . . . . . . . . 77 Changing an Anchored Connection Back to an Autoroute Connection . . . . . . . . . . . . . . . . . . . . . . . . . . . . 78 Customized Line Routing . . . . . . . . . . . . . . . . . . . . . . . . . . . . . . . . . . . . . . . . . . . . . . . . . . . . . . . . . . . . . 78 Defining Connection Line Labels and Attributes . . . . . . . . . . . . . . . . . . . . . . . . . . . . . . . . . . . . . . . . . . . . 80 Connection Line Navigation. . . . . . . . . . . . . . . . . . . . . . . . . . . . . . . . . . . . . . . . . . . . . . . . . . . . . . . . . . . . 83 Submodel Connection Labels . . . . . . . . . . . . . . . . . . . . . . . . . . . . . . . . . . . . . . . . . . . . . . . . . . . . . . . . . . 84 Connection Label Options. . . . . . . . . . . . . . . . . . . . . . . . . . . . . . . . . . . . . . . . . . . . . . . . . . . . . . . . . . . . . 84 Moving Submodel Connection Nodes . . . . . . . . . . . . . . . . . . . . . . . . . . . . . . . . . . . . . . . . . . . . . . . . . . . . 85 Connection Line Color Dots. . . . . . . . . . . . . . . . . . . . . . . . . . . . . . . . . . . . . . . . . . . . . . . . . . . . . . . . . . . . 86 Copying Components and Models. . . . . . . . . . . . . . . . . . . . . . . . . . . . . . . . . . . . . . . . . . . . . . . . . . . . . . . . 87 Copying Components within a Model . . . . . . . . . . . . . . . . . . . . . . . . . . . . . . . . . . . . . . . . . . . . . . . . . . . . 87 Copying Components From or To Another Model. . . . . . . . . . . . . . . . . . . . . . . . . . . . . . . . . . . . . . . . . . . . 88 Copying Components With User-defined Names. . . . . . . . . . . . . . . . . . . . . . . . . . . . . . . . . . . . . . . . . . ..88 Data Display . . . . . . . . . . . . . . . . . . . . . . . . . . . . . . . . . . . . . . . . . . . . . . . . . . . . . . . . . . . . . . . . . . . . . . . . . 88 Data Types . . . . . . . . . . . . . . . . . . . . . . . . . . . . . . . . . . . . . . . . . . . . . . . . . . . . . . . . . . . . . . . . . . . . . . . . . . 92 States. . . . . . . . . . . . . . . . . . . . . . . . . . . . . . . . . . . . . . . . . . . . . . . . . . . . . . . . . . . . . . . . . . . . . . . . . . . . 93 Variables . . . . . . . . . . . . . . . . . . . . . . . . . . . . . . . . . . . . . . . . . . . . . . . . . . . . . . . . . . . . . . . . . . . . . . . . . 93 Parameters. . . . . . . . . . . . . . . . . . . . . . . . . . . . . . . . . . . . . . . . . . . . . . . . . . . . . . . . . . . . . . . . . . . . . . . . 93 Tables . . . . . . . . . . . . . . . . . . . . . . . . . . . . . . . . . . . . . . . . . . . . . . . . . . . . . . . . . . . . . . . . . . . . . . . . . . . 93 Debugging the Model and Analysis. . . . . . . . . . . . . . . . . . . . . . . . . . . . . . . . . . . . . . . . . . . . . . . . . . . . . . . 94 Example of Using the Symbolic Debugger on Windows. . . . . . . . . . . . . . . . . . . . . . . . . . . . . . . . . . . . . . . 94 Example of Using the Symbolic Debugger on a Linux Platform . . . . . . . . . . . . . . . . . . . . . . . . . . . . . . . . . 97 Deleting Components and Connections. . . . . . . . . . . . . . . . . . . . . . . . . . . . . . . . . . . . . . . . . . . . . . . . . . . . 100 Deleting Components. . . . . . . . . . . . . . . . . . . . . . . . . . . . . . . . . . . . . . . . . . . . . . . . . . . . . . . . . . . . . . . . 100 Deleting Connections . . . . . . . . . . . . . . . . . . . . . . . . . . . . . . . . . . . . . . . . . . . . . . . . . . . . . . . . . . . . . . . . 101 Discrete (Digital) System Analysis . . . . . . . . . . . . . . . . . . . . . . . . . . . . . . . . . . . . . . . . . . . . . . . . . . . . . . . 102 Operating Point Considerations. . . . . . . . . . . . . . . . . . . . . . . . . . . . . . . . . . . . . . . . . . . . . . . . . . . . . . . . . 102 Linear Analysis Considerations. . . . . . . . . . . . . . . . . . . . . . . . . . . . . . . . . . . . . . . . . . . . . . . . . . . . . . . . . 102 Integration Method Considerations . . . . . . . . . . . . . . . . . . . . . . . . . . . . . . . . . . . . . . . . . . . . . . . . . . . . . . 103 Discrete (Digital) System Modeling. . . . . . . . . . . . . . . . . . . . . . . . . . . . . . . . . . . . . . . . . . . . . . . . . . . . . . . 103 Digital Models. . . . . . . . . . . . . . . . . . . . . . . . . . . . . . . . . . . . . . . . . . . . . . . . . . . . . . . . . . . . . . . . . . . . . . 103 Hybrid Models . . . . . . . . . . . . . . . . . . . . . . . . . . . . . . . . . . . . . . . . . . . . . . . . . . . . . . . . . . . . . . . . . . . . . 104 Discrete System Modeling Using Fortran, C and LIbrary Components . . . . . . . . . . . . . . . . . . . . . . . . . . . . 105 Matching TAU Method (obsolete). . . . . . . . . . . . . . . . . . . . . . . . . . . . . . . . . . . . . . . . . . . . . . . . . . . . . . . 106 Documenting and Printing the Model . . . . . . . . . . . . . . . . . . . . . . . . . . . . . . . . . . . . . . . . . . . . . . . . . . . . . 109 Generating a Model Document File. . . . . . . . . . . . . . . . . . . . . . . . . . . . . . . . . . . . . . . . . . . . . . . . . . . . . . 109 Exporting an Easy5 Model as a MAT EMX Function . . . . . . . . . . . . . . . . . . . . . . . . . . . . . . . . . . . . . . . . . . 111 MAT function “ezmodel”. . . . . . . . . . . . . . . . . . . . . . . . . . . . . . . . . . . . . . . . . . . . . . . . . . . . . . . . . . . . . . 111 Easy5 Window . . . . . . . . . . . . . . . . . . . . . . . . . . . . . . . . . . . . . . . . . . . . . . . . . . . . . . . . . . . . . . . . . . . . . . . 111 Description Lines . . . . . . . . . . . . . . . . . . . . . . . . . . . . . . . . . . . . . . . . . . . . . . . . . . . . . . . . . . . . . . . . . . . 112viiiReference ManualModel Info . . . . . . . . . . . . . . . . . . . . . . . . . . . . . . . . . . . . . . . . . . . . . . . . . . . . . . . . . . . . . . . . . . . . . . . . 113Menu Bar. . . . . . . . . . . . . . . . . . . . . . . . . . . . . . . . . . . . . . . . . . . . . . . . . . . . . . . . . . . . . . . . . . . . . . . . . 113Tool Bar. . . . . . . . . . . . . . . . . . . . . . . . . . . . . . . . . . . . . . . . . . . . . . . . . . . . . . . . . . . . . . . . . . . . . . . . . . 113Dockable Add Component WIndow. . . . . . . . . . . . . . . . . . . . . . . . . . . . . . . . . . . . . . . . . . . . . . . . . . . . . . 113Scroll Bars. . . . . . . . . . . . . . . . . . . . . . . . . . . . . . . . . . . . . . . . . . . . . . . . . . . . . . . . . . . . . . . . . . . . . . . . 113Message Line. . . . . . . . . . . . . . . . . . . . . . . . . . . . . . . . . . . . . . . . . . . . . . . . . . . . . . . . . . . . . . . . . . . . . . 114Schematic Window . . . . . . . . . . . . . . . . . . . . . . . . . . . . . . . . . . . . . . . . . . . . . . . . . . . . . . . . . . . . . . . . . 114Working with Easy5 Windows. . . . . . . . . . . . . . . . . . . . . . . . . . . . . . . . . . . . . . . . . . . . . . . . . . . . . . . . . . 114 Eigenvalue Sensitivity Analysis. . . . . . . . . . . . . . . . . . . . . . . . . . . . . . . . . . . . . . . . . . . . . . . . . . . . . . . . . . 116 Setting up an Eigenvalue Sensitivity Analysis . . . . . . . . . . . . . . . . . . . . . . . . . . . . . . . . . . . . . . . . . . . . . . 116 Eigenvalue Sensitivity Analysis Method. . . . . . . . . . . . . . . . . . . . . . . . . . . . . . . . . . . . . . . . . . . . . . . . . . . 117Executable Model. . . . . . . . . . . . . . . . . . . . . . . . . . . . . . . . . . . . . . . . . . . . . . . . . . . . . . . . . . . . . . . . . . . . . 118 Create Executable . . . . . . . . . . . . . . . . . . . . . . . . . . . . . . . . . . . . . . . . . . . . . . . . . . . . . . . . . . . . . . . . . . 119Link External Object. . . . . . . . . . . . . . . . . . . . . . . . . . . . . . . . . . . . . . . . . . . . . . . . . . . . . . . . . . . . . . . . . 120Solve Implicit Loops. . . . . . . . . . . . . . . . . . . . . . . . . . . . . . . . . . . . . . . . . . . . . . . . . . . . . . . . . . . . . . . . . 120Force Explicit Typing . . . . . . . . . . . . . . . . . . . . . . . . . . . . . . . . . . . . . . . . . . . . . . . . . . . . . . . . . . . . . . . . 120Check for Duplicate Names . . . . . . . . . . . . . . . . . . . . . . . . . . . . . . . . . . . . . . . . . . . . . . . . . . . . . . . . . . . 120Debug Mode . . . . . . . . . . . . . . . . . . . . . . . . . . . . . . . . . . . . . . . . . . . . . . . . . . . . . . . . . . . . . . . . . . . . . . 120Stop Create Executable . . . . . . . . . . . . . . . . . . . . . . . . . . . . . . . . . . . . . . . . . . . . . . . . . . . . . . . . . . . . . . 121 Executable Output Files. . . . . . . . . . . . . . . . . . . . . . . . . . . . . . . . . . . . . . . . . . . . . . . . . . . . . . . . . . . . . . . . 121 Create Executable Process. . . . . . . . . . . . . . . . . . . . . . . . . . . . . . . . . . . . . . . . . . . . . . . . . . . . . . . . . . . . 121Model Generation Listing File. . . . . . . . . . . . . . . . . . . . . . . . . . . . . . . . . . . . . . . . . . . . . . . . . . . . . . . . . . 122Executable Source File. . . . . . . . . . . . . . . . . . . . . . . . . . . . . . . . . . . . . . . . . . . . . . . . . . . . . . . . . . . . . . . 122Executable Error File . . . . . . . . . . . . . . . . . . . . . . . . . . . . . . . . . . . . . . . . . . . . . . . . . . . . . . . . . . . . . . . . 124 External (Environment) Variables . . . . . . . . . . . . . . . . . . . . . . . . . . . . . . . . . . . . . . . . . . . . . . . . . . . . . . . . 124Fortran Component . . . . . . . . . . . . . . . . . . . . . . . . . . . . . . . . . . . . . . . . . . . . . . . . . . . . . . . . . . . . . . . . . . . 129 Forced Explicit Typing . . . . . . . . . . . . . . . . . . . . . . . . . . . . . . . . . . . . . . . . . . . . . . . . . . . . . . . . . . . . . . . 129Using Integer or Logical Variables in Fortran Code . . . . . . . . . . . . . . . . . . . . . . . . . . . . . . . . . . . . . . . . . . 130Adding Nonexecutable Fortran Statements. . . . . . . . . . . . . . . . . . . . . . . . . . . . . . . . . . . . . . . . . . . . . . . . 131Reserved Fortran Unit Numbers . . . . . . . . . . . . . . . . . . . . . . . . . . . . . . . . . . . . . . . . . . . . . . . . . . . . . . . . 132Adding Comments to Fortran Code. . . . . . . . . . . . . . . . . . . . . . . . . . . . . . . . . . . . . . . . . . . . . . . . . . . . . . 132Easy5 Reserved Words. . . . . . . . . . . . . . . . . . . . . . . . . . . . . . . . . . . . . . . . . . . . . . . . . . . . . . . . . . . . . . . 132Calculating Initial Condition Values in a User-Code Component. . . . . . . . . . . . . . . . . . . . . . . . . . . . . . . . . 134Easy5 Matrix Operations. . . . . . . . . . . . . . . . . . . . . . . . . . . . . . . . . . . . . . . . . . . . . . . . . . . . . . . . . . . . . . 134Sorting Fortran Component Code . . . . . . . . . . . . . . . . . . . . . . . . . . . . . . . . . . . . . . . . . . . . . . . . . . . . . . . 135 Function Scan Analysis. . . . . . . . . . . . . . . . . . . . . . . . . . . . . . . . . . . . . . . . . . . . . . . . . . . . . . . . . . . . . . . . 135 Setting up a Function Scan Analysis. . . . . . . . . . . . . . . . . . . . . . . . . . . . . . . . . . . . . . . . . . . . . . . . . . . . . 136Function Scan with Two Independent Values . . . . . . . . . . . . . . . . . . . . . . . . . . . . . . . . . . . . . . . . . . . . . . 138 Function Scan Analysis Method . . . . . . . . . . . . . . . . . . . . . . . . . . . . . . . . . . . . . . . . . . . . . . . . . . . . . . . . . 139Graphic Files, EMFs, and PostScript. . . . . . . . . . . . . . . . . . . . . . . . . . . . . . . . . . . . . . . . . . . . . . . . . . . . . . 139 Generating the Schematic Block Diagram EMF Graphics File . . . . . . . . . . . . . . . . . . . . . . . . . . . . . . . . . . 139Generating Plotter EMF Graphics File . . . . . . . . . . . . . . . . . . . . . . . . . . . . . . . . . . . . . . . . . . . . . . . . . . . . 141Using EMF Graphics. . . . . . . . . . . . . . . . . . . . . . . . . . . . . . . . . . . . . . . . . . . . . . . . . . . . . . . . . . . . . . . . . 141ixContentsOverriding Hard copy and EMF Plot Curve and Grid Widths . . . . . . . . . . . . . . . . . . . . . . . . . . . . . . . . . . . . 142 Exporting Plot Files. . . . . . . . . . . . . . . . . . . . . . . . . . . . . . . . . . . . . . . . . . . . . . . . . . . . . . . . . . . . . . . . . . 142 Importing a PostScript File Into a Document . . . . . . . . . . . . . . . . . . . . . . . . . . . . . . . . . . . . . . . . . . . . . . . 144 Icon Editor. . . . . . . . . . . . . . . . . . . . . . . . . . . . . . . . . . . . . . . . . . . . . . . . . . . . . . . . . . . . . . . . . . . . . . . . . . . 144 Implicit Model. . . . . . . . . . . . . . . . . . . . . . . . . . . . . . . . . . . . . . . . . . . . . . . . . . . . . . . . . . . . . . . . . . . . . . . . 145 Definition of an Implicit Model. . . . . . . . . . . . . . . . . . . . . . . . . . . . . . . . . . . . . . . . . . . . . . . . . . . . . . . . . . 146 Example of an Implicit Model . . . . . . . . . . . . . . . . . . . . . . . . . . . . . . . . . . . . . . . . . . . . . . . . . . . . . . . . . . 146 How to Break Implicit Loops. . . . . . . . . . . . . . . . . . . . . . . . . . . . . . . . . . . . . . . . . . . . . . . . . . . . . . . . . . . 149 Initial Condition Calculation. . . . . . . . . . . . . . . . . . . . . . . . . . . . . . . . . . . . . . . . . . . . . . . . . . . . . . . . . . . . . 151 Initialization Statement . . . . . . . . . . . . . . . . . . . . . . . . . . . . . . . . . . . . . . . . . . . . . . . . . . . . . . . . . . . . . . . . 152 Integration Methods. . . . . . . . . . . . . . . . . . . . . . . . . . . . . . . . . . . . . . . . . . . . . . . . . . . . . . . . . . . . . . . . . . . 153 The Integration Method. . . . . . . . . . . . . . . . . . . . . . . . . . . . . . . . . . . . . . . . . . . . . . . . . . . . . . . . . . . . . . . 153 Integration Methods Available. . . . . . . . . . . . . . . . . . . . . . . . . . . . . . . . . . . . . . . . . . . . . . . . . . . . . . . . . . 154 Definition of Terms. . . . . . . . . . . . . . . . . . . . . . . . . . . . . . . . . . . . . . . . . . . . . . . . . . . . . . . . . . . . . . . . . . 155 The BCS Gear Method. . . . . . . . . . . . . . . . . . . . . . . . . . . . . . . . . . . . . . . . . . . . . . . . . . . . . . . . . . . . . . . . 157 The Runge-Kutta Methods . . . . . . . . . . . . . . . . . . . . . . . . . . . . . . . . . . . . . . . . . . . . . . . . . . . . . . . . . . . . 157 The Huen Method. . . . . . . . . . . . . . . . . . . . . . . . . . . . . . . . . . . . . . . . . . . . . . . . . . . . . . . . . . . . . . . . . . . 157 The Euler Method. . . . . . . . . . . . . . . . . . . . . . . . . . . . . . . . . . . . . . . . . . . . . . . . . . . . . . . . . . . . . . . . . . . 157 The Adams Method. . . . . . . . . . . . . . . . . . . . . . . . . . . . . . . . . . . . . . . . . . . . . . . . . . . . . . . . . . . . . . . . . . 158 The User-defined Method. . . . . . . . . . . . . . . . . . . . . . . . . . . . . . . . . . . . . . . . . . . . . . . . . . . . . . . . . . . . . 158 Integration Method Selection Guidelines . . . . . . . . . . . . . . . . . . . . . . . . . . . . . . . . . . . . . . . . . . . . . . . . . . 160 Guidelines for Setting Error Controls. . . . . . . . . . . . . . . . . . . . . . . . . . . . . . . . . . . . . . . . . . . . . . . . . . . . . 161 Interactive Simulation . . . . . . . . . . . . . . . . . . . . . . . . . . . . . . . . . . . . . . . . . . . . . . . . . . . . . . . . . . . . . . . . . 163 Linear Model Generation Analysis. . . . . . . . . . . . . . . . . . . . . . . . . . . . . . . . . . . . . . . . . . . . . . . . . . . . . . . . 163 Types of Linear Model Generation Analysis. . . . . . . . . . . . . . . . . . . . . . . . . . . . . . . . . . . . . . . . . . . . . . . . 163 Setting up a Linear Model Generation Analysis . . . . . . . . . . . . . . . . . . . . . . . . . . . . . . . . . . . . . . . . . . . . . 165 Controlling the Calculation . . . . . . . . . . . . . . . . . . . . . . . . . . . . . . . . . . . . . . . . . . . . . . . . . . . . . . . . . . . . 168 Saving the Linear Model System Matrices. . . . . . . . . . . . . . . . . . . . . . . . . . . . . . . . . . . . . . . . . . . . . . . . . 168 Linear Model Generation Method. . . . . . . . . . . . . . . . . . . . . . . . . . . . . . . . . . . . . . . . . . . . . . . . . . . . . . . . . 168 Continuous Systems. . . . . . . . . . . . . . . . . . . . . . . . . . . . . . . . . . . . . . . . . . . . . . . . . . . . . . . . . . . . . . . . . 168 Stability Analysis for Sampled-Data Systems . . . . . . . . . . . . . . . . . . . . . . . . . . . . . . . . . . . . . . . . . . . . . . 175 Linking External Code . . . . . . . . . . . . . . . . . . . . . . . . . . . . . . . . . . . . . . . . . . . . . . . . . . . . . . . . . . . . . . . . . 175 Linking Routines Using the Build Menu. . . . . . . . . . . . . . . . . . . . . . . . . . . . . . . . . . . . . . . . . . . . . . . . . . . 176 Linking Routines Using the EASY5_OBJECT Variable. . . . . . . . . . . . . . . . . . . . . . . . . . . . . . . . . . . . . . . . . 177 Linking Routines Using an Object Library . . . . . . . . . . . . . . . . . . . . . . . . . . . . . . . . . . . . . . . . . . . . . . . . . 178 Linking Library Component Routines. . . . . . . . . . . . . . . . . . . . . . . . . . . . . . . . . . . . . . . . . . . . . . . . . . . . . 179 Library Component Code . . . . . . . . . . . . . . . . . . . . . . . . . . . . . . . . . . . . . . . . . . . . . . . . . . . . . . . . . . . . . . . 180 Using Variable Dimensions in Library Component Code. . . . . . . . . . . . . . . . . . . . . . . . . . . . . . . . . . . . . . . 180 Using Integer or Logical Variables in Library Component Code . . . . . . . . . . . . . . . . . . . . . . . . . . . . . . . . . 181 Configurations . . . . . . . . . . . . . . . . . . . . . . . . . . . . . . . . . . . . . . . . . . . . . . . . . . . . . . . . . . . . . . . . . . . . . 182 Component Libraries . . . . . . . . . . . . . . . . . . . . . . . . . . . . . . . . . . . . . . . . . . . . . . . . . . . . . . . . . . . . . . . . 182。
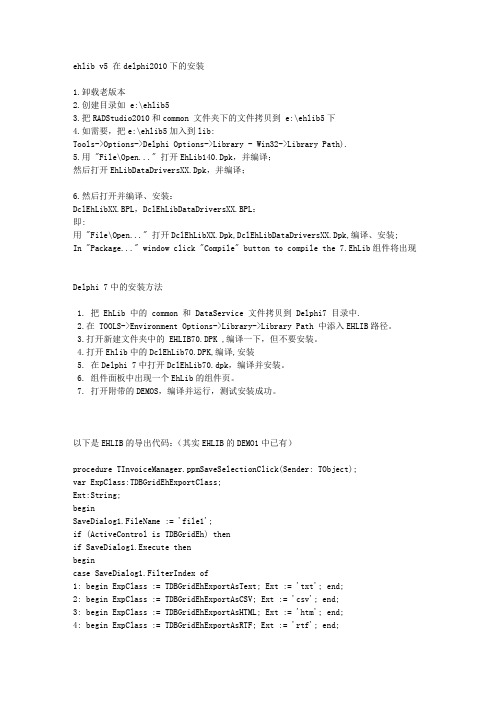
ehlib v5 在delphi2010下的安装1.卸载老版本2.创建目录如 e:\ehlib53.把RADStudio2010和common 文件夹下的文件拷贝到 e:\ehlib5下4.如需要,把e:\ehlib5加入到lib:Tools->Options->Delphi Options->Library - Win32->Library Path).5.用 "File\Open..." 打开EhLib140.Dpk,并编译;然后打开EhLibDataDriversXX.Dpk,并编译;6.然后打开并编译、安装:DclEhLibXX.BPL,DclEhLibDataDriversXX.BPL:即:用 "File\Open..." 打开DclEhLibXX.Dpk,DclEhLibDataDriversXX.Dpk,编译、安装;In "Package..." window click "Compile" button to compile the 7.EhLib组件将出现Delphi 7中的安装方法1. 把 EhLib 中的 common 和 DataService 文件拷贝到 Delphi7 目录中.2.在 TOOLS->Environment Options->Library->Library Path 中添入EHLIB路径。
3.打开新建文件夹中的 EHLIB70.DPK ,编译一下,但不要安装。
4.打开Ehlib中的DclEhLib70.DPK,编译,安装5. 在Delphi 7中打开DclEhLib70.dpk,编译并安装。
6. 组件面板中出现一个EhLib的组件页。
7. 打开附带的DEMOS,编译并运行,测试安装成功。
以下是EHLIB的导出代码:(其实EHLIB的DEMO1中已有)procedure TInvoiceManager.ppmSaveSelectionClick(Sender: TObject);var ExpClass:TDBGridEhExportClass;Ext:String;beginSaveDialog1.FileName := 'file1';if (ActiveControl is TDBGridEh) thenif SaveDialog1.Execute thenbegincase SaveDialog1.FilterIndex of1: begin ExpClass := TDBGridEhExportAsText; Ext := 'txt'; end;2: begin ExpClass := TDBGridEhExportAsCSV; Ext := 'csv'; end;3: begin ExpClass := TDBGridEhExportAsHTML; Ext := 'htm'; end;4: begin ExpClass := TDBGridEhExportAsRTF; Ext := 'rtf'; end;5: begin ExpClass := TDBGridEhExportAsXLS; Ext := 'xls'; end;elseExpClass := nil; Ext := '';end;if ExpClass <> nil thenbeginif UpperCase(Copy(SaveDialog1.FileName,Length(SaveDialog1.FileName)-2,3)) <>UpperCase(Ext) thenSaveDialog1.FileName := SaveDialog1.FileName + '.' + Ext; SaveDBGridEhToExportFile(ExpClass,TDBGridEh(ActiveControl),SaveDialog1.FileName,False);end;end;end;// 功能:设定 DbGridEh 合计行信息// 参数: pDbGrid:TDBGridEh;// pcFields : string ; 字段列表,字段用逗号分隔// pvtType : TFooterValueType ; 统计类型 TFooterValueType = (fvtNon, fvtSum, fvtAvg, fvtCount, fvtFieldValue, fvtStaticText);// 引用:// 例如:DbGridEhFoot( DbGridEh1, ´Number,Sum´, fvtSum ); 设定数量和金额字段为合计统计//--------------------------------------------------------------------------------Procedure DbGridEhFoot( pDbGrid:TDBGridEh; pcFields: string; pvtType : TFooterValueType );var nFldLoop : integer ;cFieldName : string ;tmpFldList : TStrings ;beginpDbGrid.FooterRowCount := 1; // 指定网格尾部统计行行数pDbGrid.SumList.Active := true; // 激活统计pDbGrid.FooterColor := clBtnFace ; // 指定统计行颜色tmpFldList := TStringList.Create ;StrToStringList( Uppercase(pcFields),´,´,tmpFldList ); // 将字符串转换为串列表For nFldLoop := 0 to pDbGrid.Columns.Count -1 dobegincFieldName := pDbGrid.Columns[nFldLoop].FieldName ; // 网格列字段名if tmpFldList.IndexOf( uppercase( cFieldName ) ) >= 0 thenbeginpDbGrid.Columns[nFldLoop].Footer.ValueType := pvtType ; // 统计类型end;end ;tmpFldList.Free ;end;一、如何在程序中确定Ehlib定义的报表表头颜色?在执行打印之前,加上下面的语句:DBGridEh1.FixedColor:=clLime;//clLime可以换成你想要的颜色比如clRed是红色等等PrintDBgridEh1.Options:=[pghColored,pghFitingByColWidths];//方括号里的"pghColored"是必需的,其它的根据你的需要决定取舍================================================================二、Ehlib中的PrintDBGridEh如何印页码,即第几页共几页PrintDBGridEh1.PageFooter.CenterText:='第&[Page]页共&[Pages]页'在对象管理器中的相关位置有设================================================================三、本人刚学习使用ehlib包,现在要实现类似ehlib所带demo1中一个功能:点击dbgrid 某列值的下拉按纽(可以设置),弹出一个下拉列表(其内容是另一个dataset的)。
Ehlib使用大全
一、Ehlib 概述
Ehlib 是用于 Delphi 的一个组件库,它包含了大量的控件和功能,
可以帮助开发人员快速构建功能丰富的应用程序。
Ehlib 支持 Delphi 的
各个版本,包括 Delphi 5 至 Delphi XE8、Delphi 10 Seattle、Delphi
10.1 Berlin 和 Delphi 10.2 Tokyo。
二、Ehlib 的主要功能
1.数据库控件
2.数据集控制
3.表格控件
5.图表控件
Ehlib 提供了多种图表控件,包括 TDBChartEh、TDBVertLineSeries、TDBHorizLineSeries等。
开发人员可以利用这些控件绘制各种类型的图表,如柱状图、折线图、饼图等。
6.数据导入导出
7.打印和报表功能
8.布局管理
三、Ehlib 的使用方法
2. 添加 Ehlib 到 Delphi 工程
3. 使用 Ehlib 的控件和功能
4.编写代码
可以通过编写代码来进一步配置和操作 Ehlib 的控件和功能。
可以使用 Ehlib 提供的 API 来实现各种操作,如数据的增删改查、控件的事件处理等。
四、总结
Ehlib 是一个功能丰富的 Delphi 组件库,提供了各种各样的控件和功能,可以帮助开发人员更高效地开发应用程序。
本文介绍了 Ehlib 的概述、主要功能和使用方法,希望能对开发人员在使用 Ehlib 进行应用程序开发时有所帮助。
DELPHI 表格控件DBGridEh属性设置详解----白波九道-----Allowedoperations[alopInsertEh,alopUpdateE h,alopDeleteEh,alopAppen dEh]允许操作类型:插入、更新、删除、追加Allowedselections[gstRecordBookmarks,gst Rectangle,gstColumns,gst All] gstRecordBookmarks:书签选中行 gstRectangle :区域选择 gstColumns :列选择 gstAll :所有AutoFitColWidths以自动重置列宽来设置网格的宽度等于客户区宽度AlwaysShowEditBu tton列显示下拉编辑按钮 AutoDropDown 自动下拉框DblClickNextVal 双击单元格为下一个值,数值为加1,列表下下一个 DropDownShowTitl es下拉框显示标题 DropDownSizing 下拉框可否手动调整大小 EndEllipsis 列内容显示不全的显示省略号 [Footer].Tooltips 底栏是否显示提示 HighLightRequired Layout内容位置 Alignment 标题对齐方式 Color 标题颜色EndEllipsis 标题过长用省略号结束 Orientation 标题文字方向 TitleButton 是否显示标题按钮 TitleTooltips 标题是否显示提示 ColumnDefValuesEh (列缺省值)Tooltips是否显示提示Columns[index]/Columns[ColumnName] 列对象,可用索引和名称调用 ColumnsOptimizeWidth根据内容自动调整列宽 Constraints 控件尺寸约束规定 ContraColCount 右侧锁定列 Ctl3D 3d 风格显示 Cursor显示鼠标指针样式 Active 激活数据分组 Color汇总行颜色DefaultStateExpand ed 默认显示是否为为全展开 Font 汇总行字体显示选项DataGrouping(数据分组设置) 表格中显示如EXCEL 中的分类汇总效果须加 MemT ableEh DataSetDriverEh,GroupLevels分组的级数如先按国别分组再按城市分GroupPanelVisible是否显示顶部的分组图示面板 ParentColor 使用父件颜色设置 Uses 添加EhLibMTE ParentFont 使用父件字体设置 AutoEdit自动提交表格修改到数据源 Dataset 数据集选项 Enabled 启用数据源 Datasoure (数据源设置) Tag 数据源标记(LongInt)DefaultDrawing 使用缺省的方式绘制表格,如为FALSE 须 OnDrawDataCell 事件中提供自己的例程 DrawGraphicDataDrawMemoText显示文本式备注字段EditActions[geaCutEh,geaCopyEh,gea PasteEh,geaDeleteEh,geaS electAllEh] 编辑属性,设置是否可以剪切、复制、粘贴、删除、选择 sebshowOnlyforCur Celleh只在当前单元格显示 sebshowOnlyforCur Roweh只在当前行显示 sebshowOnlyWhen GridActiveEh 当表格激活时显示EditButtonShowOptio ns(编辑按钮显示选项)sebshowOnlyWhen DataEditingEh当单元格进入编辑状态时显示 EvenRowColor 偶数行颜色FixedColor 固定区域颜色(如表头列头) Flat 平面显示效果(标题行渐变色须启用) Font 字体设置选项 FooterColor 底栏颜色 FooterFont 底栏字体设置 FooterRowCount 底栏行数 FrozenCols左侧冻结列数 ExtScrollBarSmoothStep True 平滑滚动/False 按列滚动 Tracking True 跟踪显示/Fasle 松开后显示 HorzScrollBar (水平滚动条设置) Visible 是否显示 Imemode 输入法模式选项 ImeName输入法 gioShowRowIndicatorEh 显示行指针 gioShowRecNoEh 显示行号 IndicatorOption (行首指示选项)gioShowRowselCheckbox esEh显示行选择框 IndicatorTitle (行道指示标题)DropdownMenupmNoVisibleCols/ PopupMenu1表头下拉菜单样式ShowDropdownSign显示下拉箭头图案 TitleButton 按钮是否启用 UseGlobalMenu用全局菜单 Left左端位置 MinAutoFitWidth 自适应宽度最小值 Name 控件名称 OddRowColor奇数行颜色 dgEdit能否编辑,dgAlwaysShowEditor 总是显示编辑项,选中时单击单元格直接进入编辑状态,否则双击进入编辑状态 dgTitles 显示列标题 dgIndicator 显示行首指针dgColumnResize 可否调整列宽 dgColLines 显示列线 dgRowLines 显示行线dgTabs 接收TAB 键移动到下一单元格 dgRowSelect整行选择 dgAlwaysShowSelection 显示选择区域 dgConfirmDelete 删除时确认 dgCancelOnExitOptions(表格通用选项)dgMultiSelect 可多行选择dghFixed3D 固定区(表头列头)3D 效果(渐变色须启用) dghFrozen3D 冷区3D 效果 dghFooter3D 栏底3D 效果 dghData3D数据区3D 效果 dghResizeWholeRightPartdghHighlightFocus 高光选择焦点dghClearSelection 移到下一个单元时是否清除已选记录 dghFitRowHeightToText 按文本适应行高 dghAutoSortMarking 自动排序 dghMultiSortMarking 多级排序 dghEnterAsTab 回车键作为TAB dghTraceColSizing 移动列宽时动态显示内容dghIncSearch允许在数据网格中进行增量搜索 Ctrl+F - 开始增量搜索。
1控制系统1.1控制系统硬件Control system hardware100点壁厚控制器采用贝加莱公司的新型多按键式人机操作面板(B&R PP252-1043-75)实现了胚型壁厚曲线成型﹑控制功能。
100 points parison wall thickness controller has adopted new multi-key human-machine operation panel (B&R PP252-1043-75) as display and control unit to realize the functions of parison wall thickness profile, parison wall thickness controller, etc.面板的按键布局Layout of keys on the panelFig. 1.11.2 面板上的按键Buttons on PanelIcon Definition Annotation改变壁厚曲线的编号Change thickness profile NoFunction button曲线变直线Change curve into lineFunction button曲线上半部分向右拉Upper curve moving rightwardFunction button曲线上半部分向左拉Upper line moving leftwardFunction button曲线下半部分向右拉Manual ejection outFunction button曲线上半部分向左拉Manual ejection backFunction button壁厚启动Start thickness controlFunction button壁厚封口Strart seal gapFunction button空缸Accumulator emptyFunction button满缸Accumulator fullFunction button标记MarkerFunction button口模上Core upFunction button口模下Core downFunction button+Enter 初始设定start setting parameter(no lock)State indication+Enter 口模设定Die gap tooling(no lock)State indication+Enter 储料设定(没有锁定时)Accumulator tooling(no lock)State indication+Enter 系统参数(没有锁定时)System parameter(no lock)State indication+Enter 运行记录(没有锁定时)Error logbook(no lock)State indication+Enter 锁定/解锁lock key / unlock keyState indication 中英文切换Chinese / EnglishChange interface 壁厚曲线控制Parison wall profileChange interface 壁厚跟踪曲线Parison wall traceChange interface 标记2-1Marker 2-1Change interface 标记2-2Marker 2-2Change interface 数据3-1Data 3-1Change interface 数据3-2Data 3-2Change interface 数据3-3Data 3-3Change interface 监控MonitorChange interface 存储recipeChange interface1.3 扩展图标Explanation of icons无警报State indication No alarm警报State indication Alarm没有启动壁厚的脉冲信号State indication No start thickness control pulse启动壁厚的脉冲信号State indication Start thickness control pulse没有壁厚终止﹑封口的脉冲信号State indication No thickness control end /seal pulse壁厚终止﹑封口的脉冲信号State indication Thickness control end /seal pulse非空缸State indication Accumulator is not empty空缸State indication Accumulator is empty非满缸State indication Accumulator is not full满缸State indication Accumulator is full没有标记脉冲State indication No marker pulse标记脉冲State indication Marker pulse连续式手动设定周期State indication Manual setting cycle time when continuous mode连续式自动设定周期State indication auto setting cycle time when continuous mode扩张型State indication Zero position upper收缩型State indication Zero position bottom无提示State indication No imply有提示State indication There is an imply口模的当前位置State indication Die gap current position储料缸的位置State indication Accumulator current position伺服输出State indication Out to servo valve配方编号State indication Recipe No中文界面Change interface Semi-Auto英文界面Change interface Auto连续式式时手动/自动周期设定切换Function button Manual/auto mode setting cycle time (continuemode)加调节分段线Function button Assert insert a segment line删除当前红色分段线Function button Erase current red segment line下载壁厚曲线Function button Download thickness profile切换到测试模式Function button Change into test mode修改配方名Function button Rename recipe name存储Function button Save recipe取出配方Function button Load recipe清空配方Function button Erase select recipe改名中State indication Renaming存储中State indication Saving取配方State indication Loading清空中State indication Empty连续式/ 储料式切换Function button Continuous mode / Accumulator mode扩张型/ 收缩型切换Function button Zero upper mode /Zero down mode手动调教/自动调教Function button Manual calibrate mode /Auto calibrate mode启动自动调教Function button Start auto calibrate确认零点(低点)位置Function button Assert zero position确认最大点(高点)位置Function button Assert Max positionFig. 2.2在此界面中,F1-F6分别可进入各个分支界面(参见图1.3中说明)。
EhLib使用说明.txt“恋”是个很强悍的字。
它的上半部取自“变态”的“变”,下半部取自“变态”的“态”。
ehlib v5 在delphi2010下的安装1.卸载老版本2.创建目录如 e:\ehlib53.把RADStudio2010和common 文件夹下的文件拷贝到 e:\ehlib5下4.如需要,把e:\ehlib5加入到lib:Tools->Options->Delphi Options->Library - Win32->Library Path).5.用 "File\Open..." 打开EhLib140.Dpk,并编译;然后打开EhLibDataDriversXX.Dpk,并编译;6.然后打开并编译、安装:DclEhLibXX.BPL,DclEhLibDataDriversXX.BPL:即:用 "File\Open..." 打开DclEhLibXX.Dpk,DclEhLibDataDriversXX.Dpk,编译、安装;In "Package..." window click "Compile" button to compile the 7.EhLib组件将出现Delphi 7中的安装方法1. 把 EhLib 中的 common 和 DataService 文件拷贝到 Delphi7 目录中.2.在 TOOLS->Environment Options->Library->Library Path 中添入EHLIB路径。
3.打开新建文件夹中的 EHLIB70.DPK ,编译一下,但不要安装。
4.打开Ehlib中的DclEhLib70.DPK,编译,安装5. 在Delphi 7中打开DclEhLib70.dpk,编译并安装。
6. 组件面板中出现一个EhLib的组件页。
7. 打开附带的DEMOS,编译并运行,测试安装成功。
以下是EHLIB的导出代码:(其实EHLIB的DEMO1中已有)procedure TInvoiceManager.ppmSaveSelectionClick(Sender: TObject);var ExpClass:TDBGridEhExportClass;Ext:String;beginSaveDialog1.FileName := 'file1';if (ActiveControl is TDBGridEh) thenif SaveDialog1.Execute thenbegincase SaveDialog1.FilterIndex of1: begin ExpClass := TDBGridEhExportAsText; Ext := 'txt'; end;2: begin ExpClass := TDBGridEhExportAsCSV; Ext := 'csv'; end;3: begin ExpClass := TDBGridEhExportAsHTML; Ext := 'htm'; end;4: begin ExpClass := TDBGridEhExportAsRTF; Ext := 'rtf'; end;5: begin ExpClass := TDBGridEhExportAsXLS; Ext := 'xls'; end;elseExpClass := nil; Ext := '';end;if ExpClass <> nil thenbeginif UpperCase(Copy(SaveDialog1.FileName,Length(SaveDialog1.FileName)-2,3)) <>UpperCase(Ext) thenSaveDialog1.FileName := SaveDialog1.FileName + '.' + Ext; SaveDBGridEhToExportFile(ExpClass,TDBGridEh(ActiveControl),SaveDialog1.FileName,False);end;end;end;// 功能:设定 DbGridEh 合计行信息// 参数: pDbGrid:TDBGridEh;// pcFields : string ; 字段列表,字段用逗号分隔// pvtType : TFooterValueType ; 统计类型 TFooterValueType = (fvtNon, fvtSum, fvtAvg, fvtCount, fvtFieldValue, fvtStaticText);// 引用:// 例如:DbGridEhFoot( DbGridEh1, ´Number,Sum´, fvtSum ); 设定数量和金额字段为合计统计//--------------------------------------------------------------------------------Procedure DbGridEhFoot( pDbGrid:TDBGridEh; pcFields: string; pvtType : TFooterValueType );var nFldLoop : integer ;cFieldName : string ;tmpFldList : TStrings ;beginpDbGrid.FooterRowCount := 1; // 指定网格尾部统计行行数pDbGrid.SumList.Active := true; // 激活统计pDbGrid.FooterColor := clBtnFace ; // 指定统计行颜色tmpFldList := TStringList.Create ;StrToStringList( Uppercase(pcFields),´,´,tmpFldList ); // 将字符串转换为串列表For nFldLoop := 0 to pDbGrid.Columns.Count -1 dobegincFieldName := pDbGrid.Columns[nFldLoop].FieldName ; // 网格列字段名if tmpFldList.IndexOf( uppercase( cFieldName ) ) >= 0 thenbeginpDbGrid.Columns[nFldLoop].Footer.ValueType := pvtType ; // 统计类型end;end ;tmpFldList.Free ;end;一、如何在程序中确定Ehlib定义的报表表头颜色?在执行打印之前,加上下面的语句:DBGridEh1.FixedColor:=clLime;//clLime可以换成你想要的颜色比如clRed是红色等等PrintDBgridEh1.Options:=[pghColored,pghFitingByColWidths];//方括号里的"pghColored"是必需的,其它的根据你的需要决定取舍================================================================二、Ehlib中的PrintDBGridEh如何印页码,即第几页共几页PrintDBGridEh1.PageFooter.CenterText:='第&[Page]页共&[Pages]页'在对象管理器中的相关位置有设================================================================三、本人刚学习使用ehlib包,现在要实现类似ehlib所带demo1中一个功能:点击dbgrid 某列值的下拉按纽(可以设置),弹出一个下拉列表(其内容是另一个dataset的)。
我看demo1中好象是使用了DBLookupComboboxEh,可我参看demo1怎么设置也不行,请指教。
谢谢。
呵呵,这个效果没有用DBLoookupComboBoxEh,它是利用查找字段实现的。
它在Query1中,对应VName字段,增加了一个叫VName1的查找字段,这个字段从qrVendors查找相关的数据,再在DBGridEh1显示VName1,这样显示就是那种效果了。
===============================================================四、Ehlib 怎样固定某几列?只要设置dbGridEh的FrozenCols属性为几列即可.五、定制网格标题复杂标题TDBGridEh 允许在多列上创建标题,例如:设置 eMultiTitle 属性为 True 并且填充字段的标签或列标题的标题,可以使用下面的规则:字段标签中的文本部分或列标题必须由几部分组成,并且用 "|" 分割,几个列的每一个通用部分都设置为相同。
其它字段或标题必须在相应的部分包含同样的文本。
例如:Field1.DisplayLabel := 'Title1|SubTitle1';Field2.DisplayLabel := 'Title1|SubTitle2';或DBGridEh.Columns[0].Title.Caption := 'Title1|SubTitle1';DBGridEh.Columns[1].Title.Caption := 'Title1|SubTitle2';按钮式标题设置Column.Title.TitleButton 为 True可以强制标题单元为按钮式。
写 OnTitleBtnClick 事件来控制用户单击标题单元时的操作。
六、标题属性的默认值使用TDBGridEh.ColumnDefValues.Title来设置标题属性的默认值。
七、数据行高度使用 RowHeight 和 RowLines 属性来指定数据行高。
完整的数据行高 = 行线高度+行高。
设置 RowSizingAllowed 为 True 以允许可以在运行是使用鼠标来改变行高。
设置Column.WordWrap为True可以使数据行中文本多行显示。