ABI SNP分型研究
- 格式:pdf
- 大小:3.27 MB
- 文档页数:48


snp基因分型原理SNP(Single Nucleotide Polymorphism,单核苷酸多态性)是人类基因组中最常见的遗传变异形式之一。
它指的是单个核苷酸在DNA 链中的突变,通常体现为碱基的替换。
SNP的存在可以导致个体之间基因序列的差异,进而影响个体对疾病的易感性、药物反应以及其他生理特征。
SNP基因分型原理是通过检测SNP位点上的碱基发生变异来确定个体的基因型。
人类基因组中共有数百万个SNP位点,每个位点可能有两种或更多的碱基替代选择。
基于现代高通量测序技术的快速发展,我们能够对大规模的SNP位点进行检测和分型。
SNP基因分型的方法有多种,其中最常用的方式是通过PCR扩增和测序来检测SNP位点上的碱基。
通过与参考基因组序列比对,我们可以确定个体在该位点上拥有的是哪种碱基,并据此判断其基因型。
另外,还可以利用芯片技术进行SNP分析,该技术能够同时检测数万个SNP位点,大大提高了分型的效率。
SNP基因分型的应用非常广泛。
首先,SNP在疾病易感性研究中具有重要意义。
通过分析大规模的人群样本,可以发现某些SNP位点与特定疾病之间存在相关性。
这些位点常被称为疾病相关SNP(disease-associated SNP),通过进一步的研究我们可以了解这些位点对疾病的发生机制和进展起到的作用。
其次,SNP基因分型对药物反应的个体差异研究也具有重要意义。
不同个体对药物的代谢和吸收能力存在差异,这些差异通常与SNP位点上的碱基变异有关。
基于SNP基因分型结果,我们可以确定个体对某种药物的敏感性、代谢速度等因素,从而为个体化治疗和药物剂量的选择提供依据。
此外,SNP基因分型还在人类进化研究、亲子鉴定、种群遗传学研究等领域发挥着积极作用。
通过对多个SNP位点的分型结果进行比对和分析,可以推断个体之间的亲缘关系、种群之间的遗传关系,帮助我们更好地了解人类进化和种群形成的过程。
总之,SNP基因分型技术的发展为人类遗传学和生物医学研究提供了无限可能。

全基因组snp分型
全基因组SNP分型是指对一个个体的全基因组进行SNP(单核苷酸多态性)分型,即确定个体在所有SNP位点的基因型。
SNP是指基因组中的单个核苷酸发生变异的位置,这种变异可能导致个体间的遗传差异。
全基因组SNP分型的目的是通过对大量SNP 位点进行分析,了解个体在基因组上的遗传变异情况,从而研究基因与个体表型之间的关系,以及个体之间的遗传相似性等。
全基因组SNP分型的方法主要包括SNP芯片技术和基因测序技术。
SNP芯片技术通过将已知的SNP位点固定在芯片上,通过杂交等方式检测个体的基因型。
基因测序技术可以对个体的全基因组进行测序,从而直接获得个体在所有SNP位点的基因型。
全基因组SNP分型可以应用于各种研究领域,如人类遗传学、疾病研究、个体化医学等。
通过分析个体在不同SNP位点的基因型,可以揭示基因与疾病之间的关系,以及个体对药物的反应等信息,为个体化医学提供基础数据。

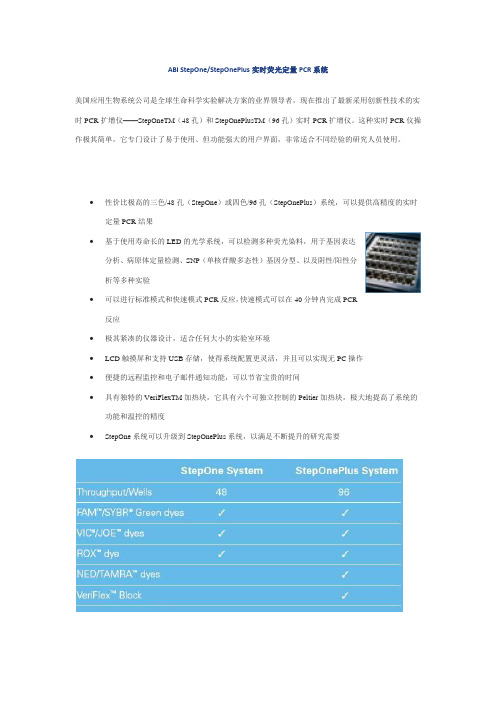
ABI StepOne/StepOnePlus实时荧光定量PCR系统美国应用生物系统公司是全球生命科学实验解决方案的业界领导者,现在推出了最新采用创新性技术的实时PCR扩增仪——StepOneTM(48孔)和StepOnePlusTM(96孔)实时PCR扩增仪。
这种实时PCR仪操作极其简单,它专门设计了易于使用、但功能强大的用户界面,非常适合不同经验的研究人员使用。
•性价比极高的三色/48孔(StepOne)或四色/96孔(StepOnePlus)系统,可以提供高精度的实时定量PCR结果•基于使用寿命长的LED的光学系统,可以检测多种荧光染料,用于基因表达分析、病原体定量检测、SNP(单核苷酸多态性)基因分型、以及阴性/阳性分析等多种实验•可以进行标准模式和快速模式PCR反应,快速模式可以在40分钟内完成PCR反应•极其紧凑的仪器设计,适合任何大小的实验室环境•LCD触摸屏和支持USB存储,使得系统配置更灵活,并且可以实现无PC操作•便捷的远程监控和电子邮件通知功能,可以节省宝贵的时间•具有独特的VeriFlexTM加热块,它具有六个可独立控制的Peltier加热块,极大地提高了系统的功能和温控的精度•StepOne系统可以升级到StepOnePlus系统,以满足不断提升的研究需要StepOne Software v2.0操作简便、但功能强大的定量PCR分析工具•实验设计向导,帮助您设计和设置实验•提供移液方案和配方,便于快速设置实验•高级设置,适用于需要更多灵活性以便进行更多复杂应用(如多重反应)的专家级的用户•快速启动设定,可以立即启动实验,并在稍后的时间再输入反应板信息•实时监控扩增曲线的增长,便于即时查看实验进程(可通过远程计算机进行监控)•自动基线和自动阈值选定功能,可以简化分析步骤•多图谱视图,可以同时观察四个视图评估数据•自动SNP(单核苷酸多态性)基因分型,具有直观的图表输出和质量评估•故障排除标记,帮助您诊断并解决实验中出现的问题•工具提示功能,当查看扩增曲线或是SNP分型的时候,方便识别不同样本孔•电子邮件通知功能,在实验开始或是结束的时候提醒您•便捷的剪切和粘贴功能•方便地导出为PowerPoint?、Excel?或.jpeg格式的文件7300型实时荧光定量PCR系统。
ManualRunning KASP genotyping on the ABI 7500 instrumentFor Research Use Only. Not for use in diagnostic procedures.Contents1. Introduction (3)2. Tips and suggestions before you start (3)3. Overview of the procedure (3)4. KASP thermal cycling conditions (4)4.1 KASP thermal cycling conditions (4)4.2 KASP recycling conditions (4)5. Step-by-step user guide (5)5.1 Define the experimental properties (5)5.2 Programme the plate setup (6)5.3 Program the run method (8)5.4 Run the thermal cycle including pre- and post-PCR reads (9)5.5 Analysis of results (10)5.6 Recycle the plate if necessary (11)5.7 Running the KASP trial kit on the ABI 7500 (11)6. Further support (11)1. IntroductionThis document is intended as a guide to running KASP TM genotyping reactions on the ABI 7500 instrument.KASP chemistry for allelic discrimination performs well on an ABI 7500 machine and this step-by-step protocol will enable users to successfully set-up, run and read plates on the 7500.2. Tips and suggestions before you start1. Optimal cycling conditions for KASP require a touchdown 2-step PCR protocol. The cyclingconditions for most SNP assays will be as described in this manual (section 4), although you must check the cycling conditions included in your SNP assay information pack to ensure that your assay does not have any specific cycling conditions.2. KASP is an endpoint chemistry and will require a final read once the PCR amplification steps havebeen completed. Completed KASP reactions must be read below 40 °C.3. In the 7500 software, a pre-read (before the thermal cycle) and a post-read (after the thermal cycle)should be included in the thermal cycle program.4. Data capture should not be performed during the thermal cycle program – no useful data will becaptured as KASP chemistry cannot be read at these temperatures. Reading the plate throughout the thermal cycle will unnecessarily reduce the lifespan of your instrument.5. The KASP recycling program will often will improve results, especially for assays that are slowto group.6. KASP is supplied with the HEX TM fluorophore but this has the same excitation and emissionspectra as VIC; they are therefore interchangeable. The ABI 7500 software only has an option for programing with VIC so ensure that you use this for the HEX allele.3. Overview of the procedure1. Define the experimental properties – see section 5.1.2. Program the plate set up including assay information and sample names – see section 5.2.3. Program the run method for KASP (including pre- andpost-read steps) – see section 5.3.4. Run the thermal cycle for your sample plate – see section5.4.5. Analyse the data – see section 5.5.6. Recycle the plate if necessary – see section 5.6.4. KASP thermal cycling conditions4.1 KASP thermal cycling conditions1. 94 °C 15 minutes2. 94 °C 20 seconds3. 61 °C 60 seconds (drop by - 0.6 °C/per cycle)Repeat steps 2-3 9 times (a total of 10 cycles) achieving a final annealing temperature of 55 °C4. 94 °C 20 seconds5. 55 °C 60 secondsRepeat steps 4-5 for 25 times (a total of 26 cycles)6. Read plate at less than 40 °C.4.2 KASP recycling conditions1. 94 °C 20 seconds2. 57 °C 60 secondsRepeat steps 1-2 twice (a total of 3 cycles)3. Read plate at less than 40 °C.* KASP cannot be read at temperatures above 40 °C. Turn off data capture for each of the cycling steps as this is not necessary.5. Step-by-step user guide5.1 Define the experimental properties• Open the ABI 7500 software• On the front screen, click on the‘Design Wizard’ button. This willopen up a new experiment. Thewizard will guide you through allstages of experimental setup.• In the Setup menu, the first stageis to define the ‘ExperimentalProperties’.• Step 1: Give your experimenta nameOptional – add in plate barcodeinformation, your user name andany comments relevant tothe experiment.• Step 2: Select the instrument that you are using (i.e. Standard or Fast)• Step 3: Select the experiment type – for KASP, this will be ‘Genotyping’• Step 4: Select ‘Other’ for the reagents type• Step 5: Select ‘Standard’ for the ramp speed• S tep 6: Tick the boxes to include a ‘Pre-PCR Read’ and an ‘Amplification’ stage inthe experimental run (Please note: Post-PCR Read is selected by default forgenotyping experiments).5.2 Programme the plate setup• Once the experimental properties are defined, click on the ‘Plate Setup’ menu.• Click on the ‘Create New SNP Assay’ button to open up the ‘New SNPAssay’ dialogue box. Fill in all the fields including a name for your assay.One allele should have FAM as the reporter and the other should haveVIC as the reporter. (HEX is the second fluorophore used in KASP, but thisis not an option in the 7500 software. VIC and HEX can be read at thesame wavelength).• Once you have created all the assays that you need for your experiment, assign these to the relevant wells of the plate. This is done by highlighting the wells, and then adding a tick to the ‘Assign’ column in the assay table.• Edit the sample names for the experiment. You can add new samples and display samples that have been defined in previous experiments.• Assign the sample names to the relevant wells of the plate. This is done by highlighting the wells, and then adding a tick to the ‘Assign’ column in the sample table.• Once the SNP assays and sample names havebeen assigned to the wells, ensure that the taskfor each well is correct. Highlight the relevantwell(s) and edit the task in the drop down menu inthe assay box. Unknown DNA samples should bedefined as ‘Unknown’ and No Template Controls should be defined as ‘Negative Control’.• Ensure that ROX TM is selected as the passive reference dye for the experiment.• The completed plate setup can be viewed from the ‘View Plate Layout’ tab.5.3 Program the run method• Once the plate layout has been defined, move to the ‘Run Method’ menu.• The “Run Method” menu is where you can edit the thermal cycling conditions.• Edit the default thermal cycle to the conditions required for KASP genotyping.• Ensure that the data capture symbol is on (i.e. in colour) for the first stage (30 °Cfor 1 min) so that the pre-read is performed, and for the last stage (30 °C for 1 min)so that the post-read is performed.• To programme the touchdown stage, you need to click in the ‘Enable AutoDelta’ box of the relevant cycling stage. Then click on the grey triangle next to the temperature (61 °C). This will open upCycling conditionsStage 11. 94 °C 15 minutesStage 21. 94 °C 20 seconds2. 61 °C 60 seconds. **Decrement -0.6 °C/per cycle**Set the decrement cycle using the ‘Auto Increment‘ tab.Repeat Stage 2 × 9 times (a total of 10 cycles) achieving a final annealing temperature of 55 °C.Stage 31. 94 °C 20 seconds2. 55 °C 60 secondsRepeat Stage 3 × 25 times (a total of 26 cycles)Stage 41. 37 °C for 1 minute. This will bring the reaction plate to the correct temperature for reading thefluorescence.10 cycles26 cycles• Select the minus sign (for a decrement) and 0.6 for thetemperature. This will ensure that the temperaturedecreases by 0.6 °C each cycle in this cycling stage(10 cycles). Click ‘Save Setting’ to return to the runmethod window. The triangle will now be green toindicate that AutoDelta settings have been programmed.• The remaining two setup menus are not required forKASP (‘Reaction Setup’ and ‘Materials List’).5.4 Run the thermal cycle including pre- and post-PCR reads• Once the experimental properties, plate setup and run method have all been programmed, you can begin the run.• Click on the ‘Run’ section of the experiment menu.• Ensure that the software is connected to the instrument, and then press the green ‘Start Run’ button.• The ‘Run Status’ will then change to ‘Running’ and the thermal cycle will begin.• Fluorescent data will be collected during the pre-read and post-read stages.5.5 Analysis of results• Once the run has completed, click on the ‘Analysis’ section of theexperiment menu.• Your genotyping data can be viewed by clicking on ‘AllelicDiscrimination Plot’.• If there are any anomalous wells (e.g. due to pipetting error), these can be omitted from the analysis. Right click on the well in the plate layout view, and select ‘Omit’.115.6 Recycle the plate if necessary• If your data has not formed tight clusters after the initial thermal cycling protocol, you canrecycle the plate in the ABI 7500 (or on a Peltier block) and perform a second post-read.• You will need to create an experiment file with the thermal cycling conditions for KASP recyclingconditions (see section 4.2).• The KASP recycling conditions are:1. 94 °C for 20 seconds2. 57 °C for 60 secondsRepeat steps 1-2 twice (a total of 3 cycles).Add a second stage (Post-PCR Read) at 30 °Cfor 1 minute to bring the plate to the correcttemperature for reading, and ensure that thedata collection symbol is on.• The data can then be viewed from the ‘Analysis’section of the experiment menu, using the‘Allelic Discrimination Plot’.5.7 Running the KASP trial kit on the ABI 7500• If you have requested a KASP trial kit to run on your ABI 7500 instrument, please follow theprotocol included with the kit to set up your reaction plate. This ABI 7500 manual can be used to help you to programme the instrument to run the trial kit reaction plate.• After running the KASP thermal cycle, the trial kit reaction plate should produce data similar tothe figure below.Results from the KASP trial kit reaction plate when run on the ABI 7500 instrument using the standard KASP thermal cycle and one recycle program.6. Further supportFor any queries about this manual, please contact ************************.Manual Running KASP genotyping on the ABI 7500 instrumentAll trademarks and registered trademarks mentioned herein are the property of their respective owners. All other trademarks and registered trademarks are the property of LGC and its subsidiaries. Specifications, terms and pricing are subject to change. Not all products are available in all countries. Please consult your local sales representative for details. No part of this publication may be reproduced or transmitted in any form or by any means, electronic or mechanical, including photocopying, recording or any retrieval system, without the written permission of the copyright holder. © LGC Limited, 2023. All rights reserved. GEN/1101/SW/@LGCBiosearch For Research Use Only. Not for use in diagnostic procedures.。
1、测序方法这个是最原始的,也是最简单的(操作简单,工作量不小啊!)一种方法,估计各位都明白,就不再累述了!2、Taqman探针法Taqman探针法可是一种无敌的方法,可用于基因荧光定量分析、甲基化检测、SNP分型、miRNA定量分析等等,差不多只要能用到的分子检测技术都有Taqman的身影。
Taqman探针法SNP分型技术的核心就是特异性的MGB探针技术,已证实的Taqman探针,3·段结合MGB技术,能更好的进行等位基因的区分。
MGB分子结合到DNA螺旋小沟,通过稳定MGB探针/模板联合体提高杂交的检验。
这种超强的稳定性可使短至13个碱基的探针提高错配的辨别力,并为困难多变的序列设计提供更高的灵活性。
所有的MGB探针都包括一个不发荧光的猝灭基团(NFQ),它能真正消除传统猝灭基团产生的背景荧光,提高信噪比,从而提供检测灵敏性。
Taqman探针法还有个好处据说AB公司能提供数以万计的现成探针,只要你付得起钱就可以了,什么可将illumina SNP芯片上的所有SNP位点都检测一遍。
Taqman探针法的缺点就是探针购买太贵,一般他们的试剂盒是1500人份的,价格可以咨询AB公司在国内的总代!1000份左右标本,几个位点用Taqman还是蛮核算的。
3、Beckman SNP genomestream技术Beckman技术的特点就是单碱基延伸法,设计时每个位点共设计3条引物,2条是扩增引物,1条为单碱基延伸引物(这个引物也可理解为探针)。
现在Beckman探针法可做到48重(也就是一次检测48个SNP 位点),引物及探针的设计可以直接提交给Beckman(这点同Taqman,不赚你,赚谁啊!),他们帮你有偿设计啊!Beckman的技术比较适合恰好有12个位点,48个位点检测,假如你的只有几个位点,或者恰巧不是12或48的倍数时,这个就有些不合算了!另外标本量不能太低,Beckman检测采用384板,一两百个样本那就算了吧!4、SNPshotSnaPshot技术平台是Applied Biosystems,ABI公司推出了专为检测SNP 设计的分析软件和试剂盒可对多个SNP 位点同时进行基因分型,也被称为minisequencing 。
美国应用生物系统公司片段分析和基因分型软件GeneMapper v3.0 中文操作手册(仅供参考。
请阅读英文原版手册。
)技术服务部x 2004年目录概述 (3)ABI PRISM GENEMAPPER V3.0中文手册 . LMS (4)一. 开机 (4)二. 输入P ANEL (4)三. 生成B IN (4)四. 定义A NALYSIS M ETHOD (5)五. 设置默认值 (5)六. 分析数据 (6)七. 编辑结果 (6)八. 创建自己的K IT、P ANE和M ARKER (6)ABI PRISM GENEMAPPER ID V3.1中文手册 . HID (7)一. 安装及登录 (7)二. 设置参数 (7)三. 分析数据 (8)四. 输出结果 (9)ABI PRISM GENEMAPPER V3.0中文手册 . SNP (10)一. 开机 (10)二. 分析片段大小 (10)三. 定义K IT、B IN S ET和P ANEL (10)四. 定义B IN和M ARKER (10)五. 定义S IZE S TANDARD和P REFERENCE (11)六. 分析数据 (11)七. 编辑结果 (17)八. 自动生成P ANEL (17)概述GeneMapper是高通量、全自动的DNA片段分析和基因分型软件,功能上相当于GeneScan、Genotyper和Template软件的整合,在应用上分为3类:以微卫星(STR) 连锁分析为基础的人和小鼠全基因组扫描,以单碱基延伸(微测序)为基础的SNP分析,和以STR遗传分析为基础的人、马、牛、羊亲子鉴定及身份认定。
其中GeneMapper ID v3.1是亲子鉴定的专用软件。
GeneMapper以Project为数据管理单位,Project之下又划分4个层次,从上到下依次为Kit、Panel (=Bin Set)、Marker 和Allele (=Bin)。