乐心I8血压计
- 格式:pptx
- 大小:15.10 MB
- 文档页数:24

血压仪使用方法
血压仪是一种用于测量人体血压的医疗器械,它能够帮助我们及时了解自己的
健康状况,对于高血压、低血压等疾病的预防和治疗起到了非常重要的作用。
正确的使用血压仪能够确保测量结果的准确性,下面我将详细介绍血压仪的使用方法。
首先,使用血压仪之前需要保持心情平静,不要进行剧烈运动或者饮酒。
在测
量血压之前,应该先休息5-10分钟,保持放松状态。
接下来,选择合适的位置坐下,将手臂伸展到与心脏同一水平,用手指触摸到手臂上的动脉搏动点,这个位置就是我们测量血压的位置。
然后,将血压仪的袖带套在手臂上,袖带的下缘应该离肘关节约2-3厘米的位置。
袖带不要过紧也不要过松,应该能够插入两个手指。
接着,打开血压仪的电源开关,紧贴袖带,开始自动充气。
在测量过程中,保持安静,不要说话或移动。
当血压仪完成充气后,将会自动释放气压,同时显示出收缩压和舒张压的数值。
在测量结束后,记得记录下测量结果,包括日期、时间以及测量时的状态(如坐着、站着或者躺着)。
这些信息能够帮助医生更好地了解您的健康状况。
在使用血压仪的过程中,还需要注意一些细节。
比如,应该避免在吃饭、喝咖
啡或者抽烟后立即测量血压,这些会影响测量结果的准确性。
另外,应该定期检查血压仪的电池和袖带,确保其正常使用。
总的来说,正确使用血压仪的方法包括保持心情平静、选择合适的位置和姿势、正确佩戴袖带、保持安静等。
这些都能够保证测量结果的准确性,帮助我们更好地了解自己的健康状况。
希望大家能够按照以上方法正确使用血压仪,保持健康的生活习惯,预防血压相关疾病的发生。

要经常测血压,有备无患。
特别是老年人平常经常侧血压好处有很多,比如可以提前预防很多严重的心脑血管疾病,但是也要掌握规律,血压在一天只能是不相同的,一般在清晨5、6点钟时血压最高,但或许也有不同,有的人在下午5、6点钟时血压最高,或其他时间。
自测血压能提高血压的诊断,高血压患者的血压运行规律并不相同。
有的人在清晨5、6点钟时血压最高,有的人在下午5、6点钟时血压最高,也有在其他时间的。
而医院的门诊时间是上午8点至下午4点或上午8点至12点、下午2点至5点。
在这些时间段就诊,有部分高血压患者的血压“正常”,造成漏诊。
而自测血压则能测出一天中血压的峰值,及时获得诊断。
血压还受情绪、环境和心理等因素的影响。
有些正常人一到医院血压就升高,这部分人可能受医院环境影响引起血压反应性升高,国外称之为“白衣高血压”(WhiteCoatHy-pertension)。
自测血压就能完全避开了医院特殊环境所造成的焦虑、紧张、恐惧、不安的心理因素,从而反映了血压的真实性,排除了误诊。
高血压是老年人最常见的疾病。
最近调查表明,我国高血压患者约有1.6亿,其中老年人占了50%左右,但知道自己的血压值,了解自己高血压病情的老年人只占被调查人数的43.9%。
因此,为了有效地防治这种老年病,老年人经常自测血压大有益处。
临床上把高血压这种危害极大的慢性疾病称为老年病可谓名副其实。
日常生活中,绝大多数老年人因为在患病早期没有显著症状,或者仅有轻微头痛、头晕等表现,所以很容易忽视自己的病情,甚至在体检时被漏诊。
为此,老年人要特别注意监测和记录血压值,特别是收缩压。
产品类别家用血压计品牌李医生型号7130 动力模式电动规格155(长)×133(宽)×85(高)自动关闭功能有测量范围20—280(mmHg)压力准确度±3(mmHg)脉搏准确度±5(%)适用工作温度5—40(℃)显示方式液晶显示注册号:粤食药监械(准)字2009第2200320号规格产品名称:臂式电子血压计型号:LYS-7130显示方式:数字式显示测量范围:血压:20~280mmHg(2.7~37.3Kpa) 心率:40跳/分钟~199跳/分钟精度:血压:±3mmHg(0.4kPa)以内心率:读出数值的±5%以内测量方法:示波法存储容量:60组测量数据电源:4节5号干电池、AC稳压电源(AC220V)电池寿命:在23摄氏度的室温下使用,加压至170mmHg(22.7Kpad)每天使用2次,碱性干电池约能使用300次使用温湿度:5℃~40℃运输和贮存温度:-20~+55℃运行大气压:86~106kPa运行和贮存大气压:50~106kPa本体重量:约365g(不包括电池)外形尺寸:155mm(长)*133mm(宽)*85mm(厚)臂带尺寸:465mm~145mm 橡胶管:600mm 适合臂周:220mm~320mm包装内附件:本体、臂带、合格证、使用说明书、收藏袋、4节5#碱性电池使用方法装入电池使用前将电池装上本体,也可使用电源适配器。
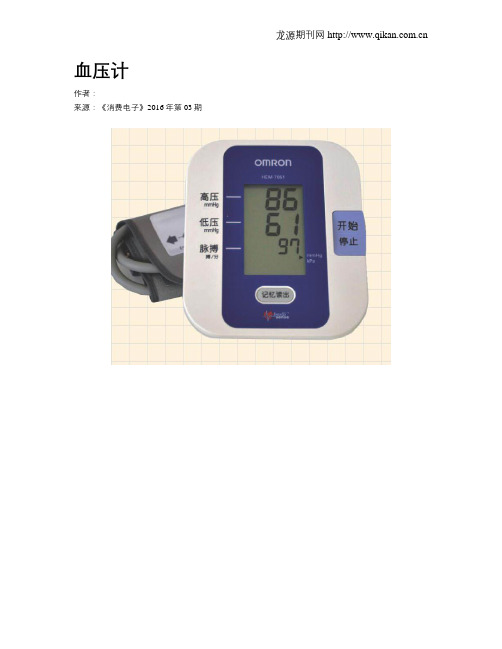
血压计作者:来源:《消费电子》2016年第03期高血压是我国最常见的慢性病之一,也是心脑血管病最主要的危险因素,由于一些高血压患者在日常生活中有时并无明显症状,其危害性常被人们所忽视,使得高血压成为人类健康的“隐形杀手”。
因此,平时监测血压状况很重要,血压计也就成了不少高血压患者的家庭常备医疗用品。
欧姆龙 HEM-7051类型:上臂式工作模式:全自动加压方式:智能加压显示方式:自动式精度:测量压力范围:0~299mmHg(0~39.9kPa)脉搏数:40~180次/分记忆组数:21组京东参考价:299元苏宁参考价:299元国美参考价:299元乐心 LS805类型:上臂式工作模式:全自动加压方式:自动显示方式:自动式精度:测量压力范围:0~299mmHg(0~40kPa)测量方法:示波测量法记忆组数:不限组数,永久记忆臂带尺寸:220-320mm京东参考价:139元苏宁参考价:139元松下 EW3106类型:臂式家用血压计加压方式:隔膜式泵的加压调整方式检测方式:臂式精度:±3mmHg以内压力检测:半导体压力传感器测量方法:示波测定法记忆组数:21次记忆臂带尺寸:约200-340mm京东参考价:229元国美参考价:229元鱼跃 YE680A加压方式:智能加压检测方式:臂式显示方式:大屏显示收缩压:60~230mmHg(8.0~30.7kPa)舒张压:40~130mmHg(5.3~17.3kPa)测量方法:示波测定法记忆组数:60×2双人记忆脉搏数:40-200次/min 京东参考价:239元苏宁参考价:235元国美参考价:229元。

ls208乐心说明书摘要:一、产品简介二、产品特点三、使用方法四、注意事项五、适用人群六、总结与推荐正文:一、产品简介ls208乐心是一款集智能与健康管理于一体的智能手环。
该产品由我国知名科技公司研发,旨在为用户提供便捷的生活方式和全面的健康保障。
乐心手环凭借其出色的性能和人性化的设计,受到了广大消费者的喜爱。
二、产品特点1.实时心率监测:ls208乐心手环采用高精度传感器,实时监测用户心率,为用户提供健康数据参考。
2.运动数据记录:支持多种运动模式,如跑步、骑行、游泳等,自动记录运动轨迹、消耗卡路里、运动距离等数据。
3.智能提醒:支持来电、短信、社交软件等消息提醒,让您随时随地掌握重要信息。
4.睡眠监测:分析用户睡眠质量,提供睡眠建议,助您养成良好的作息习惯。
5.防水设计:ls208乐心手环具备IP68级防水性能,适合各种恶劣天气使用。
6.智能充电:采用无线充电技术,充电方便快捷。
三、使用方法1.佩戴:将手环固定在手腕上,调整合适的大小。
2.连接手机:下载乐心APP,按照提示完成绑定。
3.开启运动模式:在APP中选择所需运动模式,手环将自动记录运动数据。
4.设置提醒:在APP中设置来电、短信等提醒功能。
5.充电:将手环放入充电器中,进行无线充电。
四、注意事项1.佩戴时避免手环与硬物摩擦,以免损伤表面。
2.游泳、洗澡时请取下手环,以免进水损坏。
3.长时间不使用时,请将手环放置在干燥通风处。
4.如有异常现象,请及时停止使用并联系售后服务。
五、适用人群ls208乐心手环适用于各年龄段的人群,特别是注重健康、喜欢运动的消费者。
此外,手环的设计时尚简约,也是送给亲朋好友的不错选择。
六、总结与推荐ls208乐心手环凭借其强大的功能、舒适的佩戴体验和人性化的设计,成为了智能手环市场的佼佼者。
无论是运动爱好者,还是追求便捷生活方式的用户,都可以从中获得满意的体验。

Getting Started with your Omron Elite 7300IT Blood Pressure Monitorand Microsoft® HealthVault™Welcome!This guide will show you how to set up your Omron Blood Pressure Monitor (Model ELITE7300IT) to work with Microsoft HealthVault.With this guide, you will:1.Set up your blood pressure monitor and take a test reading.2.Get ready to use your blood pressure monitor with HealthVault.3.Connect your blood pressure monitor to your computer and upload your test reading toHealthVault.IMPORTANT: If you have not already created your HealthVault account and installed HealthVault Connection Center, please go to /connectioncenter and follow the instructions.Let’s get started!Step 1: Set up your blood pressure monitor and take a test reading IMPORTANT: You will NOT be using the CD included with the device and may set it aside. IMPORTANT: The blood pressure monitor should not be connected to your computer while you are taking a measurement. Before taking a measurement, please disconnect the USB cable.¾Open your blood pressure monitor packaging. Remember, you will NOT be using the CD included with the device and may set it aside.¾Remove the device, cuff, cords, and batteries from their plastic packaging.¾Install the four AA batteries included or connect the AC adapter.¾Set the date and time on your device as described below:o If the device is on, turn it off by pressing the start/stop buttono Press and hold the ‘Set’ Button until the screen displays a flashing ‘off’o Press the set button againo Set the yearIf the year is not correct, press the button on the lower right to adjustOnce the year is correct, press the set button againo Set the monthIf the month is not correct, press the button on the lower right to adjustOnce the month is correct, press the set button againo Set the timeIf the time is not correct, press the button on the lower right to adjustOnce the time is correct, press the Start/Stop button¾Place the user selection switch to User A.¾Follow the instructions in the manual pages 23‐26 on applying the arm cuff¾Take a measurement with your blood pressure monitoro Press the Start/Stop button.o The arm cuff will start to inflate automatically taking a measurement.o When the measurement is complete, blood pressure and pulse rate are displayed. Step 2: Get ready to use your blood pressure monitor with HealthVault¾If HealthVault Connection Center is not running on your computer, please start it and sign in to your account. Connection Center then will open to a screen showing your device(s).¾Select the Omron Blood Pressure device picture on the left hand side of Connection Center.¾If you do not see a picture of your device in Connection Center, select Set up a new device and follow the on‐screen instructions.Step 3: Connect your Omron Blood Pressure Monitor to your computer and upload your reading to HealthVault¾Press the Start/Stop button to turn the monitor off.¾Find the USB cable that came with your blood pressure monitor.¾Plug the small end of your USB cable into the slot on your blood pressure monitor that's marked with the USB symbol.¾Plug the large end of your USB cable into your computer.¾The symbol “□” will start circling on the blood pressure monitor display when it is successfully connected to the computer. After several seconds the blood pressure display will be blank. NOTE: If the USB cable was connected when you took the last measurement, please disconnect and connect the cable again. Also, do not unplug the USB connector until the data has finished uploading. HealthVault Connection Center will sense when your device has been connected to your computer and will prompt you to upload your test reading.¾Follow the on‐screen prompts.You will see confirmation when your upload is complete. At that point you may unplug your blood pressure monitor from your computer.To see your reading in your HealthVault account:¾Open your Internet browser and go to . (You will be asked to sign in if you haven't accessed your account in the past 20 minutes.)¾Click your Health info tab.Whenever you have taken new readings with your device, you can follow the steps outlined in “Step 3” of this guide to upload the readings to HealthVault and better manage your health and fitness.For further help using your Omron blood pressure monitor with HealthVault:¾Go to the Troubleshooting guide.¾Refer to the printed instructions that came with your device.¾Phone Omron Customer Service: 1 (800) 634‐4350¾Go to Microsoft, HealthVault and the HealthVault logo, Windows and the Windows logo, Windows Live and the Windows Live ID logo, Windows Vista and the Windows Vista logo, and Internet Explorer, are trademarks of the Microsoft group of companies. All other trademarks are property of their respective owners. Portions of this material are © 2009 Microsoft Corporation. All rights reserved.。

智能血压计操作手册智能血压计是一种便捷的健康管理工具,可以帮助用户监测血压状况并提供相关数据分析。
本操作手册将为用户提供详细的使用指南,确保用户正确、有效地操作智能血压计。
1. 准备工作在开始使用智能血压计之前,请确保已准备好以下物品: - 智能血压计设备- 电池或电源适配器- 手机或其他配对设备(如智能手表)- 用户手册2. 开始使用步骤1:安装电池或连接电源适配器以给智能血压计供电。
步骤2:打开智能血压计设备并等待其启动。
步骤3:将手指轻轻放入智能血压计上的传感器区域,确保手指与传感器完全接触。
步骤4:启动手机或配对设备上的智能血压计应用程序,并与智能血压计设备进行蓝牙配对。
3. 测量血压步骤1:坐下并放松,确保心情平静。
步骤2:根据应用程序上的指示,选择“测量血压”选项。
步骤3:等待智能血压计设备完成测量过程。
期间请保持手指稳定,不要移动。
步骤4:测量完成后,智能血压计设备将显示您的血压数据,如舒张压(diastolic pressure)、收缩压(systolic pressure)和脉搏(pulse rate)。
步骤5:将测量结果保存在智能血压计应用程序中,以便将来参考和分析。
4. 数据分析智能血压计应用程序还提供了数据分析功能,可以帮助用户更好地了解自己的血压状况。
步骤1:打开智能血压计应用程序,并选择“数据分析”选项。
步骤2:应用程序将显示您过去一段时间的血压数据,如平均血压、血压趋势等。
步骤3:根据数据分析,可以了解您的血压是否稳定、是否存在异常波动等。
5. 注意事项- 在测量血压之前,应尽量保持心情稳定,避免剧烈运动、饮食过多或过少等影响测量结果的因素。
- 定期更换电池,以确保智能血压计设备正常运行。
- 错误使用智能血压计可能导致不准确的测量结果。
请仔细阅读用户手册,了解正确的使用方法。
本操作手册提供了智能血压计的基本使用指南,希望能帮助用户正确操作、测量血压并了解自己的健康状况。
传统与智能电子血压计谁更准确?在刚过去的2013年,移动医疗成为互联网业界大热的话题。
其中,电子血压计的智能化风潮尤为突出:既有互联网公司跨界研发的智能血压计,也有传统厂商对数据传输技术的新尝试。
这与中国高血压人群激增、市场潜力巨大不无关系。
无论是掌握较高硬件技术的老品牌,还是致力于开发后端服务的新公司,电子血压计作为医疗保健设备,其测量准确度是用户的核心诉求,而便捷的使用体验也在很大程度上影响着消费者的选择。
2014年1月,《消费者报道》进行了一项电子血压计测试,选取了传统厂商欧姆龙、松下的两款电子血压计,以及国内品牌MUMU、乐心的两款智能血压计,分别进行准确度测试以及主观的使用体验评价。
哪款电子血压计的测量准确度最高,哪个产品具有更为方便、舒适的使用感受,智能可穿戴、远程数据传输等新功能是否对消费者的口味?本期专题将为您解答。
专题执笔彭燕珊欧姆龙、乐心血压计准确度较高准确测量血压是消费者对电子血压计的核心诉求。
测试结果显示,欧姆龙和乐心的准确度较高,而松下的准确度不尽如人意。
此外,MUMU 在测试中稳定性较差,表现不佳。
本刊记者彭燕珊量血压还用得着去医院?如今,电子血压计已然成为高血压患者家中的“标配”。
比起传统的水银血压仪,它操作更简便,读数直观,还可以实时监测身体状况。
此外,一些品牌更是给它们加上了数据传输、蓝牙等新功能。
尽管如此,准确测量血压仍是消费者的核心诉求。
2013年12月下旬,《消费者报道》对4个品牌的电子血压计进行了准确度和主观评价两方面的测评。
受测品牌包括两款智能电子血压计:MUMU(木木健康)虽是互联网公司的跨界产品,但在设备生产中谨慎地选择了与医疗器械公司合作;另一个品牌――乐心(Lifesense),早期则是专供德国的电子血压计代工厂,在掌握核心硬件技术的同时转型智能医疗领域。
与之相较的,还有两家传统厂商――欧姆龙与松下。
准确度:松下不合格准确度测试在广东江南医院及广州市某大型社区进行。
Before Using the MonitorIntroduction . . . . . . . . . . . . . . . . . . . . . . . . . . . . . . . . . . . . . . . . . . . . . . . . . . .3 Safety Information . . . . . . . . . . . . . . . . . . . . . . . . . . . . . . . . . . . . . . . . . . . . . .4 Operating the Device . . . . . . . . . . . . . . . . . . . . . . . . . . . . . . . . . . . . . .4Care and Maintenance . . . . . . . . . . . . . . . . . . . . . . . . . . . . . . . . . . . . .6 Before Taking a Measurement . . . . . . . . . . . . . . . . . . . . . . . . . . . . . . . . . . . .7 Operating InstructionsKnow Your Unit . . . . . . . . . . . . . . . . . . . . . . . . . . . . . . . . . . . . . . . . . . . . . . . .8 Unit Display . . . . . . . . . . . . . . . . . . . . . . . . . . . . . . . . . . . . . . . . . . . . . . . . .10 Display Symbols . . . . . . . . . . . . . . . . . . . . . . . . . . . . . . . . . . . . . . . . . . . . . .11 Irregular Heartbeat Symbol () . . . . . . . . . . . . . . . . . . . . . . . . . . .11Movement Error Symbol () . . . . . . . . . . . . . . . . . . . . . . . . . . . . .11Heartbeat Symbol/Hypertension Indicator () . . . . . . . . . . . . . . . .12Average Value Symbol () . . . . . . . . . . . . . . . . . . . . . . . . . . . . . . .12 Battery Installation . . . . . . . . . . . . . . . . . . . . . . . . . . . . . . . . . . . . . . . . . . . .14 Setting the Date and Time . . . . . . . . . . . . . . . . . . . . . . . . . . . . . . . . . . . . . . .16 Setting the Medication Reminder Alarm . . . . . . . . . . . . . . . . . . . . . . . . . . . .20 Applying the Arm Cuff . . . . . . . . . . . . . . . . . . . . . . . . . . . . . . . . . . . . . . . . .24 Taking a Measurement . . . . . . . . . . . . . . . . . . . . . . . . . . . . . . . . . . . . . . . . .28 Using the Guest Mode . . . . . . . . . . . . . . . . . . . . . . . . . . . . . . . . . . . .30 Using the Memory Function . . . . . . . . . . . . . . . . . . . . . . . . . . . . . . . . . . . . .31 Averaging Function . . . . . . . . . . . . . . . . . . . . . . . . . . . . . . . . . . . . . .31To Display the Measurement Values . . . . . . . . . . . . . . . . . . . . . . . . .32To Delete All Values Stored in the Memory . . . . . . . . . . . . . . . . . . .33 Using the Software . . . . . . . . . . . . . . . . . . . . . . . . . . . . . . . . . . . . . . . . . . . .34 Care and MaintenanceCare and Maintenance . . . . . . . . . . . . . . . . . . . . . . . . . . . . . . . . . . . . . . . . . .38 Error Indicators and Troubleshooting Tips . . . . . . . . . . . . . . . . . . . . . . . . . .40 FCC Statement . . . . . . . . . . . . . . . . . . . . . . . . . . . . . . . . . . . . . . . . . . . . . . .42 Warranty . . . . . . . . . . . . . . . . . . . . . . . . . . . . . . . . . . . . . . . . . . . . . . . . . . . .43 Specifications . . . . . . . . . . . . . . . . . . . . . . . . . . . . . . . . . . . . . . . . . . . . . . . . .4423OPERATING THE DEVICEpressure. Self-diagnosis and treatment using measured results may be dangerous. Follow the instructions of your physician or licensed healthcare provider.of clean water. Contact a physician immediately.medicines throughout the day.literature in the box before operating the unit.456To ensure a reliable reading follow these recommendations:1. Avoid eating, drinking alcohol, smoking, exercising, and bathing for 30 minutes before taking a measurement. Rest for at least 15 minutes before taking the measurement.2. Stress raises blood pressure. Avoid taking measurements during stressful times.3. Measurements should be taken in a quiet place.4. Remove tight-fitting clothing from your arm.5. Sit on a chair with your feet flat on the floor. Rest your arm ona table so that the cuff is at the same level as your heart.6. Remain still and do not talk during the measurement.7. Keep a record of your blood pressure and pulse readings for your physician. A single measurement may not provide an accurate indication of your true blood pressure. You need to take and record several readings over a period of time. Try to measure your blood pressure at about the same time each day for consistency.8. Wait 2-3 minutes between measurements. The wait time allows the arteries to return to the condition prior to taking the blood pressure measurement. You may need to increase the wait time depending on your individual physiological characteristics.7Main Unit:89Components:(Connects to Air Jack)Stylish Zipper Case Four “AAA”Alkaline Batteries Instruction ManualCuff Selection GuideStandard Adult Cuff (Connects to Air Jack)Large Adult CuffCD-ROMSoftwareInstallation GuideMemory Symbol Pulse DisplaySymbolNOTES:• The backlight turns on when setting the date and time, setting the medication reminder alarm, when taking measurement,displaying measurement values, when the medicationreminder alarm sounds, and when downloading data to thePC.• Hold the unit diagonally to read the display.1011IRREGULAR HEARTBEAT SYMBOL ()When the monitor detects an irregular rhythm two or more times during the measurement, the Irregular Heartbeat Symbol ()will appear on the display with the measurement values.An irregular heartbeat rhythm is defined asa rhythm that is more than 25% slower or25% faster from the average rhythmdetected while the monitor is measuring thesystolic blood pressure and the diastolicblood pressure.If the Irregular Heartbeat Symbol ()displays with your measurement results, werecommend you consult your physician.Follow the directions of your doctor.MOVEMENT ERROR SYMBOL ()The Movement Error Symbol() is displayed if you move your body during the measurement. Please remove the arm cuff, wait 2-3 minutes,reapply the arm cuff and take another measurement.N ormal H ear tb eatHEARTBEAT SYMBOL/HYPERTENSION INDICATOR() TAKING A MEASUREMENTThe Heartbeat Symbol () flashes on the display during themeasurement. The Heartbeat Symbol () flashes at everyheartbeat.When the measurement is complete, the Heartbeat Symbol ()flashes on the display with your blood pressure and pulse rate if the reading is above 135 for the Systolic Blood Pressure value and/or 85 for the Diastolic Blood Pressure value.USING THE MEMORY FUNCTIONThe Heartbeat Symbol () flashes when the blood pressurereading stored in the memory is above 135 for the Systolic BloodPressure value and/or 85 for the Diastolic Blood Pressure value.A VERAGE V ALUE SYMBOL()The Average Value Symbol () is displayed when you press the Memory button (). The most recent average reading appears on the display screen.12131415Set the monitor to the current date and time before taking a measurement for the first time. If the date and time are not set correctly, the measurement values stored in the memory and the average values may not be correct.The Blood Pressure Monitor automatically stores up to 84 individual measurement values with the dates and times.NOTES:1. TO START THE SETTINGPress and hold the Date/Time Setting button() to adjust the date and time.The year flashes on the display.16176.SETTING THE MINUTEPress the Memory button () to advance by increments of one minute.Press the Date/Time Setting button () to turn the monitor off.18RESETTING THE DATE AND TIMEIf the date and time is incorrect and needs to be changed, always reset before taking the next measurement.To adjust the date or time after the initial setting:Start with the monitor in the off position.1. Press and hold the Date/Time Setting button ().The Medication Reminder Alarm Symbol () No.1 and the current setting (on or oFF) will appear on the display.Press the Date/Time Setting button repeatedly until the year flashes on the display.2.Refer to “Setting the Date and Time, 1. To Start the Setting” on page 16.The Medication Reminder Alarm Symbol () No.1 and the current setting (on or oFF) will appear on the display, after the minute has been set.3.Press the START/STOP button to turn the monitor off.192123242627282930Every time you complete a measurement the monitor stores the blood pressure and pulse rate in the memory.The monitor automatically stores up to 84 sets of measurement values (blood pressure and pulse rate). When 84 sets of measurement values are stored, the oldest record is deleted to save the most recent values. Measurements taken using the guest mode are not stored in the memory.A VERAGING FUNCTIONThe monitor calculates the average reading based on the three most recent sets of measurement values taken within 10 minutes of the last reading.NOTES:•If two sets of measurement values are stored in the memory for the 10 minutes period, the average is based on the twosets of measurement values.• If one set of measurement values is stored, this is displayed asthe average.313233344. Click [Download Data] icon to import the data.5. The Confirm dialog appears.Make sure your cable isconnected then click [Yes].6. Select the blood pressuremonitor being used and click[OK].7. Start importing data.Click [Cancel] if you want tocancel.USING THE SOFTWARE36USING THE SOFTWARE8. The dialog appears when complete.Click [OK] and view your data on thegraph.NOTES:•You cannot transfer the datawhile taking a blood pressurereading.• Do not turn the PC off orunplug the USB cable while thedata is being transferred.Refer to the Omron Health Management Software Users’Manuals.373839404142Your Omron®Elite 7300IT IntelliSense®Automatic Blood Pressure Monitor, excluding the arm cuffs and batteries, is warranted to be free from defects in materials and workmanship appearing within 5 years from the date of purchase, when used in accordance with the instructions provided with the monitor. The arm cuffs are warranted to be free from defects in materials and workmanship appearing within one year from the date of purchase when the monitor is used in accordance with the instructions provided with the monitor. The above warranties extend only to the original retail purchaser.We will, at our option, repair or replace without charge any monitor or arm cuff covered by the above warranties. Repair or replacement is our only responsibility and your only remedy under the above warranties.To obtain warranty service contact Omron Healthcare for the address of the repair location. Shipping instructions and repair information is available by calling1-800-634-4350or visit our website at .Enclose the Proof of Purchase. Include $5.00 for return shipping and handling. Include a letter, with your name, address, phone number, and description of the specific problem. Pack the product carefully to prevent damage in transit. Because of possible loss in transit, we recommend insuring the product with return receipt requested.ALL IMPLIED WARRANTIES, INCLUDING BUT NOT LIMITED TO THE IMPLIED WARRANTIES OF MERCHANTABILITY AND FITNESS FOR PARTICULAR PURPOSE, ARE LIMITED TO THE DURATION OF THE APPLICABLE WRITTEN WARRANTY ABOVE.Some states do not allow limitations on how long an implied warranty lasts, so the above limitation may not apply to you.OMRON SHALL NOT BE LIABLE FOR LOSS OF USE OR ANY OTHER INCIDENTAL, CONSEQUENTIAL OR INDIRECT COSTS, EXPENSES OR DAMAGES.Some states do not allow the exclusion or limitation of incidental or consequential damages, so the above exclusions may not apply to you.This warranty gives you specific legal rights, and you may also have other rights which may vary from state to state.FOR CUSTOMER SERVICEVisit our web site at: Call toll free:1-800-634-435043Model:Elite 7300ITDisplay:LCD Digital DisplayMeasurement Range:Pressure: 0 to 299 mmHg, Pulse: 40 to 180/min. Accuracy/Calibration:Pressure: ±3mmHg or 2% of readingPulse:±5% of readingInflation:Automatic by electric pumpDeflation: Automatic rapid deflation pressureRapid Air Release:Automatic exhaust valvePressure Detection:Electrostatic capacitive semi-conductor pressure sensor Measurement Method:Oscillometric methodPulse Wave Detection:Capacitance type pressure sensorPower Source: 4 “AAA” batteries (1.5V Alkaline)Battery Life:Approximately 300 uses when used 3 times a day with newalkaline batteries when inflated to 170mmHg at 73ºF (23ºC)(with Standard Adult Cuff).Operating Temperature50ºF to 104ºF (10ºC to 40ºC) /15 to 90% RH/Humidity:Storage Temperature-4ºF to 140ºF (-20ºC to 60ºC) /10 to 95% RH/Humidity/Air Pressure:/700 - 1060 hPaMain Unit Weight:Approximately 9 1/2 oz. (270 g)not including batteriesMain Unit Dimensions:Approximately 6 3/16" (l) × 2 15/16" (w) ×1 11/32" (h)(157 mm ×74 mm ×34 mm)Cuff Size:Standard Adult CuffApproximately 5 3/4" (w) × 17 1/2" (l)(146 mm × 446 mm)Cuff tube 23 5/8" (l) (600 mm)Large Adult CuffApproximately 6 7/8" (w) × 25 11/16" (l)(174 mm × 652 mm)Cuff tube 35 7/16" (l) (900 mm)Cuff Circumference:Standard Adult Cuff fits arm circumferences 9" to 13"(220 mm to 320 mm)Large Adult Cuff fits arm circumferences 13" to 17"(320 mm to 420 mm)4445Manufactured by OMRON HEALTHCARE Made in ChinaDistributed by:OMRON HEALTHCARE, INC.1200 Lakeside DriveBannockburn, Illinois 60015Copyright © 2008 Omron Healthcare, Inc.。
血压仪使用方法
血压仪是一种用来测量人体血压的仪器,它可以帮助我们及时了解自己的健康
状况,对于一些患有高血压等疾病的人来说,血压仪更是必不可少的家用医疗设备。
正确的使用血压仪可以确保测量结果的准确性,下面将介绍血压仪的使用方法。
首先,准备工作。
在使用血压仪之前,我们需要做一些准备工作。
首先要选择
一个安静舒适的环境,因为环境的嘈杂会影响到测量结果的准确性。
其次要保持心情舒畅,情绪稳定,因为情绪的波动也会对血压产生影响。
最后要确保测量前至少半小时内不要吸烟、喝咖啡或饮酒,这些物质会导致血压升高。
接下来,正确的使用血压仪。
首先要正确佩戴血压仪,将袖带套在上臂上,袖
带的下缘应该紧贴肘部,袖带的中心位置应该与心脏的位置相对应。
然后按下开始测量的按钮,等待血压仪完成测量。
在测量的过程中要保持安静,不要说话或移动。
测量完成后,记录测量结果,包括收缩压和舒张压。
最后,注意事项。
在使用血压仪的过程中,有一些注意事项需要我们特别注意。
首先要定期校准血压仪,确保测量结果的准确性。
其次要保持血压仪的清洁,定期清洁血压仪的袖带和传感器,以免影响测量的准确性。
另外要定期更换袖带,因为袖带会随着使用时间的增长而老化,影响测量的准确性。
总之,正确的使用血压仪对于我们的健康至关重要。
通过正确的使用方法和注
意事项,我们可以确保测量结果的准确性,及时了解自己的健康状况,及时采取措施进行调整和治疗。
希望大家能够重视血压仪的正确使用,保持健康的生活方式,预防和控制高血压等疾病的发生。
电子血压计基础知识目录一、电子血压计概述 (3)1.1 电子血压计的定义与分类 (4)1.2 电子血压计的工作原理 (5)1.3 电子血压计的应用领域 (5)二、电子血压计的构造与组件 (7)2.1 显示屏 (8)2.2 按键与按钮设计 (10)2.3 储存模块 (10)2.4 电源模块 (12)2.5 通信模块 (12)三、电子血压计的使用方法 (14)3.1 使用前的准备 (15)3.2 正确的测量姿势 (16)3.3 调整测量参数 (16)3.4 开始测量 (18)3.5 结果解读与记录 (18)四、电子血压计的测量原理 (19)4.1 压力传感器的工作原理 (20)4.2 数据处理与分析 (21)4.3 血压水平的判断标准 (23)五、电子血压计的质量控制与认证 (24)5.1 生产过程中的质量控制 (25)5.2 认证标准与程序 (26)5.3 产品认证标志与标识 (27)六、电子血压计的使用注意事项 (29)6.1 避免在危险环境中使用 (30)6.2 定期检查与维护 (31)6.3 正确的存放与使用环境 (32)6.4 异常情况的处理 (33)七、电子血压计的市场现状与发展趋势 (34)7.1 市场需求与规模 (36)7.2 竞争格局与主要品牌 (37)7.3 技术创新与发展方向 (38)7.4 行业政策与标准 (40)八、电子血压计的选购与使用建议 (41)8.1 如何选择合适的电子血压计 (42)8.2 使用中的注意事项 (44)8.3 用户体验与评价 (45)8.4 购买渠道与售后服务 (46)一、电子血压计概述电子血压计是一种利用现代电子技术与血压测量原理相结合的高精度测量设备,主要用于测量人体血压。
与传统的血压计相比,电子血压计具有更高的准确性和便捷性,已成为家庭和医疗机构中广泛使用的健康监测工具。
电子血压计的工作原理主要基于一定的压力传感技术,通过测量血管内血液对血管壁的压力来推算出血压值。