WA633SN Installation Pocket Guide & 快速安装指南(V100R003C07_01)
- 格式:pdf
- 大小:2.89 MB
- 文档页数:4
兼容IEEE 802.11b/g/n ,最高速率达150M bps。
支持2.4GHz 频段。
射频输出功率为500mW。
支持QoS 协议,根据业务类型(语音、视频、数据)进行优先级调度。
支持有线链路的完整性检测。
支持WEP 、WPA/WPA2、WAPI 、802.1X 认证/加密。
自动选择传输速率、信道和发射功率,自适应射频环境,实时回避干扰,增强信噪比,提高吞吐量,加快接入速率。
AP 上线自动发现AC ,自动加载配置,即插即用。
满足用户漫游切换,业务不中断。
网管系统实时监控,实现远程配置和快速故障定位。
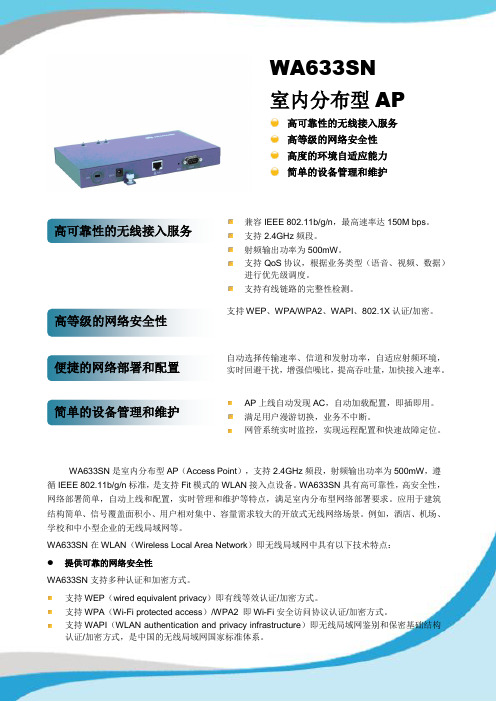
WA633SN 是室内分布型AP (Access Point ),支持2.4GHz 频段,射频输出功率为500mW ,遵循IEEE 802.11b/g/n 标准,是支持Fit 模式的WLAN 接入点设备。
WA633SN 具有高可靠性,高安全性,网络部署简单,自动上线和配置,实时管理和维护等特点,满足室内分布型网络部署要求。
应用于建筑结构简单、信号覆盖面积小、用户相对集中、容量需求较大的开放式无线网络场景。
例如,酒店、机场、学校和中小型企业的无线局域网等。
WA633SN 在WLAN (Wireless Local Area Network )即无线局域网中具有以下技术特点: 提供可靠的网络安全性WA633SN 支持多种认证和加密方式。
支持WEP (wired equivalent privacy )即有线等效认证/加密方式。
支持WPA (Wi-Fi protected access )/WPA2 即Wi-Fi 安全访问协议认证/加密方式。
支持WAPI (WLAN authentication and privacy infrastructure )即无线局域网鉴别和保密基础结构认证/加密方式,是中国的无线局域网国家标准体系。
简单的设备管理和维护便捷的网络部署和配置高等级的网络安全性高可靠性的无线接入服务WA633SN 室内分布型AP高可靠性的无线接入服务 高等级的网络安全性 高度的环境自适应能力 简单的设备管理和维护支持802.1X认证/加密方式。

ZenScreen Go MB16AP Portable USB Monitor Hybrid Signal SolutionUser GuideiiCopyright © 2018 ASUSTeK COMPUTER INC. All Rights Reserved.No part of this manual, including the products and software described in it, may be reproduced, transmitted, transcribed, stored in a retrieval system, or translated into any language in any form or by any means, except documentation kept by the purchaser for backup purposes, without the express written permission of ASUSTeK COMPUTER INC. (“ASUS”).Product warranty or service will not be extended if: (1) the product is repaired, modified or altered, unless such repair, modification of alteration is authorized in writing by ASUS; or (2) the serial number of the product is defaced or missing.ASUS PROVIDES THIS MANUAL “AS IS” WITHOUT WARRANTY OF ANY KIND, EITHER EXPRESS OR IMPLIED, INCLUDING BUT NOT LIMITED TO THE IMPLIED WARRANTIES OR CONDITIONS OF MERCHANTABILITY OR FITNESS FOR A PARTICULAR PURPOSE. IN NO EVENT SHALL ASUS, ITS DIRECTORS, OFFICERS, EMPLOYEES OR AGENTS BE LIABLE FOR ANY INDIRECT, SPECIAL, INCIDENTAL, OR CONSEQUENTIAL DAMAGES (INCLUDING DAMAGES FOR LOSS OF PROFITS, LOSS OF BUSINESS, LOSS OF USE OR DATA, INTERRUPTION OF BUSINESS AND THE LIKE), EVEN IF ASUS HAS BEEN ADVISED OF THE POSSIBILITY OF SUCH DAMAGES ARISING FROM ANY DEFECT OR ERROR IN THIS MANUAL OR PRODUCT.SPECIFICATIONS AND INFORMATION CONTAINED IN THIS MANUAL ARE FURNISHED FOR INFORMATIONAL USE ONLY, AND ARE SUBJECT TO CHANGE AT ANY TIME WITHOUT NOTICE, AND SHOULD NOT BE CONSTRUED AS A COMMITMENT BY ASUS. ASUS ASSUMES NO RESPONSIBILITY OR LIABILITY FOR ANY ERRORS OR INACCURACIES THAT MAY APPEAR IN THIS MANUAL, INCLUDING THE PRODUCTS AND SOFTWARE DESCRIBED IN IT.Products and corporate names appearing in this manual may or may not be registeredtrademarks or copyrights of their respective companies, and are used only for identification or explanation and to the owners’ benefit, without intent to infringe.Table of contentsNotices .........................................................................................................iii Safety information ......................................................................................iv Care & cleaning ............................................................................................v Takeback services ......................................................................................vi Caution ........................................................................................................vi 1.1 Welcome! ......................................................................................1-11.2 Package contents .........................................................................1-11.3Monitor introduction ....................................................................1-21.3.1 Front View and Charging Instructions .............................1-21.3.2 QuickFit Function ............................................................1-42.1 Monitor standing positions .........................................................2-12.2 Connect the USB monitor with system ......................................2-22.3 Announcements ...........................................................................2-43.1OSD (On-Screen Display) menu .................................................3-13.1.1 How to reconfigure ..........................................................3-13.1.2 OSD Function Introduction ..............................................3-23.2 Specifications .............................................................................3-113.3 Troubleshooting (FAQ) ..............................................................3-123.4Supported Timing List ...............................................................3-13NoticesFederal Communications Commission StatementThis device complies with Part 15 of the FCC Rules. Operation is subjectto the following two conditions:• This device may not cause harmful interference, and• This device must accept any interference received including interference that may cause undesired operation.This equipment has been tested and found to comply with the limits fora Class B digital device, pursuant to Part 15 of the FCC Rules. Theselimits are designed to provide reasonable protection against harmful interference in a residential installation. This equipment generates, usesand can radiate radio frequency energy and, if not installed and used in accordance with the instructions, may cause harmful interference to radio communications. However, there is no guarantee that interference willnot occur in a particular installation. If this equipment does cause harmful interference to radio or television reception, which can be determined by turning the equipment off and on, the user is encouraged to try to correctthe interference by one or more of the following measures:• Reorient or relocate the receiving antenna.• Increase the separation between the equipment and receiver.• Connect the equipment to an outlet on a circuit different from that to which the receiver is connected.• Consult the dealer or an experienced radio/TV technician for help. Canadian Department of Communications StatementThis digital apparatus does not exceed the Class B limits for radionoise emissions from digital apparatus set out in the Radio Interference Regulations of the Canadian Department of Communications.This class B digital apparatus complies with Canadian ICES-003.iiiSafety information• Before setting up this Portable USB Monitor, carefully read all the documentation that came with the package.• To prevent fire or shock hazard, never expose this Portable USB Monitor to rain or moisture.• Never try to open this Portable USB Monitor cabinet.• Before using this Portable USB Monitor, make sure all cables are correctly connected and the power cables are not damaged. If youdetect any damage, contact your dealer immediately.• Avoid dust, humidity, and temperature extremes. Do not place this Portable USB Monitor in any area where it may become wet. Place thisPortable USB Monitor on a stable surface.• Never push objects or spill liquid of any kind into the slots on this Portable USB Monitor cabinet.• If you encounter technical problems with this Portable USB Monitor, contact a qualified service technician or your retailer.• This Portable USB Monitor is powered by USB port which complies with LPS and SELV circuit according to IEC60950-1:2005.• DO NOT dispose of the product in fire• DO NOT use monitor near heating equipment or in places where there is likelihood of high temperature• Keep your monitor away from sharp objects• DO NOT place objects on top of your monitorivvCare & cleaning• Cleaning. Turn your monitor off and unplug the cable. Clean themonitor surface with a lint-free, non-abrasive cloth. Stubborn stains may be removed with a cloth dampened with mild cleaner.• Avoid using a cleaner containing alcohol or acetone. Use a cleanerintended for use with the LCD. Never spray cleaner directly on the screen, as it may drip inside the monitor and cause an electric shock.The following symptoms are normal with the monitor:• You may find slightly uneven brightness on the screen depending onthe desktop pattern you use.• When the same image is displayed for hours, an afterimage of theprevious screen may remain after switching the image. The screen will recover slowly or you can turn off the Power Switch for hours.• When the screen becomes black or flashes, or cannot work anymore,contact your dealer or service center to fix it. Do not repair the screen by yourself!Conventions used in this guideWARNING: Information to prevent injury to yourself when trying tocomplete a task.CAUTION: Information to prevent damage to the componentswhen trying to complete a task.IMPORTANT: Information that you MUST follow to complete atask.NOTE: Tips and additional information to aid in completing a task.Where to find more informationRefer to the following sources for additional information and for product and software updates.1.ASUS websitesThe ASUS websites worldwide provide updated information on ASUS hardware and software products. Refer to 2.Optional documentationYour product package may include optional documentation that may have been added by your dealer. These documents are not part of the standard package.Takeback servicesASUS recycling and takeback programs come from our commitment to the highest standards for protecting our environment. We believe in providing solutions for our customers to be able to responsibly recycle our products, batteries and other components as well as the packaging materials.Please go to /english/Takeback.htm for detailrecycling information in different region.CautionWe suggest to use the attached pen or any pen or stick that can fit in the hole at the corner as a simple stand for the monitor.Please reserve at least 10cm/4 inch of the pen at the back of the monitor to stabilize.Please be noted the pen attached has no Touch function.vi1-1ASUS USB Type-C Monitor MB16AP 1.1 Welcome!Thank you for purchasing the ASUS ® Portable USB Monitor!The latest ASUS Portable USB Monitor provides great portability andsimplicity to your daily life, enhancing both of your viewing experience and style.1.2 Package contentsCheck your package for the following items:Portable USB MonitorQuick Start GuideWarranty CardUSB Type-C CableSmart CoverUSB Type-C to A AdapterPenPower Adapter• If any of the above items is damaged or missing, contact your retailer immediately.•Inbox pen is not included in the warranty.1-2Chapter 1: Product Introduction1.3Monitor introduction1.3.1Front View and Charging Instructions1. Pen hole •Use the attached pen to insert into the hole, the monitor can stand up directly without the smart cover.2. Power button/Power LED • Press this button to turn the monitor on/off when connected to a valid source.•The color definition of the power indicator is as the below table. 3. Menu button • Press this button to enter OSD when in connection to a valid source •Long pressing the button allows you to have a quick check on battery % even the device is OFF.1-3ASUS USB Type-C Monitor MB16AP 4. Shortcut • This is a shortcut. Default is Input Device.•Long pressing the button allows you to have a quick check on battery % even the device is OFF.5. USB Type-C port • Used to connect to a valid source such as PC or mobile phone for monitor to work when there’s enough power• Used to do battery charging when the monitor is in OFF mode •Up to 9V@2A 18W power supply, signal input supported, maximumresolution 1920 x 1080@60Hz IMPORTANT:• Charge the monitor for 4 hours before using it for the first time • Use only bundled power adapter and USB cable to charge your monitor. Using different power adapter and cable might bring potentialdamage to your device.WARNING: The adapter may become warm to hot while in use. DO NOT cover the adapter and keep it away from your body while it is connected to a power source. If your device become unusual hot, disconnect the USB cable from your device and send the device including the power adapter and USB cable to an ASUS qualified service personnel1-4Chapter 1: Product Introduction1.3.2QuickFit FunctionThe QuickFit function contains two patterns: (1) Grid (2) Photo size.1.Grid pattern: Facilitates designers and users to organize content and layout on one page and achieve a consistent look and feel.Alignment grid 1 will be rotated automatically if auto rotation is enabled.•Auto rotation function is only working under Windows OS by installing DisplayWidget software.Alignment Grid22.Photo size: Provides photographers and other users to accurately view and edit their photos in real size on the screen.2.1 Monitor standing positionsYou can stand up the monitor by several positions with the smart cover.ASUS USB Type-C Monitor MB16AP2-12.2 Connect the USB monitor with systemorC2-2Chapter 2: Setup2-3ASUS USB Type-C Monitor MB16AP In case the computer does not support Type-C interface but only USB3.0 interface, please install the official driver from ASUS website firstly.Please make sure the USB Type-C cable and Type-C to A adapter is connected between the USB monitor and the system.When in connection with mobile devices, please go to ASUS website or Google Play Store to download the latest APP, please install APP before use.• Please check ASUS website for latest driver and DisplayWidget software.2.3 AnnouncementsAs this product and attached smart cover includes magnet in the structure, there could be potential risk to cause the damage of computer hard disc and objects that are sensitive to magnet.Please ensure not to stack the product with the computer when computer is in use (power on or standby mode) otherwise the hard drive couldpossibly be influenced by the result of permanent data missing or thecomputer display could be switched off due to computer auto protectionmechanism. When place this product together with computer in the bag, must have the computer power off to avoid possible hard drive damageproblem.(Check Picture A)The battery capacity will vary depending on the environment temperature, humidity, and monitor usageThe battery used in this device may present a risk of fire or chemical burn if removed or dissembled2-4Chapter 2: Setup3-1ASUS USB Type-C Monitor MB16AP 3.1OSD (On-Screen Display) menu3.1.1How to reconfigure1. Press the MENU button to activate the OSD menu.2. Press the ❑ button to toggle between options in the Menu. As you move from one icon to another, the option name is highlighted.3.To select the highlighted item on the menu press the button.4. Press the ❑ button to select the desired parameter.5.Press the button to enter the slide bar and then use the ❑ button, according to the indicators on the menu, to make your changes.6.to accept and returnto previous menu.• :Get power from source when this icon is shown •:Battery power3-2Chapter 3: General Instruction3.1.2 OSD Function Introduction1. SplendidThis function contains nine sub-functions that you can select for your preference.: This is the best choice for document editing with SPLENDID™ Video Intelligence Technology.• sRGB Mode : This is the best choice for viewing photos and graphics from PCs.• Scenery Mode : This is the best choice for scenery photo displaying with SPLENDID™ Video Intelligence Technology.• Theater Mode : This is the best choice for movie watching with SPLENDID™ Video Intelligence Technology.• Game Mode : This is the best choice for game playing with SPLENDID™ Video Intelligence Technology.•Night View Mode : This is the best choice for playing dark-scene game or watching dark-scene movie with SPLENDID™ Video Intelligence Technology.• Reading Mode : This is the best choice for book reading.• Darkroom Mode : This is the best choice for a weak ambient light environmen.•ECO Mode : Activate the ecology mode for power saving.3-3ASUS USB Type-C Monitor MB16AP • In the Standard Mode, the Saturation, SkinTone, Sharpness, and ASCR functions are not user-configurable.• In the sRGB, the Saturation, Color Temp., SkinTone, Sharpness, Brightness, Contrast and ASCR functions are not user-configurable.• In the Reading Mode, the Saturation, SkinTone, Sharpness, ASCR, contrast, and Color Temp functions are not user-configurable.•In the ECO Mode, the Saturation, SkinTone, ASCR, Sharpness, contrast, and Brightness functions are not user-configurable.2.Blue Light FilterAdjust the energy level of blue light emitted from LED backlight.• Level 0: No change.•Level 1~4: The higher the level,the more blue light will be reduced.• When Blue Light Filter is activated,the default settings of Standard Mode will be automatically imported.• Between Level 1 to Level 3, the Brightness function is user-configurable.•Level 4 is optimized setting. It is compliance with TUV Low Blue Light Certification. The Brightness function is not user-configurable.3-4Chapter 3: General InstructionPlease refer to the following to alleviate eye strains:•Users should take some time away from the display if working for long hours. It is advised to take short breaks (at least 5 mins) after around 1 hour ofcontinuous working at the computer. Taking short and frequent breaks is more effective than a single longer break.• To minimize eye strain and dryness in your eyes, users should rest the eye periodically by focusing on objects that are far away.•Eye exercises can help to reduces eye strain. Repeat these exercises often. If eye strain continues please consult a physician. Eye exercises: (1) Repeating look up and down (2) Slowly roll your eyes (3) Move your eyes diagonal.•High energy blue light may lead to eye strain and AMD (Age-Related Macular Degeneration). Blue light Filter to reduce 70% (max.) harmful blue light to avoiding CVS (Computer Vision Syndrome).3. ColorSelect the image color you like from this function.• Brightness : The adjusting range is from 0 to 100.• Contrast : The adjusting range is from 0 to 100. • Saturation : The adjusting range is from 0 to 100.• Color Temp.: Contains three preset color modes (Cool , Normal , Warm ) and User Mode.•Skin Tone : Contains three color modes including Reddish , Natural , and Yellowish .3-5ASUS USB Type-C Monitor MB16AP •In the User Mode, colors of R (Red), G (Green), and B (Blue) are user-configurable; the adjusting range is from 0 ~ 100.4. ImageYou can adjust the image Sharpness, Trace Free, Aspect Control, VividPixel and ASCR from this main function.• Sharpness : Adjusts the picture sharpness. The adjusting range is from 0 to 100.• Trace Free : Speeds up the response time by Over Drive technology. The adjusting range is from lower 0 to faster 100.• Aspect Control : Adjusts the aspect ratio to “Full ”, “4:3”.•VividPixel : ASUS Exclusive Technology that brings lifelike visuals for crystal-clear and detail-oriented enjoyment. The adjusting range is from 0 to 100.•ASCR : Select ON or OFF to enable or disable dynamic contrast ratio function.•4:3 is only available when input source is in 4:3 format .5.System SetupAdjusts the system configuration.• Splendid Demo Mode: Activate the demo mode for the Splendidfunction.• Auto Rotation: To enable/disable rotate image automatically.Please be noted that Auto rotation function is only working under Windows OS byinstalling DisplayWidget software.• Input Device Pop-up : To enable/disable Input Device & Power Supply from PC pop-up questions WHENEVER in connection.• Input Device :3-6Chapter 3: General InstructionSelect “Mobile” if connect to mobile phone ( Power supply function is not provided under “Mobile” due to common mobile devices cannot provide enough power output ). Select “PC” if connect to PC and then select“Power Supply from PC” with charging function. This function allows you to sustain the working time for longer.In PC sub-function, you can disable power supply function by selecting “ No Need Power* from PC”* No Need Power here means getting power under 100mA, and this does not affect the battery life/usage of host devices connected.• GamePlus: The GamePlus Function provides a toolkit and creates a better gaming environment for users when playing different types ofgames. Particularly, Chrosshair function is specially designed for new gamers or beginners interested in First Person Shooter (FPS) games.To active GamePlus:• Select ON to enter the GamePlus main menu.• Press to select between Chrosshair, Timer and Display Alignment function.• Press to confirm the function you choose. Select to go off, and exit.• QuickFit: See page 1-3 for details.• OSD Setup: Adjusts the OSD Timeout, DDC/CI, and Transparency of the OSD screen.•• M ore: Return the next page of System Setting.• Language: Select OSD language. The selections are: English, French, German, Spanish, Italian, Dutch, Russian, Poland, Czech, Croatia, Hungary, Romania, Portugal, Turkey, Simplified Chinese, Traditional Chinese, Japanese, Korean, Persian, Thai and Indonesian.• Key Lock: Disable all key functions. Pressing the menu button for more than five seconds to disable key lock function.• I nformation:Displays the monitor information.• Power Key Lock: To disable / enable power key.• All Reset: Selects “Yes” to revert all settings to the factory default mode.6. ShortcutSelecting this option allows you to set shortcut key.• Shortcut : User can select from “Blue Light Filter” “Splendid”, “Brightness”, “Contrast”, “Auto Rotation”, “Color Temp.”,“QuickFit”, “Input Device” and set as shortcut key.7. MyFavoriteLoad/Save all settings on the monitor.3.2 Specifications*Specifications are subject to change without notice.3.3 Troubleshooting (FAQ)The monitor automatically turns off • The monitor automatically turns off when the battery power is zero. Please connect to the ASUS adapter and check if the battery is low; if so, charge the battery before using it.• Please check if the source of signal went into sleep mode. The monitor automatically turns off after the signal source slept for more than 15 seconds to save power consumption.The signal source is shown in power supply mode • The monitor will get a small amount of electricity from the signal source. This is normal.3.4 Supported Timing List。


NC 6.33安装与升级指南培训人员:金翼NC平台测试部010-主要负责NC产品集成测试阶段的环境部署以及安装配置相关工作,精通NC产品安装与升级,技术精湛,善于创新,多次获得公司产品与技术类创新奖。
NC6.33发版后,安装NC6.33产品,共涉及7张安装盘。
由于NC6.33金盘中,UAP产品为补丁盘,且强依赖UAP6.31金盘,因此,用户安装时,必然包括NC6.3金盘,UAP6.31金盘和NC6.33金盘3张安装盘。
(市场上流通光盘V6.31指EIMM631,光盘V6.32特指NC6.3,光盘V6.32指电子销售V6.32) NC6.33上市后,将会增加一张光盘V6.33,其它安装盘可以从安装说明中的FTP地址上获取EIMM631金盘,NC_HR6.31金盘,供应商管理6.32金盘,资产管理6.31金盘4张安装盘,需结合购买产品,决定用户是否安装。
当用户购买了费用管理、网上报销和营销费用管理中的任一模块时,用户要安装EIMM6.31金盘;当用户购买了HR任何模块时,用户要安装NC6.31_HR金盘,当用户购买了供应商管理时,用户要安装供应商管理NC6.32金盘,当用户购买资产任何模块时,用户会安装资产管理NC6.31金盘。
NC6.3GOLD发版后,共发布12张安装盘。
分别为:NC6.3GOLD金盘,UAP631金盘,EIMM6.31金盘,NC_HR6.31金盘,供应商管理6.32金盘,资产管理6.31金盘, NC63XBRL 安装盘,电子销售NC6.32, 离散制造NC6.31,NC6.31OA金盘,移动CRM6.32金盘,NC6.33金盘。
NC63XBRL安装盘,电子销售NC6.32, 离散制造NC6.31,NC6.31OA金盘,移动CRM6.32金盘5张金盘,已合并到NC6.33,用户不用再使用。
以上内容,安装说明将在正式版中不显示1基本原则1. 新购买用户,强烈建议安装全部产品,按照购买的产品进行初始化,避免后续增补产品时,繁琐的安装过程。

Intellectual Property Rights (IPR) InformationCopyrights © All rights reserved. This publication contains information that is protected by copyright. No part may be reproduced, transmitted, transcribed, stored in aretrieval system, or translated into any language without written permission fromthe copyright holders.Trademarks The following trademarks are used in this document:●Microsoft is a registered trademark of Microsoft Corp.●Windows, Windows 95, 98, Me, NT, 2000, XP, Vista, 7, 8 and Explorer aretrademarks of Microsoft Corp.●Apple and Mac OS are registered trademarks of Apple Inc.●Other products may be trademarks or registered trademarks of their respectivemanufacturers.Safety Instructions and ApprovalSafety Instructions ●Read the installation guide thoroughly before you set up the device.●The device is a complicated electronic unit that may be repaired only beauthorized and qualified personnel. Do not try to open or repair the device yourself.●Do not place the device in a damp or humid place, e.g. a bathroom.●Do not stack the devices.●The device should be used in a sheltered area, within a temperature range of +5to +40 Celsius.●Do not expose the device to direct sunlight or other heat sources. The housingand electronic components may be damaged by direct sunlight or heat sources.●Do not deploy the cable for LAN connection outdoor to prevent electronic shockhazards.●Keep the package out of reach of children.●When you want to dispose of the device, please follow local regulations onconservation of the environment.Warranty We warrant to the original end user (purchaser) that the device will be free from any defects in workmanship or materials for a period of one (1) year from the dateof purchase from the dealer. Please keep your purchase receipt in a safe place as itserves as proof of date of purchase. During the warranty period, and upon proof ofpurchase, should the product have indications of failure due to faulty workmanshipand/or materials, we will, at our discretion, repair or replace the defectiveproducts or components, without charge for either parts or labor, to whateverextent we deem necessary tore-store the product to proper operating condition.Any replacement will consist of a new or re-manufactured functionally equivalentproduct of equal value, and will be offered solely at our discretion. This warrantywill not apply if the product is modified, misused, tampered with, damaged by anact of God, or subjected to abnormal working conditions. The warranty does notcover the bundled or licensed software of other vendors. Defects which do notsignificantly affect the usability of the product will not be covered by the warranty.We reserve the right to revise the manual and online documentation and to makechanges from time to time in the contents hereof without obligation to notify anyperson of such revision or changes.Be a Registered OwnerWeb registration is preferred. You can register your Vigor device via . Firmware & Tools UpdatesDue to the continuous evolution of DrayTek technology, all devices will be regularly upgraded. Please consult the DrayTek web site for more information on newest firmware, tools and documents.EU Declaration of ConformityWe DrayT ek Corp. , office at No.26, Fu Shing Road, HuKou County, Hsin-Chu Industry Park, Hsinchu 300, T aiwan , R.O.C., declare under our sole responsibility that the product●Product name: Smart Lite Giga Switch●Model Number: VigorSwitch G1080Corp.●Manufacturer: DrayTek●Address: No.26, Fu Shing Road, HuKou County, Hsin-Chu Industry Park,HsinChu 300, Taiwan, R.O.Cis in conformity with the relevant Union harmonisation legislation:EMC Directive 2014/30/EU, Low Voltage Directive 2014/35/EU and RoHS 2011/65/EU with reference to the following standardsStandard Version / Issue dateEN 550322015 Class BEN 61000-3-22014 Class AEN 61000-3-32013EN 550242010+A1:2015EN 60950-12006 +A11:2009 +A1:2010 +A12:2011+A2:2013Hsinchu22nd June, 2017Calvin Ma / President . (Place) (Date) (Legal Signature)Regulatory InformationFederal Communication Commission Interference StatementThis equipment has been tested and found to comply with the limits for a Class B digital device, pursuant toPart 15 of the FCC Rules. These limits are designed to provide reasonable protection against harmful interference in a residential installation. This equipment generates, uses and can radiate radio frequencyenergy and, if not installed and used in accordance with the instructions, may cause harmful interference to radio communications. However, there is no guarantee that interference will not occur in a particular installation. If this equipment does cause harmful interference to radio or television reception, which can be determined by turning the equipment off and on, the user is encouraged to try to correct the interference by one of the following measures:●Reorient or relocate the receiving antenna.●Increase the separation between the equipment and receiver.●Connect the equipment into an outlet on a circuit different from that to which the receiver isconnected.●Consult the dealer or an experienced radio/TV technician for help.This device complies with Part 15 of the FCC Rules. Operation is subject to the following two conditions:(1) This device may not cause harmful interference, and(2) This device may accept any interference received, including interference that may cause undesiredoperation.Caution: Any changes or modifications not expressly approved by the party responsible for compliance couldvoid the user's authority to operate the equipment.More update, please visit .P a c k a g e C o n t e n tThe 8 ports, Smart Lite Giga Switch is a standard switch that meets both IEEE 802.3u/ab Fast Ethernet and Gigabit Ethernet specifications.The network administrator can logon the switch to monitor, configure and control each port’s activity. In addition, the switch implements the QoS (Quality of Service) and VLAN. It is suitable for office application.Vigor DeviceQuick Start GuideThe type of the power adapter depends on the country that the device will be installed.UK-type Power AdapterEU-type Power AdapterUSA/Taiwan-type Power AdapterAU/NZ-type Power AdapterIf any of these items is found missing or damaged, please contact your local supplier for replacement.P a n e l E x p l a n a t i o nLED StatusExplanationOn (Green)The device is powered on and runs normally. PWROff The device is not ready or is failed. On (Green)The device is connected with 1000Mbps.On (Amber) The device is connected with 10/100Mbps.BlinkingThe system is sending or receiving data through the port.RJ 45 LNK/ACTfor Ports 1 ~ 8 OffThe port is disconnected or the link is failed. InterfaceDescriptionRSTReset to the default settings.RJ 45 LNK/ACT Port 1 ~ 8 Port 1 to Port will be used for Ethernet connection .InterfaceDescriptionSecurity hole.Connecter for a power adapter.RJ45 LNK/ACT Port 1 to Port 8H a r d w a r e I n s t a l l a t i o nBefore starting to configure the device, you have to connect your devices correctly.A hierarchical network with minimum levels of device may reduce the timing delay between server and client station. Basically, with this approach, it will minimize the number of devices in any one path; will lower the possibility of network loop and will improve network efficiency. If more than two devices are connected in the same network, select one device as Level 1 device and connect all other devices to it at Level 2. Server/Host is recommended to connect to the Level 1 device. This is general if no VLAN or other special requirements are applied.All device ports are in the same local area network.S o f t w a r e C o n f i g u r a t i o nBefore using the device, perform the following steps:1. Set up a physical path between the configured the device and a PC by a qualified UTP Cat. 5e cable with RJ-45 connector.If a PC directly connects to the device, you haveto setup the same subnet mask for PC and the device. Default values of the managed deviceare listed as follows:2. After configuring correct IP address on your PC, open your web browser and access device's IP address.3. The home page of VigorSwitch G1080 will be shown as below:IP Address192.168.1.224Subnet Mask 255.255.255.0 DHCP Client Enabled (On) Passwordadmin。

Figure 1. SCS WS Aware Workstation Monitor with Big Brother Remote TerminalsFunctionsThe WS Aware Workstation Monitor works with dual wrist straps that have a standard 3.0 mm audio mono plug. It verifies proper wearing of a wrist strap by measuring an operator’s resistance.A charge can be easily developed on a body during movements. WS Aware Workstation Monitor detects body voltage and alarms if it exceeds the preset level. Alarm thresholds for body resistance and body voltage are set at the factory but can be changed in the field. Please contact SCS Representatives or authorized distributors for details. Indicates that WS Aware WorkstationIt is used to enable and disableFigure 3. WS Aware Workstation Monitor features and components (right and left views)4. Connect the WS Aware Workstation Monitor to its remote terminals using the supplied mini-DIN cables. Route the cables so that they are out of the way and do not interfere.5. Using 25-28 AWG wire connect the tools that you wish to monitor to the ground monitor terminals on the left side of the WS Aware Workstation Monitor. Use a small screwdriver to press the orange levers when inserting or removing wires. Caution: This connection is for monitoring only and not for actual grounding.6. If you wish to monitor the grounding of StaticDissipative Mats (model CTC061), use the SCS2380 Monitor Cords, connectors and plug in their wires to mat terminals as mentioned above.7. If you will be using your WS Aware WorkstationMonitor with a Facility Monitoring System, you must read the appropriate section in the FMS User Guide first.8. Finalize the connections. Plug the power adapter ina convenient outlet. WS Aware Workstation Monitor is now ready for continuous monitoring.Enabling or Disabling MonitoringMonitoring of each ground can be enabled or disabledDissipative Surface 1Dissipative Surface 2Tool Ground 1Tool Ground 2Figure 4. CTC061 WS Aware Workstation Monitor LED’s for Dissipative Surfaces and Tool Grounds AudibleAlarm Button Programming Header (manufacturer use only)Monitoring of each wrist strap is done independently. When there is no wrist strap present, both LEDs for each wrist strap are off. When a wrist strap is plugged in, a red LED may blink for a second or two. If the wrist strap is worn properly, a green light will be on. When a wrist strap fails, a red light will be on. In case of body voltage exceeding the pre-set limit, a green light may still be on if the wrist strap is worn properly, but the red LED will blink.Status Green LED Red LED Buzzer No Wrist Strap Off Off Off Wrist Strap OK On Off Off Body Voltage On Blinks Off Wrist Strap Fail Off On Beeps Wrist Strap Output SignalsWS1WS2Voltage(V1)Current(mA)Off Off 5.020.0Off Good 4.618.4Good Off 4.216.8Good Good 3.815.2Bad Off 2.28.8Good Bad 1.87.2Bad Good 1.4 5.6Bad Bad 1.0 4.0 Monitoring of EMI on Tool Ground Electromagnetic interference (EMI) can cause equipment lockups and malfunction. The WS Aware Workstation Monitor provides monitoring of EMI on tool grounds.It is possible to have a good connection to the ground and presence of large EMI signal on the ground at the same time. Though presence of EMI does not createa failure alarm, it is wise to investigate the cause and take measures to reduce EMI. Please contact SCS for recommendations and for assistance in these matters. Ground IndicationThe following indication is available for each ground:Status LED Buzzer Ground Disabled Off OffGround OK Green OffGround OK + EMI(Tool grounds only)Orange OffGround Fail Red On Output SignalsThe following table shows the output current (or voltage across 250 ohms load) corresponding to different states of ground. For a FMS to generate an alarm it is recommended to set a 4.75V or 19mA output signal since below this level, there is at least one failure condition. This is valid only for 4-20mA output for -3 models.Mat1/Tool 3Mat2/Tool 4Tool 1Tool 2V mA Good Good Good Good 5.0020 Failed Good Good Good 4.5018 Good Failed Good Good 4.2517 Failed Failed Good Good 4.0016 Good Good Failed Good 3.7515 Good Good Good Failed 3.5014 Good Good Failed Failed 3.2513 Failed Good Failed Good 3.0012 Good Failed Failed Good 2.7511 Failed Failed Failed Good 2.5010 Failed Good Good Failed 2.259 Good Failed Good Good 2.008 Failed Failed Good Failed 1.757 Failed Good Failed Failed 1.506 Good Failed Failed Failed 1.255 Failed Failed Failed Failed 1.004 Modes of OperationThe WS Aware Workstation Monitor can work in a stand alone mode or connected to a DAS or a FMS.Stand-Alone OperationConnect the WS Aware Workstation Monitor according to previous instructions and plug its power adapterinto a convenient outlet. Do not forget to connect the WS Aware Workstation Monitor to ground. WS Aware Workstation Monitor is now ready to inform you of problems with personnel and equipment grounding. In standalone mode, the WS Aware Workstation Monitor functions as ESD awareness tool for personnel. It can also be used for hands-on ESD training that is essential for a successful ESD management program. Operation with Data Acquisition System (DAS)DAS or FMS must be able to sample data from each WS Aware Workstation Monitor in order not to miss intermittent grounding problems. SCS provides a portable or stationary DAS. Please contact a SCS Sales Representative or an authorized distributor.The WS Aware Workstation Monitor has the following interface options:Relay (RT model), 4-20mA (-3 model), and Modbus (-5 model).Environmental ConditionsThis equipment has been tested and found to be safe to operate within these environmental conditions.This is not a warranty of equipment performance within these conditions.• Indoor use only• Ingress Protection: IPX0• Altitude: Up to 2,000 m• Mains supply voltage fluctuations up to ± 10% of the nominal voltage.• Transient over-voltages up to the levels of over voltage category II.• Temporary over-voltages occurring on mains supply.• Pollution degree: 2.• Temperature: Maximum 110°F / 43°C Minimum 50°F/10°C• Humidity: Maximum 80% relative humidity for temperatures up to 31° C decreasing linearly to 50% relative humidity at 40° C.Safety InformationRead, understand, and follow all safety information contained in these instructions prior to the use of this device. Retain these instructions for future reference. Intended UseThe WS Aware Workstation Monitor is intended for use by electrical assembly personnel to monitor ground impedance for process and equipment tools.The WS Aware Workstation Monitor is both a wrist strap monitor and a ground monitor. It provides operator grounding, and monitors the resistance and body voltage of personnel. It monitors the ground connection of two dissipative mats and two tool grounds. It informs the user when excess charge is present. The systems must be installed as specified in this User’s Guide in an indoor commercial/industrial environment, and have not been evaluated for other uses or locations. If the equipment is used in a manner not specified by the manufacturer, the protection provided by the equipment may be impaired. WarningTo reduce the risks associated with hazardous voltage and fire:• Do not use the power supply if damaged. Replace power supply if damaged using only SCS suppliedparts.• Do not attempt to service the power supply or monitor, there are no user serviceable parts; returnto SCS for service.• Do not position the monitor or other equipment where unplugging the power supply is difficult.Always locate the power socket or outlet near theequipment. The power supply plug serves as thedisconnect device.• Do not use the WS Aware Workstation Monitor or its power supply outside of the operating conditions listed in this user guide.To reduce the risks associated with hazardous voltage:• Use only the power supply provided by SCS and specified for the country of use.• Make sure that the WS Aware Workstation Monitor is properly grounded.• Do not simultaneously power the WS Aware Workstation Monitor with the power supply and theRJ45 data cable.• Do not plug the WS Aware Workstation Monitor into your 10/100BaseT Ethernet factory network!• Do not plug -3 versions into -5 interfaces and vice versa, this may cause irreversible damage to the WS Aware Workstation Monitor and FMS.• Do not use a longer screw to replace the supplied parts.• Use only a dry cloth when cleaning.CautionTo reduce the risks associated with environmental contamination:• Dispose of WS Aware Workstation Monitor and power supply in accordance with all applicable local and government regulationsNoticeTo reduce the risk of damage to components or assemblies being handled:• WS Aware Workstation Monitor must be checked periodically to verify each test mode is functioningcorrectly.• Ensure proper operation of WS Aware Workstation Monitor by performing operational verification test as required.• Always properly ground your tools and dissipative mats to known good ground before connecting WSAware Workstation Monitor for monitoring.。
【每周一问】如何配置AP的上线方式?如何配置AP的上线方式?在AP启动后,AP上线管理模块会根据配置来决定AP的上线类型,根据不同上线类型来获取AP IP、网关IP、AC IP。
当获取这些信息后发起CAPWAP建链过程。
当前AP支持三种方式,DHCP、Static及PPPoE,如何配置实现呢?AC作为DHCP为AP分配IP地址:AC上的配置如下1.#配置AC全局参数(运营商标识、ID、国家码)方便识别和管理。
[AC] wlan ac-global ac id 1 carrier id ctc[AC] wlan ac-global country-code cn#创建VLANIF接口,配置其IP地址作为数据转发的三层接口,使能DHCP服务功能。
Vlanif 100为AP分配IP地址,Vlanif 101为区域A的STA分配IP地址,Vlanif 102为区域B的STA分配IP地址。
[AC] dhcp enable[AC] interface vlanif 100[AC-Vlanif100] ip address 192.168.10.1 24[AC-Vlanif100] dhcp select interface[AC-Vlanif100] quit[AC] interface vlanif 101[AC-Vlanif101] ip address 192.168.1.1 24[AC-Vlanif101] dhcp select interface[AC-Vlanif101] quit[AC] interface vlanif 102[AC-Vlanif102] ip address 192.168.2.1 24[AC-Vlanif102] dhcp select interface[AC-Vlanif102] quit说明:AP需要获取一个IP地址才能与AC建立连接,可以从AC、BRAS或DHCP服务器获取IP地址。
产品手册6331二线制可编程变送器 安全栅 | 通讯接口 | 多功能 | 隔离器 | 数显表No. 6331V108-CN自此序列号始:2217922506 大特色产品满足您的一切需求凭借创新型专利技术,信号调节更加简单、智能。
产品组合由六大产品类组成,具备多种模拟量和数字量模块,涵盖上千种工业自动化应用。
所有产品都符合甚至高于行业的最高标准。
这可确保产品即便在最恶劣的环境条件下仍能可靠运行。
5 年产品保修期,让您使用更安心。
单品出色,组合无敌温度变送器和温度传感器系列产品,提供从温度测量点到系统控制一站式信号解决方案,从而在最大程度上保证信号的完整性。
仅需一套点对点解决方案,您就可以在任何环境中将工业过程中的温度信号转换为模拟量信号、总线信号或数字通讯信号。
该方案具备响应时间短,自动校准,传感器故障检测,低漂移和卓越 EMC 性能等诸多优点。
单品为多功能系列产品,可涵盖大量现场应用,可轻而易举按照您的现场标准进行配置。
此种单品可适用多种应用方式,既节省安装和培训时间,又大大简化库存备件管理。
该设备专为长期信号精度高、功耗低、抗电噪声优异、编程简单而设计。
我们提供经济实惠、使用方便、面向未来的通讯接口,以便您能够访问所安装的 PR 产品。
所有接口均可拆卸,并带有屏幕和按钮,可以显示过程值/诊断值和对参数进行配置。
产品特定功能包括通过 Modbus 和蓝牙进行通讯,以及使用我们的 PR 过程主管 (PPS) 应用程序进行远程访问,适用于 iOS和Android 等终端。
数显表系列以其灵活性和稳定性著称。
该设备系列几乎满足过程信号读数显示的所有需求,并具有通用的输入和供电能力。
无论哪种行业,无论环境条件何其苛刻,该设备均能实时测量过程值并提供用户友好型界面和值得信赖的继电器信号。
我们采用最严格的安全标准来检验产品,以期提供最安全的信号。
秉承创新精神,我们已经在 SIL 2 全面评估本质安全型接口方面取得了开创性成就,其既高效又经济,效果卓著,成效斐然。