37 零件计数器操作指导书
- 格式:doc
- 大小:68.00 KB
- 文档页数:4

MC37,40使用说明书目 录!. 规格和特点 (1)@. 零件安装和使用上的说明 (2)1. M C40联结杆的安装 (2)2. M C40联结杆空气阀门的调节 (2)3. 布屑吸入装置的组装 (3)4. 挠性软管的连接 (3)5. 吸引力的调节 (4)6. 积尘口袋的安装 (4)7. 空气配管 (5)#. MF专用电缆线的安装方法(SC-921的安装) (6)前言感谢您购买MF-7900-H22,23、MF-7900-E11用布屑积尘装置MC37、MC40。
此装置是脚踩踏板,利用空气的力量,吸引布屑积尘的装置。
适用于工场清洁化。
!. 规格和特点型号MC37MC40名称电磁阀气动式布屑积尘装置踏板联结杆气动开关式布屑积尘装置适用机种附带电气箱(SC-921),MF-7900-H22,23和MF-7900-E11MF-7900-H22,23和MF-7900-E11主要特点• 踩了踏板的同时空气动作,吸入布屑。
• 积尘部为口袋型,因此可以简单地清除掉布屑。
• 踩了踏板的同时空气动作,吸入布屑。
• 积尘部为口袋型,因此可以简单地清除掉布屑。
注意本使用说明书是有关MC37、MC40的说明书。
本产品安装到缝纫机后使用时,请事前阅读安装的缝纫机的使用说明书中的「有关安全的注意事项」,充分理解之后再使用。
另外,为了强调MC37、MC40,简化了缝纫机的示意图。
因此,安全装置的示意图中的一部分也被省略。
@. 零件安装和使用上的说明1. MC40联结杆的安装请注意联结杆的上下方向,在各个马达的拨杆A 上都用球节1的螺丝固定,在踏板的拨杆B 上用球节2的螺丝固定。
其长度请拧松联结杆固定螺丝3,进行调整。
2. MC40联结杆空气阀门的调节1) 空气阀门的位置,请拧松阀门架固定螺丝1进行调整。
标准位置是阀门销和铆钉头轻轻地接触的位置。
2) 起动缝纫机反应过快时,请分离阀门销和铆钉头进行调整。

自动计数机操作规程
《自动计数机操作规程》
一、操作人员必须通过专业的培训,了解自动计数机的基本原理和操作方法,才能进行操作。
二、操作前需检查自动计数机的各项设备是否完好,如有故障应及时通知维修人员处理。
三、操作人员必须穿戴相关防护用具,确保操作过程中的安全。
四、确认待计数物品的类型和数量,并在自动计数机中设置相应参数。
五、在操作过程中,严禁将手指或其他物品插入自动计数机内部,以免造成危险。
六、操作人员必须及时清理自动计数机内部的杂物和灰尘,保持设备的清洁卫生。
七、操作结束后,必须对自动计数机进行清洁和保养,确保设备的长期稳定运行。
八、禁止未经授权的人员私自操作自动计数机,确保设备的安全和正常运行。
九、在操作过程中,如发现任何异常现象或设备故障,应立即
停止操作并报告相关人员处理。
十、操作结束后,及时关闭自动计数机的电源,确保设备的安全和节能。
以上是关于自动计数机操作规程的基本要求,希望所有操作人员能够严格遵守,确保设备的安全和正常运行。

计数器的操作方法
计数器是用于计算和控制某个事件发生次数的工具。
其操作方法包括以下几个步骤:
1. 初始化计数器:将计数器的初始值设定为0或其他指定的值。
2. 增加计数器:每当事件发生时,将计数器的值加一。
可以通过执行递增操作或者直接将计数器的值加上指定的增量。
3. 减少计数器:如果需要减少计数器的值,可以执行递减操作或者将计数器的值减去指定的减量。
4. 重置计数器:如果需要重新开始计数,可以将计数器的值重置为初始值。
5. 获取计数器的值:可以随时获取计数器的当前值,用于监测事件发生的次数或进行其他计算。
6. 暂停和恢复计数器:在某些情况下,可能需要暂停或恢复计数器的计数。
可以通过暂停计数器来停止计数,然后再通过恢复计数器来继续计数。
7. 设置计数器的增量和减量:有时候需要设置计数器每次递增或递减的数量。
可以通过设置增量和减量来控制计数器的步进大小。
以上是计数器的一般操作方法,具体的实现可能因使用的计数器类型和所在的编程环境而有所不同。

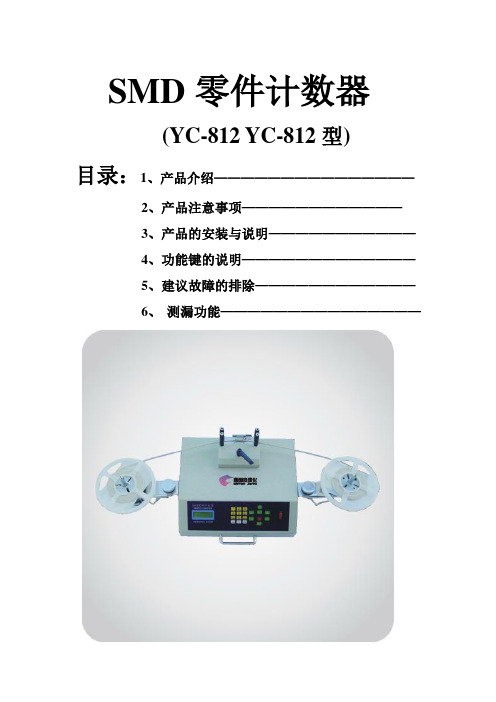
SMD零件计数器(YC-812 YC-812型)目录:1、产品介绍———————————————2、产品注意事项————————————3、产品的安装与说明———————————4、功能键的说明—————————————5、建议故障的排除————————————6、测漏功能———————————————第一章产品介绍The first chapter product introduction全自动SMD零件计数器,两种型号:普通零件计数器和测漏型零件计数器。
Completely automatic SMD components counter, two kind of models: Ordinary components counter and leak hunting components counter.一、产品原理Product principle1、普通零件计数器:采用光电传感原理,利用零件载带引导孔与零件的对应关系,通过专用处理芯片及大规模集成电路处理,实现零误差,精确测定SMD 零件计数量,可实现方便快捷的计数,是SMT物料管理的高效辅助设备。
Ordinary components counter: Uses the electro-optical sensing principle, carries using the components leads the pilot hole and the components corresponding relationships, through the special-purpose processing chip and large scale integrated circuit processing, realizes the zero error, the accurate determination SMD components counting quantity, may realize the convenience quick counting, is the SMT material management highly effective supporting facility.2、测漏型零件计数器:配备高速光纤,根据空料和实料光线强度对比原理,准确检知空料。

设备操作说明书
第 1 页 共2页
设备名称 SMD 零件计数器 设备功能 计数 文件编号 设备型号
厂 商
源尚
版 本
B0
一﹑计数说明﹕
1. 将计数器放置于平稳桌面。
2. 将电源线连接主机﹐并接AC220V 电源。
3. 将机台面板的POWER 电源开关打开﹐此时LCD 面板会发亮。
4. 将面料盘支架关节的定选钮逆时针转松﹐将面料盘支架展开成一字﹐再将固定旋钮顺时针转紧。
5. 按PITCH ﹐选择要计数的零件之间距﹕(如a.GST5009之产品REEL 带有4个小孔每个孔之间的中心距为4mm ﹐此数为行业标准﹐那么零件之间距为4*4=16mm ﹔b.24HST 系列产品REEL 带有6个小孔﹐每个孔之间中心距为4mm ﹐那么零件之间距为4*6=24mm ﹔c.GS5014之产品REEL 带有5个小孔﹐每个孔之间的中心距为4mm ﹐那么零件距为4*5=20mm)﹐此时PITCH 的数值会闪烁﹐再可按0~9键﹐直接输入PITCH 的尺寸﹐PITCH 键为选择下一参数。
6.选择到所需之PITCH 后﹐按ENTER 键确认。
7.将欲计数的零件装在左侧料盘支架上﹐右侧放置一空的相应REEL 带。
8.拉出REEL 带﹐使小孔朝下﹐放入中央部分的计数齿轮上﹐前端需固定于空的REEL 带之上。
9.以手动方式将REEL 带向右侧方向转动﹐将第一个产品第一个孔位与最后一个空装的最后一个孔位之中心部位对准计数器黑色中央线.
核 准
审 核 制 作 日 期
料盘支架
料盘支架
光纤
计数齿轮
LCD
按键面板
设备操作说明书
第2页共2页。

SMT/SMD Components Counter Functions &OperatingInstructionProduct Introduction:-Matters Need AttentionFunction Keys And Operation Procedures InstructionsHow To Connect The Printer Operation(selective use)Simple Trouble ShootingProduct IntroductionPrinciple of the product:-The SMD counter adopts the principle of photoelectric sensing,and uses the corresponding relation between the guide hole and the part,through the special-purpose processing chip and the large-scale centralized circuit processing,realizes the zero error,accurately measures the number of SMD parts,can realize the convenient and quick count,is the high efficiency auxiliary equipment of SMT material management.Product features:-Completely automatic way computation components quantity,facilitates a material,sends the material work simplicity of operator,has a special inventive mind against material belt will fall off the design to reduce to the material belt’s injury to the smallest,forward and reverse all may count,but preinstall quantity,will calculate quantity precisely,zero error.May install the scanning gun and the bar code printer,facilitates the management work.Product specifications:-Power supply: AC220V,/A100V 50/60 HZ, 25WCounting range: -99999- 99999PCSOutlook size: L470*W300*H180mmWeight:10 kgProduct applicationThe SMD material belt type components are all suitableDiameter of belt wheel:Any size is all suitablePITCH: 1,2,4,8,10,12,16,24,32,44,56 mmWIDTH: 4,6,8,12,16,24,32,44,56mm (note: smaller or wider distance can be developed or customized according to demand)Product construction:-Two kind of models1-Ordinary components counter2-Leak hunting components counter1.Charging mirror2.Tray3.Gear/movable blanks4.Wrench5.Rocket head6.Movable arm7.Display8.Power switch9.keys10.Handle11.Fiber optic amplifier12.Optical fiber buttMatters need attention1.After unpacking, please check if all the attachments are complete.2.Please read the operation manual carefully before using and keep it properly.3.Check whether the voltage specification is consistent with that ofmunicipal power.4Please make sure to connect the ground wire to ensure the safety of the person and parts.Function Keys And Operation Procedures Instructions1、功能说明1)PRINT”Operation method: press this button, the number of parts and quantities can be counted by the barcode printer.2)“SET”If "00000" is displayed at the lower left corner of the display screen, you can directly press the number key to enter the number of parts to be calculated: press the "SET" key again to change to manual mode, and "****" is displayed at the lower left corner of the display screen. Manual and automatic modes are switched through this key. (note: the automatic mode is the preset value before the disk material, and the machine will stop automatically when it rotates to the set value. In the manual mode, the machine will stop only when the "stop/reset" key is pressed manually or all materials are finished.)Operation method: after pressing this button, the PITCH value of the display screen will flash, then input the spacing of materials, and then press the "ENTER" button to confirm. If no button is pressed for 5 seconds, the memory will be automatically memorized, and the sound of a drip will be returned to standby state.4)“正传Positive direction/RIGHT”Operation method: press this button to start counting parts in the positive direction, that is, the number shows a positive number or increases. When printing, press this button to move the cursor to the right to set the parameters.5)“The opposite direction/LEFT”Operation method: press this button to start counting parts in the opposite direction, that is, the number displays negative number or decreases. When printing, press this button to move the cursor to the left to set the parameters.6)“STOP/RESET”Operation method:-1.In the state of counting or returning, press this button to stop counting or returning.2.In standby mode, press this button for more than two seconds to clear the COUNT value.3.Press this button when printing the interface to return to the main interface.4.Press this button to stop and return to the standby screen during self-test.Operation method: in standby mode, press this button for 1 second, and the machine conducts self-check test; In automatic mode, press this key to clear the set number; Set the toggle button for the print interface parameters when printing.8)“ LOSS”Operation method: press this button to turn on or off the function of Leak hunting9)“ TIME”Operation method: this button is the switching key of motor speed. Press this button, and the LCD screen will switch between H(high speed), M (medium speed) and L(low speed).10)“ENTER”Operation method: when setting parameters in the print interface, press this button to save the parameters set.2、操作流程Operation process1) connect the power cord to the host and connect the AC220V power supply2) turn on the POWER switch of the machine panel, and the LCD panel will shine3) press PITCH to set the spacing of parts to be counted and press "ENTER". Place the parts to count on the left side tray.4) manually pull out the material belt and clamp it between the material plate and counting gear, and align the intermediate hole of the first part and blank space to the middle line of the material plate.5) press the "stop/reset" button for 2 seconds to return the number to zero. Note: when pulling the material belt, the counting gear will rotate and count.6) press the "setting" button to switch to manual and automatic mode. If you choose automatic mode, you must input the quantity you want to count. Otherwise, press "forward" and the motor will not rotate.7) pull the material belt by hand and wind it to the empty material plate. Press "forward /RIGHT" to count.8) the motor will stop when the quantity arrives. Due to the inertia principle, the number of counts may be more or less than the set value of about 1, which can be manually rotated to the LCD display set value in the direction of the material disk, that is, the number of parts.9) after counting, press "reverse /LEFT" tape and then roll it back to the original LEFT panel, and then stop rotating.三、贴片计数器了解打印机操作说明(选用)How To Connect The Printer Operation(selective use)1、Inspecting device1) make sure the parts counter and BAR code host are connected2) make sure the bar code printer paper is installed correctly.2、Debugging device1) start the part counter power switch2) start the power switch of the host of BAR CODE: power indicator light and ready indicator light are on. At this time, press the FEED key of the host of BAR CODE (automatic alignment button) to make the printing paper automatic alignment. (P.S: if the POWER light is flashing, which means the machine is broken, please restart the POWER switch or FEED key and execute3、PrintPress "PRINT" on the main interface to display the PRINT interface, and the first line of the word interface shows: company name (self-setting); The second line shows the print operation.1) after entering the print interface, there will be a blinking cursor on the third line. At the cursor point again, the content can be edited and modified.2) in the print interface, press LEFT/ reverse to move the cursor to the LEFT, and press RIGHT/ forward to move the cursor to the RIGHT.3) enter Numbers and letters directly at the cursor. If you press a button in the 0--9 key continuously for a short time, you can switch between Numbers and letters on the key. Where the 1 key is used to switch special symbols, letter case and so on.4) after editing the lines, the cursor stays at the line. Press ENTER to display OK on the left side of the line and save the contents of the line. (note: save the editing lines must be the cursor in the line location and then press the ENTER key to deposit, for example: if you want to save the first and second lines, must be the cursor at the first line by pressing the ENTER key, can keep the contents of the first line, the cursor in the second row content save xiali, not at the same time save)5) SELECT to enter the interface of printing parameters on the print interface, where XYWH:XXX, XXX, XXX are displayed respectively to set the position X, Y, width and height of the printed barcode.6) press the stop/reset button to return to the main page7) press PRINT again to PRINT the contents of the PRINT interfaceAdditional attached: the scanner will display on the printing interface after scanning the bar code, press the print button to print.四、简易故障排除 Simple trouble shooting故障状况Fault conditions排除方法Elimination methods打开电源后LCD 无任何显示,无蜂鸣器响声After power on the LCD without any display, no buzzer sound电源线脱落或保险丝松动,请检查 Please check the power cord or loose fuse打开电源后LCD 无任何显示,有蜂鸣器响声The LCD has no display when the power is turned on LCD 屏线松动或损坏,请检查或联系销售商更换 LCD screen line is loose or damaged, please check or contact the seller for replacementLCD 正常显示,但按正/反转启动无效LCD display is normal, butpositive/reverse startup is invalid1. 计数数量大于或等于设定数量或盘料前选用自动模式未设定数,请参阅说明说操作须知2. 电机信号线或电源线接触不良1. The number of counts is greater than or equal to the set number or the number is not set in the automatic mode before feeding. Please refer to the instructions for operation2. Bad contact between motor signal line or power line。
1、产品概述 1.1 主要用途和适用范围SMD料带式零件皆可适用,计数数量为1~50000pcs1.2 主要规格和技术参数 计数范围 (Counter Range)(-99999~99999)噪音等级(Noise rank)〈65分贝重量(Weight)10kg外型尺寸 (Dimension)L*W*H=771*308*196电源(Power)AC220V 50Hz/AC110V 60Hz1.3产品特点:a、全自动零件记数,操作简便,易学易用;b、SMT料带式零件皆可计数,适用范围广;d、料带防脱锁定装置;c、正反皆可计数,可预设数量;2.1 产品结构:驱动部分:计数机构部分:本产品主要用于清点元件的数量,范围主要在电子元件加工包装过程、仓储清点以及元件贴片前等需清点的元件本机采用绘图型LCD显示屏,体积小、重量轻、携带方便; 料带宽度(WIDTH)8、12、16、24、32、44、56(mm)料带两元件间距(PITCH )2、4、8、12、16、20、24、28、32、36、40、44、48、52、56(mm)c、有预备电源,在停电或无市电关态下皆可计数;f、可加装条码机,方便管理作业 2 产品结构和工作原理;控制面板:3、产品的搬运、安放和调试 3.1搬运:3.2 安放:3.3调试:4.1操作步骤:5、输入欲计数数量。
6、按下“开始”键即可计数。
7、当计数数量到达时,马达会停止。
4、把要清点的载带装到托盘上,然后牵引载带到另一收带轮上。
8、因惯性原理,计数数量会多余设定记数值一些,用手动方式回转到所需数量,此时LCD面板的COUNT显示数值,即是零件数量。
9、若需打印,先把条码机连接到机器所配置的专用接口,然后按下列印按钮就可以打印条码。
本产品重量和体积都比较小,且折叠臂定位机构、记数机构等部分也直接或间接地固定在机台上,折叠臂为活动部分,搬运时须折叠须将本机置于平整的工作面上,以避免设在运行时,因不平衡因素影响正常的记数工作本产品出厂前已经过合格试验,用户不需过多调整即可方便地使用本设备,若要检测不同类型的料带,只需调整轨道即可实现检测的1、将电源线连接主机,并接上AC220V 50Hz/ AC110V 60Hz 的电源2、将机台面板的POWER电源开关切为ON,此时LCD面板会发亮。
第1篇一、概述自动计数机是一种用于自动统计物品数量的设备,广泛应用于生产、物流、零售等行业。
为确保操作人员正确、安全地使用自动计数机,特制定本操作规程。
二、操作前的准备1. 检查设备外观:确保计数机无损坏,各部件齐全,电源线、数据线等连接正常。
2. 确认电源电压:确保设备接入的电源电压符合设备要求。
3. 清理工作区域:保持工作区域整洁,避免杂物影响计数机运行。
三、操作步骤1. 开机:将计数机电源线插入电源插座,按下开机按钮,待设备启动完毕。
2. 调整计数模式:根据计数需求,选择合适的计数模式(如计数、累加、减去等)。
3. 设定计数范围:根据物品数量,设定计数范围,确保计数准确。
4. 放置物品:将待计数的物品放置在计数机上,确保物品平稳、整齐。
5. 开始计数:按下开始按钮,计数机开始自动计数,操作人员观察计数结果。
6. 检查计数结果:在计数过程中,操作人员需随时检查计数结果,确保准确无误。
7. 结束计数:完成计数后,按下停止按钮,计数机停止工作。
8. 数据导出:如需将计数数据导出,连接数据线,选择导出格式,将数据导出到电脑或其他设备。
四、操作注意事项1. 操作人员需熟悉设备操作流程,确保正确操作。
2. 严禁在设备运行过程中添加、移除物品,以免影响计数准确性和设备安全。
3. 操作过程中,如发现设备异常,立即停机检查,待问题解决后再继续操作。
4. 严禁私自拆卸、改装设备,如需维修,请联系专业人员进行。
5. 操作结束后,关闭设备电源,清理工作区域,保持设备整洁。
五、维护与保养1. 定期检查设备外观,确保无损坏。
2. 保持计数机内部清洁,定期清理计数机内部积尘。
3. 定期检查电源线、数据线等连接线,确保连接牢固。
4. 如设备出现故障,请及时联系专业人员进行维修。
六、安全注意事项1. 操作人员需佩戴防护手套、眼镜等安全防护用品。
2. 操作过程中,注意保持设备周围安全距离,避免意外伤害。
3. 严禁操作人员单独操作设备,确保有其他人员在场监督。
設備名稱 SMD 零件計數器 設備功能 計數 文件編號 設備型號
廠 商
版 本
一﹑計數說明﹕
1. 將計數器放置於平穩桌面。
2. 將電源線連接主機﹐並接AC220V 電源。
3. 將機臺面板的POWER 電源開關打開﹐此時LCD 面板會發亮。
4. 將面料盤支架關節的定選鈕逆時針轉松﹐將面料盤支架展開成一字﹐再將固定旋鈕順時針轉緊。
5. 按PITCH ﹐選擇要計數的零件之間距﹕(如a.GST5009之產品REEL 帶有4個小孔每個孔之間的中心距為4mm ﹐此數為行業標準﹐那麼零件之間距為4*4=16mm ﹔b.24HST 系列產品REEL 帶有6個小孔﹐每個孔之間中心距為4mm ﹐那麼零件之間距為4*6=24mm ﹔c.GS5014之產品REEL 帶有5個小孔﹐每個孔之間的中心距為4mm ﹐那麼零件距為4*5=20mm)﹐此時PITCH 的數值會閃爍﹐再可按0~9鍵﹐直接輸入PITCH 的尺寸﹐PITCH 鍵為選擇下一參數。
6.選擇到所需之PITCH 後﹐按ENTER 鍵確認。
核 准
審 核 制 作 日 期
料盤支架
料盤支架
光纖
計數齒輪
LCD
按鍵面板。