WS-6906寻星仪说明书
- 格式:doc
- 大小:563.50 KB
- 文档页数:4


数字卫星寻星仪使用说明书尊敬的顾客:感谢您选择我们的系列数字卫星寻星仪。
如果您是初次使用本产品的用户请仔细阅读本使用手册,并妥善保管以便日后用作参考。
本手册中所载技术规格和操作方法可能改变,恕不另行通告。
第一次使用之前仪器要充满电。
(建议第一次充电4小时,但不要超过6小时)警告:本产品采用锂聚合物电池为其供电,请不要将其置入高温、高湿环境,更不要将其至于火中,对于由于不当操作行为造成的损失,本公司不担负责任。
请不要擅自拆卸本仪器的任何部分,机身内没有用户可维修的部件,需要维修时请联系授权的维修人员,或邮寄给我们。
机器使用时请首先输入使用地经纬度,输入方法见操作说明。
目录简介...............................................4注意事项...........................................4电池的注意事项.....................................5充电器的注意事项...................................5清洁和维护.........................................6免责声明...........................................6功能介绍...........................................7一、屏幕显示内容介绍................................7(1)、角度计算区....................................7(2)、参数设置区....................................8(3)、自定义频道表和当地卫星频道表序号区............8(4)、经纬度设置和功能显示区........................9(5)、测量区.......................................9二、面板介绍.....................................10三、仪器首次使用.................................111、利用OUTPUT端口供电...........................122、开机和关机....................................133、输入当前坐标..................................13四、手动寻星.....................................151、输入参数......................................152、测量信号......................................163、搜索信号......................................16五、利用内置当地频道表寻星.......................18六、利用自定义频道表寻星.........................18七、将当地频道表某个参数调入到自定义频道表内.....19八、修改当地频道表和自定义频道表参数并保存.......19九、删除自定义频道表参数内容.....................20十、恢复出厂设置.................................20十一、技术参数...................................20十二、.随机附件..................................21十三、中国城市坐标...............................22简介:我公司数字卫星寻星仪,能够帮助您方便和快捷地完成卫星天线安装定位,该仪器信号响应速度快,弱信号时也能够显示S/N比,判断信号是否存在。

一.接收天线面对星说明:1.首先通过计算或查找资料确定天线的仰角和方位角;2.确认天线面正确安装,并且把LNB和馈源连接完好。
3.旋调仰角调节杆两个M20螺母改变天线仰角,可以用量角仪或罗盘来帮助调整仰角(先把量角仪设置到已查好的仰角值,再把量角仪贴到天线面盘背部的适宜位置。
)4.仰角调好后,松开方位套筒上六只M12×25螺栓,先手动初调,用手旋转天线面同时看寻星仪的S,Q值以找到星的大概位置。
然后用管夹上的M12的螺栓进行微调,反复调仰角和方位角,将信号调至最佳(S,Q值最大,一般Q可达90%以上)。
5.信号到最佳后,拧紧天线所有调整用的紧固件。
(注意此时要看着寻星仪,保证S,Q的值不变小)二.简单寻星仪操作说明POWER键开机以后,直接点击LOAD,就可以看到已经设置好的CMACast参数,然后选择一个点击F4,就可以开始寻星了,在寻星的过程中,按照S和Q的值调整天线面的仰角和方位角使S和Q的值达到最高。
(C/S键可以关闭/打开声音)三.寻星仪显示参数:Sat:卫星名称S:信号强度Q:信号质量BER:误码率C/N:载噪比附表:可用卫星资源参数:亚洲4号卫星C波段资源本振频率卫星下行频率符码率极化方式供电电压5150M 4038M 6666 水平18V四.详细寻星仪使用说明:1)首先点击F1(CONFIG),进入设置界面开始设置。
:设置卫星名称b.Lo:设置LNB的本振频率(默认单位是Mhz,本振频率输入范围是0,4500-5500,9500-11500)c.F:设置卫星下行频率(默认单位是Mhz)d.SR:设置符码率(默认单位是Mb/s)e.设置LNB供电方式:可以在0V,13V(垂直极化,右旋极化),18V(水平极化,左旋极化)之间切换f.L:设置卫星方位经度(一般可以不用设置)g.22KHz 状态开关(可设置“ON”或“OFF”)h.Mode模式选择(Auto,DVB,DTV三种模式可选)i.FEC参数选择(Auto,1/2,2/3,3/4,5/6,6/7,7/8七种参数可选)2)设置好参数后可点击C/S键进行参数存储,点击LOAD或F2键可以调出已经存储过的设置;也可以直接点击F4(SIGNAL)立即开始寻星。

几款便携式卫星寻星仪的特点与性能数字卫星寻星仪是一种用于卫星接收天线安装与调试的专用电子仪器,随着数字卫星电视的日趋普及,各类型卫星寻星仪的研制也得到相应发展。
从而极大地方便了众多卫视迷们对卫星接收天线的安装与调试。
数字卫星寻星仪可以在设定卫星频率及参数的同时。
非常准确又很快捷的完成卫星接收天线的安装定位工作,从而大大缩短了追星族们的调星时间。
所以说卫星星寻仪以其特有的现代科技手段和方便快捷的使用功能,深受广大卫视爱好者的青睐。
1.KPT-966卫星寻星仪这是一款调星、监控两用卫星寻星仪,该机采用手持式结构。
体积小重量轻,携带使用相当方便,是安装调试卫星电视天线的专用测试工具,具备卫星电视信号和图像显示。
广播电视监控功能,同时机内设置有自动盲扫识别卫星及其参数功能。
该寻星仪采用3.5英寸TFT液晶显示屏,图像及信号条同步显示,LED低功耗背光,内置大容量高性能锂电池,其有效寻星工作时间可达到3~4个小时。
该机主要功能配置有:AV输出和输入功能,卫星接收图像和信号质量显示,对星指导和卫星寻星管理,内置高频头保护电路,外接线路防短路报警提示,13V、18V、22K信号锁定指示灯面板同步显示。
该寻星仪主要技术性能参数如下:【显示屏尺寸】73mmx51mm;【像数】320x240;【LNB输入】F型母头;【输入阻抗】75Ω(F型);【频率范围】950MHz。
2150MHz;【信号电平】一65dBm一25dBm;【LNB供电】13/18Vmax400mA;【LNB开关控制】22kHz;【门限值】4.1dB;【解调芯片】QPSK(SCPC、MCPC兼容);【符号率】2Mbps一45Mbps;【系统处理器】32bit processor(200MHz)、SDRAM(16Mbyte);【FLASH】4Mbyte;【视频】 MPEG-2 MainLevel。
【速率】up to 15Mbps;【分辨率】720x576、720x480;【音频模式】单声道;【采样频率】32、44.1 and48kHz ;【锂电池】DC 11.1V2200mAh.【输人电压】DC12.5V1.2A;【整机尺寸】110mmx170mmx38mm【重量】390g。
Oxygen sensor溶氧电极TriOxmatic®690TriOxmatic®700Flow-through armatureD702流通式护套目录标准配备包括: (16)保养及备品 (16)构造 (3)T RI O XMATIC®690/700 构造 (3)操作..............................................................................................................................3 推荐附件.. (17)流通式护套D 702 (17)装配 (18)流通组件构造 (18)测试位置 (18)校正位置 (18)技术参数 (19)准备工作 (3)推荐应用 (3)校正 (3)测试 (3)外部清洗电极及校正 (4)校正评估:检验是否需要清洗及校正。
(4)清洗校正建议(如用于市政污水) (4)贮存 (6)保养 (6)更换电解液及盖式薄膜 (6)清洗电极 (8)清洗金工作电极 (9)清洗银计数电极 (9)在烧杯中清洗计数电极 (9)在清洗帽RA600中清洗计数电极。
(10)填充电解液 (13)电极零点检验 (14)废置处理: (14)故障检索 (14)技术参数 (15)标准配备/备品 (16)构造操作TriOxmatic ® 690/700 构造准备工作把电极连上主机。
取下灰色保护帽。
开机极化,约60 分钟。
校正精确测试建议第二天再校正一次,彻夜极化电极。
推荐应用河水,湖水,污水,污水厂活性污泥池。
校正详阅仪器操作手册。
测试1.保护帽2.保护头 注意必须达到最小流速要求,如: 水的流速要足够大。
3.盖式薄膜4.电极杆 在水中来回移动电极,动作要慢。
活性污泥中要有足够的湍流。
5.缩头6.保护环7. 计数电极(银阳极) 8. 工作电极(金阴极) 9. 隔离带10. 参比电极(溴化银)若测试值在误差容许范围内,就不必要清洗校正。
一.接收天线面对星说明:1.首先通过计算或查找资料确定天线的仰角和方位角;2.确认天线面正确安装,并且把LNB和馈源连接完好。
3.旋调仰角调节杆两个M20螺母改变天线仰角,可以用量角仪或罗盘来帮助调整仰角(先把量角仪设置到已查好的仰角值,再把量角仪贴到天线面盘背部的适宜位置。
)4.仰角调好后,松开方位套筒上六只M12×25螺栓,先手动初调,用手旋转天线面同时看寻星仪的S,Q值以找到星的大概位置。
然后用管夹上的M12的螺栓进行微调,反复调仰角和方位角,将信号调至最佳(S,Q值最大,一般Q可达90%以上)。
5.信号到最佳后,拧紧天线所有调整用的紧固件。
(注意此时要看着寻星仪,保证S,Q的值不变小)二.简单寻星仪操作说明POWER键开机以后,直接点击LOAD,就可以看到已经设置好的CMACast参数,然后选择一个点击F4,就可以开始寻星了,在寻星的过程中,按照S和Q的值调整天线面的仰角和方位角使S和Q的值达到最高。
(C/S键可以关闭/打开声音)三.寻星仪显示参数:Sat:卫星名称S:信号强度Q:信号质量BER:误码率C/N:载噪比附表:可用卫星资源参数:亚洲4号卫星C波段资源本振频率卫星下行频率符码率极化方式供电电压5150M 4038M 6666 水平18V四.详细寻星仪使用说明:1)首先点击F1(CONFIG),进入设置界面开始设置。
:设置卫星名称b.Lo:设置LNB的本振频率(默认单位是Mhz,本振频率输入范围是0,4500-5500,9500-11500)c.F:设置卫星下行频率(默认单位是Mhz)d.SR:设置符码率(默认单位是Mb/s)e.设置LNB供电方式:可以在0V,13V(垂直极化,右旋极化),18V(水平极化,左旋极化)之间切换f.L:设置卫星方位经度(一般可以不用设置)g.22KHz 状态开关(可设置“ON”或“OFF”)h.Mode模式选择(Auto,DVB,DTV三种模式可选)i.FEC参数选择(Auto,1/2,2/3,3/4,5/6,6/7,7/8七种参数可选)2)设置好参数后可点击C/S键进行参数存储,点击LOAD或F2键可以调出已经存储过的设置;也可以直接点击F4(SIGNAL)立即开始寻星。
digiital satellite meterUse the keys to move the cursor up or down in the e the OK key to confirms a selection.To escape the menu system at anytime,press EXIT key.If there are some programs stroed in the receiver,user can press OK enter the menu.You can manage the stored channels,TV and radio channels, deleting,shorting,locking,skipping,them very easily. Access to the editing channels menu,through the main menu:1. Press MENU to enter the main menu.2. The option Channel will be highlighted.3. Select TV Channel to manege the TV channels,or RadioTo delete a channel:1. In the edition channels screen, press "1" in the Keypad.2. Locate the channel you want to delete, and press OK,The channel will be marked with the symbol "X".3. Repeat step 2 with those channels you want to delete.4. To confirm the deletion, press EXIT to exit the edition channels menu.You will see a confirmation message.5. Pressing the arrow keys select option "OK" and press OK to confirm the deletion, or select cancel and press OK to cancel.1. In the edition channels menu, press "2" in the Keypad.2. Pressing the arrow keys, select the channel you want to move and press OK. You will see the channels marked with3. Pressing the arrow keys, locate the point you want to put the selected channel and press OK.4. Repeat steps 2 and 3 for those channels you want to move. To add channels to the favorite lists:digital satellite meter1. In the edition channels screen,Locat the channel you want to edit and press "4" in the Keypad.2. You will notice the sub-menu in screen.3. You can press the arrow keys to select and use the numeric keys to input the value of parameter.4. Select save to confirm them,otherwise select EXIT to to 1. In the edition channels screen,press "5" in the Keypad.2. All channels will be marked with the symbol "X"3. To confirm the deletion,press EXIT to exit the edition channels menu. You will see a confirmation message.4. Pressing the arrow keys select option "OK" and press OK to confirm the deletion,or select cancel and press OK toTo change satellitedigital satellite meterSatellite: Press OK to display the satellite list.Select the satellite you want to check with pressing .You can also pressto select the satellite.TP: Transponder,select the desired one from the pre-program options. TP Frequency: Input the value by using the numeric keys. Symbol rate: Symbol rate of the current transponder Polarization: Vertical or Horizontal polarization.Search: select the desired mode for searching.(1). Satellite:Press OK to display the satellite list.Selet the satellite you want to check with pressing .You can also press to select the satellite.(2). LNB Type: Select proper LNB type using the arrow keys according to your physical LNB type.(3). LNB Freq(1,2): Enter the proper LNB frequency referring to your LNB using the numeric keys on the Keypad. (4). LNB Power: Select the desired option,If your STB is connected to another receiver through LOOP THROUGH support ,you should check which receiver is connected directly to the LNB.In case the other receiver is directly connected to the LNB, the select OFF.(5). 22K: 22KHz control is automatically set for each LNB alternative.If "universal" is selected,22KHz control should be (6). DiSEqC: Select the port number to get the RF signal from the LNB ,which is connected, to DiSEqC switching box.(7). Positioner: Satellite position. If your antenna is potitioned incorrectly,you will not receiver signal from the satellite.SoSatellite: Select the desired satellite. TP: Select the desired transponder.Position No.&Save: Select the position No. or null.Limit setup: Setting of limits for the antenna. Movement: The satellite can now be turned into the desired direction using the arrow buttons.Continuous Move: The satellite can be continuous moved to the desired direction.Recalculation: Press OK to recalculate.Go to Reference: A dtarting point for the satellite search function can be selected by pressing the OK button.Add TP: Add a new transponder for the current satellite. Delete TP: Delete the current transponder.1. Press OK to enter the Auto Scan menu.2. Press OK to deploy the satellite list. Select the satellite you want to scan with pressing ,The satellite will be marked with the symbol "X".You can also press to select the satellite.3. Select the desired mode for searching and then press OK to start search channel automaticly.4. You can also enter the Edit satellite to reset the current(1). Satellite: Press OK to enter the submenu, and rename the name of the new satellite.Press MENU to exit this menu.(2). LNB Type: Select proper LNB type using the arrow keys according to your physical LNB type.(3). LNB Freq(1,2): Enter the proper LNB frequency referring to oyur LNB using the numeric keys on the Keypad. (4). LNB Power: Select the desired option. If oyur STB is connected to another rceiver through LOOP THROUGH suppor ,you shoule check which receiver is connected directly to the LNB. In case the other receiver is directly connected to the LNB,the select OFF.(5). 22K: 22KHzcontrol is automatically set for each LNB alternative.If "universal" is connected directly to the LNB.In case the other receiver is directly connected to the LNB,the (6). DiSEqC: Select the port number to get the RF signal from the LNB, which is connected, to DiSEqC switching box.(1). Satellite: Press OK to display the satellite list.Select the satellite you want to check with pressing . You can also press to select the satellite.(2). LNB Type: Select proper LNB type using the arrow keys according to your physical LNB type.(3). LNB Freq(1,2): Enter the proper LNB frequency referring to your LNB using the numeric keys on the Keypad. (4). LNB Power: Select the desired option.If your STB is connected to another receiver through LOOP THROUGH support, you should check which receiver is connected directly to the LNB.In case the other receiver is drectly connected to the lNB, then select OFF.(5). 22K: 22KHz control is automatically set for each LNB alternative.If "universal" is selected, 22KHz control should (6). DiSEqC: Select the port number to get the RF signal from the LNB, which is connected, to V swiching box. (7). Positioner: To set satellite position.1. Press OK to enter the Delete Satellite menu.2. Locate the satellite you want to delete, and press OK.The satellite will be marked with the symbol "X".3. Repeat step 2 with those satellite you want to delete.4. To confirm the deletion,press EXIT to exit the edition satellite menu.You will see a confirmation message.5. Pressing the arrow keys select option "OK" and press OK to confirm the deletion, or select Cancel and press OK to 3.2 TV SystemYou can set the TV type by pressing the arrow keys. If the source program is PAL, TV set PAL,source program is NTSC,3.4 OSD SettingMenu Color: Allows you to select the desired color for menu. Transparence: You can adjist the transparency level by using the arrow keys.From 0% to 80%.This function allows you to lock the channel with a password in order to prevent children from accessing the channel. You can also protect your installed data and information using the Install Lock.If the STB Panel Lock item is set to OFF, the keys of the front panel is invalidation.The default password is 0000.When the correct password is entered, the selected menu opens automatically.4.1 InformationYou can get the information of the current channel from here.digital satellite meter4.2 Satellite Guide1. Local Longitude:Enter the correct value of local longitude.2. Local Latitude: Enter the correct value of local latitude.3. Satellite Longitude: Enter the longitude of the current4. Start: Press OK. The orientation and elevation of the antenna will be display on the screen.This option allows you to restore the parameters to the original state. Be careful when you use this option, because you can 4.4 Software UpgradeBy this function,you can upgrade software via RS-232 serial port. Upgrade Mode: Select the desired upgrade mode from code,logo,programe list and all.。
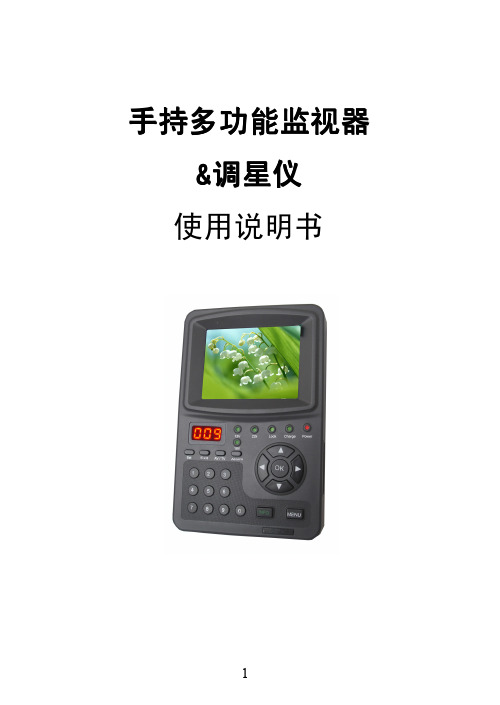
使用说明书一.面板说明
1.工作状态指示灯,
⑴.Power 灯
工作状态—开机红灯亮,电池低电红灯闪烁,关机红灯灭。
充电状态—充电绿灯亮,充饱红灯亮。
⑵.Lock灯:灯亮表示机器处于信号锁定状态。
⑶. 13V\18V灯:灯亮表示LNB的供电电压。
2.开关机键:长按超过2秒,执行开机或者关机。
3.数字键:0~9。
4.导航键:4个方向键和确认键。
►:音量增加和光标右移键。
◄:音量减小和光标左移键
▲:频道增加和光标上移键
▼:频道增加和光标下移键。
OK:参数确认键。
5.F1:屏显开关键。
6.F2:强制关机键。
开机状态下,当按开关机键不能关机时,长按此键2秒钟,强制关机。
7.PGUP:信号锁定后提示音开关。
8.PGDW:无定义。
9.BACK:返回上一次节目。
10.PAUSE:暂停键。
11.MUTE:静音键。
12.SCAN:自动搜索卫星信号。
13.INFO:显示节目信息。
14.SAT:电视、广播切换。
15.MENU:菜单键。
16.EXIT:退出键。
17.电源开关:若长时间不使用机器,建议将开关设置OFF。
18.直流电源/充电输入插孔。
19.USB升级口。
20..新增功能:寻星仪侧面两个功能接口[ A V输入(上)声音输出(下)]
二.调星指南
2.1调星操作
在节目表中选择要接收的节目,进入主菜单选择频道信息进入该菜单,也可按快捷键INFO进入,或在主菜单选节目设置进入增加节目菜单,设置好各项参数,屏幕下方显示信号强度和信号质量,调整天线方位角及仰角,使信号质量长度条(数值)最大,这时天线已经对准即可正常接收卫星信号.该机具有锁定信号提示音功能,方便在强光下或远距离调星,按一下PGUP键开启提示音,当接收到信号时,会有声音提示您,此时只是说明天线已经对准卫星,但不一定是最佳位置,还需要根据信号质量进行微调,使之处于最佳位置.
2.2自动搜索
按快捷键SCAN进入自动搜索菜单,按◄►键移动光标,按数字键输入本振频率,也可以用▲▼键修改数字,修改搜索模式、22K、DiSEqC参数,按OK键全频段自动搜索卫星节目。
三.操作指南
3.1电视节目表
1.按▲▼键可上下移动光标选择节目,右侧预览小窗口播放当前光标所在频道的节目。
2.按◄►键可以在节目列表中实现翻页功能。
3.按OK、MENU、EXIT键进入全屏播放状态。
3.2广播节目表
1.按▲▼键可上下移动光标选择节目。
2.按◄►键可以在节目列表中实现翻页功能。
3.按OK、MENU、EXIT键进入播放状态。
3.3节目设置
1.增加节目
输入本振频率、下行频率、符号率、极化方式、22K、DiSEqC、模式等参数,按OK键搜索节目。
⑴按◄►键移动光标。
⑵按数字键输入本振频率、下行频率、符号率,也可以用▲▼键修改数字。
⑶按▲▼键修改极化方式、22K、DiSEqC、模式。
⑷按OK键搜索节目。
⑸按MENU、EXIT键退出。
2.修改本振频率
⑴按◄►键移动光标。
⑵按数字键输入本振频率,也可以用▲▼键修改数字。
⑶按OK键完成修改。
3.4编辑节目
1.删除单个节目
⑴进入删除单个节目菜单,按▲▼键移动光标找到要删除的节目,按OK键打上删除标记,再次按OK键确认删除。
⑵按◄►键翻页。
⑶按MENU、EXIT键退出。
2.删除所有节目
⑴进入删除所有节目菜单,选择确定删除所有节目。
⑵选择取消不进行删除操作.
3.设置喜爱节目
⑴进入设置喜爱节目菜单,按▲▼键移动光标找到要喜爱的节目,按OK键打上喜爱标记,再次按OK键取消喜爱标记。
⑵按◄►键翻页。
⑶按MENU、EXIT键退出。
4.移动节目
⑴进入设置移动节目菜单,按▲▼键移动光标找到要移动的节目,按OK键打上移动标记.
⑵按▲▼键移动节目,再次按OK键确认移动.
⑵按◄►键翻页。
⑶按MENU、EXIT键退出。
3.5频道信息
进入频道信息菜单,显示该频道的相关信息.
3.6语言
⑴进入语言菜单,按▲▼键移动光标,按OK键选择一种语言.
⑵按MENU、EXIT键退出。
3.7系统设置
1.电视制式
⑴进入电视制式菜单,按◄►键修改参数.
⑵按MENU、EXIT键退出。
2.恢复默认设置
⑴进入恢复默认设置菜单,选择确定恢复出厂设置。
⑵选择取消不进行恢复出厂设置操作.
3.对星指导
⑴进入对星指导菜单,按◄►键移动光标.
⑵按数字键输入本地经纬度、卫星经度,也可以用▲▼键修改数字。
⑶按确认键计算天线方位角和仰角。
⑷按MENU、EXIT键退出。
4.软件升级
⑴进入软件升级菜单,按◄►键选择升级模式和升级方式.
⑵选择开始按OK键开始升级.
⑶按MENU、EXIT键退出。
5.OSD设置
⑴进入OSD设置菜单,按▲▼键移动光标.
⑵按◄►键修改参数.
⑶菜单颜色有6种风格,透明度有8个级别.
⑷按MENU、EXIT键退出。
三.技术参数。