VIVITEK D8300用户手册
- 格式:pdf
- 大小:4.89 MB
- 文档页数:26

8300系列控制器使用说明书8374,8376,8379,8382型8354,8356,8359,8362型2非常感谢您选择使用尼尔森EZ Pro ™Jr.8300控制器。
EZ Pro ™Jr.8300控制器系列采用了目前最先进的电子技术,将会为您提供更加长期可靠的服务。
请仔细阅读下面的相关产品介绍,以便您能掌握EZ Pro ™Jr.8300控制器程序的编写,操作,安装以及一些相关的注意事项。
一.特点:•尼尔森独特的选择&调节编程系统•不需要交流电源或干电池,编好的程序的保存由锂电池来提供能源,程序稳定•对任何一站都可以有不同的延迟时间•三个独立的程序•每个程序有三个开始时间(一共九个)•开始时间重叠•三个灌溉日历,满足不同的需求(周制,月制,单双日)•程序有重要日设置•预留雨量传感器接口•万年历•水预算选择,减少或增加灌溉水量的1~200%•可设定每月或每年的灌水量•两个测试循环(手动测试和循环测试)•灌水时间从1分钟到1小时59分钟•聚乙烯保险保护电路安全二.安装说明EZ Pro ™Jr.8300控制器既可安装在室内,也可安装在室3外。
电源为220V 。
将EZ Pro ™Jr.8300控制器安装在与人眼睛水平的位置。
用螺丝钉将其固定在墙上。
电源配线220V 交流电源警告:连接变压器之前不要接通220V 交流电源.安装完所有的设备之后再将变压器连接到电源上.这样能防止短路事故,以免损坏控制器.电源电缆和信号电缆用普通的电缆就可以了,连接控制器和执行器的低压信号和电源电缆应当有保护措施。
拧下两个螺丝,取下变压器保护盖,将电线通过盒底的孔,连接到内置变压器的接口上(在野外,电线的绝缘温度应达到75度,并由绝缘管保护).。
安装说明适应型号8374,8376,8379,8382(见右图)拧下变压器保护盖上的两个螺丝,并取下保护盖。
将220V 交流电源连接到变压器上,同时确保黄绿相间的地线已接好。
海康威视iVMS-8300 V7.2.2快速操作手册海康威视iVMS-8300 V7.2.2快速操作手册杭州海康威视系统技术有限公司2016.8目录第1章配置说明 (3)1.1主界面介绍 (3)1.2基础配置 (3)1.2.1组织管理 (3)1.2.2服务管理 (4)1.2.3资源管理 (7)1.2.4录像配置 (14)第2章使用说明 (19)2.1业务应用 (19)2.1.1实时监控 (19)2.1.2录像回放 (21)2.2电视墙 (25)2.2.1电视墙配置 (25)2.2.2预览上墙 (33)2.2.3回放上墙 (35)2.2.4电视墙轮巡 (36)第1章配置说明1.1主界面介绍使用平台安装时配置的用户密码登录后管理主页如下图所示。
图1-1平台主界面1.2基础配置单击主页面的,可以进入【基础配置】页面,可以对整个平台进行管理和配置,包括组织管理、用户管理、服务管理、资源管理、录像配置、报警配置、系统配置、地图配置等配置项,适合管理人员使用。
点击后默认进入【组织管理】界面。
1.2.1组织管理【组织管理】主要用于对平台的组织架构进行维护管理,平台组织以树形结构来显示,系统安装时会自动初始化主控中心,后续组织皆以主控中心为根组织建立。
【组织管理】主要功能包括【组织管理】和【自定义视图】。
新版本(共享版本)中已没有“区域”的概念,全部为组织。
图1-2 组织单元添加页面1.2.2服务管理单击【服务配置】,可进入到配置页面,可以查看已经添加的服务。
可进行服务的添加及删除操作。
第一次安装完成后系统默认会自动添加所有已安装服务到平台,无需手动安装。
部分服务,如NTP校时服务,需要手动添加到平台。
单击【添加】按钮,出现服务添加页面,填入服务及节点的详细信息,单击保存。
图1-3 添加服务页面点击添加好的服务名称,在【节点列表】里面可以继续添加其他节点。
图1-4节点信息及网域配置注意1:8300 V7.2.2的网域配置页面只为网域名称和逻辑上的配置,详细的网域IP在服务节点下配置。
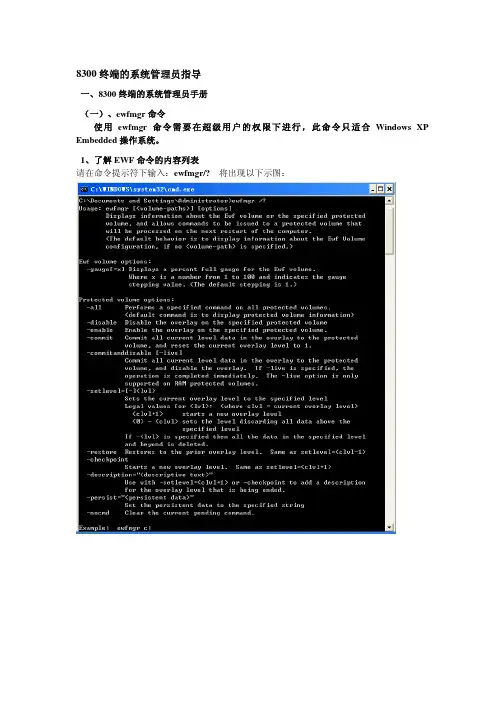
8300终端的系统管理员指导一、8300终端的系统管理员手册(一)、ewfmgr命令使用ewfmgr命令需要在超级用户的权限下进行,此命令只适合Windows XP Embedded操作系统。
1、了解EWF命令的内容列表请在命令提示符下输入:ewfmgr/? 将出现以下示图:2、查看EWF卷的配置:请在命令提示符下输入:ewfmgr 将出现以下示图:3、查看被保护卷(驱动器)的配置请在命令提示符下输入:ewfmgr volume(c:) 将出现以下示图:说明:Type:表示EWF保护类型(包括:EWF到硬盘保护---DISK,EWF到内存保护---RAM)Stste:表示EWF保护是否生效Boot Command:表示系统启动时是否有其他命令需要执行Max Levels:表示本系统最多支持的保护参数Currnet Level:表示当前EWF是在第几层4、增加一层屏蔽保护 -checkpoint请在命令提示符下输入:ewfmgr volume(c:)–checkpoint将出现以下示图:然后重新启动计算机,输入查看被保护卷(驱动器)配置的命令,将出现以下示图:5、如何恢复到上一层(或者说减掉一层) -restore请在命令提示符下输入:ewfmgr volume(c:) -restore将出现以下示图:然后重新启动计算机,输入查看被保护卷(驱动器)配置的命令,将出现以下示图:(二)、使用F8键恢复到上一层屏蔽层(或者减一层屏蔽保护层)如果系统遭受到恶性破坏,使Windouws XP Embedded系统无法正常启动进入桌面时,可以使用此方法恢复当前保护层的前一层!方法:1、计算机的COMS硬件系统检测完后,请按F8键2、然后将显示出一系列选项列表,请是哟功能上下键把光条移动到以下内容的命令上:Enhanced Write Filter Restore Mode (restores one level)然后按回车3、将出现以下字符命令:Microsoft Windows XP Embedded然后按回车4、将出现以下字符命令:Enhanced Write Filter Restore ModePlease select a volume to restore one level:multi(0)disk(0)rdisk(0)partition(1) – current level 3Start Windows NormallyUse the up ande down arrow keys to move the highlight to your choice.Press ENTER to choose.请将光标移动到以下字符内容的命令上multi(0)disk(0)rdisk(0)partition(1) – current level 3然后按回车5、将出现以下字符命令Enhanced Write Filter Restore ModePlease select a volume to restore one level:multi(0)disk(0)rdisk(0)partition(1) – current level 3This will delete all data at level 1,and set the new level to 1.Press F2 to perform the restore and restart the computerPress any other key to cancel the restore.请将光标移动到以下字符内容的命令上multi(0)disk(0)rdisk(0)partition(1) – current level 3然后请按F2键,系统等待5秒后会自动启动,重新启动后系统自动减去一层。
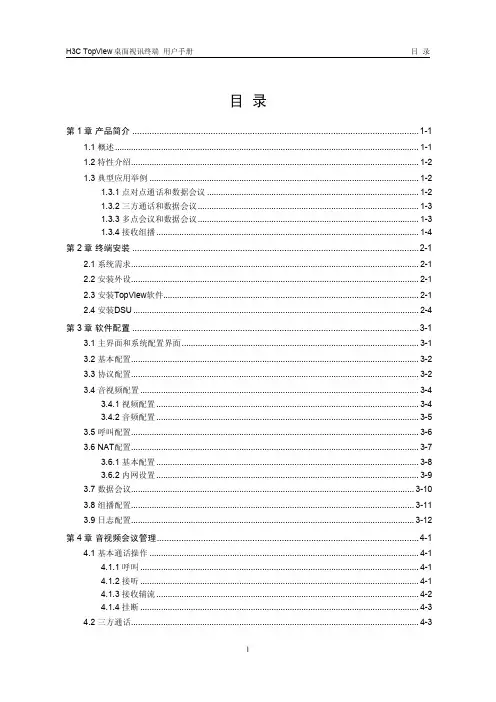
目录第1章产品简介.....................................................................................................................1-11.1 概述....................................................................................................................................1-11.2 特性介绍.............................................................................................................................1-21.3 典型应用举例.....................................................................................................................1-21.3.1 点对点通话和数据会议............................................................................................1-21.3.2 三方通话和数据会议................................................................................................1-31.3.3 多点会议和数据会议................................................................................................1-31.3.4 接收组播..................................................................................................................1-4第2章终端安装.....................................................................................................................2-12.1 系统需求.............................................................................................................................2-12.2 安装外设.............................................................................................................................2-12.3 安装TopView软件...............................................................................................................2-12.4 安装DSU............................................................................................................................2-4第3章软件配置.....................................................................................................................3-13.1 主界面和系统配置界面.......................................................................................................3-13.2 基本配置.............................................................................................................................3-23.3 协议配置.............................................................................................................................3-23.4 音视频配置.........................................................................................................................3-43.4.1 视频配置..................................................................................................................3-43.4.2 音频配置..................................................................................................................3-53.5 呼叫配置.............................................................................................................................3-63.6 NAT配置.............................................................................................................................3-73.6.1 基本配置..................................................................................................................3-83.6.2 内网设置..................................................................................................................3-93.7 数据会议...........................................................................................................................3-103.8 组播配置...........................................................................................................................3-113.9 日志配置...........................................................................................................................3-12第4章音视频会议管理...........................................................................................................4-14.1 基本通话操作.....................................................................................................................4-14.1.1 呼叫.........................................................................................................................4-14.1.2 接听.........................................................................................................................4-14.1.3 接收辅流..................................................................................................................4-24.1.4 挂断.........................................................................................................................4-34.2 三方通话.............................................................................................................................4-34.2.1 创建三方通话...........................................................................................................4-34.2.2 挂断.........................................................................................................................4-44.3 多点会议.............................................................................................................................4-54.3.1 加入会议..................................................................................................................4-54.3.2 申请发言..................................................................................................................4-54.3.3 退出会议..................................................................................................................4-64.4 录音/留言............................................................................................................................4-64.4.1 录制/停录.................................................................................................................4-64.4.2 录音文件的操作.......................................................................................................4-64.4.3 留言文件的操作.......................................................................................................4-84.5 音频调节.............................................................................................................................4-94.5.1 输出音量调节...........................................................................................................4-94.5.2 输入音量调节...........................................................................................................4-94.5.3 静音.........................................................................................................................4-94.5.4 闭音.........................................................................................................................4-94.6 视频调节...........................................................................................................................4-104.6.1 视频脱离窗口大小调整..........................................................................................4-104.6.2 三方通话远端视频切换..........................................................................................4-114.7 电话本操作.......................................................................................................................4-114.7.1 新增联系人............................................................................................................4-114.7.2 修改联系人............................................................................................................4-124.7.3 删除联系人............................................................................................................4-134.7.4 查找联系人............................................................................................................4-134.7.5 电话本导入/导出....................................................................................................4-144.8 历史记录操作...................................................................................................................4-144.8.1 查看记录................................................................................................................4-154.8.2 删除记录................................................................................................................4-154.8.3 清空记录................................................................................................................4-164.8.4 保存记录................................................................................................................4-164.9 统计信息查询...................................................................................................................4-16第5章数据会议管理..............................................................................................................5-15.1 数据会议操作界面..............................................................................................................5-15.2 非独立数据会议..................................................................................................................5-15.2.1 启动数据会议...........................................................................................................5-25.2.2 加入会议..................................................................................................................5-25.2.3 退出会议..................................................................................................................5-25.3 独立数据会议.....................................................................................................................5-25.3.1 会议模板管理...........................................................................................................5-35.3.2 召开会议的基本操作................................................................................................5-45.3.3 召开预定会议...........................................................................................................5-65.3.4 召开临时会议...........................................................................................................5-7 5.4 数据会议操作.....................................................................................................................5-75.4.1 共享操作..................................................................................................................5-75.4.2 主席权操作..............................................................................................................5-85.4.3 共享权操作..............................................................................................................5-85.4.4 控制权操作............................................................................................................5-115.4.5 即时消息................................................................................................................5-145.4.6 退出会议................................................................................................................5-15第1章产品简介1.1 概述H3C TopView桌面视讯终端(下文简称TopView)是H3C公司开发的一款运行在PC机上的视频通信软件终端。
四、操纵1、结构说明示意图结构说明示意图序号说明:NO名称〔功能〕NO名称〔功能〕NO名称〔功能〕1 料斗2 传动齿轮3 传动链条4 挤塑调速电机5 气流调节阀6 吹塑运动气缸7 气动上支架8 气动下支架9 气针锁夹10 气针11 上模活动板12 真空管连接座13 凹模14 凸模15 加温发热座16 下模固定板17 触摸屏控制系统〔PLC〕18 指示灯19 急停开关20 启动开关21 炮筒固定架22 一段发热圈23 二段发热圈24 三段发热圈a、点击挤塑、吹塑的[参数调整]按钮,将进入挤、吹塑手动参数调整界面。
语音将为你提示。
第一排有[加温]、[水泵]与[溶胶]按钮,第二、三排是手动调整开关,[左、右模板]、[切断]、[模具移位]、[气针]与[充气]按钮〔这6项按钮主要用于安装模具与检测〕。
安装模具〔详情请看模具安装说明〕,安装完成以后,调整模具开、合模距离。
完成以上操作以后,点击[加温]按钮{机器将自动为你开启加温与水泵。
机床面板中间的[温控开关]【35】便显示数字,左边前3个是挤塑[温控开关],第4个是吸塑[温控开关]。
从左向右,第一个[温控开关]控制挤塑炮筒第一段【22】溶胶段的温度,温度最高。
第二个[温控开关]控制挤塑炮筒第二段【23】搅拌段的温度,稍微要高些。
第三个[温控开关]控制挤塑炮筒第三段【24】挤出段的温度。
根据挤塑材料的不同所设置的温度也就不同〔一般情况下一段温度须比二段温度高10℃—20℃,参考,PE料,溶胶段140℃,搅拌段124℃,挤出段102℃〕。
RPJCXCJ-8300 使用说明书第14页共16页3、禁止机床超出其使用X围。
4、机床以与电气装置必须经常保持清洁,枯燥,无漏电、漏水现象。
5、定期进展全面检查维修。
6、电路图。
RPJCXCJ-8300 使用说明书第16页共16页。


LQV (Luminance Qualified Vector) Measurements with the WFM8200/8300How-To GuideIntroductionThe patented Luminance Qualified Vector (LQV) Display enhances the current Diamond/Split Diamond, Arrowhead and Vector Displays by allowing the user to view chrominance vectors within specified luminance ranges.Colorists often divide the total tonal range into the High, Mid and Low tonal ranges during the Post Production process. Doing so allows them to make more precise adjustments and enhancements to the scene content. The Vectorscope along with the exclusive Tektronix Diamond and Split-Diamond displays have been extremely valuable tools in terms of detecting and correcting color cast in the overall scene. The addition of LQV enhances these capabilities even more.Figure 1: RGB, LQV High, Vector, LQV LowFigure 1 shows the RGB Waveform in Tile one, LQV (High) in Tile 2, Full Vector in Tile 3 and LQV (Low) in Tile 4.The Luma Qualified Vector (LQV) display adds the capability to see color cast in the High, Mid, and Low tonal ranges. This is a significant enhancement because it allows the user to view color or color cast in specific regions of the picture. For example, when doing rock concerts the bright lighting often causes problems and up to now there has been no real way to easily know if you are balanced in these bright areas. LQV provides the tool needed to make sure balance is right in the Highs & Lows. The user can set upper and lower limits that can define different ranges for variety of applications.While it is possible to show up to four LQV Displays simultaneously depending on the user’s specific application, it is more likely that the focus would be placed on monitoring the Highs and Lows along with the Full Vector as shown in Figure 1.The terms HIGH and LOW as used here are somewhat relative. That is to say, that the range of values considered as being HIGH or LOW may vary according to user preference or the specific content being evaluated. In this case I simply chose approximately the top 20% of luminance levels to represent the HIGHS and the lower 20% of luminance levels to represent the LOWS.The terms HIGH and LOW as used here are somewhat relative. That is to say, that the range of values considered as being HIGH or LOW may vary according to user preference or the specific content being evaluated. In this case I simply chose approximately the top 20% of luminance levels to represent the HIGHS and the lower 20% of luminance levels to represent the LOWS .To Set Up the LQV Display(s):1. First select the tile you want to place the LQV Display (Tile 2 in Figure 2):2. Next depress the Vector Button below the display screen to place the vector display in that tile as shownin Figure 2:Figure 2. WFM8300 Front Panel3. Next Depress and Hold the Vector Button to display the Menu as shown in Figure 3 and use the up/downselection keys to select the Luma Qualified Vector and then use the Right Arrow Key to set this to the ON position.4. Now use the up/down selection keys to select the Luma High and Luma Low settings using the GeneralKnob (upper right hand corner) to set the luma limits you want to establish.5. Press the Vector button to clear the menu.6. Repeat this process for any addition LQV Displays you wish to set up with different ranges.See if you can duplicate the display in Figure 1.Figure 3. LQV Range MenuOnce you have these set-up the way you like it you can save the setting as a Preset for fast and easy recall. In fact you’ll probably want to save several variations of this based on specific applications. To learn more about how to create, save, and recall presets see our “Top-Ten” Presets for the WFM7000 Series at/applications/video/broadcasters.html where you download the files from the “Support” section located on the right side of the page.References:Data Sheets, Fact Sheets and additional application notes can be found at:/products/video_test/signal_monitors.htmlTG700 GeneratorContact Tektronix:ASEAN / Australasia (65) 6356 3900Austria* 00800 2255 4835 Balkans, Israel and other ISE Countries +41 52 675 3777Belgium* 00800 2255 4835Brazil + 55(11) 3759 7600Canada 1-800-833-9200 Central East Europe, Ukraine and the Baltics +41 52 675 3777Central Europe & Greece +41 52 675 3777Denmark +45 80 88 1401Finland +41 52 675 3777France* 00800 2255 4835Germany* 00800 2255 4835Hong Kong 400-820-5835India (91) 80 30792600Italy* 00800 2255 4835Japan 81 (3) 6714-3010Luxembourg +41 52 675 3777 Mexico, Central/South America & Caribbean (52) 55 53 35 10 85Middle East and Africa +41 52 675 3777The Netherlands* 00800 2255 4835Norway 800 16098People’s Republic of China 400-820-5835Poland +41 52 675 3777Portugal 80 08 12370Republic of Korea 82 (2) 6917-5000Russia & CIS +7 (495) 7484900South Africa +41 52 675 3777Spain* 00800 2255 4835Sweden*00800 2255 4835Switzerland* 00800 2255 4835Taiwan 886 (2) 2722-9622United Kingdom & Ireland* 00800 2255 4835USA 1-800-833-9200 If the European phone number above is not accessible,please call: +41 52 675 3777 Copyright © 2010, Tektronix. All rights reserved. Tektronix products are covered by U.S. and foreign patents, issued and pending. Information in this publication supersedes that in all previously published material. Specification and price change privileges reserved. TEKTRONIX and TEK are registered trademarks of Tektronix, Inc. All other trade names referenced are the service marks, trademarks or registered trademarks of their respective companies.04/10 JS/WWW 28W-25197-1。
海康威视iVMS 8300V7.1.5 安防集成平台用户操作手册iVMS-8300V2016-01快速安装手册密级级别:[内部公开]生效时间: 2016年01月25日保密期:无杭州海康威视系统技术有限公司2016.01目录第1章安装说明 (3)1.1 主要文件清单 (3)1.2 安装卸载说明 (3)1.2.1 服务安装 (3)1.2.2 平台安装 (4)1.2.3 客户端安装 (10)1.2.4 服务卸载 (14)1.2.5 平台卸载 (14)1.2.6 客户端卸载 (15)第2章平台配置 (16)2.1 License许可证上传 (16)2.2 平台服务配置 (17)2.3 平台控件下载 (18)2.4 客户端及控件更新 (18)2.5 IE支持说明 (19)第3章安装FAQ (20)3.1 平台日志查看 (20)3.2 安装日志查看 (20)3.3 一键安装失败 (20)3.4 清理windows服务 (21)3.5 导入license失败 (22)3.6 memcached无法启动 (22)第1章安装说明1.1主要文件清单1.2安装卸载说明1.2.1服务安装1、右键以“管理员身份运行”IVMS-8300_SVR V7.1.5.exe程序,弹出对话框,进入安装界面。
点击“下一步”,进入选择组件页面,选择需要安装的服务,点击“下一步”选择安装目录。
请根据实际需要选择必要的服务进行安装。
请根据实际使用功能按需安装。
2、安装完毕后,确认服务在WatchDog中均已正常启动。
1.2.2平台安装平台不支持修复安装操作1、右键“平台安装程序”IVMS-8300 V7.1.5.exe以“管理员身份运行”运行,弹出对话框,设置解压目录。
2、点击确定,系统自动进行解压。
3、解压结束将自动开始安装:1)弹出安装“VC++”依赖库。
如果从未安装过,点击安装即可,如果安装过,点击修复即可;2)安装完VC++依赖库后,点击关闭按钮,弹出“IVMS平台软件安装程序”界面。
海康威视iVMS-8300 V7.2.2快速操作手册海康威视iVMS-8300 V7.2.2快速操作手册杭州海康威视系统技术有限公司2016.8目录第1章配置说明 (3)1.1主界面介绍 (3)1.2基础配置 (3)1.2.1组织管理 (3)1.2.2服务管理 (4)1.2.3资源管理 (7)1.2.4录像配置 (14)第2章使用说明 (19)2.1业务应用 (19)2.1.1实时监控 (19)2.1.2录像回放 (21)2.2电视墙 (25)2.2.1电视墙配置 (25)2.2.2预览上墙 (33)2.2.3回放上墙 (35)2.2.4电视墙轮巡 (36)第1章配置说明1.1主界面介绍使用平台安装时配置的用户密码登录后管理主页如下图所示。
图1-1平台主界面1.2基础配置单击主页面的,可以进入【基础配置】页面,可以对整个平台进行管理和配置,包括组织管理、用户管理、服务管理、资源管理、录像配置、报警配置、系统配置、地图配置等配置项,适合管理人员使用。
点击后默认进入【组织管理】界面。
1.2.1组织管理【组织管理】主要用于对平台的组织架构进行维护管理,平台组织以树形结构来显示,系统安装时会自动初始化主控中心,后续组织皆以主控中心为根组织建立。
【组织管理】主要功能包括【组织管理】和【自定义视图】。
新版本(共享版本)中已没有“区域”的概念,全部为组织。
图1-2 组织单元添加页面1.2.2服务管理单击【服务配置】,可进入到配置页面,可以查看已经添加的服务。
可进行服务的添加及删除操作。
第一次安装完成后系统默认会自动添加所有已安装服务到平台,无需手动安装。
部分服务,如NTP校时服务,需要手动添加到平台。
单击【添加】按钮,出现服务添加页面,填入服务及节点的详细信息,单击保存。
图1-3 添加服务页面点击添加好的服务名称,在【节点列表】里面可以继续添加其他节点。
图1-4节点信息及网域配置注意1:8300 V7.2.2的网域配置页面只为网域名称和逻辑上的配置,详细的网域IP在服务节点下配置。
1Phone [301]874-9400•Fax [301]695-7065••Trans-Tech20078300Series:Temperature Stable ResonatorsDATA SHEETFeaturesGHigh ε'G High Q G Linear τfG Frequency stability vs.temperatureBenefitsGReduced size and weight G Low lossG Close channel spacingG Ease of temperature compensationApplicationsGAMPS/GSM/PCS/DBS/TVRO G Dielectric resonator oscillators G Microwave filters andcombinersIntroduction8300is Trans-Tech’s standard material for PCS/PCN/DCS/GSM application,combining good Q with reasonable cost.A wide range of temperature coefficients is available.Size RecommendationsCommon sizes accommodate frequencies from 0.8–13.5GHz.Trans-Tech's market leadership in this area has given us experience to guide designers toward the best mechanical configuration for optional performance in customer cavities.Material CharacteristicsDielectric constant ...........................35.0–36.5Temperature coefficient of resonant frequency(τf )(ppm/°C)...............................-3to +9Q (1/tan δ)min ........................9,500at 4.3GHz............................and 28,000at 850MHz Insulation resistance (ohm cm)(volume resistivity)@25°C .....................~1013Thermal expansion (ppm/°C)(20–200°C)...............10Thermal conductivity (cal/cm sec°C)@25°C .........0.0045Specific heat (cal/g °C)............................0.15Density (g/cc)..................................>4.65Water absorption (%)............................<0.01Composition ............................Titanate Based Color ..........................................RustComponents will be custom manufactured.Consult Trans-Tech's Applications Engineering for advice on supports,tuning,and resonator configurations.Frequency accuracy to 0.5%of a customer provided correlation sample is standard.DATA SHEET•8300SERIES:TEMPERATURE STABLE RESONATORS2Phone[301]874-9400•Fax[301]695-7065•*************************•2007Trans-TechQ(x13)024612810Frequency (GHz)Typical Q vs. Frequency403530252015105Q(x13)-60-202060Temperature (°C)Typical Q vs. Temperature403530252015105Q@850 MHzQ@4.3GHz38343612345678910111213Frequency (GHz)Typical (εr)vs. FrequencyDielectricConstant(εr)Typical Performance DataTemperatureDielectric Coefficient Q Series Type Constant of f o(τf) ± 2at 4.3 GHz D/C837436.5 ± 1+9 ppm/°C>9,500 D/C837336.0 ± 1+6 ppm/°C>9,500 D/C837235.7 ± 1+3 ppm/°C>9,500 D/C837135.5 ± 10 ppm/°C>9,500 D/C837035.0 ± 1-3 ppm/°C>9,500 Temperature CharacteristicsContact factory for custom τf and other tolerances.DATA SHEET • 8300 SERIES: TEMPERATURE STABLE RESONATORS3Phone[301]874-9400•Fax[301]695-7065•*************************•Trans-Tech Proprietary Information • Products and Product Information are Subject to Change Without Notice. • March 9, 2007Copyright © 2006, 2007, Trans-Tech Inc., Inc. All Rights Reserved.Information in this document is provided in connection with Trans-Tech, Inc. ("Trans-Tech"), a wholly-owned subsidiary of Skyworks Solutions, Inc. These materials, including the information contained herein, are provided by Trans-Tech as a service to its customers and may be used for informational purposes only by the customer. Trans-Tech assumes no responsibility for errors or omissions in these materials or the information contained herein. Trans-Tech may change its documentation, products, services, specifications or product descriptions at any time, without notice. Trans-Tech makes no commitment to update the materials or information and shall have no responsibility whatsoever for conflicts, incompatibilities, or other difficulties arising from any future changes.No license, whether express, implied, by estoppel or otherwise, is granted to any intellectual property rights by this document. Trans-Tech assumes no liability for any materials, products or information provided hereunder, including the sale, distribution, reproduction or use of Trans-Tech products, information or materials, except as may be provided in Trans-Tech Terms and Conditions of Sale.THE MATERIALS, PRODUCTS AND INFORMATION ARE PROVIDED "AS IS" WITHOUT WARRANTY OF ANY KIND, WHETHER EXPRESS, IMPLIED, STATUTORY, OR OTHERWISE, INCLUDING FITNESS FOR A PARTICULAR PURPOSE OR USE, MERCHANTABILITY, PERFORMANCE, QUALITY OR NON-INFRINGEMENT OF ANY INTELLECTUAL PROPERTY RIGHT; ALL SUCH WARRANTIES ARE HEREBY EXPRESSLY DISCLAIMED. TRANS-TECH DOES NOT WARRANT THE ACCURACY OR COMPLETENESS OF THE INFORMATION, TEXT, GRAPHICS OR OTHER ITEMS CONTAINED WITHIN THESE MATERIALS. TRANS-TECH SHALL NOT BE LIABLE FOR ANY DAMAGES, INCLUDING BUT NOT LIMITED TO ANY SPECIAL, INDIRECT, INCIDENTAL, STATUTORY, OR CONSEQUENTIAL DAMAGES, INCLUDING WITHOUT LIMITATION,LOST REVENUES OR LOST PROFITS THAT MAY RESULT FROM THE USE OF THE MATERIALS OR INFORMATION, WHETHER OR NOT THE RECIPIENT OF MATERIALS HAS BEEN ADVISED OF THE POSSIBILITY OF SUCH DAMAGE.Trans-Tech products are not intended for use in medical, lifesaving or life-sustaining applications, or other equipment in which the failure of the Trans-Tech products could lead to personal injury,death, physical or environmental damage. Trans-Tech customers using or selling Trans-Tech products for use in such applications do so at their own risk and agree to fully indemnify Trans-Tech for any damages resulting from such improper use or sale.Customers are responsible for their products and applications using Trans-Tech products, which may deviate from published specifications as a result of design defects, errors, or operation ofproducts outside of published parameters or design specifications. Customers should include design and operating safeguards to minimize these and other risks. Trans-Tech assumes no liability for applications assistance, customer product design, or damage to any equipment resulting from the use of Trans-Tech products outside of stated published specifications or parameters.。