SL12815A安装说明书(中英文)
- 格式:ppt
- 大小:860.50 KB
- 文档页数:1


1.GENERAL WARNINGSREAD THE GENERAL WARNINGS AND SAFETY PRECAUTIONS CAREFULLY BEFORE INSTALLING AND USING THE DEVICE. • This manual is an integral part of the product and must be kept near the device for quick and easy consultation. • The regulator must not be used for purposes other than those described below, and it especially cannot be used as a safety device.• Before proceeding with installation and use check the limits of application.• Dixell Srl reserves the right to vary the components of its products without prior notice to the customer, ensuring the identical and unchanged features of the same.1.1 SAFETY PRECAUTIONS• Comply with the temperature and humidity limits specified in this document and on the label on the instrument. • Uninstall the device only once you have removed all the electrical connections, otherwise the device might break.• Do not open the device; in case of failure or faulty operation send the instrument back to the dealer/distributor or to “DIXELL S.r.l.” with a detailed description of the fault.• Do not clean the device with corrosive chemical products, solvents or aggressive detergents.•Communication ports (USB, Ethernet) and voltage output are not designed for purposes not specified in this manual that may damage the controller (for example an excessive current request on the USB port to recharge\supply an external device).•The device must not be used in applications that differ from those specified in the following guide. The regulator strictly cannot be installed in the following specific cases:✓ Units installed in systems with lifesaving functions; ✓ Units for military use; ✓ Units operated in nuclear energy systems; ✓ I n all installations where the hardware controller has safety functions1.2 PRODUCT DISPOSAL (WEEE)Complying with the Directive 2012/19/EC of the European Parliament and the Council of July 4 2012, on waste electrical and electronic equipment (WEEE), we inform you that: • There lies the obligation not to dispose of electrical and electronic waste as municipal waste but to separate the waste.• Public or private collection points must be used for disposal, in accordance with local laws. Furthermore, at the end of the equipment life cycle, it is also possible to return it to the dealer when a new purchase is made. • This equipment may contain hazardous substances. Improper use or incorrect disposal can have adverse effects on human health and the environment.• The symbol shown on the product or the package indicates that the product was placed on the market after 13th August 2005 and must be disposed of as separated waste.• Should the product be disposed of incorrectly, sanctions may be applied as stipulated in applicable local regulations regarding waste disposal.2 GENERAL DESCRIPTIONThe iPro family is made of a wide range of devices developed by Dixell: programmable controllers, expansion boards, valve drivers and graphical interfaces. The combination of these devices allows a complete management of any kind of application in various fields, such as air conditioning, industrial refrigeration, residential refrigeration, etc. It is an advanced and flexible solution that can be adapted to any need of the customer or of the final application. Any Dixell product, which is considered a high technology device, requires qualified configuration, programming and commissioning phases to be used in the optimal way possible. Skipping one or more of those phases may cause malfunctioning or damages of the product for which Dixell cannot be held responsible. Do not use the product for uses that differ from those indicated in this documentation. The costumer assumes any responsibility and risk related to the configuration of the product to reach the desired results according to the final installation and use.3 DEVICE GROUNDINGTo guarantee the correct functionalities and health of the controller as well as to avoid malfunctioning and damages to the same, it is mandatory respect the following rules: • Use double insulation transformers for the controller main power supply and never ground the secondary wiring of the transformer.• Verify that the Ethernet cable and that the Switch\Router used to connect it don’t have the shield grounded. •In case of shielded cables used for the communication port connections, it is possible to ground the shield only if it is not used as reference for the communication lines and if it is not physically connected in any way to the controller.•Always check the on the devices connected to the controller (active probes and transducers, loads driven by the analog outputs, devices connected over the communication lines) in order to verify the presence of groundings before powering on the controller. Always verify preventively/in advance the presence of ground meshes in order to remove them before the powering of the plant\electrical board.4CONNECTORSIn the following table a list of the suggested connectors is available (these connectors are available also from Dixell). For every model the maximum configuration set available is shown.Model Connectors QtyIPX115DFemale connector Molex Micro-Fit 5x2 poles 1 Female connector Molex Micro-Fit 8x2 poles 1 Female connector Molex Micro-Fit 11x2 poles 1 Female connector Stelvio CPF 2 poles pin spacing 5,00 90G 1Female connector Stelvio CPF 3 poles pin spacing 5,00 90G 1 Female connector Molex Mini-Fit 2x3 poles 1 Female connector Molex Mini-Fit 2x4 poles 1 Female connector Molex Mini-Fit 2x5 poles 1 IPX125DFemale connector Molex Micro-Fit 5x2 poles 1 Female connector Molex Micro-Fit 8x2 poles 1 Female connector Molex Micro-Fit 11x2 poles 1 Female connector Stelvio CPF 2 poles pin spacing 5,00 90G 1Female connector Stelvio CPF 3 poles pin spacing 5,00 90G 1 Female connector Molex Mini-Fit 2x3 poles 2 Female connector Molex Mini-Fit 2x4 poles 2 Female connector Molex Mini-Fit 2x5 poles 15 ADDRESS SETTINGEvery expansion board must have an own dedicated address in the iPro network. That address is set via the dip-switchpresent on every board and following a binary enumeration like shown in the following table:1 2 3 4 Adr 0: OFF OFF OFF OFF Adr 1: ON OFF OFF OFF Adr 2: OFF ON OFF OFF Adr 3: ON ON OFF OFF Adr 4: OFF OFF ON OFF Adr 5: ON OFF ON OFF Adr 6: OFF ON ON OFF Adr 7: ON ON ON OFF Adr 8: OFF OFF OFF ON Adr 9: ON OFF OFF ON Adr 10: OFF ON OFF ON Adr 11: ON ON OFF ON Adr 12: OFF OFF ON ON Adr 13: ON OFF ON ON Adr 14: OFF ON ON ON Adr 15:ONONONONIf there is a modification to the address a power cycle is needed in order to confirm the modification➢The address 0 is a broadcast address and must never be used. The range of the valid addresses is from 1 to 15.6COMMUNICATIONOn every IPX device are present a CAN-BUS port and a LAN port used for communicating with any iPro device. The communication lines are mutually exclusive, and this mean that if a device is communicating with the CAN-BUS line it will not be possible to use the LAN communication line without repeating the initialization procedure.At power on, the IPX will be in listening mode on both the communication lines waiting the first valid command. Once this command is received on a communication line, that por twill be designed as active while the other will be disabled automatically6.1 CANBUS LINEThe CAN-BUS line is made by a three wires connection. It can be used with all the 10 din models of iPro devices and IPL device. The wiring connection must be a daisy chain.6.2 LAN LINEThe LAN line is made by a two wires connection. It can be used with all the 4 din models of iPro devices, IPG800 device and IPL device. The wiring connection must be a daisy chain.7 DEVICE LABELEvery controller is provided with an identification label. There follows a brief explanation on the information reported on available looking at the label.7.1 IPX LABEL8 LINE TERMINATION (CAN-BUS) When using the CAN-BUS line is mandatory the use of line termination (jumpers that need to be placed at the side of communication connectors) at the start and at the end of the communication line like highlighted in the following scheme:9 POWER LEDEvery IPX module has a green power LED that indicate the state of the power supply. If the power is supplied properly to the device this LED will be light on.10 ALARM LEDEvery IPX module has a red alarm LED that indicate the alarm state. The alarm state can happen in the following cases:•One or more probes are in alarm (wrong configuration or sensor broken) •Communication alarm (the master is not communicating for 10 seconds or more)➢Is not possibly understand which the active alarm is only looking at the expansion board. Is always needed to check the alarms from the master side.11TECHNICAL FEATURESHousing: Self-estinguishing PC Colour:RAL7012 Dimensions: 10 DIN RailMounting device: DIN bar (EN 50022, DIN 43880) Degree of protection: IP10 - Indoor, Open type device Power supply:24Vac +10/-15%, 50/60Hz 20 - 36VdcRated power:20VA (Vac), 15W (Vdc) Rated Impulse Voltage: 500VOvervoltage category:II –IPX115D – IPX125D Comparative Tracking Index (CTI): 300V Type of action: 1 Pollution degree:2Ambient Operating Temperature and Humidity:IPX115D: -10÷50° C / 20÷85%RH IPX125D: -10÷45° C / 20÷85%RH Shipping and storage temperature: -20÷85°C Resistance to heat: V0 (UL94)AC/DC voltage input:IPX115D – IPX125D: 24Vac/Vdc, 50/60Hz, (Class 2 source - SELV) Sensors/digital inputs: Classe 2 - SELV I\O ports:Classe 2– SELV IPX115D – IPX125D output rating RL1, RL2, RL4, RL5, RL6, RL7, RL8, RL9, RL10, RL12, RL13, RL15, RL20, RL21, RL22, RL23, RL24 and RL25 NO contact:Pilot duty2A, 5A inrush 24Vac class 2 source SELVRL3, RL11 and RL14 NO contact: Pilot Duty1.95A, 19.5A inrush 24Vac class 2 source SELV RL3, RL11 and RL14 NC contact: Pilot Duty (6000 cycles) 1.95A, 19.5A inrush 24Vac class 2 source SELV RL16, RL17, RL18, RL19 SSR: Pilot duty1A, 2.5A inrush 24Vac class 2 source SELVRL max commons current: Rating value per number of relays Analogue outputs: Classe 2 Circuit - SELV Cycles of operation: 30KExternal power: Classe 2 Circuit - SELV Purpose of control: Operating control Construction of control: Incorporated controlApprovals: UL 60730-1, UL 60730-2-9CAN/CSA-E60730-1, CAN/CSA-E60730-2-9IPX115D – IPX125DProduct model nameHow To Order. Identification for the product optionsDixell product codeCertifications Technical dataProduction week12INPUT\OUTPUT TECHNICAL DATA 12.1IPX115D – IPX125D➢The SSR relays are sensible to the electromagnetic interferences. These interferences may cause unwanted openings or closings of the contacts. If there is the suspect of this kind of situation, it is recommended to use an external power supply to power the SSR loads. Independently of the above situation, it is highly recomm ended that the track of the signal cables should be separated fromthe track of the power cables➢The SSR outputs are not designed to drive contactors or inductive loads. For any unusual use of the SSR relays contact Dixell for a preventive briefing13DIMENSIONS(Dimensions expressed in mm)14ELECTRICAL CONNECTION 14.1IPX115D14.2IPX125D。
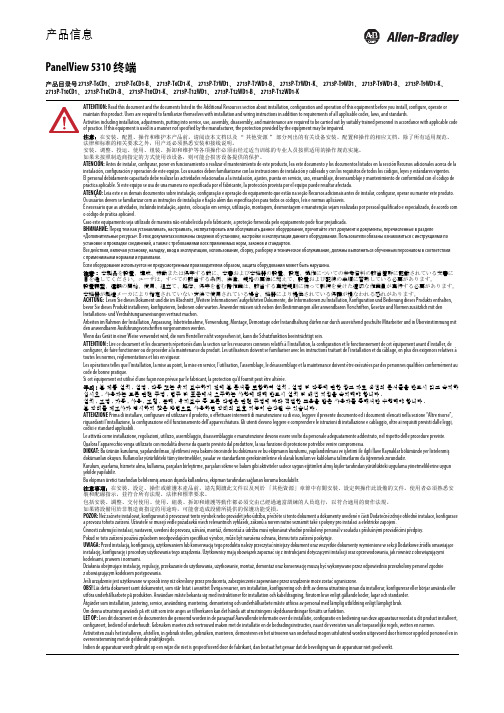
ATTENTION: Read this document and the documents listed in the Additional Resources section about installation, configuration and operation of this equipment before you install, configure, operate or maintain this product. Users are required to familiarize themselves with installation and wiring instructions in addition to requirements of all applicable codes, laws, and standards.Activities including installation, adjustments, putting into service, use, assembly, disassembly, and maintenance are required to be carried out by suitably trained personnel in accordance with applicable code of practice. If this equipment is used in a manner not specified by the manufacturer, the protection provided by the equipment may be impaired.注意:在安装、配置、操作和维护本产品前,请阅读本文档以及“其他资源”部分列出的有关设备安装、配置和操作的相应文档。
除了所有适用规范、法律和标准的相关要求之外,用户还必须熟悉安装和接线说明。

FIG.7Secure the upper cover to the bottom bracket with a hex key (FIG.7).Adjust the pan, tilt, and azimuth of the camera to the desired location (FIG.8). After adjusting, tighten the screws to complete the installation.Make sure the light sensor is at the lowest side of the camera (FIG.1).Infrared LED (IR LED)Light sensorRJ-45 Ethernet connector (supports PoE)the camera is reset, cut off the bare wire)Attach the Ethernet and power cables to the RJ-45 connector and the DC-in connector, respectively (FIG. 4).Retrieve the camera and remove the bottom bracket from theupper cover with a hex key (FIG.1). Use the included screws (M4.0x25) through the holes marked as “a,” and affix the camera in the desired location (FIG.2 & FIG.3).FIG.2Screws: 4Instruction ManualFor connecting this camera to the network, please follow one of these System Architectures1. 3.Connect the RJ-45 cable to the waterproof connector.First, remove the waterproof connector and unscrew the waterproof nut. Insert the Ethernet cable and connect the RJ-45 connector with proper tools (FIG.5). Then, tighten the waterproof connector and nut before the RJ-45 connector is connected to the camera (FIG.6).4.2.•InstallationWarning: Do not throw your product in municipal waste.This product has been designed to enable proper reuse of parts and recycling. The symbol of the crossed out wheeled bin indicates that the product(electrical and electronic equipment) should not be placed in municipal waste. Check local regulation for disposal of electronics products.66-6542ACTE-1BD/N 4MP HD TURRET IR IP CAMERABefore accessing the IP camera, make sure that the camera's RJ-45 network, audio, and power cables are properly connected. To set the IP address, consult your network administrator for an available IP address. The default IP address mode for each camera is DHCP. Users can use the assigned IP address to verify the camera's network connection.Before Accessing IP CamerasUniversal ActiveX software components are required for online display ofJPEG or H.264 Full HD video. When you log in to the IP camera from Internet Explorer,a security warning dialog box will prompt the installation of the Universal ActiveX plug-in. Click Install or Allow to download it.Software RequirementsTo configure an IP address using IPScan, download it from pkdge.co/cameras .To change the settings of the IP address, subnet mask, gateway, or HTTP port, follow the steps below:1. Run the IPScan software.2. Click Refresh. All available devices should be listed in the device list.3. Select your device from the list provided.4. Change the IP address, subnet mask, gateway, or HTTP port for the IP camera.5. Click Apply to submit the settings.6. Click Refresh to verify the settings.Configuring IP Addresses with IPScan SoftwareTo change an IP address via a web interface, type the camera's assigned IP address in the Internet browser and follow the steps below:1. Log in to the camera with the default username “admin” and default password “pass”.2. Click Basic Mode .3. Click Network > General .4. Change the IP address, subnet mask, gateway, or HTTP port for the IP camera.5. Click Submit to verify the settings.Configuring IP Addresses via Web InterfaceMake sure your Internet browser allows the signed ActiveX plug-in to work on your computer. Open Internet Explorer and go to Tools > Options > Security Settings . Set “Download Signed ActiveX plug-in controls” to “Prompt” and “Run ActiveX control and plug-in” to “Enable”.Internet Browser Settings & Application RequiredOnce complete, you can access the IP camera's live video by entering the IP address via your Internet browser. When the security warning dialogbox appears, click OK to download the ActiveX plug-in directly from the IP camera.There are two levels of user authentication (admin and guest) thatcan access the IP camera. An administrator is authorized to reset basic mode settings and see live video, while a guest is only allowed to see live video.LoginThe default username and password is as follows:To log on to the IP camera, please enter the username and password on the login page and click Submit to enter the system.Username admin PasswordpassAdministratorTo restore the hardware to factory default settings, please follow these steps:1. Short the reset wire for 10 seconds before releasing.2. The camera will be restored to factory default settings after approximately 90 seconds and will reboot automatically.3. Search for the IP device using the IPScan software.4. Start the IP device via an Internet browser.5. Enter the default username “admin” and password “pass” to operate.NOTE : The IP address will revert to DHCP.Restore Factory DefaultsNote: This equipment has been tested and found to comply with the limits for a Class B digital device, pursuant to part 15 of the FCC Rules. These limits are designed to provide reasonable protection against harmful interference in a residential installation. This equipment generates, uses and can radiate radio frequency energy and, if not installed and used in accordance with the instructions, may cause harmful interference to radio communications. However, there is no guarantee that interference will not occur in a particular installation. If this equipment does cause harmful interference to radio or television reception, which can be determined by turning the equipment off and on, the user is encouraged to try to correct the interference by one or more of the following measures:—Connect the equipment into an outlet on a circuit different from that to which the receiver is connected.—Consult the dealer or an experienced radio/TV technician for help.—Reorient or relocate the receiving antenna.—Increase the separation between the equipment and receiver.。

SAMlight教程一.Samlight软件安装1. SAMlight 软件安装过程点击“sc_sam_setup_complete_v_XXXXXX.exe”文件,然后运行它便可以进入自动安装,您可以在各种Windows操作系统中进行安装,建议安装完成后重新启动计算机。
安装过程1.双击图标安装。
出现下列窗口2.点击继续安装。
3.选中后,点击继续安装。
4.上图中软件默认的安装路径在“C:\scaps\sam2d”,要改变路径单击按钮,然后选择软件安装位置。
再点击按钮继续安装。
5.点击继续安装6.在文件复制结束后出现的窗口内点击,在紧接着弹出窗口中点击。
完成安装。
7.当第一次连接打标机时,计算机会自动引导您安装USB驱动。
点击图标会弹出以下对话框,要求用户输入控制卡密码,输入密码后即可正常使用。
(密码代号出现在对话框标题栏,格式“#xxxx”。
在说明书中找到相应密码输入即可){至此您应当可以使用软件对控制卡进行操作了。
如果你没有看到以上窗口,或在屏幕左下角看到“de mo version - only for evaluati on”表明软件与硬件之间的通讯出现故障。
关闭软件,确认控制卡有足够的电力,然后重新启动软件。
}*密码查询:*培训说明书查询:8、软件USB连接问题当我们打开SAMlight软件时,有时软件无法打开,会出现DEMO演示版的打标软件,这时我们就要看USB驱动是否安装好.首先,我们用鼠标右键点击“我的电脑”,点“属性”。
选择“硬件”—“设备管理器”如图我们看到SCAPS USB DEVICES驱动没有安装,这时我们要手动安装USB驱动。
如图点“更新驱动程序”,点“下一步”,如果第一次安装,系统会自动找到驱动,如果不是,我们就需要手动找驱动路径,如图点“下一步”,出现如图选择“浏览”,查找文件目录为安装打标软件目录中USC1文件夹中的sc_usc1.sys文件。
打开,驱动安装好了,这时打标软件就可以正常工作了。

中央控制设备型号:BMS-IFBN1281U-E安装手册BN 接口For commercial usehttps://www.toshiba-carrier.co.jp/global/manual/bms-ifbn1281u.htm[ългарски] Изтегляне на Ръководство за монтаж, Лицензионно споразумение и Лицензна информация / [Česky] Stažení Montážní příručky, Licenční smlouvy a Licenčních informací / [Dansk] Download installationsvejledning, licensaftale og licensinformation / [Deutsch] Installationshandbuch, Lizenzvereinbarung und Lizenzinformation herunterladen / [Ελληνικά] Λήψη εγγράφων «Εγχειρίδιο εγκατάστασης», «Άδεια χρήσης» και «Πληροφορίες για την άδεια» / [English]Installation Manual, License Agreement and License Information Download / [Español] Descarga del Manual de instalación, del Contrato de licencia y de la Información de licencia / [Eesti] Paigaldusjuhendi, litsentsi kokkuleppe ja litsentsiteabe allalaadimine / [Suomi] Asennusohjeiden, lisenssisopimuksen ja lisenssitietojen lataaminen / [Français] Téléchargement du manuel d'installation, du contrat de licence et desinformations sur la licence / [Hrvatski] Preuzimanje Priručnika za instalaciju, Ugovora o licenci i Informacija o licenci / [Magyar] Telepítési kézikönyv, Licencszerződés és Licencinformáció letöltése / [Italiano] Download del Manuale di installazione, del Contratto di licenza e delle Informazioni sulla licenza / [Latviešu] Uzstādīšanas rokasgrāmatas, licences līguma un licences informācijas lejupielāde / [Norsk]Nedlasting av installasjonsveiledning, lisensavtale og lisensinformasjon / [Nederlands] Installatiehandleiding, Licentieovereenkomst en Licentie-informatie downloaden / [Polski] Pobieranie Instrukcji instalacyjnej, Umowy licencyjnej i Informacji o licencji / [Português] Download do Manual de instalação, Contrato de Licença e dasInformações sobre a licença / [Română] Descărcarea Manual de instalare, Contract de licență și Informații de licență / [Русский] Скачать Руководство по установке, Лицензионное соглашение и Информацию о лицензии / [Slovensky] Stiahnutie Montážnej príručky, Licenčnej zmluvy a Informácií o licencii / [Slovenščina] Prenos navodil za montažo, licenčne pogodbe in licenčnih informacij / [Svenska] Nedladdning av Installationshandbok, Licensavtal och Licensinformation / [Türkçe] Kurulumkılavuzu, Lisans Sözleşmesi ve Lisans Bilgileri İndirme / [中文] 安装手册,许可证协议和许可证信息下载目录安全注意事项 . . . . . . . . . . . . . . . . . . . . . . . . . . . . . . . . . . . . . . . . . . . . . . . . . . . . . . . . . . . . 2简介. . . . . . . . . . . . . . . . . . . . . . . . . . . . . . . . . . . . . . . . . . . . . . . . . . . . . . . . . . . . . . . . . . . . 3 1安装. . . . . . . . . . . . . . . . . . . . . . . . . . . . . . . . . . . . . . . . . . . . . . . . . . . . . . . . . . . . . . . . . 52电源和信号线连接 . . . . . . . . . . . . . . . . . . . . . . . . . . . . . . . . . . . . . . . . . . . . . . . . . . . . . . 73设置. . . . . . . . . . . . . . . . . . . . . . . . . . . . . . . . . . . . . . . . . . . . . . . . . . . . . . . . . . . . . . . . 14 3-1.开关设置 . . . . . . . . . . . . . . . . . . . . . . . . . . . . . . . . . . . . . . . . . . . . . . . . . . . . . . 143-2.LED . . . . . . . . . . . . . . . . . . . . . . . . . . . . . . . . . . . . . . . . . . . . . . . . . . . . . . . . . . 15 4出厂默认设置. . . . . . . . . . . . . . . . . . . . . . . . . . . . . . . . . . . . . . . . . . . . . . . . . . . . . . . . . 155试运行 . . . . . . . . . . . . . . . . . . . . . . . . . . . . . . . . . . . . . . . . . . . . . . . . . . . . . . . . . . . . . . 16 5-1.BACnet 通信设置 . . . . . . . . . . . . . . . . . . . . . . . . . . . . . . . . . . . . . . . . . . . . . . . 165-2.在室内机上设置设备数据. . . . . . . . . . . . . . . . . . . . . . . . . . . . . . . . . . . . . . . . . . 175-3.设置过程中发生问题的原因 . . . . . . . . . . . . . . . . . . . . . . . . . . . . . . . . . . . . . . . . 18 6关闭 BN 接口. . . . . . . . . . . . . . . . . . . . . . . . . . . . . . . . . . . . . . . . . . . . . . . . . . . . . . . . . 181-ZH2-ZH安全注意事项•安装前请仔细阅读下述 “安全注意事项”,并进行正确安装。
P/N: 1802021503017*1802021503017*NPort W2150A/W2250A Series Quick Installation GuideVersion 6.4, January 2021Technical Support Contact Information/support2021 Moxa Inc. All rights reserved.OverviewThe NPort W2150A/W2250A wireless device servers are an ideal choice for connecting serial devices or Ethernet devices, including PLCs, meters, and sensors, to an IP-based wireless LAN or Ethernet LAN. Features•Link any serial device to an IEEE 802.11a/b/g/n network• 1 and 2-port RS-232/422/485 models, up to 921.6 kbps•Web-based configuration over Ethernet or wireless LAN •Enhanced security for remote configuration with HTTPS, SSH •Secure data access with WEP, WPA, WPA2•Fast roaming when signal strength is weak•Wireless Client: data can be seamlessly transferred between serial line, LAN, and WLAN•Per-port offline port buffering and serial data log•Dual power inputs via a power jack and terminal block Package ChecklistBefore installing the NPort W2150A/W2250A device server, verify that the package contains the following items:• 1 NPort W2150A or NPort W2250A wireless device server• 1 antenna 2.4/5GHz: ANT-WDB-ARM-02•100 to 240 VAC power adapter (excluding T models)*• 1 Ethernet cable: CBL-RJ458P-100•Quick installation guide (printed)•Warranty cardNOTE The power adapter is suitable for your region.Optional Accessories•DK35A (35 mm DIN-rail mounting kit)•CBL-PJ21NOPEN-BK-30: Locking barrel plug to bare-wires cable •Mini DB9F-to-TB: DB9-female-to-terminal-block adapter for RS-422/485 applicationsNOTE Notify your sales representative if any of the above items are missing or damaged.Hardware IntroductionThe NPort W2150A models have one serial port; the NPort W2250A models have two serial ports. Both models support RS-232/422/485 operation with DB9 connectors and include one 10/100M Ethernet port. NPort W2150A/W2150A-T NPort W2250A/W2250A-TReset Button : The reset button is used to load the factory default settings. Use a pointed object to hold the reset button down for five seconds to load the factory defaults. NameColor FunctionEnd Panel LED IndicatorsEthernet Orange 10 Mbps Ethernet connectionGreen 100 Mbps Ethernet connectionOff Ethernet cable is disconnectedTop Panel LED IndicatorsReady Red Steady on: Power is on and the NPort is booting upBlinking: An IP conflict exists or the DHCP/BOOTPserver did not respond properlyGreen Steady on: The NPort is functioning normallyBlinking: The NPort is responding to LocatefunctionOff Power is off or a power error condition existsNameColor FunctionWLANGreen Steady on: Wireless enabledBlinking: The NPort can’t establish a WLAN connection with AP (Infrastructure) or station (Ad-Hoc)Off Wireless not enabledSerial 1 Serial 2 Orange The serial port is receiving data Green The serial port is transmitting data Off No data is flowing to or from the serial portSignal Strength Red 1 Red - The signal strength (RSSI) is lower than-88 dBm 2 Red - The signal strength (RSSI) is between- 87 to -79 dBmGreen 3 Green - The signal strength (RSSI) is between -78 to -68 dBm4 Green - The signal strength (RSSI) is between -67 to -60 dBm5 Green - the signal strength (RSSI) is between-59 to -45 dBm Pull-High/Low Resistors and Terminal Resistor for RS-422/485You may need to set thepull-high/low resistors whentermination resistors are used incertain RS-422 or RS-485environments.S2(Serial 1)S3(Serial 2)DIP 1 DIP 2 DIP 3 DIP 4 Pull-high Resistor Pull-low Resistor Terminal Resistor Reserved ON1 kΩ 1 kΩ 120 Ω – OFF (Default) 150 kΩ 150 kΩ N/A – S3 is for the NPort W2250A only.NOTE Do not use the 1 kΩ setting while in RS-232 mode. Doing so will degrade the RS-232 signals and reduce the effectivecommunication distance.First-Time Hardware InstallationSTEP 1: After removing the NPort W2150A/W2250A from the box, usea crossover Ethernet cable to connect the NPort’s RJ45Ethernet port directly to your computer’s Ethernet port. STEP 2: Attach the power adapter to the NPort and then plug the adapter into an electrical outlet.STEP 3: Configure the NPort W2150A/W2250A through the Ethernet port. See the next section on how to install software. NOTE You must connect the Ethernet cable first before powering up your NPort.NOTE The operating temperature of the power adapter in the box is from 0 to 40°C. If your application is out of this range, please usea power adapter supplied by UL Listed External Power Supply(The power output meets SELV and LPS and rated 12 - 48 VDC,minimum current 0.42 A).Software Installation InformationFor the NPort’s configuration, the default IP address of the NPort is: LAN: Static; IP = 192.168.126.254; netmask = 255.255.255.0 WLAN: Static; IP = 192.168.127.254; netmask = 255.255.255.0If the NPort is configured for DHCP, but the DHCP server cannot be found, then the NPort will use the factory default IP settings.NOTE If you have forgotten the NPort's IP address, use the Device Search Utility (DSU) from your PC to locate the NPort. Aftersearching the LAN for NPort units, the DSU will display the IPaddress of each unit.NOTE Ethernet Bridge Disabled (default): Only one network interface can be actived at a time. If the Ethernet link is active,the WLAN will be inactive. If the WLAN is active, the Ethernet linkwill be inactive.Ethernet Bridge Enabled: The LAN and WLAN will both beactive. Go to the web console, find the network settings page,and set Ethernet Bridge to Enabled.You may log in with the account name admin and password moxa to change any settings to meet your network topology (e.g., IP address) or serial device (e.g., serial parameters). For first-time use, click the Wizard in the left navigation panel. The wizard will prompt you to configure the IP address, SSID, and security mode. For other settings, use the factory defaults or modify the settings for your application.For software installation, download the relative utilities from Moxa's website:https:///support/support_home?isSearchShow=1• Download the NPort Windows Driver Manager and install it as the driver to run with Real COM mode of the NPort Series.• Execute NPort Windows Driver Manager; then map the virtual COM ports on your Windows platform.• You may refer to the DB9 Male pin assignment section to loop back pin 2 and pin 3 for the RS-232 interface to carry out a self test on the device. • Use HyperTerminal or a similar program (you may download Moxa's program, called PComm Lite) to test whether the device is good or not. Pin Assignments and Cable WiringPin RS-232RS-422,4w RS-4852w RS-4851 DCD TxD-(A) –2 RXD TxD+(B) –3 TXD RxD+(B) Data+(B)4 DTR RxD-(A) Data-(A)5 GND GND GND6 DSR – –7 RTS ––8 CTS – –9 – – –SpecificationsPower RequirementsPower Input 12 to 48 VDCInput Rating 12 to 48 VDC, 237 mAPower Connector Screw-type power jack or terminal block (onlyone connection at a time)Physical CharacteristicsMaterial Aluminum sheet metal (1 mm) Dimensions 77 × 111 × 26 mm (no ears, no antenna)100 × 111 × 26 mm (with ears, no antenna) Antenna Length 109 mmMagnetic Isolation 1.5 kV magnetic isolation built in Environmental LimitsOperating TemperatureStandard Models: Wide Temp. Models: 0 to 55°C (32 to 131°F), 5 to 95%RH-40 to 75°C (-40 to 167°F), 5 to 95%RHStorage Temperature -40 to 85°C (-40 to 185°F), 5 to 95%RH。
4422 951 87261 8 December 2021/lightingInstallation InstructionsInstructions d’installation Istruzioni per l’installazione Installationsanweisungen安装指示书Instrucciones de instalaciónInstallatie-instructiesインストール手順بيكرتلا تاداشرإLLC7812/00, LLC7814/00LLC7811/00LLC7811/00, LLC7812/00, LLC7814/00There shall be an external fuse or MCB in the Line connection with a current rating of 16A or less.D N oteRF node can only be used in overvoltage category II environment classified as IT equipment.© 2021 Signify Holding. All rights reserved. Specifications are subject to change without notice. No representation or warranty as to the accuracy or completeness of the information included herein is given and any liability for any action in reliance thereon is disclaimed. Philips and the Philips Shield Emblem are registered trademarks of Koninklijke Philips N.V. All other trademarks are owned by Signify Holding or their respective owners.4422 951 87261 8 December 2021/lightingDÉCLARATION DE CONFORMITÉ À LA FCC/ICCe dispositif est conforme à la partie 15 des règles de la FederalCommunications Commission (FCC) des États-Unis et d’Industrie Canada (IC) exempts de licence RSS norme(s). Son fonctionnement est assujetti aux deux conditions suivantes: (1) Ce dispositif ne doit pas provoquer de brouillage préjudiciable, et (2) il doit accepter tout brouillage reçu, y compris le brouillage pouvant entraîner un mauvais fonctionnement. Tous les changements ou modifications non expressément approuvés par Signify, sont susceptibles d’annuler le droit de l’utilisateur à se servir de cet équipement. Ce produit est exclusivement destiné à un usage commercial.Cet équipement est conforme aux limites d’exposition aux rayonnements IC établies pour un environnement non contrôlé. Cet équipement doit être installé et utilisé avec un minimum de 200 mm de distance entre la source de rayonnement et votre corps.FRFCC/IC compliance statementThis device complies with part 15 of the FCC rules for the United States and Industry Canada (IC) license-exempt RSS standard(s). Operation is subject to the following two conditions: (1) This device may not cause harmful interference, and (2) this device must accept any interference received, including interference that may cause undesired operation. Any changes or modifications not expressly approved by Signify could void the user’s authority to operate this equipment. This product is intended for commercial use only.FCC Radiation Exposure StatementThis equipment complies with FCC radiation exposure limits set forth for an uncontrolled environment.This equipment must be installed and operated with a minimum distance 200 mm between the radiator and your body.IC Radiation Exposure StatementThis equipment complies with IC RSS-102 radiation exposure limits set forth for an uncontrolled environment.This equipment must be installed and operated with a minimum distance 200 mm between the radiator and your body.FCC statement: This equipment has been tested and found to comply with the limits for a Class A digital device, pursuant to part 15 of the FCC Rules. These limits are designed to provide reasonable protection against harmful interference when the equipment is operated in a commercial environment. This equipment generates, uses, and can radiate radio frequency energy and, if not installed and used inaccordance with the instruction manual, may cause harmful interference to radio communications. Operation of this equipment in a residential area is likely to cause harmful interference in which case the user will be required to correct the interference at his own expense.EN。