Manual
- 格式:pdf
- 大小:510.94 KB
- 文档页数:9


笔记本电脑使用简明手册----大连枫叶国际学校The concise manual of Laptop----Dalian Maple Leaf International School亲爱的同学们:为了更好的使用学校定制的全英文笔记本电脑,为帮助大家尽快熟悉它的操作规范,特制定本简明手册。
Dear students:This manual is formulated in order to help students make better use of English Exclusive laptops customized by the school.一、硬件上使用的注意事项(Attentions to the hardware):1、如何打开关闭数字键盘(How to turn on or off the number keyboard):Fn+Insert键,举例:当你想输入“J、K、L”时发现输入的是“1、2、3”,请检查是否打开了数字键盘。
Fn+Insert key, for example: If you find “1、2、 3” when you input “J、K、L”, please check whether you click on the keyboard.2、如何调整屏幕亮度及音量大小(How to adjust screen brightness or volume):Fn+左右箭头,调整音量;Fn+上下箭头,调整屏幕亮度;Fn + left-right direction key is to adjust the volume;Fn + up-down direction key is to adjust the screen brightness.3、如何打开关闭无线网络(How to switch on or off the wirelessInternet):在卡槽处可以手动打开关闭无线网络,默认是打开状态。


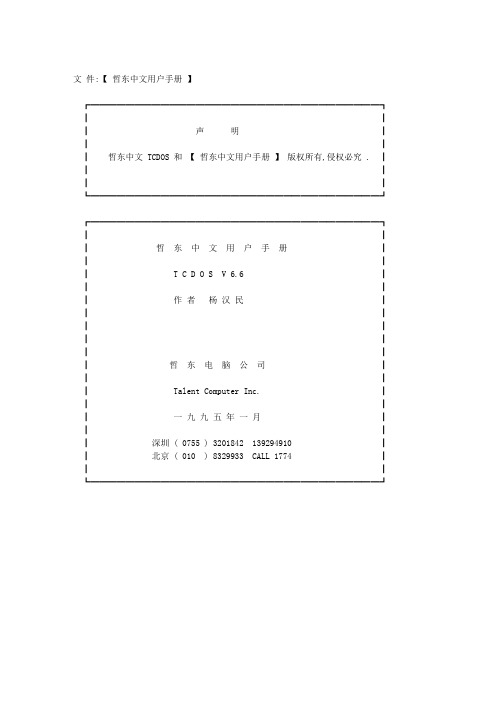
文件:【哲东中文用户手册】┏━━━━━━━━━━━━━━━━━━━━━━━━━━━━━━━━━┓┃┃┃声明┃┃┃┃哲东中文 TCDOS 和【哲东中文用户手册】版权所有,侵权必究 . ┃┃┃┃┃┗━━━━━━━━━━━━━━━━━━━━━━━━━━━━━━━━━┛┏━━━━━━━━━━━━━━━━━━━━━━━━━━━━━━━━━┓┃┃┃哲东中文用户手册┃┃┃┃ T C D O S V 6.6 ┃┃┃┃作者杨汉民┃┃┃┃┃┃┃┃┃┃哲东电脑公司┃┃┃┃ Talent Computer Inc. ┃┃┃┃一九九五年一月┃┃┃┃深圳 ( 0755 ) 3201842 139294910 ┃┃北京 ( 010 ) 8329933 CALL 1774 ┃┃┃┗━━━━━━━━━━━━━━━━━━━━━━━━━━━━━━━━━┛━━━━━━━━━━━━━━━━━━━━━━━━━━━━━━━━━━目录§1 初步使用 TCDOS (2)§2 汉字录入 (3)§3 配置 TCDOS (6)§4 打印输出 (9)§5 TCPro 图文函数库 (9)§6 支持 AutoCAD (9)§A 键盘定义列表 (10)致用户 (12)━━━━━━━━━━━━━━━━━━━━━━━━━━━━━━━━━━§1 初步使用 TCDOS欢迎使用哲东中文 TCDOS. 首先我们初步使用一下 TCDOS. 看看它是否真的如其所谓的"天下第一中文DOS" !1.1 安装 TCDOS从光盘上直接 COPY TCDOS 到 C: 盘或其它目标盘C:\> md tcdosC:\> copy e:\tcdos c:\tcdos1.2 启动 TCDOS执行 \TCDOS\TCDOS.BAT 文件C:\TCDOS> tcdos即启动了 TCDOS 此时进入 TC 中文 DOS 环境1.3 退出 TCDOS可以彻底卸出 TCDOS.释放所占内存. 执行命令C:\TCDOS> xquit通常我们可以暂时退出中文 DOS. 按系统功能键 :ctrl-alt-x进入西文 DOS 后, 可以按此系统键重返中文 DOS1.4 系统键切换中/英文 CTRL 空格轮换中文方法 CTRL 右 SHIFT和 CTRL 左 SHIFT删除汉字外码 CTRL ALT Z中西文模式开关 CTRL ALT X重新扫屏热键右 SHIFT 空格如果上述系统键与应用软件冲突,改变见§3哲东中文用户手册 3 ━━━━━━━━━━━━━━━━━━━━━━━━━━━━━━━━━━§2 汉字录入使用 CTRL SHIFT 系统键可以轮换汉字输入方法.2.1 基本 3 种输入方法TCDOS 内置 3 种输入方法①国际码录入十六进制机器码如 CEE5 -->五 41 --> A 本码还可以录入英文和符号, 控制符.键入 * 号或输入区位后键入 * 号可浏览选取②全角 ASCII所有键入被转换成全角ASCII③制表符可录入多种汉字制表和英文制表符.使用 * 号选择线型. 使用 SHIFT + 小键盘 1 - 9 选择制表符TCDOS 重新定义 ASCII 的 80--A0 为 TC 单字节制表符.87 88 89 97 98 99 8A 8B 8C 9A 9D? ? ? ? ? ? ? ? ? ? ?84 85 86 94 95 96 8D 8E 8F 9B 9E? ? ? ? ? ? ? ? ? ? ?81 82 83 91 92 93 9C 9F? ? ? ? ? ? ? ?80 € 90 ? A0 ?这些制表符为非国标码,不可打印. 仅供屏幕程序使用. 由于这些制表符与中文不冲突,建议程序员使用.2.2 双拼 ( 简拼 )使用双拼前, 必须安装它. 执行命令是C:\TCDOS> loadkey py.xx 1 ( 装入双拼词组C:\TCDOS> loadkey py.x 2 ( 装入双拼重码翻页键是 < 和 > 键标准双拼键盘图 :┌──┬──┬──┬──┬──┬──┬──┬──┬──┬──┐│Q │W │E │R │T │Y │U │I │O │P │││││││ ing│ sh│ ch│││└─┬┴─┬┴─┬┴─┬┴─┬┴─┬┴─┬┴─┬┴─┬┴─┬┘│A │S │D │F │G │H │J │K │L ││ zh │ ong││ en │ eng│ ang│ an │ ao │ ai │└─┬┴─┬┴─┬┴─┬┴─┬┴─┬┴─┬┴─┬┴──┘│Z │X │C │V │B │N │M │││││ǖ││││└──┴──┴──┴──┴──┴──┴──┘哲东中文用户手册 4 ━━━━━━━━━━━━━━━━━━━━━━━━━━━━━━━━━━2.3 全拼使用全拼前, 必须安装它. 执行命令是C:\TCDOS> loadkey zpy.x2.4 哲东双拼定义: 哲东双拼=双拼+五笔字型第一字母例如哲 : ZH E 扌--> AE R汉 : H AN 氵--> HJ I使用哲东双拼前, 必须安装它. 执行命令是C:\TCDOS> loadkey xpy.x2.5 系统配置严格说来,系统配置不是一个输入方法. 但因为它要求读取键盘, 所以,TCDOS 把它按一个输入方法来实现.系统配置实为菜单. 用方向键选取要改变的配置. 具体含义见§32.6 TC 外码与关联混录双拼, 哲东双拼, 全拼均使用同一命令装入执行.因为它们都是TC 外码.TCDOS 独创了 TC 外码体系. 只要提供 ASC 文本形式的汉字录入码本,即可由 TCDOS提供的码本工具编译为可运行的汉字输入码本.在 TC 外码之间可以互相引用.例如在哲东双拼下引用双拼词组按步执行:⑴按 CTRL SHIFT 系统键选中双拼词组按 ALT [ 建立引用目标外码⑵按 CTRL SHIFT 系统键选中哲东双拼按 ALT ] 建立引用一旦建立起引用关联, 我们可以在哲东双拼方法中使用双拼词组的外码.哲东拼音 megu 1 美观 2 美国TCDOS 首先查找哲东拼音对照表,如果没找到,转而查找双拼词组对照表. 但 ; 号直接查找引用外码, 例如哲东拼音 ;megu 1 美观 2 美国哲东中文用户手册 5 ━━━━━━━━━━━━━━━━━━━━━━━━━━━━━━━━━━2.7 安装时建立 TC 外码关联除了上述动态建立 TC 外码关联外, 在安装 TC 外码时利用LOADKEY.EXE 命令选项也可建立关联.例如: 执行序列C:> loadkey py.xx 1 安装双拼词组并设之为关联目标C:> loadkey py.x 3 安装双拼建立关联, 并设之为新关联目标C:> loadkey xpy.x 2 安装哲东双拼建立关联2.8 制作 TC 外码第一步: 用文本编辑器(如 MS EDIT 或 PE2)编辑一个 ASC 码本.┌────────────────────────────┐│ ; FILE : TEST.asc ││ ; 这是一个例子││││ make 制 code 码马││ yong 用 hu 户││ y 用││ a 哲 ; 快键││││ ; The end of file │└────────────────────────────┘我们对 ASC 码本有如下约定:1 一个外码可以有多个同码汉字2 同一外码可以多处定义3 同一汉字可以有不同外码4 分号 ; 至行尾为注解5 只有一个字母的外码为快键6 外码只使用 a - z ( 小写 )第二步: 把 ASC 码本转换为 TC 码本. 执行命令C:\TCDOS> trskey ASC码本 TC码本码名称码长码名称必须限制在 5 个汉字以内. 下面我们把我们的例子TEST.asc 转换为 TC 码本 TEST.xC:\TCDOS> trskey TEST.asc TEST.x " 例子 " 4第三步: 装入TEST.x 即可使用C:\TCDOS> loadkey TEST.x如果你没有对全部的汉字编码, 可以与其它TC外码关联使用上面我们编制了单字 TC 码本.同样方法可以制作词组码本. 在制作词组码本时有二个约定:◆ ASC 码本中, 词组之间用空格, TAB , 回车等间隔◆转换命令格式为C:\TCDOS> trskey ASC码本 TC码本码名称码长 STR哲东中文用户手册 6 ━━━━━━━━━━━━━━━━━━━━━━━━━━━━━━━━━━用户可以反编译 TC 码本获取原 ASC 码本 ,命令如下C:\TCDOS> uncode TC码本 ASC码本2.9 TCDOS 键盘管理TCDOS 使用非常开放,灵活的键盘管理. 支持对照表式的第二代汉字录入方法,也支持语音录入, 语句录入,手写录入等第三代汉字录入方法,并提供基于 MSDOS 标准的统一接口.详见 TCDOS.PRO§3 配置 TCDOSTCDOS 提供非常灵活的配置, 以构成各种应用环境.3.1 屏幕识别策略TCDOS 是中西文兼容 DOS. 西文软件不用汉化即可在其上运行并处理汉字.由于西文软件中大量使用表格符( 如下拉菜单 ). 而这些表格符与汉字编码相重叠.处理这种冲突是中西文兼容 DOS 的基本任务之一. TCDOS 采用先进的统计识别策略.按 CTRL SHIFT 键调出系统菜单,用左右方向键调至中西文环境处,用上下方向键调节屏幕显示策略.●中西文常用状态. 系统采用识别度可调的西文制表优先的统计识别策略.用 -/+ 键调节识别度.识别度在 1 -- 80 之间. ((缺省识别度 16 ) 可以在启动 TCDOS 时利用 TCVGA.EXE 选项设置识别度C:\TCDOS> tcvga /CE=20由于 TCDOS 采用非常先进的识别策略, 通常我们不需要改变缺省设置.●标准中文该状态下,系统采用汉字优先的统计识别策略.可以在启动时利用 TCVGA.EXE 选项规定启动状态为标准中文 ( 因为缺省为中西文)C:\TCDOS> tcvga /CC●西文该状态主要为程序员方便而设立,系统完全按西文显示.相当于原西文 DOS.TC 建议: 如果应用程序为中文软件,并且没有ASCII制表符, 使用标准中文模式. 否则使用中西文模式. 如果应用软件中只有封闭的制表线,可以设识别度高一些,如 40--80哲东中文用户手册 7 ━━━━━━━━━━━━━━━━━━━━━━━━━━━━━━━━━━3.2 屏幕优化选择TCDOS 自动识别各种显示卡.并尽可能优化其性能.对于像 TVGA 卡带 512K 内存的显示卡,自动采用快速的硬件滚屏.但是这将导致国内一些中文软件不能正常显示( 因为它们假定视屏起址为 A000 ).所以,有时我们不能允许这种优化.使用 TCVGA.EXE 选项来关闭这种优化C:\TCDOS> tcvga /VTC 提示程序员: 在文本模式下,不能假定中文屏幕起址为 A000 因为对一些显示卡( 或 256K VRAM ) 中西文 DOS 的文本屏幕起址必须不是 A000. 所以, 你的程序运行在文本模式下时,尽可能不使用图形,更不能对视屏直接操作.如果必要,可以使用 AH=0C INT 10 画点功能.通常,中文 DOS 即使在文本模式下也允许这个功能 ( 西文 DOS文本模式下没有此功能 )另一个办法是利用中文DOS 提供的图形功能.如画点,画线写字等( 通常这些够用了) 但请主意,这些图形功能接口并没有标准. ( 实际上, 这是中文 DOS 规范的主要内容.TCDOS 的图文接口见 TCPRO.CPP3.3 屏幕光标TCDOS 提供丙种屏幕光标. 即闪烁光标( 与西文DOS同 ) 和固定光标. 缺省为闪烁光标. 使用 TCVGA.EXE 选项设置固定光标C:\TCDOS> tcvga /CRS3.4 系统键盘定义约定俗成, 系统键使用 CTRL SHIFT 空格等键组合而成. 但是由于在 TCDOS 上可以运行其它中文DOS系统( TCDOS 之兼容性可见一斑. 西文DOS 可运行, TCDOS 就可以运行 !), 为避免冲突, 我们可以使用另一套系统键定义:要使用第二套系统键定义,利用 TCKEY.EXE 选项C:\TCDOS> tckey /ALT哲东中文用户手册 8 ━━━━━━━━━━━━━━━━━━━━━━━━━━━━━━━━━━3.5 外码缓冲区TCDOS 把汉字外码装入扩展内存 ( XMS ). 查找时使用缓冲.通常缓冲为 2K ( 缺省值 ) 但对于像 ENGLISH.XX 这样的 TC 外码缓冲需设为 5K. 通常我们使用缺省值就可以了. 使用 TCKey.EXE选项来改变设置, 例如 3KC:\TCDOS> tckey /BUF=33.7 显示字库TC DOS 允许同时使用多种显示字库. 有些系统对国标汉字进行了扩充, 如华光排版系统,金山排版系统等. TCDOS 显示全部汉字编码空间用户可以装载自已的显示字库. 有关 TCDOS 显示字库格式可以咨询哲东公司.安装( 或改装 ) 显示字库命令是C:\TCDOS> loadlib dispLIB16目前 TCDOS 提供了简繁两种字库.TCLIB 简体TCLIB.ALT 繁体3.8 TC 配置提要TCVGA [ 选项 ]/V 屏幕模式 VGA 提示/VV 使用快速 VGA 显示 ( 如 COMPQA AST 等 )/ASC 某些显示卡ROM字库缺字( 如某些 TVGA9400 卡 )则可使用TC 自带 ASCII 字库. 除非确实需要, 才使用此选项 ! /CRS 固定光标/CC 启动为标准中文缺省中西文/MS 启动后不进入中文, 使用 MSDOS 显示状态/CE=n 中古文识别策略为 (缺省策略为16) n = 1--80/12CE 图形模式 12 为中西文兼容 ( 16 线 )/12CC 图形模式 12 为传统中文兼容 ( 18 线 )多项参数连写. 例如C:\TCDOS> tcvga /CRS /ASCTCKEY [ 选项 ]/ALT 系统键定义第二套/BUF=n TC 外码缓冲大小选择 ( 缺省 = 3 )LOADLIB 显示字库TCLIB 简体字库TCLIB.ALT 繁体字库━━━━━━━━━━━━━━━━━━━━━━━━━━━━━━━━━━§4 打印输出正如 MS DOS 不提供排版打印程序一样, TCDOS 也不提供排版打印程序. TC 坚持认为, 排版打印程序是一个应用软件. 它应该独立于中文 DOS.TCDOS 6.6 支持CCED 5.0 国内最著名的排版打印系统WordPefect 5.2CS. 国际上用户最多的文字处理系统§5 TCPro 图文接口TCDOS 对西文 DOS 进行了极小扩充. 例如, 显示字库接口等.详细资料与哲东公司联系.§6 支持 AutoCAD由专业系统 TCAD 完成TCDOS for AutoCAD 专业版直接支持原版 AutoCAD 12. 目前提供了 35 种简繁字库. 基本上能满足广大 CAD 用户的需求.直接使用原版 AutoCAD 可以获得原版软件的高速度运行. 同时由于 TCDOS 是一个中文平台, 与 AutoCAD 版本无关. 所以, 以后西文 AutoCAD 版本更新, TCDOS 专业版将自动支持新版本. 这就是我们这所以直接支持原版 AutoCAD 而不是汉化它的原因. 同时也避免了由于汉化引起的版权争端.与其它 AutoCAD 中文环境不同, TCDOS 是一个中文平台. 它利用了中文DOS 的资源. 如汉字输入方法. 但是, 其它的 CAD " 中文环境" 只是对 AutoCAD 软件提供汉字环境. 我们知道, AutoCAD可以暂时退回 DOS 环境的. 这时, 其它"中文环境" 就看不见汉字了.这就是平台的优势 ! 走到哪里,都在中文环境中. ( 如果你讨厌中文,请学习系统键 CTRL ALT X 的用法 ).━━━━━━━━━━━━━━━━━━━━━━━━━━━━━━━━━━§A 键盘定义列表★系统键定义---> 第二套键盘定义切换中/英文 CTRL 空格 --> ALT 空格轮换中文方法 CTRL 右 SHIFT --> ALT 右 SHIFT和 CTRL 左 SHIFT --> 和 ALT 左 SHIFT 删除汉字外码 CTRL ALT Z中西文模式开关 CTRL ALT X重新扫屏热键右 SHIFT 空格★系统设置键定义→左移菜单←右移菜单↑选上一值↓选下一值pgUP 快速调节pgDN 快速调节━━━━━━━━━━━━━━━━━━━━━━━━━━━━━━━━━━★国际码键定义BackSpace 取消外码/放弃选择*起动中文浏览选择方式在SHIFT 或 NumLock 状态下使用方向键→左移←右移↑上移一列↓下移一列PgUp 上一区PgDn 下一区5 选中汉字★制表符键定义*切换制表线型C ───汉字单字节制表符 ( 单线 )C ━━━汉字单字节 ( 双线 )C ──国标汉字双字节制表符C ━━国标汉字双字节制表符E 英文单字节制表符-单字节单横线/汉字细横线=单字节双横线/汉字粗横线|单字节单竖线/汉字细竖线\单字节双竖线/汉字粗竖线在SHIFT 或 NumLock 状态下使用方向键7 8 9┏━━┳━━━┓4 ┃ 5┃ 6┃┣━━╋━━━┫┃┃┃┗━━┻━━━┛1 2 3★ TC 外码键定义双拼拼音词组哲东拼音均属 TC 外码a--z 外码? 外码模糊键空格结束外码或选择第一重码退格键删除外码> 下一列重码< 第一列重码1--8 选择重码直接键入下一外码时,第一重码被选中.ALT [ 建立引用目标ALT ] 建立关联引用; 强制引用外码哲东中文用户手册 12 ━━━━━━━━━━━━━━━━━━━━━━━━━━━━━━━━━━致用户:哲东电脑公司全体工作人员努力奉献优秀的软件和文档.但是,技术在不断进步,要求也在不断变化. 如果您对我们的产品(软件和用户手册)有任何意见或建议,欢迎来函.以便我们在以后的产品中改进.━━━━━━━━━━━━━━━━━━━━━━━━━━━━━━━━━━寄:━━━━━━━━━━━━━━━━━━━━━━━━━━━━━━━━━━用户姓名用户单位电话邮编地址购买日期━━━━━━━━━━━━━━━━━━━━━━━━━━━━━━━━━━用户建议日期。

MACHINEMANUAL设备说明书Machine desingnation:Open die forging press设备名称自由锻造压机Machine type:OF-2-45/50MN机器型号Customer:Henan Zhongyuan Special Steel Group Co.Ltd.客户Order No.:41107000订货号Code:代号ZSSWYear of construction:2008完成时间Preface前言Address,fax number,phone number地址传真电话Safety standards安全标准Safety layout安全规划INTRODUCTION绪论Main dimensions of machine and workpiece 设备和工件的主要尺寸、参数Tools,dimensions工具尺寸TECHNICAL DATA技术资料1Erection of the machine设备的安装Transportation weights零件吊装Suspension sketches吊装图Erection of the assemblies and of the machine 零件及设备的安装ERECTION安装2Functional descriptions of the sub-assemblies部件功能描述Hydraulic systems液压系统Pneumatic systems气压系统Lubrication润滑系统DESCRIPTION说明3General instructions for attendance维护的一般说明Maintenance hints维护规则Lubrication schematics润滑表Maintenance schematics维护表MAINTENANCE维护4Machine control,data设备控制,相关资料Operating elements操作元件Indication of malfunction故障指示Maintenance and service functions维护和保养OPERATION设备操作5Layout drawings规划图Drawings of spare and wear parts备件和易损件图纸Schematics图表DRAWINGS图纸6Recommended spare parts推荐的备件SPARE PART LIST备件7Documentation from sub-suppliers分包商技术文件SUB-SUPPLIERS DOCUMENTATION分包商文件8Test records and certificates For components subject to inspection主要零件测试报告和证书TEST CERTIFICATES检验证书9Table ofContent 目录A1Chapter 章节Title 标题Note 内容0.0Table of contents 目录0.1Preface 前言Important Advice 重要建议Standards considered 执行标准Warranty 质保Protection notice according to DIN ISO 16016版权所有After-sales service 售后服务Spare parts 备件Contact address 联系方式0.2Safety standards 安全规范Safety standards for:Operating and maintenance personnel 操作和维护人员应遵守的安全规范Fire protection measures 消防措施0.3Explanation of symbols 符号说明Explanation of all symbols used in the manual 说明书中的图表及符号说明0.4Index 索引Search assistant 快捷检索0.5Safety layout 安全规划0.6Manufacturer’sdeclaration or declaration of conformity 厂商声明及联合声明Important information重要内容This MACHINE MANUAL contains information which is required for commissioning,operation,handling,inspection and maintenance of the machine.本手册包括设备试车,操作,检查,日常维护等所需要的说明。
分区助手用户手册目录关于分区助手 (2)使用分区助手 (3)创建分区 (3)删除分区 (3)格式化分区 (3)调整和移动分区 (4)设置卷标 (4)改变盘符 (4)隐藏和取消隐藏分区 (5)设置活动分区 (5)转换分区 (5)擦除数据 (5)删除所有分区 (6)复制分区 (7)复制磁盘 (7)错误检测 (8)内嵌工具简介 (8)扩展分区向导 (8)动态磁盘转换器 (8)NTFS与FAT32转换器 (8)技术支持 (9)关于分区助手分区助手是一个简单易用、多功能的免费磁盘分区管理软件,在它的帮助下,你可以无损数据地执行调整分区大小,移动分区位置,复制分区,复制磁盘等操作,是一个不可多得分区工具。
同时它能工作在所有的操作系统中,包括Windows7/2000/XP/Vista/2003/2008和WinPE,也能工作在所有的能被Windows识别的存储设备上包括所有的硬件RAID、IDE、SATA、SCSI和USB等类型的磁盘设备。
支持2TB的大磁盘和大分区,支持的文件系统包括FAT、FAT32和NTFS。
任何操作都可以即时的在分区助手的主窗口中预览,只有在点击提交按钮之后操作才会生效,这使操作更加灵活和安全,以减少误操作。
不管是普通的用户还是高级的服务器用户,其分区助手都能满足他们的需求,为他们提供全功能、稳定可靠的磁盘分区管理服务。
特征l调整分区大小l移动分区位置l合并/拆分分区l复制分区向导l复制磁盘向导l创建/删除/格式化分区l擦除磁盘/擦除分区内嵌工具l扩展分区向导l动态磁盘转换器l NTFS与FAT32转换器附加特征l坏扇区检测l文件系统错误检查l更改盘符l隐藏/取消隐藏分区l设置成活动分区l转换FAT32到NTFSl擦除未分配空间使用分区助手创建分区1.首先,你需要右击以选择一块未分配空间,在弹出的菜单中选择创建分区选项。
2.打开一个创建分区的对话框,你可以在这里设置分区的相关信息,如盘符,卷标,分区大小,文件系统等等。
User’s ManualUSB 1.1 Serial AdapterTable of ContentsSafety Instructions (1)Introduction (1)Features (2)System Requirements (2)Package Contents (2)Specification (3)Driver Installation (4)Installation Verification (13)Certificate (15)Disclaimer (15)Safety InstructionsAlways read the safety instructions carefullyKeep this User’s Manual for future referenceKeep this equipment away from humidityLay this equipment on a reliable flat surface before setting it upIf any of the following situation arises, get the equipment checked by a service technician:The equipment has been exposed to moisture.The equipment has been dropped and damaged.The equipment has obvious sign of breakage.The equipment has not working well or you cannot get it work according to User’s Manual.IntroductionUSB1.1 Serial Adapter operates as a bridge between one USB port and standard RS232 Serial port. Users just simply hook the cable into PC or Hub’s port, and it can connect any RS-232 devices or DB 9P Male connector.FeaturesAdvanced 16 Bit processor for USB transaction and control data processingCompliant with the USB 1.1 specificationUSB suspend conditionPlug & play compatibleUtilizes low cost external crystal circuitryDebug UART for debug and code developmentUSB host device drivers available500 kbps rateSystem RequirementsIBM Compatible Pentium-233 MHz or faster64 MB RAM or more.PC with USB port available.OS support:Windows® 98SE(Vendor Supply)Windows® ME (Vendor Supply)Windows® 2000 (Vendor Supply)Windows® XP (Vendor Supply) Package ContentsUSB 1.1 serial adapterDriver CD x 1Quick Installation Guide x 1 SpecificationProduct Name USB 1.1 serial adapter Data Transfer Rate 500 kbpsFunction USB1.1 Serial Adapter operates as a bridge between one USB port and standard RS232 Serial portDriver InstallationWindows 98SEStep 1 Insert the Driver CD to your CD-ROM when the first time you turn on the computer after hardware installation completed.Step 2 Windows searches new device, and click Next to continue.Step 3 Select Search for the best driver for your device and click Next to continue.Step 4 Select Specify a location, click Browse to locate the driver shown as the below image, and click Next to continue.Step 5 Click Next to install.Step 6 The system shows Windows has finished installing the software that your new hardware device requires. Click Finish.Windows MEStep 1 Insert the Driver CD to your CD-ROM when the first time you turn on the computer after hardware installation completed.Step 2 Select Specify the location of the driver, Click Next to continue.Step 3 Select Specify a location, click Browse to locate the driver shown as the below image, and click Next to continue.Step 4 Click Next to install.Step 5 The system shows Windows has finished installing the new hardware device. Click Finish.Windows 2000Step 1 Insert the Driver CD to your CD-ROM when the first time you turn on the computer after hardware installation completed.Step 2 Windows searches new device, and click Next to continue.Step 3 Select Search for a suitable driver for my device, and click Next to continue.Step 4 Select Specify a location, click Browse to locate the driver shown as the below image, and click Next to continue.Step 5 Click Next to install.Step 6 The system shows Windows has finished installing the software for the device. Click Finish.Windows XPStep 1 Insert the Driver CD to your CD-ROM when the first time you turn on the computer after hardware installation completed.Step 2 Windows searches new device. Select Install from a list or specific location and click Next to continue.Step 3 Select Search for the best driver in these locations, click Browse to locate the driver shown as the below image, and click Next to continue.Step 6 The system shows The wizard has finished installing the software. Click Finish.Installation Verification Windows 98SEWindows MEWindows 2000Windows XPCertificateFCCThis equipment has been tested and found to comply with Part 15 of the FCC Rules. Operation is subject to the following two conditions:This device may not cause harmful interferenceThis device must accept any interference received. Including interference that may cause undesired operation.CE – CertificateThis equipment is in compliance with the requirements of the following regulations: EN 55 022: CLASS BDisclaimerInformation in this document is subject to change without notice. The manufacturer does not make any representations or warranties (implied or otherwise) regarding the accuracy and completeness of this document and shall in no event be liable for any loss of profit or any commercial damage, including but not limited to special, incidental, consequential, or other damage. No part of this document may be reproduced or transmitted in any form by any means, electronic or mechanical, including photocopying, recording or information recording and retrieval systems without the express written permission of the manufacturer.。
EzCAP Audio Capture Quick Installation Guide
1. Hardware Installation
The EzCAP Audio Capture device doesn‟t need any driver installation, as the Windows Operating System will install the driver automatically.
Please connect audio capture USB connector into your computer‟s free USB 2.0 port. The system will note “Found new hardware.”, please wait for a moment until system notes “The device is ready to use”.
Please check hardware installing correctly.
Right click “My Computer”(on your desktop) and select “Properties”, and select “Hardware” option, please click “Device Manager” key.
Then, please click “Sound, video and game controllers”, then you will find the device name –“USB Audio Device”. This will confirm that the device has been connected successfully.
2. Hardware Connection
Please connect your Audio Capture device to your record player or cassette deck. You may need to also use a …male-to-male‟ RCA lead which is usually supplied with your audio equipment. This can be purchased as an accessory - please call 0845 555 4444 and request an …ECPLEAD‟ – cost around £5.
3. Software Installation
Please insert software CD in your CD drive, and double click “My Computer”and “EzCAP Audio Capture” CD icon.
Please double click “audio editing.exe” to install software, and click or select “Next”, “I accept the agreement”and/or “finish”to finish the software installation.
4, Operation.
It may be that you need to pull the audio capture device and plug it into your computer again.
A, Double click “audacity” icon on your computer‟s desktop, please select your language first, then click “OK”.
Please click “Edit” key on the software panel, and select “Preferences”.
Please select recording device to be “USB PnP Device”, and channels to be “2(Stereo)”. And select “Software Play through (Play new track while recording it)”, then click “OK”.
B. Now, we can start to record analogue audio to be digital MP3 format file. Begin playing your vinyl or cassette and click red record key (see below) to start recording audio - when you want to finish, please click yellow stop key.
For the first time you do this, you need to follow a few more steps if you want to export as MP3 file.
Click “File”, and select “Export As MP3”.
You need to select a file name and location now.
If requested, you may need to locate the plug-ins file –“lame_enc.dll”– see below
You may be asked to provide some additional information about your recording.
You can now use the file for your iPod by iTunes / or other MP3 player. PLEASE NOTE:
To use the …Effects‟ functions provided in the drop-down menus on Audacity software (such as noise removal or bass boost), you need to select the portion of your recorded music to be changed – to do this …click, hold and drag‟ with your left mouse key the section of music from the horizontal time bar found in the Audacity window (on screen). Then simply select …Effect‟ from the top menu and choose your desired effect.
TROUBLESHOOTING:
If you find your recording is quite distorted and there is a lot of excess noise and interference, then please follow these instructions:
Please check as following:
1. Select …Volume control‟ –by double clicking on little speaker icon at
bottom right of screen
2. Change the Mixer Device to “USB PnP Audio Device” then click “OK”
3. Check the volume level on the popup panel; Drag the level to a lower
level and you will get better quality sound.。