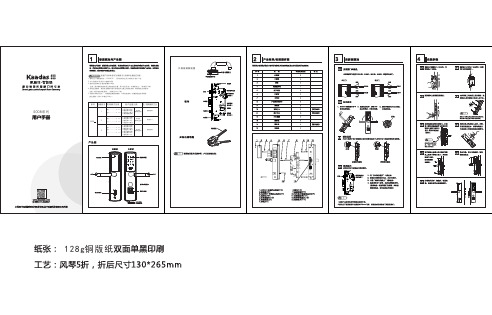
凯迪仕m3-w使用说明书
- 格式:docx
- 大小:37.29 KB
- 文档页数:2

ContentsAbout This Guide (1)Appearance (2)Set Up Y our Deco Extender (3)Dashboard (5)Update Deco Units (6)Authentication (7)About This GuideThis guide provides a brief introduction to Deco Whole Home Mesh Wi-Fi Extender and the Deco app, as well as regulatory information.Please note that features of Deco Extenders may vary slightly depending on the model and software version you have, and on your location, language and internet service provider. All images, parameters and descriptions documented in this guide are used for demonstration only.ConventionsMore Info• Specific product information can be found on the product page at https://.• A Technical Support Forum is provided for you to discuss our products at https://.• Our T echnical Support contact information can be found at the Help center of the Deco app and the Contact T echnical Support page at https:///support.Speed/Coverage/Device Quantity Disclaimer Maximum wireless transmission rates are the physical rates derived from IEEE Standard 802.11 specifications. Range, coverage, and maximum quantity of connected devices are based on test results under normal usage conditions. Actual wireless data throughput. wireless coverage, and quantity of connected devices are not guaranteed and will vary as a result of 1) environmental factors, including building materials, physical objects, and obstacles, 2) network conditions, including local interference, volume and density of traffic, product location, network complexity, and network overhead, and 3) client limitations, including rated performance, location, connection quality, and client condition.operational temperature:0-40度2Appearance Deco Extender has four LED lights and a Reset button. See the explanation below:Reset Button:Press to reset Deco Extender to factory default settings.3Set Up Y our Deco Extender Follow the steps below to add the Deco Extender to your existing Deco network.Before you start Install the Deco app and set up a Deco network. For instructions, refer to the user manual of your Deco Whole Home Mesh Wi-FiSystem/Unit. 2. Add your Deco Extender On the dashboard, tap + and select DECOS .Identify your Deco model. 3. Find a suitable spot Follow the app instructions to find a suitable spot within the range of your existing Deconetwork.44. Plug in your Deco Extender Plug the Deco Extender into a wall outlet andwait until its Power LED turns solid on. 5. Specify the location Select a location for this Deco Extender. If its location is not listed, you can create a new one by choosing Custom. 6. Finish The Deco app will automatically optimize your Deco network and finish adding the DecoExtender.View connected devices Display all Deco units Check the working status56Update Deco Units TP-Link is dedicated to improving product features and providing a better customer experience. Update Deco units when prompted in the Deco app.Update AvailableUpdating DecoUp-to-dateAuthenticationCOPYRIGHT & TRADEMARKSSpecifications are subject to change without notice. is a registered trademark of TP-Link T echnologies Co., Ltd. Other brands and product names are trademarks or registered trademarks of their respective holders.No part of the specifications may be reproduced in any form or by any means or used to make any derivative such as translation, transformation, or adaptation without permission from TP-Link T echnologies Co., Ltd. Copyright © 2018 TP-Link T echnologies Co., Ltd. All rights reserved.FCC compliance information statementProduct Name: AC1200 Whole Home Mesh Wi-Fi ExtenderModel Number: Deco M3WResponsible Party:TP-Link USA Corporation, d/b/a TP-Link North America, Inc.Address: 145 South State College Blvd. Suite 400, Brea, CA 92821Website: /us/T el: +1 626 333 0234Fax: +1 909 527 6803E-mail:*********************This equipment has been tested and found to comply with the limits for a Class B digital device, pursuant to part 15 of the FCC Rules. These limits are designed to provide reasonable protection against harmful interference in a residential installation. This equipment generates, uses and can radiate radio frequency energy and, if not installed and used in accordance with the instructions, may cause harmful interference to radio communications. However, there is no guarantee that interference will not occur in a particular installation. If this equipment does cause harmful interference to radio or television reception, which can be determined by turning the equipment off and on, the user is encouraged to try to correct the interference by one or more of the following measures:• Reorient or relocate the receiving antenna.• Increase the separation between the equipment and receiver.• Connect the equipment into an outlet on a circuit different from that to which the receiver is connected.• Consult the dealer or an experienced radio/ TV technician for help.This device complies with part 15 of the FCC Rules. Operation is subject to the following two conditions:1. This device may not cause harmful interference.2. This device must accept any interference received, including interference that may cause undesired operation.Any changes or modifications not expressly approved by the party responsible for compliance could void the user’s authority to operate the equipment.Note: The manufacturer is not responsible for any radio or TV interference caused by unauthorized modifications to this equipment. Such modifications could void the user’s authority to operate the equipment.FCC RF Radiation Exposure Statement:This equipment complies with FCC RF radiation exposure limits set forth for an uncontrolled environment. This device and its antenna must not be co-located or operating in conjunction with any other antenna or transmitter.“T o comply with FCC RF exposure compliance requirements, this grant is applicable to only Mobile Configurations. The antennas used for this transmitter must be installed to provide a separation distance of at least 20 cm from all persons and must not be co-located or operating in conjunction with any other antenna or transmitter.”This device is restricted in indoor environment only.We, TP-Link USA Corporation, has determined that the equipment shown as above has been shown to comply with the applicable technical standards, FCC part 15. There is no unauthorized change is made in the equipment and the equipment is properly maintained and operated.Issue Date: 2018-10-24CE Mark WarningThis is a class B product. In a domestic environment, this product may cause radio interference, in which case the user may be required to take adequate measures.OPERATING FREQUENCY (the maximum transmitted power)2400 MHz -2483.5 MHz (20dBm)5150 MHz -5250 MHz (23dBm)5250 MHz -5350 MHz (23dBm)5470 MHz -5725 MHz (30dBm)EU Declaration of ConformityTP-Link hereby declares that the device is in compliance with the essential requirements and other relevant provisions of directives 2014/53/EU, 2009/125/EC and 2011/65/EU.The original EU declaration of conformity may be found at /en/ceRF Exposure InformationThis device meets the EU requirements (2014/53/EU Article 3.1a) on the limitation of exposure of the general public to electromagnetic fields by way of health protection.The device complies with RF specifications when the device used at 20 cm from your body.Restricted to indoor use.Canadian Compliance StatementThis device complies with Industry Canada license-exempt RSSs. Operation is subject to the following two conditions:1. This device may not cause interference, and2. This device must accept any interference, including interference that may cause undesired operation of the device.Le présent appareil est conforme aux CNR d’Industrie Canada applicables aux appareils radio exempts de licence. L’exploitation est autorisée aux deux conditions suivantes :1. l’appareil ne doit pas produire de brouillage;2. l’utilisateur de l’appareil doit accepter tout brouillage radioélectrique subi, meme si le brouillage est susceptible d’en compromettre le fonctionnement.Caution:1. The device for operation in the band 5150–5250 MHz is only for indoor use to reduce the potential for harmful interference to co-channel mobile satellite systems;DFS (Dynamic Frequency Selection) products that operate in the bands 5250- 5350 MHz, 5470-5600MHz, and 5650-5725MHz.Avertissement:1. Le dispositif fonctionnant dans la bande 5150-5250 MHz est réservé uniquement pour une utilisation à l’intérieur afin de réduire les risques de brouillage préjudiciable aux systèmes de satellites mobiles utilisant les mêmes canaux;Les produits utilisant la technique d’atténuation DFS (sélection dynamique des fréquences) sur les bandes 5250- 5350 MHz, 5470-5600MHz et 5650-5725MHz.Radiation Exposure Statement:This equipment complies with IC radiation exposure limits set forth for an uncontrolled environment. This equipment should be installed and operatedwith minimum distance 20cm between the radiator & your body.Déclaration d’exposition aux radiations:Cet équipement est conforme aux limites d’exposition aux rayonnements IC établies pour un environnement non contr lé. Cet équipement doit être installé et utilisé avec un minimum de 20 cm de distance entre la source de rayonnement et votre corps.Industry Canada StatementCAN ICES-3 (B)/NMB-3(B)Korea Warning Statements당해 무선설비는 운용중 전파혼신 가능성이 있음.NCC Notice & BSMI Notice注意!依據 低功率電波輻射性電機管理辦法第十二條 經型式認證合格之低功率射頻電機,非經許可,公司、商號或使用者均不得擅自變更頻率、加大功率或變更原設計之特性或功能。

面板把手均为304不锈钢,厚度2.0以上指纹锁技术与参数开锁认证方式:指纹、密码、机械钥匙、(遥控选配)指纹采集窗口:光学式指纹图像分辨率:500dpi指纹图像采集时间:<0.5s指纹对比:<1s指纹对比方式:1:N指纹误识别率(FZR):<.001%指纹拒真率(FRP): <0.1%指纹容量:3000枚密码容量:8组遥控容量30个开门记录容量3000条LED指示低压报警:<4.2V供电电压:DC6V电流消耗:峰值电流<120mA,平均电流<45mA电池:4-8节AA碱性电池功能特点1:瞬间启动——指纹门锁2:智能沟通——液晶显示3:主宾显示——分享不同权限4:智能语音提示——操作便捷5:触摸式密码设计——时尚耐用6:超B级叶片空旋锁头——应急钥匙7:电源显示外置——欠电显示8:指纹同步更新功能9:常开——办公商务方便10:指纹+密码二合一式开启——安全保障11:禁试功能——保护外侵12:挟持密码设置——人性化安全保障13:开门记录——数据记录存储查询14:防撬报警——撬锁报警锁具关闭保护15:液晶显示——时尚大气16:上提把手——上锁天地勾锁门管理指纹设置注册管理指纹”时正确放入手指提示“请在录入一次”三次录入至系统提示“录入成功”→表示录入成功,注:前五枚录入的指纹为管理指纹,系统从1-5自动按顺序记录管理指纹ID号。
录入完毕按“*”号键退出。
用户指纹设置验证管理员指纹”时扫描管理指纹进入菜单→进入“1指纹设置”栏后按“#”号键确认进入→画面显示“1添加指纹”栏按“#”号键确认→按“8”号键向下选择至用户指纹栏(第六枚及以后为用户指纹)→正确将手指放入指纹窗口三次至系统提示“录入成功”→表示录入成功,系统自动按顺序记录指纹的ID号,按“#”号键可继续录入下一枚指纹. 可以录入用户指纹2995枚,录入完毕按“*”号键退出。
密码设置验证管理员指纹”时扫描管理指纹进入菜单→按“8”号键向下选择进入“密码设置”栏→按“#”号键确认→进入“添加密码”栏后按“#”号键确认设置第“1组用户密码”→按“#”号键确认→输入要设置的密码后按“#”号键确认→重新输入您要设置的密码按“#”号键确认至“滴答滴”或“添加成功”.(注:a可设置8组用户密码,每组密码最多12位,b本锁出厂时不设置用户密码,c当您设置密码后才可以使用密码,d本锁密码为乱码设计,输入密码时前、后可随意按多位数字键以防止旁人偷窥,前、后可以各12位乱码)遥控器设置号设置键进入菜单→∈提示“验证管理员指纹”时扫描管理指纹进入菜单→按“8”号键下调至“遥控设置”栏再按“#”号键确认进入→提示“添加遥控器”时按“#”号键确认→按住遥控器上的任意键至系统提示“添加成功”表示录入成功,系统自动按顺序记录遥控器的顺序号,按“#”号键可继续录入下一个遥控器,录入完毕等待10秒,超时自动退出。

智能锁使用说明书使用前请仔细阅读使用说明书,并妥善保管一.技术参数启动方式指纹/密码/卡/机械钥匙指纹传感器半导体供电方式5号碱性电池4节应急电源5V应急电源接口·MiroUSB待机功耗60uA动态功耗小于5A显示OLED键盘背光独立LED指纹容量100枚指纹识别速度小于1S指纹拒真率小于0.01%指纹认假率0.0001%密码输入防窥视密码长度6-12位用户总量300卡类型Mifare 1 高频卡工作温度-30℃ ~ 70℃开锁记录250组初始管理员密码12345623二.用户构成三.功能说明1.1.用户类型数量权限管理用户5开锁、进入管理普通开锁用户295开锁1.默认管理员密码:123456,按 + # +管理员密码进入操作系统。
2.系统初始化:初始化系统有两种方式,软件初始化和硬件初始化,软件初始化是进入系统设置后选择初始化菜单,硬件初始化是在后锁面的电池盖里面有个复位按键孔,按住复位按键5秒,屏幕提示初始化系统,按#号键确认初始化。
3.用户容量:用户总量为300个,对应300个用户编号。
每一个用户编号只可以对应一个指纹或者密码或者卡。
编号1~5为管理员用户,6~300为普通开锁用户。
指纹用户量受限于指纹模组。
比如指纹模组的指纹容量为100,则最大指纹用户量为100。
四.操作设置1.触摸唤醒屏幕指示灯亮起,按 + # 键进入功能菜单验证入口注意:所有的设置和更改都需要进入功能菜单设置。
2号键是上翻,8号键是下翻,#号键是确认, 号键是返回。
***42.3.删除开锁信息按 + # 号键,进入功能菜单验证入口;输入管理员密码,输入初始密码123456 + # 号键;进入设置界面。
进入设置界面,如图所示;先择录入开锁信息,按#号键确认。
录入管理员信息,按#号键确认;输入密码、指纹、IC 卡;管理员可以设置5位(包括指纹、卡片、密码)编号位001-005。
进入删除开锁信息;显示 “按编号删除”,输入用户编号按#号键确认后即可删除;进入“分组删除”后,里面可以删除管理员信息和普通用户信息。

![[VIP专享]门锁安装使用手册8.8](https://img.taocdn.com/s1/m/31e896d9d0d233d4b14e69c8.png)
智能门锁使用手册(版本8.8)前言TM、IC、RF等智能卡系列门锁是高新技术系列产品。
该系列智能门锁为独立型智能门锁,由智能卡、智能门锁、管理软件三部分组成。
门锁采用性能稳定、功能优越的智能卡(TM、IC、RF)作为开门钥匙,门锁微电脑智能控制,是一种安全可靠,高效节能,技术先进,操作灵活方便,便于管理的多功能智能型门锁。
适用范围广泛,可用于酒店、宾馆、机关部门、现代化办公室、写字楼、居民住宅等。
为了让广大用户更好安装、掌握、使用智能门锁,用户在安装、使用智能门锁之前,敬请先详细参阅本手册及光盘内《门锁管理软件操作说明8.8》目录第一章安装智能门锁------------------------------3第二章安装管理系统及设置门锁信息-----------------6第三章智能卡管理及使用---------------------------9第四章总台常见操作-------------------------------11第五章管理员常见操作-----------------------------12第六章智能门锁问题解答 -------------------------13第七章门锁维护-----------------------------------15第一章安装智能门锁一、准备门锁的安装工具工具:锤、扁凿、尺、十字螺丝刀、4mm内六角螺丝板手、2mm内六角螺丝板手。
电钻、钻头。
二、区别门锁方向1、右(R)开门锁:门合页(门钮)位位于右边门框的为右开门。
2、左(L)开门锁:门合页(门钮)位位于左边门框的为左开门。
(见图-1)右开门(R) 室外左开门(L)图-1 左、右开门示意图三、开挖锁槽方法*(例:方型IC卡锁/ K70#大锁体)开挖锁槽:在门的适当高度上先开锁芯槽:在门侧中央处挖锁芯槽(见图-2);挖好后,在门的内外以我方提供的开孔模板或图纸(见图-3 )为样开孔,先在门的一边开一半(挖到锁芯槽处),再在另一面把孔开通,此操作可避免误差;说明:在门侧居中处,先挖28 mm X 157 mm,深110 mm的锁芯槽,挖好后,同样在门侧,以锁芯槽中心为轴对称,挖一个30 mm X 206 mm,深6 mm的浅槽。
凯迪仕智能锁产品销售手册一、智能锁市场现状随着时代的发展,人们对生活品质的追求越来越高。
传统机械锁,结构简单,容易重码,安全性差。
且携带不便,使用烦琐。
近年来不断涌现的各种密码锁、磁卡锁、感应卡锁、指纹锁等智能锁具,已拥有相当规模的市场容量。
在安全、方便、智能等各方面有绝对优势的智能锁必将逐渐替代机械锁,这已是不可否认的事实。
来自资料搜索网() 海量资料下载目前国内的智能锁市场,经过多年的发展,已开始进入成长期。
去年国内已有过三百个新建房地产楼盘预装智能锁,智能锁已成为中高端楼盘必需卖点。
受此带动,民用零售市场也已启动,如深圳安防市场,超过30%的店铺有智能锁出售,各大建材市场,智能锁已是随处可见。
2009年智能锁中国市场总销量达五十亿,比上年增长130%。
但市场的普及率还是很低,相比国际发达国家,如韩国的智能锁普及率已在68%以上。
预计未来几年将是中国智能锁市场高速发展期,十年内市场容量必突破千亿大关。
在温州,市场上智能锁也已随处可见。
都市花苑新田园等楼盘已率先预装智能锁。
而去年市区开盘的十来个楼盘,大部分都准备安装智能锁,如绿城广场、香缇半岛、京都城等。
温州人消费意识超前,经济实力强,智能锁潜力巨大。
二、产品知识1、指纹锁指纹锁是一种以人体指纹为识别载体和手段的智能锁具,它是计算机信息技术、电子技术、机械技术和现代五金工艺的完美结晶。
指纹锁一般由电子识别与控制、机械联动系统两部分组成。
指纹的唯一性和不可复制性决定了指纹锁是目前所有锁具中最为安全的锁种。
2、关于半导体电容式指纹模块的介绍(1)从光学传感器到电容传感器——指纹采集技术的演进指纹传感器是实现指纹自动采集的关键器件。
最早的指纹识别技术,是以光学传感器为基础的光学识别系统,识别范围仅限于皮肤的表层,通常把它叫做第一代指纹识别技术;而采用了电容传感器技术的第二代指纹识别系统实现了识别范围从表皮到真皮的转换,从而大大提高了识别的准确率和系统的安全性。
目录2 3 6 15 16 21 26 29 31使用须知产品简介安装调试设置智能锁添加到“萤石云视频”使用智能锁维护与保养附录使用须知. . . . . . . . . 萤石智能指纹锁(以下简称为“锁”)作为高科技产品,安装的好坏直接影响到门锁的正常操作及使用寿命,建议您请有智能锁安装经验的师傅进行安装,并根据产品附件中门板开孔图样板进行开孔,凿支承窝,确认所开凿的孔准确无误,然后严格按照本手册中的步骤进行操作,如果安装后发现锁有任何异常,请及时和当地的经销商或本公司的售后服务部门联系,以便快速解决问题。
如果您的房间正在装修,我们建议您将产品卸下,待装修完成后再把产品重新装上,这样做的目的是:①.避免装修过程中腐蚀性物质或腐蚀性气体腐蚀锁体,影响外观及降低产品使用寿命;②.避免门的油漆未干会影响锁的灵活传动;③.为避免对锁外观面造成腐蚀,请勿使用消毒液等腐蚀性液体擦拭锁外表面。
锁在执行初始化操作后会清空所有用户信息,在门锁安装调试完成后,请您尽快将锁初始化再重新添加密码、感应卡、指纹等开锁信息。
门锁使用一段时间后,电池电量偏低时,门锁会发出低电压警报,每次开门显示屏会提示电量不足,此时请及时更换电池并注意正负极的安装。
更换电池前请购买质量好的5号电池,因为好的电池使用时间比较长,以确保锁长时间正常使用。
若您要出远门或长期不使用锁,请将机械钥匙随身携带,不可放在室内;并取出电池,以确保锁的使用寿命。
指纹较平较细或年龄较小的用户,建议您用大拇指注册指纹,提高指纹采集时的成功率,且同一用户注册2枚以上指纹。
锁的指纹容量为200枚,密码容量为500组,感应卡容量为500张。
鉴于锁产品本身置于开放环境等特点,我们建议您谨慎注意使用安全,包括妥善保管机械钥匙及感应卡等细小部件、开锁前核查周围环境、定期更新密码及感应卡设置、及时擦除残留指纹等,避免您的开锁信息被非法盗取、复制,造成安全隐患。
支持人脸或指纹识别开锁的电子锁,将涉及您的人脸、指纹信息的处理。
智能门锁管理软件使用手册目录一、概述 (3)二、入门操作 (4)三、主界面 (9)四、操作 (12)4.1 发客人卡 (12)4.2 续住写卡 (13)4.3 客人换房 (14)4.4 补发客人房卡 (15)4.5 客人退房 (15)4.6 查看卡片信息 (16)4.7 发行管理卡片 (17)4.8 挂失卡片 (31)4.9 注销卡片 (32)4.10 读取开门记录 (33)4.11 门锁房号设置(制安装卡) (34)4.12 管理参数设置 (35)4.13 客人预订管理 (38)五、查询 (40)5.1查询各种持卡记录 (40)5.2查询日志记录 (41)六、工具 (42)6.1修改状态 (42)6.2公共信息 (43)6.3万年历 (45)6.4世界时钟 (45)七、系统 (46)7.1重新登录 (46)7.2修改密码 (46)7.3系统参数 (47)7.4操作员设置 (53)7.5数据库维护 (54)一、概述门锁的基本设置:门锁安装完毕,在投入使用前必须使用安装卡对门锁进行系统设置。
设置过程如下:1、用安装卡设置门锁编号;2、用时钟卡设置门锁时间。
注意:安装卡不可对已有系统信息的门锁进行设置,若要重新设置门锁,先用清除卡清除门锁内信息。
卡片的使用和管理:●应急开门卡:可以开所有门,包括反锁。
使用之后,门锁状态始终为开。
此卡一般不用,只在特殊情况时才用此卡。
●总控开门卡:可以开启所有门锁,即使反锁也可以开启。
一般由酒店总经理、客房部经理等管理人员持有,总卡有挂失功能,如果发生丢失,应采用挂失功能补发总卡,并用它将所有的门锁开一遍,这样原来的总卡开门功能将失效,如需恢复已被挂失的总卡的开门功能只需在系统重新做一次总卡即可。
●楼栋开门卡:开某一区域某一栋所有门。
如:***大酒店\***栋。
如果酒店只有一栋楼,没有添加多栋,则不显示该类型。
一般由客房管理人员持有。
●楼层开门卡:开某一区域某一栋某一楼层所有门。
凯迪仕m3-w使用说明书
凯迪仕M3-W无线手持迷你扫描仪使用说明书
一、产品概述
凯迪仕M3-W无线手持迷你扫描仪是一款便携式的无线扫描设备,可以快速、高质量地扫描纸质文档、图片等,并将扫描结果存储到TF卡中或通过WiFi传输到电脑或移动设备。
该扫描仪设计精巧、操作简便,适用于商务办公、学习、归档等多种场景。
二、产品特点
1. 无线扫描:通过内置的WiFi模块,可以无线连接电脑、手机、平板等设备,方便快捷地传输扫描图像。
2. 高画质扫描:采用高清成像技术,可以实现最高1200dpi的扫描分辨率,并支持黑白、彩色和灰度三种模式的扫描。
3. 按钮操作:设备上的按键设计简单明确,用户可以通过按键选择不同的扫描模式、分辨率和存储格式,并进行扫描和保存操作。
4. 可调节扫描角度:设备上配备了一个可旋转的扫描头,用户可以自由调节扫描角度,适应不同纸张大小和扫描要求。
5. TF卡扩展:支持TF卡存储扫描结果,最大支持32GB的存储容量,方便用户随时查看和导出扫描图像。
6. 归档管理:提供配套的扫描管理软件,用户可以将扫描结果进行编辑、整理、归档,并添加相关的注释和标签。
三、使用方法
1. 开机:长按电源按钮3秒开启设备,并等待启动完成。
2. 确定扫描模式:根据需要选择扫描模式,如黑白、彩色或灰度。
3. 设置分辨率:按下分辨率按钮,通过向上或向下键选择所需的扫描分辨率。
4. 调整扫描角度:手持设备,通过旋转扫描头调整扫描角度,适应纸张大小。
5. 扫描操作:将设备的扫描头对准要扫描的文档,按下扫描按钮进行扫描。
扫描完成后,屏幕上会显示扫描结果。
6. 存储扫描结果:根据需要选择将扫描结果存储到TF卡或通
过WiFi传输到电脑或其他设备。
7. 关机:长按电源按钮3秒关闭设备,完成使用。
四、注意事项
1. 使用时请保持纸张平整,避免纸张弯曲或折叠,以免影响扫描效果。
2. 使用过程中请尽量避免强烈的光线照射到扫描头,避免影响图像质量。
3. 在扫描较大面积的文档时,可以将文档分成若干部分进行扫描,然后通过软件合并图像。
4. TF卡请注意插入方向,避免插反或损坏设备。
5. 使用前请确保电池已经充满电,以免因电量不足而影响使用。
6. 长时间不使用时,请将设备关机,并取下TF卡,以免数据
丢失或设备损坏。
以上是凯迪仕M3-W无线手持迷你扫描仪的使用说明书,希
望对您有所帮助。
如有其他问题,请参考产品配套的详细说明书或联系售后服务中心。