惠普扫描仪使用手册
- 格式:pdf
- 大小:1.14 MB
- 文档页数:26
扫描仪操作步骤说明书操作扫描仪时,请按照以下步骤进行操作。
本说明书将详细介绍如何正确地使用扫描仪,并确保您能够顺利进行扫描操作。
请仔细阅读以下内容。
1. 检查设备连接在开始使用扫描仪之前,请确保设备已正确连接到您的电脑或其他设备上。
检查电源线和数据线是否牢固连接,并确保所连接的设备已打开和正常工作。
2. 打开扫描软件在您的电脑上打开扫描软件。
通常情况下,您可以在操作系统的"开始菜单"或"应用程序"文件夹中找到扫描软件的图标。
双击该图标,等待软件加载完毕。
3. 准备扫描文件将需要扫描的文件放置在扫描仪的进纸托盘上。
请确保文件摆放整齐,并且没有折叠、撕裂或损坏的部分。
关闭进纸托盘,确保文件可以顺利进入扫描仪。
4. 设置扫描参数在扫描软件的界面上,点击"设置"或"选项"按钮,进入扫描参数设置页面。
根据您的需求,选择扫描的颜色模式(黑白、灰度或彩色)、分辨率、文件格式等参数。
请注意,不同的设置选项可能对扫描速度和文件大小产生影响。
5. 开始扫描确认扫描参数设置完成后,点击"扫描"或"开始扫描"按钮,开始进行扫描操作。
扫描仪将会自动将文件从进纸托盘上依次送入进行扫描,并将扫描结果保存至您指定的位置。
6. 预览和编辑扫描文件(可选)某些扫描软件支持预览和编辑扫描文件的功能。
在扫描完成后,您可以在软件界面上查看扫描结果,并进行一些基本的编辑操作,如裁剪、旋转、亮度调节等。
根据需要,您可以选择是否进行这些操作。
7. 保存扫描文件在完成扫描和编辑之后,点击"保存"或"存储"按钮,将扫描文件保存至您的电脑或其他设备上。
请选择合适的文件名和保存位置,并选择您想要的文件格式(如PDF、JPEG等)。
8. 完成操作在保存扫描文件后,您可以选择继续扫描其他文件,或者关闭扫描软件。
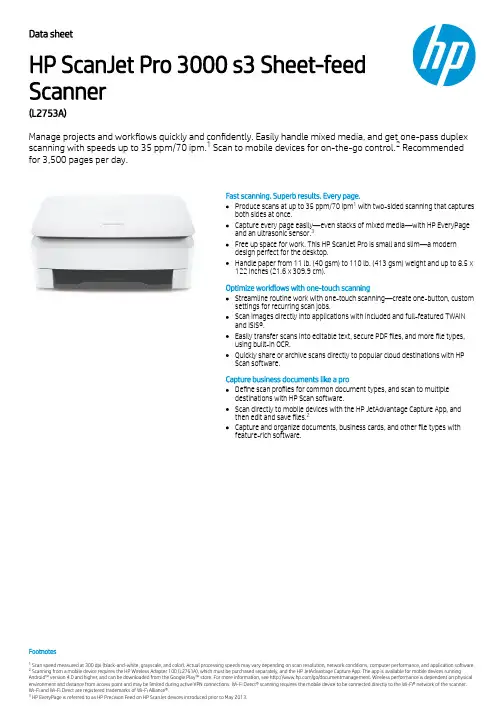
Data sheet HP ScanJet Pro 3000 s3 Sheet-feed Scanner (L2753A)Manage projects and work ows quickly and con dently. Easily handle mixed media, and get one-pass duplex scanning with speeds up to 35 ppm/70 ipm. Scan to mobile devices for on-the-go control. Recommendedfor 3,500 pages per day.Fast scanning. Superb results. Every page.Produce scans at up to 35 ppm/70 ipm with two-sided scanning that captures both sides at once.Capture every page easily—even stacks of mixed media—with HP EveryPage and an ultrasonic sensor.Free up space for work. This HP ScanJet Pro is small and slim—a modern design perfect for the desktop.Handle paper from 11 lb. (40 gsm) to 110 lb. (413 gsm) weight and up to 8.5 x 122 inches (21.6 x 309.9 cm).Optimize work ows with one-touch scanningStreamline routine work with one-touch scanning—create one-button, custom settings for recurring scan jobs.Scan images directly into applications with included and full-featured TWAIN and ISIS®.Easily transfer scans into editable text, secure PDF les, and more le types,using built-in OCR.Quickly share or archive scans directly to popular cloud destinations with HP Scan software.Capture business documents like a proDe ne scan pro les for common document types, and scan to multiple destinations with HP Scan software.Scan directly to mobile devices with the HP JetAdvantage Capture App, and then edit and save les.Capture and organize documents, business cards, and other le types with feature-rich software.FootnotesScan speed measured at 300 dpi (black-and-white, grayscale, and color). Actual processing speeds may vary depending on scan resolution, network conditions, computer performance, and application software. Scanning from a mobile device requires the HP Wireless Adapter 100 (L2761A), which must be purchased separately, and the HP JetAdvantage Capture App. The app is available for mobile devices running Android™ version 4.0 and higher , and can be downloaded from the Google Play™ store. For more information, see /go/documentmanagement. Wireless performance is dependent on physical environment and distance from access point and may be limited during active VPN connections. Wi-Fi Direct® scanning requires the mobile device to be connected directly to the Wi-Fi® network of the scanner.Wi-Fi and Wi-Fi Direct are registered trademarks of Wi-Fi Alliance®. HP EveryPage is referred to as HP Precision Feed on HP ScanJet devices introduced prior to May 2013.12132123Data sheet | HP ScanJet Pro 3000 s3 Sheet-feed ScannerAccessories and servicesAccessories L2754A HP ScanJet Pro 3000 s3 Roller Replacement KitService and Support U9JR1E HP 3 year Exchange Hardware Support for ScanJet Pro 3xxxU9JR3E HP 3 year Return to Depot Hardware Support for ScanJet Pro 3xxx Technical speci cationsControl panel Scan button, Cancel button, Power button with a LED and a LED for Error indication.Scanner speci cationsScanner type Sheetfed; Scan technology: CMOS CIS; Scan input modes: One default scan mode on front-panel for HP scan in Win OS, HP Easy Scan/ICA in Mac OS and third parties applications via TWAIN,ISIS and WIA; Twain version: Windows: 32-bit and 64-bit TWAIN version 2.1; Mac: n/a; Colour scanning: Yes; Output resolution dpi settings: 75; 150; 200; 240; 300; 400; 500; 600; 1200 ppi; Imagescaling or enlargement range: Will not perform any arbitrary scalingScan Size ADF: Maximum 216 x 3100 mm; Minimum 50.8 x 74 mmScan speed Up to 35 ppm/70 ipmScan resolution Optical Up to 600 dpi (color and mono, Sheet-feed); Hardware: Up to 600 dpi (color and mono, Sheet-feed)Scan le format For text & images: PDF, JPEG, PNG, BMP, TIFF, Word, Excel, Text (.txt), Rich Text (rtf) and Searchable PDFScanner advanced featuresAuto-color detect, auto-crop, auto-exposure, auto orient, OCR, zonal OCR, zonal barcode, edge removal, background cleanup, remove hole, color drop out, straighten the page, scan to cloud, scan toemail, PDF security, misfeed detection advance setting, advanced misfeed detection, Citrix ReadyGrayscale levels/Bit depth256/24-bits external 48-bits internalDuty cycle Recommended for 3,500 pagesAuto document feeder capacity50 sheets of 75 g/m² paperConnectivity Standard USB 2.0 and USB 3.0 (SuperSpeed); Optional: USB 2.0 port for Wi-Fi accessoryMemory Standard 512 MBExternal I/O ports 1 x USB 3.0 and 1 x USB 2.0 portMedia handlingMedia typesCut Sheet Paper, Printed Paper (Laser and ink), Pre-Punched Paper, Bank Checks, Business Cards, Freight Bills, Carbonless forms, Previously stapled media with staple removed, Plastic cards (up to1.24mm)Media size (ADF)U.S.-Letter: 215.9 x 279.4 mm (8.5 x 11 in); U.S.-Legal: 215.9 x 355.6 mm (8.5 x 14 in); U.S.-Executive: 184.2 x 266.7 mm (7.25 x 10.5 in); ISO A4: 210 x 297 mm (8.3 x 11.7 in); JIS B5: 182 x 257 mm(7.2 x 10.1 in); ISO B5: 176 x 250 mm (7.0 x 9.9 in); ISO A5: 148 x 210 mm (5.8 x 8.3 in); ISO A6: 105 x 148 mm (5.8 x 4.1 in); ISO A7: 74 x 104 mm (2.9 x 4.1 in); ISO A8: 52 x 74 mm (2.0 x 2.9 in) Media weight (ADF)40 to 413 g/m²Compatible operating systems OS X El Capitan 10.11, Microsoft® Windows® 10, 8.1, 8, 7, XP: 32-bit or 64-bitMinimum system requirementsPC: Microsoft® Windows® 10, 8.1, 8, 7, XP: 32-bit or 64-bit, 2 GB available hard disk space, CD-ROM/DVD drive or Internet connection, USB port, Microsoft® Internet Explorer; Windows Vista®: (32-bitonly), 2 GB available hard disk space, CD-ROM/DVD drive or Internet connection, USB port, Microsoft® Internet Explorer 8; Windows® XP SP3 or higher (32-bit only): any Intel® Pentium® II, Celeron® or233 MHz compatible processor, 850 MB available hard disk space, CD-ROM/DVD drive or Internet connection, USB port, Microsoft® Internet Explorer 8Software included HP WIA scan driver, HP TWAIN scan driver (32-bit and 64-bit), HP Scan, HP Scanner Tools Utility, Nuance PaperPort (Win only), I.R.I.S Readiris, I.R.I.S Cardiris (Win only), EMC ISIS (Win only) Dimensions and weightProduct dimensions (W x D x H)Minimum: 310 x 198 x 190 mm; Maximum: 342 x 310 x 319 mmPackage dimensions (W x D x H)397 x 248 x 303 mmProduct weight 3.4 kgPackage weight 5.0 kgOperating environment Temperature: 10 to 35ºC Humidity: 15 to 80% RH (non-condensing)Storage Temperature: -40 to 60ºCPower Requirements: Input Voltage range: 90 - 264 VAC, Rated Frequency: 50 - 60HZ, Worldwide use; Consumption: 4.2 watts (ready), 0.7 watts (sleep), 0.1 watts (off), 0.1 watts (auto-off); ENERGY STAR: Yes Certi cationsIEC 60950-1:2005 +A1+A11+A12 and all applicable amendments; CSA/UL 60950-1, 2nd edition (2007); EN 60950-1:2006 +A11 +A1 +A12+A2; EAC safety; Canada cUL CoC; China CCC; European UnionCE; Kenya PVOC; Kuwait TER; Nigeria SON; Saudi Arabia SASO; South Africa NRCS; Taiwan BSMI; Ukraine safety approval Electromagnetic compatibility: Class B Emissions; CISPR 22:2008 (International);European Union EMC Directive 2014/30/EU, EN 55022:2010 (CE mark); China GB9254-2008 (CCC); Taiwan CNS13438:2006 (BSMI); USA CFR47 Part 15, Subpart B (FCC); ICES-003:2012 Issue 6 (Canada);Australia C-tick (includes New Zealand); KN 22 and Korea KCC; EAC EMC Certi cate; Ukraine EMC approval; EN 61000-3-2:2014 (harmonics); EN 61000-3-3:2013 ( icker); Immunity CISPR 24:2010, EN50024:2010 Energy Star; CECP; EPEAT-SilverWhat's in the box L2753A HP ScanJet Pro 3000 s3 Sheet-feed Scanner engine; Installation guide; Support yer; Warranty guide; 2CDs; Power cord; USB cable; Power AdapterWarranty 1 Year Limited Warranty (Return to HP/Dealer - Unit Exchange)Technical speci cations disclaimersWith input and output trays folded and covers closedPower requirements are based on the country/region where the scanner is sold. Do not convert operating voltages. This will damage the scanner and void the product warranty.Actual speeds may vary depending on scan resolution, connectivity type, computer performance and application software.© Copyright 2022 HP Development Company, L.P. The information contained herein is subject to change without notice. The only warranties for HP products and services are set forth in theexpress warranty statements accompanying such products and services. Nothing herein should be construed as constituting an additional warranty. HP shall not be liable for technical oreditorial errors or omissions contained herein.ap-en May 2022312123。
扫描仪操作手册扫描仪是一种用于将纸质文件转换为数字格式的设备。
它可以将文档或图片扫描成电子文件,以便存储、编辑或共享。
本操作手册将介绍扫描仪的基本操作和功能,并提供详细的步骤和说明来帮助用户使用扫描仪。
第一部分:基本操作和设置一、连接和安装1. 将扫描仪连接到电脑或其他设备的USB接口。
确保连接牢固且能够正常工作。
2. 打开电脑,插入扫描仪的安装光盘或下载并安装最新的驱动程序。
3. 按照安装向导的指引,完成扫描仪的驱动程序和软件的安装。
二、调整设置1. 打开扫描仪的控制面板或相应软件,并选择合适的扫描设置。
2. 针对不同的扫描任务,选择适当的分辨率、文件格式和颜色模式。
一般来说,高分辨率适合保留细节,而低分辨率则用于较快的扫描速度。
3. 根据需要,选择常见的文件格式,如PDF、JPEG或TIFF,并指定扫描输出的文件夹或位置。
三、预览和裁剪1. 放置要扫描的文件或图片在扫描仪的扫描区域内。
2. 在扫描设置中选择预览选项,启动扫描预览功能。
此功能可在扫描之前显示预览图像,以确保扫描区域和设置的准确性。
3. 如有必要,使用裁剪工具或选定区域来调整扫描区域,确保只扫描所需的部分。
四、开始扫描1. 确认扫描设置,并点击“开始扫描”按钮。
2. 扫描仪会开始扫描,并将图像或文件保存在指定的位置。
根据文件的大小和设置的分辨率,扫描完成的时间可能有所不同。
3. 扫描过程中,保持稳定并避免移动扫描仪,以确保扫描图像的清晰度和准确性。
第二部分:高级功能和技巧一、多页扫描1. 对于多页文档或文件,选中“多页扫描”选项,并确保适当调整设置。
2. 将每一页文档依次放入扫描区域,然后点击“开始扫描”按钮。
3. 扫描仪会依次扫描每一页,并将它们合并成一个多页文档。
保存完整的文档后,您可以编辑或拆分每一页。
二、OCR识别1. 如果您需要将扫描的文档转换为可编辑的文本,选择OCR(光学字符识别)功能。
2. 启动OCR功能后,扫描仪会自动进行图像识别并将文本提取到一个可编辑的文件中。
HP Designjet HD Scanner andT1200 HD Multifunction Printer Introductory informationUSB 2.0 high-speed certifiedIntroductory InformationOther sources of informationThe User’s Guide for your scanner is available on the CD that comes with the scanner. The guide provides information on the following topics:• How to copy• How to scan• How to print• How to manage files• How to use copy options and tools• How to customize the copy tools• How to maintain and recover the system• How to set up the system• How to scan and copy thick media• Troubleshoot scanner hardware problems• Troubleshoot scanner software problems• Troubleshoot touch screen problems• Troubleshoot printing problems• About the scanner hardware• About the scanner software• About copy and layout features and options• About media• About HP support• About HP Designjet OnlineLegal notices© Copyright 2009 Hewlett-Packard Development Company, L.P.The information contained herein is subject to change without notice. The only warranties for HP Products and services are set forth in the express warranty statement accompanying such products and services. Nothing herein should be construed as constituting an additional warranty. HP shall not be liable for technical or editorial errors or omissions contained herein.2Scanner softwareThe scanner software is installed in the scanner’s touch screen, and runs automatically when you switch on the touch screen. The first screen that you see is divided into three main sections:• The viewing section on the left, for previewing scanned images; with nine buttons above it that can be used to change the preview• The control section on the right, with four tabs containing options for Copy, Scan, Print and Setup tasks• The toolbar on the bottom, with nine buttons that are described belowThe Quit button shuts down the touch screen.The Online Help button provides information on the use of the scanner.The File Manager button opens the File Management dialog box.The Print Queue button accesses the print queue.The Collate button groups copies into sets.The Preview button scans the document to preview the image and select an area of interest.The Reset button resets settings to default values.The Stop button cancels the current scanner activity.The Copy button (seen in the Copy tab) starts copying.The Scan button (seen in the Scan tab) starts scanning.The Print button (seen in the Print tab) starts printing.Create a media profileYou can create a media profile only for a paper type that is currently loaded in the printer. The media profile list includes the paper types with existing media profiles and also the paper types currently loaded in the printer (the latter shown with an asterisk). You can select one of the paper types loaded in the printer and create a media profile as described below if it is not already created. You cannot change the names of the media profiles.In order to print, you must first create a media profile, and you must have at least one printer connected to the scanner, directly or over a network.1. Check that the media profile you intend to create does not already exist in the media profile list.2. Clean and calibrate the scanner, unless that has already been done recently. See “Scanner maintenance” onpage 6.3. Start media profile creation by selecting the Setup tab.34. Press the Media Profile button, and then press the Tool button. (Alternatively: Printer > Tool > Media Profile).5. If you see a Calibrate RIP button and would like to use it, refer to the online help.6. Select the paper type that you have loaded in the printer.7. When you are warned that no media profile exists for that paper type, press OK.8. Press the Print Color Sheet button to print a color patch reference sheet. Some printers print a special test sheet,which you can discard, before printing the color sheet.9. Press the Scan Sheet button to scan the color sheet.10. Load the color sheet face down into the scanner. Align the arrow on the color sheet with the arrow on the centerof the scanner.11. Press the OK button to start the scan.12. When you see a message confirming that the media profile has been created, press OK.Make copiesCaution: Before scanning an old or delicate document, you are recommended to enclose it in the protective covering provided by HP for this purpose, to avoid damaging the document.1. If you do not already have a media profile for the paper type you are planning to use, you must create one. Seethe preceding section.2. Insert your document.a. Place the document face down with the top edge forward in the scanner insertion slot. Align the center ofthe document with the center of the insertion slot.b. Slide the document gently into the insertion slot until you feel it pulled into the starting position.3. Select color or black-and-white copying.Your selection determines which type-of-original templates are available in the following step.4. Select the type-of-original template.a. Select the Copy tab.b. Press the Type of Original button. The Type of Original dialog box appears.c. Select a type-of-original template that best describes your current input.d. If you want to change the settings for any of these options, or want to create a new option, press the Toolbutton. To save the new configuration, press the New button and enter a name for it.If you change any of the original template settings, the Type of Original dialog box shows the symbol “*”next to the template name to denote that changes have been made. For example, changes made to theCAD template appear in the dialog box as “CAD*”.5. Select the scan and print quality.a. In the Copy tab, press the Quality button.b. Select the print quality, which may be Fast, Normal or Best.c. Choose among various scan-quality options:• Set the scan resolution, or select Auto. If you select Auto, a suitable scan resolution is chosen automatically, taking the print resolution into consideration; and the chosen scan resolution is displayed.• Select Descreen to increase print quality but reduce scanning speed.• Select Turbo to increase scanning speed but reduce print quality. It has no effect at resolutions below 300 dpi.5. Select the input size.a. Select the Copy tab.b. Press the Input size button. The Input size dialog box appears.4c. Select the size that fits your original. Select Auto to have the scanner automatically detect the width andlength of the original.d. If you want to change the settings for any of these options, or want to create a custom-paper size, press theTool button. To save the changes or the custom-paper size, press the New button and enter a name for it.6. Select the output size.a. Press the Copy tab.b. Press the Output Size button. The Output Size dialog box appears.c. Select the size that you want for your output copy.d. If you want to change the settings for any of these options, or want to create a custom-paper size, press theTool button. To save the changes or the custom-paper size, press the New button and enter a name for it.If you have selected an output size that differs from the input size, the scanner calculates the scaling percentage and displays it with the Scale button in the Copy tab after the first preview. Alternatively, you can specify a scaling percentage by pressing the Scale button and selecting a predefined scale percentage, or by pressing the Tool button and entering a scale percentage.7. Set the number of copies.a. Press the Copies button if you want to make more than one copy of the loaded document.b. Enter the number of copies in the Edit field.This option allows you to leave the system working unattended.8. Press the Copy button to begin copying with the settings you have configured.Press the Stop button to cancel the current preview or copy process.Press the Reset button to clear the settings you have configured and reset the program to the default values. Scan to fileCaution: Before scanning an old or delicate document, you are recommended to enclose it in the protective covering provided by HP for this purpose, to avoid damaging the document.1. Place the document face down with the top edge of the original in the scanner insertion slot. Feed the originalinto the scanner. Use the center arrow for correct positioning.2. Select the Scan tab, and then configure the scan settings, which are described in the following steps.Output settings such as margins, layout, and media profile can be configured later, when you print the file.3. Select Color or B&W scanning.4. Select the type-of-original template that best describes your original.5. Select the scan resolution.a. In the Scan tab, press the Scan resolution button.b. Select the print quality, which may be Fast, Normal or Best. This is used only to determine the scanresolution if you select Auto.c. Choose among various scan-quality options:• Set the scan resolution, or select Auto. If you select Auto, a suitable scan resolution is chosen automatically, taking the print resolution into consideration; and the chosen scan resolution is displayed.• Select Descreen to increase print quality but reduce scanning speed.• Select Turbo to increase scanning speed but reduce print quality. It has no effect at resolutions below 300 dpi.6. Use the Size and Resize options to define the dimensions of your scanned image. You can use Size: Auto andResize: None to maintain the size of the original.If you want to change the settings for any of these options, or want to create a custom-paper size, press the Tool button. To save the changes or the custom-paper size, press the New button and enter a name for it.57. The default filename is composed of the current date and time. To change the default name, press the File Namebutton and enter a new name.8. Press Settings > File Format to select the output-file format. Various format options are available.9. Press the File destination button to select the folder to which the scanned file is saved. The Change Folder dialogbox appears.10. In the Change Folder dialog box, you can:• Press the arrows to navigate the folders.• Press the folder up button (marked “..”) to move up a level.• Press the New Folder button to create a new folder within the current folder.• Press a folder name to move your search to that folder’s level.11. Press OK in the Change Folder dialog box when you have selected the destination folder for your file. Files to beshared across the network should be placed in the D:\images folder. Once a file is saved in this folder it can be accessed throughout the network, from any computer running any operating system.12. Press the Scan to file button to start the scan-to-file process and save the image.Scanner maintenanceYou should perform scanner maintenance once a month to maintain optimum scan quality. This routine maintenance involves cleaning the glass plate and the scanning area, and calibrating the scanner. It is important to clean before calibration.1. Turn off the scanner and disconnect the scanner power cable.2. Push down on the two lever buttons found near the insertion slot on each side of the scanning area lid. Thescanning area lid-locking mechanism disengages.3. Holding both lever buttons down, place your free fingers in the insertion slot and flip open the scanning arealid. The scanning area is exposed for cleaning.4. Gently wipe the glass plate and the entire scanning area, including the main cover and the roller, with a lint-freecloth dampened with a mild, streak-free, glass cleaner.Do not use abrasives, acetone, benzene, or fluids that contain these chemicals. Do not spray liquids directly onto the scanner’s glass plate or anywhere else in the scanner.5. Dry the glass completely using a separate clean, dry, lint-free cloth such as the one provided with themaintenance kit.6. Turn on the scanner and leave it on for at least an hour before proceeding to the next step.7. Select the Setup tab, then Options > Scanning > Scanner Maintenance.8. The Maintenance Wizard guides you through the procedures of scanner alignment, stitching, and calibration. Tocalibrate the scanner, you need the maintenance sheet that came with your scanner.Software error messagesUnder the following circumstances, a warning message may appear on the panel PC touch screen, advising the user to perform maintenance:• Scanner maintenance has not been performed within the last 30 days.• The lamp intensity diminishes. If you replace the lamp, you should also replace the filter.• The condition of the glass plate has deteriorated beyond an acceptable level.• The condition of the original background has deteriorated beyond an acceptable level.If you see any of these warnings displayed on the panel PC touch screen, consult the User’s Guide for information on recommended maintenance procedures.6。
NS MFP 1005 series版权和许可©Copyright 2020 HP Development Company, L.P.除非适用的版权法允许,否则未经事先书面同意,严禁进行复制、改编或翻译。
此处包含的信息如有更改,恕不另行通知。
HP 产品与服务的全部保修条款在此类产品和服务附带的保修声明中均已列明。
此处内容不代表任何额外保修。
HP 对此处任何技术性或编辑性的错误或遗漏概不负责。
商标说明Apple和Apple图标是苹果公司在美国和其他国家/地区的注册商标。
OS X是苹果公司在美国和其他国家/地区的注册商标。
AirPrint X是苹果公司在美国和其他国家/地区的注册商标。
iPhone是苹果公司在美国和其他国家/地区的注册商标。
Microsoft® 和 Windows® 是 Microsoft Corporation 在美国的注册商标。
Amazon和Kindle是, Inc. 或其附属公司的商标。
Wi-Fi和Wi-Fi Direct是Wi-Fi Alliance的注册商标。
(有关详细信息,请参阅 https:///who-we-are/our-brands 。
)目录1 使用入门 (1)打印机视图 (2)打印机前视图 (2)打印机后视图 (2)控制面板功能 (3)基础型号 (3)无线机型 (5)控制面板显示特征 (7)使用 HP Smart应用进行打印、复印、扫描和故障排除 (9)2 连接您的打印机 (11)使用路由器连接到无线网络 (12)使用 Wi-Fi Protected Setup (WPS) 将打印机连接到无线网络 (12)使用 HP 打印机软件将打印机连接到无线网络 (12)不使用路由器进行无线连接 (13)无线设置 (16)连接到有线(以太网)网络 (17)3 设置打印机 (19)用HP Embedded Web Server (EWS) 和 HP 设备工具箱 (Windows) 设置打印机 (20)访问并使用 Embedded Web Server (EWS) 测试通信状况 (20)用软件 (Windows 7) 打开 HP Embedded Web Server (EWS) (20)从网络浏览器中打开 HP Embedded Web Server (EWS) (20)使用 Wi-Fi Direct 连接时打开 HP Embedded Web Server (EWS) (21)浏览 HP Embedded Web Server (21)配置IP网络设置 (22)查看或更改网络设置 (22)更改网络上打印机的名称 (22)手动配置IPv4 TCP/IP参数 (22)使用 HP Embedded Web Server 分配或者更改系统密码 (23)ZHCN iii更改节能设置 (23)设置无活动则休眠/自动关闭模式 (23)设置无活动则关闭延迟选项,设置打印机使用1瓦特或者更少能量 (23)设置延迟关闭 (24)更新固件 (25)使用固件更新功能来更新固件 (25)更改打印机连接种类 (Windows 7) (26)4 放入介质 (27)放入纸张 (27)加载并打印信封 (30)装载并打印标签 (32)5 打印 (35)使用Windows计算机打印 (36)选择纸张类型类别(Windows) (36)双面手动打印 (Windows) (37)每张打印多页(Windows) (38)使用苹果计算机进行打印 (39)使用移动设备打印 (40)6 复印 (41)制作副本 (42)复印身份证 (43)7 扫描 (45)使用HP智能应用扫描 (46)使用HP智能应用来扫描Windows电脑 (46)使用HP智能应用来从MAC OS电脑扫描 (46)运用HP扫描软件扫描(Windows 7) (47)8 管理墨粉、介质和部件 (49)检查墨粉量 (50)重新加载碳粉 (51)更换成像鼓 (54)订购耗材、介质和部件 (56)iv ZHCN9 解决问题 (57)HP支持 (58)联系HP (58)注册打印机 (58)额外保修选项 (58)其他信息 (58)控制面板指示灯说明 (60)恢复出厂默认设置 (63)打印机不取纸或者传送失效 (64)简介 (64)产品不拾取纸张 (64)产品拾取多张纸 (64)清除卡纸 (65)简介 (65)卡纸位置 (65)常见或多次卡纸 (66)从进纸盒区域清除卡纸 (67)从打印机内部清除卡纸 (69)清除输出区域中的卡纸 (71)改善打印质量 (72)简介 (72)重新打印文档 (72)检查墨粉量 (72)更新打印机固件 (72)从不同的软件程序打印 (72)检查打印作业的纸张类型和打印质量设置 (72)检查打印机内装入的纸张类型 (72)检查纸张类型和打印设置(Windows) (73)检查纸张类型和打印质量设置(OS X) (73)目视检查成像鼓 (74)检查纸张和打印环境 (74)步骤一:使用符合HP规格要求的纸张 (74)步骤二:检查打印机所处的环境 (74)调整打印强度 (75)解决打印质量问题 (76)提高复印和扫描图像质量 (81)简介 (81)检查扫描仪玻璃上是否有灰尘或污点 (81)检查纸张设置 (81)ZHCN v优化文本或图片 (81)边到边复制 (82)解决无线网络问题 (83)简介 (83)无线连接检查清单 (83)进行无线网络诊断测试 (84)在无线设置完成后打印机不再打印 (84)产品不打印且计算机安装了第三方防火墙 (85)移动无线路由器或产品后无线连接无法正常工作 (85)无法将更多设备连接到无线印刷机(Wi-Fi Direct) (85)无线产品在连接到VPN时断开通信 (85)网络未出现在无线网络列表中 (85)无线网络不工作 (86)降低无线网络中的干扰 (86)解决以太网连接问题 (87)附录 A 打印机规格 (89)技术规格 (90)支持的操作系统 (91)打印机外形尺寸 (93)功耗、电气规格和声发射 (94)工作环境范围 (95)警告图标 (96)激光警告 (97)附录 B 服务和支持 (99)HP 有限保修声明 (100)HP 高级保护保修:Laser NS 墨粉重新添加套件 和 HP激光成像鼓 有限保修声明 (101)关于非 HP 耗材的 HP 政策 (102)HP 防伪网站 (103)HP 墨粉重新添加套件和HP激光成像鼓上存储的数据 (104)最终用户许可协议 (105)客户自行维修保修服务 (108)客户支持 (109)附录 C 环境产品管理计划 (111)保护环境 (112)臭氧制造 (112)耗电量 (112)vi ZHCN用纸 (113)塑料 (113)HP Laser NS 打印耗材 (113)纸张 (113)材料限制 (113)电池信息 (114)电子硬件回收 (114)化学物质 (114)SEPA 环保标志用户信息(中国) (115)打印机、传真机和复印机中国能效标识实施规则 (115)WEEE(土耳其) (115)有害物质/元素及其含量表(中国) (115)材料安全数据表 (MSDS) (116)EPEAT (116)有关更多信息 (117)索引 (119)ZHCN viiviii ZHCN1使用入门●打印机视图●控制面板功能●控制面板显示特征●使用 HP Smart应用进行打印、复印、扫描和故障排除ZHCN1打印机视图●打印机前视图●打印机后视图打印机前视图1控制面板2平板扫描仪3重新装载端口4重新加载指示灯5墨水量指示器6进纸盒7出纸槽扩展板8手指凹槽9出纸槽打印机后视图1以太网端口(仅限以太网型号)2USB界面端口3电源接头2第 1 章 使用入门ZHCN控制面板功能基础型号1纸张指示灯 当您开始打印或复印作业时,如果进纸盒中缺纸,则纸张指示灯会闪烁。

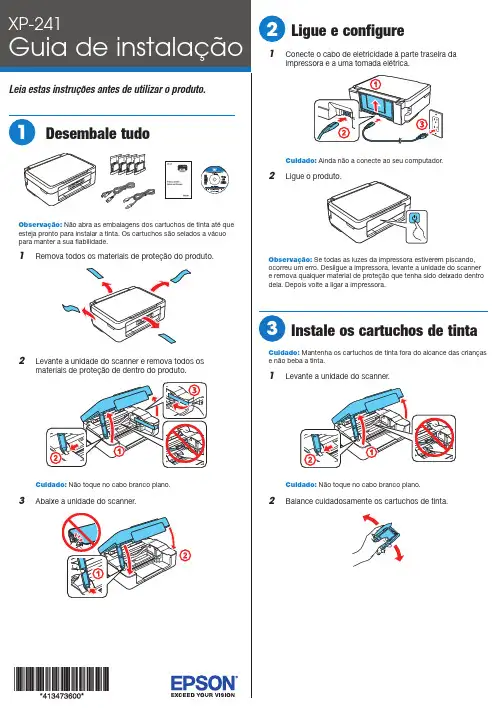
Não abra as embalagens dos cartuchos de tinta até queesteja pronto para instalar a tinta. Os cartuchos são selados a vácuoemova todos os materiais de proteção do produto.1 C onecte o cabo de eletricidade à parte traseira daCuidado: Ainda não a conecte ao seu computador.2Observação: Se todas as luzes da impressora estiverem piscando,ocorreu um erro. Desligue a impressora, levante a unidade do scannere remova qualquer material de proteção que tenha sido deixado dentrodela. Depois volte a ligar a impressora.Cuidado: Mantenha os cartuchos de tinta fora do alcance das criançase não beba a tinta.1 L evante a unidade do scanner.2 B alance cuidadosamente os cartuchos de tinta.1 C ertifi que-se de que o produto terminou de carregar atinta. Depois, vire o protetor do alimentador para a frente,eleve o suporte de papel, incline-o levemente para trás eabra a bandeja de saída.2 C arregue o papel com o lado brilhante ou imprimívelvirado para cima e com a borda estreita primeiro, contra a borda direita do alimentador de papel.3 DPainel de controleProblemas?Se encontrar problemas durante a instalação, veja abaixo:A configuração da rede falhou.• C ertifique-se de selecionar o nome de rede (SSID) correto.• A impressora só pode se conectar a uma rede que suporte 2,4 GHz. Se o seu roteador oferecer conexões de 2,4 GHz e 5 GHz, certifique-se de que a conexão de 2,4 GHz está ativada.• C aso veja uma mensagem de alerta de firewall, clique em Desbloquear ou Permitir para que a configuração continue.Não é possível encontrar a sua impressora durante a configuração depois de conectá-la usando um cabo USB.Certifique-se de que a impressora está ligada e conectadacorretamente conforme mostrado:Observação: Se o seu computador não tiver um drive para CD/DVD ou se estiver usando um Mac, você precisará de uma conexão à internet para obter o software do produto.1 C ertifique-se de que o produto NÃO ESTÁ CONECTADOao seu computador.Windows ®: Caso veja a janela do Assistente para adicionar novo hardware, clique em Cancelar e desconecte o cabo USB.2Insira o CD do produto ou vá até a página de suporte do seu produto para baixar e executar o pacote de software do produto:.br/suporte/xp2413 S iga as instruções na tela para executar o programa deinstalação.OS X: Certifique-se de instalar o Software Updater para receber atualizações de firmware e software para o seu produto.4 Q uando a tela Selecione a sua conexão aparecer,selecione uma das opções e siga as instruções na telado seu computador.• Conexão sem fiosNa maioria dos casos, o programa de instalação do software tenta configurar automaticamente a sua conexão sem fios. Se a configuração não tiver sucesso, você pode ter que digitar o nome (SSID) e senha da sua rede.• Conexão USB diretaC ertifique-se de que tem um cabo USB.Impressão através de dispositivo móvelPara imprimir a partir de um dispositivo móvel, o seu produto precisa ser configurado para impressão sem fios ou Wi-Fi Direct ®. Veja o Manual do usuário online para mais informações.Soluções Epson Connect ™OEpson Connect oferece uma variedade de opções de impressão remota para o seu produto. Conecte-se sem fios a partir do seu tablet, smartphone ou computador. Imprima documentos e fotos do outro lado da sala ou do .br/connectEpson iPrint ™ para iOS/Android ™Baixe o aplicativo Epson iPrint da App Store ou do Google Play ™ para imprimir documentos e fotos a partir do seu dispositivo iOS ou Android em qualquer impressora Epson habilitada para e-mail.Cartuchos de tinta para substituição da XP-241Capacidade normal。
惠普M126打印机怎么扫描⽂件为PDF⽂件?惠普M126⽤法惠普M126NW打印机作为⼀款经典型号,带有打印复印扫描以及⽆线打印功能,且耗材价格低廉,易得。
想要使⽤惠普M126NW扫描复印⽂件,该怎么实现额?下⾯我们就来看看详细的教程。
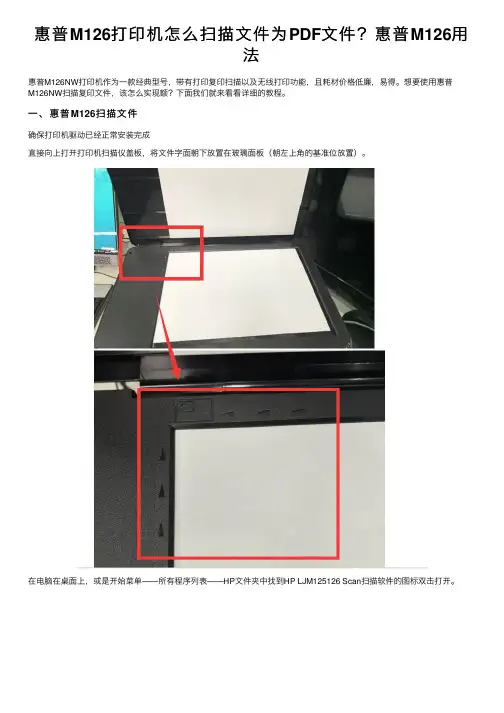
⼀、惠普M126扫描⽂件确保打印机驱动已经正常安装完成直接向上打开打印机扫描仪盖板,将⽂件字⾯朝下放置在玻璃⾯板(朝左上⾓的基准位放置)。
在电脑在桌⾯上,或是开始菜单——所有程序列表——HP⽂件夹中找到HP LJM125126 Scan扫描软件的图标双击打开。
打开后在左边选择另存为PDF,右边可以选择扫描⼤⼩分辨率等选项根据需要选择后,点击右下⾓的扫描。
等待扫描完成后,在中间即可看到预览效果,如还有其他页⾯,可更换玻璃⾯板纸张点击左下⽅的加号添加第⼆页,如没有其他页⾯可直接点击保存。
弹出另存为界⾯,选择保存路径输⼊⽂件名点击保存即可。
完成后保存路径的⽂件夹会⾃动打开⽅便查找,双击保存的⽂件即可打开此PDF⽂件,但请确保电脑已安装PDF阅读器。
请注意PDF⽂件Win10可以⽤Edge浏览器打开,其他版本系统默认应⽤⽆法打开PDF⽂件。
⼆、惠普M126复印⽂件1、打开打印机复印扫描舱,将需要复印部分的介质置于玻璃上,然后盖上舱盖2、按下右下⾓“扫描”按钮,此时液晶⾯板上出现“复印菜单—复印证件选项3、按两下“OK”按钮,将介质中信息扫描到打印机中,做好打印准备4、若不需要复印双⾯证件,可直接按操作⾯板左下⾓“复印”按钮,进⾏复印5、如若复印双⾯证件,重复步骤1,将证件翻⾯,然后按“OK”按钮;最后直接按操作⾯板左下⾓“复印”按钮进⾏证件的复印操作。
注意事项:这款打印机⽀持证件双⾯复印的,所以⽆需执⾏两次复印操作以上就是惠普M126打印机扫描和复印的技巧,希望⼤家喜欢,请继续关注。
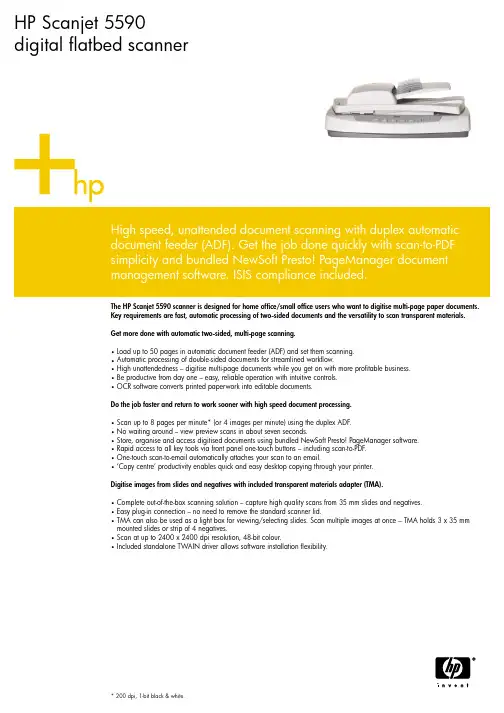
HP Scanjet 5590digital flatbed scannerThe HP Scanjet 5590 scanner is designed for home office/small office users who want to digitise multi-page paper documents.Key requirements are fast, automatic processing of two-sided documents and the versatility to scan transparent materials.Get more done with automatic two-sided, multi-page scanning.•Load up to 50 pages in automatic document feeder (ADF) and set them scanning.•Automatic processing of double-sided documents for streamlined workflow.•High unattendedness – digitise multi-page documents while you get on with more profitable business.•Be productive from day one – easy, reliable operation with intuitive controls.•OCR software converts printed paperwork into editable documents.Do the job faster and return to work sooner with high speed document processing.•Scan up to 8 pages per minute* (or 4 images per minute) using the duplex ADF.•No waiting around – view preview scans in about seven seconds.•Store, organise and access digitised documents using bundled NewSoft Presto! PageManager software.•Rapid access to all key tools via front panel one-touch buttons – including scan-to-PDF.•One-touch scan-to-email automatically attaches your scan to an email.•‘Copy centre’ productivity enables quick and easy desktop copying through your printer.Digitise images from slides and negatives with included transparent materials adapter (TMA).•Complete out-of-the-box scanning solution – capture high quality scans from 35 mm slides and negatives.•Easy plug-in connection – no need to remove the standard scanner lid.•TMA can also be used as a light box for viewing/selecting slides. Scan multiple images at once – TMA holds 3 x 35 mmmounted slides or strip of 4 negatives.•Scan at up to 2400 x 2400 dpi resolution, 48-bit colour.•Included standalone TWAIN driver allows software installation flexibility.* 200 dpi, 1-bit black & white. /ukFor more information, please call your local HP sales office or representative: Austria:0800 242 242, Algeria:(0)61 56 45 43, Bahrain: 800 728, Belgium: (078) 15 20 30 (0.0496 EUR/min), Bulgaria:(+359) 2960 1940,Croatia:(+385 1) 60 60 200, Czech Republic: (00 420 2) 261 108 108 (Prague),Denmark: 48 12 10 00, Egypt: 532 5222, Estonia: (+372) 6813 823,Finland:(+358) 0205350 or 0205 350, France: (1) 69 82 6060,Germany:0180 532 6222 (12 Cent/min), Greece: (01) 678 96 00, Hungary: (+36) 1 382-1111, Iceland: (354) 570 1000,Ireland:+ 353 1 6158200,Israel:(972) 9 8304848, Italy: (02) 92121, Kazakhstan:+7 (3272) 980 824, Latvia: (371) 800 80 12, Lithuania:8 800 10000 or 8 5 2103333, Luxembourg: (+352) 263 160 34,Middle East: 00971 4 883 4427, Morocco (African Region):+212 22 40 47 47,Netherlands: (020) 5476666, Norway:22 735600,Poland: infolinia: 0-800 122 622, Portugal:(808) 206 001, Romania:(+401) 205 3300, Russia: +7 (095) 797 35 00, Saudi Arabia:800 124 4646,Serbia/Montenegro: +381 11 201 99 00, Slovakia:+421-2-50222111, Slovenia: +3861 2307 420, South Africa: 0800 118 883,Spain:(91) 634 88 00, Sweden: (08) 444 2000, Switzerland:0848 88 44 66, Tunisia:71 891 222, Turkey: +90 (216) 579 71 71, UAE: 8004910,UK: 08705 474747,Ukraine:+380 44 490 61 20.©2004 Hewlett-Packard Development Company, L.P . The information contained herein is subject to change without notice. The only warranties for HP Products and services are set forth in the express warranty statements accompanying such products and services. Nothing herein should be construed as constituting an additional warranty. HP shall not be liable for technical or editorial errors or omissions contained herein.Published in EMEA 07/045982-4670EEETechnical specificationsScanner type FlatbedInput modes Front-panel “scan”, “copy”, “e-mail”, “share-to-web”, “save-document-to-disc”; HP Photo & Imaging software; user application via TWAIN Preview speed 7 secScan speed10 x 15 cm colour photo into Microsoft Word : < 28 secs OCR a full page of text into Microsoft Word: < 48 secs Black-and-white drawing into Microsoft Word: < 31 secsScan speed: tests performed on a 1.7 GHz HP Vectra PC with 256 MB of RAM and Windows 2000Automatic document feeder Capacity: plain paper: Standard, 50 sheetsSpeed: up to 8 ppm; simplex mode, black and white, 200 dpi, 1-bit Scan resolutionOptical: 2400 dpiHardware: 2400 x 2400 dpiEnhanced: 12 dpi to 999999 enhanced dpi Bit depth 48-bitScaling10 to 2000% in 1% increments Maximum document size 216 x 297 mmInterface and connectivity Hi-Speed USB – compatible with USB 2.0 specificationsOperating systems compatibility Microsoft Windows 98, 98 SE, Me, 2000, XP (Professional and Home Editions); Mac OS X (10.1.5, 10.2 or higher)Minimum system requirementsWindows: USB-compatible PC with Microsoft Windows [98, 98 SE, Me, 2000, XP (Professional and Home Editions)]; Pentium II Celeron or compatible CPU; Internet Explorer 5.01 SP2 or later; 64 MB RAM; 175 MB disk space, plus 50 MB for full-colour scanning; SVGA monitor (800 x 600, 16-bit colour); CD-ROM drive; USB port; HP Memories Disc Creator software requires CD-Writer and 700 MB additional disk spaceMacintosh: USB-compatible Macintosh computer with Mac OS X (10.1.5, 10.2 or higher); 128 MB RAM; 240 MB disk space; SVGA monitor (800 x 600, 16-bit colour); CD-ROM drive; USB port; HP Memories Disc Creator software requires CD-Writer and 700 MB additional disk spaceSoftware includedCD-ROM with software for Microsoft Windows and Macintosh: HP Photo & Imaging software with HP Memories Disc Creator & HP Instant Share , Integrated I.R.I.S. Readiris OCR, NewSoft Presto! PageManager 7, HP Commercial Scanjet 5590 TWAIN (Windows only)Dimensions (w x d x h)488 x 340 x 162 mmWeightNet weight: 5.73 kg, maximum shipping weight: 8.1 kgMultiple file formats PC: Bitmap (BMP), TIFF, GIF, PDF, HTML, JPEG, FlashPix(FPX), TIFF compressed, DCX, PCX, RTF Mac: PICT, TIFF, JPEG, TIFF compressed, GIF, PDF, TEXT, HTML, FlashPix(FPX)Operating environment Operating temperature: 5 to 40°C, storage temperature: -40 to 70°C Operating humidity: 5 to 90% RH, storage humidity: 5 to 90% RHPower requirements 100 to 240 VAC (±10%), 50/60 Hz (±3%), consumption: 36 watts maximum Energy StarYesRegulatory compliance information/safety Safety UL listed, EU LVD & EN 60950 compliant, European Third Party approval, Certified by Czech Republic (EZU),Russia (GOST), Poland (PCBC)Electromagnetic compatibility EU (EMC Directive)Warranty1 year hardware warranty plus telephone support through HP Customer Care Centres; 5 day standard unit exchange (1 year);24-hour electronic support available free at the following site: /supportOrdering informationL1910AHP Scanjet 5590 digital flatbed scanner, USB cable –compatible with USB 2.0specifications, power cable, power supply (where applicable), automatic document feeder (ADF), ADF cleaning cloth, transparent materials adapter (TMA), TMA instruction sheet, user’smanual, setup poster, warranty sheet, CD-ROM(s) with software for Microsoft Windows and MacintoshService & support1 year standard hardware warranty upgradeable to a 3 year expressexchange warranty with anHP Care Pack。
扫描仪使用操作规程一、概述扫描仪是一种常见的办公设备,用于将纸质文档转换为电子文件。
为了确保用户能够正确、高效地使用扫描仪,本文将介绍扫描仪的使用操作规程。
二、准备工作1. 检查设备:确认扫描仪和电源连接良好,确保设备无损坏和松动的部件。
2. 驱动安装:如扫描仪需要安装驱动程序,请先安装相应的驱动程序,并确保驱动程序已成功安装。
三、操作步骤1. 打开扫描软件:启动扫描仪所配套的软件(如HP Scan、Epson Scan等),或直接双击桌面上的扫描软件图标,等待软件加载完成。
2. 放置文档:打开扫描仪的文档盖板或者自动进纸器,将要扫描的纸质文档平整地放置在扫描仪的扫描区域内,确保文档与扫描区域平行。
3. 设置扫描参数:根据需要,选择扫描的分辨率、颜色模式、文件格式等参数,以及是否需要自动裁剪、去除背景等功能。
4. 预览扫描:点击扫描软件界面上的“预览”按钮,系统会自动进行扫描预览,以便用户确认文档的位置和清晰度。
5. 调整扫描区域:如需要调整文档的扫描区域,可通过鼠标拖拽边框或者输入具体数值来操作。
6. 执行扫描:点击扫描软件界面上的“扫描”按钮,系统将开始执行扫描任务,将文档转换为电子文件。
7. 保存文件:在弹出的保存路径选择对话框中,选择保存文件的路径和文件名,并确认保存格式和其他参数设置。
8. 完成扫描:等待扫描软件将文件保存至指定路径,并在界面上显示扫描完成的提示。
四、使用注意事项1. 避免过厚的文档:扫描仪有一定的扫描厚度限制,请确保文档的厚度不超过扫描仪的规格要求。
2. 避免杂物干扰:在扫描过程中,应避免放置任何杂物在文档和扫描仪之间,以免影响扫描效果。
3. 清洁纸质文档:为了保证扫描效果,应保持文档的整洁,避免有污渍、涂鸦或撕裂等情况。
4. 定期清理扫描仪:为了保持扫描仪的正常工作,应定期清理设备表面和进纸通道,以去除灰尘和杂质。
5. 注意数据安全:在保存扫描文件时,应选择安全可靠的保存路径,并根据需要进行文件加密或者备份。
惠普扫描仪怎么设置彩⾊扫描?
扫描仪的在使⽤的时候,会考虑是否使⽤彩⾊扫描,那么惠普扫描仪怎么设置彩⾊扫描呢?下⾯我们就来看看详细的教程。
惠普HP2050打印机驱动程序 for win7 中⽂安装版
类型:打印机
⼤⼩:17.1MB
语⾔:简体中⽂
时间:2014-11-05
查看详情
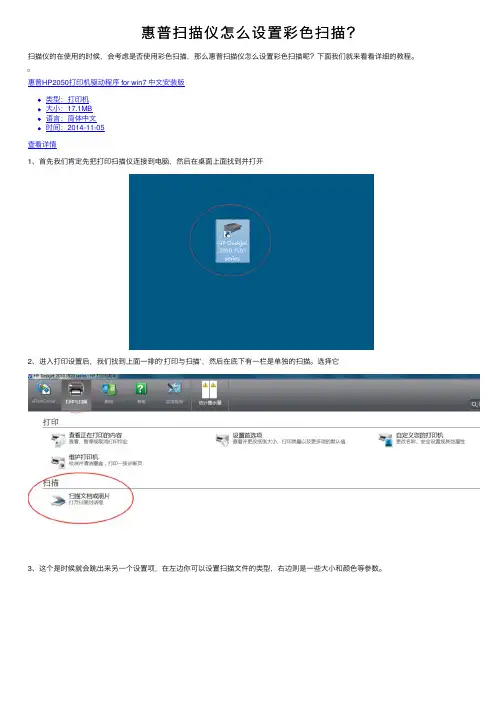
1、⾸先我们肯定先把打印扫描仪连接到电脑,然后在桌⾯上⾯找到并打开
2、进⼊打印设置后,我们找到上⾯⼀排的‘打印与扫描’,然后在底下有⼀栏是单独的扫描。
选择它
3、这个是时候就会跳出来另⼀个设置项,在左边你可以设置扫描⽂件的类型,右边则是⼀些⼤⼩和颜⾊等参数。
4、我们看到有⼀个输出类型是⿊⽩,我们点击选择彩⾊,同样的,我们可以在⾼级设置中,对彩⾊进⾏颜⾊的对⽐度和亮度的调节。
5、⼀切就绪后,我们把想要扫描的⽂件放⼊扫描仪,然后进⾏扫描,结果就会跳出⼀个彩⾊的扫描⽂件,点击保存即可。
以上就是惠普扫描仪设置彩⾊扫描的技巧,希望⼤家喜欢,请继续关注。
HP ScanJet Pro 3500f1FlatbedScannerIdeal for small and medium businesses that want versatile,full-featured scanning for everything from quick,ad-hoc tasks to complexprojects.1Scan speeds of up to 50ipm (25ppm)measured at 300dpi (black and white,greyscale,and colour).Actual processing speeds may vary depending on scan resolution,network conditions,computer performance,and application software.2HP EveryPage is referred to as HP Precision Feed on HP ScanJet devices introduced prior to May 2013.Fast,reliable two-sided scanning●Produce up to 50images (25pages)per minute 1with two-sided scanning.Reliably scan 3,000sheets per day.●Capture every page easily –even for stacks of mixed media –with HP EveryPage and an ultrasonic sensor.2●Scan documents up to 21.6x 309.9cm (8.5x 122in)through the ADF ,and use the flatbed for bulky media.●Spend less time waiting –scans reach theirdestination at fast speeds with a USB 3.0connection.Work smarter with quick,simple scanning●Define scan profiles for common document types and scan to multiple destinations with HP Scan software.●Create one-button scan settings for recurring tasks and make selections using the LCD control panel.●Quickly share or archive scans directly to popular cloud destinations with HP Scan software.●Scan directly into applications without opening another program with HP’s full-featured TWAIN driver.Sharp images and accurate text capture●Accurately capture text from documents for easy editing with HP Scan and I.R.I.S.Readiris™Pro OCR software.●Get sharp,true-to-life scans of documents,graphics,and photos with up to 1200dpi resolution.●Book-edge scanning prevents distorted text,even near the spine of books and other bound materials.●Auto-imaging features in the included HP Scan software let you enhance images and delete blank pages.HP ScanJet Pro3500f1Flatbed Scanner TECHNICAL SPECIFICATIONSScan Technology CMOS CIS(Contact Image Sensor)Scan Type Flatbed,ADF;Colour Scanning:YesScan Speed Up to25ppm/50ipm(300dpi)Scan Resolution Hardware:Up to600x600dpi(colour and monochrome,ADF);Up to1200x1200dpi(colour and monochrome,flatbed)Optical:Up to600dpi(colour and monochrome,ADF);Up to1200dpi(colourand monochrome,flatbed)Scan File Format For text&images:PDF,JPEG,PNG,BMP,TIFF,TXT(text),RTF(rich text)andsearchable PDFScan Input Modes Scan front-panel function for Save as PDF,Save as JPEG,Email as PDF,Email asJPEG,Send to Cloud,Everyday Scan and Save as Editable Text(OCR).HP Scan inWindows OS,HP Easy Scan/ICA in Mac OS and thrid parties applications viaTWAIN.Light Source(Scanning)Light Emitting Diode(LED)Output resolution dpi settings75,150,200,240,300,400,500,600,and1200ppiGrayscale Levels/Bit Depth256;Bit Depth:24-bitDuty Cycle(daily)3,000pages(ADF)Multi Feed Detection YesAuto Document Feeder Capacity Standard,50sheetsDuplex ADF Scanning YesMedia Size(ADF)A4,A5,A6,B5,B5(JIS)Media Weight(ADF)45to120g/m²External I/O ports USB3.0(Super Speed only)Standard Connectivity USB3.0(Super Speed only)Control Panel2-line LCD;5buttons(Simplex/Duplex,Power,Cancel,Back andTools/Maintenance)Media Types Supported Paper(banner,inkjet,photo,plain),envelopes,labels,cards(greeting,index) Twain Version TWAIN Certified.Version2.1Software Included HP Scanner Device Driver,HP WIA Scan Driver,HP TWAIN Scan Driver(Certified),HP Scan,HP Scanner Tools Utility,HP Event(Button)Handler,HP WindowsInstaller,I.R.I.S.Readiris Pro,I.R.I.S.Cardiris,Nuance PaperPort,LPDF(file withlink to download software);No Mac Software on CDCompatible Operating Systems Windows10(32-bit/64-bit),Windows8.1(32-bit/64-bit),Windows8(32-bit/64-bit),Windows7(32-bit/64-bit);Mac OS X Mavericks10.9,OS XYosemite10.10Minimum System Requirements PC:Windows7or higher,2GHz processor,2GB RAM,170MB available hard diskspace(driver-only install),USB2.0,1024x768SVGA monitor;Mac:Mac OS Xv10.9(Mavericks)or higher,1GB available hard disk space,Internet access Operating Environment Operating Temperature Range:10to35°CStorage Temperature Range:-40to60°CRecommended Operating Temperature Range:10to35°CRecommended Humidity Operating Range:15to80%RH(non-condensing)Non-Operating Humidity Range:0to90%RH(non-condensing)Power Power Consumption:4.51watts(ready),1.40watts(sleep),0.22watts(auto-off),0.22watts(manual-off)Power Requirements:Input voltage:90to264VAC,50/60HzAcoustic Power Emissions 5.8B(A)Energy Star YesRegulatory complianceinformation/safetyIEC60950-1:2005+A1and all applicable amendments;EN60950-1:2006+A11+A1+A12+A2;EAC safety;European Union CE;Kenya PVOC;NigeriaSON;Saudi Arabia SASO;South Africa NRCS;Ukraine safety approval Electromagnetic compatibility Class B Emissions;CISPR22:2008(International);European Union EMCDirective2004/108/EC,EN55022:2010(CE mark);EAC EMC Certificate;Ukraine EMC approval;EN61000-3-2:2014(harmonics);EN61000-3-3:2013(flicker);Immunity CISPR24:2010,EN50024:2010Product Dimensions460x387x145mm;Packaged:579x245x499mmProduct Weight 5.58kg;Packaged:7.6kgWhat's In The Box L2741A:HP ScanJet Pro3500f1Scanner;HP ScanJet Pro3500f1FlatbedScanner Engine;Install Guide;HP Scan Software&Drivers CD;HP Bonus PackSoftware CD;Supporting flyers;Cushions;USB cable;Power adapter;PowercordsWarranty One-year commercial hardware warranty,phone and Web support included.Warranty may vary by country as required by law.Go to/support to learn about HP award winning service andsupport options in your region.Service And Support Options U8TF9E HP3year Next business day Exchange ScanJet Pro3500SVCU8TG1E HP3year Next business day Onsite Exchange ScanJet Pro3500SVCU8TG4PE HP1year Post Warranty Next business day Exchange ScanJet Pro3500SVCU8TG5PE HP1year Post Warranty Next business day Onsite Exchange ScanJetPro3500SVCCount on dependable support to create the best image possible.We can help you enhance your printing and imaging environment,protect your IT investment,and grow your business—with expert support that’s affordable,personal,and tailored to your needs through HP Care Pack Services.For more information,visit our website at HP ScanJet Pro3500f1Flatbed Scanner L2741AThe product could differ from the images shown.©Copyright2015HP Development Company,L.P.The information contained herein is subject to change without notice.The only warranties for HP products and services are set forth in the express warranty statements accompanying such products and services.Nothing herein should be construed as constituting an additional warranty.HP shall not be liable for technical or editorial errors or omissions contained herein.Published in EMEA September20154AA6-1038EEE。
HP Scanjet 4670vp可移动直立式超薄透明扫描仪独特的空间设计HP Scanjet 4670vp 卓而不凡的超薄、直立式设计,方便您随心所欲进行可视扫描。
多功能扫描使用透扫器(TMA),可将35毫米负片和幻灯片转换为灵活的数字文件。
栩栩如生的图像效果2400 dpi 光学分辨率和48位真彩,展现品质出众的专业扫描效果。
HP Scanjet 4670vp 可移动直立式超薄透明扫描仪精彩立现,只需一键扫描仪类型 平板式输入模式前面板扫描, 复印、HP Instant Share 即时共享技术或节能按钮; HP Image Zone 照片和图像处理软件; 透扫器(TMA); 通过TWAIN 连接的用户应用程序增强特性 立式扫描,透明扫描,HP 独有的扫描技术, 用于大幅面扫描的组合功能, 透扫器(TMA); 兼容高速USB2.0标准以及HP Image Zone 照片和图像 处理软件速度 预览速度: 少于6秒 扫描速度:少于27秒:4" x 6"照片扫描到Microsoft ® Word 文件 少于32秒:整页OCR少于22秒:4" x 6"照片扫描到电子邮件分辨率 2400 dpi 光学分辨率 2400 x 2400 dpi 硬件分辨率高达999,999 dpi 增强分辨率*成像技术 CCD; HP 独有的扫描技术色彩深度 48位真彩缩放比率 10到2000%,递增频率1%最大文件尺寸 216 x 297毫米(8.5 x 11.7英寸)接口与操作系统要求 兼容高速USB 2.0标准;支持的操作系统有: Microsoft ®Windows ®98、98 SE 、Me 、2000、 XP(专业版及家庭版); Mac OS X 10.1.5,10.2,10.3或更高版本。
外形尺寸 413 x 298 x 19毫米重量1.38千克最低系统要求 PC 机: 兼容USB 接口,Microsoft ® Windows ® 98、98SE 、Me 、2000、 XP(专业版及家庭版); Intel Pentium II, 233 MHz 处理器,Celeron 或 兼容的处理器;255MB 可用硬盘空间,64MB 内存,Microsoft Windows IE 5.01 SP2浏览器或更高版本;SVGA 显示器(800x600,16位彩色); 光驱 Mac 机: 兼容USB 接口,Mac OS X 10.1.5, 10.2,10.3或更高版本; 128MB 内存;240MB 硬盘空间;SVGA 显示器(800x600,16位彩色);光驱;USB 接口包装箱内容 • HP Scanjet 4670vp 可移动直立式超薄透明扫描仪• 透扫器(TMA) • 立式支架• USB 接口和电源电缆组件-兼容高速USB 2.0标准 • AC 交流电源线 • 安装海报 • 使用手册随机光盘内含的Microsoft ® Windows ® 以及Macintosh ® 系统: – HP Image Zone 照片和图像处理软件,附带HP Instant Share 即时 共享技术– Adobe ® Photoshop Elements 软件 – ArcSoft ® Panorama Maker– I.R.I.S. ReadIris Pro OCR 软件多种文件格式 对于PC :TIFF, TIFF 压缩, TIFF(多页型),Bitmap, DCX 文件, PCS 文件, JPEG, GIF 文件, FlashPix, PlainText 格式, PDF 文件, HTML 文件, RichText 格式 对于Mac : TIFF, TIFF 压缩格式, TIFF(多页型), Bitmap, PICT, JPEG, GIF 文件, FlashPix, PDF 文件, PlainText 格式, HTML 文件, RichText 格式操作环境 工作温度范围: 10ºC - 35ºC 工作湿度范围: 15 - 85% RH 存放温度范围: -40ºC - 70ºC 存放湿度范围: 0 - 90% RH电源 通用交流适配器: 100-240VAC (50-60赫兹), 0.6安培输入;12伏直流,1.25安培输出符合的规范信息 安全性:EU (符合IEC60950第三版本要求,第三方安全认证), 北美(国家认可测验实验室认证), 波兰(PCBC), 俄罗斯(GOST) 电磁兼容性:EU (CE 符合认证), 北美(FCC), 澳大利亚(SMA), 新西兰(SMA), 俄罗斯(GOST), 韩国(MIC), 台湾(BSMI)订购信息产品号 说明L1935AHP Scanjet 4670vp 可移动直立式超薄透明扫描仪欲订购HP 附件和耗材,请与您当地HP 销售办事处或最近的HP 授权经销商联系。