拟南芥培养Protocol
- 格式:doc
- 大小:30.50 KB
- 文档页数:2
拟南芥培养Protocol拟南芥培养Protocol拟南芥生长的适宜温度白天为22℃-24℃,夜温最好比日温低2℃,适宜的湿度为60-70%,生长期适宜的光强为150μmol·s-1·m-2(6支36W日光灯下35cm处测得)。
幼苗期不耐高光强,可适当遮荫.光质也较重要,应选用植物生长专用的日光灯(如荷兰产TLD型Philip豪华直管荧光灯).拟南芥在日照长于12小时下才会开花,一般拟南芥生长室的日照长度定于14-16h为佳1.准备发苗培养基:1/2 MS,Sucrose:10g/L,pH5.7,agar:0.7-0.8%.灭菌后,在超净台上分装入培养皿.2.种子消毒:种子放在1.5ml试管中, 加入1ml10%NaClo,混匀,消毒5min,用无菌水洗5次以上(用移液枪吸).3.播种:用移液枪将种子吸到培养皿上,可多加些水,将种子铺均匀(不要太密,太密根缠在一起不好移苗),用移液枪吸干水,在超净台上让培养皿干了,密封盖子,4℃暗处理两天后,移到光照培养箱(22℃,光周期12h),若种子较密,则在光照培养箱中生长1周后即可移苗,否则根长太长后易缠在一起,但太小的苗移栽后,需适当遮荫.最好是在每皿<30株这样的密度下,让其生长两周后再移苗.4.移苗:将蛭石与珍珠岩按(3:1)的比例混好,装入花盆,将花盆放入有水的塑料周转框中,框中的水就会通过花盆底部的孔渗上来,待花盆中的基质湿透后即可移苗.小心轻轻用镊子从培养皿中连根拉出小苗,把根平放在蛭石表面,用镊子把根轻轻压下.移苗结束后,用保鲜膜覆盖3-4天后揭膜.从苗期直至开花,可在塑料周转框中始终保持1-3cm的水层,在开始收籽期,不再需要过多的水分,可保持塑料周转框干燥,此时每隔2-3天浇一次水即可.整个生长期可浇3-4次拟南芥营养液.5.收籽:在种荚变黄,变干时可以收籽.将种子抖落在纸上,用金属滤网过一下以除去杂质,将种子装入写了标记的小纸袋中,放于干燥的环境中让种子进一步干燥后,封存于1.5ml试管中.附拟南芥营养液配方nutrient solution containing:5mM KNO3, 2.5mM KH2PO4, 2mM MgSO4, 2mM Ca(NO3)2, 50μM Fe-EDTA, 70μM H3BO4,14μM MnCl2, 0.5μM CuSO4, 1μM ZnSO4, 0.2μM Na2MoO4, 10μM NaCl, 0.01μM CoCl2, adjusted to PH 5.7具体配法(药品刚好50L水培液用):O ,):溶解,加水至500ml, 1)大量元素(包括25.25gKNO3,24.65gMgSO4·7H2配制成100倍母液Ⅰ。
HANDLING ARABIDOPSIS PLANTS AND SEEDSMethods used by the Arabidopsis Biological Resource Center GROWTH OF PLANTSGrowth of plants in sterile conditionsGrowth of plants on soil•Planting on soil•Growth conditions•Control of pests•Plant isolation and harvestingSEED HANDLING AND PRESERVATIONThreshingSeed dryingSeed moisture content determinationSeed packaging for storageSeed storage and preservationSeed viabilityThe methods used by the ABRC for handling plants and seeds are outlined below. These procedures are designed to generate healthy plants that give maximum set of pure seeds and to preserve these in the safest and most convenient manner. Many other approaches may be equally as good, especially in specific experimental situations.GROWTH OF PLANTSArabidopsis can be grown in a variety of environmental settings including growth rooms, window ledges, outdoors, growth chambers and greenhouses.Peat moss-based mixes, commercial greenhouse mixes, relatively inert media watered with nutrient solutions, and defined agar media can all be employed as plant substrates.Our focus will be on growth of plants on agar and soil in growth chambers and greenhouses. The plant and seed management methods are discussed in the chronological order in which they would normally be utilized.Growth of plants in sterile conditionsIt is necessary to use sterile conditions to grow Arabidopsis for specific experiments such as selection of transformed plants, drug resistant plants, early root and shoot phenotypes, lethal mutants, etc. Otherwise, contaminants can essentially take over plant cultures. Various shapes and sizes of containers such as petri dishes, 'Magenta' boxes, or culture tubes can be used, depending on the required length of the growing time (2-3 weeks or to maturation) and characterization of phenotypes (shoot or roots). We will emphasize theuse of petri dishes. All procedures should be accomplished in a sterile hood or environment.The most commonly used media is 0.5x or 1x Murashige and Skoog (MS) mineral salts with 0.8-1% BactoAgar TM. Optional 0-3% sucrose and vitamins can be added to the media. Preparation of 0.5x MS agar media is as follows:1. Add 4.31 g of MS Salts to 1.8 L of distilled water and stir to dissolve.2. Check and adjust pH to 5.7. Adjustments can be made with 1M KOH.3. Dilute to final volume of 2 L and add agar (10 g / L).4. Autoclave 15 minutes at 15 psi, 121o C.5. Optional sucrose and vitamins should be added after agar media cools, before pouring solution into container (e.g. petri dishes, Magenta boxes, culture tubes).Seeds can be surfaced sterilized by soaking for 8 min in bleach (5.25-6.15% Sodium hypochlorite) with 0.05% Tween 20 and rinsing the seeds 3-5 times with sterile, distilled water. Be sure that all bleach residue is removed. Maintain seeds in a small amount of water in a watch glass and plant immediately.There are several methods for placing the seeds on medium, depending on the preferred plant density and type of container used:a.) For planting of individual seeds in low density, a small pasteur pipet with a latex bulb on the upper end can be used. Exhaust air from the pipet, submerge its tip and use slow release pressure on bulb to draw a single seed into the end of the pipet. The seed can be dropped at the desired location by carefully exhausting of the pipet. Do not draw seeds beyond 1-2 cm into the pipet. Repeated pipetings are used for the remainder of the seeds.b.) For planting at high densities with uniform distribution on agar, mix seeds in sterile distilled water (or 0.1% cooled top agar), pour onto dish, and swirl to distribute seeds evenly. A sterile Pasteur pipet tip can be used to move seeds around to adjust the distribution, and to remove excess water. Allow the water or top agar to dry slightly before replacing lid.After planting seeds on Petri dishes with agar, replace cover and seal with Parafilm to prevent desiccation. Place dishes at 3-4°C (refrigerator temperature) for at least 2 to 4 days to break dormancy, if needed. Dishes can be placed directly into the growth environment. A temperature of 23-25°C, 130-150 (E m-2 sec-1 illumination are suitable. Growth of plants on soil•Planting on soilDifferent mixtures and media can be utilized for growing Arabidopsis. Growth of plants on soil includes all media that can be successfully used for non-sterilegrowth of plants in pots or other similar containers. Mixtures of soil that havesubstantial peat moss with some perlite and vermiculite for aeration can be usedsuccessfully. Peat-based commercial mixes represent a convenient and reliablebase for growing plants. Mixes such as "Sunshine LC1 mix" support healthyArabidopsis growth and have fertilizer added so that fertilization is not necessary in the very early growth phases.Seeds can be planted in various ways, however, strict control of numbers of seeds planted can be maintained, and separate rows of different lines can be planted in the same pot for critical comparisons with the techniques described here. The density of planting depends on the genetic material, the purpose of the plants and availability of seeds. For seed production, high yields are achieved utilizing densities of 10 to 20 plants per 10 cm square pot. Larger populations of plants do not necessarily reduce yield, but production per plant is reduced inversely. Larger populations are necessary for maintenance of representative proportions in a segregating population, and this can be achieved with more dense plantings in one or two 10 cm pots or in flats (approx 26 cm x 53 cm).Preparation of pots and planting can be accomplished as follows:1. Thoroughly wet soil with tap water and apply a commercially available extended time release fertilizer such as Osmocote 14-14-14 (14% nitrogen, 14% phosphate, 14% potassium) which feeds up to 3 months from planting (apply in amounts according to the label). Alternatively, nutrient solution can be used to wet the soil. Mix well with trowel or large spoon. Soil can be autoclaved to eliminate pests, but this is not usually necessary.2. Place soil loosely in pots or flats, level without compressing to give a uniform and soft bed. Pots are ready for planting.3. When planting many seeds in a pot, scatter them carefully from a folded piece of filter paper (weighing paper or other paper) distributing seeds evenly onto the surface of the soil.4. When planting individual seeds in low density, use a Pasteur pipet with a latex bulb on the upper end. Exhaust air from the pipet, submerge its tip and use slow release pressure on bulb to draw a single seed into the end of the pipet. The seed can be dropped at the desired location in the pot by carefully exhausting of the pipet. Repeated pipetings are used for the remainder of the seeds.5. Planted seeds should not be covered with additional soil, because Arabidopsis seeds need light for germination.6. If several pots are planted, they can be placed in a tray or other similar container and covered with clear plastic wrap. In all cases the plastic wrap should not be allowed to contact the soil surface. Cut several small slits in the plastic with a knife in order to provide some aeration, but still maintain enough humidity for germination and also avoid seed desiccation. Clear plastic domes are available for covering flats, but should not be tightly sealed.7. Pots can be placed at 3-4°C (refrigerator temperature) for at least 2-4 days to eliminate any dormancy, improve germination rate and its synchrony. The use ofa cold treatment to break dormancy of seeds, also called stratification, is very important for plantings utilizing freshly harvested seeds, which have more pronounced dormancy. Most widely used lines have moderate dormancy, and cold treatment may not be required when planting older seeds of these lines. For certain lines, as many as 7 days of cold treatment is necessary. Cold treatment of dry seeds is normally not effective in breaking dormancy.8. After cold treatment, place pots in growth area (growth chamber, growth room, greenhouse, etc) and maintain approx 2 cm of water around base of pots during the germination phase. Leave plastic wrap on for plants grown in growth chamber.•Growth conditionsIn general, the growth and development of Arabidopsis plants, including time to flowering and time to harvest depend on several growth conditions in addition to the genetic background. Management of water, nutrition, light and temperature will ensure that healthy plants develop and produce high quality and quantity of seeds. Under continuous light, 25°C, good water supply and good nutrition, seeds of the commonly used lines germinate within 3-5 days, bolt and flower around 3-4 weeks, and can be harvested within 8-12 weeks.Water and nutritionMaintenance of soil moisture is imperative for successful germination of seeds. This can be ensured in one of two ways: a) leaving the plastic with small perforations over the pots or tubs, or b) placing the pots in flats without the plastic cover and maintaining a depth of 1-3 cm of water, which is maintained continually until all plants germinate and have expanded cotyledons. We prefer the former for growth chamber and the latter for the greenhouse. The first method is dangerous in the greenhouse setting, due to the potential for overheating underneath the plastic covering on sunny days, killing the germinating seedlings. After germination, plants are watered as needed to avoid water stress. Water is best applied by sub-irrigation when the soil begins to dry. Sub-irrigation can be achieved by placing pots into flats or trays, allowing proper drainage of the soil. Over-watering should be avoided due to the potential for algal or fungal growth on the soil surface. Over-watering of greenhouse plants also provides favorable soil conditions for fungus gnat larvae. More frequent watering may be necessary during the first few days, as it is necessary to avoid any drying before the first two true leaves begin expanding. After plants have developed true leaves, watering frequency may be reduced to as low as once or twice per week until the plants flower. The water requirement of plants increases dramatically during silique filling. Daily watering at this stage is necessary for good seed production.Water requirement is strongly influenced by relative humidity. Arabidopsis plants, including seedlings, tolerate low humidity (e.g., 20-30%) although increased humidity (e.g., 50-60%) greatly reduces the risk of accidental drying of the soil surface and subsequent desiccation of the fragile, germinating seedlings. Very high humidity (more than 90%) can induce the formation of mold. Low humidity (less than 50%) is desirable when siliques begin to mature.Poor nutrition can lead to rapid flowering, short growth period and low seed set. If an extended time release fertilizer was not utilized before, a mild mineral nutrient solution can be applied to the pots at 2-week intervals (5 mM KNO3, 2.5 mMKH2PO4 (adjusted to pH 6.5), 2.0 mM MgSO4, 2.0 mM Ca (NO3)2, 50 microM Fe-EDTA, 70 microM H3BO3, 14 microM MnCl2, 0.5 microM CuSO4, 1 microM ZnSO4, 0.2 microM Na2MoO4, 10 microM NaCl, 0.01 microM CoCl2, pH 6.5).LightOptimum light is approx 130-150 uE m-2 sec-1. Very high output or cool white (VHO or SHO) fluorescent lamps, supplemented by incandescent lighting are used for growth chambers. Older plants tolerate higher light intensity, up to full sun, although the use of 60% shade cloth in summer greenhouses helps with light intensity control and temperature regulation. Supplemental evening and morning light is provided in the greenhouse during winter since the plants generally require a long photoperiod (at least 12 hours) for flowering. Photoperiods of 16 hours work well for greenhouse growth. Plants flower rapidly under continuous light or long days, while under short days flowering is prevented or delayed, favoring growth of vegetative tissue. Continuous light is well-tolerated and can be used to accelerate the reproductive cycle.TemperatureThe optimum growth temperature range for Arabidopsis is 23-25°C. In general, high temperatures favor a reduced number of leaves and flowers, and fertility is reduced. At lower temperatures, growth is slow and flowering is delayed. Lower temperatures are permissible, but higher temperatures are not recommended, especially for germination through early rosette development. Older plants tolerate higher temperatures, at least up to 30°C. It is advisable to set the greenhouse temperature at 21-23°C to avoid fluctuations to higher temperatures. It is recommended that night temperatures be maintained 2-4°C lower than the day temperature. Some late flowering natural accessions (ecotypes) require an additional 4°C incubation (vernalization) of young rosettes for 3-4 weeks to induce flowering.•Control of pestsSeveral insects can cause substantial damage to or even kill Arabidopsis plants in the greenhouse and growth chambers. The main pests we have encountered are thrips, aphids and fungus gnats; other minor pests are whiteflies and spider mites. Despite any precautions (avoiding transfer of insects from contaminated areas to growth space), even the most carefully managed growth spaces occasionally become infested by pests. The best strategy for eliminating the infestation is emptying the room, destroying all plants growing in the area (if possible), thoroughly cleaning the room and heating the space to 40C for at least 24 hours to kill insect eggs and larvae.An important aspect of insect control is detection and identification before populations multiply. Traps (yellow cards with adhesive) are vital in this regard for catching winged insects. Fresh traps should be placed in greenhouse rooms and growth chambers frequently and monitored continuously. Always identify a pest before embarking on treatment.Although chemical or biological treatments can reduce the population of insects, such remedies cannot make a room completely pest-free while allowing Arabidopsis plants to survive.Where local governmental regulations permit and infestation is highly probable, application of insecticide as a preventative measure can be very effective in assuring plant health throughout growth. This helps to avoid heavy use of chemicals that may be necessary after infestations have occurred. The following procedure may prevent infestation of thrips, aphids, fungus gnats and white flies.1. Add 1.2 ml of "Enstar", 1.2 ml of "Tempo" and 1.2 ml of "Conserve" to 3 gal of water. Mix well. Spray lightly on rosettes prior to bolting stage - before placement of any isolation devices for the plants.2. "Marathon" (granular) can be added to the soil surface as per product label. However, applications for small plants can be made in the tray with water in cases where the pots are being sub-irrigated. This practice reduces risk of damage to the plants by the insecticide.Listed below are the main pests and the possible insecticides used for their control once insects have been observed.Thrips: these insects feed on developing buds and leaf primordia, visual symptoms of damage are: brown spots in young leaves, withered inflorescence tips, crumpled and curled leaves, sterility and plant death. Effective pesticides to control thrips are "Conserve", "Mesurol", "Duraguard", or "Marathon". Aphids: severe infestation can produce stunted plants or even plant death. Insecticides like "Marathon", "Mesurol", "Duraguard" are useful.Fungus gnats: the larvae of this insect inhabit the soil around the plants, especially in over-watered pots, and can cause severe root and leaf damage, destroying plants; adults are easily detected (2-3 mm long). Larvae populations can be controlled by reduced watering or by treating the soil with the highly selective biological insecticide "Gnatrol" (Bacillus thuringiensis), or the microencapsulated Chlorpyrifos "Duraguard" for time release control. "Marathon" is a systemic alternative.Note that the use of brand names does not constitute an endorsement of product nor does it imply that other approaches may be necessarily inferior. The chemicals listed are for information only. Also, when these or any other pesticides are employed, check the label instructions of the manufacturer before purchase or application for registered usages of the product and recommended application rates and frequencies. Label instructions of pesticides must be strictly followed, and the product applied only by individuals with currently valid licenses. All applications of pesticides should be made in evening hours, and greenhouse rooms flushed with fresh air before the next morning to minimize exposure to workers. Notice of application should always be posted.Many predator species are currently marketed for control of some of the above pests. Some of these are effective, but others are less successful. We have used predators to eradicate spider mites. However, some others have been less successful in our hands, and when it becomes necessary to apply chemicals to control one pest, all predators are often lost. We have also experienced difficulty in keeping some predators on hand for quick response to pest immigration. However, as technology relating to this type of pest control advances, their use will surely increase.•Plant isolation and harvestingIt is necessary to avoid seed mixing among adjacently growing lines and to prevent loss of seeds due to shattering while assuring quality of the harvested seeds. It is essential to keep plants of one line isolated from neighboring plants to ensure that absolutely no cross-contamination can occur. It is useful to keep inflorescences from sprawling for maximum use of growth area. Various means and devices, such as "Aracons TM", plastic floral sleeves and plastic bags can be employed to achieve these goals. In case you need access to the plants while they are growing e.g. if you are making crosses, it may not be practical to contain the plants inside an isolation system, therefore plants can be supported on wire stakes or plastic rods using disposable wire bag ties.Watering of pots should be discontinued several days prior to harvest so that pots are dry when harvest is conducted. It should be noted that delays in harvesting following physiological maturation of the plant result in seed deterioration, especially under non-optimal environmental conditions.Commercial seed collectors: Aracons TM (Lehle Seed Co. Catalog) placed soon after bolting are effective for single plant harvesting, preventing cross pollination and seed contamination, but are not necessary when simple bulk production is desired. Harvesting after pots have been allowed to dry is accomplished easily by carefully cutting off the inflorescence under the cone device, placing the Aracons TM plus contents carefully on a large plastic bag (approx 4 liter) or a large piece of paper, removing the plant material from the plastic cylinder, and then shaking the seeds into the bag or paper. Alternatively, if plants are totally dry, the plant material can be placed directly onto threshing sieve (see threshing section below).Use of plastic floral sleeves: For bulk seed production using individual pots, the pots can be placed into transparent clear plastic (i.e. polypropylene) floral sleeves near the bolting time. These sleeves fit snugly around a 10-cm pot, extend 50-60 cm upward, and are wider at the top allowing for expansion of the developing inflorescences, maintain upright stiffness, and tear easily for harvesting. All plant inflorescences are maintained within the sleeve, forming a propagator for each pot. At harvest, the sleeves can be cut or torn, the inflorescences cut off at the base, and the plant material placed into plastic bags or, if plants are totally dry directly onto threshing sieve. This method is very effective for achieving high densities of lines while maintaining productivity and purity of each pot. Bagging inflorescences by pot: Inflorescences can simply be trained into an approx 4 liter transparent plastic bag before any siliques begin to brown. The bag, however, may potentially collect moisture from transpiration or careless watering and provides a haven for insects when greenhouses are sprayed. To reduce these possibilities, the tops of these bags should be kept widely open at all times. Wait until the inflorescence has browned before harvesting. This method is conducive to strict isolation of the lines, and the bag serves to collect shattered seeds. Harvesting is accomplished by carefully cutting the entire inflorescence off at its base after all seeds have matured and shaking the seeds into the plastic bag.Bulk production on the open bench: For bulk seed production, the best method is to simply grow the plants on the open bench, keep all lines separated by adequate space, avoid disturbance of maturing inflorescences, and harvest when all siliques are dry. The entire inflorescence is cut off at its base and carefully placed into an approx 4 liter or larger transparent plastic bag, depending on the size of the bulk of plants. This is compatible with the goals of high seed quality, maximum seed yield, and good pest protection. Some seeds may be lost, but the remainder are almost always healthy, and result in vigorously germinating seedlings. After harvest, the entire contents of the bag are allowed to dry in preparation for threshing.Early harvest of individual siliques: Seeds from individual siliques can be harvested after the siliques have turned completely yellow, if rapid turnover is required. However, such seeds do have high levels of germination inhibitors. Fornormal seed production, seeds are harvested only after the siliques havecompletely browned, and when pressed with fingers, do not compress (if thesilique has dried even further, the silique may shatter at this point). At this stage,seeds are completely formed. Since formation and maturation of siliques occurover time, early siliques can be harvested before later ones mature to avoid seedloss. However, it is usually recommended to wait until the entire inflorescence has browned before harvest.SEED HANDLING AND PRESERVATIONThe longevity of seeds can be affected by a) genotype, b) pre-storage environment, such as conditions during seed maturation, harvesting and seed handling and c) seed storage conditions. A slow process of deterioration begins as soon as seeds mature on a plant. Therefore the sooner seeds are placed into storage, the better. Harvested seeds should be processed promptly (including threshing, cleaning, drying and packaging) and then placed into storage.Preservation of seeds involves adherence to a few simple principles. Hence, it is not a difficult task although deviations can result in damage to seeds. We treat Arabidopsis as oil seeds which means that the most careful, and conservative handling procedures must be applied. The following procedures form a sequence that ensures that the seeds will be conserved in the best possible condition.ThreshingHand rather than machine threshing and cleaning of the small Arabidopsis seeds is recommended mainly because the threshing machines need rigorous cleaning between lines to avoid sample cross-contamination, require very careful adjustment and do not accommodate the variable size of Arabidopsis seeds well.If seeds are collected in a plastic bag, the harvested plant material should be allowed to dry for a few days in the opened bag before threshing, since threshing is easier when the inflorescences are dry. Seeds should be threshed when the moisture content is approx 10%, to minimize seed damage during threshing. This moisture content will be reached when all material in the bag appears to be dry. The plastic bags containing dried inflorescences can be gently hand-pressed from the outside, and the seeds will fall to the bottom of the bag. Most of the dry inflorescence can be removed from the bag by hand before seeds are sieved to separate them from chaff.Hand sieves with graded mesh sizes (i.e. No. 40) are recommended to remove debris, with seeds passing through the mesh and collected on clean paper. Totally dry plants from Aracons TM and sleeves can be placed directly onto the sieve. After sieving, the seeds are still likely to be mixed with soil and residue. A combination of additional sieving, blowing and visual inspection can be employed to clean the seeds completely. Small samples can be cleaned by hand with the aid of a pointed tool on an opaque glass plate illuminated from below. Cleaned seed samples are placed in open, carefully labeledglass jars (do not use plastic due to static effects), or in small manila "coin" envelopes to allow seeds to dry.Seed dryingThe moisture content of Arabidopsis seeds after threshing is usually around 10%. The seeds should be dried to 5-6% moisture, prior to storage. This is verified by moisture testing, as outlined in the protocol below, on samples that can be disposed. Higher moisture content can cause seed deterioration. There are many methods available for drying seeds. The safest method is to air-dry the seeds at room temperature for 1-3 weeks. Low relative humidity (20-30%) is necessary for seeds to reach the desired moisture content. The lower the humidity, the faster the seeds will dry and the lower their final moisture content. If after testing, the moisture content is not low enough, continue to dry further and check again.Seed moisture content determinationGeneral ConsiderationsMoisture testing is necessary to verify that seeds are dry enough for storage. Seed moisture content can be determined by several methods. The method outlined is a destructive method, and the seeds employed for testing will no longer be viable.1. The total weight of seeds used for a moisture content determination should be sufficient to make the test accurate and yet not be wasteful of seeds. The sample should be fully representative of the accession and a minimum of 100 mg should be used to prepare the samples for the test. Accurate results were obtained using approximately 200 mg of seeds.2. The lower the weight of seed used, the more accuracy is required to achieve a true result. Small samples should be weighed with an analytical balance to four decimal places using light-weight dishes (small aluminum dishes or petri dishes), so that the ratio of the weight of the seeds and the dish is not too disproportionate.3. It is suggested that a minimum of three replicates of 100 mg of seeds or two replicates of 200 mg of seeds per sample be used for the moisture content determination.4. Always work with care and finish one sample at a time. Do not leave the dishes open in the laboratory between weighings because the seeds will either lose or absorb water from the air and small changes in weights can result in large differences in the calculations when the amount of seed used is small.5. High temperatures cannot be used to determine the moisture content because the oil will also vaporize and give a false result of water plus oil content. Temperatures of just over 100°C allow evaporation of water and minimal vaporization of oils.Equipment:Heat resistant dishes with cover, analytical balance, forced draft oven,s desiccator with silica gel, tongs and oven cloth.Method:1. Weigh one clean numbered dish and cover accurately to 4 decimal places using an analytical balance. Write the weight (W1) in the notebook.2. Add approximately 100 or 200 mg of seeds distributed evenly over the base of the dish, replace the cover and accurately weigh the dish and cover. Write this weight (W2) in the notebook.3. Place the dish in a safe place and continue to do the second and/or third replicates in the same way.4. When all samples have been weighed into numbered dishes, place each dish on top of its numbered lid in the oven at 100-105°C.5. Wait for the oven to reach this temperature and heat the samples for 15-17 hours.6. Remove the dishes from the oven, replace their covers and place in a desiccator to cool for 30 to 45 minutes at room temperature. After heating, make sure that the dishes are put directly into the desiccator so that the dry seeds do not absorb more moisture.7. Remove the dishes one by one from the desiccator and immediately weigh each dish and cover, and write the weight (W3) in the notebook. Do not leave the desiccator open during the weighings.8. Moisture content is calculated as the loss in weight as a percentage of the original weight of seeds. This is known as wet basis or fresh-weight basis, and is expressed to one decimal place. Algebraically, if W1 is the weight of the dish, W2 the weight of dish and seed before drying, and W3 the weight of dish and seed after drying, then:% Moisture Content = 100 x ( W2 - W3 ) / ( W2 - W1 )Seed packaging for storageAfter seed moisture content is within the safe storage limits, dried seeds should be placed in tightly sealed and impermeable containers to prevent rehydration. Cryovials (with threaded lids and gaskets) are convenient for storage. They hold large numbers of seeds, seal tightly and can be resealed many times.In packaging seeds, each container should be labeled with relevant information including date of storage using a waterproof permanent marker, or a suitable printed label. In determining seed quantities, approx 1250 seeds = 25 mg = 50 microliters. Seal the。
![[转载]拟南芥培养](https://uimg.taocdn.com/d965915f68eae009581b6bd97f1922791688bed3.webp)
[转载]拟南芥培养一、拟南芥播种种子装入dorf管内,20μl种子加1ml 75% 乙醇消毒1分钟;吸去乙醇,加入1ml 50%次氯酸钠:50%无菌水:0.05%吐温(or 5%漂白粉),震荡洗涤15-20分钟;稍离心使种子沉于下部,吸去次氯酸钠或漂白粉,加入无菌蒸馏水清洗(清洗3次,每次洗完后稍离心,吸净水分);将种子用接种环均匀铺于MS培养基上,用封口膜封口,放入4℃冰箱内冷处理2-3天(春化)。
MS培养基的用量:直径为9cm的培养皿用25ml,直径为6cm 的培养皿用12.5ml。
加培养基时先将凝固的培养基用微波炉高温5分钟左右至全部解冻,然后慢慢冷却至不太烫手时倒板,如要加潮霉素等抗生素也是在此次加,加入后摇匀然后倒板。
倒板后至自然冷却即可铺种,如水分较多或板不够硬,亦可于倒板后将培养皿盖打开晾10分钟左右(此时超净台要关闭)。
种子的杀菌、清洗、铺板等过程在超净工作台上无菌操作,操作者进入超净工作台要用酒精棉球擦拭手、器具、超净台,防止感染细菌、真菌。
二、MS固体培养基制备1.培养基母液的配制和保存MS培养基含有近30种营养成分,为了避免每次配制培养基都要对这几十种成分进行称量,可将培养基中的各种成分,按原量的20倍或200倍分别称量,配成浓缩液,这种浓缩液叫做培养基母液。
这样每次使用时,取其总量的1/20(50 mL)或1/200(5 mL),加水稀释,制成培养液。
现将制备培养基母液所需的各类物质的量列出,供配制时使用。
大量元素(母液Ⅰ,20×) mg/LNH4NO3 33 000KNO3 38 000CaCl2·2H2O 8 800MgSO4·7H2O 7 400KH2PO4 3 400微量元素(母液Ⅱ,200×) mg/LKI 166H3BO3 1 240MnSO4·4H2O 4 460ZnSO4·7H2O 1 720Na2MoO4·2H2O 50CuSO4·5H2O 5CoCl2·6H2O 5铁盐(母液Ⅲ,200×) mg/LFeSO4·7H2O 5 560Na2-EDTA·2H2O 7 460有机成分(母液Ⅳ,200×) mg/LⅣA肌醇 20 000ⅣB烟酸 100盐酸吡哆醇(维生素B6) 100盐酸硫胺素(维生素B1) 100甘氨酸 400上述几种母液都要单独配成1 L的贮备液。
实验目的:拟南芥无菌培养。
实验仪器:光照培养箱,盆.培养皿,超净台,灭菌锅.实验试剂:营养土,蛭石,MS培养基实验步骤:1、配制MS培养基(一般装在三角瓶里,最好只装最大体积的70%以内),高温灭菌(115度15分钟)在未固化情况下,(固化的话可以在微波炉里融化再使用)在超净台里倒入培养皿(一般一个培养皿内装25ml左右培养基,培养皿也是要灭菌的,一般用报纸或者牛皮纸包一排,十几个吧),待充分凝固之后平放密封保存(倒好之后最好静置15-20分钟,然后放在塑料袋里,保存在4度)2、将拟南芥种子用10%消毒水(洗洁精体积分数)浸泡15分钟左右(要保证每粒种子都浸透),无菌水冲洗3遍,加入适量0.12%的琼脂溶液(要灭菌的)用蓝枪头播在之前准备的灭菌MS固体培养基上(要在超净台中操作),点种子大概的确有点难以想象,下次你来拿种子和苗的时候我可以给你演示一下;3、4℃春化2天后转到光照培养间,温度22℃/18℃(日/夜),16h/8h光周期,白炽灯光照培养,光照强度五千Lx。
(也不用这么严格的,一般22-25度,5000-7000lx,差不多就行了)4、大约7-10天后,拟南芥根须和芽均已长出,长到3至4片叶后可以移入土中培养(平板里长太久的话似乎会影响植物以后的生长)。
5、用营养土和蛭石以1:1的比例混合拌匀配制,以保证营养及透气性。
用高温杀菌以杀死土中的害虫。
(我们现在种得多,土都不灭菌的,注意拔拔杂草就行了)6、用镊子小心夹住培养皿中的拟南芥茎处,取出放在土上,卷起根须塞入土中。
避免将叶片带入土里。
放在光照培养间,条件和长平板一样就行了7、在托盘中浇水,通过毛细作用由底部的孔吸收上去,保证土壤湿润。
刚移植的前两天可以用基本上透明的盖子盖住盆顶。
MS培养基的配方是对的单位mg/L大量元素:NH4NO3 1 650KNO3 1 900CaCl2·2H2O 440MgSO4·7H2O 370KH2PO4 700微量元素:KI 0.83H3BO3 6.2MnSO4·4H2O 22.3ZnSO4·7H2O 8.6Na2MnO4·2H2O 0.25CuSO4·5H2O 0.025CoCl2·6H2O 0.025FeSO4·7H2O(27.8)+Na2-EDTA·2H2O(37.3)有机成分:肌醇100烟酸0.5盐酸吡哆醇(维生素B6)0.5盐酸硫胺素(维生素B1)0.5甘氨酸2注意:肌醇一般是要另外分开来独自配成浓缩液,因为它比较难溶,一般配成100倍,而除去肌醇后的有机,还是可以配成1000倍的。
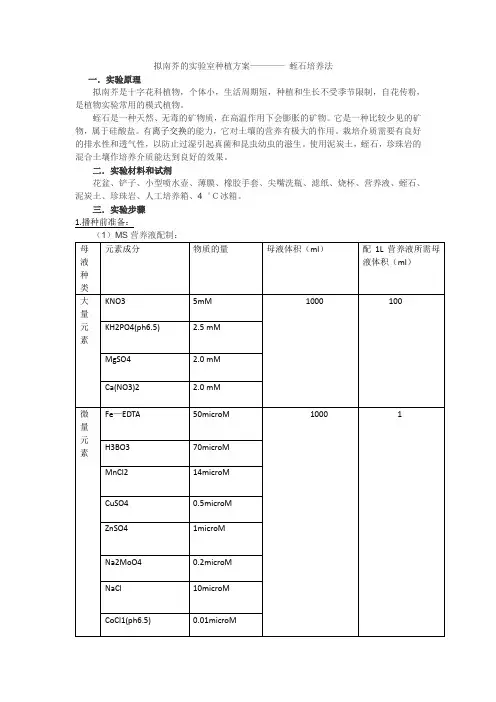
拟南芥的实验室种植方案————蛭石培养法一.实验原理拟南芥是十字花科植物,个体小,生活周期短,种植和生长不受季节限制,自花传粉,是植物实验常用的模式植物。
蛭石是一种天然、无毒的矿物质,在高温作用下会膨胀的矿物。
它是一种比较少见的矿物,属于硅酸盐。
有离子交换的能力,它对土壤的营养有极大的作用。
栽培介质需要有良好的排水性和透气性,以防止过湿引起真菌和昆虫幼虫的滋生。
使用泥炭土,蛭石,珍珠岩的混合土壤作培养介质能达到良好的效果。
二.实验材料和试剂花盆、铲子、小型喷水壶、薄膜、橡胶手套、尖嘴洗瓶、滤纸、烧杯、营养液、蛭石、泥炭土、珍珠岩、人工培养箱、4︒C冰箱。
三.实验步骤(2)种子处理春化种子:将种子放置于烧杯内,4︒C冰箱下,保持3-4天。
(3)土壤混合物的配置泥炭土:蛭石:珍珠岩=1:1:1。
用铲子放入花盆中,用营养液浇灌至湿润。
2.播种:将种子倒在滤纸上,轻轻震荡纸张,可均匀播撒,用薄膜(既保证所需温度又保证所需湿度)封住花盆口,薄膜扎孔(以便后继浇灌营养液)。
3.培养:(1)人工培养箱,温度23︒C,光强240 µmol·m-2·s-1,16h光照, 8 h 黑暗, 相对湿度60%~70%。
(2)在培养时浇培养液,用尖嘴洗瓶浇灌,1-2天浇一次。
(3)种子发芽后,及时揭开薄膜,幼苗生长过程中及时浇灌营养液和适宜的水分。
四. 实验结果预测3-4天后种子可发芽,此时,及时揭去薄膜,继续培养植株,作实验观察。
五.注意事项(1)实验过程中佩戴橡胶手套。
(2)幼苗浇灌水分不易过量,以避免根部缺氧死亡。
(3)种子播种时要均匀。
(4)配置土壤混合物时,要保持珍珠岩完整和土质蓬松。
五. 参考文献和资料翟中和,丁明孝,王喜中.细胞生物学(第四版).高等教育出版社。
刘金亮. 拟南芥实验室常用的种植方法.西北师范大学,生命科学学院,730070。
张庆友,孙新月,兰伟,许树成,祝雪兰. 拟南芥实验室种植栽培要领. 生物学通报. 2015年第50卷第七期。
拟南芥待转化植株培养及遗传转化一实验目的:获得待转化拟南芥植株并进行花序浸润转化植株。
二实验材料:拟南芥种子(拟南芥的生态型最好是Col-0或者Ws-O,Nd-O,No-O),25cm3花盆,15ml离心管,10ml吸管,Agar,乙醇,次氯酸钠,利福平,Silwet L-77,营养液配方所需试剂,营养土,蛭石,塑料薄膜,托盘等。
三实验步骤:1 待转化植株培养⑴种子消毒:20μl种子装入1.5ml离心管内,加1ml 75% 乙醇消毒1分钟;吸去乙醇,加入1ml 1%次氯酸钠,震荡洗涤15-20分钟;稍离心使种子沉于下部,吸去次氯酸钠,加入无菌蒸馏水清洗(清洗3次,每次洗完后稍离心,吸净水分);均匀撒播于MS培养基平板上,注意每次洗脱用V ortxe充分混匀。
⑵春化作用:将MS培养基放到4℃冰箱中放置2天。
⑶将MS培养基放置在23 0 C/20 0 C光照培养箱16h/8h培养,在有3~5片成熟叶片后,移栽生长良好的拟南芥幼苗至用营养液浇灌过的营养土和蛭石(4:6)中生长,营养土和蛭石分装在25cm3的小培养皿中,保湿7天左右,湿度为60%~80%。
在生长期间适当浇灌营养液,按需要没3-4周一次(或者时间更长)。
⑷为了在每个植株上得到较多的花芽,当大多数植株第一个花序形成后剪去第一个花序,解除顶端优势,促使多个次生花序的同步出现。
当大多数花序约1~10cm高(剪主序后4~8d)时准备浸润。
表1 MS培养基注意事项:①溶化琼脂:用粗天平分别称取琼脂5.5g、蔗糖20 g,放入1 000 mL的搪瓷量杯中,再加入750 mL蒸馏水,用电炉加热,边加热边用玻璃棒搅拌,直到液体呈半透明状。
然后再将配好的混合培养液加入到煮沸的琼脂中,最后加蒸馏水定容至1000 mL,搅拌均匀。
②调节PH至5.7~5.8。
表2 营养液配方(无需调节PH)成分含量(mol/L)Ca(NO3)2·4H2O 1.01×10⁻³NH4H2PO4 1.30×10⁻⁴KNO3 5.10×10⁻³MgSO4·7H2O 4.98×10⁻⁴NaOH 3.13×10⁻⁵Fe-EDTA 2.24×10⁻⁵H3BO39.68×10-6Mncl2·4H2O 2.03×10⁻⁶CuSO4·5H2O 2.1×10⁻⁷MoO3 1.39×10⁻⁷Co(NO3)2·6H2O 8.59×10⁻⁸NH4NO3 2.93×10-52 农杆菌的培养取出保种的农杆菌菌液活化后,挑取农杆菌单菌落接入10mL无菌LB液体培养基中(一般含75mg/ L利福平、100mg/ L链霉素和100mg/ L卡那霉素),28℃恒温下250r/ min 振摇过夜培养。
拟南芥培育方法—通用指南一、原理拟南芥作为高等植物的模式生物被全世界的植物生物学实验室广泛研究。
然而,照顾好这种小植物可能不是那么容易。
这里介绍一个马里兰大学帕克学院的HevenSze实验室的通用指南。
Sze实验室及其他实验室的成员为建立这个在实验室培育拟南芥的通用指南做出了许多努力。
二、步骤1. 准备种植用土我们使用Miracle-Gro混合土(2立方英尺一袋)与Miracle-Gro珍珠岩(8夸脱一袋)来培养拟南芥,在一个可以放下2袋混合土的大容器中和土,1袋混合土(2立方英尺)混入半袋珍珠岩(4夸脱)。
注意:Sze实验室在装土之前经常将土灭菌!(方法如下)(1)将干土放入灭菌容器中,直至与顶部相差一英寸,将土拍实。
(2)用铝箔纸将容器封住,在每一个容器上放一张灭菌用胶带,缠好。
确保容器外没有土,放入灭菌锅。
(3)用常规/秒速/快速模式灭菌30~50 min,灭菌模式及时间取决于灭菌的容器数量。
(4)当温度降至室温,将土放入花盆,轻轻压实。
记住将灭菌土保存好,避免种子或菌类污染。
灭过菌的土至少可以使用两星期,如无需要请不要多次灭菌。
(5)将花盆用去离子水浸没(不要超过土表面)用humidomes覆盖,使其吸水3-6小时或过夜。
吸水后应该还保存约1英寸高的水,如果没有请添水。
(6)此时的土可以用于种植拟南芥。
2. 种子消毒方法A(1)取适量种子(野生型、突变体或互补株系)置于一个EP管中,加1 ml 消毒溶液。
消毒溶液:20%Chlorox消毒液0.05%Tween-20用新灭过菌的无菌水配制。
(2)用振荡器以最大速度震荡20-30秒。
(3)放置7-10 min,偶尔震荡一下。
(4)8 000 rpm 离心5秒。
(5)仔细将水倒出。
(6)加1 ml 无菌水,震荡重旋种子。
(7)8 000 rpm 离心5秒,倒去上清。
(8)重复步骤6-7,重复四次。
(9)将灭菌的种子移到底部铺有无菌滤纸的小Fisher盘(100×15 mm)中。
拟南芥植物培养的原理
拟南芥是一种常见的模式植物,广泛应用于基础生物学和遗传学研究中。
其培养方法相对简单,通常采用无菌培养的方式进行。
拟南芥的培养基主要包括两类,即无机盐基础培养基和有机物添加剂培养基。
无机盐基础培养基主要由氮、磷、钾、钙等元素组成,提供植物基本的营养物质,而有机物添加剂则可以为其提供必要的碳源和能量。
通常情况下,拟南芥的培养基中还需要添加适量的激素和维生素等生长因子,以促进其正常的生长和发育。
同时,还需对培养基进行适当的酸碱度调节和温度控制,以确保植物能够在良好的环境条件下生长。
在培养过程中,还需要采用无菌技术,确保培养环境的无菌状态。
同时,需要定期更换培养基和对植物进行移栽操作,以维持其正常的生长和发育。
总之,拟南芥植物培养需要掌握一定的基础知识和技术,才能够获得健康的植株并进行相关的实验研究。
- 1 -。
1.1 播种和发芽拟南芥可在非无菌条件下,生长在土壤或人工配制的各种培养基中。
作为栽植的容器,可根据各自条件置于花盆或格状分离的多穴塑料盘中。
常用的混合物有泥炭藓、营养土、蛭石和珍珠岩等,例如珍珠岩∶蛭石∶泥炭藓=1∶1∶1的混合物,表土、堆肥或腐殖质土∶珍珠岩或蛭石=1∶1,1∶2或2∶1的混合物。
如果用于营养研究则可以蛭石类惰性物质作培养介质,施以配有营养物质的水溶液。
栽培拟南芥的介质均要求有良好的排水性,因此一般混合砂子、蛭石等惰性介质,保持良好的排水,防止过湿引起真菌和昆虫幼虫滋生。
播种前土壤混合物进行高压灭菌处理 30min,以杀死可能存在于混合物中的任何害虫。
在把土壤混合物置于花盆或其他容器中后,将整个容器置于水或营养液中,靠毛细管作用浸湿介质,然后将处理洗净来的种子,用尖头烧融后的移液管小心移至土表,均匀播下。
如果播种量较大,可用浓度为0.1g/100mL琼脂或砂子事先均匀混合后播种。
种子发芽期间必须保持高湿度,故容器可用塑料膜复盖,保持一周左右方可揭去。
[1]将播有种子的容器移至低温或相应低温条件下,在 2~4℃下放置 2~4d,从而于吸胀条件下破除种子休眠,这对新鲜收获的拟南芥种子尤为必要。
对大多数拟南芥品系来说其种子是中度休眠的,收获已久的这类生态型的拟南芥种子可免于低温处理,而有些生态型甚至需长达7d的低温处理。
干种子的低温处理往往是无效的。
低温处理后,将盆移至温室或生长室,在22℃ 左右发芽,夜温可比日温低2℃,用 2000lx的荧光灯给予光照,光周期为18h光 /6h暗(也可24h光照[2]),在 5d左右可见拟南芥发芽。
拟南芥发芽需光,故防止种子被土覆盖。
1.2 生长发育条件的控制[3]拟南芥一般是冬性一年生植物,自然条件下种子在秋天发芽,幼年期度过冬天,花分生组织在春季分化,种子在夏季成熟脱落。
大多数实验室栽植的拟南芥品种在发芽后 4周开花,而在 4~6周后采集种子。

拟南芥培养攻略The Standardization Office was revised on the afternoon of December 13, 2020拟南芥培养全攻略拟南芥又名阿拉伯芥,属十字花科,为二年生草本植物。
具有植株形态小,平铺直径5cm,高30cm;生长区域小,易于培养;基因组小,只有5条染色体,15700万个碱基对,27000个基因;生长速度快,周期短,一个世代大约只需要6周的时间;可自花授粉,也可以在不同种质系间杂交,种子多,每株每世代可产数千粒种子等特点。
因此,拟南芥是植物科学,包括遗传学和植物发育研究中的模式植物之一(图1)。
在2000年,拟南芥成为了第一个基因组被完整测序的植物。
尽管拟南芥生长周期短,且易于培养,但根据不同的实验需求,在培养过程中,对光照、水分及湿度等各种条件的控制有所差别,利用PERCIVAL AR 系列拟南芥培养箱可设置不同的生长环境,满足不同的实验需求。
一、正常培养简单的拟南芥培养,可用于基因表达、器官发育、基因突变等研究。
1、首先把拟南芥种子放到滤纸上,用70%酒精进行消毒处理,再用无水酒精进行处理(也可选择20%漂白剂以及% Triton X-100 非离子表面活性剂做杀菌处理20分钟)。
用无菌水冲洗5遍,然后将种子点到MS培养基上,,另加%琼脂以及2%蔗糖。
2、把种子放到4℃黑暗条件下进行春化48h-72h左右,AR系列培养箱图在长日照或短日照条件下催芽,然后转到PERCIVAL AR 系列培养箱中(图2)。
利用Intellus 控制器,编辑简单的昼夜模式,设定光照时间16小时(黑暗8小时)或者光照14小时(黑暗10小时);选配Q22连续光强调节装置,设定光照强度为100-150umol/;设定箱体内温度为光照条件下20-22℃,黑暗条件下18-20℃;选配湿度控制系统,设定箱体内相对湿度70%。
3、 出苗大约7~10天,然后移入土中培养,采用底部灌溉方式浇水(利用土壤的毛细作用)。
植物材料的固定、包埋和制片一、植物材料的固定和包埋在此过程应注意避免Rnase的污染。
所使用的熔蜡管(管盖不能耐受180℃烘,只需高压湿热灭菌即可)、量筒、三角瓶和药勺均需180℃烘5小时以上。
所用蒸馏水无需用DEPC处理。
所固定的材料越小越好,尽可能切除多余的材料。
材料取下后应立即固定。
取材后若不能立即固定,则应置于冰上运输。
配试剂前请计算一下所需用量,用多少配多少,节约试剂。
300 ml量为例)1、先打开一个60℃左右的水浴锅。
2、在通风橱中往三角瓶中加入12 g多聚甲醛(终浓度为4%)。
3、用量筒配300 ml PBS缓冲液(30 ml 10×PBS+270 ml水),另加1粒NaOH,盖好锡箔纸后,轻轻摇动,稍微溶化后置于水浴锅中溶解。
4、完全溶解后,取出,加0.1% Tween-20 (300 ul)和0.1% Triton(300 ul)混匀(包埋水稻时还要再加3 ml 25%的戊二醛)。
5、置于冰上或4℃冰箱降至室温,然后用硫酸调pH 至7.0。
6、把配制好的甲醛溶液分装到小瓶中,(一般用10 ml的小瓶)。
7、分装好的甲醛溶液应放置在冰浴中当天使用。
二、固定材料1、取植物新鲜材料,去除不需要的部分至适当大小。
注意:所固定的材料越小越好,尽可能去除无用多余的部分。
2、把取好材料放入冰浴的装有甲醛溶液的小瓶中。
注意每瓶中的切块数:太多固定不好;太少则浪费固定液(固定液:材料≥20:1)。
3、材料放入固定液后,应通过抽真空(1至数分钟,视具体情况而定:尽可能短时间,以材料沉入固定液中为准),帮助固定液进入组织中,以达到迅速固定植物材料的目的。
抽气减压时,尽量不要使液体过分沸腾。
抽真空时,材料一般在固定液中浮起;抽完真空的材料应该沉入固定液中,有时可能要反复多次抽真空,直至材料沉没在固定液中。
一般抽真空多于5分钟大部份材料还不沉没在固定液中的情况极少见,如果此情况发生,建议抽真空达10分钟后,继续做步骤4。
拟南芥培育方法—通用指南一、原理拟南芥作为高等植物的模式生物被全世界的植物生物学实验室广泛研究。
然而,照顾好这种小植物可能不是那么容易。
这里介绍一个马里兰大学帕克学院的HevenSze实验室的通用指南。
Sze实验室及其他实验室的成员为建立这个在实验室培育拟南芥的通用指南做出了许多努力。
二、步骤1. 准备种植用土我们使用Miracle-Gro混合土(2立方英尺一袋)与Miracle-Gro珍珠岩(8夸脱一袋)来培养拟南芥,在一个可以放下2袋混合土的大容器中和土,1袋混合土(2立方英尺)混入半袋珍珠岩(4夸脱)。
注意:Sze实验室在装土之前经常将土灭菌!(方法如下)(1)将干土放入灭菌容器中,直至与顶部相差一英寸,将土拍实。
(2)用铝箔纸将容器封住,在每一个容器上放一张灭菌用胶带,缠好。
确保容器外没有土,放入灭菌锅。
(3)用常规/秒速/快速模式灭菌30~50 min,灭菌模式及时间取决于灭菌的容器数量。
(4)当温度降至室温,将土放入花盆,轻轻压实。
记住将灭菌土保存好,避免种子或菌类污染。
灭过菌的土至少可以使用两星期,如无需要请不要多次灭菌。
(5)将花盆用去离子水浸没(不要超过土表面)用humidomes覆盖,使其吸水3-6小时或过夜。
吸水后应该还保存约1英寸高的水,如果没有请添水。
(6)此时的土可以用于种植拟南芥。
2. 种子消毒方法A(1)取适量种子(野生型、突变体或互补株系)置于一个EP管中,加1 ml 消毒溶液。
消毒溶液:20%Chlorox消毒液0.05%Tween-20用新灭过菌的无菌水配制。
(2)用振荡器以最大速度震荡20-30秒。
(3)放置7-10 min,偶尔震荡一下。
(4)8 000 rpm 离心5秒。
(5)仔细将水倒出。
(6)加1 ml 无菌水,震荡重旋种子。
(7)8 000 rpm 离心5秒,倒去上清。
(8)重复步骤6-7,重复四次。
(9)将灭菌的种子移到底部铺有无菌滤纸的小Fisher盘(100×15 mm)中。
专利名称:拟南芥的培养方法专利类型:发明专利
发明人:黄福萍
申请号:CN201610786953.4申请日:20160831
公开号:CN106386433A
公开日:
20170215
专利内容由知识产权出版社提供
摘要:本发明公开了一种拟南芥的培养方法,包括如下步骤:步骤一、将拟南芥种子放入质量体积浓度60%‑90%的酒精溶液中浸泡10‑30min,之后采用质量体积浓度10%‑15%的次氯酸钠溶液浸泡5~8min,然后于温度0~4℃和黑暗条件下处理3~4天,最后置于固体培养基中培育成根长1.2cm 以上的幼苗;步骤二、将幼苗移至第一液体培养液中培养,并在一液体培养液的底层铺设一层蛭石和贝壳碳酸钙的第一混合物层,于温度18~22℃、湿度60%~80%、光照2000~3000lux和24h光照的条件下,培养,得到小苗;步骤三、更换液体培养液,在第二液体培养液的底层铺设蛭石和蛋壳粉末的第二混合物层,于温度18~22℃、湿度60%~80%、光照2000~3000lux和24h光照的条件下,继续培养小苗;步骤四、循环重复步骤二和三,直至将拟南芥小苗培养至需求的时期。
申请人:黄福萍
地址:536000 广西壮族自治区北海市海城区菜园里2巷15号
国籍:CN
代理机构:北京远大卓悦知识产权代理事务所(普通合伙)
代理人:靳浩
更多信息请下载全文后查看。
GFP转基因拟南芥的培养及荧光观察GFP转基因拟南芥的培养及荧光观察实验原理:1.GFP报告基因全称为绿色荧光蛋白(Green fluorescent protein,GFP),简称GFP,20世纪60年代在水母中发现的发光蛋白。
由238氨基酸组成的单链多肽,在蓝光或紫外光激发下发出绿色荧光,用于蛋白质在活细胞中的准确定位及动态变化观察(分泌蛋白的分选、亚细胞定位)2.目的基因MAP65-1,是一种微管结合蛋白,可以根据拟南芥叶片表皮细胞、保卫细胞,下胚轴和根部细胞中微管骨架的分布情况来推断目的基因是否存在。
3.表达载体:植物表达载体的构建→导入农杆菌自我复制→浸染花粉转入拟南芥;卡那霉素抗性培养基筛选,卡那霉素:抗生素影响植物细胞叶绿体和线粒体的蛋白合成,引起植株黄化死亡.卡那霉素能对转基因植物进行筛选实质上是通过卡那霉素抗性基因起作用的。
转基因植物由于含有卡那霉素抗性基因而抑制了卡那霉素的作用,所以通过卡那霉素,转化体就很容易从非转化体中筛选出来。
GFP转基因植株野生型植株GFP转基因植株转基因植株1/2MS培养基1/2MS卡那抗性培养基实验材料:GFP转基因拟南芥种子及野生型种子;1/2MS培养基;1/2MS卡那抗性培养基;75%乙醇;10%NaClO;无菌水。
实验步骤:1.种子春化(加蒸馏水放入4℃冰箱中过夜);2.75%乙醇消毒1min(混匀,尽量将液体吸净,动作要快);3.10%NaClO消毒10min (混匀,尽量将液体吸净,动作要快);4. 无菌水洗三遍,用牙签将种子点在培养基表面(每皿4-5颗种子尽量均匀);5.封膜,做好标记,平放于培养架上培养。
实验结果:黄化正常拟南芥下胚轴的叶绿体从数量和正常黄化苗在叶肉细胞和保卫细胞中,转基因拟南芥观察到绿色荧光标记,但在野生型中未观测到该少等长势不优良的现象,是因为野生型不存在卡那抗性基因,而转基因植株存在卡那抗性基因,所以可以将转基因植株在卡那抗性培养基中筛选出来;在转基因拟南芥中,荧光标记在不同位置亮度效果不同,我们认为可能是与不同位置微管分布情况和微管结合蛋白对不同位置的结合效果不同有关。
拟南芥植物组织培养 WTD standardization office【WTD 5AB- WTDK 08- WTD 2C】拟南芥组织培养一、种子消毒:方法一:将拟南芥种子置于1 .5 ml eppendorf 管(微量离心管)中,加入1 ml 蒸馏水,4C春化3 d,70 %(v/v )乙醇1mi n、7 %(v/v )次氯酸钠10 mi n 浸泡消毒,并用无菌水冲洗5 次。
方法二:在超净工作台内,用无菌蒸馏水浸泡1 min,然后用80%乙醇消毒90s,最后用无菌蒸馏水冲洗3~5次备用。
消毒完毕的种子可以用200ul的tips吸去洗涤液,然后在超净工作台上挥发掉残余水分、洗涤液。
方法三、取野生型拟南芥种子放人离心管内,75%乙醇清洗后,无菌蒸馏水清洗1—2次,转入无菌离心管;5%次氯酸钠溶液浸泡5—6 min,用无菌蒸馏水清洗3~4次,加入1 ml无菌水,用移液枪接种。
二、选用的培养基选用1/2MS培养基对种子进行培养。
(MS和1/2MS都可以,1/2MS就是大量元素减半,其他东西和ms培养基是一样的量。
糖可以加,会长得比较好,但是也很容易污染。
如果在平板上要生长时间比较长,需要做一些实验的,比如根的发育,最好不要加。
)也可以用MS+30 g/L蔗糖的固体培养基。
(我想两种培养基都接种上,比作对比确定好坏)。
MS培养基配料表:三:接种方法拟南芥种子消毒后,用移液枪吸取拟南芥种子和水的混合物,均匀地在MS 生长培养基的培养皿平板上滴落,并使之形成两条平行的直线。
(如不行,可适当添加琼脂)。
四、培养得无菌苗接种后置于光照培养箱(型号:GXZ.500C;培养光照条件为16小时光照,8小时黑暗,培养温度为22℃中竖直培养。
3天后即可取材用于器官离体再生实验。
萌发5天后,在超净工作台中,用镊子将苗移栽到装有1/2 MS培养基的50ml三角瓶中(每瓶4--6棵,视情况而定),于短日照条件下培养30天左右获得无菌苗。
Protein ChIP using Honda bufferCrosslinking1.播种大约50mg的拟南芥种子于平板中,两周后,在50ml锥形管中取1.5至2g 植物样品(取3个重复),里面加入35ml PBS pH7.4。
2.在锥形管中加入1ml甲醛(最终浓度1%),立即进行抽真空5minX3次。
3.在锥形瓶中加入2.5ml 2M的甘氨酸,继续抽真空7min4.用纯水冲洗植物四次,并用纸巾吸干水分。
5.将植物用锡箔纸包起来,放入液氮后放入-80℃保存样品。
Chromatin extraction1.将植物样品在液氮中研磨成细粉,在50ml离心管中加入35ml Honda Buffer悬浮沉淀,并在4度孵育至少30min。
将匀浆过滤两层纱布,挤压纱布,并用10ml的新鲜的Honda Buffer冲洗纱布,将滤液放入新的50ml离心管。
2.在4℃离心机中3500g离心15min。
将上清倒掉,并用1ml Honda Buffer重悬沉淀,将匀浆转移到2ml离心管中,在4℃离心机中用2500g离心5min。
(多次重悬离心,直至沉淀呈灰白色,至少离心两次)3.将沉淀在12000g下离心2min,彻底去除上清。
4.用600ul N uclei lysis buffer重悬沉淀,将匀浆装入超声波破碎的管子中,每管≤300ul 进行破碎:15S ON/90S OFF 4cycles一次,重复两次,每次破碎结束后将管子上下颠倒混匀样品,并用离心机将样品轻离下来(瞬离不超过两秒)。
此步骤结束后要用高盐和RNA酶处理进行解交联检测是否将DNA破碎。
此步也应用于Histon CHIP实验中5.破碎后将样品在4℃离心机中12000rpm离心10min,收集上清。
取10%作为input 放入-80℃冰箱中,剩下的样品用ChIP dilution buffer至少稀释十倍,将1%SDS稀释成≤0.1%用做IP。
Immunoprecipitation (IP)1.准备protein A magnetic beads,每个IP 10ul,用1ml的ChIP dilution buffer洗beads3次,每次5分钟,让磁珠附着在磁铁上并丢弃缓冲液。
拟南芥培养Protocol
拟南芥生长的适宜温度白天为22℃-24℃,夜温最好比日温低2℃,适宜的湿度为60-70%,生长期适宜的光强为150μmol·s-1·m-2(6支36W日光灯下35cm处测得)。
幼苗期不耐高光强,可适当遮荫.光质也较重要,应选用植物生长专用的日光灯(如荷兰产TLD型Philip豪华直管荧光灯).拟南芥在日照长于12小时下才会开花,一般拟南芥生长室的日照长度定于14-16h为佳
1.准备发苗培养基:1/2 MS,Sucrose:10g/L,pH5.7,agar:0.7-0.8%.灭菌后,在超净台上分装入培养皿.
2.种子消毒:种子放在1.5ml试管中, 加入1ml10%NaClo,混匀,消毒5min,用无菌水洗5次以上(用移液枪吸).
3.播种:用移液枪将种子吸到培养皿上,可多加些水,将种子铺均匀(不要太密,太密根缠在一起不好移苗),用移液枪吸干水,在超净台上让培养皿干了,密封盖子,4℃暗处理两天后,移到光照培养箱(22℃,光周期12h),若种子较密,则在光照培养箱中生长1周后即可移苗,否则根长太长后易缠在一起,但太小的苗移栽后,需适当遮荫.最好是在每皿<30株这样的密度下,让其生长两周后再移苗.
4.移苗:将蛭石与珍珠岩按(3:1)的比例混好,装入花盆,将花盆放入有水的塑料周转框中,框中的水就会通过花盆底部的孔渗上来,待花盆中的基质湿透后即可移苗.小心轻轻用镊子从培养皿中连根拉出小苗,把根平放在蛭石表面,用镊子把根轻轻压下.移苗结束后,用保鲜膜覆盖3-4天后揭膜.从苗期直至开花,可在塑料周转框中始终保持1-3cm的水层,在开始收籽期,不再需要过多的水分,可保持塑料周转框干燥,此时每隔2-3天浇一次水即可.整个生长期可浇3-4次拟南芥营养液.
5.收籽:在种荚变黄,变干时可以收籽.将种子抖落在纸上,用金属滤网过一下以除去杂质,将种子装入写了标记的小纸袋中,放于干燥的环境中让种子进一步干燥后,封存于1.5ml试管中.
附拟南芥营养液配方
nutrient solution containing:
5mM KNO3, 2.5mM KH2PO4, 2mM MgSO4, 2mM Ca(NO3)2, 50µM Fe-EDTA, 70µM H3BO4,14µM MnCl2, 0.5µM CuSO4, 1µM ZnSO4, 0.2µM Na2MoO4, 10µM NaCl, 0.01µM CoCl2, adjusted to PH 5.7
具体配法(药品刚好50L水培液用):
1)大量元素(包括25.25gKNO3,24.65gMgSO4·7H2O ,):溶解,加水至500ml,
配制成100倍母液Ⅰ。
2)23.6g Ca(NO3)2·4H2O:溶解,加水至500ml,配制成100倍母液Ⅱ。
3)铁盐:0.69gFeSO4.7H2O,0.93gNa.EDTA.2H2O两种药品分别溶解,混合后
定容至500ml,配制成100倍母液Ⅲ。
4)微量元素母液(母液Ⅳ):1000倍。
4340mgH3BO4,2772mgMnCl2.4H2O,
125mgCuSO4.5H2O,287.5mgZnSO4.7H2O,72.6mgNa2MoO4.2H2O,
58.5mgNaCl, 2.38mgCoCl2.6H2O,加水至1000ml。
5)17.0g KH2PO4加水至500ml,配制成100倍母液Ⅴ。
6)K2SO4:10.88g,溶解加水至500ml,配制成100倍母液Ⅵ。
正常培养液:
每升各取10ml母液Ⅰ、母液Ⅱ、母液Ⅲ、母液Ⅴ,1ml母液Ⅳ,pH 5.7;。