Colink调试器产品介绍与使用指南
- 格式:pdf
- 大小:986.44 KB
- 文档页数:19

O-LINK仿真器使用说明书版本:V 2.0珠海欧比特控制工程股份有限公司广东省珠海市唐家东岸白沙路1号(邮编: 519080)电话*************传真*************前 言感谢您使用最新推出的O-LINK仿真器!为了使您能尽快熟练地操作O-LINK仿真器,我们随机配备了内容详细的使用说明书,在您第一次安装和使用本设备时,请务必仔细阅读所有随机资料。
基于提高部件及设备性能和可靠性的需要,我们有时会对设备(包括硬件和软件)做一些改动,届时,我们会尽量修改或增加资料,但仍可能在某些描述上与实际改动后的不一致,敬请谅解。
本使用说明书中如有错误和疏漏之处,热切欢迎您的指正。
厂家相关信息●生产企业名称: 珠海欧比特控制工程股份有限公司●生产企业地址: 广东省珠海市唐家东岸白沙路1号●产品标准编号:O-LINK●售后服务单位: 珠海欧比特控制工程股份有限公司●联系方式:地 址: 广东省珠海市唐家东岸白沙路1号电 话: ************传 真: ************邮 编: 519080珠海欧比特控制工程股份有限公司ii目 录1.简介 (1)1.1工作原理 (1)1.2主要特点 (3)1.3产品规格 (4)2.硬件连接 (5)3.软件安装 (6)4.与调试器软件配合使用 (12)4.1与V8MON配合使用 (12)4.1.1初始化连接 (12)4.1.2常规操作 (13)4.2与DMON配合使用 (22)4.2.1初始化连接 (22)4.2.2常规操作 (23)4.3与GRMON配合使用 (23)4.3.1初始化连接 (23)4.3.2常规操作 (24)5.ORION联机调试 (25)5.1初始化连接 (25)5.2调试操作 (29)珠海欧比特控制工程股份有限公司iii珠海欧比特控制工程股份有限公司 11. 简介O-Link 是欧比特公司为支持调试SPARC V8架构内核处理器(S698PM 等)推出的 JTAG 仿真器。


智能手机调试软件KMlink用户手册智能手机调试APP用户手册前言感谢您选择使用CV100系列变频器智能手机调试软件KMlink!随着4G时代的来临,智能手机也越来越普遍,几乎人手一部智能手机,体验4G带来的多媒体和移动办公等应用。
智能手机调试APP是深圳市步科电气有限公司基于这一时代背景研发的一款利用智能手机进行变频器设备调试的手机软件。
本手册详细介绍了智能手机调试APP的产品特性、软件安装、使用与操作、问题处理指导等环节的指引,用户在使用产品前,敬请详细阅读本手册,建议妥善保留,以备后续操作的参考。
目前支持控制器产品型号:CV100及行业专机。
注意事项⏹本使用说明书中的图例仅为了说明,可能会与您订购的产品有所不同。
⏹由于产品升级或规格变更,以及为了提高说明书的便利性和准确性,本说明书的内容会及时进行变更。
⏹如果您使用中仍有一些使用问题不明,请与本公司客户服务中心联系。
⏹全国统一服务电话:400-700-5281目录前言 (1)第1章产品信息 (3)1.1系统构成 (3)1.2蓝牙模块 (3)第2章软件安装 (4)2.1系统支持 (4)2.2APP软件的安装 (4)第3章使用指导 (6)3.1蓝牙连接配对 (6)3.2功能介绍 (8)3.2.1参数设置 (8)3.2.2参数查阅 (9)3.2.3自由读写 (9)3.2.4示波器 (10)第1章产品信息1.1系统构成图1-1系统构成图1.2蓝牙模块使用本软件时,需要变频器安装了我司的蓝牙模块配套使用。
WiFi模块如下图所示:图1-2蓝牙模块第2章软件安装2.1系统支持智能手机调试APP目前只支持Android系统,用户只需要下载安装包进行安装即可。
iOS系统目前还不支持。
关于手机型号,我公司已对Android系统的华为、小米等型号进行了测试,用户在使用过程中遇到手机型号不支持时请与我公司客服联系。
2.2APP软件的安装智能手机调试软件KMlink可以通过扫描二维码到步科官网下载安装。

USER MANUAL OF SMART CONTROLLER Read themanual carefully before installing or connecting your Smart Kit (Wireless Module). Make sure to save this manual for future reference.IMPORTANT NOTE:QR CODEDECLARATION OF CONFORMITYHereby, we declare that this AC is in compliance with the essential requirements and other relevant provisions of Directive 2014/53/EU.A copy of the full DOC is attached.1.Model: EU-OSK103Standard: IEEE 802. 11b/g/nAntenna Type: Printed PCB Antenna Frequency: WLAN 2400~2483.5 MHz Operation Temperature: 0ºC~45ºC/32ºF~113ºF Operation Humidity: 10%~85%Power Input: DC 5V/300mAMaximum Transmitted Power: 19.8dBm Max∙Applicable system: iOS, Android.(iOS 8.0 or above, Android 6.0 or above)-Please keep your APP up to date with thelatest version.-Due to some situations, we affirm: Not allAndroid and iOS systems are compatiblewith the APP. We will not be liable for anyissue as a result of the incompatibility.∙Wireless Safety StrategySmart kit only supports WPA-PSK/WPA2-PSKencryption and none encryption.WPA-PSK/WPA2-PSK encryption isrecommended.Due to different network situation, control process may time-out in some occasions. If this situation occurs, the display between board and APP may not be the same, please don’t get confused.Smart phone camera needs to be 5 million pixels or above to scan the QRcode sufficiently.Request time-out could happen due to different network situation. Hence,it is mandatory to do networkconfiguration once again.The APP system is subject to update without prior notice due to someproduct function improvement. Theactual network configuration processmay slightly be different from themanual, so, the actual process shallprevail.Wi-Fi signal must be strong in order for the Air-conditioning unit to workproperly. If Wi-Fi signal is weak in theroom wherein the AC unit is placed,usage of repeater is advised.3.The following QR code is only available for DOWNLOADING the app.Android iOS∙For Android Phone users: scan Android QR code or go to google play then search“NetHome Plus” app and download it.∙For iOS users:scan iOS QR code or go to App Store then search “NetHome Plus”app and download it.1.Remove the protective cap of the SmartKit (wireless module)2.Open the front panel and insert the SmartKit (wireless module) into the reservedinterface.3.The QR code packed with Smart Kit(wireless module) is attached to the sidepanel of the machine to ensure that it willbe scanned by the mobile phone. Otheroption is to take the picture of the QRcode and save it to their phone. It is alsoavailable on the front page of the usermanual.This interface is only compatible with Smart Kit (Wireless Module) provided by the manufacturer.5. USER REGISTRATIONPlease ensure your mobile device is connected to the Wi-Fi router. The wirelessrouter must be connected to the internet before doing the registration and network configuration.It is better to log-in your email on the box and activate your account by clicking the link in case you forget your password. You can also log in using the Third Party applications (Facebook & Twitter)NOTE:For iOS users, you will receive a verification e-mail with the attached link in your registered e-mail address while for Android users, you can already log in after registration.6.∙It is necessary to forget any other network which is around the premises and make sure your device is connected to the wireless network you want to configure.∙Make sure your device’s wireless function works well and can be connected back to your original wireless network automatically.֍Using Android device to do networkconfiguration1.Make sure your mobile device hasalready been connected to thewireless network which you wish to use.Also, you need to forget other irrelevantwireless network in case it influencesyour configuration process.2.Disconnect the power supply of AC.3.Connect the power supply of AC andcontinuously press the “LED DISPLAY” or“DO NOT DISTURB” button seven timesin 10 seconds.4.When the AC displays “AP”, it meansthat the AC wireless has alreadyentered into “AP” mode.Some type of AC does not need step 2 to be in AP mode.NOTE:The user must finish all the steps within 8 minutes after powering on the AC or else you will have to reset and go back again to step 1.(SCAN THE QR CODE METHOD)(MANUAL SETUP METHOD)1. Make sure yourmobile device isalready connected to the wireless network you want to use. Also, you need to forget all irrelevant wireless networks in case it influences you configuration process.2. Disconnect the power supply of AC (some units).3. Connect the power supply of AC and continuously press the “LED DISPLAY” button or “DO NOT DISTURB” button seven times in 10 seconds.4. When the AC displays “AP”, it means the AC wireless has already entered into “AP” mode.The user must finish all the steps within 8 minutes after powering on the AC or else you will have to reset and go back again to step 1.֍ Using iOS device to do network configuration(SCAN THE QR CODE METHOD)(MANUAL SETUP METHOD)When finishing network configuration, app will display success cue words on thescreen.Due to different internet environment, it is possible that the device status still displays“offline”. If this situation occurs, it isneeded to pull and refresh the device liston the app and make sure the devicestatus becomes “online”. Alternatively,user can turn off the AC power and turn iton again and then the status will become“online” after a few minutes.Please ensure both your mobile device and air conditioner is connected to the internet before using the app to control the air conditioner via internet.Not all function of the app is available on air conditioner. Example: ECO, Turbo, Swing function. Please check the user manual for more information.It Includes: Timer on, Timer off, 8ºC Heat, Sleep, Check and 4 way air direction.If the air conditioner does not support the above function, it will not be shown on the function list.Weekly, the user can make an appointment to turn on or turn off AC on a specific time. User can also choose circulation to keep the AC under schedule control every week.The user can let the AC run under 8ºC heat by one click. When people go outside, this function can protect your furniture from frost damage. (NOTE: THIS FUNCTION MAY NOT BE AVAILABLE TO ALL UNITS)Theuser can customize their comfortable sleep by setting target temperature.The user can simply check the AC running status with this function. When running this procedure, it can detect the normal items, abnormal items and detailed information.The air conditioner can be controlled by multi-users at the same time by “Share device” function.IC: 1 257 5A-MD NA 15This device complies with Part 15 of the FCC rules and industry Canada’s license-exempt RSS’s.Operation is subject to the following two conditions:1.This device may not cause interference;and2.This device must accept any interference,including interference that may causeundesired operation of the device.Only operate the device in accordance with the instructions supplied.Changes or modification to this unit not expressly approved by the party responsible for compliance could void the user’s authority to operate the equipment.This device complies with FCC radiation exposure limits set forth for an uncontrolled environment. In order to avoid the possibility of exceeding the FCC radio frequency exposure limits, human proximity to the antenna shall not be less than 20 cm (8 inches) during normal operation.This equipment has been tested and found to comply with the limits for a Class B digital device, pursuant to part 15 of the FCC rules. These limits are designed to provide reasonable protection against harmful interference in a residential installation. This equipment generates uses and can radiate radio frequency energy and if not installed and used in accordance with the instructions, it may cause harmful interference to radio communications. However, there is no guarantee that interference will not occur in a particular installation. If this equipment does not cause harmful interference to radio or television reception, which can be determined by turning the equipment off and on, the user is encouraged to try to correct the interference by one or more of the following measures:--Reorient or relocate the receiving antenna.--Increase the separation between the equipment and receiver.--Connect the equipment into an outlet on a circuit different from that to which the receiver is connected.--Consult the dealer or an experienced radio/TV technician for help.Company will not be liable for any issues and problems caused by internet, wireless router and smart devices. Please contact the original provider to get further help.CS374U-APP-(OSK103)-B16110800000329KPII20190731。
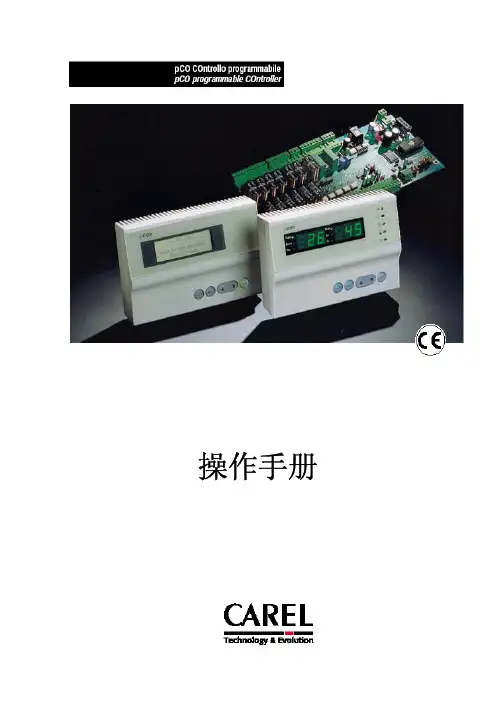
操作手册目录---------------------------------------------------------------------------------1 1.简介-------------------------------------------------------------------------------21.1基本特性--------------------------------------------------------------------------22.硬件结构---------------------------------------------------------------------------2 2.1产品代码--------------------------------------------------------------------------3 2.2pCO主板布局-----------------------------------------------------------------------4 2.3输入/输出口说明-------------------------------------------------------------------5 3用户手操器--------------------------------------------------------------------------63.1用户手操器版本--------------------------------------------------------------------6 3.2 pCO手操器按键--------------------------------------------------------------------83.3图形显示手操器的功能和特性--------------------------------------------------------84. 安装------------------------------------------------------------------------------9 4.11pCO主板的安装-------------------------------------------------------------------9 4.2输入接口-------------------------------------------------------------------------10 4.3输入接口-------------------------------------------------------------------------11 4.4电源-----------------------------------------------------------------------------12 4.5主板EPROM的安装------------------------------------------------------------------12 4.6手操器的安装---------------------------------------------------------------------124.7图形显示手操器中程序存储器EPROM的安装--------------------------------------------135. 安装注意事项---------------------------------------------------------------------136. pLAN局域网-----------------------------------------------------------------------13 6.1主板地址------------------------------------------------------------------------14 6.2手操器地址-----------------------------------------------------------------------15 6.3专用/共享手操器------------------------------------------------------------------15 6.4 pLAN局域网的电气连接------------------------------------------------------------15 6.5 pLAN局域网中手操器远距离安装----------------------------------------------------16 6.6 pLAN局域网的技术特性------------------------------------------------------------17 6.7 pLAN局域网的元件----------------------------------------------------------------177选配卡----------------------------------------------------------------------------177.1图形显示手操器的串行打印卡-----------------------------------------------------177.2标准4×20LCD或6-LED显示手操器的串行打印卡---------------------------------------187.3用于监控和远程维护网络的RS422串行通讯卡-----------------------------------------187.4用于监控和远程维护网络的RS485串行通讯卡-----------------------------------------197.5用于RS232接口的Modem接口卡------------------------------------------------------197.6时钟卡--------------------------------------------------------------------------197.7pLAN 局域网的地址卡-------------------------------------------------------------197.8地址,时钟,32KbityEPROM卡------------------------------------------------------207.9OEM加湿器管理卡-----------------------------------------------------------------207.10选配卡的安装-------------------------------------------------------------------20 8故障原因---------------------------------------------------------------------------20 9技术参数---------------------------------------------------------------------------22 9.1, pCO主板PCOB*的技术参数---------------------------------------------------------22 9.2手操器PCOI*和PCOT*技术参数-------------------------------------------------------239.3电气参数-------------------------------------------------------------------------2310.尺寸-----------------------------------------------------------------------------24 10.1用户手操器----------------------------------------------------------------------24 10.2按键和显示窗口------------------------------------------------------------------2410.3PCOB*主板-----------------------------------------------------------------------2511.用户手操器的安装 ----------------------------------------------------------------26 11.1面板安装------------------------------------------------------------------------26 11.2墙壁安装------------------------------------------------------------------------26 12电气连接--------------------------------------------------------------------------271.简介pCO系列控制器是CAREL公司设计生产的一种可编程控制器,采用双微处理器技术;适用于空调和冷冻领域.可据用户的需要编写程序,使空调系统和冷冻设备运行在最佳的状态1.1基本特性类型: pCO有不同的版本可供选择.手操器可据用户需要个性化设计.据下面的特性,用户可从中选择· 标准或图形液晶显示(LCD);发光数码管显示(LED).· 按键的数目.· LED信号灯的数目.· 聚碳酸酯按键区贴面.可编程性:用CAREL公司的专利软件EasyTools对pCO控制器进行编程. 优点如下:·程序可以在不同的硬件中传递.开发出的应用程序能够快速、简单地传送给Macroplus(相反也是),仅需修改一下输入/输出口.·开发时间短、竞争性的价格、用户个性化的程序.·在线测试保证可靠性.如果用户决定使用EasyTools开发新的程序,用户可以得到最大的信任和独立.使用一组拥有许多不同应用功能的硬件,允许标准化;对整个单元,单个设备、单个电子元件进行功能测试、在线测试、”烤机”测试.将得到很高的可靠性串行接口:为连接监视器(RS485和RS422)和 pLAN局域网而安装应用范围:pCO可编程控制器是一种完全可编程,使用灵活方便的控制器.应用范围非常广泛,相同的硬件可以实现不同的控制;单冷或热泵系统(标准程序)屋顶机单元(标准程序)精密空调单元(标准程序)中小型空气处理单元(定制程序)低温展示柜控制(定制程序)冷库控制(定制程序)其它的应用程序可据用户的特别需求而开发。
雨辰柯林控制器说明书摘要:一、概述二、产品特点1.功能特点2.性能特点3.设计特点三、产品参数1.控制器规格2.输入/输出接口3.电源需求四、安装与调试1.安装步骤2.调试方法五、操作指南1.操作步骤2.异常处理六、维护与保养1.维护周期2.保养方法3.更换部件七、安全注意事项八、故障排除九、售后服务与技术支持正文:一、概述雨辰柯林控制器是一款高性能、高可靠性的控制器产品,广泛应用于各种工业自动化领域。
本说明书为您提供有关产品的基本信息、特点、参数以及使用方法等内容。
请您仔细阅读并根据实际需求进行合理选用。
二、产品特点1.功能特点雨辰柯林控制器集成了多种功能,如PID控制、比例积分微分(PID)控制、多种报警输出、数据记录等。
可以满足各种复杂控制需求,实现设备的精准控制。
2.性能特点本控制器具有出色的性能,响应速度快、精度高、抗干扰能力强。
在恶劣的工业环境中,仍能保持稳定的工作性能。
3.设计特点雨辰柯林控制器采用模块化设计,便于维修和升级。
同时,产品外观采用防水、防尘设计,满足工业现场的需求。
三、产品参数1.控制器规格控制器采用标准尺寸,便于安装和使用。
具体尺寸请参考产品实物或联系厂家。
2.输入/输出接口控制器具备多种输入接口,如模拟量、数字量等;输出接口包括继电器输出、PWM输出等。
3.电源需求控制器电源需求根据不同型号而定,请务必查阅产品参数表,确保选用合适的电源。
四、安装与调试1.安装步骤请参照产品安装图纸进行安装,确保安装牢固、稳定。
同时,注意控制器与相关设备的连接,确保连接正确无误。
2.调试方法在安装完成后,进行设备调试。
首先,对控制器进行初始化设置,然后通过上位机或其他设备对控制器进行参数配置。
在调试过程中,观察设备运行状态,如有异常,及时调整参数。
五、操作指南1.操作步骤操作控制器时,请遵循以下步骤:1) 开机:开启电源,控制器自检后进入工作状态。
2) 参数设置:通过上位机或其他设备进行参数设置。

©EURESYS s.a.2020-Document D205CN-PCIe Hardware Manual-Coaxlink-12.7.2.2117 built on2020-08-17使用条款EURESYS s.a.EURESYS s.a.拥有其公司商标、硬件和软件文档的所有产权、所有权和权利。
EURESYS s.a.文档中提到的所有公司/产品名称归其各自的所有人。
未经事先允许,不允许授权、使用、租赁、出借、翻译、复制、复印,或修改本书中包含的EURESYS s.a.EURESYS 公司的硬件、软件、品牌或文件。
EURESYS s.a.EURESYS s.a.可随时自行决定修改产品规格或更改本文档中的信息,无需事先通知。
EURESYS s.a.EURESYS s.a.对因使用EUREYS公司的硬件或软件而导致的收入、利润、商誉、数据、信息系统,或其他特定的、突发的、间接的、后果性的,或惩罚性的损害,EURESYS s.a.或因本文件中的遗漏或错误而造成的任何损失或损害,均概不负责。
本文档随Coaxlink12.7.2(doc版本)提供。
2117目录1.关于本文档51.1.文件范围62.机械规格82.1.电路板和支架布局92.2.连接器22DIN1CoaXPress主机连接器23 DIN2CoaXPress主机连接器24 DIN4CoaXPress主机连接器25 DIN8CoaXPress主机连接器26 Micro BNC1CoaXPress主机连接器27 Micro BNC2CoaXPress主机连接器28 Micro BNC4CoaXPress主机连接器29 CoaXPress数据转发连接器30外部I/O连接器31外部I/O连接器33 3610/3612外部I/O连接器34 3614外部输入/输出1连接器36 3614外部输入/输出2连接器38内部I/O1连接器40内部I/O2连接器42 3610/3612内部I/O连接器44 3614外部输入/输出2连接器46 I/O扩展连接器48 C2C-链路连接器50辅助电源输入连接器512.3.LED52CoaXPress LED灯53板状态LED55 FPGA状态LED562.4.固件恢复开关572.5.物理性能593.电气规格603.1.CoaXPress主机接口613.2.PCI Express接口653.3.配电693.4.PCI Express电源773.5.辅助电源783.6.I/O功率输出803.7.差分输入813.8.差分输入/输出833.9.TTL输入/输出(版本1)853.10.TTL输入/输出(版本2)883.11.TTL输入/5V CMOS输出913.12.TTL、5V CMOS和LVTTL电平943.13.隔离输入953.14.隔离输出984.环境规范1004.1.环境条件1014.2.温度监测器1024.3.热数据1034.4.合规1055.相关产品及配件1075.1.1625DB25F I/O适配器电缆1085.2.1636InterPC C2C链路适配器111硬件描述112使用1636作为HD26F I/O适配器114使用1636作为C2C链路扩展器115适配器供电115 InterPC互连115 LEDs1165.3.3303C2C链路带状电缆1195.4.3304HD26F I/O适配器电缆1205.5.3610/3612I/O扩展模块1235.6.3614输入/输出扩展模块1325.7.自定义C2C链接带状电缆组件1351.1.文件范围61.1.文件范围CoaxLink主要产品□序列号前缀,是位于卡序列号开头的3个字母的字符串。
2015年10月中文版J a p a nK o r e aT a i w a nA m e r i c a sE u r o p eC h i n aA S E A NI n d i aT u r k e yC H I N An e r P r o d u c t f o r C h i n aC-L i n k P a r t(中国用户选型专用)C C-L i n k P a r t n e r P r o d u c t f o r C h i n aC C-L i n k兼容产品集(中国用户选型专用)深圳市杰曼科技股份有限公司称重仪表/过程设备可通过CC-Link通讯快速组建重量监控反馈、控制系统特点●拥有单排高亮LED显示;外型小巧,节省安装空间●120/240/480次/秒多种A/D采样速度可选●1/100000显示精度●立抗振数字滤波器,开启后可最大限度屏蔽现场干扰●支持AC 90V~260V宽范围电源输入●板防护等级达到IP65●方便连接CC-Link产品,快速组建称重控制系统站类型远程设备站占用站数1,2或4个站CC-Link版本Ver.1.10外形尺寸105(W)×57(H)×151(D)mm 重量大约550g联系方式深圳市杰曼科技股份有限公司电话:*************网址:南京华太自动化技术有限公司适配器CC-Link适配器FR8000smartLink远程IO.可将数字量,模拟量,温度,定位,计数等模块混合接入CC-Link系统稳定,可靠,性价比高。
特点●插片式IO,便于扩展●优秀的背板总线,数据传输“0”延时●全系产品通过CE认证,性能稳定●所有电器特征符合IEC61131-2标准●诊断功能丰富,支持远程诊断和维护●体积小,节约安装空间站类型远程设备站占用站数1-4逻辑站可配CC-Link版本Ver.1.1外形尺寸适配器(94mm x 68mm x 50mm)IO模块(94mm x 68mm x12mm)重量0.13kg联系方式南京华太自动化技术有限公司电话:************邮箱:*********************网址:CC-Link 协会(中国)CC-Link作为亚洲最早开发的现场总线,2001年4月在高速发展的中国设立了CC-Link推广中心,开始了现场网络推广工作。
NEC微波iPASOLINK200使用手册目录1. 简述 (3)2. 设备配置主流程图 (4)3. 系统要求和硬件连接 (5)4. LCT连接和登录 (6)5. 设置步骤 (8)1)菜单说明: (8)2)一般配置操作流程图 (11)1-设备配置(Equipment Configuration) (13)2-射频配置(Radio Configuration) (16)3-网管设置(Network Management) (19)4-预置-Modem设置 (20)5-预置-以太网功能设置(ETH function) (21)6-预置-E1/STM-1交叉连接设置 (25)7-预置-时钟同步设置 (28)8-维护-设备日期时间设置 (29)6. 其他常用菜单 (30)6.1测量收发信电平 (30)6.2 当前\历史性能数据监测 (30)6.3 环回操作 (32)6.4 设备硬\软启动 (33)6.5其他功能 (33)1. 简述iPASOLINK 200型微波设备是集成TDM交换、分组交换及微波光纤特性于一体的数字微波系统,是汇聚下一代分组IP微波高集成化产品。
此系统的结构与传统分体式微波结构一致,但融入了新型的交换、汇聚和流量管理等技术特点,使得接口类型丰富、配置灵活,节约了投资成本、有效地提高了数据通道利用率。
iPASOLINK 200型微波设备适用于2G/3G/LTE等网络,可以实现从已有PDH/SDH网络平滑升级到下一代的混合型或全IP承载网络。
本快速设置手册描述了如何进行设置、管理、监测和控制iPASOLINK 200型微波设备。
2. 设备配置主流程图3. 系统要求和硬件连接用户必须自行准备计算机、LAN电缆和必要的外部设备,以对设备进行设置。
最低的计算机软件和硬件配置如下。
系统要求操作系统WINDOWS XP WINDOWS VISTA WINDOWS 7IE8, IE7, FIREFOX 3.6 或更高WINDOWS XP WINDOWS VISTA & WINDOWS7CPU PENTIUM-M 1.6 GHz 或以上INTEL CORE2 DUO 1.6 GHz 内存512 MB或以上 1 GB硬盘40 GB或以上空余空间40 GB或以上空余空间显示器COLOR LCD (1024x768) COLOR LCD (1024x768)网卡10/100 Base T(X) 10/100 Base T(X)iPASOLINK 200型微波设备使用LCT软件进行设备设置、监测和维护操作。
2019年12月13日 更新C2000-A1-PDD2020-BB1 使用说明书RS485 ⇋ 2DI + 2DO远程 I/O 模块 — RS485 型开关量模块深圳市中联创新自控系统有限公司Shenzhen United Innovation Automatic Control System Co., Ltd.24445578810111213131414141414141414151515161617182020232324252526272930目录目录1. 快速使用1.1. 使用前准备1.2. 设备接线1.3. 软件设置及设备调试1.3.1. 设备搜索及参数设置1.3.2. 设备调测2. 硬件说明2.1. 技术参数2.2. 产品外观2.3. 指示灯2.4. 端口说明2.5. 尺寸2.6. 安装方式3. 产品功能3.1. DI 采集3.1.1. DI 采集类型3.2. DO 控制3.2.1. DO 状态3.2.2. DO 上电状态3.3. 其他功能3.3.1. 滤波器参数4. 软件操作4.1. 软件安装4.2. 软件界面及功能介绍4.3. 软件使用4.3.1. 设置设备串口参数4.3.2. 设备状态查看4.3.3. 设备状态控制5. 通信协议5.1. 寄存器列表5.2. 协议应用范例5.2.1. 读DO 状态(0x01)5.2.2. 写DO 状态(0x0F)5.2.3. 写单个DO 状态(0x05)5.2.4. 读DI 状态(0x02)5.2.5. 读DI 滤波器参数(0x03)5.2.6. 写滤波参数(0x10)6. 装箱清单7. 产品服务【版权声明】©2000 - 2019 中联创新版权所有【商标声明】及其它中联创新服务相关的商标均为深圳市中联创新自控系统有限公司及其关联公司所有。
本文档涉及的第三方主体的商标,依法由权利人所有。
【免责声明】本文档仅提供有关康耐德产品的信息。
本文档并未授予任何知识产权的许可,包括未以明示或暗示、以禁止发言或其他方式授予任何知识产权许可。
三菱PLC与CC-Link配置与应用CC-Link 通信原理简介CC-Link 的底层通讯协议遵循RS485。
一般情况下,CC-Link 主要采用广播-轮询的方式进行通讯。
具体的方式是:主站将刷新数据(RY/RWw)发送到所有从站,与此同时轮询从站1;从站 1 对主站的轮询作出响应(RX/RWr),同时将该响应告知其它从站;然后主站轮询从站2(此时并不发送刷新数据),从站2 给出响应,并将该响应告知其它从站;依此类推,循环往复。
广播-轮询时的数据传输帧格式请参照图2,该方式的数据传输率非常高。
除了广播-轮询方式以外,CC-Link 也支持主站与本地站、智能设备站之间的瞬时通讯。
从主站向从站的瞬时通讯量为150 字节/数据包,由从站向主站的瞬时通讯量为34 字节/数据包。
瞬时传输时的数据传输帧格式请参照图2,由此可见瞬时传输不会对广播轮询的循环扫描时间造成影响。
CC 所有主站和从站之间的通讯进程以及协议都由通讯用LSI-MFP(Mitsubishi Field Network Processor)控制,其硬件的设计结构决定了CC-Link 的高速稳定的通讯。
CC-Link 网络设置与编程在基于CC-Link 现场总线的应用过程中,最为重要的一部分便是对系统进行通信初始化设置。
目前CC-Link 通信初始化设置的方法一般有三种,1)采用的是最基本的方法,即通过编程来设置通信初始化参数。
2)使用CC-Link 通信配置的组态软件GX-Configurator for CC-Link,采用通信初试化设置的方法。
该组态软件可以对A 系列和QnA 系列的PLC 进行组态,实现通信参数的设置,整个组态的过程十分简单,但遗憾的是,目前该方法还不支持Q 系列的PLC。
3)通过CC-Link网络参数来实现通信参数设定。
这是Q系列的PLC新增的功能,而A系列和QnA系列PLC并不具备这项功能。
整个设置的过程相当方便。
1st Edition, July 2009Translated from P/N 04908-07064PLEASE NOTE:This document has been prepared by translating the german version of the Manual using Google Translate. It has not been authorised or approved by ESU. If you use this translation, it isentirely at your own risk.1. Declaration of ConformityWe, ESU electronic solutions ulm GmbH &Co KG, Industriestraße 5, D-89081 Ulm,declare in sole responsibility that the productTo which this declaration relates is in conformity with the following standards:EN 71 1-3: 1988 / 6: 1994 - EN 50088: 1996- EN 55014, Part 1 + Part 2: 1993EN 61000-3-2: 1995 - EN 60742: 1995 - EN 61558-2-7: 1998Under the provisions of Directive88/378/EEC -89/336/EEC -73/23/EEC2. WEEE DeclarationDisposal of old electrical and electronic equipment (valid in the European Union and other European countries with separate collection systems)This symbol on the product, its packaging or its literature indicates that this product may not be treated as household waste.Instead, take this product to the appropriate disposal point for recycling of electrical and electronic equipment. If the product is disposed of correctly, you will help prevent negative effects to the environment and health that could be caused by improper disposal. The recycling of materials will preserve our natural resources. For more information about recycling this product, please contact your local Citizen's Advice Bureau, your household waste disposal service or the shop where you purchased this product.3. Important - Please read this firstCongratulations on your purchase of a ESU ECoSlink terminal. This manual will guide you step by step through the possibilities offered by, and the use of the device in detail.Please read this manual thouroughly before installing or using the device.Although the board is very robust, an incorrect connection may result in the destruction of the ECoSLink Terminal.Avoid "costly" experiments.• 4. ECoSLink Bus StructureThe ECoSLink Bus is based on the CAN (Controller Area Network) protocol. This was originally designed for use in the automobile industry where robustness and the capacity to handle high data flow rates is essential. CAN allows all data to be transmitted at 250 kbit/second over the ECoSLink bus. The ECoSLink cable carries both data as well as the power supply for the ECoSLink Terminals themselves.An ECoSLink Bus can be up to 100metres long. All units must be wired up in series,with the first Terminal only being connected to your Master Controller. The last module in the chain will automatically configure itself to terminate the Bus electronically. This prevents false signals being generated within the Bus.ECoSLink Terminals automatically recognise the two different types of equipment that can be connected to them, namely:• Bus Connection Modules (such as the ECoSLink Terminal or Märklin® Terminal)• Equipment using the Bus (such as hand throttles, boosters (e.g. ECoSBoost), and feedback modules (e,g, ECoSDetector or EcoSDetector Standard).Bus Connection Modules extend the bus and add extra connection points. The first Bus Connection Module must always be connected directly to the Master Controller. Each additional Module must be connected to the previous Module,forming a single chain of Modules.By using different connectors and appropriate cables incorrect wiring is not possible.Each ECoSLink Terminal has an input and an output socket for the ECoSLink Bus itself. A 9-pin plug connector is used for the input socket and a 9-pin mini-DIN connector for the output socket. The ECoS and CS1 each has only one output jack (labeled "ECoSLink Extend"), as this is always the beginning of the bus.Equipment such as hand throttles, boosters etc, are connected to the bus via ECoSLink 7-pin mini-DIN connectors. These connectors are also installed on the ECoS and CS1. The connection cable between the ECoS or CS1 and the first Terminal must not exceed 1.8m (6 feet).These cables are virtually "stubs" fromthe main bus terminal.The cable connecting the first Terminal to the Master Controller must not be lengthened or it will upset the signal timing. If the cable supplied with equipment to be connected to the bus is too short, the bus must be extended with extra ECoSLink Terminal modules as necessary.5. OverviewIf your layout is growing and you want to connect additional ECoSBoost boosters or ECoSDetector feedback modules or more than 3 Märklin ® mobile station 60652 hand controllers, then you need one or more ECoSLink terminals. The ECoSLink module is intended for permanent installation on your layout and connection to the ECoSLink Extend socket on your ECoS or Märklin ® central station connected. Each Terminal has two ECoSLink connection sockets on the front and four sockets on the back for connecting devices. The Terminals themselves are either powered through the ECoSLink bus by the ECoS or CS1 or via an (optional) external power supply. The individual ECoSLink Terminals are connected togetherwith standard computer Cat 5e ethernet network cables (sometimes called"patch cable"with RJ45 connectors). Thus, a total run of up to 100m is possible with the appropriate cabling.Making the correct connections is made easier by the use of different connector types. Wrong connections are almost impossible.a) ECoSLink connectors b) Bus input RJ45 socket c) Bus input white pin plug d) Bus output RJ45 sockete) Bus output mini-DIN connector f) DIP Switchesg) External power supply input h) Status LEDBefore making any connections the front panel must first be fitted to the circuit board. To do this, first remove the two fixing screws as arrowed. Then align the front panel to the circuit board and fix the panel to the board with the two screws provided in the holes as indicated on Figure 4. To avoid damage to the retaining bushes take care that you do notovertighten the screws.Make sure that you have the circuit board the right way round. The connectors must be on the underside of the board when the printing on the faceplate is the right way up.The items using the bus are connected to the ECoSLink Connect sockets. ECoSLink Connect sockets can be recognized by their 7-pin mini-DIN connector Devices suitable for connection are, for example:• ECoSBoost boosters• ECoSDetector and ECoSDetector Standard feedback modules• Märklin ® mobile station 60651 or 60652 (An adapter cable for the mobile stations is required which can be obtained from Maerklin spares, item number 610479)• ESU Navigator Base Units• Bachmann Dynamis Pro Box UnitsAs shown in Figure 3 the ECoSLink Terminal has two sockets on the front and four sockets at the rear. The front sockets are primarily intended for hand throttles or controllers. The hand controller can always be unplugged and plugged in at another location as the ECoSLink bus is "hot plug" capable. The rear jacks are provided for Booster and feedback modules.Only one Bus input and one Bus output can be used at any one time on a Terminal. The signals are routed through each Terminal in turn, as described in Section 4. It is possible to use different connections at each end of the cable connecting two ECoSLink Terminals together.Each ECoSLink Terminal can only have one bus input and one bus output in use at any one time.To make the wiring as flexible as possible, use computer ethernet network cable with 8-pin RJ45 connectors. These pre-assembled cables are available in all lengths from computer shops. They need to be fully wired (with eight wires in the cable). We recommend using CAT5 cable or better.NevercablesLoconet ®, XPressNet ®, s88-N which also use 8-pin Ethernet cable. Never connect these The first ECoSLink Terminal must be connected to the Master Controller with the supplied supplied for this purpose. An second Terminal can be connected as required to the first ECoSLinkTerminal.ECoSLink cables carry both the data signals and a power supply from the Master Controller. The ECoS/CS1 can deliver up to 1A at 12V to the connected devices. Once the ECoSLink bus is activated by turning on the power, the status LEDs light up.The LED shows only the general bus status. It does not show when data is being transmitted.6. Suitable Master ControllersThe ECoSLink Terminal is suitable for connection to the following Master Controllers:• ESU ECoS 50000 with monochrome display• ESU ECoS 50200 with colour display• Märklin® central station 60212 withMärklin® Firmware• Märklin® central station 60212 with ESU Firmware 3.0.0. "Reloaded“• Märklin® central station 60213 with colour displayUse your ECoSLink Terminal only with a suitable Master Controlles. A list of ESU retailers is available on our Web site.7. Connection to the ControllerThe first ECoSLink Terminal must be connected as shown in Figure 5 to the Master Controller with the 0.9m longcable supplied with the Terminal.ECoSLinkExtendSocket WhitePin Plug• First insert the white plug on the cable into the white socket on the Terminal.Ensure the plug is the right way round.The cable can only be used one way round.• Next, insert the mini-Din plug into the ECoSLink Extend socket on the Master Controller, again making sure that you have properly aligned the pins on the plug with the holes in the socket.Do not use excessive force to insert the plug. The plug only fits one way into the socket. If the plug does not go in easily,then the pins on the plug are not properly aligned with the socket. Make sure any external power to the ECoSLink Terminal is turned off, and that the power supply to your Master Controller is also turned off.8. Adding More ECoSLink TerminalsIf you need to to add more ECoSLink Terminals, connect each new one to the one you added most recently. In this way a chain of modules is built up.If you want to connect two Terminals that are far apart, use normal ethernet network cable with RJ45 connectors.short damage cablesIf the distance between the Terminals that you want to connect is short, use the cable supplied with the ECoSLink Terminal.• Connect one end of the cable to the bus output RJ45 socket ofthe first ECoSLink Terminal, see Figure 3, item d, and then,• Connect the other end of the cable to the bus input RJ45 socket of the second ECoSLink Terminal, see Figure 3, item b.Take great care not to confuse the input and output sockets.Never connect two outputs or two inputs together. This could result in damage to your Master Controller!Do not mix ECoSLink cables with other cables used for model railways. 8-pin Ethernet cable is also used to connect up Loconet ®, XPressNet ®, s88-N systems.Never connect these systems directly to the ECoSLink bus as this would cause a• Insert the Mini-DIN plug into the mini-DIN outlet socket on the first ECoSLink Terminal Module, aligning it correctly.• Then push the white trailing socket onto the white pin plug on the second module.Make sure that you have the socket connector the right way round as it can only be inserted one way one way on to the pin plug.9. Adding an External Power SupplyFor larger layouts, the number of hand throttles, boosters and feedback modules may require more power than the ECoS/CS1 can supply. Typical power An ESU ECoS can typically provide about 1A current. It will therefore be necessary only very rarely to add an external power supply unit (PSU) for the ECoSLink bus.If you do use an external PSU, then mostof the usual model railway PSUs, whether DC or AC, can be used provided the following requirements are met:• DC: Voltage Range 16-22 Volts DC • AC: Voltage Range 14-16 Volts AC • Current: Minimum Output of 1 AmpDo not use a traditional 12 Volt DC output PSU, the voltage is too low.The PSU must only be connected to the ECoSLink Terminal!The operating temperature of the ECoSLink Terminal will depend on the output voltage of the PSU. The higher the voltage, the warmer the Terminal will become during use.The PSU is connected to the external power supply input, see Figure 3, item g,on the ECoSLink Terminal. Removable terminal blocks make wiring easier. The polarity of the connecting wires does not matter. Once the PSU is turned on, this is recognised by the Terminal. The remaining bus sections are then supplied with power from this PSU. All devices on the bus BEFORE the Terminal connected to the PSU are still supplied by the Master Controller. Figure 8 shows this relationship.The status LEDs light up on the ECoSLink Terminals only when the bus has been turned on by the Master Controller.10. DIP Switch SettingsOccasionally it is necessary to change the settings of the DIP Switch on an ECoSLink Terminal. The factory default settings are:1 Off/Aus 2 Off/Aus 3 On/An 4 On/An 5 On/An6 On/AnThe necessary controllines for external ECoSBoost boosters are built into the ECoSLink bus cable. Very long cable lengths can sometimes cause problems if many ECoSBoost units are used. We recommend that all ECoSBoost units are connected within the first 15-25m (49-82feet) of the ECoSLlink bus. The start of the bus is always the Master Controller itself.The Booster control lines are terminated separately with DIP switches 1 to 4 thus:1 2 3 4 ResultOn On Off Off Booster control lines areterminated. Do not attach a booster after this point in the chain as control lines have been disconnected at this ECoSLink Terminal.Off Off On On Booster control lines arenot terminated. You can connect more boosters to ECoSLink Terminals after this one as the control lines are still connected through.11. Installing ECoSLink TerminalsThe ECoSLink Terminal should be installed on the fascia panel of your layout. The maximum thickness of the fascia must not exceed 20mm. To help you install the EcoSLink Terminal a mounting template has been provided on page 9. Cut out a rectangular hole 63mm x 40mm as marked on the template and drill four holes in the positions shown on the mounting template.The ECoSLink Terminal must be installed so that the circuit board does not touch any wood panels or come into contact with exposed wires or metallic objects below the baseboard.14. NotesCongratulations on your purchase of this ESU product. This high tech quality product hasbeen manufactured according to the latest production processes and has passed stringent quality checks and tests.Therefore ESU electronic solutions ulm GmbH & Co KG offers you in addition to the national warranty rights as governed by law, a specialWarranty conditions:• This warranty is valid for all ESU products, purchased from an ESU dealer.• Any repair or replacement under this warranty is subject to proof of purchase. The warranty certificate completed by your ESU dealer together with the receipt serve as the proof of purchase. We recommend that you keep the receipt together with the certificate.• In the event of a warranty claim, please fill in the goods return note on page 9 and return it with the item for repairScope of warranty / exemptions:The warranty of ESU electronic solutions ulm GmbH & Co KG comprises the free of charge repair or replacement of any faulty part due to faulty design, manufacturing or material or transport damage.Any futher claims are excluded.This warranty expires:1. In case of failure due to wear and tear.2. If ESU products have been modified with parts not approved by ESU.3. If parts have been altered, especially missing shrink sleeves, or wires soldered directly to the decoder.4. If the product is used for a different purpose to the one intended by the manufacturer.5. If recommendations issued by ESU electronic solutions ulm GmbH & Co. KG are not adhered to.For reasons of liability no examination or repairs can be carried out on parts built into locos or coaches.The warranty period will not be extended due to repairs or replacement.You may submit your claim by either returning the faulty product to your dealer or by shipping it directly to ESU electronic solutions ulm GmbH & Co KG together with the warranty certificate, the receipt and a detailed description of the fault to:11Translated from ESU P/N 04908-07064 by Keith Montgomery, August 2011。
ICD33LP 用户使用手册1介绍 (2)1.1概述 (2)1.2ICD33LP 的操作环境和功能概括 (3)2ICD33LP 与ICD33的区别 (4)2.1硬件 (4)2.2目标板硬件的支持 (4)2.3调试功能 (4)3ICD33LP 套件说明 (5)3.1检查套件内容 (5)3.2套件内容详细说明 (5)4各部分的名字和功能 (6)4.1控制面板 (6)4.2监控终端 (6)4.2.1BRK IN输入终端 (6)4.2.2复位终端 (6)4.3LEDS (6)4.3.1POWER (power-on LED ,green) (6)4.3.2EMU(emulation LED ,ren) (6)4.4电源支持操作部分 (7)4.4.1电源开关 (7)4.4.2直流电源输入 (7)4.5PC接口 (7)4.6目标板接口 (7)5连接ICD33LP (7)5.1连接DC电缆 (7)5.2连接ICD33LP和主机 (7)5.3连接到目标系统 (8)6开启方法(电源的打开顺序) (9)7目标系统连接测试 (9)1介绍1.1概述ICD33LP是一个简化版的ICD33(In-Circuit Debugger for the E0C33 Family).此工具大大降低了用户的开发成本。
它和ICD33一样用于辅助高效开发,使用S1CC33芯片的调试信号引脚及EPSON提供的软件开发环境(DB33)进行嵌入式系统的开发。
此手册主要解释如何使用ICD33LP及ICD33LP 与ICD33 的区别。
注:1.有关调试程序(db33.exe)的功能和命令的具体细节参见“E0C33 Family C Compiler Package Manual”中的“debugger”.2.有关ICD33 的使用具体细节参见“In-Circuit Debugger(ICD33) Manual”ICD33LP的外观:1.2 ICD33LP 的操作环境和功能概括操作环境在主机上,ICD33LP 使用 IBM PC/AT 或具有串行端口的兼容机。
中文操作手册INCOLINK电子自准直仪ELCOMAT系列免费联机软件关于我们北京宝御德科技有限公司在中国大陆地区独家代理并技术支持:德国Moller-Wedel Optical GmbH自准直仪球径仪测角仪焦距/曲率半径/角度组合测量仪相机镜头测试仪屈光度仪详细资料请访问:或直接垂询:北京宝御德科技有限公司地址:北京海淀区增光路27号增光佳苑2号楼1座2105室邮编:100048电话:***********/36网站:Email:******************INCOLINK软件中文操作手册 2内容1.、介绍 32.、安装 33.、主菜单 44.、子菜单-连接 55.、子菜单-选项 76、准时间触发测量 87、将测量数值从ELCOMAT电子自准直仪传输至表格 98、从ELCOMAT电子自准直仪中加载数值10 INCOLINK软件中文操作手册 31、介绍INCOLINK软件可以从ELCOMAT系列电子自准直仪(ELCOMAT vario, ELCOMAT 2000, ELCOMAT 3000, ELCOMAT HR)输出数据至计算机,对测量数据进行时间控制记录、并提供一个通用接口以集成至用户特定软件(如EXCEL®) 。
它兼容WINDOWS 95/98, WINDOWS 2000, WINDOWS XP。
INCOLINK软件的接口并没有保护,可以用于不同的计算机上。
软件接口设计的理念是赋予ELCOMAT潜在用户一个简单的工具,以将测量数值输出至台式机或笔记本计算机上。
2、安装安装包用一张CD光盘构成。
请按下操作以安装此程序:⇒启动WINDOWS。
将安装CD置于CD驱动器内,并启动程序“SETUP.EXE”;⇒按安装程序提示操作;⇒在成功安装后,启动程序INCOLINK。
INCOLINK软件中文操作手册 43、主菜单在启动INCOLINK后,主菜单将显示:简要说明如下:.OPEN(打开)按此按钮以打开一个存储过的文件SAVE (保存)按此按钮以将表格存储至文件CONNECTION(连接)按此按钮以设置连接OPTIONS(选项)按此按钮以选择选项TABLE TO CLIPBOARD(表格至剪贴板)按此按钮以当前表格存储至剪贴板START(开始)按此按钮以存储每个从ELCOMAT传输至表格的测量数值STOP(停止)按此按钮以停止数据传输CURRENT LINE(当前行)显示当前测量数值的将要存储在哪行1,2,3,...10 按1或2或3或…10以选择ELCOMAT数据存储的表格(只适用于ELCOMAT vario、ELCOMAT 3000及ELCOMAT HR-C,文本模式下)VALUE TO TABLE (数值至表格)将显示的测量数值输出至表格CLEAR SELECTION(清除选择)删除表格中所选行的测量数值CLEAR TABLE(清除表格)删除这个表格SET(设置)将当前显示的X和Y的数值设为零RESET(重置)将当前显示的数值转换为绝对数值Arcsec, degree, deg-min-sec,mrad, µ/m 选择角度单位INCOLINK软件中文操作手册 5在您开始运行INCOLINK软件前,请注意如下事项:ELCOMAT 2000、ELCOMAT HR只能工作在RS-232兼容模式;ELCOMAT vario、ELCOMAT 3000及ELCOMAT HR-C 可以工作在兼容模式和文本模式。
VCC-GND-Link 调试器使用说明书2022.04.30卓卓行鱼图一调试器实物图该调试器有两种状态,一种状态为可以调试ARM内核MCU的ARM状态;另一种状态调试RISC-V内核的MCU的RISC-V状态,该状态支持的MCU主要是沁恒公司的RISC-V内核的MCU,该调试器功能等同于沁恒公司的型号为WCH-Link调试器,我们的调试器也经过了沁恒公司的认可和授权同意。
在这里也为沁恒公司的MCU吹捧一下,RISC-V内核的CH32V307确实很NB,大家可以试试,价格很好,性能很强,供货我看以后也没有什么问题,毕竟国产,产量有保证,沁恒公司的ARM内核的MCU兼容性也很好,可以说完全有能力替代STM32F1系列,不像STM32这样MCU,价格动不动就起飞,支持国产,国货当自强!!!在ARM状态下该调试器可以结合IDE(例如keil MDK)调试ARM内核的MCU例如沁恒公司的ARM内核的CH32Fxx,ST公司的STM32系列,华大(现在叫小华)的HC32系列,几乎所有的ARM内核(Cortex-Mx)都是可以调试,沁恒公司的MCU也可以使用MounriverIDE进行调试,在在ARM模式下,keil-MDK选择调试器CMSIS-DAP型号。
该调试器也附加有USB转串口功能,电平标准为TTL。
应用场景:图二调试器连接核心板示意图使用调试器步骤: 调试MCU确认MCU 内核确实调试器为ARM 状态确实调试器为RISC-V 状态ARM 内核RISC-V 内核按住切换按键插拔USB上电,之后即使再上电也是上一次状态在keil-mdk 、Mounriver IDE 等,选择CMSIS-DAP 不是ARM 状态是ARM状态按住切换按键插拔USB 上电,之后即使再上电也是上一次状态不是RISC-V 状态切换为RISC-V 状态在Mounriver IDE,RTT studio 等选择WCH-Link 是ARM 状态调试ARM MCU 调试RISC-V MCU切换为ARM 状态上电查看ARM/RISC-V LED 状态(灭)为RISC-V 状态上电查看ARM/RISC-VLED 状态(亮)为ARM 状态MCU 官方dastasheet如何确定调试器为ARM 还是RISC-V 状态:(一)观察调试器上的状态灯(ARM/RISC-V 灯):a) 该灯亮为:ARM 状态,使用Keil/MounRiver Studio IDE ,支持 SWD 协议的 ARM核芯片,例如沁恒CH32F 系列,ST 的STM32,华大的HC32。