
龙发品牌培训手册
- 格式:ppt
- 大小:1.54 MB
- 文档页数:26
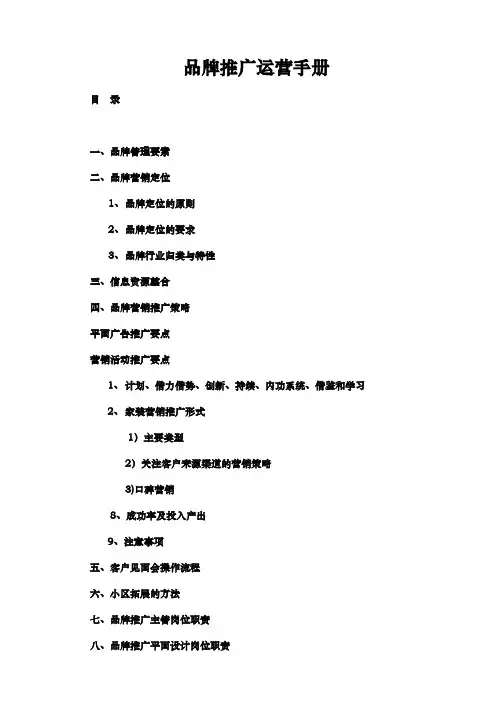
品牌推广运营手册目录一、品牌管理要素二、品牌营销定位1、品牌定位的原则2、品牌定位的要求3、品牌行业归类与特性三、信息资源整合四、品牌营销推广策略平面广告推广要点营销活动推广要点1、计划、借力借势、创新、持续、内功系统、借鉴和学习2、家装营销推广形式1)主要类型2)关注客户来源渠道的营销策略3)口碑营销8、成功率及投入产出9、注意事项五、客户见面会操作流程六、小区拓展的方法七、品牌推广主管岗位职责八、品牌推广平面设计岗位职责一、品牌营销管理要素品牌营销管理通常包括以下几方面:⏹⏹⏹⏹促销广告⏹⏹企业活动1、人力资源、员工士气、品牌文化2、广告3、服务水平和行为4、产品绩效和产品开发(公司优势与后期开发(差异化)5、公共关系6、企业活动7、有形建筑(店面)8、渠道与客户关系管理9、包装10、促销11、赞助12、口碑二、品牌营销定位东易日盛品牌代表着高质量、完整家居装饰服务,所以我们应该着力于这种定位方式,以品牌效应作为市场的切入点,极力营造高品质的家庭装饰服务1、东易日盛品牌定位三原则:1)“文化”原则要体现东易日盛品牌文化内涵,东易日盛为客户创造一个美好、时尚而具有品味的生活方式,它不是一个简单的“装修公司”,我们卖的不仅是木工、泥工的产品组合,而是一种文化和生活方式。
2)艺术”原则营销策划核心应体现“一个充满艺术气质的品牌”,要在画面表现、内容体现、形式表现上突出艺术性的美观感,要支持品牌艺术的扩展!包括在设计、施工、服务方面体现“艺术”完美性!3)“责任”原则作为一个具体社会责任的企业是东易日盛品牌展示出另一个涵意,我们在品牌推广和活动策划中应尽力体现,我们的责任体现在对客户的负责、对工程的负责、对设计的负责,我们还需要努力参于更多社会活动,如爱心、奖学金等,展示我们的企业对社会的责任!2、品牌营销定位的要求1)定位要清晰2)主线明确3)主诉求具体、鲜明3、品牌行业归类与特性1)品牌归类“奢侈品”类别中国消费者的收入与支出水平决定我们的产品定位东易日盛客户群决定我们的品牌策略2)品牌需要表达的特性品质的精湛文化的影响服务的细致客户的区分(报价策略)三、信息资源整合1、对外1)产业链的整合(主材、饰材)2)集团资源整合3)宣传渠道整合2、对内设计、工程、材料、人力、客服3、外部信息分类1)行业信息:房地产、物业、建材、竞争对手;2)政府、行业管理部门3)媒体信息4)业主调查反馈4、市场信息反馈1)小区开盘情况2)小区能接受合作方式3)同行宣传模式4)前期活动反馈四、品牌营销推广策略1、平面广告推广要点1)广告目标要准确A主力广告要选择当地发行量与影响力最大的媒体投放B可选择针对业主和中高端消费者的专业杂志作为辅助(要考虑性价比)2)广告牌面要固定A确定媒体后一定要固定广告版面及周期,以便让消费者形成习惯性记忆B广告版面选择家装版或房产版,阅读此版面读者有家装消费趋势和意向3)广告位置要醒目A尽可能与媒体商议选择广告投放位置“邻居”,与大品牌为邻B如有可能在不增费用状况下可采取异形广告4)软文形成栏目类(指按硬广收费软文)A要点与广告版面要固定相同,最好以栏目形式出现,家装课堂、专家专栏B软文内容着重强化宣传与当地企业差异化特点,可读性和知识性及趣味性加强5)图文广告牌面设计要符合公司VI系统,主题鲜明并与营销思路一致。

沙发销售技能培训方案一、培训目的在传统家具市场中,沙发销售一直是关键的环节。
而近年来,随着电商的兴起和消费升级,消费者对沙发的质量和舒适性要求越来越高,因此需要沙发销售人员具备更加专业的销售技能,以提高客户的购买满意度和店铺的销售业绩。
本培训方案旨在提升销售人员的专业素质和销售能力,让他们能更好地拓展客户群体,增加销售额。
二、培训内容1. 沙发产品知识了解各类沙发产品的材质、功能、性价比以及市场需求。
掌握产品的规格、用途、维护和保养等方面的知识,能够熟练地回答客户提出的相关问题。
2. 销售话术技巧熟练掌握销售话术技巧,并能根据客户的需求随机应变进行沟通。
掌握各种销售技巧,如演示销售、推销和激励等,从而提高客户购买的意愿。
3. 客户服务技巧培养良好的服务态度,包括沟通技巧、回应服务和解决问题的能力。
加强与客户的疏通和沟通、应对客户的投诉和意见,提高客户的满意度和忠诚度。
4. 团队协作和沟通强化团队协作和沟通的能力,培养员工团队合作意识和互助支持精神。
通过团队协作,提高工作质量和效率,提升客户满意度和店铺销售业绩。
5. 销售管理知识熟悉销售流程和销售管理的流程,了解行业相关的法规和政策。
正确管理销售过程,提高销售额,避免销售过程中出现纠纷和问题。
三、培训方式1. 常规培训方法通过线下讲授、现场演练等方式进行传统的一对一、小组、培训。
2. 在线培训方法选择在线视频、直播课堂等方式,使用互联网平台进行远程学习,使学员可以随时随地学习并获得及时的帮助。
四、培训效果评估通过采用问卷调查、考核、日志回顾等多种形式,对销售人员的学习和掌握情况进行评估,并及时给予反馈和跟进。
同时根据实际销售业绩来进行评估和奖励,通过奖励机制激励学员的学习积极性和业绩水平。
五、总结本文介绍了针对沙发销售人员的技能培训方案,旨在提高销售人员的专业素质和销售能力。
通过掌握沙发产品知识、销售话术技巧、客户服务技巧、团队协作和沟通技巧以及销售管理知识等方面的培训,可以更好地服务客户,提高销售业绩。

Micro Casa a LevaTraining ManualContentsOverview 1Models 1Specifications 1Features 1Available accessories 1Package contents 2Leva parts 3Assembly 4Operating instructions 4Making coffee 5Procedure 5Frothing or heating milk 7Refilling the boiler 7Maintenance and cleaning 8Daily 8Weekly 8Background information 9Operating principles 9The group head 9Precautions 10Elektra srlVia a.Volta 18, 31030 Dosson di Casier (Treviso) Italy Fax. (39) 0422-490620 Tel. (39) 0422-490405–*******************Training manual – Micro casa a leva1ModelsAvailable in four versions: ▪ S1 Brass/copper ▪ S1CChrome▪ S1CO Chrome with Brass▪S1CB Chrome only machine with carry case. Includes an additional chrome boiler cover with Morano blue glass ball.SpecificationsWeight10 kg Boiler capacity 1.8 litres Height50 cm Base Diameter26 cmFeatures▪ Traditional lever extraction method ▪ Durable and hard wearing construction ▪ Easy to clean and operate ▪ Silent coffee extraction▪Powerful steam wand for creamy cappuccinos and smooth lattesAvailable accessories▪Dumping boxes, two types:▪ Coffee grinders, two models ▪ Cups, two types:TC (Cappuccino – Ivory)TE (Espresso – Ivory)▪Cleaning brush (SPA)Copper and brass finish (model MS)Chrome finish(model MSC)Brown wood base brass ball grip (SB) Black wood base, chrome ball grip (SBN)Training manual – Micro casa a leva2Micro casa a leva Instruction manual espresso coffee machinewith guarantee cardBoiler cover, handle (eagle or Morano blue ball) and brass bolt Boiler plug/ Pump leversafety release valvePlastic drip tray Brass or chrome drip tray coverCoffee handleSingle and double filter basketsDosing spoonTamperTraining manual – Micro casa a leva3decorative boiler cover handleboiler covermetal drip tray coverplastic drip trayswitch bolt to attach handle to coverboiler plug/safety release valveleversteam wandsteam wand tapfilter basketcoffee handleboiler pressure gaugeboiler water level gaugeelementindicator lightgroup head boilerTraining manual – Micro casa a leva41. Place plastic drip tray into position.2. Place chrome / brass drip tray cover into plastic drip tray.3. Attach lever handle securely.4. Place filter basket into coffee handle.5.Attach coffee handle to group head. 6. Attach eagle to boiler cover with metal bolt.1. Fill boiler with fresh, cold water until boiler level sight glass isnearly full. (For best results use filtered or bottled water.) 2. Screw the boiler plug/safety valve on securely (turn clockwise). 3. Place boiler cover into position.4. Ensure the steam wand tap is in the off position.5. Connect the electrical plug to a suitable 240V power outlet.6. Switch on power outlet, then switchon the machine at its on/off switch. A red lamp in the switch should glow, indicating power to the machine is on.The heating element indicator light will turn on and a soft boiling sound will be heard as the water heats. The element indicator light will go out when the boiler pressure reaches thegreen band of the pressure gauge (1–1.25 bars of pressure). This takes around 12 minutes. The machine isnow ready to make coffee.Screw pump lever clockwise into pumpand hand tighten.Steam tap in the OFF positionTraining manual – Micro casa a leva5Hot surfaces – some parts of this machine will become hot enough to cause burns, in particular the boiler and group head casings. The steam wand and boiler lid can also become too hot to touch. As well, if the machine is left on for extended periods (not recommended), the base can become uncomfortably hot.Boiler water level – it’s essential to ensure the boiler is never ▪ coffee beans freshly ground to the correct densityallowed to run dry, as the heating element will burn out.The main requirements for making good coffee are: ▪ filter basket filled with grounds to correct level, and evenly tamped ▪ correct temperature of the water passing through the grounds ▪cups, coffee handle and machine correctly heated.Procedure1. Ensure machine is warmed up , in particular the group head,coffee handle and filter basket. This can be done by placing the handle (fitted with a filter basket) into the group head, and pulling the pump lever down so water flows for about five seconds. Note: If there is no coffee in the handle, releasing the pump lever after pulling it down can cause the lever to return forcefully to the upright position, possibly causing injury. Hold the lever so it rises slowly . 2. Remove the heated handle/basket from the machine and: ▪To make a single cup — with the single cup filter basket fitted to the handle, add one level espresso dosing spoon of coffee grounds to the basket, and tamp down firmly. The tamped grounds should be approximately 4mm from the top of the basket. ▪To make a double cup — with the double cup filter basket fitted to the handle, add a level espresso dosing spoon of coffee grounds to the filter basket and tamp down firmly. Add another level dosing spoon of coffee grounds and tamp firmly. The tamped grounds should be around 4mm from the top of the basket, as below.The tamped coffee grounds should be around 4mm from the top of the filter basket.If too high, the handle won’t fit into the group head.hot4mmTraining manual – Micro casa a leva6Hold machine base and always keep elbow abovepump leverLever in fully loweredposition. Hold untilcoffee starts dripping. 3. Wipe off excess coffee grounds from the rim of the filter basket. 4. Fit the coffee handle securely intogroup head – to ensure it does not release during coffee extraction. Make sure the coffee handle is properly locked into position by moving it to the right to give a tight fit. Otherwise the handle can twist and release during coffee extraction. 5. Place coffee cup(s) onto drip tray. 6. Place one hand on the base of themachine to secure it. 7. Hold the lever with the other hand,keeping your elbow above the lever. 8. Push the lever down in a singlemotion while standing over the machine and keeping your elbow above the lever at all times. You’ll hear and feel water entering the group head chamber. 9. Hold the lever in this position untilcoffee begins to drip through. 10. Release the lever which will slowlyreturn to the upright position. 11. For more coffee, pull the lever downonce more. Wait for coffee to drip and release lever. The second extraction of coffee will flow more quickly.12. When the lever is fully raised, removethe coffee handle by slowly andcarefully pulling it horizontally to the left until a pressure releasing hiss is heard. Allow the pressure to slowly release to avoid splattering the coffee grounds. 13. Dump the used coffee cake into dumping box or by tapping thecoffee handle on a non-metal surface. 14. Rinse the handle/basket and return to the group head.Notes:▪ It normally takes 25–30 seconds to extract a shot of coffee. ▪Around 30ml of coffee is extracted per cycle of the pump lever.Make sure the coffee handle is securely fittedTraining manual – Micro casa a leva7You can froth or heat milk while coffee is being extracted. To do this: 1. Purge the steam wand of condensation by releasing steam into acontainer. 2. Fill a stainless steel jug with the required amount of milk. Avoidfilling jug much more than half way. 3. Immerse the tip of the steam wand into the centre of the jug, justbelow the surface of the milk. 4. Turn on the steam tap until you hear a soft “psst-psst” sound,which indicates the milk is being frothed. As the milk level rises, lower the jug to ensure the wand stays just under the surface of the milk to maintain the “psst-psst” sound. 5. When the milk is sufficiently frothed, lower the steam wand intothe milk to heat it. Move the wand around the milk to ensure even heating. Do not boil the milk!Correct temperature can be judged by holding your hand against the jug. When the temperature is too hot to the touch, wait four seconds or so, then turn off the steam.6. Remove the jug and immediately release a small amount ofsteam into a container to flush any milk deposits from the tip of the wand. Otherwise, the milk will dry, possibly blocking the wand and causing a health hazard. Also wipe the steam wand with a clean damp cloth to remove any milk before it dries.Refilling the boiler1. When the boiler level is less than a quarter full, turn off themachine. Then open the steam tap and allow all the boiler steam to release into a jug or suitable container.2. Remove the boiler cover. Use a cloth, as the cover will be hot.3. Carefully undo the boiler plug (it could be hot!), and refill theboiler. Replace the boiler plug and boiler cover and turn on the machine. It should be ready to make coffee in around five minutes.Turn steam tap on (as shown) and release boiler pressure untilgauge shows 0Training manual – Micro casa a leva8Daily1. Use a clean sponge, cloth or brush to clean the shower head andup inside the group head.Looking into the group head.Clean all parts, including the rubber sealing ringand the surface of the shower head.2. Place a cup onto drip tray and push the pump lever down to flusha small amount of water through the group head.3. Place a small jug of cold water under the steam wand and releasesteam to remove any milk deposits from the wand. 4. Wipe the surface of the wand with a soft damp cloth, including allgrooves or places where milk could build up. 5. Remove filter baskets from coffee handle and wash in warmsoapy water. Rinse them thoroughly under hot running water. 6. Remove the metal drip tray cover and plastic drip tray and washthem in warm soapy water. 7. Use a clean, wet paper towel or soft cloth to remove marks fromthe surface of the machine (while warm) and polish with a clean, dry soft paper towel or soft cloth. Do not use any alcohol, solvents or abrasive creams or cloths on the surface of the machine.WeeklyWith commercial espresso machine cleaning chemical1. Put three teaspoons of cleaning chemical into half a litre of veryhot water. 2. Place coffee baskets and handle into the solution to soak for 20 to30 minutes. Ensure that the bakelite part of the handle is not immersed in the solution.3. Rinse and wash all parts with warm soapy water.4. Rinse thoroughly in hot water.group headTraining manual – Micro casa a leva9 Operating principlesThe beauty of the Elektra Micro casa a leva is that it uses a traditional spring-loaded piston to produce the eight bars of pressure needed to pump hot water through the coffee grounds. The water in the boiler is heated to give a boiler pressure of around one bar of pressure. The boiler pressure is governed by a pressure release valve (called a pressure-stat ) that allows maximum pressure to be reached regardless of the boiler water level.The spring-loaded piston is compressed by pulling a lever down. This allows the pressurised boiler water to enter the group head chamber. When the lever is released, the spring causes the piston to return to the upright position, forcing water through the coffee grounds to extract a true flavoursome espresso.This machine allows the user to extract coffee and froth/heat milk at the same time.The group headThe coffee handle fits into the group head, with water flowing through a “shower screen”, as below. If the basket is too full, the grounds will press against the shower screen, stopping the handle from being fitted to the group head.Coffee handle and group head.Water passes through the shower screen to give aneven flow of water through the coffee grounds.The coffee handle has two lugs either side that locate into two slots in the group head. The handle is fitted by aligning the lugs and slots, then pushing the handle up so it can be twisted to the right.When the coffee handle is fitted into the group head, a rubber ringinside the group head seals against the top of the filter basket. It’stherefore important to make sure the top of the filter basket isclean and free of coffee grounds . Otherwise leakage can occur, and in some cases the rubber seal can become dislodged due to a build-upof coffee grounds behind the seal.Training manual – Micro casa a leva10▪Place machine on a suitable surface – which should be firm and low enough to allow easy operation of the pump lever. When you are pulling it down, your elbow should be above the lever at all times to give best control.▪The boiler plug/safety release valve– which should be firmly screwed into the top of the boiler before the machine is switched on. This device incorporates a pressure release valve (pressure stat) to regulate the boiler pressure. It should only be tightened by hand, as over-tightening can damage the valve. Turn the plug clockwise to tighten.▪When refilling the boiler, make sure all pressure has been released before removing the boiler plug.▪Other precautions are shown elsewhere, indicated with an exclamation symbol.Precaution symbolThe boiler plug, safety release valve.Turn clockwise to tighten.。
