Dell Storage Customer Presentation Virtualization and Private Cloud Module
- 格式:pptx
- 大小:2.93 MB
- 文档页数:21

Dell Storage MD1400 机柜硬件用户手册注、小心和警告注: “注”表示可以帮助您更好地使用计算机的重要信息。
小心: “小心”表示可能会损坏硬件或导致数据丢失,并说明如何避免此类问题。
警告: “警告”表示可能会造成财产损失、人身伤害甚至死亡。
版权所有© 2014 Dell Inc. 保留所有权利。
本产品受美国、国际版权和知识产权法律保护。
Dell™和 Dell 徽标是 Dell Inc. 在美国和 / 或其他管辖区域的商标。
所有此处提及的其他商标和产品名称可能是其各自所属公司的商标。
2014 - 09Rev. A00目录1 关于机柜 (5)前面板功能部件和指示灯 (5)前挡板功能部件和指示灯 (6)硬盘驱动器指示灯显示方式 (7)背面板功能部件和指示灯 (8)机柜管理模块 (8)安装两个 EMM 时的机柜故障转移 (9)EMM 热关机 (9)电源指示灯代码 (10)您可能需要的其他信息 (10)2 安装机柜组件 (12)建议工具 (12)前挡板(可选) (12)卸下前挡板 (12)安装前挡板 (13)硬盘驱动器 (13)安全性:型号 AMT、E03J 和 E04J (13)卸下硬盘驱动器挡片 (13)安装硬盘驱动器挡片 (14)卸下硬盘驱动器 (14)安装硬盘驱动器 (15)从硬盘驱动器托盘卸下硬盘驱动器 (15)将硬盘驱动器安装到硬盘驱动器托盘中 (16)机柜管理模块 (16)卸下 EMM 挡片 (16)安装 EMM 挡片 (17)卸下 EMM (17)安装 EMM (18)交流电源设备或冷却风扇模块 (18)卸下交流电源设备或冷却风扇模块 (19)安装交流电源设备或冷却风扇模块 (19)关于直流电源设备 (20)电源指示灯代码 (20)直流电源设备模块背面板功能部件 (21)卸下和安装直流电源设备 (22)控制面板 (28)卸下控制面板 (28)安装控制面板 (29)背板 (29)卸下背板 (29)安装背板 (31)3 机柜故障排除 (32)安全第一——为您和您的机柜着想 (32)机柜启动故障的故障排除 (32)通信中断故障排除 (32)外部连接故障排除 (32)电源设备或冷却风扇模块故障排除 (32)机柜冷却问题故障排除 (33)机柜管理模块故障排除 (33)硬盘驱动器故障排除 (34)机柜连接故障排除 (34)受潮机柜故障排除 (35)受损机柜故障排除 (35)4 获得帮助 (36)Contacting Dell (36)说明文件反馈 (36)1关于机柜前面板功能部件和指示灯图 1: 前面板功能部件和指示灯5前挡板功能部件和指示灯图 2: 前挡板功能部件和指示灯6硬盘驱动器指示灯显示方式图 3: 硬盘驱动器指示灯1.硬盘驱动器活动指示灯(绿色)2.硬盘驱动器状态指示灯(绿色和琥珀色)3.硬盘驱动器7背面板功能部件和指示灯图 4: 背面板功能部件和指示灯机柜管理模块每个 EMM 都为机柜提供以下数据路径和机柜管理功能:•监测和控制机柜环境要素(例如温度、风扇、电源设备和机柜 LED)。

适用于 VMware 的 Dell Storage Compellent 集成工具管理员指南版本 3.1注、小心和警告注: “注”表示可以帮助您更好地使用计算机的重要信息。
小心: “小心”表示可能会损坏硬件或导致数据丢失,并说明如何避免此类问题。
警告: “警告”表示可能会造成财产损失、人身伤害甚至死亡。
© 2016 - 2018 Dell Inc. 或其子公司。
保留所有权利Dell、EMC 和其他商标为 Dell Inc. 或其子公司的商标。
其他商标均为其各自所有者的商标。
2018 - 01Rev. A01前言 (5)修订历史记录 (5)读者对象 (5)相关出版物 (5)联系 Dell 支持 (6)1 安装 CITV (7)CITV 简介 (7)安装要求 (7)部署 CITV (7)设置 CITV (8)在 CITV 虚拟设备上配置时间 (8)登录 CITV (9)配置 CITV 设置 (9)更新 CITV (10)显示 CITV 的当前版本 (10)检查 CITV 更新 (11)为 CITV 安装更新 (11)在非联网站点更新 CITV (12)重新引导 CITV (13)2 VASA Provider (14)配置 VASA Provider 设置 (14)注册 VASA Provider (14)向 VMware vCenter 注册 VASA Provider (15)在 VASA Provider 和 VMware vCenter 之间同步存储数据 (15)验证供应商提供程序详细信息 (15)使用 VASA Provider 信息 (16)配置文件驱动的和基于策略的存储 (16)查看 Dell VASA Provider 存储功能 (16)3 Replay Manager Service for VMware (18)配置 RMSV (18)4 Dell Storage vSphere Web Client 插件 (19)安装 Dell Storage vSphere Web Client 插件 (19)在升级安装后注册 vSphere Web Client 插件 (19)移除 vSphere Web Client 插件 (20)附录 A: CITV 应用程序故障排除 (21)查看 VASA 警报和事件 (21)VASA Provider 故障排除 (21)目录3重新启动 VASA Provider (22)保存 VASA Provider 日志文件 (22)RMSV 故障排除 (22)重新启动 RMSV (23)保存 RMSV 日志文件 (23)vSphere Web Client 插件故障排除 (23)Dell 存储图标缺失 (23)插件摘要和监测页面似乎已禁用 (24)快照和快照计划创建失败 (24)无法启用实时卷以进行自动故障转移 (24)创建 NFS 数据存储时出现故障 (24)管理在插件外部创建的 NFS 数据存储 (24)查看 vSphere Web Client 日志文件 (24)4目录前言本指南提供有关安装 Compellent Integration T ools for VMware (CITV) 以及配置以下应用程序的说明:•Dell VASA Provider•Dell Replay Manager Service for VMware (RMSV)•Dell Storage vSphere Web Client 插件主题:•修订历史记录•读者对象•相关出版物•联系 Dell 支持修订历史记录文档编号:680-079-004表. 1: 修订历史记录读者对象本指南的目标读者是拥有 Dell Storage Center、Enterprise Manager 和 Replay Manager 的中级到专家级知识的信息技术专业人员。
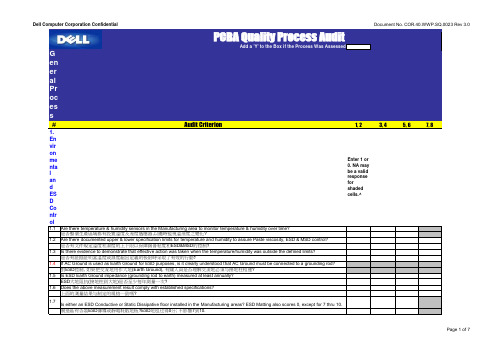
PCBA Quality Process AuditAdd a 'Y' to the Box if the Process Was AssessedGeneralProcess#Audit Criterion1, 23, 45, 67, 8 Environme nta l an d ES D Co ntr ol Enter 1 or 0. NA may be a valid response for shaded cells.^1.1Are there temperature & humidity sensors in the Manufacturing area to monitor temperature & humidity over time?是否整個生產區域都有設置溫度及溼度感應器,以隨時監視溫溼度之變化?1.2Are there documented upper & lower specification limits for temperature and humidity to assure Paste viscosity, ESD & MSD control?是否有文件規定溫度和濕度的上下限以保障錫膏粘度和ESD&MSD的控制?1.3Is there evidence to demonstrate that effective action was taken when the temperature/humidity was outside the defined limits?是否有証据証明當溫度或濕度超出定義的极限時采取了有效的行動?1.4If AC Ground is used as Earth Ground for ESD purposes, is it clearly understood that AC Ground must be connected to a grounding rod?對ESD控制, 如果把交流地用作大地(Earth Ground), 有關人員是否理解交流地必須与接地柱相連?1.5Is ESD Earth Ground impedance (grounding rod to earth) measured at least annually?ESD大地阻抗(接地柱到大地)是否至少每年測量一次?1.6Does the above measurement result comply with established specifications?上面的測量結果与制定的規格一致嗎?1.7Is either an ESD Conductive or Static Dissipative floor installed in the Manufacturing areas? ESD Matting also scores 0, except for 7 thru 10.制造區有否裝ESD傳導或靜電耗散地板?ESD地毯也得0分; 不影響7到10.Dell Computer Corporation Confidential Document No. COR.40.WWP.SQ.0023 Rev 3.0Note*: Due to a safety concern some personal may not be required to wear ESD Smocks and two ESD Shoe Straps / ESD Shoes?如果你覺得NA是個合适的輸入, 請看Instructions一章對NA的詳細說明.注意:出于對安全的考慮,一些人可允許不需穿靜電服和兩個靜電鞋套/靜電鞋.。


Dell Storage with Microsoft Storage Spaces Configurations and Solution IDsUse these configurations and solution IDs when you purchase your Dell Storage with Microsoft Storage Spaces (DSMS) solution.Dell EngineeringMay 2016RevisionsTHIS WHITE PAPER IS FOR INFORMATIONAL PURPOSES ONLY, AND MAY CONTAIN TYPOGRAPHICAL ERRORS AND TECHNICAL INACCURACIES. THE CONTENT IS PROVIDED AS IS, WITHOUT EXPRESS OR IMPLIED WARRANTIES OF ANY KIND.Copyright © 2016 Dell Inc. All rights reserved. Dell and the Dell logo are trademarks of Dell Inc. in the United States and/or other jurisdictions. All other marks and names mentioned herein may be trademarks of their respective companies.Table of contentsRevisions (2)Introduction (4)1Converged configurations and solution IDs (5)2Scale-Out File Server configurations and solution IDs (8)IntroductionThis document is intended to support Dell Storage with Microsoft Storage Spaces (DSMS) configurations,which have unique solution SKUs called solution IDs. These DSMS solution IDs are required when orderinga DSMS configuration, which is the only way to get access to the benefits such as performance and sizing,optimized server and storage components, single-payload updates, and solution-level technical support.If you are in a geographical area outside of the US, the solution IDs are not available at this time; however,you may reference the configuration name instead. Use this document for the most complete list ofsolution IDs.This document is divided into two sections:∙Converged configurations and solution IDs∙Scale-Out Filer Server Solution IDsFigure 1The correct solution ID or configuration connects you to all the solution has to offer, including Dell Services and Support.1Converged configurations and solution IDsUse the following information to order the proper systems for your converged DSMS solution. If you areUS, use the solution ID, if you are in another geographical area, use the configuration.reference when you purchase the DSMS solution.2Scale-Out File Server configurations and solution IDs Use the following information to order the proper systems for your SOFS DSMS solution. If you are US, use the Solution ID, if you are in another geographical area, use the configuration.。

DELLCompellentStorageSolution戴尔康贝存储⽅案⽬录第⼀节技术⽅案 (3)1.1投标产品/解决⽅案 (3)1.1.1 Dell Compellent Storage Center系统架构 (3)1.1.2 Dell Compellent SC8000 Storage Center 控制器:⾯向虚拟化数据中⼼和云的企业级存储 (6)1.1.3 Dell Storage Center 6.5 (8)1.1.4 Dell Storage SC4020 阵列:将企业级存储的优势扩展到中⼩规模的部署中 (12)1.1.5 Dell Storage SC9000:满⾜当前数据中⼼需求的企业存储 (15)1.1.6 Dell Compellent FS8600横向扩展NAS 设备 (18)1.1.7 Dell Compellent SC200 和 SC220 盘柜:可扩展且⾼效的扩展能⼒,⽤于块和⽂件存储211.1.8 Dell Compellent SC280 ⾼密度盘柜:适合您数据中⼼的⾼容量成本优化型存储 (24)1.1.9 Dell Compellent 闪存优化型解决⽅案:以硬盘价格提供⾼容量闪存性能 (26)1.1.10 Dell Compellent管理套件 (28)1.1.11存储虚拟化 (31)1.1.12动态容量虚拟化 (32)1.1.13数据即时回放、精简导⼊ (33)1.1.14精简导⼊将以前的卷转为精简配置卷 (33)1.1.15从SAN引导 (34)1.1.16企业存储管理器 (35)1.1.17数据调度 (38)1.1.18快道技术 (38)1.1.19回放管理器 (39)1.1.20远程即时回放 (40)1.1.21 Live Volume (41)i.复制 (42)ii.Dell Compellent加密和验证 (43)21.1.22 Dell Compellent RAID级别和RAID管理 (44)1.1.23额外的冗余性:RAID级别和RAID管理 (45)1.1.24 Dell Compellent恢复时间 (47)1.1.25 Compellent Copilot 护航服务 (47)iii.保修、维护和⽀持 (49)iv.复制安装相关服务 (50) v.双控制器安装服务 (50) vi.初始配置和扩展 (52) vii.安装和管理 (52)3第⼀节技术⽅案1.1 投标产品/解决⽅案1.1.1 Dell Compellent Storage Center 系统架构Dell Compellent Storage Center 包含系统运⾏所必需的所有服务器接⼝、控制器、磁盘驱动器和所有控制系统。
Scale your solution to meet yourstorage needsDell Storage with Microsoft® Storage Spaces (DSMS) extends the value proposition of Microsoft’s SDSin numerous ways. In particular, Dell’s end-to-end engagement throughout the lifecycle of the entire solution provides tangible benefits to the customer. Dell stays engaged starting from pre-sales assistance on capacity and performance sizing, as well as solution optimization for specific workload, and all the way through the factory fulfillment and deployment of the solution. A full range of solution support offerings ranging from 3-year NBD (next business day) to Mission Critical 4-hour support worldwide ensure your option to select support levels based on your business requirements.DSMS lets you configure and tune your solution for levels of performance, capacity and availability as needed. Dell provides sizing guidance, a clear best practices guide and a detailed deployment guide. While maintaining maximum flexibility, you can rest assured that only validated and tested building blocks are used.Easy to size and manageDSMS is based on a disk pooling model. A storage pool can be composed of a mixture of solid-state drives (SSD — fast tier) and inexpensive, bulk hard-disk drives (HDD — standard tier). Frequently accessed data (hot) in a tiered storage space gets moved to the SSD in the fast tier, while infrequently accessed data (cold) is moved to the high-capacity hard disks in the standard tier. This enables you to balance capacity and performance.You can enable powerful caching features in Storage Spaces with Dell SSD products to support I/O intensive workloads like virtual desktop infrastructure (VDI). Storage Spaces uses SSDs — which excel at random access — in the storage pool to create a durable write-back cache that buffers small random writes to SSDs before later writing them to HDDs. This reduces the latency of the random writes and significantly reduces any impact on data transfer performance.Dell servers and storage help optimize the benefits of Storage SpacesWith Storage Spaces running on the highest performing, most innovative Dell™ PowerEdge™ servers and Dell Storage enclosure solutions ever, hosters and cloud providers can enable cost-effective, highly available and highly scalable workloads. Fully engineered for virtualization with large memory support and enhanced I/O throughput, PowerEdge servers enable organizations to maximize the comprehensive virtualization platform offered in Microsoft Windows Server® 2012 R2. The Dell Storage MD Series storage enclosures with its wide range of array form factors, connectivity options and storage enclosures offers unparalleled flexibility to extend performance or capacity as needs change. And with best-in-class integration between Dell network management technologies, systems management solutions, and Microsoft System Center 2012 R2, our mutual customers can be more efficient and agile.Dell Storage with Microsoft Storage Spaces Dell is delivering a new way to deploy validated software-defined storage (SDS) using standard server, storage and networking components.Highly scalableworkloadsincluding PrivateCloud, VDI, SQLand Hyper-V®Validated configurations for simple deploymentDSMS uses Dell Storage MD1400, Dell Storage MD1420, and PowerVault MD3060e storage enclosures for the storage component. The scale-out file server (SOFS) design accommodates 2 to 4 storage enclosures in a cluster for a total of up to 240 hard drives (using the MD3060e). The storage enclosures are connected with 12Gb (MD14x0) or 6Gb (MD3060e) shared SAS (serial-attached SCSI). The storage nodes that run the Microsoft Windows Server operating system with Storage Spaces, Cluster Shared Volumes (CSV), and the SMB3 protocol stack use either the PowerEdge R630 server or PowerEdge R730 server. The solution supports 2 to 4 storage nodes per cluster. DSMS offers remote direct-memory access (RDMA) for workloads that require high-throughput and low-latency networking. RDMA over Converged Ethernet (RoCE) and iWARP are the supported implementations. Dell has also validated several Dell network switches, but third-party networking is supported as well. Since the Dell Storage with Microsoft Storage Spaces solution is a SOFS architecture, it supports a wide range of compute solutions, including PowerEdge servers, FX architecture and blades. DSMS is available in all-flash configurations, converged and SOFS using the MD1420.The following specifications apply to all SOFS DSMS configurations which include 2x1, 2x2, 2x3, 2x4, 3x3, 3x4, 4x3, and 4x4:*Using Dell Storage with Microsoft Storage Spaces specific SKUsThe following specifications apply to all Converged DSMS configurations which include 2x1, 2x2, 2x3, 2x4, 3x3, 3x4, 4x3, 4x4:*Using Dell Storage with Microsoft Storage Spaces specific SKUsEnd-to-end technology solutionsReduce IT complexity, lower costs and eliminate inefficiencies by making IT and business solutions work harder for you. Youcan count on Dell for end-to-end solutions to maximize your performance and uptime. A proven leader in Servers, Storage and Networking, Dell Enterprise Solutions and Services deliver innovation at any scale. And if you’re looking to preserve cash or increase operational efficiency, Dell Financial Services™ has a wide range of options to make technology acquisition easy and affordable. Contact your Dell Sales Representative for more information.Learn More at /Microsoft.©2016 Dell Inc. All rights reserved. Dell and DELL logo are trademarks of Dell Inc. Other trademarks and trade names may be used in this document to refer to either theentities claiming the marks and names or their products. Dell disclaims proprietary interest in the marks and names of others. This document is for informational purposesonly. Dell reserves the right to make changes without further notice to any products herein. The content provided is as is and without express or implied warranties of anykind. Leasing and financing provided and serviced by Dell Financial Services L.L.C. or its affiliate or designee (“DFS”) for qualified customers. Offers may not be available ormay vary in certain countries. Where available, offers may be changed without notice and are subject to product availability, credit approval, execution of documentationprovided by and acceptable to DFS, and may be subject to minimum transaction size. Offers not available for personal, family or household use.SS_DSMS_032416。
Dell Data Security Console User Guide v10.0Notes, cautions, and warningsNOTE: A NOTE indicates important information that helps you make better use of your product.CAUTION: A CAUTION indicates either potential damage to hardware or loss of data and tells you how to avoid the problem.WARNING: A WARNING indicates a potential for property damage, personal injury, or death.© 2012-2018 Dell Inc. All rights reserved. Dell, EMC, and other trademarks are trademarks of Dell Inc. or its subsidiaries. Other trademarks may be trademarks of their respective owners.Registered trademarks and trademarks used in the Dell Encryption, Endpoint Security Suite Enterprise, and Data Guardian suite of documents: Dell™ and the Dell logo, Dell Precision™, OptiPlex™, ControlVault™, Latitude™, XPS®, and KACE™ are trademarks of Dell Inc. Cylance®, CylancePROTECT, and the Cylance logo are registered trademarks of Cylance, Inc. in the U.S. and other countries. McAfee® and the McAfee logo are trademarks or registered trademarks of McAfee, Inc. in the US and other countries. Intel®, Pentium®, Intel Core Inside Duo®, Itanium®, and Xeon® are registered trademarks of Intel Corporation in the U.S. and other countries. Adobe®, Acrobat®, and Flash® are registered trademarks of Adobe Systems Incorporated. Authen tec® and Eikon® are registered trademarks of Authen tec. AMD® is a registered trademark of Advanced Micro Devices, Inc. Microsoft®, Windows®, and Windows Server®, Internet Explorer®, Windows Vista®, Windows 7®, Windows 10®, Active Directory®, Access®, BitLocker®, BitLocker To Go®, Excel®, Hyper-V®, Outlook®, PowerPoint®, Word®, OneDrive®, SQL Server®, and Visual C++® are either trademarks or registered trademarks of Microsoft Corporation in the United States and/or other countries. VMware® is a registered trademark or trademark of VMware, Inc. in the United States or other countries. Box® is a registered trademark of Box. Dropbox ℠ is a service mark of Dropbox, Inc. Google™, Android™, Google™ Chrome™, Gmail™, and Google™ Play are either trademarks or registered trademarks of Google Inc. in the United States and other countries. Apple®, App Store℠, Apple Remote Desktop™, Boot Camp™, FileVault™, iPad®, iPhone®, iPod®, iPod touch®, iPod shuffle®, and iPod nano®, Macintosh®, and Safari® are either servicemarks, trademarks, or registered trademarks of Apple, Inc. in the United States and/or other countries. EnCase™ and Guidance Software® are either trademarks or registered trademarks of Guidance Software. Entrust® is a registered trademark of Entrust®, Inc. in the United States and other countries. Mozilla® Firefox® is a registered trademark of Mozilla Foundation in the United States and/or other countries. iOS® is a trademark or registered trademark of Cisco Systems, Inc. in the United States and certain other countries and is used under license. Oracle® and Java® are registered trademarks of Oracle and/or its affiliates. Travelstar® is a registered trademark of HGST, Inc. in the United States and other countries. UNIX® is a registered trademark of The Open Group. VALIDITY™ is a trademark of Validity Sensors, Inc. in the United States and other countries. VeriSign® and other related marks are the trademarks or registered trademarks of VeriSign, Inc. or its affiliates or subsidiaries in the U.S. and other countries and licensed to Symantec Corporation. KVM on IP® is a registered trademark of Video Products. Yahoo!® is a registered trademark of Yahoo! Inc. Bing® is a registered trademark of Microsoft Inc. Ask® is a registered trademark of IAC Publishing, LLC. Other names may be trademarks of their respective owners.User Guide v10.02018 - 08Rev. A011 Introduction (4)Contact Dell ProSupport (4)2 Navigation (5)3 Encryption Status (7)4 Sign-in Access (8)Enroll Credentials for the First Time (8)Add, Modify, or View Enrollments (8)Password (9)Recovery Questions (10)Recovery Questions Already Enrolled (10)5 Glossary (12)Dell Data Security Console3ContentsIntroduction The Data Security Console provides access to applications that ensure security for all users of the computer, to view and manage encryption status of the computer's drives and partitions, and to easily enroll their PBA password and recovery questions.The following features are available:•Enroll credentials for use with PBA•T ake advantage of multi-factor credentials, including passwords and smart cards•Recover access to your computer if you forget your password without help desk calls or administrator assistance•Easily change your Windows password•Set personal preferences•View encryption statusData Security ConsoleTo open the Data Security Console, from the Desktop, double-click the Dell Data Security Console icon.You can access these applications:•Encryption Status allows you to view the encryption status of the computer's drives and partitions.•The Sign-In Access tool allows you to set up and manage PBA password, configure PBA self-recovery questions, and view the status of your credential enrollment.This guide describes how to use each of these applications.Be sure to periodically check /support for updated documentation.Contact Dell ProSupportCall 877-459-7304, extension 4310039 for 24x7 phone support for your Dell product.Additionally, online support for Dell products is available at /support. Online support includes drivers, manuals, technical advisories, FAQs, and emerging issues.Be sure to help us quickly connect you to the right technical expert by having your Service Tag or Express Service Code available when you call.For phone numbers outside of the United States, see Dell ProSupport International Phone Numbers.4Dell Data Security ConsoleIntroductionNavigation To access an application, click the appropriate tile.Title barTo return to the home page from within an application, click the back arrow in the left corner of the title bar, next to the name of the active application.To navigate directly to another application, click the down arrow next to the active application name, and select an application.5Dell Data Security ConsoleNavigationTo minimize, maximize, or close the Data Security Console, click the appropriate icon in the right corner of the title bar.To restore the Data Security Console after minimizing, double-click its notification area icon.To open Help, click the ? on the title bar.Data Security Console DetailsTo view details about the Data Security Console, policies, running services, and logs, click the gear icon on the left side of the title bar. This information might be necessary for an administrator to provide technical support.Select an item from the menu.Menu Item PurposeAbout Contains version information.Show Info Contains the following:•product version and date information•whether Dell Encryption and/or PBA advanced authentication is managed by the enterprise or by a local administrator•version numbers of the operating system, BIOS, motherboard, and Trusted Platform Module (TPM).MS Info Runs the Microsoft Windows System Information utility to display detailed information about the hardware, components, and software environment.Copy Info Copies all of the system information to the clipboard, to paste into an email for your administrator or Dell ProSupport.Feedback Displays a form where you can provide feedback to Dell about this product. (On non-domain computers, this option is always available. On domain computers, this option is determined by policy.)Policies Displays a hierarchy of policies that apply to this computer.Services Displays details about the services that are running.Support Connects to the Dell ProSupport website.Log Displays a detailed list of logged events, for troubleshooting.6Dell Data Security ConsoleNavigationEncryption Status The Encryption page displays the encryption status of the computer. If a disk, drive, or partition is not encrypted, its status reads Unprotected. A drive or partition that is encrypted shows the status Protected.To update encryption status, right-click the appropriate disk, drive, or partition, and select Refresh.7Dell Data Security ConsoleEncryption StatusSign-in Access Sign-in Access lets you enroll, modify, and check enrollment status, based on policy set by the administrator.After initial enrollment, you can click the Sign-in Access tile to add or modify credentials.NOTE: The Sign-in Access tile will display only if the PBA is active.Enroll Credentials for the First TimeTo enroll credentials for the first time:1 On the Data Security Console home page, click the Sign-In Access tile.2 On the Password page, to change your Windows password, enter the current password then enter and confirm a new password andclick Change.3 On the Recovery Question page, select and provide answers to three Recovery Questions then click Enroll.For more detailed information about enrolling a credential, or to change a credential, see Add, Modify, or View Enrollments. Add, Modify, or View EnrollmentsTo add, modify, or view enrollments, click the Sign-In Access tile.Tabs in the left pane list available Enrollments. This varies based on your platform or type of hardware.The Sign-in Access page displays supported credentials, their policy setting (Required or N/A), and their enrollment status. From this page, users can manage their enrollments, based on policy set by the administrator:•To enroll a credential for the first time, on the line with the credential, click Enroll.•T o delete an existing enrolled credential, click Delete.•If policy does not allow you to either enroll or modify your own credentials, the Enroll and Delete links on the Status page are inactive.•To change an existing enrollment, click the appropriate tab in the left pane.If policy does not allow enrollment or modification of a credential, a message displays on the credential's enrollment page, "Credentials modification is not allowed by policy."8Dell Data Security ConsoleSign-in AccessPasswordTo change your Windows password:1 Click the Password tab.2 Enter the current Windows password.3 Enter the new password and enter it again to confirm it, and click Change.Password changes are effective immediately.4 At the Successful Enrollment dialog, click OK.NOTE:You should only change your Windows password in the Data Security Console rather than in Windows. If the Windows password is changed outside of the Data Security Console, a password mismatch will occur, requiring a recovery operation.9Dell Data Security ConsoleSign-in AccessRecovery QuestionsThe Recovery Questions page allows you to create, delete, or change your recovery questions and answers. Recovery Questions provide a question and answer-based method for you to access your Windows accounts if, for example, the password is expired or forgotten.NOTE:Recovery questions are used to recover access to a computer only. The questions and answers cannot be used to log on.If you have no previous PBA recovery questions enrolled:1 Click the Recovery Questions tab.2 Select from a list of pre-defined questions and then enter and confirm the answers.3 Click Enroll.NOTE:Click Reset to clear the selections on this page and start over.Recovery Questions Already EnrolledIf PBA recovery questions have already been enrolled, you can either delete or re-enroll them.1 Click the Recovery Questions tab.2 Click the appropriate button:•T o remove the PBA recovery questions completely, click Delete.•To re-define PBA recovery questions and answers, click Re-enroll.10Dell Data Security ConsoleSign-in AccessDell Data Security Console11Sign-in Access5Glossary Credential - A credential is something that proves a person’s identity, such as their Windows password.Preboot Authentication (PBA) - Preboot Authentication serves as an extension of the BIOS or boot firmware and guarantees a secure, tamper-proof environment external to the operating system as a trusted authentication layer. The PBA prevents anything being read from the hard disk, such as the operating system, until the user has confirmed they have the correct credentials.Protected – For a self-encrypting drive (SED), a computer is protected once the SED has been activated and the Pre-boot-authentication (PBA) is deployed.Self-encrypting Drives (SEDs) - A hard drive that has a built-in encryption mechanism that encrypts all data stored on the media and decrypts all data leaving the media, automatically. This type of encryption is completely transparent to the user.Single Sign-On (SSO) - SSO simplifies the logon process when multi-factor authentication is enabled at both preboot and Windows logon. If enabled, authentication is required at preboot only, and users are automatically logged on to Windows. If not enabled, authentication may be required multiple times.Trusted Platform Module (TPM) - TPM is a security chip with three major functions: secure storage, measurement, and attestation. The Encryption client uses TPM for its secure storage function. The TPM can also provide encrypted containers for the software vault.12Dell Data Security ConsoleGlossary。
Dell Storage Center SC9000 Storage System Getting Started GuideRegulatory Model: E31SRegulatory Type: E31S001Notes, Cautions, and WarningsNOTE: A NOTE indicates important information that helps you make better use of your computer.CAUTION: A CAUTION indicates either potential damage to hardware or loss of data and tells you how to avoid the problem.WARNING: A WARNING indicates a potential for property damage, personal injury, or death.Copyright © 2015 Dell Inc. All rights reserved. This product is protected by U.S. and international copyright and intellectual property laws. Dell™ and the Dell logo are trademarks of Dell Inc. in the United States and/or other jurisdictions. All other marks and names mentioned herein may be trademarks of their respective companies.2015 - 10Rev. A00Setting Up the Storage SystemConsider the following best practices before setting up your SC9000 storage system.•Dell recommends that you use a dedicated SAN network for data transmission when using a Fibre Channel or iSCSI storage system.•Always configure redundant data paths to provide alternate paths to and from the host server should one of the data paths become disabled.•Before connecting any cables between the storage system and host server or expansion enclosure, physically label each port and connector.•Always follow proper power-up and power-down procedures when cycling power across the network. Verify that critical network components are on separate power circuits.NOTE: This product is intended for restricted access locations, such as a dedicated equipmentroom or equipment closet.WARNING: If installed in a closed or multi-unit rack assembly, the operating ambienttemperature of the rack environment may be greater than room ambient temperature. Therefore, consideration should be given to installing the equipment in an environment compatible with the maximum ambient temperature (Tma) specified by the manufacturer.Safety WarningsThe following information only applies to Fibre Channel storage systems.Laser Radiation for Fibre Channel Storage SystemsCAUTION: Class I laser radiation when open, avoid exposure to beam.WARNING: Laser radiation, avoid direct exposure to beam.The unit is certified in the U.S. to conform to the requirements of DHHS 21 CFR, chapter 1 Subchapter J for Class I (1) laser products, and elsewhere is certified as a Class I laser product conforming to the requirements of IEC 60825-1:2007.Class I laser products are not considered to be hazardous. The laser system and unit are designed so there is never any human access to laser radiation above a Class I level during normal operation, user maintenance or prescribed service condition.Locating Your Service TagYour storage system is identified by a unique Service Tag and Express Service Code.The Service Tag and Express Service Code are found on the front of the system by pulling out the information tag. Alternatively, the information may be on a sticker on the back of the storage system chassis. This information is used by Dell to route support calls to the appropriate personnel.3NOTE: The Quick Resource Locator (QRL) code on the information tag is unique to your system.Scan the QRL to get immediate access to your system information using your smart phone or tablet.Other Information You May NeedTo install the storage system, you may need the following additional information.NOTE: See the safety and regulatory information that shipped with your Storage Centercomponents. Warranty information is included as a separate document.•The Dell Storage Center System Manager Administrator's Guide describes how to use the Storage Center System Manager to manage a Storage Center.•The Dell Enterprise Manager Administrator’s Guide describes how to use Dell Enterprise Manager to manage multiple Storage Center systems.Installation and ConfigurationBefore you begin installation, make sure that the site where you plan to install the storage system has standard power from an independent source or a rack power distribution unit with a UPS.In addition, verify that there is space in the rack to install the storage system.Unpacking Storage Center EquipmentUnpack the storage system and identify the items in your shipment.Figure 1. SC9000 Storage System Components•Documentation•Storage system•Rack rails•Front bezel•Power and network cables (not shown)4Installing the SC9000 Storage System in a RackInstall the storage system and other Storage Center components in a rack.NOTE: Mount the storage system in a manner that allows for expansion in the rack and prevents the rack from becoming top‐heavy.Figure 2. Install the Storage System in a RackInstalling the Front BezelInstall the bezel on the front of the storage system.1.Hook the right end of the bezel onto the storage system.Figure 3. Front Bezel2.Insert the left end of the bezel into the securing slot until the release latch snaps into place.3.Secure the bezel with the keylock.Connecting the Power CablesConnect the power cables to the storage system.1.Before connecting the power cables, make sure that the power switches on the storage system arein the OFF position.2.Connect the power cables to the power supplies in the storage system chassis.5Figure 4. Power Cables3.Secure each power cable to the storage system chassis using the strain relief fasteners.4.Plug the other end of the power cables into a grounded electrical outlet or a separate power sourcesuch as an uninterrupted power supply (UPS) or a power distribution unit (PDU).NOM Information (Mexico Only)The following information is provided on the device described in this document in compliance with the requirements of the official Mexican standards (NOM):Importer:Dell Inc. de México, S.A. de C.VPaseo de la Reforma 2620-11 ° PisoCol. Lomas Atlas11950 México, D.F.Model number:E31SSupply voltage:100–240 VACFrequency:50/60 HzCurrent consumption:12 A–6.5 ATechnical Specifications6789Expanded operating temperature restrictions•Do not perform a cold startup below 5°C.•The operating temperature specified is for amaximum altitude of 3050 m (10,000 ft).•Redundant power supplies are required.•Peripheral cards that are not Dell-qualified arenot supported.•Peripheral cards greater than 25 W are notsupported.10。
Dell Storage Center Update Utility Administrator’s GuideNotes, Cautions, and WarningsNOTE: A NOTE indicates important information that helps you make better use of your computer.CAUTION: A CAUTION indicates either potential damage to hardware or loss of data and tells you how to avoid the problem.WARNING: A WARNING indicates a potential for property damage, personal injury, or death.Copyright © 2017 Dell Inc. or its subsidiaries. All rights reserved. Dell, EMC, and other trademarks are trademarks of Dell Inc. or its subsidiaries. Other trademarks may be trademarks of their respective owners.2017 - 04Rev. BContentsAbout This Guide (4)Revision History (4)Audience (4)Contacting Dell (4)1 Storage Center Update Utility (5)Application Overview (5)System Requirements (5)System Preparation (5)Download and Install the SCUU (5)Configure Dell SupportAssist Settings (5)Install the Storage Center Update Utility (6)Update Storage Center Software Using a Distro Directory (7)Update Storage Center Software Using a Distro File (8)3About This GuideThis guide describes how to update your storage system using the Storage Center Update Utility (SCUU).The SCUU is used to update Storage Centers that cannot connect to the Dell SupportAssist server. The SCUU updates the Storage Center Operating System and firmware on any storage system running software version 6.6.5 or later.Revision HistoryDocument Number: 680-118-002T able 1. Document Revision HistoryAudienceThe information provided in this guide is intended for users who cannot use the Dell SupportAssist functionality to perform Storage Center updates.CAUTION: Recovery of Storage Center software or system state is not possible without support assistance. Dellrecommends backing up the system before initiating any updates.Contacting DellDell provides several online and telephone-based support and service options. Availability varies by country and product, and some services might not be available in your area.T o contact Dell for sales, technical support, or customer service issues, go to /support.•For customized support, enter your system service tag on the support page and click Submit.•For general support, browse the product list on the support page and select your product.4Storage Center Update UtilityThe Storage Center Update Utility (SCUU) is a Windows application that provides updates to the Dell Storage Center Operating System on your storage system. The SCUU makes the Storage Center distribution or distro available to the Storage Center. The distro contains updates to the Storage Center Operating System and other Storage Center firmware.NOTE: Dell Storage Center OS Version 7 and later is managed using the Dell Storage Manager user interface. After using the Storage Center Update Utility to update the Storage Center OS, use Storage Manager to maintain the storage system. For more information, see the Dell Storage Manager Administrator’s Guide.Application OverviewReview the following guidelines before downloading and installing the Storage Center Update Utility (SCUU).System Requirements•The SCUU only supports updating software on storage systems running Storage Center Operating System version 6.6.5 or later.•The SCUU runs on Windows 7, 8, and 8.1; Windows Server 2008 R2, and Windows Server 2012 R2.•The SCUU requires .NET Framework version 4.5 or later.System PreparationThe inbound TCP port needs to be open to allow the SCUU to serve updates. Use either of the following methods to open the inbound TCP port:•Open the inbound TCP port in the Windows firewall. (The default port is 9005).•In the SCUU Preferences window, select Automatically configure Windows Firewall to allow port traffic.Download and Install the SCUU1.Download a copy of the SCUU and the update distro from the Dell support website at /support.2.Unzip the distro into a location accessible by the SCUU. Dell recommends the location: c:\Dell\SCUU3.Install the SCUU software in the default installation location according to the instructions in Install the Storage Center UpdateUtility.Configure Dell SupportAssist SettingsTo allow the SCUU to communicate with the Storage Center and serve updates, connect to the Storage Center using the Dell Storage Manager Client and configure the Dell SupportAssist settings.1.Click the Storage tab.2.In the Storage pane, select the Storage Center to modify.3.In the right pane, click Edit Settings. The Edit Storage Center Settings dialog box opens.4.Click the Dell SupportAssist tab.5.Click Turn Off SupportAssist.NOTE: The following options are only available when Dell SupportAssist is disabled.6.Under the Configure Update Utility for updating Storage Center text, select Enabled.7.In the Update Utility Host or IP Address field, enter the host name or IP address of the Storage Center Update Utility.8.In the Update Utility Port field, enter the port of the Storage Center Update Utility. The default port is 9005.9.Click OK.Storage Center Update Utility5For more information, see the Dell Storage Manager Administrator’s Guide.Install the Storage Center Update UtilityDownload the SCUU and a Storage Center update distro from the Dell support website at /support.PrerequisitesNOTE: Install the SCUU on a computer that is on the same network as the Storage Center that you want to update. For new Storage Center installations, install the SCUU software before running the storage system setup wizard.Steps1.T o start the installation, double-click the ScuuSetup-1.xx.xx.xx.exe file.2.If prompted, allow the installation program to install the SCUU.The SCUU is installed in the C:\Program Files (x86)\Dell\Storage Center Update Utility\ folder.The Preferences dialog box opens for new SCUU installations.Figure 1. Storage Center Update Utility Preferences Dialog BoxSpecify the following information in the Preferences dialog box:•IP address on which the SCUU listens for update requests. You can specify a specific address, or listen on all IP addresses.•Port through which the SCUU communicates.•Directory to store the logs.•Directory where the distros will be unzipped.3.(Optional) Select Validate upgrade distro after selection to have the SCUU validate each distro when it is opened in the mainSCUU window.NOTE: If Validate upgrade distro after selection is not selected, the distro is still validated when the upgrade service is started.4.(Option) Select Start serving distro for upgrade immediately after selection to have the SCUU start the hosting serviceautomatically after the selection of a distro.Next stepsNOTE: The firewall must be disabled on the inbound TCP port to allow the SCUU to provide updates to the Storage Center. T o disable the firewall to allow inbound TCP port traffic, select Automatically configure Windows Firewall to allow port traffic in the Preferences dialog box.6Storage Center Update UtilityUpdate Storage Center Software Using a Distro DirectoryUse these instructions to update Storage Center software using a distro directory.PrerequisitesCAUTION: Recovery of Storage Center software or system state is not possible without assistance from Dell T echnical Support. Dell recommends backing up the system before performing a Storage Center software update.Steps1.Start the SCUU.Figure 2. Storage Center Update Utility2.Click Distro Directory. The Browse For Folder dialog box opens.3.Select the folder that contains the distro.4.Click OK.If Validate upgrade distro after selection is selected in the Preferences dialog box, the SCUU displays a progress message on the main window while the distro is validated. If the distro is valid, the Start button turns green and the message Distro successfully validated appears in the Info pane.5.If Start serving distro for upgrade immediately after selection is selected in the Preferences dialog box, the hosting service isstarted automatically. If not, click Start.The SCUU hosts the update to the Storage Center, which allows the Storage Center to download the update.6.(Optional) If you want to stop the update service, click Stop.If any update sessions are in progress, a warning appears before the SCUU stops the update service.7.After starting the SCUU, use the Dell Storage Manager Client to check for updates.a.Connect directly to the Storage Center or connect to a Data Collector and select the Storage Center to update from theStorage pane.b.In the right pane, select Actions → System → Check for Update.For more information about using Storage Manager, see the Dell Storage Manager Administrator’s Guide.Storage Center Update Utility7Update Storage Center Software Using a Distro FileUse these instructions to update Storage Center software using a distro ZIP file.PrerequisitesCAUTION: Recovery of Storage Center software or system state is not possible without assistance from Dell T echnical Support. Dell recommends backing up the system before performing a Storage Center software update.Steps1.Start the SCUU.Figure 3. Storage Center Update Utility2.Click Distro File.3.Locate and select the distro ZIP file, and then click Open.The SCUU performs the following actions:•SCUU extracts the ZIP file to the directory specified in the Preferences dialog box.•SCUU opens the distro.•If Validate upgrade distro after selection is selected in the Preferences dialog box, the SCUU displays a progress message on the main window while the distro is validated. If the distro is valid, the Start button turns green and the messageDistro successfully validated appears in the Info pane.4.If Start serving distro for upgrade immediately after selection is selected in the Preferences dialog box, the hosting service isstarted automatically. If not, click Start.SCUU now responds to update requests from Storage Centers.5.(Optional) T o stop the update service, click Stop.If any update sessions are in progress, a warning appears before the SCUU stops the update service.6.After starting the SCUU, use the Dell Storage Manager Client to check for updates.a.Select a Storage Center from the Storage view. (Data CollectorData Collector connected Dell Storage Client only)b.In the right pane, select Actions → System → Check for Update.For more information about using Storage Manager, see the Dell Storage Manager Administrator’s Guide.8Storage Center Update Utility。