飞利浦剃须刀RQ1290 RQ1280 RQ1260 RQ1250的中文说明书(1)
- 格式:ppt
- 大小:1.01 MB
- 文档页数:15
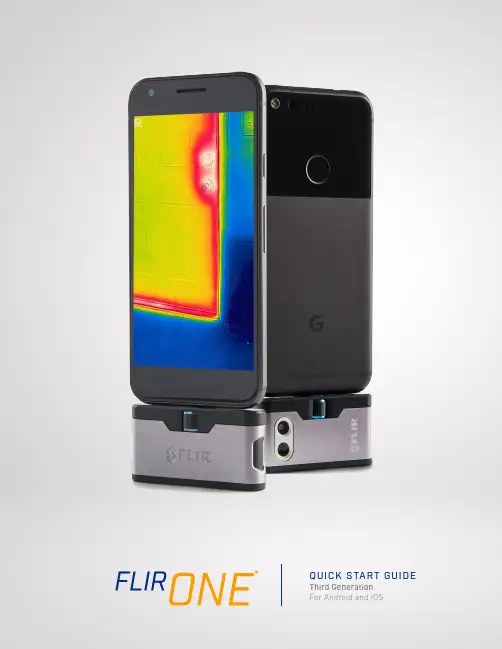
QUICK START GUIDE Third GenerationFor Android and iOSQUICK START GUIDE 2FLIR ONE QUICK START GUIDE STEP 1Charge the FLIR ONE with the included USB-C power cableconnected to a 1A power source. The Charge Indicator LED next to the USB-C connection blinks on and off while the FLIR ONE is charging and stays on continuously when it is fully charged. It will take about an hour to completely charge your FLIR ONE. Ensure the FLIR ONE is fully charged before using it the first time.Note: The power cable for the iPhone (with a Lightning connector) will not work to charge the FLIR ONE iOS model.STEP 2 Download and install the FLIR ONE app, which is available on the Apple App Store and Google Play Store. When you start the FLIR ONE app, the first-time User Guide will help you get started with the FLIR ONE.STEP 3Press the power button on the bottom of the FLIR ONE to turn it on. The indicator light will turn orange. It will flash green when the device is ready. If needed, adjust the blue dial of the OneFit™ and extend the connector to the appropriate length to fit through your smartphone’s protective case. Connect the FLIR ONE to your smart phone and start the FLIR ONE app. You will be asked to create a user account with your email address and a password.STEP 4Check out the app’s Home screen to access your gallery, get the latest Tips & Tricks for using your FLIR ONE, share your photos and videos with the FLIR ONE community, and stay up to date with allthe latest news and promotions from FLIR.3STEP 5Explore all the Camera features on the FLIR ONE.COLOR PALETTES • Tap on the Features icon in the bottom right of the screen • Choose between 9 different color palettesSPOT METER • Tap on the Spot Meter icon in the top left corner to get exact temperature measurement on the center of the screen TIMER • Set a timer for 3 or 5 secondsCHANGE CAMERA MODES• Select Video, Photo or Time Lapse MSX® PARALLAX • The image that displays in the app is a combination of a thermal image and a visible-light image through a unique process called FLIR MSX. The FLIR ONE thermal camera can produce an image even in total darkness. When visible light is available, the FLIR ONEvisible-light camera is used to enhance the detail of the FLIR ONE thermal camera.•When looking at an image up close or far away, you can adjust theMSX alignment for the object to align the thermal and visible-light images. Tap on the features button on the bottom right corner, tap MSX Distance, and adjust as needed.MODE SCREEN MSX DISTANCE SLIDER ALIGNEDWARNING The FLIR ONE and FLIR ONE Pro are not waterproof. Use caution if the FLIR ONE or FLIR ONE Pro are used to observe very hot objects like fire or molten metal.。
SW7700™ Lucas lm Ltd.English 6简体中文 25IntroductionCongratulations on your purchase and welcome to Philips! To fully benefit from the support that Philips offers, register your product at/welcome .Please read this user manual, as it contains information about the features of this shaver as well as some tips to make shaving easier and more enjoyable.General description (Fig. 1)1Shaving unit with hair chamber2On/off button3Replacement reminder4Cleaning reminder5Travel lock symbol6Unplug for use symbol7Battery status indicator8Socket for small plug9Click-on precision trimmer attachment 10Supply unit11Small plug12PouchImportant safety informationRead this important information carefully before you use the appliance and its accessories and save it for future reference. The accessories supplied may vary for different products.6EnglishDanger-Keep the supply unit dry.Warning -To charge the battery, only use the detachable supply unit (HQ8505) provided with theappliance.-The supply unit contains a transformer. Do not cut off the supply unit to replace it with another plug, as this causes a hazardous situation.-This appliance can be used by children aged from 8 years and above and persons withreduced physical, sensory or mental capabilities or lack of experience and knowledge if they have been given supervision or instruction concerning use of the appliance in a safe way and understand the hazards involved. Children shall not play with the appliance. Cleaning and user maintenance shall not be made bychildren without supervision.-Always unplug the shaver before you clean it under the tap.-Always check the appliance before you use it.Do not use the appliance if it is damaged, as this may cause injury. Always replace adamaged part with one of the original type.-Do not open the appliance to replace the rechargeable battery.7EnglishCaution-Never immerse the cleaning system or the charging stand in water and do not rinse it under the tap.-Never use water hotter than 60°C to rinse the shaver.-Only use this appliance for its intended purpose as shown in the user manual.-For hygienic reasons, the appliance should only be used by one person.-Never use compressed air, scouring pads,abrasive cleaning agents or aggressive liquids such as petrol or acetone to clean theappliance.-If your shaver comes with a cleaning system,always use the original Philips cleaning fluid (cartridge or bottle, depending on the type of cleaning system).-Always place the cleaning system on a stable,level and horizontal surface to prevent leakage.-If your cleaning system uses a cleaning cartridge, always make sure the cartridge compartment is closed before you use the cleaning system to clean or charge the shaver.-When the cleaning system is ready for use, do not move it to prevent leakage of cleaning fluid.-Water may drip from the socket at the bottom of the shaver when you rinse it. This is normal and not dangerous because all electronics are enclosed in a sealed power unit inside the shaver.-Do not use the supply unit in or near wallsockets that contain an electric air freshener to prevent irreparable damage to the supply unit.8EnglishElectromagnetic fields (EMF)-This Philips appliance complies with allapplicable standards and regulations regarding exposure to electromagnetic fields.General-This shaver is waterproof. It is suitable for use in the bath or shower and for cleaning under the tap. For safety reasons, the shaver cantherefore only be used without cord.-The supply unit is suitable for mains voltages ranging from 100 to 240 volts.-The supply unit transforms 100-240 volts to a safe low voltage of less than 24 volts.When you press the on/off button for the very first time, all display indications light up in sequence.Charge the shaver before use.Quick charge: When the battery is empty and you connect the shaver to a wall socket, the lights of the battery status indicator light up white one after the other repeatedly. When the battery contains enough energy for one shave, the bottom light of the battery status indicator starts flashing white slowly.9EnglishWhile the shaver continues to charge, first thebottom light of the battery status indicator flasheswhite and then lights up white continuously. Thenthe second light flashes and lights upcontinuously, and so on until the shaver is fullycharged.Battery fully chargedNote: This shaver can only be used without a cord.When the battery is fully charged, all lights of thethe battery status indicator light up whitecontinuously.Note: When you press the on/off button during orafter charging, the 'unplug for use' symbol lights upto indicate that the shaver is still connected to thewall socket.Note: When the battery is full, the display switchesoff automatically after 30 minutes.Battery lowWhen the battery is almost empty, the bottom lightof the battery status indicator flashes orange.Remaining battery chargeThe remaining battery charge is shown by thelights of the battery charge indicator that light upcontinuously.10EnglishClean the shaver after every shave for optimal performance (see 'Cleaning and maintenance'). When you switch off the shaver, the cleaning reminder flashes to remind you to clean the shaver.You can lock the shaver when you are going to travel. The travel lock prevents the shaver from being switched on by accident (see 'Activating the travel lock').For maximum shaving performance, replace the shaving heads every two years. The shaver is equipped with a replacement reminder which reminds you to replace the shaving heads. The replacement reminder flashes to indicate that you have to replace the shaving heads (see 'Replacing the shaving heads').Note: After replacing the shaving heads, you need to reset the replacement reminder by pressing theon/off button for 7 seconds.ChargingCharge the shaver before you use it for the firsttime and when the display indicates that thebattery is almost empty.Charging takes approx. 1 hour. A fully chargedshaver has a shaving time of up to 60 minutes.Note: You cannot use the shaver while it ischarging.Charging with the supply unit1Make sure the shaver is switched off.2Put the small plug in the shaver and put thesupply unit in the wall socket.The display of the shaver indicates that theshaver is charging.3After charging, remove the supply unit from thewall socket and pull the small plug out of theshaver.in the bath or shower.-Use this shaver for its intended household useas described in this manual.-For hygienic reasons, the shaver should only beused by one person.-Trimming is easier when the skin and hair aredry.Note: This shaver can only be used without a cord.1To switch the shaver on or off, press the on/off button once.The replacement symbol lights up continuously when the shaver is switched on.Skin adaptation periodYour first shaves may not bring you the result you expect and your skin may even become slightly irritated. This is normal. Your skin and beard need time to adapt to any new shaving system. To allow your skin to adapt to this new appliance, we advise you to shave regularly (at least 3 times a week) and exclusively with this appliance for a period of 3 weeks.For the best results on skin comfort, pre-trim your beard if you have not shaved for 3 days or longer. Dry shaving1Switch the shaver on.2Move the shaving heads over your skin in circular movements to catch all hairs growing in different directions. Exert gentle pressure for a close, comfortable shave.Note: Do not press too hard, this can cause skin irritation.3Switch off and clean the shaver after each use.The display lights up for a few seconds to show the battery status.Wet shavingFor a more comfortable shave, you can also use this shaver on a wet face with shaving foam or shaving gel.1Apply some water to your skin.2Apply shaving foam or shaving gel to your skin. 3Rinse the shaving unit under the tap to ensure that the shaving unit glides smoothly over your skin.4Switch the shaver on.5Move the shaving heads over your skin in circular movements to catch all hairs growing in different directions. Exert gentle pressure for a close, comfortable shave.Note: Do not press too hard, this can cause skin irritation.Note: Rinse the shaving unit regularly to ensure that it continues to glide smoothly over yourskin.6Dry your face.7Switch off the shaver and clean it after eachuse.Note: Make sure that you rinse all foam or shavinggel off the shaver.Using the click-on attachmentRemoving or attaching the click-on attachment1Make sure the shaver is switched off.3Hold the trimmer perpendicular to the skin and move it downwards while exerting gentlepressure.4Switch off and clean the trimmer after use.You can lock the shaver when you are going to travel. The travel lock prevents the shaver from being switched on by accident.1Press the on/off button for 3 seconds to enter the travel lock mode.While you activate the travel lock, theindications on the display light up briefly. When the travel lock is activated, the travel locksymbol flashes.1Press the on/off button for 3 seconds.While you deactivate the travel lock, the indications on the display light up briefly. When the travel lock is deactivated, the travel lock symbol flashes and goes out. The shaver switches on and is now ready for use again.Note: The shaver unlocks automatically when it is connected to wall socket.Cleaning and maintenance-Regular cleaning guarantees better shavingresults.-Never clean, remove or replace the shaving unitwhile the shaver is switched on.-Do not apply pressure to shaving head combs.-Do not touch shaving heads with hard objectsas this may dent or damage the precision-madeslotted combs.-Do not use abrasives, scourers or aggressiveliquids such as gasoline or acetone to clean theshaver.Cleaning the shaver under the tapClean the shaver after every shave for optimal5Rinse the shaving head holder under a warm tap.6Carefully shake off excess water and let the shaving head holder air dry completely.7Attach the shaving head holder to the bottompart of the shaving unit (‘click’).Clean the trimmer after each use.1Switch the shaver on.2Rinse the trimmer under a warm tap.3After cleaning, switch off the shaver.4Carefully shake off excess water and let the attachment air dry completely.Tip: For optimal performance, lubricate theteeth of the attachment with a drop of sewingmachine oil regularly.ReplacementReplacing the shaving headsSwitch the shaver off.Pull the shaving head holder off the bottompart of the shaving unit.Turn the retaining ring anticlockwise and lift itoff the shaving head.Repeat this process for the other retaining rings.Place them aside in a safe place.Remove the shaving heads from the shavinghead holder.Discard the used shaving heads immediately toavoid mixing them with the new shaving heads.8To reset the replacement reminder, press and hold the on/off button for approx. 7 seconds.Store the shaver in the pouch.Note: Always let the shaver dry before you store itin the pouch.Ordering accessoriesTo buy accessories or spare parts, visit/service or go to yourPhilips dealer. You can also contact the PhilipsConsumer Care Center in your country (see theinternational warranty leaflet for contact details).The following accessories are available:-SH70 Philips shaving heads-RQ111 Philips beard styler-RQ585 Philips cleansing brush-RQ560, RQ563 Philips cleansing brush heads-HQ8505 supply unitNote: The availability of the accessories may differby country.Recycling-Do not throw away the product with the normalhousehold waste at the end of its life, but handit in at an official collection point for recycling.By doing this, you help to preserve theenvironment.21English-This product contains a built-in rechargeablebattery which shall not be disposed of withnormal household waste. We strongly adviseyou to take your product to an official collectionpoint or a Philips service centre to have aprofessional remove the rechargeable battery.-Follow your country’s rules for the separatecollection of electrical and electronic productsand rechargeable batteries. Correct disposalhelps prevent negative consequences for theenvironment and human health.Removing the rechargeable shaver batteryfront and back panel in the bottom of theappliance. Remove the back panel.2Remove the front panel.3Unscrew the two screws at the top of the inner panel and remove the inner panel.4Remove the rechargeable battery with ascrewdriver.22EnglishWarranty and supportIf you need information or support, please visit/support or read theinternational warranty leaflet.Warranty restrictionsThe shaving heads (cutters and guards) are notcovered by the terms of the international warrantybecause they are subject to wear. TroubleshootingShaverProblem Possible cause SolutionThe appliance does not work when I press the on/off button.The appliance is stillattached to the wallsocket. For safetyreasons, theappliance can onlybe used withoutcord.Unplug the appliance andpress the on/off button toswitch on the appliance.The rechargeablebattery is empty.Recharge the battery.The travel lock isactivated.Press the on/off button for3 seconds to deactivate thetravel lock.The shaving unit issoiled or damagedto such an extentthat the motorcannot run.Clean the shaving headsthoroughly or replacethem. Also see 'Hairs or dirtobstruct the shaving heads'for a detailed description ofhow to clean the shavingheads thoroughly.The appliance does not shave as well as it used to.The shaving headsare damaged orworn.Replace the shaving heads.23EnglishProblem Possible cause SolutionHairs or dirt obstruct the shaving heads.Clean the shaving heads in the regular way or clean them thoroughly.To clean the shaving heads thoroughly, remove the shaving heads from the shaving head holder one by one (see 'Replacement'). Then separate the cutter from its guard and rinse each matching set under the tap.After rinsing, place the cutter back into its corresponding guard.Finally, put the shaving heads back into the shaving head holder (see 'Replacement').I replaced the shaving heads,but the replacement reminder is still showing.You have not resetthe replacement reminder.To reset the replacement reminder, press and hold the on/off button for approx. 7 seconds.Water is leaking from the bottom of the appliance.During cleaning,water may collect between the inner body and the outer shell of the appliance.This is normal and not dangerous because allelectronics are enclosed in a sealed power unit inside the appliance.24English介绍感谢您的惠顾,欢迎光临飞利浦! 为了让您能充分享受飞利浦提供的支持,请在 /welcome 上注册您的产品。
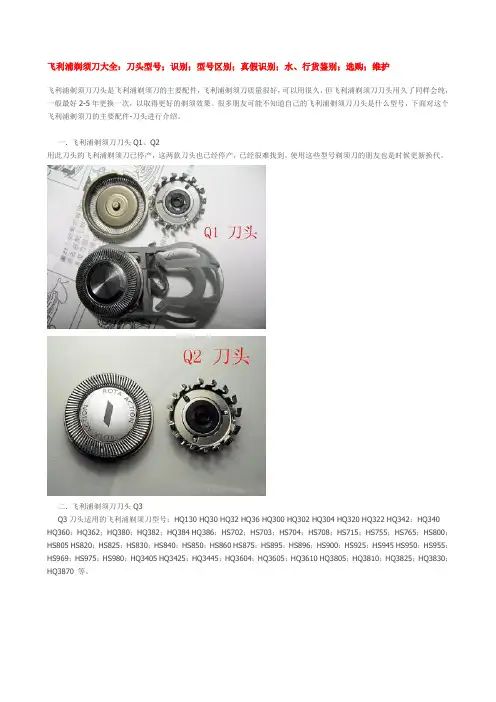
飞利浦剃须刀大全:刀头型号;识别;型号区别;真假识别;水、行货鉴别;选购;维护飞利浦剃须刀刀头是飞利浦剃须刀的主要配件,飞利浦剃须刀质量很好,可以用很久,但飞利浦剃须刀刀头用久了同样会纯,一般最好2-5年更换一次,以取得更好的剃须效果。
很多朋友可能不知道自己的飞利浦剃须刀刀头是什么型号,下面对这个飞利浦剃须刀的主要配件-刀头进行介绍。
一. 飞利浦剃须刀刀头Q1、Q2用此刀头的飞利浦剃须刀已停产,这两款刀头也已经停产,已经很难找到。
使用这些型号剃须刀的朋友也是时候更新换代。
二. 飞利浦剃须刀刀头Q3Q3刀头适用的飞利浦剃须刀型号:HQ130 HQ30 HQ32 HQ36 HQ300 HQ302 HQ304 HQ320 HQ322 HQ342;HQ340 HQ360;HQ362;HQ380;HQ382;HQ384 HQ386;HS702;HS703;HS704;HS708;HS715;HS755;HS765;HS800;HS805 HS820;HS825;HS830;HS840;HS850;HS860 HS875;HS895;HS896;HS900;HS925;HS945 HS950;HS955;HS969;HS975;HS980;HQ3405 HQ3425;HQ3445;HQ3604;HQ3605;HQ3610 HQ3805;HQ3810;HQ3825;HQ3830;HQ3870 等。
现在使用Q3刀头的飞利浦剃须刀是:HQ130。
三. 飞利浦剃须刀刀头Q4Q4刀头适用的飞利浦剃须刀型号:HQ40 HQ41 HQ42 HQ46 HQ402 HQ406 HQ420 HQ422 HQ460 HQ481 HQ489 HS190 HQ801 HQ802 HQ803 HQ804;HQ851;HQ852;HQ853等。
现在使用Q4刀头的飞利浦剃须刀是:HQ40;HQ46;HQ460;HQ481;HS190;HQ801;HQ802;HQ803;HQ804;HQ851;HQ852;HQ853。
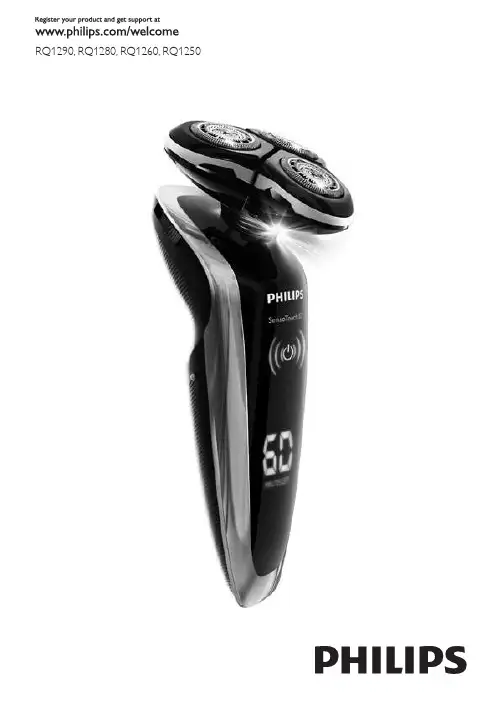
RQ1290,RQ1280,RQ1260,RQ125023感谢您的惠顾,欢迎光临飞利浦!为了您能充分享受飞利浦提供的支持,请在 /welcome 上注册您的产品。
请阅读本用户手册,手册包含有关此剃须刀各种功能的信息以及一些使用技巧,让您的剃须体验更轻松更舒适。
一般说明 (图 1)A 剃须刀 (RQ1290/RQ1280/RQ1260/RQ1250)1 修剪器2 修发器开/关滑块3 剃须刀头部件4 保护盖5 剃须刀6 剃须刀开/关按钮7 显示B 充电器C Jet Clean 高效能清洁系统 (RQ1008/RQ1007)(仅限于特定型号)1 剃须刀支架2 “清洗仓已空”符号3 清洁符号4 干燥符号5 Jet Clean 高效能清洁系统开/关按钮(仅限于 RQ1008:以及用于选择程序的向上/向下按钮)6 清洗仓释放按钮D 清洁刷E 清洁液F 精美软袋G 适配器重要信息使用本产品之前,请仔细阅读本使用说明书,并妥善保管以备日后参考。
注意: 在本使用说明书中,术语“产品”指剃须刀和 Jet Clean 高效能清洁系统。
如果您的剃须刀不随附 Jet Clean 高效能清洁系统,则它专指剃须刀。
概述危险-确保电源适配器干燥。
(图 2)警告-电源适配器内含有一个变压器。
切勿将其剪断,而用另一个插头代替,否则将导致严重后果。
-本产品不打算由肢体不健全、感觉或精神上有障碍或缺乏相关经验和知识的人(包括儿童)使用,除非有负责他们安全的人员对他们使用这些产品进行监督或指导。
-应照看好儿童,确保他们不会玩耍这些产品。
-清洁产品时要小心使用热水。
切记先检查水温是否太高,以防手被烫伤。
警告-切勿将 Jet Clean 高效能清洁系统和充电器浸入水中,也不要放在水龙头下冲洗。
-产品和附件不可用洗碗机清洗。
-一定要在抗有机溶剂腐蚀的表面上放置和使用本产品。
-必须在 5 摄氏度至 35 摄氏度之间的温度下使用、存放和为本产品充电。
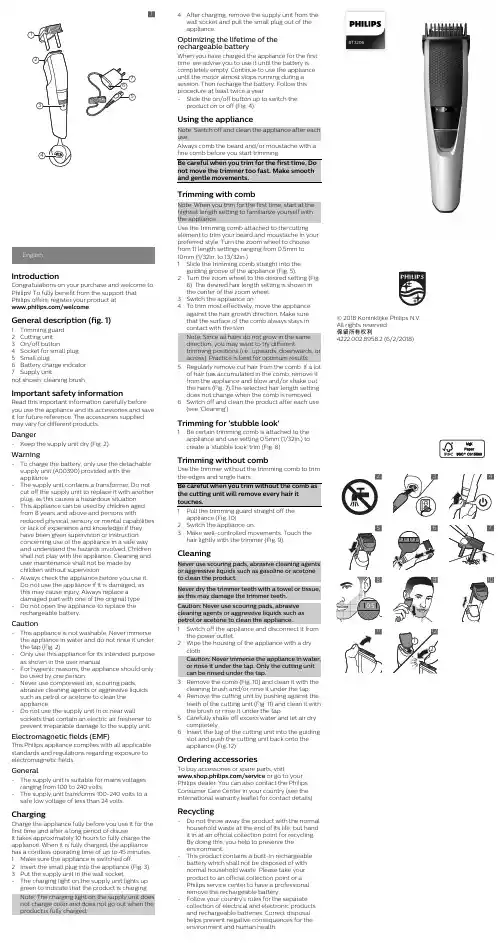
EnglishIntroductionCongratulations on your purchase and welcome to Philips! To fully benefit from the support that Philips offers, register your product at/welcome.General description (fig. 1)1Trimming guard2Cutting unit3On/off button4Socket for small plug5Small plug6Battery charge indcator7Supply unitnot shown: cleaning brushImportant safety informationRead this important information carefully before you use the appliance and its accessories and save it for future reference. The accessories supplied may vary for different products.Danger-Keep the supply unit dry (Fig. 2).Warning-To charge the battery, only use the detachable supply unit (A00390) provided with theappliance.-The supply unit contains a transformer. Do not cut off the supply unit to replace it with another plug, as this causes a hazardous situation.-This appliance can be used by children aged from 8 years and above and persons withreduced physical, sensory or mental capabilities or lack of experience and knowledge if theyhave been given supervision or instructionconcerning use of the appliance in a safe wayand understand the hazards involved. Children shall not play with the appliance. Cleaning and user maintenance shall not be made bychildren without supervision.-Always check the appliance before you use it.Do not use the appliance if it is damaged, asthis may cause injury. Always replace adamaged part with one of the original type.-Do not open the appliance to replace the rechargeable battery.Caution-This appliance is not washable. Never immerse the appliance in water and do not rinse it under the tap (Fig. 2).-Only use this appliance for its intended purpose as shown in the user manual.-For hygienic reasons, the appliance should only be used by one person.-Never use compressed air, scouring pads, abrasive cleaning agents or aggressive liquidssuch as petrol or acetone to clean theappliance.-Do not use the supply unit in or near wall sockets that contain an electric air freshener to prevent irreparable damage to the supply unit. Electromagnetic fields (EMF)This Philips appliance complies with all applicable standards and regulations regarding exposure to electromagnetic fields.General-The supply unit is suitable for mains voltages ranging from 100 to 240 volts.-The supply unit transforms 100-240 volts to a safe low voltage of less than 24 volts. ChargingCharge the appliance fully before you use it for the first time and after a long period of disuse.It takes approximately 10 hours to fully charge the appliance. When it is fully charged, the appliance has a cordless operating time of up to 45 minutes. 1Make sure the appliance is switched off.2Insert the small plug into the appliance (Fig. 3). 3Put the supply unit in the wall socket.-The charging light on the supply unit lights up green to indicate that the product is charging.Note: The charging light on the supply unit does not change color and does not go out when the product is fully charged.from 11 length settings ranging from 0.5mm to10mm (1/32in. to 13/32in.).1Slide the trimming comb straight into theguiding groove of the appliance (Fig. 5).2Turn the zoom wheel to the desired setting (Fig.6). The desired hair length setting is shown inthe center of the zoom wheel.3Switch the appliance on.4To trim most effectively, move the applianceagainst the hair growth direction. Make surethat the surface of the comb always stays inthe brush or rinse it under the tap.5Carefully shake off excess water and let air drycompletely.6Insert the lug of the cutting unit into the guidingslot and push the cutting unit back onto theappliance (Fig. 12).Ordering accessoriesTo buy accessories or spare parts, visit/service or go to yourPhilips dealer. You can also contact the PhilipsConsumer Care Center in your country (see theinternational warranty leaflet for contact details).Recycling-Do not throw away the product with the normalhousehold waste at the end of its life, but handit in at an official collection point for recycling.By doing this, you help to preserve theenvironment.-This product contains a built-in rechargeablebattery which shall not be disposed of withnormal household waste. Please take yourproduct to an official collection point or aPhilips service center to have a professionalremove the rechargeable battery.-Follow your country’s rules for the separatecollection of electrical and electronic productsand rechargeable batteries. Correct disposalhelps prevent negative consequences for theenvironment and human health.BT3206© 2018 Koninklijke Philips N.V.All rights reserved选择,长度范围在 0.5 毫米到 10 毫米(1/32 英寸到13/32 英寸)之间。

![PHLIPS 飞利浦 [ 睿锋 ] 系列电动剃须刀 说明书](https://uimg.taocdn.com/9b84b571a5e9856a57126017.webp)
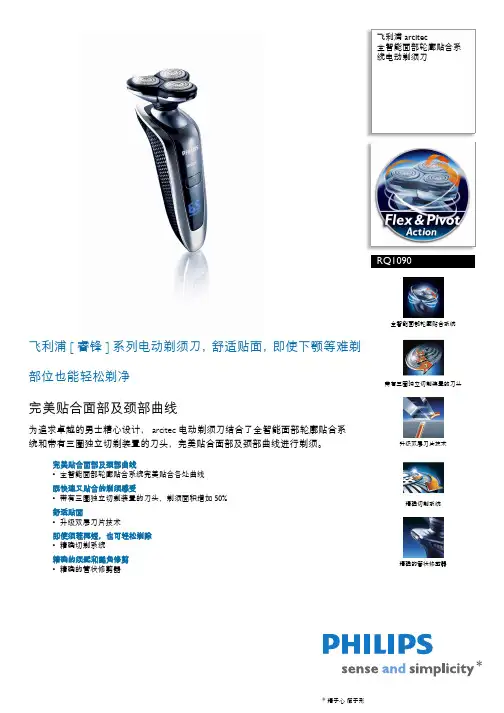
飞利浦 arcitec全智能面部轮廓贴合系统电动剃须刀具有 Jet Clean 高效能清洁系统RQ1085飞利浦[睿锋]系列电动剃须刀,舒适贴面,即使下颚等难剃部位也能轻松剃净完美贴合面部及颈部曲线为追求卓越的男士精心设计,arcitec 电动剃须刀结合了全智能面部轮廓贴合系统和带有三圈独立切剃装置的刀头,完美贴合面部及颈部曲线进行剃须。
完美贴合面部及颈部曲线•全智能面部轮廓贴合系统完美贴合各处曲线既快速又贴面的剃须感受•带有三圈独立切剃装置的刀头,剃须面积增加 50%舒适贴面•升级双层刀片技术即使须茬再短,也可轻松剃除•精确切剃系统精确的须髭和鬓角修剪•精确的管状修剪器*精于心 简于形发行日期 2011-07-12版本: 4.0.112 NC: 0000 000 00000© 2011 Koninklijke Philips Electronics N.V.保留所有权利。
规格如有更改,恕不另行通知。
所有商标是Koninklijke Philips Electronics N.V. 或它们各自所有者的财产。
产品亮点RQ1085/21全智能面部轮廓贴合系统电动剃须刀具有 Jet Clean 高效能清洁系统规格全智能面部轮廓贴合系统剃须刀头部件上的三个独立浮动刀头可以全方位进行旋转。
这种独特的组合确保了在曲线部位依然完全贴合皮肤,轻松捕捉即使最细的颈部毛发。
带有三圈独立切剃装置的刀头与普通的单圈切剃旋转剃须刀头相比,带有三圈独立切剃装置的刀头增加了 50% 的剃须面积。
升级双层刀片技术双层刀片将胡须轻轻提起,然后舒适地从须根处剃除。
精确切剃系统超薄刀头上的狭缝用于剃除较长的胡须,圆孔则能捕捉及剃除较短的须茬。
精确的管状修剪器独特的管状修剪器技术具备出色的精确性和可操作性。
完美贴合面部轮廓,尤其适合修剪须髭和鬓脚。
水洗设计剃须刀具有防水设计,可在自来水龙头下轻松冲洗。
剃须性能•剃须系统: 带有三圈独立切剃装置的刀头, 精确切剃系统, 升级双层刀片技术•面部轮廓跟踪: 全智能面部轮廓贴合系统, 旋转式剃须刀头部件•美发造型: 呵护皮肤的精确修发器轻松使用•显示屏: 电池电量指示灯, 充电指示灯, 更换刀头提示灯, 旅行锁•充电: 充电式设计, 快速充电•充电: 1小时•剃须时间: 21 天•清洁: 自动清洁系统, 水洗设计, 清洁指示灯设计•表面处理: 镜面涂料的显示屏附件•桌架: Power pod 充电储藏盒, 高效能清洁器•维护: 清洁刷, 保护盖。


飞利浦剃须⼑⼤全:⼑头型号识别型号区别真假识别鉴别选购维护飞利浦剃须⼑⼤全:⼑头型号;识别;型号区别;真假识别;⽔、⾏货鉴别;选购;维护飞利浦剃须⼑⼑头是飞利浦剃须⼑的主要配件,飞利浦剃须⼑质量很好,可以⽤很久,但飞利浦剃须⼑⼑头⽤久了同样会纯,⼀般最好2-5年更换⼀次,以取得更好的剃须效果。
很多朋友可能不知道⾃⼰的飞利浦剃须⼑⼑头是什么型号,下⾯对这个飞利浦剃须⼑的主要配件-⼑头进⾏介绍。
⼀. 飞利浦剃须⼑⼑头Q1、Q2⽤此⼑头的飞利浦剃须⼑已停产,这两款⼑头也已经停产,已经很难找到。
使⽤这些型号剃须⼑的朋友也是时候更新换代。
⼆. 飞利浦剃须⼑⼑头Q3Q3⼑头适⽤的飞利浦剃须⼑型号:HQ130 HQ30 HQ32 HQ36 HQ300 HQ302 HQ304 HQ320 HQ322 HQ342;HQ340HQ360;HQ362;HQ380;HQ382;HQ384 HQ386;HS702;HS703;HS704;HS708;HS715;HS755;HS765;HS800;HS805 HS820;HS825;HS830;HS840;HS850;HS860 HS875;HS895;HS896;HS900;HS925;HS945 HS950;HS955;HS969;HS975;HS980;HQ3405 HQ3425;HQ3445;HQ3604;HQ3605;HQ3610HQ3805;HQ3810;HQ3825;HQ3830;HQ3870 等。
现在使⽤Q3⼑头的飞利浦剃须⼑是:HQ130。
三. 飞利浦剃须⼑⼑头Q4Q4⼑头适⽤的飞利浦剃须⼑型号:HQ40 HQ41 HQ42 HQ46 HQ402 HQ406 HQ420 HQ422 HQ460 HQ481 HQ489 HS190 HQ801 HQ802 HQ803 HQ804;HQ851;HQ852;HQ853等。
现在使⽤Q4⼑头的飞利浦剃须⼑是:HQ40;HQ46;HQ460;HQ481;HS190;HQ801;HQ802;HQ803;HQ804;HQ851;HQ852;HQ853。
S7980English 6简体中文 35IntroductionCongratulations on your purchase and welcome to Philips! To fully benefit from the support that Philips offers, register your product at/welcome or via the SkinAnalyst app.Introducing Philips’ first ever complete shaving and skincare system. Assess and measure thecondition of your skin, personalize your FaceSmart shaving and cleansing settings, and best of all,receive daily skincare advice tailored to you.General description (Fig. 1)1Protection cap for cleansing brush2Cleansing brush3Cleansing brush base4Shaving unit5On/off button6Handle7Socket for small plug8SkinAnalyst sensor9Notification symbol10Shaving unit detector11Cleansing brush detector12Cleaning reminder13Bluetooth® symbol14Travel lock symbol15Battery charge indicator16Pouch17Supply unit (adapter)6EnglishRead this important information carefully before you use the shaver, the Skinanalyst sensor and save it for future reference. The accessories supplied may vary for different products.Danger-Keep the supply unit dry.Warning -To charge the battery, only use the detachable supply unit (type HQ8505) provided with the shaver.-The supply unit contains a transformer. Do not cut off the supply unit to replace it with another plug, as this causes a hazardous situation.-The shaver and SkinAnalyst sensor can be used by children aged from 8 years and above and persons with reduced physical, sensory or mental capabilities or lack of experience and knowledge if they have been given supervision or instruction concerning use of bothappliances in a safe way and understand the hazards involved. Children shall not play with the shaver. Cleaning and user maintenance shall not be made by children without supervision.-Always unplug the shaver before you clean it under the tap.-Always check the shaver and SkinAnalyst sensor before you use it. Do not use it if it is damaged, as this may cause injury. Always replace a damaged part with one of the original type.7English-Do not open the shaver to replace the rechargeable battery.Caution -Never use water hotter than 80°C to rinse the shaver.-Never rinse the SkinAnalyst sensor under the tap.-Only use the shaver and the SkinAnalyst sensor for its intended purpose as shown in the user manual.-For hygienic reasons, the shaver should only be used by one person.-Never use compressed air, scouring pads,abrasive cleaning agents or aggressive liquids such as petrol or acetone to clean the shaver.-Water may drip from the socket at the bottom of the shaver when you rinse it. This is normal and not dangerous because all electronics are enclosed in a sealed power unit inside the shaver.-Do not use the supply unit in or near wallsockets that contain an electric air freshener to prevent irreparable damage to the supply unit.-Keep your iPhone away from water and moist environments.-The shortwave radio frequency signals of a Bluetooth shaver may impair the operation of other electronic and medical devices.8English-Do not use the shaver in medical facilities,aircraft, refuelling points, close to automatic doors, automatic fire alarms or otherautomatically controlled devices.-Switch off Bluetooth where it is prohibited.-Keep this shaver at least 20 cm frompacemakers and other medical devices. Radio waves may impair the operation of pacemakers and other medical devices.Electromagnetic fields (EMF)-This Philips shaver complies with all shaver standards and regulations regarding exposure to electromagnetic fields.General-This shaver is waterproof. It is suitable for use in the bath or shower and for cleaning under the tap. For safety reasons, the shaver cantherefore only be used without cord.-The shaver is suitable for mains voltages ranging from 100 to 240 volts.-The supply unit transforms 100-240 volts to a safe low voltage of less than 24 volts.-The frequency band in which the shaver operates is 2.4 GHz.-The maximum radio frequency power radiated in the frequency band in which the shaver operates is <10dBm.9EnglishThe displayThe shaver is equipped with a notification symbol.This symbol lights up when important advice isavailable in the app. Go to the app to obtain thisadvice. It reminds you to unplug the shaver beforeyou switch it on and to clean it for optimalperformance. It also reminds you to replace theshaving heads every two years or the cleansingbrush every three months.Attachment detection featureWhen you have paired your iPhone with theshaver, the attachment detection feature isactivated. Every time you switch on the shaver, thisfeature automatically recognizes the attachment(shaving unit/cleansing brush) that is attached tothe shaver handle and adapts the settingsaccordingly. Unpairing of your iPhone and theshaver deactivates this feature.Make sure your shaver is connected to youriPhone. The SkinAnalyst app also offers thepossibility to (de)activate the Attachmentdetection feature. You can do this by going to Myprofile, My shaver and switching off the Autoattachment detection. You can then manuallyselect the brush attachment, by switching on theshaver and press and hold the on/off button forone second.10EnglishShaving unit detectorThe shaving unit detector lights up to indicate thatthe shaving unit has been attached to the handle.Cleansing brush detectorThe cleansing brush detector lights up to indicatethat the cleansing brush has been detected.When you switch off the shaver, the cleaningreminder flashes to remind you to clean theshaver. Clean the shaver and the attachments aftereach use for optimal performance.The shaver is equipped with Bluetooth 4.0 toconnect your shaver to the app on your iPhone.Bluetooth is automatically activated when youswitch on the shaver for the first time. You can onlydeactivate it by switching on the travel lock. Travel lockYou can lock the shaver when you are going totravel. The travel lock prevents the shaver frombeing switched on by accident. The travel lock alsodeactivates Bluetooth.Activating the travel lock1Press the on/off button for 3 seconds to enterthe travel lock mode.While you activate the travel lock, the travel locksymbol flashes. When the travel lock is activated,the travel lock symbol lights up continuously.Deactivating the travel lock1Press the on/off button for 3 seconds.The travel lock symbol flashes and then goes out.The shaver is now ready for use and Bluetooth isactivated again.ChargingBattery charge indicatorCharging takes approx. 1 hour.Quick charge: When the battery is empty and youconnect the shaver to the wall socket, the batterycharge indicator flashes quickly. When the shavercontains enough energy for one shaving orcleansing session, the battery charge indicatorstarts flashing slowly..While the shaver continues to charge, the battery charge indicator flashes slowly until the battery is fully charged.When the battery is fully charged, the batterycharge indicator lights up blue continuously.Note: The shaver can only be used without cord.Note: When the battery is full, the display switchesoff automatically after 30 minutes. If you press theon/off button during charging, the notificationsymbol lights up blue to remind you that you haveto disconnect the shaver from the wall socket.When the battery is almost empty, the batterycharge indicator flashes orange.When the battery is completely empty, the batterycharge indicator flashes orange quickly. ChargingCharging takes approx. 1 hour.Charge the shaver before first use and when thedisplay indicates that the battery is almost empty.Note: You can charge the shaver after every use.This will not harm the battery.Charging with the supply unit1Make sure the shaver is switched off.2Insert the small plug into the shaver and put the supply unit in the wall socket.3After charging, remove the supply unit from the wall socket and pull the small plug out of theshaver.Preparing for usePairing the shaver and your iPhoneFor this shaver a special app is available. You candownload the SkinAnalyst app from the App store.By using the app, your skincare and shavingroutine will be personalized. The app gives youexpert advice based on your skin, shaving method,local weather conditions, etc. to support your dailyskincare and shaving routine.Note: The app is available for iPhone 6, iPhone 6Plus, iPhone 6S and iPhone 6S Plus equipped withiOS9 or higher.To create a secure and safe connection, first theshaver and your iPhone need to be paired once.1Download the SkinAnalyst app from the Appstore.2Make sure Bluetooth on your iPhone isswitched on.Open the app on your iPhone.Follow the instructions in the app. After youhave filled in the skin assessment, the app asksyou to pair your iPhone with the shaver.Switch on the shaver. Bluetooth is activatedautomatically.6In the app, the pop-up message 'press pair'appears. When your iPhone and the shaverhave been paired successfully, the Bluetoothsymbol flashes briefly and then goes out. If thisdoes not happen, please see 'Troubleshooting'.7Once the shaver and the app have been paired,the shaver automatically selects the rightpersonal settings depending on the attachmentyou have clicked on. During shaving orcleansing, you can open the app to see thesettings you are using and the duration of theshaving or cleansing session.Note: When you use the shaver, keep youriPhone and shaver within transmission range(no more than 5 meters from each other, in thesame room).Using the shaverUsing the SkinAnalyst sensor1Open the app before measuring your skin.2If you have an iPhone case, first remove the case from your iPhone.3Pull the clamp of the SkinAnalyst sensor outwards and gently place your iPhone into the holder with its camera pointing towards theopening on the inside of the holder. Be careful when you attach or remove the SkinAnalystsensor to prevent scratches on your iPhone.Note: The SkinAnalyst sensor can only be used on iPhone 6, iPhone 6 Plus, iPhone 6S andiPhone 6S Plus equipped with iOS9 or higher.4Insert the jack plug of the SkinAnalyst sensorinto your iPhone.Note: Keep the SkinAnalyst sensor placed onthe skin during measurement to avoid flashinginto your eyes.-Do not look into the sensor before and afterskin measurement.-When you take a picture of the skin, pleaseposition the sensor flat onto your skin so toensure it can take a clear picture of your skin. Connecting with the shaver1Make sure Bluetooth on your iPhone isswitched on.5Keep your iPhone and shaver close to each other in order to stay connected.Caution: Do not use your iPhone in moistsurroundings. Moisture and water can damage your iPhone.1To switch on the shaver, press the on/off button once.2To switch off the shaver, press the on/off button once.In order to benefit optimally from the treatments, you have to synchronize your treatments regularly. The shaver can store up to 15 shaves and/or cleansing treatments, so make sure you synchronize the shaver at least once after every 15 treatments. As an extra reminder, the notification symbol flashes every 9 treatments, without a connection between the shaver and the app, to tell you to connect with the app.1Open the app and make sure you are close to the shaver.2The app connects with the shaver automaticallyand synchronizes your last shaves or cleansing treatments.Using the attachmentsNote: Attach the cleansing brush on the cleansingbrush base first, before you place it on the shaver.Removing or attaching the attachments1Make sure the shaver is switched off.directly after shaving to prevent skin irritation. Forbetter shaving results, use the cleansing brushTracker and change the cleansing brush settings. You can adjust the settings and choose between four settings depending on your personal cleansing needs: sensitive, dry, normal or oily. Using the shaving unitNote: This shaver can only be used without cord. Skin adaptation periodYour first shaves may not bring you the result you expect and your skin may even become slightly irritated. This is normal. Your skin and beard need time to adapt to any new shaving system. We advise you to follow the advice provided by the app and shave regularly (at least 3 times a week) with this shaver for a period of 4 weeks to allow your skin to adapt to the new shaver.Dry shaving1Switch on the shaver.2Move the shaving heads over your skin in circular movements to catch all hairs growing in different directions. Make sure each shavinghead is fully in contact with the skin. Exertgentle pressure for a close, comfortable shave.Note: Do not press too hard, this can cause skin irritation.3Clean the shaver after use.Wet shavingYou can also use this shaver on a wet face with shaving foam or shaving gel.To shave with shaving foam or shaving gel, follow the steps below:1Apply some water to your skin.2Apply shaving foam or shaving gel to your skin.3Rinse the shaving unit under the tap to ensure that the shaving unit glides smoothly over your skin.4Switch on the shaver.5Move the shaving heads over your skin in circular movements to catch all hairs growing in different directions. Make sure each shavinghead is fully in contact with the skin. Exertgentle pressure for a close, comfortable shave.Note: Do not press too hard, this can cause skin irritation.Note: Rinse the shaving unit regularly to ensure that it continues to glide smoothly over yourskin.6Dry your face.7Clean the shaver after use.Note: Make sure you rinse all foam or shavinggel off the shaver.Shave settingsThe app has a feature that allows you topersonalize your shave settings. Go to the UsageTracker and change the shaving settings. You canadjust the settings and choose between threesettings depending on your personal shavingneeds: extra sensitive (xs), sensitive (s) and normal(n).Unpairing your shaver and iPhonePairing allows a connection between 1 shaver and 1iPhone. To remove this connection (e.g. when youhave a new iPhone 6, 6 Plus, 6S or 6S Plusequipped with iOS9 or higher), follow the stepsbelow:1Remove pairing from the app: open the app ->Go to the menu in the app -> Select 'Appsettings' and press 'Remove pairing from app'.2Unpair the shaver: press and hold the on/offbutton on the handle for approx. 10 seconds toremove the bond between shaver and app.Note: The unpairing of the shaver is successfulwhen the Bluetooth and notification symbolflash simultaneously (approx. 4 seconds).3Unpair your iPhone: choose Settings -> General-> Bluetooth -> Select the device by pressing (i)-> and press 'forget devices'.Cleaning and maintenanceIf the shaver and the app are paired, the cleaningreminder on the shaver lights up after each shaveas an extra reminder to tell you to clean theshaver.Cleaning the shaving unit under the tapClean the shaving unit after every shave for7Attach the shaving head holder to the bottom part of the shaving unit (‘click’).Clean the cleansing brush every time you have used it.1Switch off the shaver.2Detach the brush head from the attachment holder.3Clean the parts thoroughly with warm water and soap.4Dry the cleansing brush with a towel.Detach your iPhone from the SkinAnalystsensor.-Put the protection cap on the cleansing brushPut the protection cap on the SkinAnalystsensor to protect it from dirt accumulation.Replacement Replacing the shaving headsAs an extra reminder, the notification symbol also lights up when the shaving heads should be replaced. This advice is also available in the app. For maximum shaving performance, we advise you to replace the shaving heads every two years. Replace damaged shaving heads immediately. Always replace the shaving heads with original Philips shaving heads (see 'Ordering accessories'). 1Switch off the shaver.2Pull the shaving head holder off the bottompart of the shaving unit.3Turn the retaining rings anticlockwise and remove them. Place them aside in a safe place. 4Remove the shaving heads from the shavinghead holder.Discard the used shaving heads immediately to avoid mixing them with the new shaving heads.The brush head should be replaced every 3months or earlier if the brush hairs are deformed or damaged. As an extra reminder, the notification symbol also lights up when the brush head should be replaced. This advice is also available in theapp.Ordering accessoriesTo buy accessories or spare parts, visit/service or go to yourPhilips dealer. You can also contact the PhilipsConsumer Care Center in your country (see theinternational warranty leaflet for contact details).The following accessories and spare parts areavailable:-SH70 Philips shaving heads-HQ110 Philips shaving head cleaning spray-RQ560/RQ563 Philips cleansing brush-HQ8505 supply unitNote: The availability of the accessories may differby country.Recycling-Do not throw away the product with the normalhousehold waste at the end of its life, but handit in at an official collection point for recycling.By doing this, you help to preserve theenvironment.-This product contains a built-in rechargeablebattery which shall not be disposed of withnormal household waste. Please take yourproduct to an official collection point or aPhilips service center to have a professionalremove the rechargeable battery.-Follow your country’s rules for the separatecollection of electrical and electronic productsand rechargeable batteries. Correct disposalhelps prevent negative consequences for theenvironment and human health. Removing the rechargeable batteryBend the hooks aside and remove the powerunit.Warranty and supportIf you need information or support, please visit/support or read theinternational warranty leaflet. TroubleshootingThis chapter summarizes the most commonproblems you could encounter with the shaver,SkinAnalyst sensor and its accessories. If you areunable to solve the problem with the informationbelow, visit /support for a list offrequently asked questions or contact theConsumer Care Center in your country. Problem Possible cause SolutionI cannot connect the shaver to the app.You have notdownloaded the app.Download theSkinAnalyst app.The app is availablefor iPhone 6, iPhone6 Plus, iPhone 6Sand iPhone 6S Plusequipped with iOS9or higher.Your shaver is notswitched on.Make sure the shaveris switched on.You have not openedthe app.Make sure you openthe app.your iPhone cannotfind the shaver.The shaver isavailable for iPhone6, iPhone 6 Plus,iPhone 6S andiPhone 6S Plusequipped with iOS9or higher.Problem Possible cause SolutionBluetooth is not switched on.Make sure Bluetooth is enabled on the shaver and your iPhone.The shaver is not charged.Make sure the shaver is charged.I want to use the shaver without the app.You can also use the shaver without the app. However, only when you use the app together with the shaver, the app is able to provide tips and advice based on your usage. With the app you can set your shave settings. The app also reminds you when you need to replace the shaving heads, to clean the shaver, etc.I cannot change the shavesettings/cleansing brush settings on the shaver.Make sure there is a good connection between the shaver and your iPhone.You can select the attachment (shaving unit/cleansing brush) on the shaver. In the app, you can change the settings per attachment (shaving unit:normal/sensitive/extra sensitive, cleansing brush: dry skin/normal skin/oily skin/sensitive skin).31EnglishProblem Possible cause Solution The shaver does not shave as well as it used to.The shaving headsare damaged or worn.Replace the shaving heads (see 'Replacing the shaving heads').Hairs or dirt obstruct the shaving heads.Clean the shaving heads in the regular way or clean them thoroughly.To clean the shaving heads thoroughly,remove the shaving heads from the shaving head holder one by one (see 'Replacing the shaving heads'). Then separate the cutter from its guard and rinse each matching set under the tap.After rinsing, place the cutter back into its corresponding guard. Finally, put the shaving heads back into the shaving head holder (see 'Replacing the shaving heads').The cleansing brush does not clean as well as it used to.The cleansing brush is damaged or worn.Replace the cleansing brush (see 'Replacing the cleansing brush').32EnglishProblem Possible cause SolutionThe shaver doesn't detect the right attachment.The attachment isheavily polluted ordamaged.Try to clean theattachment (see'Cleaning andmaintenance'); if theissue persists, switchoff the detectionfeature from the appand select theattachment manuallyby pressing theon/off button for onesecond while theshaver is switchedon.The shaver does not work when I press the on/off button.The shaver is stillattached to the wallsocket. For safetyreasons, the shavercan only be usedwithout cord.Unplug the shaverand press the on/offbutton to switch onthe shaver.The rechargeablebattery is empty.Recharge the battery.The travel lock isactivated.Press the on/offbutton for 3 secondsto deactivate thetravel lock.The shaving unit issoiled or damaged tosuch an extent thatthe motor cannot run.Clean the shavingheads thoroughly orreplace them. Alsosee 'Hairs or dirtobstruct the shavingheads' for a detaileddescription of how toclean the shavingheads thoroughly.The shaver switches off when I select a different brush program.You cannot changethe brush programduring cleansing.Switch off the shaverbefore you select adifferent brushprogram.33EnglishProblem Possible cause Solution I get an error in the app during skin measurement.You did not place the SkinAnalyst sensor flat on your skin.Place the SkinAnalyst sensor flat on your skin.You did not insert the plug of the SkinAnalyst sensor into your phone properly.Remove the plug ofthe SkinAnalystsensor from yourphone and insert the plug into your phone again.Your phone did not recognize the SkinAnalyst sensor.Make sure that:-the cover/case of your iPhone is detached.-the camera lens of your iPhone is clean-the SkinAnalyst sensor is correctly attached to your iPhoneYour phone did not recognize the SkinAnalyst sensor.Make sure that yourvolume limit settings are reset to default settings (go to Settings > Music >Volume limit > slide to the max).Water is leaking from the bottom of the shaver.During cleaning,water may collect between the inner body and the outer shell of the shaver.This is normal and not dangerousbecause allelectronics are enclosed in a sealed power unit inside the shaver.34English说明感谢您的惠顾,欢迎光临飞利浦! 为了让您能充分享受飞利浦提供的支持,请在 /welcome 上或通过 SkinAnalyst 应用程序注册您的产品。