飞利浦剃须刀介绍
- 格式:doc
- 大小:1005.50 KB
- 文档页数:9

Powerful shave, gentle on skinwith SkinIQ T echnologyThe Philips Series 5000 delivers a powerful shave, cutting now even more hair per stroke*. Equipped with advanced SkinIQ technology, the shaver senses and adapts to your hair density, for improved skin comfort.A powerful shaveFollows the contours of your faceGuides hair into the optimal cutting positionMore cutting performance in every strokeSkinIQ technologyA shaver with the power to tame beardsFor a convenient shaveChoose a convenient dry or refreshing wet shaveEven-up your mustache and sideburns60 minutes of shaving from a 1-hour chargeA more intuitive shaving experiencePowerful cleaning pod for maintenance and hygieneThe electric shaver with an Eco passportFully charged in one hourHighlightsSteelPrecisionbladesPowerful yet gentle , the 45 self -sharpening SteelPrecision blades on this Philips shaver complete up to 90,000 cutting actions per minute , cutting more hair per stroke ** for a clean , comfortable finish .Power A daptsensorThe electric shaver has intelligent facial -hair sensor that reads hair density 125 times per second . The technology auto -adapts cutting power for an e ffortless and gentle shave .360-D FlexingheadsDesigned to follow the contours of your face ,this Philips electric shaver has fully flexible heads that turn 360° for a thorough and comfortable shave .Hair -Guide precisionheadsThis new shape precision shaver is enhanced with hair guiding channels for optimal cutting and skin comfort .Cable -free Quick CleanPod10x more e ffective than cleaning with water **,the powerful cleaning pod thoroughly cleans and lubricates your shaver in just 1 minute .Using it helps maintain shaver performance and increase hygiene .Shave wet ordryA wet and dry shaver that adapts to your preference . Choose a convenient dry shave ,or pair with your favourite foam or gel for a refreshing wet shave .Pop -uptrimmerRe fine and de fine your mustache and sideburns with the pop -up trimmer —and complete your look with ease .60 minutes of cordlessshavingA shaver for at home or on -the -go . Get 60minutes of shaving time from a 1-hour charge , or plug it in for instant and continuous power . 1-hour chargingtimeFully charge your Philips shaver in just 1 hour with the powerful and energy e fficientlithium -ion battery . In a hurry ? Plug in your shaver for 5 minutes and get enough power for 1 full shave .SpecificationsA ccessoriesMaintenance: Cleaning brushQuick Clean Pod: 1 cartridge included, Y es Integrated pop-up trimmerTravel and storage: Protective cap, Soft pouch PowerA utomatic voltage: 100-240 VCharging: 1 hour full charge, 5 min quick chargeBattery type: Li-ionRun time: 60 minutesStand-by power: 0.04 WMax power consumption: 9 WDesignColor: Electric BlueHandle: Rubber gripShaving heads: A ngular Consumer Trade ItemHeight: 35.9Width: 16.2Length: 16Net Weight: 1.091Gross Weight: 1.4595GTIN: 8720689002349Country of origin: CNHarmonized system code: 85101000Outer CartonHeight: 34.4Width: 25.5Length: 17.2Net Weight: 1.29Gross Weight: 2.16GTIN: 18710103959660Service2-year warrantyReplacement head SH71: Replace every 2 yrswith SH71Shaving PerformanceShaving system: SteelPrecision bladesContour following: 360-D Flexing headsSkinIQ technology: Power A dapt sensorEase of useWet & Dry: Wet and dry useCleaning: One-touch open, Fully washableDisplay: LED display, Battery level indicator,Travel lockSmartClick attachmentFits product type: RQ585/51 DOES NOT fitangular head type* Tested versus Philips Series 3000.* * Comparing shaving debris after using cleaning fluidvs. water in the cartridge© 2023 Koninklijke Philips N.V.A ll Rights reserved.Specifications are subject to change without notice. Trademarks are the property of Koninklijke Philips N.V. or their respective owners.Issue date 2023‑09‑01 Version: 6.6.1E A N: 87 20689 00234 9 。
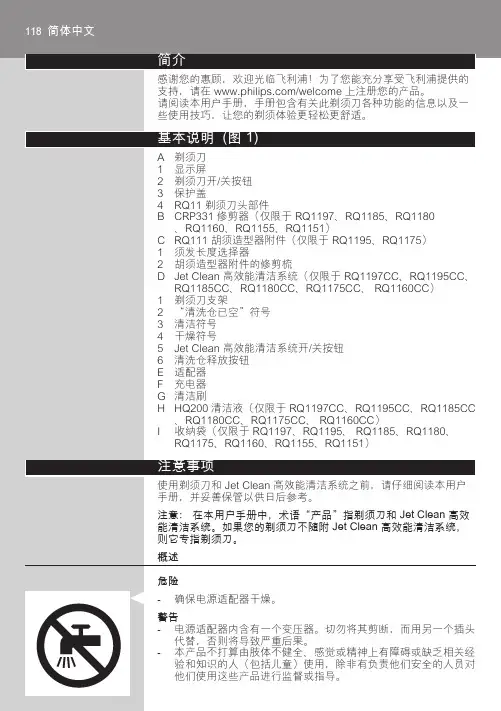
SW7700™ Lucas lm Ltd.English 6简体中文 25IntroductionCongratulations on your purchase and welcome to Philips! To fully benefit from the support that Philips offers, register your product at/welcome .Please read this user manual, as it contains information about the features of this shaver as well as some tips to make shaving easier and more enjoyable.General description (Fig. 1)1Shaving unit with hair chamber2On/off button3Replacement reminder4Cleaning reminder5Travel lock symbol6Unplug for use symbol7Battery status indicator8Socket for small plug9Click-on precision trimmer attachment 10Supply unit11Small plug12PouchImportant safety informationRead this important information carefully before you use the appliance and its accessories and save it for future reference. The accessories supplied may vary for different products.6EnglishDanger-Keep the supply unit dry.Warning -To charge the battery, only use the detachable supply unit (HQ8505) provided with theappliance.-The supply unit contains a transformer. Do not cut off the supply unit to replace it with another plug, as this causes a hazardous situation.-This appliance can be used by children aged from 8 years and above and persons withreduced physical, sensory or mental capabilities or lack of experience and knowledge if they have been given supervision or instruction concerning use of the appliance in a safe way and understand the hazards involved. Children shall not play with the appliance. Cleaning and user maintenance shall not be made bychildren without supervision.-Always unplug the shaver before you clean it under the tap.-Always check the appliance before you use it.Do not use the appliance if it is damaged, as this may cause injury. Always replace adamaged part with one of the original type.-Do not open the appliance to replace the rechargeable battery.7EnglishCaution-Never immerse the cleaning system or the charging stand in water and do not rinse it under the tap.-Never use water hotter than 60°C to rinse the shaver.-Only use this appliance for its intended purpose as shown in the user manual.-For hygienic reasons, the appliance should only be used by one person.-Never use compressed air, scouring pads,abrasive cleaning agents or aggressive liquids such as petrol or acetone to clean theappliance.-If your shaver comes with a cleaning system,always use the original Philips cleaning fluid (cartridge or bottle, depending on the type of cleaning system).-Always place the cleaning system on a stable,level and horizontal surface to prevent leakage.-If your cleaning system uses a cleaning cartridge, always make sure the cartridge compartment is closed before you use the cleaning system to clean or charge the shaver.-When the cleaning system is ready for use, do not move it to prevent leakage of cleaning fluid.-Water may drip from the socket at the bottom of the shaver when you rinse it. This is normal and not dangerous because all electronics are enclosed in a sealed power unit inside the shaver.-Do not use the supply unit in or near wallsockets that contain an electric air freshener to prevent irreparable damage to the supply unit.8EnglishElectromagnetic fields (EMF)-This Philips appliance complies with allapplicable standards and regulations regarding exposure to electromagnetic fields.General-This shaver is waterproof. It is suitable for use in the bath or shower and for cleaning under the tap. For safety reasons, the shaver cantherefore only be used without cord.-The supply unit is suitable for mains voltages ranging from 100 to 240 volts.-The supply unit transforms 100-240 volts to a safe low voltage of less than 24 volts.When you press the on/off button for the very first time, all display indications light up in sequence.Charge the shaver before use.Quick charge: When the battery is empty and you connect the shaver to a wall socket, the lights of the battery status indicator light up white one after the other repeatedly. When the battery contains enough energy for one shave, the bottom light of the battery status indicator starts flashing white slowly.9EnglishWhile the shaver continues to charge, first thebottom light of the battery status indicator flasheswhite and then lights up white continuously. Thenthe second light flashes and lights upcontinuously, and so on until the shaver is fullycharged.Battery fully chargedNote: This shaver can only be used without a cord.When the battery is fully charged, all lights of thethe battery status indicator light up whitecontinuously.Note: When you press the on/off button during orafter charging, the 'unplug for use' symbol lights upto indicate that the shaver is still connected to thewall socket.Note: When the battery is full, the display switchesoff automatically after 30 minutes.Battery lowWhen the battery is almost empty, the bottom lightof the battery status indicator flashes orange.Remaining battery chargeThe remaining battery charge is shown by thelights of the battery charge indicator that light upcontinuously.10EnglishClean the shaver after every shave for optimal performance (see 'Cleaning and maintenance'). When you switch off the shaver, the cleaning reminder flashes to remind you to clean the shaver.You can lock the shaver when you are going to travel. The travel lock prevents the shaver from being switched on by accident (see 'Activating the travel lock').For maximum shaving performance, replace the shaving heads every two years. The shaver is equipped with a replacement reminder which reminds you to replace the shaving heads. The replacement reminder flashes to indicate that you have to replace the shaving heads (see 'Replacing the shaving heads').Note: After replacing the shaving heads, you need to reset the replacement reminder by pressing theon/off button for 7 seconds.ChargingCharge the shaver before you use it for the firsttime and when the display indicates that thebattery is almost empty.Charging takes approx. 1 hour. A fully chargedshaver has a shaving time of up to 60 minutes.Note: You cannot use the shaver while it ischarging.Charging with the supply unit1Make sure the shaver is switched off.2Put the small plug in the shaver and put thesupply unit in the wall socket.The display of the shaver indicates that theshaver is charging.3After charging, remove the supply unit from thewall socket and pull the small plug out of theshaver.in the bath or shower.-Use this shaver for its intended household useas described in this manual.-For hygienic reasons, the shaver should only beused by one person.-Trimming is easier when the skin and hair aredry.Note: This shaver can only be used without a cord.1To switch the shaver on or off, press the on/off button once.The replacement symbol lights up continuously when the shaver is switched on.Skin adaptation periodYour first shaves may not bring you the result you expect and your skin may even become slightly irritated. This is normal. Your skin and beard need time to adapt to any new shaving system. To allow your skin to adapt to this new appliance, we advise you to shave regularly (at least 3 times a week) and exclusively with this appliance for a period of 3 weeks.For the best results on skin comfort, pre-trim your beard if you have not shaved for 3 days or longer. Dry shaving1Switch the shaver on.2Move the shaving heads over your skin in circular movements to catch all hairs growing in different directions. Exert gentle pressure for a close, comfortable shave.Note: Do not press too hard, this can cause skin irritation.3Switch off and clean the shaver after each use.The display lights up for a few seconds to show the battery status.Wet shavingFor a more comfortable shave, you can also use this shaver on a wet face with shaving foam or shaving gel.1Apply some water to your skin.2Apply shaving foam or shaving gel to your skin. 3Rinse the shaving unit under the tap to ensure that the shaving unit glides smoothly over your skin.4Switch the shaver on.5Move the shaving heads over your skin in circular movements to catch all hairs growing in different directions. Exert gentle pressure for a close, comfortable shave.Note: Do not press too hard, this can cause skin irritation.Note: Rinse the shaving unit regularly to ensure that it continues to glide smoothly over yourskin.6Dry your face.7Switch off the shaver and clean it after eachuse.Note: Make sure that you rinse all foam or shavinggel off the shaver.Using the click-on attachmentRemoving or attaching the click-on attachment1Make sure the shaver is switched off.3Hold the trimmer perpendicular to the skin and move it downwards while exerting gentlepressure.4Switch off and clean the trimmer after use.You can lock the shaver when you are going to travel. The travel lock prevents the shaver from being switched on by accident.1Press the on/off button for 3 seconds to enter the travel lock mode.While you activate the travel lock, theindications on the display light up briefly. When the travel lock is activated, the travel locksymbol flashes.1Press the on/off button for 3 seconds.While you deactivate the travel lock, the indications on the display light up briefly. When the travel lock is deactivated, the travel lock symbol flashes and goes out. The shaver switches on and is now ready for use again.Note: The shaver unlocks automatically when it is connected to wall socket.Cleaning and maintenance-Regular cleaning guarantees better shavingresults.-Never clean, remove or replace the shaving unitwhile the shaver is switched on.-Do not apply pressure to shaving head combs.-Do not touch shaving heads with hard objectsas this may dent or damage the precision-madeslotted combs.-Do not use abrasives, scourers or aggressiveliquids such as gasoline or acetone to clean theshaver.Cleaning the shaver under the tapClean the shaver after every shave for optimal5Rinse the shaving head holder under a warm tap.6Carefully shake off excess water and let the shaving head holder air dry completely.7Attach the shaving head holder to the bottompart of the shaving unit (‘click’).Clean the trimmer after each use.1Switch the shaver on.2Rinse the trimmer under a warm tap.3After cleaning, switch off the shaver.4Carefully shake off excess water and let the attachment air dry completely.Tip: For optimal performance, lubricate theteeth of the attachment with a drop of sewingmachine oil regularly.ReplacementReplacing the shaving headsSwitch the shaver off.Pull the shaving head holder off the bottompart of the shaving unit.Turn the retaining ring anticlockwise and lift itoff the shaving head.Repeat this process for the other retaining rings.Place them aside in a safe place.Remove the shaving heads from the shavinghead holder.Discard the used shaving heads immediately toavoid mixing them with the new shaving heads.8To reset the replacement reminder, press and hold the on/off button for approx. 7 seconds.Store the shaver in the pouch.Note: Always let the shaver dry before you store itin the pouch.Ordering accessoriesTo buy accessories or spare parts, visit/service or go to yourPhilips dealer. You can also contact the PhilipsConsumer Care Center in your country (see theinternational warranty leaflet for contact details).The following accessories are available:-SH70 Philips shaving heads-RQ111 Philips beard styler-RQ585 Philips cleansing brush-RQ560, RQ563 Philips cleansing brush heads-HQ8505 supply unitNote: The availability of the accessories may differby country.Recycling-Do not throw away the product with the normalhousehold waste at the end of its life, but handit in at an official collection point for recycling.By doing this, you help to preserve theenvironment.21English-This product contains a built-in rechargeablebattery which shall not be disposed of withnormal household waste. We strongly adviseyou to take your product to an official collectionpoint or a Philips service centre to have aprofessional remove the rechargeable battery.-Follow your country’s rules for the separatecollection of electrical and electronic productsand rechargeable batteries. Correct disposalhelps prevent negative consequences for theenvironment and human health.Removing the rechargeable shaver batteryfront and back panel in the bottom of theappliance. Remove the back panel.2Remove the front panel.3Unscrew the two screws at the top of the inner panel and remove the inner panel.4Remove the rechargeable battery with ascrewdriver.22EnglishWarranty and supportIf you need information or support, please visit/support or read theinternational warranty leaflet.Warranty restrictionsThe shaving heads (cutters and guards) are notcovered by the terms of the international warrantybecause they are subject to wear. TroubleshootingShaverProblem Possible cause SolutionThe appliance does not work when I press the on/off button.The appliance is stillattached to the wallsocket. For safetyreasons, theappliance can onlybe used withoutcord.Unplug the appliance andpress the on/off button toswitch on the appliance.The rechargeablebattery is empty.Recharge the battery.The travel lock isactivated.Press the on/off button for3 seconds to deactivate thetravel lock.The shaving unit issoiled or damagedto such an extentthat the motorcannot run.Clean the shaving headsthoroughly or replacethem. Also see 'Hairs or dirtobstruct the shaving heads'for a detailed description ofhow to clean the shavingheads thoroughly.The appliance does not shave as well as it used to.The shaving headsare damaged orworn.Replace the shaving heads.23EnglishProblem Possible cause SolutionHairs or dirt obstruct the shaving heads.Clean the shaving heads in the regular way or clean them thoroughly.To clean the shaving heads thoroughly, remove the shaving heads from the shaving head holder one by one (see 'Replacement'). Then separate the cutter from its guard and rinse each matching set under the tap.After rinsing, place the cutter back into its corresponding guard.Finally, put the shaving heads back into the shaving head holder (see 'Replacement').I replaced the shaving heads,but the replacement reminder is still showing.You have not resetthe replacement reminder.To reset the replacement reminder, press and hold the on/off button for approx. 7 seconds.Water is leaking from the bottom of the appliance.During cleaning,water may collect between the inner body and the outer shell of the appliance.This is normal and not dangerous because allelectronics are enclosed in a sealed power unit inside the appliance.24English介绍感谢您的惠顾,欢迎光临飞利浦! 为了让您能充分享受飞利浦提供的支持,请在 /welcome 上注册您的产品。

飞利浦S5830剃须刀说明书产品参数:
•产品名称:Philips/飞利浦S5830剃须刀
•品牌:Philips/飞利浦
•飞利浦型号:s5830
•特色功能:护肤;可水洗;浮动刀头
•充电方式:充电式
•使用方式:干湿双剃型
•充电模式:有线充电
•适用电压:全球通用电压(100-240V)
•充电时间:1小时
•完全充电使用时间:40分钟
•剃须方式:旋转式
•刀头数量:三刀头
•刀头材质:精钢
产品概述:
1.这款剃须刀可放心在水龙头下清洗。
2.本产品适合在100-240伏的电源电压下工作。
3.电源适配器可将100-240伏的电压转换为24伏以下的安全低电
压。
充电电池充电指示灯:
1.充电约需1小时-快速充电(仅限于特定型号):当产品连接到电
源时,电池充电指示灯的指示灯将逐个持续亮起。
当产品所含电量足以完成一次剃须时,电池充电指示灯的底灯会缓慢闪烁。
2.如将产品连接至电源,充电过程将继续。
第一个底灯闪烁,然后持
续亮起,表示产品正在充电。
接着第二个指示灯闪烁,然后持续亮起,依此类推,直至产品充满电。
飞利浦剃须刀大全:刀头型号_识别首先声明本人只是一名普通的消费者,刚第一次买飞利浦的剃须刀,过年有空,就把飞利浦所有剃须刀看了个遍,发现第一次购买的消费者普遍存在误区,其他的功能并不是最重要的,现在就重点谈谈关于飞利浦刀头的看法。
总的来讲飞利浦是高档比技术,中档比舒适,低档比寿命。
下面细讲。
1 关于旋转刀头,过去用的是往复式,换了旋转的一比才觉得往复式各个方面都不如旋转的(除非你胡子比头发硬)。
2 关于飞利浦旋转刀头的分类:1,2,3,4号刀头是一样的,为15个刀头,单层刀片。
淘汰产品,体现不出飞利浦的优势,故不推荐。
(如飞科双头+双环刀网+充电的才三十几块,除了寿命比不过外,整体效果有得拼。
)5,6号刀头是一样的,为15个刀头,双层刀片。
低端产品,物美价廉。
"提须"功能明显,但只适合胡须较软的年轻人。
7,8号刀头是一样的,为9个刀头,双层刀片。
中端产品,物有所值。
剔粗胡须效果明显。
9号刀头,是双环的,外圈为12个刀头,双层刀片,内圈为6个刀头,单层刀片。
剃须迅速。
虽是高端产品,但其双头系列中的低价产品9080是我认为最值的。
10号刀头,飞利浦的顶级产品。
(不过我没试过。
)3再谈谈其他方面:关于刀头数量,即使你很有钱我也不推荐三头的,1因为剃须效果取决与刀头质量而非数量,如果9号双头的也剔不动,那还是用手刮的吧。
2三头的体积太大,高档货还有那个大充电底座,不仅无法随身携带,就像广告那样摆在床头也傻得很。
关于电源,锂电池最好,如果使用不频繁,镍氢电池不如干电池(干电池的型号配金霸王能用很长时间)。
问题补充:如果有人说在我这样的刀头分类里,刀头还是有所不同的(如HQ64刀头比HQ54刀头如何高级),我要告诉你,它们的区别,你用肉眼看不出来,实际的剃须感受就更加无法分辨了。
产品名称详细参数飞利浦HQ 912 剃须刀颜色:黑色;刀头类型:旋转式;充电时间:8小时;充电显示灯:绿色详细参数飞利浦HQ 916 刀头类型:旋转式;操作时间:30分钟;外接电源:100-240V;充电时间:8小时详细参数飞利浦HQ 902 剃须刀颜色:蓝色;刀头类型:旋转式;适配电池:2节5号干电池详细参数飞利浦HQ 904 剃须刀颜色:银灰色;刀头类型:旋转式;适配电池:2节5号干电池详细参数飞利浦HQ130刀头类型:旋转式;适配电池:2节5号干电池详细参数飞利浦HQ 914 剃须刀颜色:金色;刀头类型:旋转式;充电时间:8小时;充电显示灯:绿色详细参数飞利浦HQ 6080 剃须刀颜色:灰白;刀头类型:旋转式;外接电源:100-240V;充电显示灯:是详细参数。

产品名称飞利浦HQ130飞利浦HQ902飞利浦HQ904飞利浦HQ912飞利浦HQ914产品图片产品价格87 元115 元148 元239 元329 元刀头型号HQ30HQ55HQ55HQ55HQ55刀头数量2个2个2个2个2个显示器-----操作时间-----自动选择:100-240V 自动选择:100-240V充电式环保镍氢电池充电式环保镍氢电池外接电源-----适配电池2节5号干电池2节5号干电池2节5号干电池--快速充电-----充电时间---8小时8小时充电显示灯---绿色绿色电池电量满/低显示灯---量满时绿色灯量满时绿色灯,不足时橙色特色功能-提须及切剃系统,弹性贴面系统,独立浮动刀头,防腐蚀刀头,胡茬储藏室,水洗设计提须及切剃系统,弹性贴面系统,独立浮动刀头,防腐蚀刀头,胡茬储藏室,水洗设计独立浮动刀头,防腐蚀刀头,胡茬储藏室,弹性贴面系统,精确切剃系统,水洗设计,替换刀头,升级双层刀片技术独立浮动刀头,防腐蚀刀头,胡茬储藏室,弹性贴面系统,精确切剃系统,水洗设计,替换刀头,升级双层刀片技术功率-----重量-----剃须刀颜色-蓝色银灰色黑色金色电源系统 2 节 AA 电池:60 分钟剃须时间 2 节 AA 电池:60 分钟剃须时间 2 节 AA 电池:60 分钟剃须时间飞利浦HQ7320飞利浦HQ7310飞利浦HQ7340飞利浦HQ30飞利浦HQ46飞利浦HQ5715 665 元629 元939 元停产136 元265 元HQ8HQ8HQ8HQ3HQ30HQ643个3个3个-------充电指示器-10天--60分钟30分钟(不接60小时电源线)电池自动选--干电式充电式择:100-240V220V-50Hz 充电式环保镍氢电池-220V220V220V-50HZ-----2节5号干电池-3分钟-----8小时8小时8小时8小时-8小时绿/红灯绿色支持支持---量满时绿色灯-----可水洗可水洗-双层刀片技术-独立浮动刀头,防腐蚀刀头,胡茬储藏室,弹性贴面系统,精确切剃系统,水洗设计,替换刀头,升级双层刀片技术---------100g-金属色黑色金属色深青绿色黑色灰色飞利浦QG3040飞利浦HQ851飞利浦HQ852飞利浦HQ5710飞利浦HQ5705飞利浦HQ801停产205 元199 元185 元155 元129 元-HQ 40HQ 40HQ64HQ54HQ40------------最多35 分钟30 分钟30 分钟60小时60小时60分钟充电式充电式/电池式充电式/电池式电池电池电池-100-240V100-240V220V-50Hz220V-50Hz220V-50Hz -----2节5号干电池---3分钟3分钟-10小时8小时8小时8小时8小时-LED 指示灯(在适配器上)支持充电指示灯支持充电指示灯绿/红灯绿/红灯绿/红灯------------------540g10201010---黑色白色蓝色灰色灰色黑色飞利浦HQ804飞利浦HQ803飞利浦HQ802飞利浦HQ7160飞利浦HQ9080飞利浦HQ7140121 元119 元119 元859 元825 元停产HQ40HQ40HQ40HQ8HQ9HQ8------------60分钟60分钟60分钟35小时最多30 天35小时电池电池电池充电/电源充电式/电池充电/电源式220V-50Hz220V-50Hz220V-50Hz220V-50Hz100-240V220V-50Hz-2节5号干电池2节5号干电池2节5号干电池-充电式环保锂电池---3分钟支持快速充电3分钟---8小时1小时8小时绿/红灯绿/红灯绿/红灯绿/红灯LCD 多功能显绿/红灯示 : 双色红绿---红绿支持电量不足指示灯, 电量已满指示灯----------------550g-黄绿色黑红色白色绿色灰色绿色飞利浦HQ7120飞利浦HQ6675飞利浦HQ6095飞利浦HQ6090飞利浦HQ6075飞利浦HQ6070655 元停产585 元558 元465 元315 元HQ8HQ8HQ8HQ8HQ8HQ8------------35小时35小时35小时35小时35小时35小时充电/电源充电/电源充电/电源充电/电源充电/电源充电/电源220V-50Hz220V-50Hz220V-50Hz220V-50Hz220V-50Hz220V-50Hz ------3分钟3分钟3分钟3分钟3分钟3分钟8小时8小时8小时8小时8小时8小时绿/红灯绿/红灯绿/红灯绿/红灯绿/红灯绿/红灯红绿红绿红绿红绿红绿红绿------------------绿色绿色绿色绿色绿色银色飞利浦HQ6073飞利浦HQ8160飞利浦HQ8240飞利浦HQ7390飞利浦HQ8140飞利浦HQ7240395 元停产1350 元1390 元停产1159 元HQ8HQ9HQ9HQ8HQ9HQ8--3个3个----镜面涂料的显示屏镜面涂料的显示屏--35小时18天-10天18天35小时充电/电源充电/电源充电式充电式充电/电源充电/电源220V-50Hz220V-50Hz100-240V100-240V220V-50Hz220V-50Hz ---充电式环保镍氢电池--3分钟----3分钟8小时1小时 1 小时 1 小时1小时8小时绿/红灯绿/红灯支持充电显示灯支持绿/红灯绿/红灯红绿暗蓝色-绿色/红色蓝色红绿------有SmartTouch面部轮廓跟踪系统有弹性贴面系统有防敏感保护盖水洗设计弹性贴面系统有防敏感保护盖水洗设计------绿色蓝色银色黑灰色金属色绿色银色绿色飞利浦HQ7380飞利浦HQ7290飞利浦HQ7360飞利浦HQ7180飞利浦HQ9090飞利浦RQ10951150 元停产930 元990 元965 元3500 元HQ8HQ8HQ8HQ8HQ9RQ103个-3个--3个镜面涂料的显示屏-镜面涂料的显示屏--数字液晶10天35小时10天35 分钟80天最多21天充电式充电/电源充电式充电式充电/电源充电式/电源式100-240V220V-50Hz100-240V100-240V220V-50Hz220V-50Hz充电式环保镍氢电池-充电式环保镍氢电池充电式环保镍氢电池---3分钟-支持3分钟快速充电--1 小时8小时 1 小时 1 小时1小时1小时绿色绿/红灯绿色支持充电显示灯绿/红灯绿/红灯绿色/红色红绿绿色/红色-红绿-----弹性贴面系统有防敏感保护盖水洗设计独立浮动刀头-弹性贴面系统有防敏感保护盖水洗设计独立浮动刀头-------172g金属色绿色金属色-亮银色冰银色飞利浦HQ9190飞利浦RQ1085飞利浦HQ9170飞利浦HQ8170飞利浦HQ9160飞利浦HQ8270CC停产3000 元停产停产停产2136 元HQ9RQ10HQ9HQ9HQ9HQ9-3个---3个-数字液晶---LED指示灯多功能显示器最长80天最多21天最长80天18天最长80天-充电/电源充电式/电源充电/电源充电/电源充电/电源充电式式220V-50Hz220V-50Hz220V-50Hz220V-50Hz220V-50Hz100-240V --------3分钟-3分钟-1小时1小时1小时1小时1小时 1 小时绿/红灯绿/红灯绿/红灯绿/红灯绿/红灯支持充电显示灯红绿-红绿蓝色红绿-----------有SmartTouch面部轮廓跟踪系统有弹性贴面系统有旅行锁有Jet Clean高效能清洁系统有防敏感保护盖-172g----亮银色冰银色外壳亮银色绿色银色亮银色黑色飞利浦RQ1050飞利浦HQ8170CC飞利浦HQ8260飞利浦HQ9199飞利浦RQ10752085 元停产1580 元6299 元停产RQ10HQ8HQ9HQ9RQ10--3个-3个数字液晶-镜面涂料的显示屏-数字液晶最多21天55分钟-最多30 天最多21天充电式/电源式充电式/电池式充电式充电式/电池式充电式/电源式220V-50Hz-100-240V100-240V220V-50Hz-充电式环保锂电-充电式环保锂电池--支持快速充电-支持快速充电-1小时1小时 1 小时1小时1小时绿/红灯LED指示灯支持充电显示灯LCD 多功能显示 : 双色绿/红灯-支持电池电量低、满显示灯-支持电量不足指示灯, 电量已满指示灯-----有SmartTouch面部轮廓跟踪系统有弹性贴面系统有旅行锁有防敏感保护盖水洗设计--172g-550172g冰银色外壳黑色黑色冰银色外壳。
哒”一声)。
2 按下长度选择器 (1),然后将其向左或向右推动 (2) 以选择所需
的须发长度设置。
3 按下剃须刀上的开/关按钮将其打开。
4 您现在可以开始修整胡须。
使用不带修剪梳的胡须造型器附件
您可以使用不带修剪梳的胡须造型器附件修剪和修整胡须、须髭或鬓角的轮廓。
1 将修剪梳抽离胡须造型器附件。
胡茬造型大胡子
须髭
简体中文129
简体中文131
-当清洁剂水位下降至最低水位以下时,“清洗仓已空”符号将开始闪烁,支架将返回到起始位置。
-如果每天都使用 Jet Clean 高效能清洁系统清洗您的剃须刀,则需要大约每 15 天向清洗仓内补充清洁剂一次。
清洁 Jet Clean 高效能清洁系统
每隔 15 天清洁一次清洗仓。
您可以用湿布擦拭 Jet Clean 高效能清洁系统的外表面。
1 同时按下 Jet Clean 高效能清洁系统两侧的释放钮 (1)。
然后将
Jet Clean 高效能清洁系统从清洗仓上提起 (2)。
,留下清洗仓。
2 将清洗仓中残余的清洁剂倒出。
您只需将清洁剂倒入水槽。
3 在水龙头下冲洗清洗仓。
清洗仓不可在洗碗机中清洗。
4
给清洗仓注入 HQ200 清洁剂,注入量在两线之间为宜。
简体中文
132
简体中文133
简体中文134
简体中文137
简体中文138
简体中文139。


飞利浦6600剃须刀中文使用说明飞利浦6600剃须刀中文使用说明产品介绍•品牌:飞利浦•型号:6600•类型:剃须刀产品特点•刀头设计精巧,舒适剃须体验•高效剃须,减少皮肤刺激•充电快速,使用时间长久•可湿剃、干剃两种模式切换•方便清洁,可水洗使用步骤1.洗净脸部,去除油脂和污垢。
2.按下电源按钮,启动剃须刀。
3.将刀头靠近脸部,以轻柔的方式剃须,保持刀头与皮肤接触。
4.剃须结束后,关闭剃须刀电源。
注意事项•使用前请先阅读产品说明书。
•避免将剃须刀浸入水中,以免损坏。
•若皮肤产生不适,请立即停止使用。
•请勿将剃须刀交给未成年人使用。
•使用后请及时清洁刀头并存放在干燥通风的地方。
常见问题解答•问:剃须刀无法启动怎么办?–答:请检查电池是否已耗尽,如是,请充电后再使用。
•问:为什么剃须后皮肤有红疹?–答:可能是由于剃须过快或刀头刺激引起,建议剃须时用温水软化皮肤,缓慢剃须。
•问:刀头需要多久更换一次?–答:一般建议使用3个月后更换新刀头,以保持最佳剃须效果。
以上是对飞利浦6600剃须刀中文使用说明的相关介绍和说明,希望能帮助您更好地使用该产品。
如果有其他问题,请参考产品说明书或联系客服。
清洁和维护•在使用完剃须刀后,拔下电源适配器并关掉电源开关。
•将刀头从主机上取下,用刷子或水龙头清洗刀头和机身,确保没有剩余的剃须膏或头发。
•可根据需要在刀头上涂抹少量润滑油。
•清洗完毕后,将刀头安装回主机。
•存放在干燥通风的地方,避免阳光直射或放在过热的环境中。
常见问题解答•问:可以在水中使用剃须刀吗?–答:是的,飞利浦6600剃须刀是防水的,可湿剃和干剃两种模式切换。
•问:如何更换剃须刀头?–答:将旧的刀头从主机上取下,然后将新的刀头安装回主机,确保完全贴合。
•问:如何保持最佳的剃须效果?–答:及时清洁刀头,定期更换刀头,以及正确使用剃须刀的方法,可以保持最佳的剃须效果。
以上是对飞利浦6600剃须刀中文使用说明的相关介绍和说明,希望能帮助您更好地使用该产品。


飞利浦无线充电剃须刀作者:来源:《消费电子》2018年第12期据外媒报道,飞利浦推出了一款S9000 Prestige系列剃须刀,支持手机Qi充电。
S9000 Prestige刀片加入纳米技术,刀锋更加锐利,配合宽阔的刀网狭缝,可以轻易捕捉更多毛发。
续航方面,S9000 Prestige充满电需3小时,可连续使用1小时。
——Luna DiSplay外观上,Luna Display是个普普通通的U盘,实际上,它可以通过Wi-Fi无线连接的方式将iPad转换为Mac的显示器,不用线就可以连接第二块屏幕。
Luna Display提供USB-C和MiniDisplayPort两种接口,适配众多iPad和Mac产品。
这是一款颠覆传统设计的手表,其设计灵感来源于火星的奇妙天象,利用悬磁浮双滚珠专利技术,呈现别致的读表方式。
odm Mars火星创新双滚珠手表外观采用金属拉丝线条打造,表盘外一层的滚珠为时针,内一层的滚珠为分针。
经常睡不着觉,这个助眠器可以帮到你!Sleepion助眠器通过播放催人入睡的音乐以及散发香气,配合缓慢摇晃的灯光来帮助用户入睡。
Sleepion助眠器目前共有15首音乐,除了大自然的声音外,还内置了肖邦和莫扎特的音乐。
此外,Sleepion助眠器支持360°全方位扩音,带给用户更真实的沉浸感。
——TOUGHBOOK 31松下近日发布了新款三防笔记本——TOUGHBOOK 31坚固型,该机型搭载英特尔酷睿i5-7300U vPro芯片。
采用16GB DDR4内存模块,支持32GB扩展。
空间容量方面,则是更为突出的256GB SSD。
同样支持扩展。
其他方面。
笔记本的续航时间可达10小时以上。
有更强、更快的Wi-Fi芯片、LTE速度以及专门的GPS调节解码器。
这款名为SleepytroⅡ的机器号称是世界上第一款把婴儿推车变成安抚摇椅的智能设备,用户只需将它挂在把手上就可以直接使用。
除此之外。
飞利浦电动剃须刀广告文案
产品命名:飞利浦电动剃须刀
产品现状:
飞利浦电动剃须刀自1939年面世以来,为讲究生活素质的男士提供完美的剃须感受,多年来保持世界销量第一,成为世界各地男士首选。
经过不断完善,现已推出,具有独立浮动刀头、弹性贴面系统、须髭和鬓角修剪、弹出式修发器等多种功能的产品。
创意说明:
很多男性都有胡子,而每个男人都希望自己能给亲朋好友以及需要认识的人留下一种干净利落的印象。
而这则广告诉求就是飞利浦电动剃须刀的方便、快捷、干净的特性。
平面广告:
标题:魅力人生
副标题:飞利浦成就你的男人魅力。
正文:男生成长为男人是必然的,而男人长出胡子也是必然的,而男人使用飞
利浦更是必然的!因为,飞利浦会带给你光洁引人的更大魅力。
广告语:飞利浦成就你的男人魅力。
广播广告:
(欢快高雅的轻音乐)有一种态度,是要向对手表示强悍,无懈可击;有一种态度,是要向朋友表示友善温和稳健;有一种态度,是要向最心爱的人,表示无限的亲近。
他风度优雅迎面春风,一天之中的美妙时刻,他满怀柔情亲近倍致。
这一切,源自他的浪漫与自信,源自他的它的卓越与体贴,源自他的锐利与速度。
飞利浦剃须刀——让男人的每一面都淋漓尽致一丝不苟。
电视广告:
广告文案
系别:
学号:
班级:
姓名:。
飞利浦S5588的中文说明书
1、Steel精密刀片:这款剃须刀具有 45 个强大的自动的刀片,每次切割更多毛发,每分钟高达90,000 次光滑切割,实现轻松和温和的剃须。
2、强力剃须:这款电动剃须刀采用 SkinIQ 技术,可识别您的毛发并适应它们,从而提高皮肤质感。
3、传感器功率适配器:智能面部毛发传感器可测量每秒 125 次的胡须,并相应
4、电动多功能剃须刀:弯曲头可以360旋转,可适应您的面部、颈部或松木的轮廓;使用 Philips k 的亲肤弹出式胡须、上肢胡须和胡须的轮廓。
5、供货范围包括:Philips 飞利浦剃须刀,可以用水冲洗,一个直观的三个电池指示灯,一个清洁器,一个旅行表,一个内置修剪器和一个旅行盒。
飞利浦剃须刀</剃须刀排行榜em>如何辨别真假第一、从刀头辨认现在大多数的飞利浦(Philips)剃须刀都是在国内珠海市生产的,但所有剃须刀的刀头全部是从荷兰原装进口的。
不同型号的剃须刀对应不同型号的刀头HQ2刀头:正面刻有“ROTA ACTION”英文字样(代表电须刀:HQ26已停产)HQ3刀头:正面刻有“LIFT AND CUT”和“DOUBLE ACTION”英文字样(代表电须刀:HQ130)HQ4刀头:正面刻有“LIFT AND CUT”和“MICRO+”英文字样(代表电须刀:HS190)HQ5刀头:正面刻有“LIFT AND CUT”和“REFLEX ACTION”英文字样(代表电须刀:HQ560已停产)HQ54刀头:正面刻有“LIFT AND CUT”英文字样(代表电须刀:HQ5705、HQ5710)HQ64刀头:正面刻有“6-SERIES”和“SUPER LIFT AND CUT”英文字样(代表电须刀:HQ6070、HQ6073)HQ8刀头:正面刻有“8-S ERIES”英文字样(代表电须刀:HQ6090、HQ7310)HQ9刀头:无英文字样,三圈刀网,增加 50% 的剃须面积(代表电须刀:HQ8240、HQ8260)RQ10刀头:无英文字样,三圈独立切剃装置,剃须面积增加 50%(代表电须刀:RQ1095、RQ1050)第二、从生产日期辨认型号为:HQ30、HQ40、HQ46、HQ460、HQ5705、HQ5710、HQ5715、HQ6070、HQ6073、HQ6075、HQ6090、HQ6095等等这些须刀,打开刀头,查看胡须储藏室内,会看到一串数字,是6位数的,也就是这款须刀的出厂日期,比如:080812就是2008年8月12日出厂的产品了。
而其它型号的须刀,这串数字就会在修剪刀部位,打开修剪刀后也可以看到。
补充一点,因为型号太多,这串6位数哪些型号在胡须储藏室,哪些型号在修剪刀部位在这里就不做统计了,不过,可以确定:除了HS190这款须刀串号是在机身后部,其它的型号的串号只可能在胡须储藏室和修剪刀部位这两个地方!第三、从其他信息辨认电须刀的产品机身上,除了有串号外,应该还注有:产品型号,技术参数,生产产地的信息。
/support/ifuS8050, S5536, S5535English 3简体中文 13Important safety informationRead this important information carefully before you use the appliance and its accessories and save it for future reference. The accessories supplied may vary for different products. The box shows which accessories are supplied with your product and whether your product is bluetooth enabled.Danger-Keep the supply unit dry.Warning -To charge the battery, only use the detachablesupply unit (HQ8505) provided with theappliance.-The supply unit contains a transformer. Do notcut off the supply unit to replace it with anotherplug, as this causes a hazardous situation.-This appliance can be used by children agedfrom 8 years and above and persons withreduced physical, sensory or mental capabilitiesor lack of experience and knowledge if theyhave been given supervision or instructionconcerning use of the appliance in a safe wayand understand the hazards involved. Childrenshall not play with the appliance. Cleaningand user maintenance shall not be made bychildren without supervision.-Always unplug the appliance before you clean itunder the tap.3English4English-Always check the appliance before you useit. Do not use the appliance if it is damaged,as this may cause injury. Always replace adamaged part with one of the original type.Philips Quick Clean Pod cartridge fluid-Do not swallow.-Keep out of reach of children.Caution-Never immerse the charging stand in water anddo not rinse it under the tap.-Never use water hotter than 60°C to rinse theshaver.-Only use this appliance for its intended purposeas shown in the user manual.-For hygienic reasons, the appliance should onlybe used by one person.-Never use compressed air, scouring pads,abrasive cleaning agents or aggressiveliquids such as petrol or acetone to clean theappliance.-If your shaver comes with a cleaning system,always use the original Philips Quick Clean Podcartridge.-Always place the cleaning system on a stable,level and horizontal surface to prevent leakage.-Always make sure the cartridge compartment isclosed before you use the cleaning system.-When the cleaning system is ready for use, donot move it to prevent leakage of cleaning fluid.-Water may drip from the socket at the bottomof the shaver when you rinse it. This is normaland not dangerous because all electronicsare enclosed in a sealed power unit inside theshaver.-Do not use the supply unit in or near wallsockets that contain an electric air freshener toprevent irreparable damage to the supply unit.-Do not use the appliance on chapped skin,open wounds, healing wounds, skin recoveringfrom surgery or if you suffer from a skin diseaseor skin irritation, such as severe acne, sunburn,skin infection, skin cancer, inflammation,eczema, psoriasis, nylon allergy etc.-Do not use the cleansing brush attachment ifyou are taking steroid-based medication, as thismay cause irritation or injury.-If you wear piercings on your face, removethe piercings before you use the click-onattachments or make sure that you do not usethe appliance on or near the piercing.-If you wear jewelry, contact lenses or glasses,remove them before you use the click-onattachments, or make sure that you do not usethe appliance on or near jewelry or glasses.Battery safety instructions-Only use this product for its intended purposeand follow the general and battery safetyinstructions as described in this user manual.Any misuse can cause electric shock, burns, fireand other hazards or injuries.-To charge the battery, only use the detachablesupply unit (HQ8505) provided with theproduct. Do not use an extension cord.-Charge, use and store the product at atemperature between 5 °C and 35 °C.-Always unplug the product when it is fullycharged.5English6English-Do not burn products and their batteries anddo not expose them to direct sunlight or tohigh temperatures (e.g. in hot cars or near hotstoves). Batteries may explode if overheated.-If the product becomes abnormally hot, givesoff an abnormal smell, changes color or ifcharging takes much longer than usual, stopusing and charging the product and contactyour local Philips dealer.-Do not place products and their batteries inmicrowave ovens or on induction cookers.-This product contains a rechargeable batterythat is non-replaceable. Do not open theproduct to replace the rechargeable battery.-When you handle batteries, make sure that yourhands, the product and the batteries are dry.-To prevent batteries from heating up orreleasing toxic or hazardous substances, donot modify, pierce or damage products andbatteries and do not disassemble, short-circuit,overcharge or reverse charge batteries.-To avoid accidental short-circuiting of batteriesafter removal, do not let battery terminalscome into contact with metal object (e.g.coins, hairpins, rings). Do not wrap batteries inaluminum foil. Tape battery terminals or putbatteries in a plastic bag before you discardthem.-If batteries are damaged or leaking, avoidcontact with the skin or eye. If this occurs,immediately rinse well with water and seekmedical care.Electromagnetic fields (EMF)This Philips appliance complies with all applicablestandards and regulations regarding exposure toelectromagnetic fields.General-This shaver is waterproof. It is suitable for usein the bath or shower and for cleaning underthe tap. For safety reasons, the shaver cantherefore only be used without cord.-The supply unit is suitable for mains voltagesranging from 100 to 240 volts.-The supply unit transforms 100-240 volts to asafe low voltage of less than 24 volts. Recycling-Do not throw away the product with thenormal household waste at the end of its life,but hand it in at an official collection point forrecycling. By doing this, you help to preservethe environment.-This product contains a built-in rechargeablebattery which shall not be disposed of withnormal household waste. Please take yourproduct to an official collection point or aPhilips service center to have a professionalremove the rechargeable battery.-Follow your country’s rules for the separatecollection of electrical and electronic productsand rechargeable batteries. Correct disposalhelps prevent negative consequences for theenvironment and human health. Removing the rechargeable batteryOnly remove the rechargeable battery whenyou discard the appliance. Before you removethe battery, make sure that the appliance isdisconnected from the wall socket and that thebattery is completely empty.7English1 Twist the shaving head to remove it from thehandle.2 Insert a flat-head screwdriver under the rim ofthe panel and pry off.3 Remove the two screws from the top with a torxor flat-head screwdriver.4 Slide the front shell off.5 Break the bridge on top with a wire cutter.6 Insert a flat head screwdriver on either side ofthe shaver body to release the hooks.8English7 Slide the power unit out of the body.Warranty and supportIf you need information or support, pleasevisit /support or read theinternational warranty leaflet.Warranty restrictionsThe shaving heads (cutters and guards) are notcovered by the terms of the international warrantybecause they are subject to wear.9EnglishTroubleshootingThis chapter summarizes the most commonproblems you could encounter with the appliance.If you are unable to solve the problem with theinformation below, visit /supportfor a list of frequently asked questions or contactthe Consumer Care Center in your country. ShaverProblem Possible cause SolutionThe appliance does not work when I press the on/off button.The appliance isstill attached tothe wall socket. Forsafety reasons, theappliance can onlybe used withoutcord.Unplug the appliance andpress the on/off button toswitch on the appliance.The rechargeablebattery is empty.Recharge the battery.The travel lock isactivated.Press the on/off button for3 seconds to deactivate thetravel lock.The shaving unit issoiled or damagedto such an extentthat the motorcannot run.Clean the shaving headsthoroughly or replace them.The appliance does not shave as well as it used to.The shaving headsare damaged orworn.Replace the shaving heads.Hairs or dirtobstruct theshaving heads.Clean the shaving headsthoroughly.10EnglishProblem Possible cause SolutionWater is leaking from the bottom of the appliance.During cleaning,water may collectbetween the innerbody and theouter shell of theappliance.This is normal and notdangerous because allelectronics are enclosed in asealed power unit inside theappliance.Philips Quick Clean PodProblem Possible cause SolutionMy shaverisn't clean after using the Philips Quick Clean Pod.You removed theshaver before thecleaning programwas finished.Leave the shaver in thePhilips Quick Clean Pod forthe full cleaning program.Each cleaning programtakes approximately 1minute. The cleaning icongoes out when the cleaningprogram is finished.The Philips QuickClean Pod Cartridgeneeds to be replaced.Replace the Philips QuickClean Pod Cartridge.The Philips QuickClean Pod is tilted.Place the Philips QuickClean Pod on a flat surface.My Philips Quick Clean Pod does not switch on.The Philips QuickClean Pod ispowered by themotor of the shaver.Place the shaver into thePhilips Quick Clean Pod.Switch on the shaver.The shaver isconnected to the wallsocket.Disconnect the shaver fromthe supply unit.11EnglishProblem Possible cause SolutionThe shaver battery is empty.Charge the shaver before using the Philips Quick Clean Pod.My Philips Quick Clean Pod is overflowing.You regularly use thePhilips Quick CleanPod after rinsingthe shaver but notshaking off excesswater.Shake off excess water afterrinsing the shaving headseach time before puttingthe shaver into the PhilipsQuick Clean Pod.You shaved withshaving gel or foamand did not rinse theshaver before usingthe Philips QuickClean Pod.Rinse the shaving headsthoroughly before using thePhilips Quick Clean Pod.12English重要安全信息使用本产品及其附件之前,请仔细阅读本重要信息,并妥善保管以供日后参考。
飞利浦8系刀头和3刀悬浮贴面系统
今天大家上了好多飞利浦,把我8835的刀头部分拆了大家看下,很明显8系到片没有之前那么密,而且刀网的外形不是圆形了,而是限位卡,这个后面会介绍
来张特写,不管新老刀头都是飞利浦特有的双层刀片
刀架变化很大,很有科技感
正
面照,的确是椭圆,而且这几个椭圆可以活动,下面会提到用途这次面罩不能拆下,而是和机身连为一体,刀头刀架装好是这样的
注意看,刀网没有固定,以前都是卡在刀架上的,但是这个没有任何固定,只是用限位卡防止它转动
传动轴的活动范围很大,知道刀架为什么是椭圆的了吧?
面罩不是整体,而是三块,可以活动
整个面罩可以凹下去,人脸的轮廓是凸出的,所以这个结构可以贴和脸部刀网也可以按下去,这就是刀网没有固定的原因
这里有个旋钮,调整面罩和脸的贴合度
其实这个开关的奥秘就在三个传动轴中间这个突起,这个突起顶住刀架的中间部分,通过调整
它的高度来限制面罩和刀网的活动范围。