常用SENSOR安装手册
- 格式:pdf
- 大小:1.48 MB
- 文档页数:27

THE FUTURE IS WHAT WE MAKE ITC7364B Duct TVOC SensorINSTALLATION INSTRUCTIONSThe TVOC sensor emulates the human perception of air quality much more than a CO 2 sensor and even detects odorless, potentially hazardous substances such as carbon monoxide.The CO 2-equivalent sensor output value was developed to allow the IAQ sensor to be used in select Demand Controlled Ventilation applications.Before InstallationRead these instructions carefully before installing and commissioning the transmitter. Failure to follow these instructions may result in product damage. Do not use in an explosive or hazardous environment, with combustible or flammable gases, as a safety or emergency stop device or in any other application where failure of the product could result in personal injury. Take electrostatic discharge precautions during installation and do not exceed the device ratings.NOTE 1: The air quality sensor requires a continuous calibration time of at least 3 weeks before the sensor algorithms provide accurate measurements. During this period the product-to-product readings may show large variations. The sensor may also indicate very high ppm readings during the initial calibration phase.NOTE 2: The air quality sensor is meant to provide an accurate measurement of INDOOR air quality. Diesel exhaust is not a component of indoor air quality and the sensor should not be used in such an application.MountingThe duct type sensor installs on the outside of a return air duct with the sampling tube inserted into the duct. Mount the sensor in an easily accessible location in a straight section of duct at least five feet from corners and other items that may cause disturbances in the air flow. Avoid areas with vibrations or rapid temperature changes.For proper function probe must be mounted with holes in probe aligned with air stream (sensor mounting holes oriented at 90 degrees relative to air stream)Drill a 7/8” or 1” hole in the duct at the preferredlocation and insert the probe into the hole to mark the enclosure mounting holes. Remove the unit and drill the two mounting holes. Clean all drilled holes of debris before mounting the device. Mount the enclosure to theduct with two #10 sheet metal screws (not included)such that the duct air flow is parallel with the vent holes in the probe (i.e.: air flows directly into the probe holes). To prevent air leaks, ensure the gasket is compressed around the probe between the device enclosure and the air duct. As shown in Figure 1.The enclosure has a hinged cover with a latch. Open the cover by pulling slightly on the latch on the bottom side of the enclosure and at the same time pulling on the cover, as illustrated in Figure 2.A 1/2” NPT threaded connection hole is provided in the left side of the enclosure. Screw the EMT connector or cable gland connector in until tight. See Figure 3. It is recommended that weatherproof conduit or cable gland fittings be used.Fig. 3. EMT ConnectionThis device has a half-wave type power supply so the power supply common is the same as the output signal common. Therefore, several devices may be connected to one power supply and the output signals all share the same signal common. Use caution when grounding the secondary of an AC transformer or when wiring multiple devices to ensure that the circuit ground point is the same on all devices and the controller.Ensure the controller Analog Input (AI) matches the TVOC voltage output signal type before power is applied. The voltage signals have a minimum loadrating. Follow the ratings in the Specification section or inaccurate readings may result.Connect the LINEAR output signal to a 0-5 or 0-10 Vdc analog input port on the controller as shown in Figure 6. The device is factory configured for 0-5 Vdc output signal but may be changed to 0-10 Vdc via the menu. Changing output signal may be done during set up of the device. This linear output signal represents to 0-2000 ppm CO 2-equivalent value.The ASO (Analog Stepped Output) output signal is a second voltage signal that represents the three air quality levels of GOOD, FAIR, and POOR. Each level may be set independently via the menu to any value between 0 and 10 Vdc. The factory default is GOOD = 2.5 V, FAIR = 5.0 V, and POOR = 7.5 V. This signal canDUCT TVOC SENSORWiring•Deactivate the 24 Vac/dc power supply until all connections are made to the device to prevent electrical shock or equipment damage. Follow proper electrostatic discharge (ESD) handlingprocedures when installing the device or equipment damage may occur•Use 18-22 AWG shielded wiring for all connections and do not locate the device wires in the same conduit with wiring used to supply inductive loads such as motors. Make all connections in accordance with national and local codes.• Connector layout is shown in Figure 5. Diagram shown includes all options. If option is not ordered, connector will not be present.•Connect the positive DC voltage or the hot side of the AC voltage to the terminal marked POWER. The power supply common is connected to the terminal marked COMMON as shown in Figure 6.•The device is reverse voltage protected and will not operate if connected backwards.Fig. 4. Secure CoverFig. 5. PCB LayoutPOWER LINEARCOM PWR ASO LINEARN.O.RELAYUP DOWN MENUTwo security screws are provided which can be installed to help secure the cover once settings and wiringconnections are complete. See Figure 4.Fig. 6. WiringDUCT TVOC SENSORalso be connected to a controller analog input, or it can be connected directly to a 0-5 or 0-10 Vdc input of a damper actuator for direct ventilation control as shown in Figure 7. In this way, the Indoor Air Quality Sensor can be used as a stand-alone device. Since all steps are completely adjustable, the device can also drive a reverse acting actuator.The relay output available on the RELAY terminals. The relay output terminals are completely isolated from other connections and are NOT connected to the signal COMMON terminal as shown in Figure 8. This signal can be used to directly control an alarm, a ventilation fan or may be connected to a digital input of a Building Automation System for status monitoring. Respect the relay contact specification as listed in this document.Set-UpVerify that the TVOC sensor is properly wired and all connections are tight. Apply power to the device and note that the LCD will display the software versionnumber for a few seconds and then the device will enter Warm Up mode. The Warm Up mode will last for five minutes and the LCD will count down the time. This time is required to allow the device and sensor to reach normal operating temperature. After the five minutes has expired the device will enter normal operation and the LCD will indicate the TVOC status and ppm value.OperationIn normal operation, the TVOC sensor will detect a broad range of reducing gases such as CO and VOCs and translate the measurement into a parts per million (ppm) CO 2 equivalent value. This value is displayed on the LCD in either ppm or % as set in the menu. The air quality value is also displayed as either GOOD, FAIR or POOR and these values can also be set via the menu.The GOOD, FAIR and POOR air quality levels control the Analog Stepped Output (ASO) signal. The ASO output signal comprises of three independently set voltage levels that can be used to directly control a damper actuator for three positions. The levels are set via the menu and each level can be set anywhere from 0-10 Vdc. The GOOD, FAIR and POOR air quality levels will also be displayed on the tri-color front panel LED. The LED colors are displayed as GOOD = green, FAIR = blue and POOR = red. If required, the LED operation can be disabled via the menu.The air quality value is also sent to the LINEAR output as a 0-5 or 0-10 Vdc signal to represent the 0-2000 ppm CO 2 equivalent. This signal can interface to any voltage analog input for logging or control purposes.The linear output scaling and ASO operation is shown below. Note that the ASO GOOD/FAIR trip level = 1000 ppm and the FAIR/POOR trip level = 1500 ppm. The ASO output levels are GOOD = 2.5 V, FAIR = 5.0 V and POOR = 7.5 V.The normally open relay will close when the airquality exceeds a pre-set trip point. The trip point and hysteresis value can be programmed via the menu such that the relay closes when IAQ > Relay Setpoint and opens when IAQ < Relay Setpoint - Hysteresis. By default, the relay has a one minute minimum onand off time to prevent short cycling. This feature may be disabled via the menu. The menu may alsobe used to test the relay function. The relay can be used to control an alarm, fan directly or to signal a digital input.Fig. 7. ASO WiringFig. 8. Relay WiringASODUCT TVOC SENSOROther features and configuration are described in the Setup Menu section.NOTE: The air quality sensor requires a continuous burn-time of at least 3 weeks before the sensoralgorithms provide accurate measurements. During this period the product-to-product readings may show large variations. The sensor may also indicate very high PPM readings during the initial burn-in phase.The TVOC sensor is meant to provide an accurate measurements of INDOOR air quality. Diesel exhaust is not a component of indoor air quality and the sensor should not be used in such an application.MenuThe menu may be accessed any time after the initial warm-up period. The menu is controlled by using the three buttons on the PCB labeled UP, DOWN, and MENU. All values entered are saved in non-volatilememory and will be restored correctly in case of a power failure.The menu has several items as shown below. To enter the menu, press and release the <MENU> key while in normal operation. This will enter the User menu step 1, pressing the <MENU> key a second time advances to step 2. Each press of the <MENU> key advances the menu item. The <UP> and <DOWN> keys are used to make changes to program variables by scrollingthrough the available options. When a value is changed, use the <MENU> key to save it to memory and advance to the next menu item. Actual menu displays with the factory default value are shown.NOTE: If no keys are pressed for 2 minutes, the menu will automatically exit.IAQ Unit ppmThe LCD displays the IAQ sensor reading from 450-2000 ppm. Use<UP> or <DOWN> to change from ppm (default) to % for 0-100 % display. 0-100% = 450-2000 ppm. Thissetting has no effect on the LINEAR output signal, it is always scaled 0-2000 ppm = 0-5/0-10 Vdc.<MENU>Press to advance to next menu item1. IAQ UnitIAQ G/F 1000 ppmThis sets the trip point from Good to Fair IAQ for the LED and ASO. Thefactory default is 1000 ppm. Use <UP> or <DOWN> to change from 700 to 1200 ppm in 25 ppm steps.<MENU>Press to advance to next menu item2. IAQ G/F IAQ F/P 1500 ppmThis sets the trip point from Fair to Poor IAQ for the LED and ASO. The factory default is 1500 ppm. Use <UP> or <DOWN> to change from 1300 to 1700 ppm in 25 ppm steps. Note that both IAQ trip points have a 25 ppm hysteresis built in.<MENU>Press to advance to next menu item3. IAQ F/P Analog Out 5VThe LINEAR analog output signaldefaults to 0-5 Vdc. It can be changed with <UP> or <DOWN> to 0-10 Vdc. The selected scale is always equal to 0-2000 ppm.<MENU>Press to advance to next menu item4. Analog Output ASO Good 2.5 VdcThis sets the ASO output voltage for the Good range. It can be set using <UP> or <DOWN> anywhere from 0-10 Vdc. Resolution is 0.1 Vdc. The ASO output changes accordingly.<MENU>Press to advance to next menu item5. ASO Good Output ASO Fair 5 VdcThis sets the ASO output voltage for the Fair range. It can be set using <UP> or <DOWN> anywhere from 0-10 Vdc. Resolution is 0.1 Vdc and ASO out updates.<MENU>Press to advance to next menu item6. ASO Fair Output ASO Poor7.5 VdcThis sets the ASO output voltage for the Poor range. It can be set using <UP> or <DOWN> anywhere from 0-10 Vdc. Resolution is 0.1 Vdc and ASO out updates.<MENU>Press to advance to next menu item7. ASO Poor Output IAQ Cal 0 ppmUse <UP> or <DOWN> to add orsubtract an offset to the IAQ signal. This can change from -200 to + 200 ppm in 10 ppm increments.<MENU>Press to advance to next menu item8. IAQ CalibrationRelay Test OFFRelay SP 1000 PPMUse <UP> or <DOWN> to toggle the relay on or off for testing.Use <UP> or <DOWN> to change the relay setpoint from 750-1500 ppm. Default is 1000. Resolution is 25 ppm.<MENU>Press to advance to next menu item<MENU>Press to advance to next menu item9. Relay Test 10. Relay Set Point Relay Hy 100 PPMRelay Dly YESRelay Op NOCan change the relay hysteresis to 20, 50, 100, or 200 ppm. Default is 100.By default, the relay has a 1 minute minimum on time and a 1 minute minimum off time to prevent fast cycling. This feature can be disabled here.By default, the relay is normallyopen as its non-energized state. Use <UP> or <DOWN> to change to NC (normally closed).<MENU>Press to advance to next menu item<MENU>Press to advance to next menu item<MENU> Exits the User menu and returns the normal operation. The LCD flashes“Menu Exits” for 3 seconds.11. Relay Hysteresis 12. Relay Delay 13. Relay Open/ClosedDimensionsTHE FUTUREIS WHAT WE MAKE IT® U.S. Registered Trademark © 2020 Honeywell International Inc.Printed in Canada 31-00414-01WEEE Directive 2012/19/EC Waste Electrical and Electronic Equipment directiveAt the end of the product life dispose of the packaging and product in a corresponding recycling centre. Do not dispose of the unit with the usual domestic refuse. Do not burn the product.Honeywell Building TechnologiesIn the U.S.:Honeywell715 Peachtree Street NE Atlanta, GA WARNING: This product can expose you to chemicals which are known to the State of California to cause cancer/birth defects or other reproductive harm. For more information go to .。

REGATTA Compass SensorProduct reference: 90-60-396USER MANUAL&INSTALLATION GUIDERev : 1Zi de Kerandré – Rue Gutemberg – 56700 – HENNEBONT – FRANCECONTENTS1OPERATION (3)P RESENTATION (3)L IST OF CHANNELS DISPLAYED (4)ALARMS SETTING (4)F ILT E R ING OF THE CHANNELS (4)D IAGNOSTIC FOR 1ST LEVEL TROUBLESHOOTING. (5)2SENSOR CALIBRATION (6)O FFSET SETTING (6)COMPASS AUTOCOMPENSATION (8)3INSTALLATION (9)L IST OF ACCESSORIES (9)INSTALLATION PRECAUTIONS (9)I NSTALLING THE COMPASS ON A VERTICAL SURFACE (10)C ONNECTION TO THE TOPLINE BUS (14)1 OPERATIONPRESENTATIONThe Regatta Compass sensor is a measuring instrument that provides the magnetic heading, heel and pitch of the boat.It is connected to the Regatta Compass interface of your TOPLINE installation.The sensor is equipped with a 10-meter cable, a mounting bracket, two screws and the Regatta Compass interface.architecture of the installationLIST OF CHANNELS DISPLAYEDThe Regatta compass, connected to the TOPLINE bus of your installation, creates the channel below. They are accessible from the displays of the TOPLINE range.ALARMS SETTINGThe setting of an alarm enables you to monitor the magnetic heading you are following. When the preset angle range is exceeded, a warning message is displayed and an audible alarm is activated.There is no alarm for heel and pitch.ProcedureDisplay the magnetic heading channel.Select the BASE sub-channel and enter the value of the reference heading selected for the alarm.Select the RANGE sub-channel and enter the tolerance on either side of the reference heading.0°To cancel the alarm, enter the value 0 in the RANGE sub-channel.Thus, the setting of an alarm on the compass will allow you to effectively monitor the heading consistency of your boat.To activate the alarms, please refer to the user guide of your display.FILTERING OF THE CHANNELSThe level of filtering of a channel determines the frequency of update of the data displayed. For example, in rough sea when the boat moves significantly, it is useful to increase the filtering of the magnetic heading channel to stabilise the value displayed. Conversely, in calm sea, low filtering will be preferable to obtain a fast response of the display.Filtering is adjustable between 1 and 32, and the default value is 8. The lower this value is, the higher the frequency of update is.Please refer to the user guide of your display to adjust the filter setting.Technical specificationsPower supply: 10 to 16VDCPower consumption: <200mA (Compass & Interface)Resolution: 0.1° (with Processor)Roll and pitch measurement range: +/- 50°Tightness: IP66Weight: 270gOperating temperature: -10°C to +50°CStorage temperature: -20°C to +60°CDIAGNOSTIC FOR 1ST LEVEL TROUBLESHOOTING.This chapter can help you rapidly resolve minor problems which do not require the intervention of a specialist. Before contacting technical support, please check the troubleshooting table below.Problem Possible causes and solutionsThe Topline installation does not detect the compass.The bus cable is not or is badly connected to the terminal box : check theplugging inside the terminal box. Check the state of the cables : theymust not show any sign of wear or cut.The magnetic heading displayed is very different from that indicated by the steering compass.Check that no equipment likely to disrupt the steering compass of your boat or the fluxgate compass is in the vicinity: please consult the list in the installation chapter.Check that the steering compass of your boat is compensated.Carry out a calibration of the compass.If you do not manage to solve the problem, please contact your distributor.2 SENSOR CALIBRATIONThe Regatta Compass is adjusted at the factory. However, an offset adjustment is required to adapt the sensor to the specificities of your boat and to obtain an optimum measurement accuracy. Follow the calibration procedure below, while visualising the settings on a display: please refer to the user guide of your display.OFFSET SETTING2.1.1 PrincipleAfter the installation, it is necessary to adjust the OFFSET of the Regatta Compass so that the magnetic heading displayed is identical to the true magnetic heading.In order to do that, you must carry out an actual test at sea with your boat. Take the GPS unit of your boat as reference, and make sure there is no current and the sea is calm in the area chosen for this test. Follow a set bottom (magnetic) heading and note the heading shown by the magnetic heading channel of your display. Then, deduce the difference between the steering compass and the magnetic heading displayed : this value is the correction offset of the Regatta compass.2.1.2 Procedure for setting the offset coefficient (the default offset value is 0):Select the calib offset sub-channel of the magnetic heading channel.Enter the new calculated offset coefficient and validate using the enter key. The new setting will be saved to the memory.2.1.3 Procedure for setting the heel offset (the default offset value is 0):Select the sub-channel offset calib of the Heel channel.Enter the new offset coefficient and confirm by pressing enter. The new setting will be saved to the memory.2.1.4 Procedure for setting the pitch offset (the default offset value is 0):Select the sub-channel offset calib of the Pitch channel.Enter the new offset coefficient and confirm by pressing enter. The new setting will be saved to the memory.Please refer to the user guide of your display to perform the setting.COMPASS AUTOCOMPENSATIONOn some boats, the Regatta Compass may be strongly disrupted by its environment. Despite a careful installation and an offset properly adjusted, an important difference remains between the magnetic heading displayed and the true magnetic heading, throughout the measurement range between 0 and 359°. In this case, you can perform an autocompensation of the Regatta Compass to achieve an acceptable level of accuracy.2.1.5 Autocompensation principleThe operation consists in executing a perfect circle with your boat at a rigorously constant speed. Thus, your Regatta Compass will be accurately corrected between 0and 359°.2.1.6 Autocompensation procedure for the Regatta CompassIn order to achieve a successful autocompensation, you must sail:-On a smooth sea, with no current,-Away from large magnetic masses such as cargo ships, buoys, metallic pontoons,…-At a constant speed of about 2 or 3 knots.1. Display the magnetic heading channel.2. Launch the “autocompensation” mode according to the procedure described in the userguide of your display.3. Start to describe the circle then launch the autocompensation procedure.4. One circle is enough to perform the autocompensation correctly.5. The display then sends out a message to the user indicating that the autocompensation issuccessful. The number 3 for the Gyropilot and the number 3000 alternately with dashes for the other displays (Performance, TL25 and SL50).6. Exit the autocompensation mode.Please refer to the user guide of your display to perform the autocompensation procedure. Should there be a problem during autocompensation, the display will notify the user of the cause of the fault indicating alternately, for 5 seconds, the message PANNE with the following code :-code 11: Failure through timeout (> 5 minutes) or excessively slow rotation (< 30 sec / 45°). -code 12: Failure through excessive heel.-code 13: Any other error.In case of autocompensation error, the measurements are not saved to the memory and the sensor resumes its normal operating mode.3 INSTALLATIONBefore starting the installation, take the time to select the most appropriate location for the sensor. Indeed, the Regatta Compass and its TOPLINE interface, just like the steering compass of your boat, is sensitive to metal masses, the movements of the boat and the disturbances caused by electrical appliances. Although it can be autocompensated, the installation must be carefully carried out in order to achieve an optimum level of accuracy. LIST OF ACCESSORIES-TOPLINE Terminal box: 90-60-121-TOPLINE bus cable: 20-61-001INSTALLATION PRECAUTIONSThe location of the sensor must be:-as close as possible to the pitch and roll centres of the boat; the closer it is to the centre of gravity, the more stable the measurement will be.-more than one metre away from onboard magnetic compasses (to avoid a mutual disturbance).-as far as possible from onboard magnetic masses.-With the least amount of vibration.-Do not install the compass inside boats with a steel hull. A position on the mast can be considered on this type of boat.Below is a list of equipment likely to disrupt a fluxgate compass:-The keel of the sailing boat (when it is made out of cast iron or steel).-The radio and radar equipment.-The boat’s engine.-Generators and battery chargers.-Voltage regulators.-Electrical motors.-Tool boxes and anchors.-The electrical windlass.-High voltage electrical cables.Before installing the Regatta Compass, you can check that the location will not be disrupted by following the procedure below:Place a bearing compass at the selected location. Then, with your boat, execute a full 360° circle in order to compare the information provided by the steering compass and the boarding compass. If the variations are less than 10°, the location is suitable.Also make sure you will be able to run the cable without being too close to the high amperage cables, such as those of the generator motor and batteries. Keep a distance of at least 1 metre between the cables.INSTALLING THE COMPASS ON A VERTICAL SURFACEUsing a spirit or electronic level, mark the mounting holes of the mounting bracket at the chosen location.Drill the 4mm holes and screw the self-tapping stainless steel screws.Drill 6mm holes for the mounting bracket centre screws.Spirit levelSensor preparationThere are two ways to install the sensor:Using threaded pins:This method is easier for the user because it allows the position of the compass to be adjusted. However, these screws will protrude under the sensor by about 20mm, which can prevent the compass from being installed in a limited space.Install the cable and the seal on the compass.Screw the pins onto the compass.Serial number ConnectorArrow pointing forwardCompassThreaded pin ConnectorSealUsing screws: The screws allow the space needed for the compass and its mounting bracket to be optimised.Installation of the compassCompass Seal Threaded pin CableMounting bracket Positioningscrews Washers Washers NutScrewPass the connector of the compass through the seal. Connect the cable to the compass.11 46_Regatta_Compass_Interface_um_EN_14Insert the seal onto the compass so as to match the mounting holes between the compass and the seal. Pass the cable through the mounting bracket and place the compass onto its mounting bracket. Line up the “Forward” arrow with the centreline of the boat. Screw the mounting screws or nuts, depending on the chosen solution. Make sure the axis of the compass has not moved while tightening the screws or nuts.Installing the compass on a horizontal surfacePass the connector of the compass through the seal. Connect the cable to the compass. Insert the seal onto the compass so as to match the mounting holes between the compass and the seal. Drill the holes for the threaded mounting pins of the compass using a 6mm drill bit. Drill the cable hole using a 38mm drill bit. Pass the cable through the hole. Position the compass on the surface. Screw the threaded pins onto the compass. Place the flat washers and lock washers on the pins. Hand screw the nuts onto the pins.12 46_Regatta_Compass_Interface_um_EN_14Serial numberConnectorCompassThreaded pinConnectorConnectorSeal Positioning arrowMounting surfaceFlat washer Lock washerNut13 46_Regatta_Compass_Interface_um_EN_14CONNECTION TO THE TOPLINE BUS1. Run the compass bus cable to the interface of the Regatta Compass of your installation. 2. Connect the bus cable of the Regatta compass interface to a terminal box. 3. Connect the bus cable inside the terminal box:If you reduce the length of the bus cable, strip and galvanise the wires before connecting them inside the terminal box.REGATTA COMPASS-+12VDC power supplyDATA black 12VDC whiteTerminal box 90-60-41714 46_Regatta_Compass_Interface_um_EN_14NOTES_____________________________________________________________________________________________________ _____________________________________________________________________________________________________ _____________________________________________________________________________________________________ _____________________________________________________________________________________________________ _____________________________________________________________________________________________________ _____________________________________________________________________________________________________ _____________________________________________________________________________________________________ _____________________________________________________________________________________________________ _____________________________________________________________________________________________________ _____________________________________________________________________________________________________ _____________________________________________________________________________________________________ _____________________________________________________________________________________________________ _____________________________________________________________________________________________________ _____________________________________________________________________________________________________ _____________________________________________________________________________________________________ _____________________________________________________________________________________________________ _____________________________________________________________________________________________________ _____________________________________________________________________________________________________ _____________________________________________________________________________________________________ _____________________________________________________________________________________________________15 46_Regatta_Compass_Interface_um_EN_14NOTES_____________________________________________________________________________________________________ _____________________________________________________________________________________________________ _____________________________________________________________________________________________________ _____________________________________________________________________________________________________ _____________________________________________________________________________________________________ _____________________________________________________________________________________________________ _____________________________________________________________________________________________________ _____________________________________________________________________________________________________ _____________________________________________________________________________________________________ _____________________________________________________________________________________________________ _____________________________________________________________________________________________________ _____________________________________________________________________________________________________ _____________________________________________________________________________________________________ _____________________________________________________________________________________________________ _____________________________________________________________________________________________________ _____________________________________________________________________________________________________ _____________________________________________________________________________________________________ _____________________________________________________________________________________________________ _____________________________________________________________________________________________________ _____________________________________________________________________________________________________16 46_Regatta_Compass_Interface_um_EN_14。

Installation Instructions for theHIH-4030/4031 Humidity SensorsISSUE 350022701Sensing and ControlPERSONAL INJURYDO NOT USE these products as safety or emergency stop devices or in any other application where failure of the product could result in personal injury.The sensor’s housing does not provide electrical safety isolation. Mount the sensor in a location where it cannot be touched, or where a surrounding barrier prevents human contact.Failure to comply with these instructions could result in death or serious injury. CAUTIONIMPROPER HANDLINGDo not remove the sensor from its original protective packaging until it is ready to be installed.Do not touch the sensor surface. Use latex finger cots. Handle the sensor by its package edges or leads. Do not allow objects to enter the cavity of the sensor element.Failure to comply with these instructions may result in product damage. NOTICEFor HIH-4030 only: Under condensing conditions where enough liquid water forms on the sensor to create a parasitic leakage path, the HIH-4030 Series Humidity Sensor produces an erroneous reading of 0% humidity. If this erroneous reading is assumed to be correct by your control function, excess humidity is likely to be introduced into the system. Once the liquid water evaporates from the sensor and the environment returns to a non-condensing state, the device returns to normal functionality.Shade the sensor from direct light. Intense direct light can flood junctions in the CMOS (Complementary Metal Oxide Semiconductor) device and drive the output signal to the minimum. This does not harm the sensor or affect calibration. Proper operation resumes shortly after the direct light is removed. Ambient scattered light normally does not affect performance.At the end of its working life, dispose the sensor in accordance with Directive 2002/96/EC (WEEE). CAUTIONIMPROPER CLEANINGInsert and solder the sensor after the PCB cleaning process.Failure to comply with these instructions may result in product damage.CAUTIONIMPROPER SENSOR POSITIONINGPosition the sensor so that its face is exposed to the atmosphere being monitored.Failure to comply with these instructions may result in product damage.Failure to comply with these instructions may result in product damage.PROTECTIVE TAPE REMOVAL 1. Use proper ESD protection.2. Use finger cots to ensure that no foreign debris falls into the filter, sensor cover or die.3. Remove protective tape according to Fig. 1.SOLDERINGHand soldering is acceptable. If reflow soldering is required, use a no-clean flux. Limit the contact of the flux to the leads only.Reflow soldering profile is specified by J-STD-020B for a smallpackage with a peak temperature of 250 o C [482 oF].MOISTURE SEALING THE LEADSIf, in the presence of intermittent moisture or othercontaminants, there is the possibility of galvanic paths between the leads, moisture seal the leads and exposed pads.HIH-4030/4031 SeriesIssue 3 500227012 Honeywell Sensing and Control1. Can only be achieved with the supplied slope and offset. For HIH-4030/31-003 catalog listings only.2. Includes testing outside of recommended operating zone.3. Includes testing for recommended operating zone only.4. Device is calibrated at 5 Vdc and 25 ºC.5. Non-condensing environment. When liquid water falls on the humidity sensor die, output goes to a low rail condition indicating no humidity. Sensor is ratiometric to supply voltage. Extended exposure to >90% RH causes a reversible shift of 3% RH. Sensor is light sensitive. For best performance, shield sensor from bright light.Figure 2. Operating Environment (Non-condensing Figure 3. Storage Environment (Non-condensingHIH-4030/4031 Series Issue 3 50022701Honeywell Sensing and Control 3HIH-4030/4031 Series Issue 3 50022701Sensing and ControlHoneywell1985 Douglas Drive NorthGolden Valley, MN 55422 /sensing 50022701-3-ENFebruary 2012Copyright © 2012 Honeywell International Inc. All rights reserved.WARRANTY/REMEDYHoneywell warrants goods of its manufacture as being free of defective materials and faulty workmanship. Honeywell’s standard product warranty applies unless agreed to otherwise by Honeywell in writing; please refer to your order acknowledgement or consult your local sales office for specific warranty details. If warranted goods are returned to Honeywell during the period of coverage, Honeywell will repair or replace, at its option, without charge those items it finds defective. The foregoing is buyer’s sole remedy and is in lieu of all other warranties, expressed or implied, including those of merchantability and fitness for a particular purpose. In no event shall Honeywell be liable for consequential, special, or indirect damages.While we provide application assistance personally, through our literature and the Honeywell web site, it is up to the customer to determine the suitability of the product in the application.Specifications may change without notice. The information we supply is believed to be accurate and reliable as of this printing. However, we assume no responsibility for its use. SALES AND SERVICEHoneywell serves its customers through a worldwide network of sales offices, representatives and distributors. For application assistance, current specifications, pricing or name of the nearest Authorized Distributor, contact your local sales office or:E-mail:*********************Internet: /sensingPhone and Fax:Asia Pacific +65 6355-2828+65 6445-3033 FaxEurope +44 (0) 1698 481481+44 (0) 1698 481676 FaxLatin America +1-305-805-8188+1-305-883-8257 FaxUSA/Canada +1-800-537-6945+1-815-235-6847+1-815-235-6545 Fax。
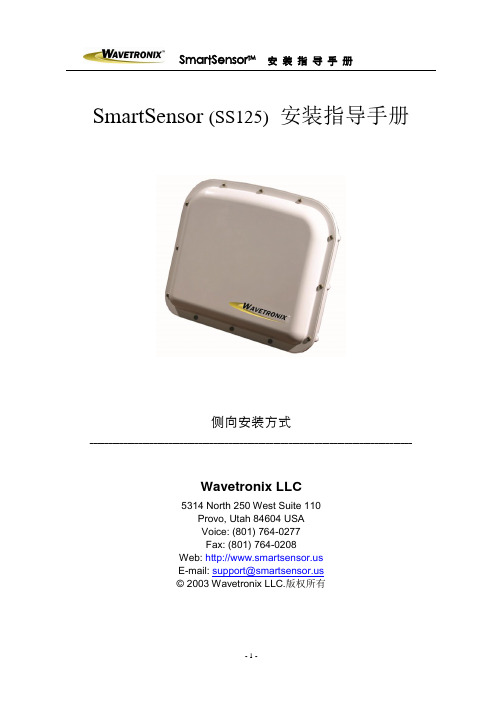
SmartSensor (SS125)安装指导手册侧向安装方式______________________________________________________________________________________Wavetronix LLC5314 North 250 West Suite 110Provo, Utah 84604 USAVoice: (801) 764-0277Fax: (801) 764-0208Web: E-mail: support@© 2003 Wavetronix LLC.版权所有目录文字约定 (4)产品提示 (4)产品简介 (5)SmartSensor开箱检查 (5)安装SmartSensor系统 (6)填充硅质绝缘密 (6)将SmartSensor单元固定在支架上 (6)将固定支架及SmartSensor单元安装在立柱上 (7)连接SmartSensor电缆到SmartSensor单元 (7)连接SmartSensor电缆到接线箱 (9)连接SmartSensor电缆到SmartSensor单元 (9)利用SmartSensor管理软件配臵SmartSensor单元..................10-17 设臵过程总结 (17)附录 (18)SmartSensor 技术参数 (18)电缆接口定义 (18)SmartSensor接口连接视图 (19)文字约定_________________________________________________________________________在使用本指导手册之前,了解本手册中采用的条款和文字排版约定是十分重要的。
粗体文字——通常是要选择的,例如菜单选项、命令按钮或列表中的项目。
产品提示________________________________________________________________________________图标示例在等边三角形中一个闪电标志的图标表示警告用户有触电的危险。

TWIG Door Sensor Installation GuideTWIG Protector ExTWIG Protector Pro ExFor TUP91EU devices:TWIG Embody since SW version 9For TUP90EU devices:TWIG Protector Pro since SW version 40TWIG Protector since SW version 40TWIG Protector EasyS and EasyP since SW version 40including SRD receiver compatible with:SW version CS1R.03.200.0000Detailed configuration instructions are available in TWIG Configuration Guide. For any further questions please contact TWIG support at or +358 40 510 5058.Due to differences in use, installation and hardware, all settings and functions may not be applicable to each device version. Device SRD receiver’s software needs to b e updated to SW versionCS1R.03.200.0000. Device needs to be configured with setting Tag/Door Sensor enabled=ON1. InstallationDoor sensor has integrated Lithium coin battery giving typical 30 000 read cycles.Mount the sensor to door frame and the magnet to door next to each other. The longer marked side of the sensor need to be installed towards magnet. Mounting of the sensor on metal or areas with RF interference may damp the signal and can even totally block the sensor to be read. Mounting can be done with double sided tape or screws.2. UseTWIG Door Sensor is activated by removing its magnet from sensor installed next to it.To read the ID from TWIG Door Sensor, TWIG device settings need to correspond those of the TWIG Door Sensor. Check the device is configured with setting Tag/Door Sensor enabled=ON1. When door is opened and magnet removed from sensor installed next to it,sensor sends a signal to alarm device. The range is about 5-7 meters.2. When TWIG device receives the signal, a door open symbol (image on theleft) is displayed on the device screen.3. TWIG device sends a status message !INF to service center phone number.4. TWIG device is waiting one minute for the MPTP acknowledgement messageACK_1_TAG from the service center phone number.5. When the device receives the acknowledgement message, the symbol on theleft is displayed and device returns to normal state. The repeating dooropenings always require the acknowledgement message or user pressing theSEND key before the next door opening can be registered.6. If the acknowledgement message is not received, the device requests theuser • to send the status message again by pressing the SEND key (TWIGEmbody and Easy devices) or number 1 (other TWIG devices) or• to return to normal state by pressing the END key (TWIG Embody andEasy devices) or number 2 (other TWIG devices).• Device returns to normal state in a minute if END or number 1 keys arenot pressed.3. Safety & recyclingUsage: -20°C to +50°C, Storage: -30°C to +70°C. Do not open the device or battery by yourself or pierce holes in it. Rough handling may break the circuitry inside the device. Do not drop, knock, twist or shake the device or its battery. Even though the device is waterproof, do not wet the device unnecessarily or immerse it in water. Protect the device from heat. High temperatures may shorten the life of electrical devices, melt or warp plastics and damage batteries. Do not warm up the device or battery or use it near fire. Do not short-circuit the battery or battery contacts. Clean the device with a soft cloth, dampened slightly with mild soapy water. Do not clean the device with harsh chemicals, solvents or other corrosive substances. Only allow service personnel authorised by the dealer to service the device.BATTERY CARE, MAINTENANCE AND DISPOSALMagnet needs to be kept together with the sensor when storing the unit. The amount of actual reading cycles depends on the interval used for reading. If the sensor is read several times within minute it will shorten the battery life dramatically. Typical reading interval where maximum performance can be achieved is few times per day. When storing unit for a long time, it should be kept cool in a dry place.Integrated lithium batteries and the device itself should be disposed according to the country-specific regulations.。

Corporate Headquarters ⏹ 3031 Pleasant View Road, P.O. Box 620979, Middleton, Wisconsin 53562-0979 USA ⏹ Tel +608 831 4116 ⏹ Fax +608 836 1736London, UK ⏹ Unit 26-28, Victoria Industrial Estate, Victoria Road, London W3 6UU, UK ⏹ Tel +44 (0)20 8896 1000 ⏹ Fax +44 (0)20 8896 2000Rome, IT ⏹ Via Pieve Torina, 48, 00156 Rome, Italy ⏹ Tel +39 (06) 32 111 683 ⏹ Fax +44 (0)20 8752 8486Holzkirchen, DE ⏹ Ohmstrasse 3, 83607 Holzkirchen, Germany ⏹ Tel +49 (80 24) 47 00-0 ⏹ Fax +49 (80 24) 47 00-3 00Hong Kong ⏹ Rm 1801, 18/F, Tower 1 Phase 1, Enterprise Square, 9 Sheung Yuet Road, Kowloon Bay, Kowloon, Hong Kong ⏹ Tel +852 2799 1220Service: (Americas) ⏹ (UK) ⏹ (DE) ⏹ (Asia)Web: ⏹ Copyright © 2012 ETC. All Rights Reserved. ⏹ Product information and specifications subject to change.7184M2170 ⏹ Rev A ⏹ Released 2012-12 ⏹ ETC intends this document to be provided in its entirety.OverviewThe Unison Paradigm ® Light Sensor provides light level measurement to the connected Paradigm control system. The control system receives the measurements to maintain a programmed lighting output in both dimmed and switched lighting systems.The Paradigm Light Sensors are available in three models:•P-LS - Light Sensor with Controller •P-LSC - Light Sensor Controller Only •P-LSH - Light Sensor Only Each controller supports an individual pair of Light Sensors and is available in neutral white or black finish.A light sensor may be installed within the controller or installed remotely, using up to 1,000 feet (304m) of 16 AWG wire per controller. When using a pair of light sensors, both sensors transmit their light readings to a single controller which provides an averaged reading to the connected Paradigm control system.Wire SpecificationControllerThe Paradigm Light Sensor utilizes LinkConnect to power the sensor and to provide data to and from the connected Paradigm control system.LinkConnect is topology-free and polarity independent. You can install your data runs in any desired combination of bus, star, loop, and home-run. ETC recommends using Belden 8471 (or equivalent) wire. The total combined length of a LinkConnect wire run may not exceed 1,640 feet (500m), with a maximum distance of 1,312 feet (400m)between any two devices.light sensor with controllerlight sensorthread extenderAll control wiring should be installed and terminated by a qualified installer, should follow standard wiring installation practices, and meet local codes. Leaveapproximately 10 inches (254mm) of wiring in the junction box or tied back in the ceiling to allow for wiring connections and future service needs.Remoting the Light SensorThe Paradigm Light Sensor Controller provides termination for up to two light sensors. Each light sensor must be separately wired to the controller using no more than 1000 feet (304m) of 16 AWG wire total per controller. These wire runs must remain separate from LinkConnect wiring. ETC recommends using Belden 8471 (or equivalent) wire.Installation EnvironmentThe Paradigm Light Sensor Controller is intended for installation to a finished ceiling surface, soft ceiling tile, attached to a round fixture junction box or single-gang RACO switch box. The controller operates in ambient temperatures of 0°C to 40°C, non-condensing humidity.The Paradigm Light Sensor can be mounted directly in the controller , installed to a 1/2” conduit knockout or installed into a soft ceiling tile using the provided light sensor thread extender. The light sensor can be installed outdoors when mounted to a weatherproof enclosure. The sensor in this weatherproof installation scenario operates in ambient temperatures of -25°C to 70°C.Parts and SuppliesThe following parts and supplies are included with the specific Paradigm Light Sensor assembly ordered:N o t e :ETC requires that all stations be grounded by using a 14 AWG (2.5mm 2) ESD drain wire.Parts and Supplies Light Sensor complete unit (P-LS)Light Sensor only (P-LSH)Light Sensor Controlleronly (P-LSC)soft ceiling tile adaptorX X LinkConnect and ground wire pigtailsX X light sensor thread extenderX X 3 position WAGO connectorsX X 2 position WAGO connectorsX 1 each nuts and washers 3/4” and 1”X X 2 each screws 6-32 x 3/4” and 1 3/4”X X blank sensor head X XInstallationThe Paradigm Light Sensor is provided with a twist-lock mounting plate that can be mounted to a finished ceiling, junction box, or soft ceiling tile. Determine the installation method and follow the specific instructions detailed.•"Junction Box Installation" on page 3•"Soft Ceiling Tile Installation" on page 5•"Installing the Light Sensors Remotely (optional)" on page 6Junction Box InstallationStep 1:Pull Belden 8471 (or equivalent) and 14 AWG (2.5mm2) ground wire to thejunction box.N o t e :The LinkConnect pigtail and WAGO connectors provided are only required when the sensor and controller are installed in series with other sensors. If you are not continuing the data run, direct termination is recommended on the sensor control board.terminatewires hereoptionalsensor wiresTermination is available at the controller for LON (LinkConnect) from the data source (Paradigm), and up to two light sensors. Flexibility is provided with regards to how the light sensor(s) is installed. You can install a light sensor at the controller or up to two light sensors can be installed remotely.Step 2:If you are installing the controller in series with other sensors, sensorcontrollers, or stations (continuing the data run), use the provided LinkConnect pigtail, ESD ground pigtail and WAGO connectors to make the terminations. Ifyou are not continuing the data run , proceed to step 4.Step 3:If you are installing the primary and/or optional second light sensorremotely from the controller, reference "Installing the Light Sensors Remotely (optional)" on page 6, then return to these instructions. If you are not remoting a light sensor, proceed to step 4.Step 4:Orient the smooth side of the mounting plate to the junction box and pull eachrun of Belden 8471 (LON and remote sensor wires) and the 14 AWG (2.5mm 2) ESD drain wire from the junction box through the provided holes near the center of the mounting plate.Step 5:Secure the mounting plate to the junction box using the screws provided (bothshort and long screws are included for convenience).Step 6:Strip each wire 5/16” (8mm) and terminate the white, black, and green (ground)wires to the LON terminal block located on the sensor control board. Torque each termination to 3.1-3.5 in-lb.a:Terminate the white incoming wire to terminal A.b:Terminate the black incoming wire to terminal B.c:Terminate the green wire to the labeled ground terminal.Step 7:If the primary or an optional second light sensor is installed remotelyfrom the controller, reference "Installing the Light Sensors Remotely (optional)" on page 6 for termination instructions, then return to these instructions. Otherwise, proceed to step 8.Step 8:Attach the sensor to the mounting plate by aligning the tabs on the sensor withthe slots on the mounting plate, then twist clockwise until the two are locked into place.N o t e : Primary Sensor and Optional Sensor wires should terminate directly to the terminals located on the controller. See “Installing the Light Sensors Remotely (optional)” on page6.a:Strip 3/16” (5mm) of insulation from each installed LONwire.Open the three terminal levers on a WAGO connectorand insert the installed (typically black) Belden 8471LinkConnect wire, the black lead from the sensor pigtail,and the continuing Belden 8471 (typically black) wire intothe terminals.Close the levers onto the wires.Repeat the above for the installed (typically white)Belden 8471 LinkConnect wire and the remaining pigtailfrom the sensor, as well as the ESD ground wires usinga new WAGO connector and the ground pigtail for eachtermination type.Soft Ceiling Tile InstallationStep 1:Pull the Belden 8471 (or equivalent) and 14 AWG (2.5mm 2) ground wire to theinstallation location.Step 2:Orient the smooth side of the mounting plate to the ceiling tile and insert thesoft ceiling tile adaptor through the two small holes near the center of the mounting plate.Step 3:Poke the tines through the ceiling tile, then bend each tine over in oppositedirections for a secure fit.Step 4:If you are installing the sensor in series with other sensors or stations(continuing the data run), use the provided LinkConnect pigtail, ESD ground pigtail and WAGO connectors to make the terminations. If you are not continuing the data run , proceed to step 5.Step 5:If you are installing the primary and/or optional second light sensorremotely from the controller, reference "Installing the Light Sensors Remotely (optional)" on page 6, then return to these instructions. If you are not remotinga light sensor, proceed to step 6.poke the adapter through the ceiling tile, then bendit over for a secure fit.LinkConnect pigtail andWAGO connectors(optional use)terminatewires hereoptionalsensor wires a:Strip 3/16” (5mm) of insulation from each installed wire.Open the three terminal levers on a WAGO connector andinsert the installed (typically black) Belden 8471LinkConnect wire, the black lead from the sensor pigtail,and the continuing Belden 8471 (typically black) wire into the terminals.Close the levers onto the wires.Repeat the above for the installed (typically white) Belden 8471 LinkConnect wire and the remaining pigtail from the sensor, as well as the ESD ground wires using a newWAGO connector for each termination type.Step 6:Create a hole for wire pass-through in the ceiling tile by poking through thecenter hole or oblong hole of the mounting plate, then pull the wires through.Step 7:Strip each wire 5/16” (8mm) and terminate the white, black, and green (ground)wires to the LON terminal block located on the controller board. Torque each termination to 3.1-3.5 in-lb.a:Terminate the white incoming wire to terminal A.b:Terminate the black incoming wire to terminal B.c:Terminate the green wire to the labeled ground terminal.Step 8:If you are installing the primary and/or optional second light sensorremotely from the controller, reference "Terminating Remote Light Sensor Control Wiring" on page 7, then return to these instructions. If you are not remoting a light sensor, proceed to step 9.Step 9:Attach the controller to the mounting plate by aligning the tabs on the controllerwith the slots on the mounting plate, then twist clockwise until the two are locked into place.Installing the Light Sensors Remotely (optional)Step 2:Run Belden 8471 (or equivalent) between the controller and the light sensor installation location.Step 3:For a soft ceiling tile installation , pull the light sensor wire leads through thethread extender, then attach the thread extender onto the light sensor.Step 4:Insert the light sensor through the prepared installation location. This shouldbe done from the finished side of the installation location to the unfinished side (ceiling).Step 5:Thread the appropriate washer and nut (two sizes included) onto either thelight sensor or extension adaptor (if used), securing it in place.installed with thread extenderinstalled without extender Two light sensors may be connected to thecontroller and installed remotely. Each light sensormust be separately wired to the controller using nomore than 1000 feet (304m) of 16 AWG wire totalper controller. These wire runs must remainseparate from LinkConnect wiring. ETCrecommends using Belden 8471 (or equivalent)wire.Step 1:Prepare a hole in the sensorinstallation location (3/4” hole withoutadapter or 1” with adapter).Terminating Remote Light Sensor Control WiringTermination is available at the controller for up to two light sensors (labeled “Primary Sensor” and “Optional Sensor”). When remote light sensors are installed, followthese instructions to terminate the control wiring at both the light sensor and thecontroller. Torque each termination to 3.1-3.5 in-lb.Step 1:Terminate the incoming wire from the controller to the light sensor leads using the WAGO cage clamp connectors (provided).a:Strip 3/8” (9-10mm) from the ends of each wire (both light sensor lead and the and wires from the controller).b:Open the terminal levers on the WAGO connector and insert the installed (typically black) Belden 8471 incoming wire and the black lead from the lightsensor.c:Close the levers onto the wires.d:Repeat for the installed (typically white) Belden 8471 wire and remaining wire lead using another WAGO connector.Step 2:Terminate the incoming wire pairs from the remote light sensors to the controller.a:At the controller, strip 3/16” (5mm) of insulation from the ends of each installed light sensor wire.b:Using a small 1/8” (3,35mm) flat blade or #1 Phillips screwdriver, loosen the terminals on the ‘Primary Sensor” and ‘Secondary Sensor’ connectors foundon the underside of the controller.c:Insert the black (typical) wire from the first light sensor wire pair into terminal ‘1’ of the ‘Primary Sensor’ connector.d:Insert the white (typical) wire from the first light sensor wire pair into terminal ‘2’ of the ‘Primary Sensor’ connector.e:Repeat this process for the second wire pair to the ‘Optional Sensor’ connector. Power Up and TestPower UpFor power to be applied to the Paradigm Light Sensor, any additional LinkConnect terminations for the system must also be made. In addition, the ParadigmArchitectural Control Processor (P-ACP) and Station Power Module (P-SPM) must be installed in the host DRd or ERn rack enclosure.Identify Number of Connected Remote SensorsThe controller termination board includes an LED, labeled ‘Sensor Count’ that blinks according to the number of remote sensors installed. As needed, refer to this LED to ensure the system has been wired properly and the controller has properly detected the correct number of connected light sensors.Binding Sensors to ParadigmThe Paradigm Architectural Control Processor (P-ACP) to which this sensor is physically wired to must learn, or be told, the station hardware address (known as a neuron ID). When the sensor is unbound from the connected P-ACP, the service pin LED blinks.The neuron ID is labeled on the sensor control board and can be manually entered into the configuration using LightDesigner software. Alternatively, the sensor can be identified using the service pin button (designated with “S” on the button) and by the connected Paradigm ACP using its [LonWorks Connections] menu. Reference the related source documentation, either the LightDesigner Online Help System or the Unison Paradigm Architectural Control Processor Configuration Manual; specifically the section on Arch Setup Menu, LonWorks Connections.Record a Target Lighting ValueThe Paradigm Light Sensor includes a button that by default provides recording of target lighting values for its dimming daylight harvesting feature. Pressing the record button enables a five second timer and illuminates the LED red. When the timer expires, the measured light level is stored as the amount of desired light that the connected Paradigm control system should maintain, and the red LED blinks twice to confirm.。
START-UP SHEET – 5000TOCe SENSORThe 5000TOCe Sensor housing provides four LED status lights and a single push button key for local UV lamp control. See Figure 1. UV Lamp ON LED: 1) When illuminated continuously, UV Lamp is on; or, 2) When flashing, indicates sensor is in rinse and auto-balance mode. UV Lamp ON key: Allows the user to turn UV lamp on or off at the sensor. Sensor Status LED: Illuminates continuously when sensor is powered and the patch cable is plugged in. Not lit if patch cable or power is disconnected. Error LED: Illuminates continuously when an Error condition exists.Fault LED : Flashing when a Fault condition exists.The following steps are necessary to install, setup and operate a 5000TOCe Sensor in conjunction with the 770MAX Multiparameter Analyzer Transmitter. For complete details on the 5000TOCe Sensor, refer to Instruction Manual 58 130 082.1. Sensor installation - The 5000TOCe Sensor is designed to be mounted in a variety of installation applications: Wall-mounted, pipe-mounted, and bench-top. The sensor is shipped with mounting tabs installed that can be removed for bench-top installation. A minimum clearance dimension of 18” (45.7 cm) is required on the left side of the sensor for UV lamp change-out. Two plumbing connections are provided on the right side of the enclosure. The lower connection is labeled ‘Sample Inlet’ and the upper connection ‘Sample Outlet’. A third connection, a safety drain, is located on the bottom of the enclosure. For benchtop installations, this drain connector must be removed. Figure 2 shows a typical installed configuration. The installation kit (P/N 02205) includes installation tubeFigure 2Connect the 0.125” (3 mm) PTFE tubing to a sample point isolation valve (not supplied). Warning: For inlet pressure above85 psi (5.9 bar), a pressure regulator (Thornton p/n 58 091 552)is required. Flush sample tubing before installing at the sensor.Close the isolation valve. Attach the other end of the PTFE tubing to the high capacity inlet filter. In applications with high ambient humidity, irregular flow rates, high temperature water or water with significant changes in water temperature resulting in internal condensation, we recommend installation of the Sample Conditioning Coil (included). – See the 5000TOCe Instruction Manual for installation procedure. Connect the stainless steel drain tube (Thornton p/n 58 091 553) as shown in Figure 4. The 0.31” (8 mm) safety drain tubing connects to the tube fitting onthe bottom of the enclosure and should also be directed to anatmospheric drain. See Figure 2 for dimensional restrictions regarding drain tubing. 2. Electrical connections are provided on the left side of the enclosure. There are two fittings: 1) AC Power bulkhead fitting for power cable, and 2) 770MAX patch cable connection. Feed the power cable through the bulkhead fitting on the side-wall. AC power connections are positioned on the right side of the printed circuit board, located on the backside of the sensor front cover. See Figure 3 for terminal wiring. Ensure line fuse is properly installed. See product label for specified fuse size.At this point, sample water can be introduced into the sensor. First, close the inlet needle valve by turning fully clockwise the adjustment knob. Slowly open the sample point isolation valve. Next, open the needle valve slowly, which will start flow to the sensor. Use the inlet needle valve to vary flowrate and make adjustments as needed to establish flow. Turning the adjustment knob counter-clockwise three turns should provide sufficient flow through the sensor. Once there is flow, check to be sure there are no leaks inside the enclosure. Allow the sensor to initially flush with sample water (4-24 hrs is recommended). Close front cover and connect the 770MAX patch cable to the connector on the bottom left side of enclosure.3. Setting the Flowrate – Prior to making a TOCmeasurement, proper operational flow must be established (20 mL/min ±5%). In the 770MAX TOC measurement menus, select the measurement attached to TOC sensor channel, go to Set Flow Rate option (refer to menu tree on reverse side of this sheet) and select ‘Yes’. Once this is done, the four sensor LED lights become indicators showing when proper flowrate is established. All four LEDs will be lit when the flow rate is set properly. If only the bottom one or two LEDs are lit, flow is too low. If only the top one or two LEDs are lit, the flow is too high. Turn the adjustment knob clockwise to decrease flow. Turn adjustment knob counter-clockwise slowly to increase flow.Once the flow rate is set, return the Set Flow Rate functionin the 770MAX menu back to “No” and exit menus. LEDs will revert to their normal function.4. TOC Measurement Setup is accessed through the ‘Measurements’ menu of the 770MAX instrument. Upon reaching the ‘Measurements’ menu, push enter and select the measurement (A,B,C…P) connected with the channel of the TOC sensor. Use the page-down key to access the additional menu screens. At the third menu screen, you will be prompted to push ‘5’ to enter the TOC menus available. The menu tree shown below illustrates the setup options that are available when a 5000TOCe Sensor is attached to a 770MAX (menus shown below reflect factory default settings for a 5000TOCe Sensor). NOTE: A maximum of two Smart 5000TOCe Sensors can be attached to one 770MAX with the two remaining Smart inputs available for any other 770MAX Smart sensors.5. TOC Sensor Startup requires the following steps for the sensor to begin making TOC measurements. Once all Measurement Setup options are configured, the user can push the UV lamp button at the sensor or move back to the screen showing the ‘UV Lamp On’ option. By selecting ‘Yes’ to this function, the sensor UV Lamp will turn on and TOC measurement will begin. However, during initial startup, the 770MAX will display the message, ‘press the UV Lamp ON switch on Sensor #x, to turn on UV lamp’, (x = channel). Push ‘enter’ to continue. This message will remain until the ‘sensor’ key is pushed. Once the ‘sensor’ key is pushed, the measurement will begin. If the Auto-Start feature is set to ‘Ye’s this message will not be displayed. If the Auto-Start feature was left in the ‘No’ position, then this message will again appear after a sensor power loss.Mettler-Toledo Thornton, Inc.36 Middlesex TurnpikeBedford, MA 01730 USATel. +1-781-301-8600Fax +1-781-301-8701Toll Free +1-800-510-PURE ( US and Canada only)********************© Mettler-Toledo Thornton, Inc. 2009OM58130084 Rev.A 04/09 /thornton。
Model 102B03ICP® Pressure SensorInstallation and Operating ManualFor assistance with the operation of this product, contact PCB Piezotronics, Inc.Toll-free: 800-828-884024-hour SensorLine: 716-684-0001Fax: 716-684-0987E-mail:************Web: The information contained in this document supersedes all similar information that may be found elsewhere in this manual.Service –Due to the sophisticated nature of the sensors and associated instrumentation provided by PCB Piezotronics, user servicing or repair is not recommended and, if attempted, may void the factory warranty. Routine maintenance, such as the cleaning of electrical connectors, housings, and mounting surfaces with solutions and techniques that will not harm the physical material of construction, is acceptable. Caution should be observed to ensure that liquids are not permitted to migrate into devices that are not hermetically sealed. Such devices should only be wiped with a dampened cloth and never submerged or have liquids poured upon them.Repair –In the event that equipment becomes damaged or ceases to operate, arrangements should be made to return the equipment to PCB Piezotronics for repair. User servicing or repair is not recommended and, if attempted, may void the factory warranty.Calibration –Routine calibration of sensors and associated instrumentation is recommended as this helps build confidence in measurement accuracy and acquired data. Equipment calibration cycles are typically established by the users own quality regimen. When in doubt about a calibration cycle, a good “rule of thumb” is to recalibrate on an annual basis. It is also good practice to recalibrate after exposure to any severe temperature extreme, shock, load, or other environmental influence, or prior to any critical test.PCB Piezotronics maintains an ISO- 9001 certified metrology laboratory and offers calibration services, which are accredited by A2LA to ISO/IEC 17025, with full traceability to SI through N.I.S.T. In addition to the normally supplied calibration, special testing is also available, such as: sensitivity at elevated or cryogenic temperatures, phase response, extended high or low frequency response, extended range, leak testing, hydrostatic pressure testing, and others. For information on standard recalibration services or special testing, contact your local PCB Piezotronics distributor, sales representative, or factory customer service representative.Returning Equipment –Following these procedures will ensure that your returned materials are handled in the most expedient manner. Before returning any equipment to PCB Piezotronics, contact your local distributor, sales representative, or factory customer service representative to obtain a Return Warranty, Service, Repair, and Return Policies and Instructions Materials Authorization (RMA) Number. This RMA number should be clearly marked on the outside of all package(s) and on thepackinglist(s) accompanying the shipment. A detailed account of the nature of the problem(s) being experienced with the equipment should also be included inside the package(s) containing any returned materials.A Purchase Order, included with the returned materials, will expedite the turn-around of serviced equipment. It is recommended to include authorization on the Purchase Order for PCB to proceed with any repairs, as long as they do not exceed 50% of the replacement cost of the returned item(s). PCB will provide a price quotation or replacement recommendation for any item whose repair costs would exceed 50% of replacement cost, or any item that is not economically feasible to repair. For routine calibration services, the Purchase Order should include authorization to proceed and return at current pricing, which can be obtained from a factory customer service representative.Contact Information –International customers should direct all inquiries to their local distributor or sales office. A complete list of distributors and offices can be found at . Customers within the United States may contact their local sales representative or a factory customer service representative. A complete list of sales representatives can be found at . Toll-free telephone numbers for a factory customer service representative, in the division responsible for this product, can be found on the title page at the front of this manual. Our ship to address and general contact numbers are:PCB Piezotronics, Inc.3425 Walden Ave.Depew, NY14043 USAToll-free: (800) 828-884024-hour SensorLine SM: (716) 684-0001 Website: E-mail:************PCB工业监视和测量设备 - 中国RoHS2公布表CHINA RoHS COMPLIANCEDOCUMENT NUMBER: 21354 DOCUMENT REVISION: D ECN: 46162Drawing Number: 21075Revision: CECN Number: 47023 1.0 INTRODUCTIONThis series of miniature dynamic pressure sensors is specifically designed for shock tube and blast wave measurements and for other applications requiring very high frequency, near non-resonant response.The term used to describe the transient response of this model series is “Frequency Tailoring” and it encompasses several mechanical and electrical design features coupled with stringent in-process fabrication/test procedures with heavy emphasis on the shock tube as a tool.2.0 DESCRIPTIONAlthough this series consists of sensors with three basic mechanical configurations and six different sensitivities, each model is basically similar in internal design.Typical ICP ® Probe Style SensorEach utilizes the acceleration-compensated Series 113 quartz piezoelectric element coupled to a source follower type miniature electronics. (See “General Guide to ICP ® Instrumentation,” G -0001B, for a detailed description of the ICP ® concept.)The figure above shows the components of the basic ICP ® probe, i.e. the piezoelectric element and the ICP ® source follower amplifier. These components are joined together as an inseparable sealed assembly at the factory. Disassembly should not be attempted in the field. Series 113B2x are in a probe configuration and are installed with a hollow clamp nut with 5/16-24 external threads. The housing of these models is at electrical ground potential. Series 113B3x are similar to the B2x Series with an additional feature; all Invar construction. The all Invar sensors are designed to have minimal susceptibility to thermal transient events and are specifically suited for high-temperature shock and blast measurements. Series 113: Probe Style Sensor Series 102 consist of the basic 113 Series probe, as in the above mentioned series, mounted in a 3/8-24 threaded mounting adaptor. The probe is installed at the factory in an "off ground" configuration, i.e. the probe body is insulated from the external mounting adaptor body. The Model 102A12 utilizes the same inner probe design as the above two designs but in a 3/8-24Seal Ring Potting Preload SleeveElectrodes 0.218DiaQuartz AccelerationMass and Mounting Clamp NutDrawing Number: 21075Revision: CECN Number: 47023 adjustment of diaphragm mounting depth where it is necessary to adapt to various wall thicknesses. These models are supplied only as low-pressure (250 psi and 100 psi) sensors and are also "off ground".Models 102A21 and 102A22 are high-temperature ICP ® versions to 400 ︒F (204 ︒C), with a 3/8-24 straight threads adaptor and 1/8-27 NPT adaptor, respectively.Series 102: Thread Mount Design, Ground-Isolated Sensor3.0 INSTALLATIONThis manual contains outline and installation information for your specific model.Prepare mounting ports in accordance with instructions given in specific installation drawings, paying particular attention to sealing surfaces. These surfaces must be smooth and free from chatter marks, nicks and other irregularities which could preclude a pressure tight seal.To fully realize the high-frequency response capabilities of this sensor series, flush mounting of the diaphragm must be used.In some cases, where flash temperatures such as those generated by blasts and shock fronts are present, it may be necessary to thermally insulate the diaphragm to minimize signals generated by these effects.be an effective insulating material in many cases. One or more layers may be used across the end of diaphragm and adaptor. A silicone rubber coating approximately .010” thick has also been proven effective in many applications. General Electric RTV type 106 is recommended. Apply the rubber coating to the surface of the diaphragm and allow it to cure in accordance with the manufacturer’s instructions. (If you have ordered the CA option, ablative coated models, further protection will not be necessary.) Although ICP ® sensors have low-output impedance and in general are not affected by moisture, in extreme environments it is good practice to protect cable connections with shrink tubing. It is not necessary to use low-noise cable with this sensor series. In fact, an optional Model 070B09 Solder Connector Adaptor allows the use of ordinary two-wire cable if desired. 4.0 OPERATION It is only necessary to supply the sensor with a 2 to 20 mA constant current at +20 to +30 VDC through a current-regulating diode or equivalent circuit. (See guide G-0001B for powering and signal utilization information pertaining to all ICP ® instrumentation). Most of the signal conditioners manufactured by PCB have an adjustable current feature allowing a choice of input currents from 2 to 20 mA. In general, for lowest noise (best resolution), choose the lower current ranges. For driving long cables (to several thousand feet), use higher current, up to 20 mA maximum. To operate system using a PCB signal conditioner: 1. Switch power on. 2. Wait several minutes for the IC ampli- fier to turn on and stabilize. 3. Proceed with measurements.Drawing Number: 21075Revision: CECN Number: 47023 5.0 POLARITYThe sensors in this series produce a positive-going output voltage for increasing pressure input.6.0 LOW-FREQUENCY RESPONSEThe low-frequency response of an ICP ® system is determined by:1. The discharge T.C. of the sensor2. If AC-coupled at power unit, the coupling time constant.Consult Section 7.0 in guide G-0001B detailed explanation of low-frequency characteristics of ICP ® instruments.7.0 HIGH-FREQUENCY RESPONSEFrequency tailoring and the very high-natural frequency of the sensor give an extremely wide usable frequency range (beyond 100 kHz). Exceptionally fast response time (1 µsec) and clean, virtually non-resonant response to rapid step functions are also features of these sensors. As mentioned previously, the diaphragm must be flush-mounted to fully realize the high-frequency response capabilities of this series.8.0 CALIBRATIONPiezoelectric sensors are dynamic devices, but static calibration means can be employed if discharge time constants are sufficiently long. Generally, static methods are not employed below several hundred seconds time constant.To employ static means, direct couple the sensor to the DVM readout using a T-Connector from the sensor jack or use the Model 484B in the calibrate mode. Apply pressure with dead weight tester and take readings quickly. Release pressure after each calibration point.For the shorter time constant, rapid step functions of pressure are generated by a pneumatic pressure pulse recorder or storage oscilloscope. PCB offers a complete calibration service. Consult factory for details. ICP is a registered trademark of PCB Piezotronics。
Series 641RM Air Velocity TransmitterSpecifications - Installation and Operating InstructionsBulletin E-66-RMThe Series 641RM Air Velocity Transmitter uses a heated mass flow sensortechnology. It has 8 user selectable ranges from 250 FPM to 15000 FPM withcorresponding metric ranges of 1.25 MPS to 75 MPS. The Series 641RM Air VelocityTransmitter provides an isolated 4-20 mA out-put proportional to the velocity. With theoptional 1/2˝ 4-1/2 digit LED display, the Series 641RM Air Velocity Transmitter willprovide a highly visible local readout of the velocity.INSTALLATIONLocation: Select a location where the temperature will be within 32 to 140°F (0 to60°C) to mount the enclosure. The transmitter may be located any distance from thereceiver provided that the total loop resistance does not exceed 600 Ω. The probeshould be located where conditions are representative of the overall environmentbeing monitored. Avoid locations where turbulence, stagnation, or rapidly fluctuatingvelocities or temperatures are present as these conditions may affect the readings.The filter setting may be used to average velocity readings in turbulent conditions.Position: The transmitter is not position sensitive and may be mounted in anyorientation.Probe Orientation: Dots on the probe indicate the direc-tion of the calibrated airflow.Align these dots toward the source of the process air.Airflow: The Series 641RM Air Velocity Transmitter is intended for use with clean dryair. Particulates in the air may cause sensor damage. Dust accumulation may impairthe velocity measurement and will require probe cleaning.TO READ DISPLAY UNIT MUST BE MOUNTED HORIZONTALLY AS SHOWNABOVE. DISPLAY CAN BE TURNED 180 SO CONDUIT OPENING CAN BEPOSITIONED TO THE RIGHT OR LEFT.Note: Where conduit connections are not made, a 1/2˝ NPT cable seal should be used to prevent contaminants from entering the case. Where conduit connections are made, make sure that any possible condensation within the conduit will not flow into the transmitter housing.ELECTRICAL CONNECTIONThe Series 641RM Air Velocity Transmitter has been designed for easy and flexible connection to power and loop receivers. Electrical connection is made inside thebody of the device with a “Euro” style terminal block. The device features a current loop that is fully isolated from the power source. The current loop has an internal 24 V isolated supply so no external loop power is required. With full isolation, loop grounding is not a concern. The input power requirements are also very flexible. The device may be powered from either an AC or DC power source.Receiver-Transmitter Connection — The Series 641RM Air Velocity Transmitter is designed as a three or four wire 4-20 mA device. The current loop output is isolated from the power supply input and provides an internal 24-volt loop supply. With a DC power supply, a three or four-wire connection may be used. Do not use a three-wire connection with an AC power source. In a three-wire connection either power supply wire may be used as the common. The total loop resistance should not exceed 600 Ω.Power Supply Connection — The power supply may be either AC or DC. The DC power may be from 12-35 V. The power connection is not polarity sensitive so the positive and negative connections may be made to either power terminal. The AC connection may be from 10-16 VAC RMS. Do not exceed 20 VAC. When selecting a transformer please note that the specified output for transformers is at some specified current. With a load current less than the specified current transformer output may be significantly higher than the specified voltage. Transformers with secondary voltages of 10-16 VAC are recommended.Do not exceed the specified supply voltage rating. Permanent damage not covered by the warranty may result. Do not use anexternal power source on the current loop connection.Do not use a receiver with an internal power supply or use an external supply in the current loop. The current loop is poweredfrom within the Series 641RM Air Velocity Transmitter. Connecting an external supply to the current loop may destroy the transmitter. Using an external supply voids thewarranty.Do not use transformers with a secondary voltage rating greaterthan 16 VAC RMS.Interior label diagramPOWER SUPPLY AC OR DC RECEIVER4-WIRE 3-WIRERECEIVER NEGATIVECOMMONRECEIVERDC SUPPLY ONLY (EITHER POLARITY)3-WIRERECEIVER POSITIVECOMMONRECEIVERDC SUPPLY ONLY (EITHER POLARITY)3 or 4-wire connectionWire Type and Length — The wire selection for an installation is often overlooked or neglected and may contribute to improper or even intermittent operation. In all cases ensure that the connection meets all applicable national and local electrical codes. Although the 4-20 mA current loop systems are relatively immune to wire or wiring related problems, selection of the wire for some installations will be an important factor in ensuring satisfactory system operation. Twisted conductors will usually be immune to most stray electric and magnetic fields and to some extent electromagnetic fields, such as interference from RF transmitters. With twisted pair wiring the current loop and the power connections should be separate pairs. Avoid using flat or ribbon cable that has no regular conductor twist. Where interference is possible, it is recommended that shielded wire be used. The shield must not be used as one of the conductors and should be connected to ground at only one end, generally at the power supply. Similarly, if the installation uses conduit, the conduit should be connected to protective ground as specified by the applicable code and the signal wiring must not be connected to the conduit at more than one point or as specified by the code. The maximum length of wire connecting the transmitter and receiver is a function of the wire resistance and receiver resistance. The total loop resistance must not exceed 600 Ω, including the receiver resistance and wire resistance. The power supply connection must be designed so that the worst case voltage drop due to wire resistance will not cause the power supply voltage at the transmitter to drop below the specified value. Provided the power supply voltage is maintained within the specified voltage range, the Series 641RM Air Velocity Transmitter is not affected by variations in power supply voltage.TRANSMITTER SETUPThe Series 641RM Air Velocity Transmitter has been designed for easy setup. It has five configuration parameters that may be adjusted by the user. These parameters are Output Filter, Range (in English or Metric), span, 4 mA set-point and 20 mA set-point. All of these may be adjusted at any time in the field. These adjustments may also be easily returned to factory default.A set of controls and indicators are provided within the unit consisting of the select button, enter button, adjustment control, and six LED indicators. When operating normally, only the RUN LED indicator will be illuminated. During the setup operation the LED indicators will indicate the parameter selected, when it is being adjusted, and status of the adjustment process. If the unit is left in the setup mode for several minutes without any activity it will return to the normal operating mode.Two buttons and a potentiometer control the setup process.The SELECT button is used to scroll between the setup parameters. The ENTER button allows access to each parameter for adjustment.The ADJUST potentiometer is used to change the value of the parameters. Holding the ENTER button for 2.5 seconds saves the new parameter value.Making AdjustmentsThe adjustment process has three steps: select the para-meter, adjust the parameter, save the new value. These are described in the following steps.1. Select the parameter: Each time the SELECT but-ton is pressed the LED indicator will advance to the next parameter. When the last parameter, SPAN, is selected, the next time the SELECT is pressed the unit will return to RUN mode. Pressthe SELECT button until the LED indicator illuminates the desired parameter. Press ENTER. The selected indicator will begin to blink, show-ing the parameter may now be adjusted. If the unit is left in the setup mode, after several minutes it will reset to the operate mode.2. Adjust the parameter: Turn the ADJUST poten-tiometer until the desired setting is made. This may be adjusted using a small screwdriver or similar tool. Be careful not to force the control past its stops or damage will result.3. Save the parameter: To save the new parameter press and hold the ENTERbutton. The LED indicator will begin to flash at a faster rate. After about 2.5 seconds all of the LED indicators will flash when the parameter is saved. If you do not want to save the parameter press the SELECT button without entering the parameter.The adjusted value will be discarded and next LED indicator will be illuminated.Adjusting the Output FilterThe output filter may be adjusted to smooth the readings when measuring turbulent flow. The time constant may be adjusted from 0.5 seconds to 15 seconds. To adjust the fil-ter time constant, select the FILTER indicator. Press ENTER to enable adjustment. Turn the ADJUST until the desired amount of damping is achieved. To save the value press and hold the ENTER button until the LED indicators all flash, indi-cating the value was saved. To discard the adjustment press SELECT before pressing the ENTER button.1: Indicator on0: Indicator offRange SelectionThe range selection allows you to select one of eight ranges in either feet per minute (FPM) or meters per second (MPS).Ranges:FPM: 250, 500, 1000, 2000, 3000, 5000, 10000, 15000 MPS: 1.25, 2.5, 5, 10, 15, 25, 50, 75Select the RANGE indicator by pressing ENTER when the RANGE LED indicator is illuminated. The A,B,C LED indi-cators will display which range setting is currently active. Press ENTER to enable adjustment. Turn the ADJUST until the desired range indication is achieved. If you want to dis-card the adjustment press SELECT. If you want to save the range press and hold ENTER. The RANGE LED will blink at a faster rate for about 2.5 seconds then all of the LEDs will flash indicating the value was saved.The range setting is displayed with the LED indicators. The function of these indicators is summarized on the control label inside the unit. The following table summarizes the indicator status for each range settingPrinted in U.S.A. 7/21FR# 443309-00 Rev. 2©Copyright 2021 Dwyer Instruments, Inc.Span SettingThe Series 641RM Air Velocity Transmitter has been cali-brated for standard sea level conditions. As a mass flow device it will always read the air velocity for standard condi-tions. Density changes due to barometric or absolute pres-sure are not corrected automatically. The span setting allows correction for altitude or other static pressure condi-tions that affect the density of the process air. This parame-ter allows for a ±50% adjustment in the span value.To make the span adjustment you will need to know either the absolute static pressure or the corrected velocity of the process air. Set the air velocity to a known value, ideally about 3/4 of the full-scale range value. Press SELECT until the SPAN LED indicator is illuminated then press ENTER. The SPAN LED will begin to blink. Adjust the control for the desired velocity then press and hold the ENTER button until all of the LED’s flash, indicating the new value was saved. If you know the absolute static pressure you can compute the corrected velocity using the following equation:Where:P0 is the standard pressure of 29.9 in. Hg. or 760 mm Hg PA is the absolute pressure readingVrdg is the indicated velocity Vcor is the corrected velocity4 mA SettingTo make this setting you will need a milliammeter connect-ed in the current loop. It is not required to use a known air flow velocity to make this calibration setting. The calibration settings of the velocity and mA outputs are independent of each other. Press SELECT until the 4 mA LED indicator is illuminated then press ENTER. The milliammeter will now read approximately 4.0 mA. Adjust the control for a 4.0 mA reading on the milliammeter. Press and hold ENTER to save the new setting. Pressing SELECT before pressing ENTER will restore the previous calibration value.20 mA SettingIt is not required to use a known air flow velocity to make this calibration setting. The calibration settings of the veloc-ity and mA outputs are independent of each other. With the milliammeter connected in the current loop, press SELECT until the 20 mA LED indicator is illuminated. Press ENTER to begin adjustment of the 20 mA set point. The 20 mA LED will now be blinking. Adjust the control until the milliamme-ter reads 20.0 mA. Press and hold ENTER to save the new setting. Pressing SELECT before pressing ENTER will restore the previous calibration value.Restoring Factory Default SettingsThe 4 mA, 20 mA, and Range settings override factory default values. To restore these to the factory default set-tings, start with the unit in the RUN mode. Press and hold the ENTER button. The RUN LED indicator will begin to blink. After about 2.5 seconds all LED indicators will flash indicating the factory settings have been restored. Range and Filter settings are not affected by this operation. If you are unsure whether any have been altered, press the SELECT button six times to sequence through all settings. When you return to the RUN mode, the RUN LED indicator will blink several times if either the 4 mA, 20 mA, or span settings have been changed. The RUN LED will otherwise remain on.MAINTENANCEIn general the Series 641RM Air Velocity Transmitter should require very little maintenance. In some installations dust may accumulate on the sensor over time. This can be removed by carefully brushing the probe with a small camel hairbrush. If too much force is applied during cleaning, the sensor of the Series 641RM Air Velocity Transmitter may be damaged. Therefore, a trained technician should perform the cleaning operation. A jet of air may also dislodge the accumulated buildup. However, the sensor is delicate and this operation should be done carefully with clean regulated air. Using a shop air supply may exert enough force to dam-age the sensor. Most air supplies of this sort will also con-tain water or oil that could damage the sensor. Technical grade denatured or isopropyl alcohol may be used where the dust accumulation does not respond to brushing. Do not use water. Always disconnect the power when perform-ing a cleaning operation.Aside from field calibrations for span, 4 mA and 20 mA set-ting as described above, the Series 641RM Air Velocity Transmitter cannot be fully factory calibrated in the field. Because of specialized computer instrumentation required, these units must be returned to Dwyer Instruments for fac-tory calibration. Contact customer service to receive a return goods authorization number before shipping.V cor = V rdgP OP A。