YAMAHA数字调音台01v96中文使用说明书
- 格式:doc
- 大小:18.00 KB
- 文档页数:4
在《雅马哈01V 6V2数字调音台进阶应用指南(四)》[1]中讨论了内部效果器的使用,并说明了效果库的内容。
接下来继续深入地了解其更为详尽的设置与操作。
这部分对其输入/输出通道的一些主要设置的灵活应用进行详解。
1 输入通道的门限动态处理在01V 6的每个输入通道,都有一个单独的噪声门(GATE)可用,相当于内置了32台噪声门设备已。
在多支话筒同时打开的情况下,合理地设置通道噪声门,可避免话筒线路带来的本底噪声,以及多支话筒并用造成的传声增益下降易啸叫的问题。
作用类似智能话筒混音器。
01V 6的门限触发还可由非本通道信号来实现(其他输入通道或AUX 发送通道)。
利用这个功能,将门限类型设为限制器,还可实现类似会议系统的主席优先模式,即某路话筒的信号会触发其他所有话筒信号的限幅。
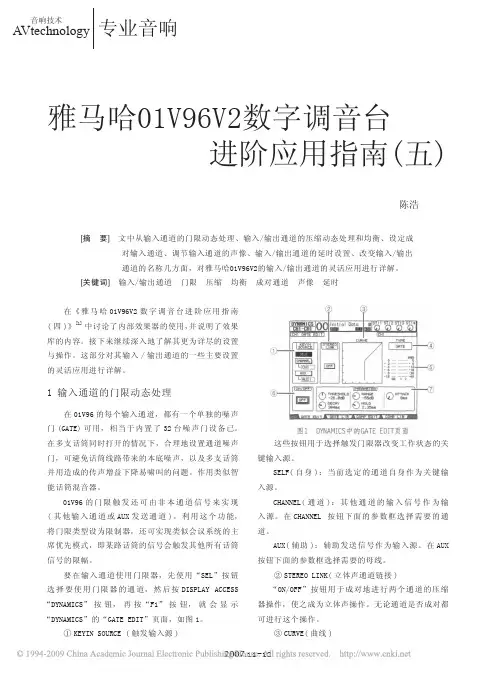
要在输入通道使用门限器,先使用“SEL”按钮选择要使用门限器的通道,然后按DISPLAY ACCESS “DYNAMICS”按钮,再按“F1”按钮,就会显示“DYNAMICS”的“GATE EDIT”页面,如图1。
①KEYIN SOURCE (触发输入源)这些按钮用于选择触发门限器改变工作状态的关键输入源。
SELF(自身):当前选定的通道自身作为关键输入源。
CHANNEL(通道):其他通道的输入信号作为输入源。
在CHANNEL 按钮下面的参数框选择需要的通道。
AUX(辅助):辅助发送信号作为输入源。
在AUX 按钮下面的参数框选择需要的母线。
②STEREO LINK(立体声通道链接)“ON/OFF”按钮用于成对地进行两个通道的压缩器操作,使之成为立体声操作。
无论通道是否成对都可进行这个操作。
③CURVE(曲线)雅马哈01V 6V2数字调音台进阶应用指南(五)图1 DYNAMICS中的GATE EDIT页面[摘 要] 文中从输入通道的门限动态处理、输入/输出通道的压缩动态处理和均衡、设定成 对输入通道、调节输入通道的声像、输入/输出通道的延时设置、改变输入/输出 通道的名称几方面,对雅马哈01V 6V2的输入/输出通道的灵活应用进行详解。
雅马哈调音台使用说明当最初接触调音台的时候,很容易会被它面板上花花绿绿、数目众多的旋钮和推杆唬住。
首先我们来看一下左边的面板。
实际上,左边每一路的推杆和旋钮的意义都是一样的。
所以你只需要集中精力了解一个通道的操作方法就可以通盘掌握。
较少路数的调音台有4路和8路的输入控制,而路数最多的有96路甚至更多的。
这个调音台有8路输入控制,我们只取其中一个来讲解各部分的作用。
1.MIC:麦克风输入接口麦克风输入经由 XLR 母座,可接受平衡式或非平衡式低电平讯号,使用专业动圈式、电容式或丝带式低阻抗麦克风,如果使用非平衡式麦克风需要尽量使用愈短愈好的麦克风线,以避免电波噪音的干扰。
2.LINE:高电平输入接口高电平输入通常经由 TRS 1/4" 立体 Phone Jack 或 TRS 1/4" Mono Phone Jack 送入,麦克风音源以外的讯号都可经由高电平输入至混音机,立体 Phone Jack 的输入是平衡式的,相同于 XLR 的方式,但是如果一定要用非平衡式器材时,可用Mono Phone Jack ,其接线不能太长(4.5m 以内)。
3.LINE -20DB:衰减 20 分贝按键按下此键可以对输入电平衰减 20 分贝。
一般在环境噪音较大,设备电平噪音较大或电平过高的时候使用该按键。
使用该键将对音频输入信号的所有频率进行衰减,以达到将音量较小的杂音或电噪音过滤掉的目的。
有时会出现输入电平信号过高的现象,如不进行衰减,则衰减器的控制范围就会大大降低,只能在一个很小的区域内滑动,造成对音量输出控制很难操作。
此时应按下此键,以增大衰减器的有效控制范围。
4.PEAK:峰值指示灯Peak 灯亮时,警告使用者输入信道内的讯号过强。
发现 Peak 灯亮时,并且任由这种情况持续的话,调音台会启动自我保护功能,切断音源输出。
所以,此时应调整输入音量大小,否则,调音台的音频输出将被自动切断。
可使用的控制包括:Line -20 DB、减小Gain、拉低衰减器,一般以减小Gain为宜。
雅马哈01V96i数字调⾳台说明书仅需连接1条USB数据线即可进⾏多轨录⾳在01V96VCM的基础上,新增了⽀持96kHz采样的16in/16out USB⾳频流功能。
考虑到扩声对现场录⾳的要求不断提⾼这⼀最新动向,不必使⽤⾳频接⼝或Mini-YGDAI扩展卡,只需直接连接已有的USB 端⼝与PC,便可实现多轨录⾳。
当然多轨环境下的回放也更加完善。
还附赠了PC上所需的DAW软件、Steinberg公司的“Cubase AI 6”,可⽅便地准备好录⾳环境。
⽽且,USB端⼝可双向发送、接收MIDI数据。
与外接设备的协作也更加顺畅。
麦克风主扩扬声器LR舞台返听扬声器及其它例)MY8-DA96吉他96kHz 16通道输⼊输出(可⽤于录⾳/回放)⽀持MIDI控制数据传输Cubase AI6(附赠)合成器...基于独⾃理念的“VCM EFFECTS ”&“REV-X ”CHANNEL STRIP 插件拥有5种模型,且均配置1970年代最具代表性的压缩器和EQ 。
完整再现模拟设备所独具的饱和感(FET 、真空管、变压器等设备的特性),并配置可实现最佳调⾳的参数。
可简单获取在实际设备的操作中难以获得的理想⾳效。
最新VCM 效果器V I N T A G E S T O M P 模拟了以前有名机之称的Phaser 。
与其他VCM 效果器⼀样,准备了多台不同状态的实体机,并认真分析了电阻、电容器、光耦合器等内部设备。
经过反复试验,终于成功的实现在PC 平台上再现。
不妨在吉他或键盘上试⽤,定使您仿佛穿越到70年代,“那个声⾳”的世界渐渐在眼前复苏。
MASTER STRIP 的插件“OPEN DECK ”运⽤VCM 技术,并忠实模拟了被称为名机的开盘式录⾳机模拟电路和模拟磁带的特性。
使⽤这个插件可获取并掌控终极的模拟声⾳。
除4种机型外,还带有磁带的新旧、磁带速度、乖离率、EQ 等选项,同时录⾳与播放可选择不同的唱盘,并可随意更改声⾳、失真、饱和等特性,仅需⼀按便可构筑⾳响师追求的独特的混⾳质感。
雅马哈调音台使用说明一、连接设备1.检查所有设备的电源开关是否关闭。
2.查看调音台的主线路输入是否连接到主混音台或扬声器。
3.将各种音频设备连接到合适的输入插孔。
这些设备包括麦克风、乐器、合成器、电脑等。
二、调节输入通道1.选择要调节的输入通道。
2.根据具体情况选择输入插孔类型,如XLR、TRS或RCA。
3.根据需要,打开或关闭48V幻象电源(如果需要给麦克风供电)。
4.调节增益控制,确保输入信号适中,尽量避免过载。
5.使用EQ控制调节音频频率,以增强或削弱特定频段的声音。
三、设置辅助信号1.选择要调节的辅助信号通道。
2.将辅助信号发送到外部设备(如效果器或监听器)。
3.调节辅助信号的沉入量和出座量,以确保适当的信号强度。
四、设置总线和主混音1.将输入通道的信号路由到合适的总线。
2.合理分配不同通道的信号到主混音输出。
3.使用主混音控制调节整个音频信号的平衡,并通过主输出连至扬声器或录音设备。
五、特殊效果和功能1.使用内置效果器为音频信号添加特殊效果。
调整混响、回声、合唱等参数,使声音更加丰富。
2.使用自带的压缩器控制音频动态范围,使音量更加平衡稳定。
3.使用控制台上的旋钮和按钮进行特殊功能设置,如盖帽、切换、静音等。
六、音频录制和回放1.选择要录制的音频源,并连接到音频录制设备,如计算机的音频接口或独立的数字录音机。
2.调整录音设备的输入增益,确保录制的音频质量良好。
3.开始录制音频,并确保每个信号通道的平衡和混合。
七、暂存和存储设置1.如果调音台有存储功能,可以在使用前设置和保存各种音频配置。
2.根据需要,命名并存储相关设置。
八、正常关闭设备1.逐步关闭各个设备的音量和增益控制,以避免突发噪音。
2.关闭所有设备的电源,包括调音台、扬声器和外部设备。
总之,正确使用雅马哈调音台需要了解各种控制元素和连接方式,并根据具体需要进行调整。
熟练掌握调音台的功能和特点,将能够实现高质量的音频处理和混音效果。
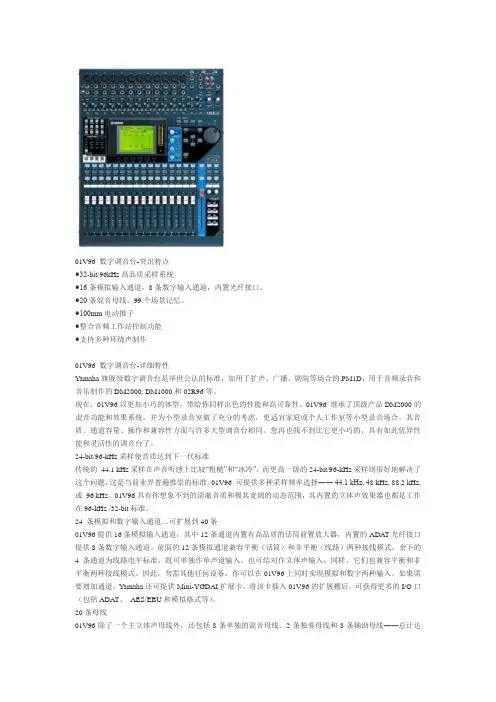
01V96 数字调音台-突出特点●32-bit/96kHz高品质采样系统●16条模拟输入通道,8条数字输入通道,内置光纤接口。
●20条混音母线,99个场景记忆。
●100mm电动推子●整合音频工作站控制功能●支持多种环绕声制作01V96 数字调音台-详细特性Yamaha旗舰级数字调音台是举世公认的标准,如用于扩声、广播、剧院等场合的PM1D,用于音频录音和音乐制作的DM2000, DM1000和02R96等。
现在,01V96以更加小巧的体型,带给你同样出色的性能和高可靠性。
01V96 继承了顶级产品DM2000的混音功能和效果系统,并为小型录音室做了充分的考虑,更适宜家庭或个人工作室等小型录音场合。
其音质、通道容量、操作和兼容性方面与许多大型调音台相同。
您再也找不到比它更小巧的、具有如此优异性能和灵活性的调音台了。
24-bit/96-kHz采样使音质达到下一代标准传统的44.1 kHz采样在声音听感上比较“粗糙”和“冰冷”,而更高一级的24-bit/96-kHz采样则很好地解决了这个问题,这是当前业界普遍推崇的标准。
01V96 可提供多种采样频率选择―― 44.1 kHz, 48 kHz, 88.2 kHz, 或96 kHz。
01V96具有你想象不到的清澈音质和极其宽阔的动态范围,其内置的立体声效果器也都是工作在96-kHz /32-bit标准。
24 条模拟和数字输入通道…可扩展到40条01V96提供16条模拟输入通道,其中12条通道内置有高品质的话筒前置放大器,内置的ADAT光纤接口提供8条数字输入通道。
前面的12条模拟通道兼容平衡(话筒)和非平衡(线路)两种接线模式,余下的4条通道为线路电平标准,既可单独作单声道输入,也可结对作立体声输入。
同样,它们也兼容平衡和非平衡两种接线模式。
因此,勿需其他任何设备,你可以在01V96上同时实现模拟和数字两种输入。
如果需要增加通道,Yamaha还可提供Mini-YGDAI扩展卡,将该卡插入01V96的扩展槽后,可获得更多的I/O口(包括ADAT、AES/EBU和模拟格式等)。
雅马哈01V96V2数字调音台的使用一、实验目的1、掌握数字调音台的基本使用;2、掌握场景的存储和调用;3、了解计算机对调音台的遥控操作。
二、实验器材1、雅马哈01V96V2数字调音台 1台2、话筒 1只3、耳机 1副4、连接线若干5、计算机 1台三、实验原理及实验简介(一)调音台及功能介绍1、调音台是电声系统中最重要的设备之一,又称混音控制器。
调音台常被誉为专业电声系统的“中枢”,以它为中心,连接各种信号源设备和音频输出设备,将音频信号进行调节、加工及处理,使音响效果达到高保真,符合艺术性的要求。
2、调音台的功能介绍01V96小型数码调音台提供无损的24位/96 kHz数字音频处理功能,以及同时40通道同步的混音能力。
01V96广泛的应用于多轨录音、立体声缩混和环绕声制作。
在硬件特点上,它有17个100毫米的电动衰减器,用于控制输入通道、辅助发送和母线输出。
而且衰减器的功能可以有由四个可选软件层来决定。
从320x240像素的液晶显示屏上,在选中通道可以直接通过按钮和控制器等调节均衡参数。
面板上提供8个可以自定义的功能键,可以控制01V96的各种内部参数。
它提供ADAT光纤接口,用来作为传输数字音频的标准,还有扩展槽用于安装选购的数字I/O卡、AD卡和DA卡。
在通道配置上,一次最多可混音32个输入通道和4个ST IN通道,可以将多个通道组合在一起并对通道进行配对用于立体声。
它有8个母线输出和8个AUX发送,可以将母线输出1-8跳线到立体声母线作为编组母线使用。
它可以为用于存储和调用每个输入通道和输出通道的通道设置通道库,每通道均带有四波段均衡器和动态处理器(不包括立体声输入通道),同时,动态处理器和均衡器的设定可以存储在库中共需要时调用。
在效果应用上,它拥有4个高品质的多通道效果器,可以通过辅助发送和通道插入来使用,它提供的效果库可以存储和调用效果设定,而且可以用于增加效果的可选的附加效果包,附加效果包利用了多种多样的的新算法。
ATTENTIONSOFTWARE LICENCING AGREEMENTPLEASE READ THIS SOFTWARE LICENSE AGREEMENT (“AGREEMENT”) CAREFULLY BEFORE USING THIS SOFTWARE. YOU ARE ONLY PERMITTED TO USE THIS SOFTWARE PURSUANT TO THE TERMS AND CONDITIONS OF THIS AGREEMENT. THIS AGREEMENT IS BETWEEN YOU (AS AN INDIVIDUAL OR LEGAL ENTITY) AND YAMAHA CORPORATION (“YAMAHA”).BY DOWNLOADING, INSTALLING, COPYING, OR OTHERWISE USING THIS SOFTWARE YOU ARE AGREEING TO BE BOUND BY THE TERMS OF THIS LICENSE. IF YOU DO NOT AGREE WITH THE TERMS, DO NOT DOWNLOAD, INSTALL, COPY, OR OTHERWISE USE THIS SOFTWARE. IF YOU HAVE DOWNLOADED OR INSTALLED THE SOFTWARE AND DO NOT AGREE TO THE TERMS, PROMPTLY DELETE THE SOFTWARE.1. GRANT OF LICENSE AND COPYRIGHTYamaha hereby grants you the right to use the software program(s) and data (“SOFTWARE”) accompanying this Agreement. The term SOFTWARE shall encompass any updates to the accompanying software and data. The SOFTWARE is owned by Yamaha and/or Yamaha’s licensor(s), and is protected by relevant copyright laws and all applicable treaty provisions. While you are entitled to claim ownership of the data created with the use of SOFTWARE, the SOFTWARE will continue to be protected under relevant copyrights.•You may use the SOFTWARE on your computer(s.)•You may make one or reasonable copies of the SOFTWARE in machine-readable form for backup purposes only, if the SOFTWARE is on media where such backup copy is permitted. On the backup copy, you must reproduce Yamaha’s copyright notice and any other proprietary legends that were on the original copy of the SOFTWARE.•You may permanently transfer to a third party all your rights in the SOFTWARE, provided that you do not retain any copies and the recipient reads and agrees to the terms of this Agreement.2. RESTRICTIONS•You may not engage in reverse engineering, disassembly, decompilation or otherwise deriving a source code form of the SOFTWARE by any method whatsoever.•You may not reproduce, modify, change, rent, lease, or distribute the SOFTWARE in whole or in part, or create derivative works of the SOFTWARE.•You may not electronically transmit the SOFTWARE from one computer to another or share the SOFTWARE in a network with other computers.•You may not use the SOFTWARE to distribute illegal data or data that violates public policy.•You may not initiate services based on the use of the SOFTWARE without permission by Yamaha Corporation.Copyrighted data, including but not limited to MIDI data for songs, obtained by means of the SOFTWARE, are subject to the following restrictions which you must observe.•Data received by means of the SOFTWARE may not be used for any commercial purposes without permission of the copyright owner.•Data received by means of the SOFTWARE may not be duplicated, transferred, or distributed, or played back or performed for listeners in public without permission of the copyright owner.•The encryption of data received by means of the SOFTWARE may not be removed nor may the electronic watermark be modified without permission of the copyright owner.3. TERMINATIONThis Agreement becomes effective on the day that you receive the SOFTWARE and remains effective until terminated. If any copyright law or provisions of this Agreement is violated, the Agreement shall terminate automatically and immediately without notice from Yamaha. Upon such termination, you must immediately destroy the licensed SOFTWARE, any accompanying written documents and all copies thereof.4. DISCLAIMER OF WARRANTY ON SOFTWAREYou expressly acknowledge and agree that use of the SOFTWARE is at your sole risk. The SOFTWARE and related documentation are provided “AS IS” and without warranty of any kind. NOTWITHSTANDING ANY OTHER PROVISION OF THIS AGREEMENT, YAMAHA EXPRESSLY DISCLAIMS ALL WARRANTIES AS TO THE SOFTWARE, EXPRESS, AND IMPLIED, INCLUDING BUT NOT LIMITED TO THE IMPLIED WARRANTIES OF MERCHANTABILITY, FITNESS FOR A PARTICULAR PURPOSE AND NON-INFRINGEMENT OF THIRD PARTY RIGHTS. SPECIFICALLY, BUT WITHOUT LIMITING THE FOREGOING, YAMAHA DOES NOT WARRANT THAT THE SOFTWARE WILL MEET YOUR REQUIREMENTS, THAT THE OPERATION OF THE SOFTWARE WILL BE UNINTERRUPTED OR ERROR-FREE, OR THAT DEFECTS IN THE SOFTWARE WILL BE CORRECTED.5. LIMITATION OF LIABILITYYAMAHA’S ENTIRE OBLIGATION HEREUNDER SHALL BE TO PERMIT USE OF THE SOFTWARE UNDER THE TERMS HEREOF. IN NO EVENT SHALL YAMAHA BE LIABLE TO YOU OR ANY OTHER PERSON FOR ANY DAMAGES, INCLUDING, WITHOUT LIMITATION, ANY DIRECT, INDIRECT, INCIDENTAL OR CONSEQUENTIAL DAMAGES, EXPENSES, LOST PROFITS, LOST DATA OR OTHER DAMAGES ARISING OUT OF THE USE, MISUSE OR INABILITY TO USE THE SOFTWARE, EVEN IF YAMAHA OR AN AUTHORIZED DEALER HAS BEEN ADVISED OF THE POSSIBILITY OF SUCH DAMAGES. In no event shall Yamaha’s total liability to you for all damages, losses and causes of action (whether in contract, tort or otherwise) exceed the amount paid for the SOFTWARE.6. THIRD PARTY SOFTWAREThird party software and data (“THIRD PARTY SOFTWARE”) may be attached to the SOFTWARE. If, in the written materials or the electronic data accompanying the Software, Yamaha identifies any software and data as THIRD PARTY SOFTWARE, you acknowledge and agree that you must abide by the provisions of any Agreement provided with the THIRD PARTY SOFTWARE and that the party providing the THIRD PARTY SOFTWARE is responsible for any warranty or liability related to or arising from the THIRD PARTY SOFTWARE. Yamaha is not responsible in any way for the THIRD PARTY SOFTWARE or your use thereof.•Yamaha provides no express warranties as to the THIRD PARTY SOFTWARE. IN ADDITION, YAMAHA EXPRESSLY DISCLAIMS ALL IMPLIED WARRANTIES, INCLUDING BUT NOT LIMITED TO THE IMPLIED WARRANTIES OF MERCHANTABILITY AND FITNESS FOR A PARTICULAR PURPOSE, as to the THIRD PARTY SOFTWARE.•Yamaha shall not provide you with any service or maintenance as to the THIRD PARTY SOFTWARE.•Yamaha is not liable to you or any other person for any damages, including, without limitation, any direct, indirect, incidental orconsequential damages, expenses, lost profits, lost data or other damages arising out of the use, misuse or inability to use the THIRD PARTY SOFTWARE.7. GENER ALThis Agreement shall be interpreted according to and governed by Japanese law without reference to principles of conflict of laws. Any dispute or procedure shall be heard before the Tokyo District Court in Japan. If for any reason a court of competent jurisdiction finds any portion of this Agreement to be unenforceable, the remainder of this Agreement shall continue in full force and effect.8. COMPLETE AGREEMENTThis Agreement constitutes the entire agreement between the parties with respect to use of the SOFTWARE and any accompanying written materials and supersedes all prior or contemporaneous understandings or agreements, written or oral, regarding the subject matter of this Agreement. No amendment or revision of this Agreement will be binding unless in writing and signed by a fully authorized representative of Yamaha.Special Notices•The software and this manual are the exclusive copyrights of Yamaha Corporation.•Please read carefully the Software Licensing Agreement at the front of this manual before installing the application.•Copying of the software or reproduction of this manual in whole or in part by any means is expressly forbidden without the written consent of the manufacturer.•Yamaha makes no representations or warranties with regard to the use of the software and documentation and cannot be held responsible for the results of the use of this manual and the software.•Future upgrades of application and system software and any changes in specifications and functions will be announced at the following website. /•The screen displays as illustrated in this manual are for instructional purposes, and may appear somewhat different from the screens which appear on your computer.•Copying of the commercially available musical data including but not limited to MIDI data and/or audio data is strictly prohibited except for your personal use.•Windows is a registered trademark of Microsoft® Corporation in the United States and other countries.•Apple, Mac and Macintosh are trademarks of Apple Inc., registered in the U.S. and other countries.•The company names and product names in this manual are the trademarks or registered trademarks of their respective companies.01V96i EditorThe 01V96i Editor enables you to prepare the 01V96i mixing console settings beforehand by editing the parameters offline, and also remotely monitor/control the 01V96i online.Installing the SoftwareProcedures1Verify that your system meets the operating requirements of each software program.page32Install the Studio Manager and each Editor.page33Install the appropriate driver to your computer.page44Start up the Studio Manager, then start up the Editor.page6 For subsequent operations, refer to the PDF manual from the [HELP] menu in each software program.Software installationMinimum System RequirementsKeep in mind that the software is often updated and the system requirements are subject to change. You can check the latest version information of each program and its system requirements at the following website/The system requirements may differ slightly depending on the particular computer.Installing softwareTo use 01V96i Editor, you’ll need to install the following software programs. Follow the appropriate instructions below.•Studio Manger•01V96i Editor•Yamaha Steinberg USB DriverStudio Manager InstallationStudio Manager is a cross-platform application that enables you to use multiple Editor programs for remotely controlling Yamaha hardware from your computer, and allows you to save the Editor settings for instant recall. For specific instructions on using the software, refer to the PDF manual from the [HELP] menu in the Studio Manager and each Editor.You can download the latest version of Studio Manager at the following website. For specific installation instructions, refer to the installation guide included in the downloaded file./01V96i Editor InstallationFollow the instructions below to install the software programs.1Double-click “setup.exe” (Windows) or “Install 01V96i_Editor.pkg” (Mac) in the compressed file (you have downloaded).A setup dialog of 01V96i Editor is displayed.NOTE When using Windows Vista / 7, if the “User Account Control” window appears, click [Continue] or [Yes].2Follow the on-screen instructions to install the software.NOTE For specific instructions on using the software, refer to the PDF manual from the [HELP] menu in each program.Driver InstallationTo operate the 01V96i from your computer via Ethernet, you’ll need to install the Yamaha Steinberg USB Driver software.Yamaha Steinberg USB Driver enables communication between a USB device (which in compatible with the Yamaha Steinberg USB Driver) and your computer.You can download the latest version of Yamaha Steinberg USB Driver at the following website. For specific installation instructions, refer to the installation guide./Getting StartedOverview of Studio Manager and RecallStudio Manager is a cross-platform application that enables you use multiple Editor programs for remotely controlling Yamaha hardware from your computer, and allows you to save the Editor settings for instant recall.01V96i EditorThe settings of each Editor can be saved and recalled together from Studio Manager. In other words, you can change the settings of your entire system in a single operation by recalling the settings for multiple devices from Studio Manager. This capability is referred to as “Recall.”When you want to save setting files, you can do this from Studio Manager to recall multiple devices at once, or from an individual Editor to recall only a specific device.Starting and setting up Studio ManagerYou’ll need to perform the following setup in order to use the Editors in Studio Manager.1Start up Studio Manager.For Windows:Click the [Start] button, place your mouse cursor over [Programs (All Programs)] [YAMAHA Studio Manager], then click [Studio Manager].For Mac OS X:Select and open the “Applications” folder, the “YAMAHA” folder, then the “StudioManager” folder, then double-click “SM2.”2Set up Studio Manager.For details, refer to the PDF manual, found in the [Help] menu on the Studio Manager.NOTE On the Macintosh, do not execute the Studio Manager via Rosetta. The 01V96i Editor cannot be added to the Studio Manager via Rosetta.3Start up each Editor.In the Studio Manager window, double-click the icon for each Editor.Studio Manager window4Set up each Editor.For details, refer to the PDF manual, found in the [Help] menu on each Editor.5Synchronize each Editor with your mixing console.For details, refer to the PDF manual, found in the [Help] menu on each Editor.Uninstall (removing the installed application)To remove the installed Editors and Studio Manager if using Windows:Select [Start] ✂ [Control Panel] ✂ [Programs and Features] or [Uninstall a program], then select the application to be removed and click [Uninstall/Change].Follow the on-screen instructions to uninstall the application.If the “User Account Control” window appears, click [Continue] or [Yes].To remove the installed Editor if using Mac:Double-click “Uninstall 01V96i_Editor.app” in the downloaded folder.After a dialog opens, follow the on-screen instructions to uninstall the application.TroubleshootingWhen controlling the 01V96i from your computer via USB, the 01V96i does not operate correctly.•Have you installed the latest Y amaha Steinberg USB Driver?•Is the USB cable connected correctly?•Have you selected an appropriate network port in the 01V96i Editor?................................01V96i Editor Owner’s ManualC.S.G., Pro Audio Division© 2005-2011 Yamaha Corporation110MW-A0。
雅马哈调音台操作说明1.音频输入设置-首先,将需要输入调音台的音频源连接到调音台的对应通道,可以是麦克风、乐器、音响设备等。
-通过调整通道上的增益控制旋钮来调整音频输入的音量。
一般情况下,增益控制旋钮应保持在适当的范围内,若增大过多可能会导致音频失真。
-如果需要,可以通过PAD按钮或开关来降低输入的音频信号的电平,以防止过载或失真。
-如果输入信号有问题,可以通过使用EQ控制旋钮来进行频率响应调整。
2.音频通道控制-每个音频通道都有独立的音量控制旋钮,可以用来调整输入信号的音量。
-还有一个用于平衡输入和输出的旋钮,称为平衡控制旋钮。
可以通过平衡控制旋钮将左右声道的音量平衡调整到理想的状态。
- 每个通道通常都有一个mute开关,可以用来临时静音该通道的音频信号。
-如果需要,可以将每个通道的音频信号发送到其他效果器或处理器中,如混响器、压缩器等。
3.主音量控制-调音台上通常有一个主音量控制旋钮,可以用来调整整个音频设备的总音量。
-主音量控制旋钮通常与输出设备相连,如音箱、录音设备等。
4.效果器和处理器设置-一些调音台上配备有内置的效果器和处理器,如混响、均衡器、压缩器等。
-可以通过选择相应的效果器和处理器,然后调整其参数,来对音频信号进行处理和增强。
5.子组设定-一些调音台上具有子组总线功能,可以将多个音频通道的信号发送到一个共同的子组总线上。
-这可以用于将不同乐器或声音分组,便于整合和处理。
6.监听和录制-调音台上通常有一个独立的监听控制台,可以用来监听和调整音频信号。
-可以通过调整监听控制台上的音量旋钮、左右声道平衡控制等来调整音频信号的输出。
-如果需要录音,可以将调音台的输出连接到录音设备,然后通过录音设备来录制音频信号。
7.音频信号处理技巧-在操作调音台时,还需要一些音频信号处理的技巧。
-例如,可以使用动态处理器(如压缩器和门限控制器)来控制音频信号的动态范围,以及混响器来添加空间感。
-使用均衡器可以调整音频信号的频率响应,并通过滤波器等工具来控制不必要的噪声。

雅马哈调音台使用说明当最初接触调音台的时候,很容易会被它面板上花花绿绿、数目众多的旋钮和推杆唬住。
首先我们来看一下左边的面板。
实际上,左边每一路的推杆和旋钮的意义都是一样的。
所以你只需要集中精力了解一个通道的操作方法就可以通盘掌握。
较少路数的调音台有4路和8路的输入控制,而路数最多的有96路甚至更多的。
这个调音台有8路输入控制,我们只取其中一个来讲解各部分的作用。
1.MIC:麦克风输入接口麦克风输入经由 XLR 母座,可接受平衡式或非平衡式低电平讯号,使用专业动圈式、电容式或丝带式低阻抗麦克风,如果使用非平衡式麦克风需要尽量使用愈短愈好的麦克风线,以避免电波噪音的干扰。
2.LINE:高电平输入接口高电平输入通常经由 TRS 1/4" 立体 Phone Jack 或 TRS 1/4" Mono Phone Jack 送入,麦克风音源以外的讯号都可经由高电平输入至混音机,立体 Phone Jack 的输入是平衡式的,相同于 XLR 的方式,但是如果一定要用非平衡式器材时,可用Mono Phone Jack ,其接线不能太长(4.5m 以内)。
3.LINE -20DB:衰减 20 分贝按键按下此键可以对输入电平衰减 20 分贝。
一般在环境噪音较大,设备电平噪音较大或电平过高的时候使用该按键。
使用该键将对音频输入信号的所有频率进行衰减,以达到将音量较小的杂音或电噪音过滤掉的目的。
有时会出现输入电平信号过高的现象,如不进行衰减,则衰减器的控制范围就会大大降低,只能在一个很小的区域内滑动,造成对音量输出控制很难操作。
此时应按下此键,以增大衰减器的有效控制范围。
4.PEAK:峰值指示灯Peak 灯亮时,警告使用者输入信道内的讯号过强。
发现 Peak 灯亮时,并且任由这种情况持续的话,调音台会启动自我保护功能,切断音源输出。
所以,此时应调整输入音量大小,否则,调音台的音频输出将被自动切断。
可使用的控制包括:Line -20 DB、减小Gain、拉低衰减器,一般以减小Gain为宜。
使用说明书保存本说明书以便将来参阅。
1. IMPORTANT NOTICE: DO NOT MODIFY THIS UNIT!This product, when installed as indicated in the instructions con-tained in this manual, meets FCC requirements. Modifications not expressly approved by Y amaha may void your authority, granted by the FCC, to use the product.2. IMPOR TANT: When connecting this product to accessories and/or another product use only high quality shielded cables. Cable/s supplied with this product MUST be used. Follow all installation instructions. Failure to follow instructions could void your FCC authorization to use this product in the USA.3. NOTE: This product has been tested and found to comply with the requirements listed in FCC Regulations, Part 15 for Class “B” digital devices. Compliance with these requirements provides a reason-able level of assurance that your use of this product in a residential environment will not result in harmful interference with other elec-tronic devices. This equipment generates/uses radio frequencies and, if not installed and used according to the instructions found in the users manual, may cause interference harmful to the operation of other electronic devices. Compliance with FCC regulations does* This applies only to products distributed by YAMAHA CORPORATION OF AMERICA.(class B)not guarantee that interference will not occur in all installations. If this product is found to be the source of interference, which can be determined by turning the unit “OFF” and “ON”, please try to elimi-nate the problem by using one of the following measures:Relocate either this product or the device that is being affected by the interference.Utilize power outlets that are on different branch (circuit breaker or fuse) circuits or install AC line filter/s.In the case of radio or TV interference, relocate/reorient theantenna. If the antenna lead-in is 300 ohm ribbon lead, change the lead-in to co-axial type cable.If these corrective measures do not produce satisfactory results, please contact the local retailer authorized to distribute this type of product. If you can not locate the appropriate retailer, please con-tact Y amaha Corporation of America, Electronic Service Division, 6600 Orangethorpe Ave, Buena Park, CA90620The above statements apply ONL Y to those products distributed by Y amaha Corporation of America or its subsidiaries.FCC INFORMATION (U.S.A.)• This applies only to products distributed by Y amaha-Kemble Music (U.K.) Ltd.(3 wires)ADVARSEL!Lithiumbatteri—Eksplosionsfare ved fejlagtig håndtering. Udskiftning må kun ske med batteri af samme fabrikat og type. Levér det brugte batteri tilbage til leverandoren.VARNINGExplosionsfara vid felaktigt batteribyte. Använd samma batterityp eller en ekvivalent typ som rekommenderas av apparattillverkaren. Kassera använt batteri enligt fabrikantens instruktion.VAROITUSParisto voi räjähtää, jos se on virheellisesti asennettu. Vaihda paristo ainoastaan laitevalmistajan suosittelemaan tyyppiin. Hävitä käytetty paristo valmistajan ohjeiden mukaisesti.(lithium caution)NEDERLAND / THE NETHERLANDS•Dit apparaat bevat een lithium batterij voor geheugen back-up.•This apparatus contains a lithium battery for memory back-up.•Raadpleeg uw leverancier over de verwijdering van de batterij op het moment dat u het apparaat ann het einde van de levensduur afdankt of de volgende Y amaha Service Afdeiing:Y amaha Music Nederland Service Afdeiing Kanaalweg 18-G, 3526 KL UTRECHT T el. 030-2828425•For the removal of the battery at the moment of the disposal at the end of the service life please consult your retailer or Y amaha Service Center as follows:Y amaha Music Nederland Service CenterAddress : Kanaalweg 18-G, 3526 KL UTRECHT T el : 030-2828425•Gooi de batterij niet weg, maar lever hem in als KCA.•Do not throw away the battery. Instead, hand it in as small chemical waste.(lithium disposal)上述警告位于设备侧面上。
雅马哈调音台使用说明当最初接触调音台的时候,很容易会被它面板上花花绿绿、数目众多的旋钮和推杆唬住。
首先我们来看一下左边的面板。
实际上,左边每一路的推杆和旋钮的意义都是一样的。
所以你只需要集中精力了解一个通道的操作方法就可以通盘掌握。
较少路数的调音台有4路和8路的输入控制,而路数最多的有96路甚至更多的。
这个调音台有8路输入控制,我们只取其中一个来讲解各部分的作用。
1.MIC:麦克风输入接口麦克风输入经由 XLR 母座,可接受平衡式或非平衡式低电平讯号,使用专业动圈式、电容式或丝带式低阻抗麦克风,如果使用非平衡式麦克风需要尽量使用愈短愈好的麦克风线,以避免电波噪音的干扰。
2.LINE:高电平输入接口高电平输入通常经由 TRS 1/4" 立体 Phone Jack 或 TRS 1/4" Mono Phone Jack 送入,麦克风音源以外的讯号都可经由高电平输入至混音机,立体 Phone Jack 的输入是平衡式的,相同于 XLR 的方式,但是如果一定要用非平衡式器材时,可用Mono Phone Jack ,其接线不能太长(4.5m 以内)。
3.LINE -20DB:衰减 20 分贝按键按下此键可以对输入电平衰减 20 分贝。
一般在环境噪音较大,设备电平噪音较大或电平过高的时候使用该按键。
使用该键将对音频输入信号的所有频率进行衰减,以达到将音量较小的杂音或电噪音过滤掉的目的。
有时会出现输入电平信号过高的现象,如不进行衰减,则衰减器的控制范围就会大大降低,只能在一个很小的区域内滑动,造成对音量输出控制很难操作。
此时应按下此键,以增大衰减器的有效控制范围。
4.PEAK:峰值指示灯Peak 灯亮时,警告使用者输入信道内的讯号过强。
发现 Peak 灯亮时,并且任由这种情况持续的话,调音台会启动自我保护功能,切断音源输出。
所以,此时应调整输入音量大小,否则,调音台的音频输出将被自动切断。
可使用的控制包括:Line -20 DB、减小Gain、拉低衰减器,一般以减小Gain为宜。
看你问了很多问题了关于雅马哈台子的问题。
那么我就帮你说明一下调音台的各个插孔和旋钮的作用吧。
图上顶端一排标有mic1,mic2,mic3······mic9/10,mic11/12。
这些我们称他为卡农插孔。
他的作用是接话筒的平衡插口。
对应下来标有LINE的插口我们称为直插。
他的作用也是接话筒。
他还有其他的作用就是连接一些周边设备。
比如效果器等等。
第三排标有INSERT这些插口也是直插口。
我们称他为断点输入,作用是将一些有需要的设备串联到调音台里。
第四排标有GAIN1,2····11/12的白色旋钮我我们称为增益旋钮。
他的作用是控制他所对应的那一路的主音量。
第五排√80按键的意思是低音切除。
按下此键,这一路80HZ一下的频率全部切除。
一般这个按键是用于人声的话筒。
作用是保证人声话筒的干净。
第六排标有COMP的黄色旋钮是雅马哈调音台一个特有的功能旋钮。
这个旋钮的功能是压限。
作用是保护设备。
一般情况下都是保持他在0db。
也就是上图所标的这个位置。
第七排标有PEAK的灯是信号过载灯。
当这个灯亮起来的话说明你这一路的信号已经过载了,那么久需要你将你上面的GAIN旋钮减少或者将这一路的推子拉下来一点。
也就是说这个灯不能亮。
第八排标有HIGH的蓝色旋钮是控制这一路高音的旋钮。
第九排标有MID的蓝色旋钮是控制这一路中音频率的旋钮。
他的频率从250HZ 到5kHZ。
第十排的蓝色旋钮是控制这一路中音的旋钮。
也就是说你要控制这一路的中音要配合上面一排的频率快旋钮来使用。
将上面一排的旋钮旋到你要控制的那个中音的大概频率后再通过下面这一排的旋钮来控制他的大小。
第十一排标有LOW的蓝色旋钮是控制这一路低音的旋钮。
第十二排,十三排,十四排标有AUX1,AUX2,AUX3,的蓝色旋钮是辅助输出的音量旋钮。
他对应调音台右上角的SEND+4DBU的AUX1,AUX2,AUX3的插孔。
Y A M A H A数字调音台v中文使用说明书集团标准化工作小组 #Q8QGGQT-GX8G08Q8-GNQGJ8-MHHGN#1、初始化 01V962、通常用场景记忆页面来存储和调入场景3、检查电池和系统版本4、使用监听您可以删除全部的用户设定并且恢复01V96到出厂的状态,同时可以复位操作锁的密码。
步骤如下:1 确保 01V96 的电源关闭。
2 按住 SCENE MEMORY [STORE] 按钮不放,然后打开电源开关。
片刻之后,出现如下的确定窗口:3 如果要对 01V96 进行初始化,移动光标到INITIALIZE 按钮,然后按[ENTER]。
取消初始化操作,移动光标到CANCEL按钮,然后按[ENTER]。
当01V96的内部信息重写后,01V96就回到了工厂设定。
4 如果是要清除密码,在第二步的时候移动光标到 PASSWORD 按钮,然后按[ENTER]。
密码就重新设定成“1234”。
如果出现确认窗口后您不进行任何操作,该窗口会自动关闭然后启动01V96。
Utility | Battery页面用于检查内部电池的情况和显示系统版本。
可以通过反复按DISPLAY ACCES[UTILITY] 按钮来显示该页面。
1Status (状态)如果状态显示“Okay”,说明电池的电量充足。
如果显示“Voltage Low!”,就提醒您赶快找YAMAHA的经销商或者是服务中心更换电池。
否则会引起01V96的记忆数据丢失。
2Ver 是版本号。
)显示当前的系统版本。
当您要进行系统软件升级之前,一定要先检查当前系统版本。
请访问以下网站检查最新系统的版本号码:com/在Scene Memory(场景记忆)页面,您可以存储、调入、写保护、删除和编辑场景的标题。
1 把您要作为场景保存的 01V96 参数调节好。
2 反复按DISPLAY ACCESS [SCENE]按钮直到出现 Scene | Scene page 页面。
Y A M A H A数字调音台01v96中文使用说明书(总7页) -CAL-FENGHAI.-(YICAI)-Company One1-CAL-本页仅作为文档封面,使用请直接删除1、初始化 01V962、通常用场景记忆页面来存储和调入场景3、检查电池和系统版本4、使用监听初始化 01V96您可以删除全部的用户设定并且恢复01V96到出厂的状态,同时可以复位操作锁的密码。
步骤如下:1 确保 01V96 的电源关闭。
2 按住 SCENE MEMORY [STORE] 按钮不放,然后打开电源开关。
片刻之后,出现如下的确定窗口:3 如果要对 01V96 进行初始化,移动光标到INITIALIZE 按钮,然后按[ENTER]。
取消初始化操作,移动光标到CANCEL按钮,然后按[ENTER]。
当01V96的内部信息重写后,01V96就回到了工厂设定。
4 如果是要清除密码,在第二步的时候移动光标到PASSWORD按钮,然后按[ENTER]。
密码就重新设定成“1234”。
如果出现确认窗口后您不进行任何操作,该窗口会自动关闭然后启动01V96。
检查电池和系统版本Utility | Battery页面用于检查内部电池的情况和显示系统版本。
可以通过反复按DISPLAY ACCES[UTILITY] 按钮来显示该页面。
1Status (状态)如果状态显示“Okay”,说明电池的电量充足。
如果显示“Voltage Low!”,就提醒您赶快找YAMAHA的经销商或者是服务中心更换电池。
否则会引起01V96的记忆数据丢失。
2Ver X.XX (X.XX 是版本号。
)显示当前的系统版本。
当您要进行系统软件升级之前,一定要先检查当前系统版本。
请访问以下网站检查最新系统的版本号码:com/通常用场景记忆页面来存储和调入场景在Scene Memory(场景记忆)页面,您可以存储、调入、写保护、删除和编辑场景的标题。
1 把您要作为场景保存的 01V96 参数调节好。
1、初始化01V96
2、通常用场景记忆页面来存储和调入场景
3、检查电池和系统版本
4、使用监听
初始化01V96
您可以删除全部的用户设定并且恢复01V96到出厂的状态,同时可以复位操作锁的密码。
步骤如下:
1 确保01V96 的电源关闭。
2 按住SCENE MEMORY [STORE] 按钮不放,然后打开电源开关。
片刻之后,出现如下的确定窗口:
3 如果要对01V96 进行初始化,移动光标到INITIALIZE 按钮,然后按[ENTER]。
取消初始化操作,移动光标到CANCEL按钮,然后按[ENTER]。
当01V96的内部信息重写后,01V96就回到了工厂设定。
4 如果是要清除密码,在第二步的时候移动光标到PASSWORD按钮,然后按
[ENTER]。
密码就重新设定成“1234”。
如果出现确认窗口后您不进行任何操作,该窗口会自动关闭然后启动01V96。
检查电池和系统版本
Utility | Battery页面用于检查内部电池的情况和显示系统版本。
可以通过反复按DISPLAY ACCES[UTILITY] 按钮来显示该页面。
1Status (状态)
如果状态显示“Okay”,说明电池的电量充足。
如果显示“Voltage Low!”,就提醒您赶快找YAMAHA的经销商或者是服务中心更换电池。
否则会引起01V96的记忆数据丢失。
2Ver X.XX (X.XX 是版本号。
)
显示当前的系统版本。
当您要进行系统软件升级之前,一定要先检查当前系统版本。
请访问以下网站检查最新系统的版本号码:
com/
通常用场景记忆页面来存储和调入场景
在Scene Memory(场景记忆)页面,您可以存储、调入、写保护、删除和编辑场景的标题。
1 把您要作为场景保存的01V96 参数调节好。
2 反复按DISPLAY ACCESS [SCENE]按钮直到出现Scene | Scene page 页面。
3 旋转参数轮或者是按[INC]/[DEC]按钮来选择场景记忆,移动光标到其中一个按钮,然后按[ENTER]。
1 TITLE EDIT (标题编辑)
选择这个按钮显示Title Edit (标题)编辑窗口,用于编辑场景标题。
2 RECALL (调入)
调入选择好的场景记忆。
3 STORE (存储)
存储场景到选择好的场景记忆中。
在默认情况,会在存储之前显示一个确定窗口。
4 CLEAR(清除)
删除选择好的场景记忆。
5 PROTECT ON/OFF (保护开/ 关)
打开或者是关闭当前选定的场景的写保护。
在场景标题后面显示挂锁( ) 就表示写保护。
6 Library list (库列表)
场景记忆01-99在库记忆中列表显示。
已储存的场景的标题在标题滚动栏列表
显示空的库记忆显示“No Data!”,选定的记忆在一个和标记的点状框显示。
7 PATCH LINK INPUT (分配连接输入)
8 PATCH LINK OUTPUT (分配连接输出)
这些参数显示在场景储存的时候的输入和输出分配库序号。
连接着的输入和输出分配也可以被调入。
您可以移动光标到参数框然后改变库序号11
监听
使用监听
1 把监听系统连接到MONITOR OUT连接头上。
如果使用耳机监听,就把耳机插到耳机插座上。
2 按MONITOR部分的Monitor Source selector(监听源选择)来选择监听信号。
监听01V96的内部信号,关闭selector (按钮弹起)。
监听2TR IN 连接头的信号,打开selector(按钮按下)。
3 在放音的时候,使用MONITOR [MONITOR LEVEL] 控制器调节监听音量。
使用[PHONES LEVEL] 控制器调节耳机音量。
PHONES MONITOR
OUT
MONITOR
2TR IN
LEVEL
PHONES
LEVEL
0 10 0 10。