HLK-M30-M35 AT指令使用指导手册V1.3
- 格式:pdf
- 大小:271.10 KB
- 文档页数:18


Universal Module V3 User guideContentsProduct information page 3 T echnical specifications page 4 Wiring diagram page 5 Wiring diagramDoor strike / Magnetic door lock page 6 Installation page 7 Setup page 8-9 Remote access/Integration page 10 Support page 11Product information 3/12 The Danalock Universal module is a device for controlling all 12-24V powered commercially available locking mechanisms; door strikes, electromechanical or magnetic locks, gates etc.The module works in parallel with what is already installed or in any new installation.The module has two relay outputs and one power output. The relays or the power-output can be controlled remotely with the Danalock app via Android (from version 4.4.4) and iOS (from iOS 9.0 and iPhone 4S) smartphones. The relay is both Bluetooth Low Energy 4.0 and/or Z-Wave driven.Relay modeThe two relays can be operated either parallel or separately. The relays are working for a desired time (1-180 sec.) or permanent when activated. The activation for the relays can be delayed for relay 2 after activating relay 1. The two relays can be setup individually for permanent activation or for a desired time.T echnical specifications 4/12 Operating voltage range 12-24V DC, 12-24V ACMax input (at 24V) 100mA Number of relays 2 Type of relays Potential-freecontacts (NO/NC) Max AC power 1A at 12V Max AC current 1A at 12V Max relay voltage 48 VWireless communication Bluetooth 4.0LE/Z-Wave Plus (optional) Bluetooth range 5-10 metersWiring diagram 5/12ellowWiring diagram - Magnetic door lock 6/12BlackGrey Power input 12-24V AC/DC 1 ampGrey 12/24 in White 12/24 inBrown GroundWhite Ground input 12-24V AC/DC 1 amp Red Yellow Green Relay 2: Normally openViolet Relay 2: Normally closedBlue Relay 2: CommenWiring diagram - Door strike7/12Grey 12/24 in White 12/24 inInstallation 8/12 1. Mounting instructionConnect the Universal Module to the relevant motor drive while considering the wiring diagram.Note!Please make sure to connect the Universal Module to a smartphone during installation. As soon as you are registered as owner, no one else is able to control the door/gate, and it is only you who can grant other users access.2. Connect to the smartphoneT o connect the Module to a smartphone, please follow the Danalock App User Guide on:https:///?page_id=2894When installing the Module you will be asked to set the Relay time. In the User guide for the motorized door lock you will find the recommended time (pulse = 1sec). Per default, the Universal Module will switch off after 1 sec.Note!The Relay time can be changed under settings at any time.User Guide 9/12Y ou find the updated version of the Danalock App User Guide under:https:///?page_id=2894Among other things, the guide will show you how to share access. If you like to change owner/administrator of the Module, you have to delete the Module from the app before connecting it to a new owner.Note!Please only delete the Module from the keychain when in Bluetooth range of the Module. If you are not in Bluetooth range, you will have to reset (see “T ouch button commands) it by pressing the button on the Module. If the Module is a built-in solution, a reset can cause additional charges from eg. a locksmith.T ouch button commands 10/12 Y ou find the gold-colored touch button in one corner of the circuit board. One short press switches the Relay off. Holding down/pressing the touch button will trigger the following commands:1 flash switches the relays off.2 flashes puts the Module inZ-Wave inclusion mode.5 flashes resets the key.10 flashes means a factory resetof all key and relay settings.Remote access/Integration 11/12DanabridgeThe Universal Module is only accessible when the user is in Bluetooth range. T o gain remote access, you can use a spare smartphone or tablet: https:///?page_id=2981Z-WaveThe Danalock Universal Module with Z-Wave is compatible with a long list of gateways.Read more about it here:https:///?page_id=2597Support 12/12You will find a list with frequently asked questions here: https:///?page_id=3417Please write or call us in case of any questions:+0045 42428122Poly-control ApSGammel Stillingvej 427 C, 8462 Harlev - DK*************************************+45 4242 8122。

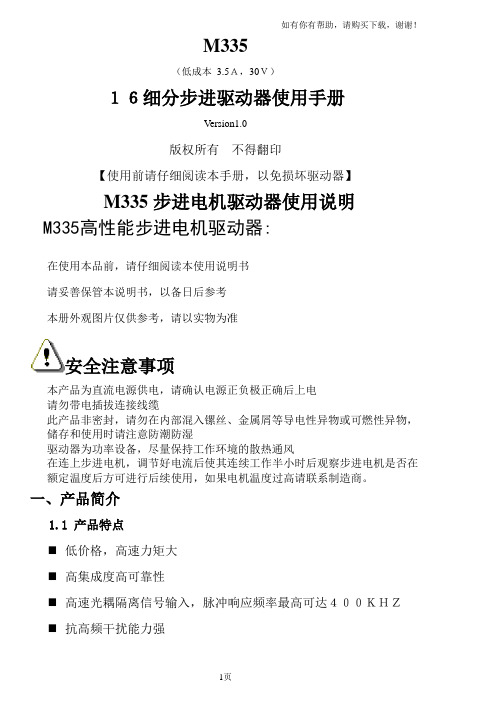
M335(低成本 3.5A,30V)16细分步进驱动器使用手册Version1.0版权所有不得翻印【使用前请仔细阅读本手册,以免损坏驱动器】M335步进电机驱动器使用说明M335高性能步进电机驱动器:在使用本品前,请仔细阅读本使用说明书请妥善保管本说明书,以备日后参考本册外观图片仅供参考,请以实物为准安全注意事项本产品为直流电源供电,请确认电源正负极正确后上电请勿带电插拔连接线缆此产品非密封,请勿在内部混入镙丝、金属屑等导电性异物或可燃性异物,储存和使用时请注意防潮防湿驱动器为功率设备,尽量保持工作环境的散热通风在连上步进电机,调节好电流后使其连续工作半小时后观察步进电机是否在额定温度后方可进行后续使用,如果电机温度过高请联系制造商。
一、产品简介1.1 产品特点⏹低价格,高速力矩大⏹高集成度高可靠性⏹高速光耦隔离信号输入,脉冲响应频率最高可达400KHZ⏹抗高频干扰能力强⏹最高输入电压:DC 30V⏹电源防反接保护⏹输出电流峰值可达3A(峰值)⏹输出电流设定方便⏹小巧精美外形尺寸⏹细分精度:整步、二细分、八细分、十六细分⏹自动半流锁定⏹衰减4档可调1.2 应用领域适合各种中小型自动化设备和仪器,例如:雕刻机、打标机、切割机、激光照排、绘图仪、数控机床、拿放装置等。
在用户期望低成本、小噪声、高速度的设备中效果特佳。
二、电气、机械和环境指标2.1 电气指标2.2 使用环境及参数2.3 机械安装图 单位:毫米三、驱动器接口及接线介绍:3.13.2:强电接口描述※:推荐采用侧面安装,散热效果更佳。

PAMA操作指南目录:章节名称起始页次1.概述---------------------------------------------------------------- 32.操作元件及符号说明----------------------------------------- 43.机床开关机------------------------------------------------------ 204.常用的M代码-------------------------------------------------- 225. PAMA自带的子程序----------------------------------------- 25一机床概述本机床时意大利PAMA公司产的最大加工直径160MM的镗铣床。
如下图1.1 技术数据机床一共有X,Y,Z,W,E,E4和SP轴,如下图所示:二操作面板说明如下图所示B1 C1D1A2 C2 A3 C3 D3 A4B6 D6E6 A7 B7 D7B8 C8A9 B9 A10 A11E12 E13E14 E15 A16 C16 D16A17 B17D17E172.2 西门子按钮面板2.3 西门子自定义按键区2.4 手动刀具夹紧和放松这个面板主要用于刀具的夹紧和放松1.使能便携式面板用旋钮“E16”激活便携式面板指示灯“D16”亮,确认面板激活2.恢复机床操作启用移动按钮面板后,恢复机床操作A) 夹紧刀具B) 将旋钮转到空闲位置2.5 附件头夹紧和刀具夹紧类似1.使能便携式面板用旋钮“E17”激活便携式面板指示灯“D17”亮,确认面板激活.2.6 附件库按钮站三机床开关机机床关机步骤1.按下“急停”按钮(1)2.按下“”键3.然后在控制面板,一次按下如下的步骤4.关机的过程中,需要等待,知道屏幕变黑,显示一行白字“”5.按下“机床停止”按钮6.将开关旋转至“O”位置M功能使用说明1.M10和M11M10功能是夹紧轴,M11是放松轴,用法是M11=100+X(注:其中X是需要的轴号)例如:1)松开所有轴N20 ......N30 X100 F2000 M112)只松开B轴N20 .....N30 X100 F2000 M11=1063) 夹紧所有轴N20 .....N30 X100 F2000 M102. M31andM34M31是允许在特殊的干涉区域的自动操作,M31=100+轴号M34 是撤销M31功能1)静止在Z轴的干涉N20.....N30 M31=103N40 STOPRE (注:M31,后一定要加“STOPRE”,否则格式错误) 3.M50和M51M50是激活雷尼绍探针M51是禁止激活雷尼绍探针1)激活探针N20.....N30 SPOS=0N40 M50N50 M5N60 CYCLE9772)关闭探针N20.....N30 CYCLE978N40 M51N50 M5N60.....4 M20和M21M20 使能附件轴M21 禁止使能附件轴M2O 启动的功能.附件轴的夹紧耦合功能.附件轴的连续运动.启动润滑.激活附件头的一个测量系统.其他相关功能激活附件轴N20.....N30 M20关闭附件轴N20.....N30 M21子程序功能说明1.L106(XXX)xxx是刀具名(不是内部刀具号)例子装载刀具名为80刀到主轴上N10.....N20 L106(80)N30卸载主轴上的刀具N10.....N20 L106()2.L140(y)L140是用来更换附件头。
重庆磨床有限责任公司数控齿条磨床简明使用手册MCK7170V1.5机床标准配置SIEMENS828D修整滚轮、动静压主轴、3D测头PLC版本CQM94 828D V2H人机界面版本CQM94 V2X2016/10/17 V1.52016/07/25 V1.32016/02/29 V1.12016/02/01 V1意见及建议反馈:cqmlf@ 编制者:刘峰一、概述重庆磨床有限责任公司自2001年成规模生产、改造的数控外圆磨床。
产品型号包括MK1320/MK1332(数控外圆磨床)、MKS1320/MKS1332(数控高速外圆磨床)、MKS1620/MKS1632(数控端面外圆磨床)、MK8240/MKS8240(数控曲轴磨床)。
如未加说明有,本手册中“机床”泛指“上述所有型号数控机床”。
机床主要配置西门子802D及802DSL T/M value 、802DSL G/N plus、828D或FANUC 0iTC及FANUC 0iTD数控系统。
本手册所述数控系统为828D。
二、操作注意事项因意外事故可能会造成人身伤害和机床损坏,机床配置了安全装置(包括硬件和软件):1, 机床防护罩(包括砂轮防护罩)2, X、Z 轴的极限限位开关。
在此开关范围内的软极限开关(参数设定)和可编程软极限。
3, 急停按钮。
4, 进给暂停按钮、复位键。
5, 过热、过流保护开关,以及互锁开关、门开关(选配)。
6, 报警显示,信息显示,原点回零异常警示(增量式编码器)。
7,使用程序锁或者操作权限(密码)来保护程序和变量以及参数不被意外修改。
8,基本联锁:这种联锁必须修改PLC才能改变,例如砂轮未启动时冷却液不能启动9,可变联锁:这种联锁可以通过修改参数取消,例如将动静压主轴更换为普通主轴时,可以取消主轴油泵和砂轮的联锁。
主轴压力继电器故障时,可以取消压力继电器和砂轮的联锁。
10,界面已经编入多种保护措施,如果需要修改请联系我公司技术人员。
button Tap the button to enter the Phone function;button Tap thebutton Tap the button to enter Messaging. Notification Barusers can use the phone to input text by using the keyboards on the screen to addcontact information, write text messages, or take notes memos, etc.;by using theon-screen keyboard, users can input Chinese, English, symbols and numbers.Using the keyboard• KeyboardsWhen is displayed in the lower left corner of the keyboard:Tap and hold ,to open the "Select input method" popup menu, whereusers can choose among "Simplified Chinese - Pinyin", "Stroke", "Handwriting", "Other input methods" and “Settings” (with which users can set users'keyboard preferences).Tap to switch to the English keyboard, displayed as .English keyboardWhen is displayed in the lower left corner of the keyboard, English language input is selected.To type uppercase letters, touch ,so that the icon becomes illuminated . Tap again to switch to lowercase .Double tap the to keep letters uppercase .Numbers and symbolsTap the icon to enter numbers and tap the icon enter symbols. Tapicon to select other symbols.Text input1. When users touch a text input area, the keyboard will automatic pop-up, marked by theblinking cursor.2. Proceed to tap the keys on the keyboard.3. After saving the files, click the icon on the computer taskbar;4. Click on the below message when it appears;Dialing a numberAfter entering a number tap to "Add to new contact" or "Add toicon to to answer the call, and drag it to to reject the call.Tap button to enter Contacts list and check contacts' information;Tap to shutdown microphone for current call so the caller cannot hearTap to hold current call if possible under the current network;Tap to record current call as audio; users can find and play the audiosTap to save the number users just input, which can be dialed directlyTap to activate dial pad, which can be used to input information thatTap to enable the loudspeaker;Tap to end the call.Enter the country code, area code and phone number and tap .to open up the call log.Tap "Add another field" for additional items. users can tap the icon which is left to the typed item and choose the item tag users would like in the popup box.1. Dial the number on the phone dial pad, tap on the icon, and then selectbetween "Add to new contact" or "Add to existing contact".2. On the contact details screen, tap the Menu key,will appear, which allow users to share contacts by "Email", "MMS",button to start writing a new text message. Enter the recipient number directly, or tap the rightusers can also send a message from the Home screen > contacts list, select contact > tap the button to the right of the phone number;2. Type users' message, then tap "Send";then tap to send.In the confirmation box, tap "OK".1. Tap the icon to create new a message;2. Tap the button and choose the content which users want to add.users can tap icon to switch to smilie keyboard. Smilies and contacts information (text form) will be delivered as short messages, while contacts Vcard, photos, audios3. Tap to send.To start surfing, tap the Browser icon on the Home screen, or type users' desiredTap on the number key at the bottom of the screen and the numberTap the at the bottom of the screen to view users' favorites.Tap on the number key at the bottom of the screen, tap the upperTap on the number key at the bottom of the screen and then dragTap on the button > enter URL or select from Favorites, History or Most Visited.1. Tap the icon;2. Tap the left zone to see Favorite, History and Most Visited.1. Tap the Favorite button ;2. Tap the dot right to the website to make it as chosen > ;3. Tap edit button on the screen bottom.1. Tap the Favorite button ;2. Tap the dot right to the website to make it as chosen > ;3. Tap the delete button on the screen bottom.1. Tap “Favorite” icon > ;1. Tap “Favorite” icon > ;1. Tap “Favorite” icon > ;3. Tap the icon on the right side.Tap to updateTap to write a new mail. Tap to search.tap to delete, or users can tap “...” > “Delete” after reading the mail.1. In the Email app, tap the button to start writing;Enter the recipient's email address; when there is a suggested address1. Select the account which users want to remove and tap .Tap and to play and pause music.Tap or to skip to the previous or next song.Increase or decrease the volume by dragging theTap the repeat icon, to repeat one song, to repeat all songs in playlist, to disable the repeat.Tap to enter shuffle mode , and tap again exit.1. Select a song, and tap icon in the bottom screen.2. Type the desired playlist name, then tap "OK".itle > tap > add to a playlist.2. Tap > tap "Rename playlist" > “Save”.1. Select a song, tap to play the song;2. When playing a song, tap to add song to the current playlist.Select the songs users want to remove, then tap to complete removal.one to delete only one song, multi-selection means delete severalEnter a playlist and select the songs that users want to remove, then tap Tap on the right side of the playlist > choose “Delete” > Delete completed.Tap the screen to activate controlling menu, tap totap or to go next or previous.In the video list, tap and hold a video, and thenWhen viewing a picture in full-screen, users can touch the picture > > tap the picture (the selected picture would be highlighted, tap again to cancel) > "share via Email"; users can choose from “Email”, "MMS", "Bluetooth" and more by tapping .When viewing a picture in full-screen, tap the picture > “Delete”; or users can tap the picture > > tap pictures (multi-selection is available) > “Delete”.When viewing a picture in full-screen,tap the picture > to tailor the picture;Within the blue frame is reserved area, while outside the frame is going to be cut off.Rotate: Rotate left , Rotate right ;Label: users can label the picture with doodles or words;Tap on the screen to focus, and when the focus frame turns to green, tap to take the photo. Double-tap the screen to activate the exposure compensation adjustingTap to switch between the front and rear camera.1. To start recording, tap > . The upper left corner shows2. To pause the video, tap .3. To stop recording, tap .4. To watch the recorded video clip, tap the bottom left thumbnail button.When shooting photos with rear camera: tap > > “On”, “Off” or “Auto”. When shooting videos with rear camera: tap > > “On” or “Off”.ap in the bottom area to enter searching page;After entering the app center, tap the icon in the bottom area to enter My Apps where users can manage the installed apps such as update and uninstall; if users1. Open "Documents" and select the file(s) to delete.2. Tap the icon, and confirm by tapping "Delete".Weekly mode: Tap to switch to weekly mode which shows all events of this week;2. In the detailed view, tap to edit event;3. When complete, tap "Save".1. Tap to begin writing a new note;2. Enter the desired note.Tap to adjust font size, and to change background color;Tap to attach a shopping list; tap to insert a picture which can be chosen rom both Gallery and Documents; tap to record voices andounds to words which will be shown on the voice card.Tap > setting an alarm clockTap > choose from “Edit” or “Delete” the clock; tap “Edit” to enterTap > Stopwatch; tap “tart” toS start keep time, tap “Lap” to record; tap “Reset” to clear the records.Tap to set a Timer; tap “Start” to start keep time; tap “New task” to define your own events; tap “Tone” to set the reminding ringtone.。
Switch 1 up, Switch 2 upAux active, Glitch kill active (For radios with an Aux channel)Switch 1 down, Switch 2 upAux inactive, Glitch kill active (For radios with no spare channels)Switch 1 up, Switch 2 downAux active, Glitch kill inactive(Use at your own risk)Switch 1 down, Switch 2 downAux inactive, Glitch kill inactive Safety override. Engine can run at all times, except during battery power loss, low voltage, or high engine temp. (Use at your own risk)•Power off - LED off - Engine killed •Solid Green - Aux switched on - Engine can run•Solid Red - Aux switched off - Engine killed •Flashing Red - Engine killed•Flashing Green - Safety override - Engine can run •Flashing Red/Green - 5 second kill period•Flashing Green/Amber - Low Voltage - Engine killed •Flashing Red/Amber - High engine temp - Engine Killed (temp sensor optional)STATUS LEDDIP SWITCH SETUPLOW VOLTAGE CUTOFFThe Super Bee kill switch should be placed in a water resistant radio/battery box on your RC vehicle. Plug the main kill switch unit into the Aux channel on your radio receiver, or if your radio doesn’t have an Aux channel you will need to plug the Super Bee into your steering channel with a Y-splitter cable. With some radio receivers you may need to trim off the tab on the J-plug connector to get the Super Bee to plug in to your radio receiver. Connect the gray Killer RC ignition cable to the ignition coil terminals. Polarity doesn’t matter. (For Marine style ignition coils connect black wire to black wire on ignition coil; ground red wire to engine case.) Zip tie ignition cable away from the flywheel, and any other moving parts.Website: Email: *****************Visit the Killer RC Forum for more detailed info about the Super Bee and how to set up your radio.ADJUSTABLE GLITCH SENSITIVITYWhen you turn on the radio receiver power, the LED on the Super Bee will first show the Low Voltage Cutoff status, and then it will show the Glitch Sensitivity status, which will be a green LED. The optional Killer RC Buzzer will also sound a tone in unison with the flashing LED. There are 4 levels of glitch sensitivity. One green LED flash is the most sensitive (factory default). Four green LED flashes is the least sensitive. Leave the sensitivity at setting #1 unless your RC vehicle is experiencing small glitches or the ignition firing seems to be irregular. To change the glitch sensitivity: During the first 5 seconds after turning on the radio receiver power you must cycle the #2 dip switch up/down or down/up to move to the next set point. Example: #1 to #2 to #3 to #4 and then back to #1. You should then be able to see a change in the number of green LED flashes and buzzer tones.To minimize radio glitches we highly recommend that you use the Killer RC gray ignition wiring, which has an Electro Magnetic Interference filter installed on the cable. If you are experiencing unusual radio glitches try a new spark plug. Spark plugs can have internal damage that can cause radio noise. Use a “resistor style” spark plug.When you turn on the radio receiver power, the LED on the Super Bee will flash amber a number of times, letting you know how the low voltage mode is set. This feature allows you to protect your battery from over-discharge. Once the receiver battery voltage gets down to the set point the Super Bee will kill the engine. The LED output will flash the LED lights (optional part) once the battery gets within .2v of the cutoff point.To change the voltage cutoff point: During the first 5 seconds after turning on the radio receiver power you need to cycle the #1 dip switch up/down or down/up to move to the next set point. 3v to 4v to 5v to 6v and then back to 3v. For example: if you are set at 4v cutoff and you wanted to move up to 6v cutoff you would need to cycle the #1 switch back and forth two times. This setting is remembered.3 Amber flashes = 3v cutoff4 Amber flashes = 4v cutoff (default,5 cell NiMh)5 Amber flashes = 5v cutoff (2S LiFe)6 Amber flashes = 6v cutoff (2S LiPo)INSTALLATIONGLITCH SENSIT-IVITYLOW VOLTAGE CUTOFFFOR SPEKTRUM RADIOS USERSWith Spektrum brand radios you must only use Glitch Sensitivity level 1 (one green LED flash during power-up). Also, when using a Spektrum with an Aux channel be sure to set the radio's built-in failsafe properly to prevent it from overriding the Super Bee. Visit the Killer RC forum for detailed instructions on radio setup.R/C GAS KILL SWITCH。
电磁配量泵gamma/ X, GMXa操作说明书原版操作说明书 (2006/42/EC)零部件号 984566BA G 007 03/19 ZH请首先完整阅读使用说明书。
• 请勿丢弃说明书。
因安装或操作失误而造成的损失,由运营商承担。
最新版本的操作说明书可从我们的主页下载。
请阅读下列补充说明!之后您将能更好地使用操作说明书。
文中特别强调:n 列举操作指导ð操作指导的结果Ä “指明产品识别码和序列号” 第 2 页:指向本章中相关内容的链节- 参见 ...:指向本文档中相关内容或指向其它文档的参考[按键]“菜单级 1 è 菜单级 2 è 菜单级 ...”:菜单路径“软件界面文本” 信息说明书中给出了设备正确操作或易于您操作的重要信息。
安全提示安全提示用图标标识 - 参见“安全章节”。
在咨询或订购备件时,请务必指明铭牌上或菜单的“设置/菜单è 信息”中所注明的产品识别码和序列号。
由此可以明确识别设备型号和材料类型。
补充说明插图 1: 请阅读!指明产品识别码和序列号补充说明2目录目录1产品识别码 (6)2关于此泵 (9)3安全说明章节 (10)4储存、运输和拆包 (14)5设备概览和控制元件 (15)5.1 设备概览 (15)5.2 控制元件 (16)5.2.1 控制元件 (16)5.2.2 按键功能 (20)6功能说明 (21)6.1 输送单元 (21)6.2 驱动单元 (21)6.3 计量功率 (23)6.4 自动排气 (23)6.5 运行模式 (23)6.6 功能 (24)6.7 继电器(选件) (24)6.8 LED 指示灯 (25)6.9 运行模式、功能和故障状态的等级 (25)7装配 (26)8液压安装 (28)8.1 安装软管管路 (29)8.1.1 无排气装置的计量泵的安装 (29)8.1.2 带排气装置的计量泵的安装 (32)8.1.3 带自动排气装置的计量泵的安装(SEK 型号) (32)8.2 基本安装提示 (34)9电气安装 (35)9.1 连接电源电压 - 电源电压 (36)9.2 插口描述 (37)9.2.1 “外部控制”插口 (37)9.2.2 “液位开关”插口 (38)9.2.3 “计量监控”插口 (39)9.2.4 “隔膜破裂传感器”插口 (39)9.2.5 继电器 (40)10设置的基本信息 (43)10.1 控制系统设置基本信息 (43)10.2 检查可设置的参数 (45)10.3 切换到设置模式 (45)11设置/“菜单” (46)11.1 “信息” (46)11.2 “设置” (46)11.2.1 “运行模式” (47)11.2.2 “自动控制” (51)11.2.3 “冲程长度” (51)11.2.4 计量 (52)11.2.5 浓度 (56)11.2.6 校准 (61)11.2.7 系统 (63)3目录11.2.8 输入端/输出端 (65)11.2.9 排气 (69)11.2.10 “吸入时间” (71)11.2.11 “设置系统时间” (71)11.2.12 “日期” (71)11.3 计时器 (71)11.3.1 激活/禁用 (72)11.3.2 设置计时器 (72)11.3.3 全部删除 (78)11.3.4 示例 (78)11.3.5 计时器提示 (80)11.3.6 典型的缺陷 - 计时器功能故障 (80)11.3.7 所选功能的简要解释 (80)11.4 “服务” (85)11.4.1 “访问保护” (85)11.4.2 “密码 ” (85)11.4.3 “删除计数器” (86)11.4.4 “错误日志” (86)11.4.5 “更换隔膜” (86)11.4.6 “显示屏” (87)11.4.7 “出厂设置” (87)11.4.8 隔膜部件编号:XXXXXXX (87)11.4.9 备件组件编号:XXXXXXX (87)11.5 “语言” (Language) (87)12操作 (88)12.1 手动操作 (88)13维护 (90)14维修 (92)14.1 更换计量膜 (93)14.2 清洁隔膜破裂传感器 (95)14.3 清洁阀门 (95)15故障排除 (96)15.1 无错误信息的故障 (96)15.2 带错误信息的故障 (97)15.2.1 LCD 屏幕中的故障信息 (97)15.2.2 LCD 屏幕中的警告信息 (98)15.2.3 所有其它故障 (99)15.3 日志 (99)15.3.1 日志中的故障信息 (99)15.3.2 日志中的警告信息 (100)15.3.3 日志中的事件信息 (100)15.3.4 日志记录 - 详细视图 (101)16停用和废弃处理 (102)17技术数据 (104)17.1 功率参数 (104)17.2 精度 (105)17.2.1 标准输送单元 (105)17.2.2 自动排气式输送单元 (105)17.3 黏度 (105)17.4 材料参数 (106)4目录17.5 电气数据 (106)17.6 温度 (106)17.7 气候 (107)17.8 防护等级和安全要求 (107)17.9 兼容性 (107)17.10 装运重量 (108)17.11 声压级 (108)17.12 连续式吸液枪 (108)18分解系统图和订购信息 (110)18.1 分解系统图 (110)18.2 订购信息 (150)19尺寸图 (151)20计量流量设置图表 (160)21欧盟认证符合性声明 (163)22认证 (164)23gamma/ X 操作/设置概览 (165)24总操作菜单 gamma/ X (167)25常规显示和辅助显示 (173)26加装继电器的安装说明书 (175)27索引 (177)5产品识别码1 产品识别码6产品识别码7产品识别码82 关于此泵ProMinent gamma/ X 系列计量泵是具备以下特点的微处理器控制的电磁计量泵:n 便捷的计量功率设置,单位:l/hn 可用的材料组合,PP、聚偏二氟乙烯、有机玻璃、聚四氟乙烯和不锈钢n 释放气体的高黏度介质的专用泵头规格n 发光的 LCD 屏幕以及可从任何方位观察的 3 个 LED 指示灯(运行信息、警告信息和错误信息)n 外部接触式操纵对应的系数 99:1 ...1:99n 批运行最多 99 999 冲程/启动脉冲n 针对流量比例计量任务的便捷设置输入浓度n 冲程频率设置,以 1 冲程/小时的步幅(0 ...12000 冲程/小时)n 电子式冲程长度无级调节,0 ...100%(建议值 30 ...100%)n 2 级液位开关接口n 通过可调整分配冲程频率信号值的 0/4-20 mA 标准信号进行外部控制n 用于远程传输冲程长度和冲程频率的可选的 4-20 mA 输出端n 100 - 230 V, 50/60 Hz 通用电源件n 可选的 230 V 继电器模块,也可事后便捷而安全地加装n 可选的 24 V 组合继电器,也可事后便捷而安全地加装gamma/ X 的液压部件与 Beta ® 的液压部件相同(不包括型号0220、0424 和 0245)。