K3导航索菱S26 主机单页说明书(UI-48A)带蓝牙
- 格式:pdf
- 大小:5.00 MB
- 文档页数:2

欢迎使用本公司导航仪!使用本产品之前请详细阅读以下声明:●我公司保留对本《使用手册》的最终解释权。
●本产品规格、图片有任何变动,恕不另行通知,请以产品实物为准。
●请用户将重要资料进行备份,因资料丢失、损坏等造成的损失,本公司概不承担任何责任。
●请正确安装本导航仪,不要挡住驾驶员视线,不要阻挡安全气囊,对于非正确安装本导航仪造成的产品故障以及其他人身损害、财产损失,本公司不承担任何责任。
●请使用原厂提供的配件,以免造成无法预期的损坏。
使用不兼容的非原厂的配件,将导致保修承诺失效,甚至可能危害您及他人的安全。
对此,本公司不承担任何责任。
●由于交通建设的发展,可能出现导航电子地图数据与实际交通指示不完全一致的情况,请您务必遵照道路现状、现地标志等交通规则行驶。
在汽车驾驶过程中查看或操作导航仪,可能会导致严重的交通事故。
由于使用导致的交通意外及造成的各种损失,本公司不承担任何责任。
●本手册已经过仔细核对,但不排除有少量文字错误的可能性。
如发现,请联系本公司客户服务中心。
目录导航功能--------------------------------------------------------------------------------------------------------------------9 CMMB数字电视功能----------------------------------------------------------------------------------------------------11 音乐功能--------------------------------------------------------------------------------------------------------------------14 视频播放功能--------------------------------------------------------------------------------------------------------------17 图片浏览功能--------------------------------------------------------------------------------------------------------------19 电子书阅读功能-----------------------------------------------------------------------------------------------------------21 FLASH播放功能----------------------------------------------------------------------------------------------------------24 主题更改设置--------------------------------------------------------------------------------------------------------------26 墙纸设置--------------------------------------------------------------------------------------------------------------------28 计算器-----------------------------------------------------------------------------------------------------------------------29 单位换算--------------------------------------------------------------------------------------------------------------------29 GPS信息--------------------------------------------------------------------------------------------------------------------30 预警设置--------------------------------------------------------------------------------------------------------------------31 收藏夹-----------------------------------------------------------------------------------------------------------------------36 WINCE桌面----------------------------------------------------------------------------------------------------------------39 黑白棋---------------------------------------------------------------------------------------------------------------- ------41 麻将--------------------------------------------------------------------------------------------------------------------------41语言设置--------------------------------------------------------------------------------------------------------------------44日期时间设置--------------------------------------------------------------------------------------------------------------45触摸屏校准-----------------------------------------------------------------------------------------------------------------45系统信息---------------------------------------------------------------------------------------------------------------------46 USB设置---------------------------------------------------------------------------------------------------------------------46 导航路径设置---------------------------------------------------------------------------------------------------------------46恢复出厂设置---------------------------------------------------------------------------------------------------------------47 FM发射----------------------------------------------------------------------------------------------------------------------48与计算机通讯----------------------------------------------------------------------------------------------------------------49 附录----------------------------------------------------------------------------------------------------------------------------521.1 产品特点本导航仪以GPS导航功能为主,支持视频播放、音频播放、flash播放、图片浏览、电子书阅读,数字电视、FM、A V-IN输入、电子狗预警等功能。

KY-INS112组合导航系统使用说明书北京北斗星通导航技术股份有限公司导航产品事业部目录1.概述 (1)2.功能及指标 (1)2.1主要功能 (1)2.2性能指标 (1)3.工作原理 (3)3.1.产品组成 (3)3.2.基本原理 (3)4.使用说明 (4)4.1外形尺寸 (4)4.2电气接口 (5)5.系统导航工作流程 (8)5.1.组合导航流程 (8)5.2.纯惯性导航流程 (8)6.产品配置 (9)6.1.设备接口功能 (9)6.2.配置查询 (10)6.3.波特率配置 (10)6.4.协议及更新率配置 (10)6.5.初始值配置 (12)6.6.功能模块配置 (12)6.7.“零速修正”配置 (12)6.8.“位置输出平滑”配置 (13)6.9.载体类型配置 (13)6.10.GNSS天线杆臂配置 (14)6.11.输出杆臂设置 (15)6.12.安装角设置 (15)6.13.输出角设置 (16)6.14.强制转惯性导航 (16)6.15.系统复位 (17)7.输出语句解析格式 (17)7.1.可输出的协议类型 (17)8.存储数据导出 (22)9.系统维护 (24)9.1.固件升级 (24)9.2.参数上传 (24)10.注意事项 (25)11.附录 (25)11.1.卫星接收机COM2输出配置 (25)11.2.差分配置说明 (26)11.2.1.差分基准站设置 (27)11.2.2.差分通讯链路设置 (27)11.2.3.差分移动站设置 (28)11.3.32位CRC校验计算方法 (28)1. 概述KY-INS112组合导航系统由MEMS传感器及高端GNSS 接收机板卡(NovAtel-718D )组成,通过多传感器融合及导航解算算法实现。
该产品可靠性高,环境适应性强。
通过匹配不同的软件,产品可广泛应用于无人机、无人车、测绘、船用罗经、稳定平台、水下运载器等领域。
2. 功能及指标2.1主要功能组合导航系统能够利用GNSS 接收机接收到的卫星导航信息进行组合导航,输出载体的俯仰、横滚、航向、位置、速度、时间等信息;失去信号后输出惯性解算的位置、速度和航姿信息,短时间内具备一定的导航精度保持功能。

易联云K3S产品用户手册-V1.0目录一、 产品概述 (4)1、型号差异 (4)二、 使用之前 (4)1、零部件说明 (4)2、以太网连接(K3S-WIFI) (4)3、连接电源 (5)4、装纸 (5)5、软件部署 (5)6、开机 (5)8、配置W I F I账号密码(K3S-WIFI) (6)9、使用驱动打印 (6)三、 技术参数 (6)1、概述 (6)2、打印 (6)3、物理属性 (7)四、 按键使用 (7)1、按住【HOME】键开机 (7)2、联网成功后 (7)五、 指示灯状态 (7)1、联网成功前 (7)2、联网成功后 (7)3、异常报警 (8)六、 打印机提示音 (8)2、真人语音模式 (8)七、 打印功能支持 (8)1、多联打印 (8)2、字体加宽 (8)3、字体加高 (8)4、字体加粗 (8)5、二维码打印 (8)6、条形码打印 (8)7、长订单打印 (9)8、LOGO打印 (9)9、驱动打印 (9)11、重单判断 (9)12、主动请求订单 (9)13、掉线重联 (9)14、打印机在线升级 (9)15、自定义设置 (9)八、 用户自定义设置 (9)1、LOGO设置 (10)2、声音设置 (10)3、温度查询 (11)4、按键打印设置 (11)5、设置打印份数 (11)6、资费查询(K2S-GPRS) (11)7、打印机位置查询(K2S-GPRS) (12)九、 简单问题处理指南(FAQ) (12)1、打印机开机联网困难? (12)4、开机打印提示“登录失败此终端号未绑定或未激活”? (12)5、打印机异常报警 (12)6、打印机在线不打印? (13)7、易联云无线打印机绑定后不上线? (13)8、使用一段时间后打印字迹不清晰? (13)9、易联云无线打印机会不会出现漏单的情况? (13)10、使用易联云无线打印机有后期服务费吗? (13)11、打印机如何排版? (13)12、打印机放在商家那里,商家需要怎么操作? (13)13、使用易联云无线打印机如何统计一个订单使用的GPRS流量? (13)14、使用易联云无线打印机对网站服务器有什么要求? (13)15、使用易联云无线打印机对网站的开发语言有要求吗? (13)十、 保修范围 (13)1、保修时间 (13)2、打印机附件保修期 (13)3、打印机退换事宜; (13)4、免除保修责任的范围 (14)5、售后服务事项 (14)附录一:联网方式的切换说明 (15)附录二:以太网配置说明 (16)1.以太网配置准备 (16)2.使用电脑「打印机配置助手」进行配置 (17)附录三:WIFI配置说明 (20)1.使打印机进入W I F I配置模式 (20)2.使用手机「微信」进行配置 (20)3.使用电脑「打印机配置助手」进行配置 (21)4.使用「浏览器」进行配置 (22)5、WIFI配置过程中一些常见问题 (24)一、产品概述易联云智能云打印机不是局域网打印机,而是互联网云打印机,可实现远程云打印,打印机只需连接WIFI无线路由器(连接广域网)或者通过GPRS上网,无需连接电脑,打印机在任何地方都可以打印订单,不受距离的限制,顾客通过微信、APP、收银系统提交订单后,2s内出单,真正省时、省力,为商家省去了大量的人力。
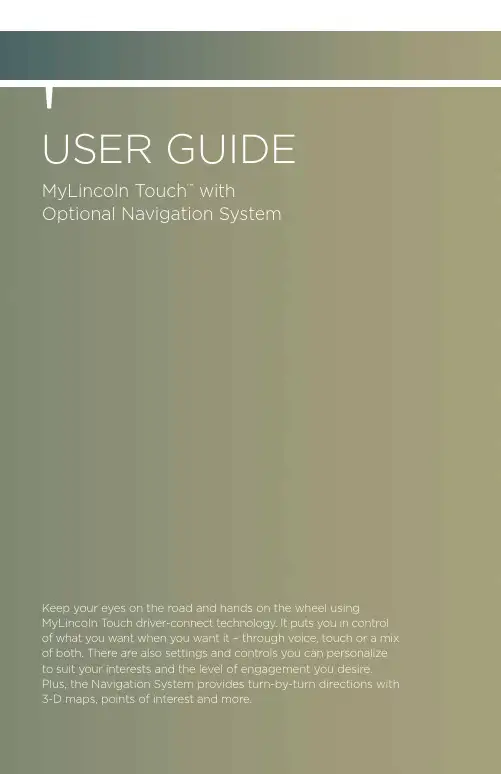
Master the Basicstraditional knobs and buttons have been replaced by controls and screens familiar to anyone with experience using remote controls, gaming systems or mobile phones.to optimize your experience using sYNc ® with MyLincolntouch tM , here are two essential devices to have with you:Bluetooth is the wireless technology that is used to connect your vehicle with your phone or other compatible devices. For details on compatible devices, visit for a complete list that is frequently updated with the latest technology on the market.Multifunction Display similar to a message Infotainment Displaythe color and features of GettinG FAMiLiARBluetooth-enabled PhoneDigital Media PlayerPrimary ControlsSecondaryControls ContentContentControlsNavigaTiONtoggle buttons have a consistent look with arrows indicate additional content to page up or down.high-priority features appear much larger than low-priority ones.some buttons have multiple light bars to highlight that additional features are available.iNsert sD carD SET uP yOurfind Bluetooth in the menu (lookfor this symbol). turnBluetooth On if it is not already Learn more about how sYNc® works, discover how to personalize your experience, get support when you need it and much more.vEHiClE HEalTH rEPOrT (vHr)GeneRAL tiPSBe patient. in-vehicle touch-screen technology is new and evolving. inspired in part by the devices you’re already familiar with using – like smartphones – the touch screenin your vehicle is built to a durable, automotive standard and designed to perform in。
General DescriptionThe CHRISTIE 3Q is a console mounted, cue driven automation designed specifically for the CHRISTIE P35GPS Projector/SLC console combination. This costefficient design provides control of most booth and auditorium functions including: theprojector motor, Xenon lamp, changeover douser, house light dimmer (up/mid/down),audio switching (Stereo/SR/Digital/Non-sync), stage curtains, slide projector, remotestatus indication (run/stop/fault/ready), built-in two projector interlock, full remotecapability, lens turret/masking and Xenon Auto-Focus control (for properly equippedprojectors and consoles). The automation provides manual control of all functions andcues as well as two user assignable option switches pre-wired to the main terminalboard.The automation utilizes a reliable cue detector instead of a cam timer, to initiate the various automated functions. A cue expander may be utilized to provide up to fouradditional custom functions (i.e. special dimmer functions, mid-show stop, additionalsound formats, etc.). The compact printed circuit board design provides reliable,trouble-free operation with the familiarity and simplicity of electro-mechanical relays.SUMMARY OF FEATURES♦ Designed specifically for P35GPS/SLC combination♦Separate trailer and feature pre-selects for picture and audio formats♦Reliable relay and PCB based design♦Built-in two projector interlock♦Full manual controls for all functions including cues♦All low voltage controls on PCB♦LED illuminated run, stop, and cue buttons for long service life♦Panel mounted alarm buzzer♦Two pre-wired, user assignable option switches♦Full remote control and status capabilities2NORMAL SHOW SEQUENCE♦Start ButtonMotor OnLamp OnDouser CloseSlide Projector OffLens/Masking/AutoFocus to Start Format (selectable)♦Start Cue ------ at beginning of trailersDimmer Mid or DownCurtain OpenDouser OpenStart Audio to Stereo or SR (selectable)Status Indicator to Run♦Feature Cue ------ at beginning of featureDimmer DownFeature Audio to Stereo, SR or Digital (selectable)Lens/Masking/AutoFocus to Feature Format (selectable)♦Show End Cue ------ at end of feature creditsCurtain CloseDouser CloseDimmer UpAudio to Non-SyncLens/Masking/Auto Focus to Start Format (selectable)♦Film Run OutMotor OffLamp OffSlide Projector OnStatus Indicator to Stop3♦Fault (Film Break)Motor OffLamp OffDimmer UpSlide Projector OnStatus Indicator to FaultAlarm Sounds♦Cancel AlarmShuts off AlarmDouser CloseAudio to Non-Sync4CUE PLACEMENTThe CHRISTIE 3Q automation utilizes three different cues for normal show operation .♦ Show Start - (inboard cue) ¾ placed two feet prior to the start of the trailers.♦ Feature - (center cue)¾ placed two feet prior to the start of the feature or policy trailer .♦ Show End - (outboard cue)¾ placed two feet prior to the end of the credits.NoteThe automation may be used with any cue sensor which provides at least three cues with consistent duration contact closure when a cue is detected .Although only three cues are required for normal show operation, an expander board may be added to further customize show operations.5COMPONENT FUNCTIONSWITCH FUNCTIONStart (PB - 1)Latches Start Relay, engaging motor and lamp.Turret/masking to start format, closes douser, audio tonon-sync. Slide projector OFF. Will not start if fail-safesare down. L.E.D. illuminated, green when active.Stop (PB - 2)Disengages Start Relay, motor and lamp OFF.Slide projector ON. L.E.D. illuminated, redwhen active or fail-safes are down.Motor (S1)Manual motor control.Lamp (S2)Manual lamp control.Douser (S3)Manual opening and closing of changeover douser.Dimmer (S4)Manual raising or lowering of house lights.Format (S5)Manual control of lens turret/aperture/masking/Auto-Focus.Start Audio (S6)Selects trailer audio format to Stereo or SR.Start Format (S7)Selects trailer picture format to Flat or Scope.Feature Audio (S8)Selects feature audio format to Stereo, SR or Digital.6SWITCH FUNCTIONFeature Format (S9)Selects feature picture format to Flat or Scope.Start Cue (PB - 3)Manual Show Start Cue. Active only when Start Relay islatched. Brings lights to MID, audio to Mono/Stereo,douser open, curtain open.Feature Cue (PB - 4)Manual Feature Cue. Active only when Start Relay islatched. Brings lights to LOW, audio to Stereo/SR,feature picture format to Flat or Scope.Show End Cue (PB - 5)Manual Show End Cue And Alarm Cancel. Brings lightsUP, audio to non-sync, douser close, curtain close, startpicture format to Flat or Scope.Option 1 (S10)ON/OFF Switch. May be used for interlock activation.Pre-wired to TB5 38-41. (see wiring diagram). Option 2 (S11)Momentary Switch. May be used for manual curtaincontrol. Pre-wired to TB5 42-44. (see wiring diagram). Buzzer (LS1)Sounds alarm if a film break occurs.Fuse (F1)Automation main fuse, 2 Amp., 3AGC.7COMPONENT FUNCTIONP.C.B. Assembly All low voltage control circuitry.Start Relay (K1)Latches through Stop Relay. Holds Power Relay latchedengaging motor and lamp.Stop Relay (K2) Disengages Start Relay. Relay is latched when fail-safesare down.Alarm Relay (K3)Sounds alarm if Stop Relay is latched due to fail-safe.Alarm sounds if show is between the Show Start andShow End Cues.Show End Relay (K4)Actuates Show End Cue functions. Disengages AlarmRelay.Feature Relay (K5)Actuates all Feature Cue functions.Show Start Relay (K6)Actuates all Show Start Cue functions. Latches AlarmRelay.Power Relay (K7)Activated by Start Relay engages motor and lamp. 3PDT,12VAC coil, with 10A rated contactsOpen Relay (K8)Opens douser and stage curtains. 3PDT, 12VAC coil,with 10A rated contacts.Close Relay (K9)Closes douser and stage curtains. 3PDT, 12VAC coil,with 10A rated contacts.Transformer (T1)12VAC , 2 Amp transformer. Provides 12V power forautomation.All relays are 4PDT, 12VAC coil withcontacts rated at 5A @125V exceptwhere designated.8INTERLOCK - TWOPROJECTORNoteMake sure both Automations are on the samephase. TB5-25 should read 0 VAC betweenthe two Automations. (see wiring diagram).♦Connect Remote Start (46) to Option 1A Common (38) in each automation.♦Connect Fail-safe Interlock (45) to Option 1B Common (40) in eachautomation.♦Connect Option 1A N.O. (39) and Option 1B N.O. (41) from projector 1 to their corresponding terminals on projector 2.Check•Switching on the Option 1 switches in both automations will activate interlock.•Tie-up both sets of fail-safes to ready position.•Press start on either automation. Both projectors' motors and lamps will start.•As the cues pass through each automation, functions will be performed independently as usual.•Once the Show Start Cue has gone through both automations, fail-safe protection for the interlock will be active. Dropping of the fail-safes oneither projector will stop both projectors, raise the house lights, andsound the alarms. Once the Show End Cue has gone through one of theautomations, interlock fail-safe will be discontinued and the projectorswill shut off independently as the film runs out.9TERMINAL ASSIGNMENTTB-1 Automation PCB (Reference Only)1. Dimmer Switching Common (W78)(W79)Up2. Dimmer(W13)Mid3. DimmerDown (W80)4. Dimmer5. Audio Switching Common (W15)Format(W62)Audio6. Start(W63)Format7. FeatureAudio8. Non-Sync (W19)9. ShowCue (W64)Start(W81)Cue10.FeatureCue (W82)EndShow11.12. Cue Common (W65)Fail-Safe (W83)13.(W88)Start14.Remote(Automation Switching Common) (W84)15. Ground12VAC (W85)16.(W26)Indicator17.Run(W27)Indicator18.Stop(W86)Indicator/AlarmFault19.20. Format Switching Common (W87)(W89)Format21.StartFormat (W90)22.FeatureFail-Safe (Input/Output) (W45)23. Interlock(W91)outputBuzzer24.TB-2 Automation PCB (194898-001)1. 12VAC (W117/W122)(W118/W123)2. Ground(W119)3. PowerRelay(W120)Relay4. Open(W121)5.CloseRelay6.Alarm Active (12VAC when active)10TB-3Automation Chassis (195631-001)1. Line 115VAC (W61)2. Neutral (W2)3. Ground (W3)4. Motor (W71)5. Motor (W72)6. Lamp (W73)7. Lamp (W74)8. Douser Common (W75)9. Douser Open (W76) 10. Douser Close (W77) 11. Curtain Common (W35) 12. Curtain Open (W36) 13. Curtain Close (W37) 14. Dry Circuit Common (W29) 15. Dry Circuit N.C. (W30) 16. Dry Circuit N.O. (W31)TB-5Main Console Terminal Board (Field Terminations)1. Line 115VAC Feed to Automation (W1)2. Neutral to Automation (W2)3. Ground (W3)4. Motor (W4/W71)5. Motor (W5/W72)6. Xenon (W6/W73)7. Xenon (W7/W74)8. Douser Common (W8/W75)9. Douser Open (W9/W76) 10. Douser Close (W10/W77) 11. Dimmer Switching Common (W11/W78) 12. Dimmer Up (W12/W79) 13. Dimmer Mid (W13) 14. Dimmer Down (W14/W80) 15. Audio Switching Common (W15) 16. Stereo (W16) 17. SR (W17) 18. Digital (W18) 19. Non-Sync (W19) 20. Show Start Cue [ N.O. CIRCUIT](W20/W64) 21. Feature Cue [ N.O. CIRCUIT](W21/W81) 22. Show End Cue [ N.O. CIRCUIT](W22/W82)23. Fail-Safe(Fire Alarm Shutdown) (W23/W83)(Switching Common) (W24/W84)24. Ground25. 12VAC (W25W85)26. Run Indicator (W26)Indicator (W27) 27.Stop28. Fault Indicator/Alarm (W28/W86)29.Common(W29) DryCircuit30. Dry Circuit N.C. [ 15A CONTACT] (W30)N.O. (W31) Circuit31.Dry32. Lens Common (W32/W87)33.Flat (W33) Lens(W34) Scope34.LensCurtainCommon (W35) 35.(W36) Open36.Curtain(W37) Close37.CurtainCommon1A(W38) Option38.N.O. (W39) 1AOption39.Common1B(W40) Option40.N.O. (W41) 1BOption41.(W42)Common42.2OptionA(W43) 2Option43.B2(W44) Option44.(Input/Output)(W45)Buss45. Fail-Safe46. Start Buss [ N.O. CIRCUIT](W46/W88)(W47)Common47.MaskingFlat (W48) 48.Masking49. Masking Scope (W49)NoteUnless otherwise noted, all circuits are drycontact closure and are rated for low voltagecontrols only.PARTS LIST COMPONENT PART NUMBER ♦Push ButtonsStart (Green) 578000-079Stop (Red) 578000-078Cues (White) 578000-077♦SwitchesS1, S2, S10 (DPST) 578722-024S3, S4, S5, S11 (SPDT, Mom.) 578712-018S6, S7, S8 (SPDT) 578722-017S9 (SPDT, Center off) 578712-003Relays♦K1-K6 (4PDT,Small) 599000-122K7-K9 (3PDT, Large) 571312-001♦OtherBuzzer 546900-035Transformer 587700-077Fuse 546102-011Cable♦Automation Cable Assembly 195838-001A p p e n d i x A:W i r i n g D i a g r a m s Appendix A contains wiring diagrams associated with options available with the 3Q automation.¾Cue Detector Wiring, for 598931-690 3Q Failsafe¾Option One Wiring, Two Projector Interlock¾Option Two Wiring, Manual Curtain Control¾Option Two Wiring, Manual Masking Control¾3Q Status Panel Wiring¾3Q Status Wiring Riser Diagram¾Phase Check, Two Projector Interlock¾3Q Wiring w/o P35GPS Projector¾3Q Automation Schematic(Show Start)(Feature)(Show End)FEATURE3Q AUTOMATION WIRING DIAGRAMSizeDocument Number RevDate:SheetofB23Thursday, August 04, 20052503380THESE DRAWINGS AND SPECIFICATIONS ARE THE EXPRESS PROPERTY OF CHRISTIE DIGITAL SYSTEMS AND SHALL NOT BE REPRODUCED OR COPIED OR USED AS THE BASIS FOR THE MANUFACTURE OR SALE OF APPARATUS WITHOUT EXPRESS WRITTEN PERMISSION OF CHRISTIE DIGITAL SYSTEMS.D I M ME R C O M D I M M E R U P D I M M E R M I D D I M M E R D O W N A U D I O S W C O M S T A R T A U D I OF O R M A T F E A T U R E A U D I O N O N -S Y N C S H O W S T A R T C U E F E A T U R E C U E S H O W E N D C U E C U E C O M F A I L S A F E R E M O T E S T A R TG R O U N D 12V A C R U N I N D I C A T O R S T O P I N D I C A T O R F A U L T A L A R M F O R M A T S W C O M S T A R T F O R M A T F E A T U R E F O R M A T I N T E R L O C K F A I L -S A F E B U Z Z E R O U TPCB ASSY22uF C250V K4SHOW END 9101115263141374812K5FEATURE 9101115263141374812TB2123456JP21N4004CR1K1START LATCH 9101115263141374812K6SHOW START9101115263141374812TB1123456789101112131415161718192021222324K3ALARM 9101115263141374812K2STOP 9101115263141374812J 2J 1/J 2J 1/W 122W117W118W117/122W118/123W119W104W104W106W109J5W110J7W107J 4/W 111W111W112W113W114W115W116W120J4J3/8J3/6J5J6J7J8/W108W108W102W103/123W101W121W103SizeDocument NumberRevDate:SheetofB 33Thursday, August 04, 20052503380THESE DRAWINGS AND SPECIFICATIONS ARE THE EXPRESS PROPERTY OF CHRISTIE DIGITAL SYSTEMS AND SHALL NOT BE REPRODUCED OR COPIED OR USED AS THE BASIS FOR THE MANUFACTURE OR SALE OF APPARATUS WITHOUT EXPRESS WRITTEN PERMISSION OF CHRISTIE DIGITAL SYSTEMS.12VAC12VAC GNDMOTOR POWER ENABLE DOUSER OPEN ENABLE DOUSER CLOSE ENABLE115VAC LINE 115VAC NEUTRALGROUND MOTOR MOTOR LAMP LAMPDOUSER COM DOUSER OPEN DOUSER CLOSE CURTAIN COM CURTAIN OPEN CURTAIN CLOSE DRY CIRCUIT COM DRY CIRCUIT N.C.DRY CIRCUIT N.O.OPEN CLOSEPOWER POWER RELAYSTB312345678910111213141516TB2123456DOUSER/CURTAINK578914253BA6DOUSER/CURTAINK678914253BA6T12BLK7RED4BLK9RED8WHT MOTOR/LAMP/SPAREK478914253BA6。

Honey,I’m Home!Nucleus at a GlanceInstant Video & Audio CallingConnect with all your loved ones with ease, so home is justa tap away.Connect to MobileConnect your smartphone so you can easily check in on-the-go.Connect to AlexaActivate Alexa, Amazon’s voice activated virtual assistant.Privacy & SecurityThe Privacy Camera Shutter, Do Not Disturb, and Privacy settingsgive you full control of your device.MicrophoneSpeakersCameraCamera Privacy ShutterTouchscreenLED Light, SensorsOn / Off (hold),Sleep Display (tap)Your Nucleus DeviceWhat’s In The BoxNucleus DeviceWall Mounting BracketDC Power AdapterPower CordDesktop StandAdhesive Cord Clips Wood Screws & Anchors Level Cable Fasteners Product SpecificationsScreen Size 8” Diagonal IPS ScreenScreen Resolution 1280 x 800Wi-Fi 802.11 b/g/n, 2.4 Ghz onlyEthernet YesBluetooth Low Energy Yes (Reserved for future features)Power * Please visit /POE for more information DC Adapter (Included) or Power over Ethernet (POE)*Battery No Physical Camera Shutter Yes Sensors T emperature, Humidity Speakers Stereo Speakers Additional Ports Micro USB (for diagnostic use only) Ethernet (RJ45)Wide Angle Camera 5MP, 120-degree wide-angleLet’s Get Y ou Set Up!Setup OverviewMount It On Your WallPower Me Up Connect Me To The InternetSet It On Your DeskWe recommend you mount your Nucleus to your wall in areas likethe kitchen, living room, or kids’ room.Use the included DC PowerAdapter to power your device.You can connect your device through Wi-Fi oruse an Ethernet cableYour Nucleus can also be placed on any flat and stable surface usingthe desk mount.Alternatively if you have Power Over Ethernet, that can be used to power and to connect your device to the Internet.To learn more about Power Over Ethernet (POE), visit /POESlide the wall mount bracket*This side up6. Attach Your Nucleus 5. Power On Your Device7. Attach Cord Clips1. Power Your Device2. Attach Desk StandLED Light GuideNucleus LED LightMaintenance & SupportMaintenanceCustomer SupportWarrantyClean the screen with a soft cloth; be careful not to wipe it with anything abrasive.Experiencing Problems?*************************************’ll be happy to solve your issues.This device is not waterproof. Please keep your Nucleus device away from rain, sinks, or other wet locations.For additional product information and helpful tips, visit: /supportNucleus comes with a limited one-year warranty. For more information, visit:/warrantyDon’t expose the Nucleus device to extreme heat. Do not place in direct sunlight. Do not attempt to dry your Nucleus with an external heat source such as a microwave or hair dryer.Don’t expose the Nucleus device to extreme cold. For example, don’t leave it in the trunk of your car in sub-zero temperatures.If your device gets wet, unplug all cables and wait for the device to completely dry beforepowering it on.。

1080P全高清多媒体播放器1080P FULL HD MEDIA PLAYER使用手册V1.0-K1--5目录引言 (2)第一章产品规格....................................................... .2 1.1基本功能.. (2)1.2参数列表 (3)1.3快速安装 (4)第二章遥控器按键功能 (4)第三章使用指南 (7)3.1主菜单 (7)3.2媒体播放 (8)3.2.1电影 (8)3.2.2图片 (10)3.2.3音乐 (11)3.2.4文本 (11)3.2.5文件 (13)3.2.6设置 (14)第四章疑难解答 (17)- 1 -引言本手册为您系统地介绍了如何使用,使用技巧以及注意事项。
请在使用前,仔细阅读本手册,以便您快速正确地掌握使用方法。
本公司只对产品本身存在的问题负有保修的责任,对因操作不当、自行维修和其他异常情况导致硬盘损坏或资料损失,以及由此产生的其他影响,本公司不予负责。
为了不断的改进产品功能和性能,因此本公司保留对本手册中所描述的产品进行改进而不预先通知的权利。
第一章产品规格1.1基本功能■ 支持MPEG1/2/4、H.264解码,最高分辨率达到FULL HD (1920*1080)■ 支持RM/RMVB与FLV解码,RM/RMVB最高分辨率达720P (1280*720)■ 支持HDMI、YPbPr、CVBS等全接口输出,满足各种使用需求■ 支持A VI/MPG/MPEG/XVID/VOB/DA T/MP4/TS/M2TS/MKV /H.264/RM/RMVB/MOV/DIVX3/DIVX4/DIVX5/DIVX6等众多常见的视频格式直接播放■ 支持PCM/DTS/AC3/MP3/RA/AMR等音频解码■ 简易安装,连接电视机及插入相关设备即可使用,无须安装任何软件,全功能遥控器,中文界面,老人小孩均可轻松操作- 2 -■ 支持接入SD/SDHC/MMC卡、U盘、USB移动硬盘、USB 硬盘座,扩展更多选择■ 支持SMI/ASS/SSA/SRT/SUB/PGS/SUB+IDX等字幕格式■ 图片播放,支持JPG/BMP/PNG/GIF/TIFF等图片格式,JPG 更可支持高达13068*10173的超高分辨率■音乐欣赏支持MP3/WMA/WA V/OGG/AAC/FLAC/ALAC/APE 等音乐格式播放1.2参数列表- 3 -1.3快速安装第一步:连接显示设备1.CVBS视频输出,将A V视频线(黄红白三色莲花插头)插入电视机接口,另一端接播放器的A V接口。
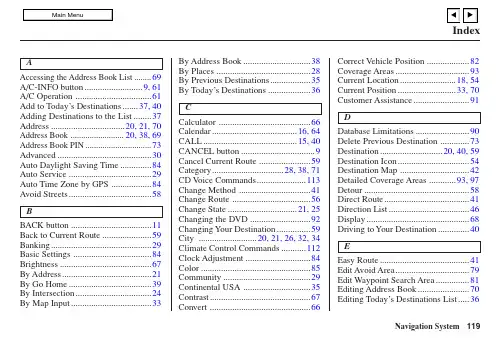
119AAccessing the Address Book List ........69A/C-INFO button..........................9, 61A/C Operation ..................................61Add to Today’s Destinations.......37, 40Adding Destinations to the List ........37Address.................................20, 21, 70Address Book ......................... 20, 38, 69Address Book PIN...............................73Advanced..........................................30Auto Daylight Saving Time..............84Auto Service .....................................29Auto Time Zone by GPS ..................84Avoid Streets.....................................58BBACK button ....................................11Back to Current Route......................59Banking.............................................29Basic Settings ...................................84Brightness.........................................67By Address........................................21By Go Home.....................................39By Intersection..................................24By Map Input (33)By Address Book..............................38By Places ..........................................28By Previous Destinations..................35By Today’s Destinations...................36CCalculator .........................................66Calendar......................................16, 64CALL..........................................15, 40CANCEL button.................................9Cancel Current Route .......................59Category................................28, 38, 71CD V oice Commands......................113Change Method ................................41Change Route ...................................56Change State...............................21, 25Changing the DVD ...........................92Changing Your Destination...............59City ..........................20, 21, 26, 32, 34Climate Control Commands...........112Clock Adjustment .............................84Color.................................................85Community.......................................29Continental USA ..............................35Contrast.............................................67Convert (66)Correct Vehicle Position ...................82Coverage Areas.................................93Current Location.........................18, 54Current Position..........................33, 70Customer Assistance.........................91DDatabase Limitations........................90Delete Previous Destination .............73Destination............................20, 40, 59Destination Icon................................54Destination Map ...............................42Detailed Coverage Areas ............93, 97Detour...............................................58Direct Route......................................41Direction List....................................46Display..............................................68Driving to Your Destination..............40EEasy Route........................................41Edit Avoid Area.................................79Edit Waypoint Search Area...............81Editing Address Book.......................70Editing Today’s Destinations List.. (36)Index120Emergency........................................29Entering Security Code.....................87Entering the Street Number..............24Entering Your Schedule ....................65Error Message.................................105FFind Place Commands....................111Frequently Asked Questions...........102GGlobal Commands..........................109Go Home ....................................20, 39Go Home PIN.............................39, 73Going Off the Route .........................53GPS Initialization .............................88Guidance Mode ..........................52, 82Guidance Prompts ............................69Guidance Screen...............................45HHome Address ..................................72Hotel/Motel (29)IInformation.......................................61Intersection .................................20, 24Information ScreenV oice Commands........................116JJoystick.............................................10KKey to Zagat Ratings ........................66Keyboard Layout ..............................84LLandmark Icons................................50Leisure ..............................................29MMap Color.........................................85Map Coverage...................................93MAP/GUIDE button.....................9, 45Map Input ...................................20, 33Map Legend..........................17, 44, 64Map Matching ..................................88Map Orientation................................49Map Scale .........................................48Map Screen.................................17, 44Maximize Freeways..........................41MENU button ...............................9, 20Menu Color.......................................85Message ............................................65Microphone.......................................11Minimize Freeways ..........................41Minimize Toll Roads ........................41Motel.................................................29NName...............................28, 29, 31, 70Navigation Display Commands......110Navigation General Commands (109)OOff-road Tracking.......................53, 82On-Screen Commands....................117On-Screen Commands Assist .........117On-Screen Keyboard ........................14Outside Temp (61)IndexHandsFreeLink (15)121PPC Card ............................................92Personal Information ........................69Phone Number......................28, 32, 71PIN Number......................................72Place Name.................................31, 32Place Name by Keyword ..................31Places....................................20, 28, 71Previous Destinations ...........20, 35, 71RRadio V oice Commands..................113Read List.....................................30, 62Rear CD V oice Commands............115Rear DVD V oice Commands.........115Rear Radio V oice Commands........114Recalculation ....................................74Reporting Errors ...............................91Reroute .............................................74Restaurant.........................................29Routing & Guidance. (74)SSave Current Location......................54Schedule ...........................................65Schedule List ....................................65Screen ...............................................10Security Code ...................................87Selecting the City .......................21, 25Selecting the State or Province...21, 25Selecting the Street.....................23, 26Set up Screen (first) Commands.....116Shopping...........................................30Show Icon on Map......................50, 52Sort by Distance to Travel ................31Split Screen Guidance ......................47State ............................................33, 34Street...........................................23, 26System Controls..................................9System Function Diagram ................19System Information ..........................83System Initialization.........................87System Limitations...........................89System Set-up...................................67System Start-up .. (16)TTalk button........................................11Temperature V oice Commands.......112Time Adjustment ..............................85Title ..................................................65Today’s Destinations...................20, 36Today’s Destinations List .................37Travel................................................30Troubleshooting..............................105UUnits (mile or km)............................84Unverified Area.................................76Unverified Area Routing.............75, 76Unverified Streets ...............................6Update DVD .....................................91User Name........................................73Using the V oice Control System. (12V)Vehicle ..............................................82Verified Streets ...................................6View Routes......................................41V oice. (84)IndexRoadside Assistance .........................64122V oice Command Help.......................62V oice Command Index ...................109V oice Control Basics ........................11V oice Recognition Feedback ............84V oice Recognition, Improving..........12V olume..............................................67ZIndexZOOM buttons (10)Zagat Restaurants..............................30。
起亚k3说明书尊敬的用户:欢迎选择起亚K3轿车,我们相信您已经对该产品进行了充分的了解和考虑,而在这里,我们将为您提供更详尽的使用说明以及维修保养方案,希望能够帮助您更好地了解并更正确地使用起亚K3车型.一、车型介绍1.1外观设计起亚K3轿车采用了流线型轮廓设计,以提高其整体性能和美观性,前脸采用了起亚家族式的设计理念,通过大面积的进气格栅和锋利的大灯组装点,让车的前脸更显时尚大气。
车身线条流畅,从前到后呈现出一种优美的曲线,展现出非常好的视觉效果,同时还配有多种车身彩色选择,为您打造更具有时尚感的驾驶体验。
1.2内饰及配置起亚K3轿车的内饰采用时尚、优雅的设计风格,车厢空间也更加宽敞明亮。
配备了全液晶仪表盘、中控触屏、自动空调等多种便捷设备,打造出更加人性化和舒适化的驾乘感受。
车载娱乐系统方面,起亚K3配备了7寸多媒体触屏,并且支持Apple CarPlay和Android Auto等手机互联功能,使得使用者能够方便地获取多种娱乐内容,还可以在手机导航、拨打电话等功能上进行操作。
GPS导航功能还能有效地指导您的行车路线,帮助您更方便地进行驾驶。
1.3安全配置起亚K3轿车在安全配置方面表现出色,包含了电子稳定控制系统、胎压监测系统、坡道起步辅助系统等多项安全设备。
此外,该车型还配备了前、后泊车雷达和倒车影像系统,非常适合城市道路驾驶。
二、使用说明2.1上车和软启动使用首先要确保起亚K3车门已经完全关闭,然后按下启动按钮即可。
在启动前,还要确保安全带已经扣好。
轿车采用了软启动技术,使得启动时发动机的过绞变得更加柔顺,不会出现过于急剧的加速或者马达声音遽然提高的情况,从而保证驾驶的平滑和舒适性。
2.2驾驶用车起亚K3同其他车型一样,驾驶前安全必须第一位。
此外,必须要熟练掌握起步、行驶、转弯等各个方面的技巧,以保证行车安全。
2.3手动换挡技巧手动变速器是汽车驾驶中一个非常重要的工具,能够在平路、上坡、降坡和其他各种路况下提供更好的行车性能和驾驶体验。
Table of ContentsIntroduction (2)Important Safety Information (3)System Controls (4)Screen 4 MENU button (5)MAP/GUIDE button (5)CANCEL button (5)ZOOM button (5)SETUP icon (5)JOYSTICK (5)A/C button (5)System Start-up (6)Main Menu (7)Address (7)Intersection (7)Phone No. (POI) (7)Places (7)Map Imput (7)Personal Addresses (8)Previous Destination (8)Today's Destinations (8)Selecting By Address (9)Change State (9)Selecting the City (11)Selecting the Street Address...... 13Selecting By Intersection. (15)Selecting the City (16)Selecting the Street (18)Selecting By Phone No. (POI) (21)Selecting By Places (22)Name (22)Category (25)Selecting By Previous Destination (32)Selecting By Map Input (33)Current Position (33)A City (34)State (36)Continental USA (38)Selecting by Today's Destinations (39)Adding Destinations To The List (39)Selecting Destinations From the List (40)Editing the List (41)Traveling To Your Destination (42)The Map Screen (46)Save Current Location (47)Landmark Icons (49)Going Off the Route (49)Modifying the Route (50)Personal Addresses (52)Entering a PIN (52)Entering Personal Addresses (53)Updating a Personal Address (57)Selecting a Personal Address Asa Destination (58)System Setup (60)Bright (60)Volume (60)Display (60)Reroute (61)Address (61)Location Correction (62)Personal PIN (63)Clock (63)Information (63)Show Icon on Map (64)System Security (65)System Limitations (66)Customer Assistance (68)DVD Removal (69)Non-detailed Coverage (70)Detailed Coverage Areas (71)Climate Control System (76)Navigation SystemUse these links (and links throughout this manual) to navigate through this reference.For a printed owner's manual, click on authorized manuals or go to .Refer to2001 TL Owner's Manual for more information.User AgreementAlpha Index。
K3 Complete User manual1、Product introductionK3 is a multi-function USB DAC for PC-HiFi. Being connected to a computer, it can work such as USB decoding, USB digital interface, audio decoding and amplification, etc.Product features:●Dual USB AUDIO mode●Flagship decoding capability PCM384k/DSD256●RGB work indicator●Dual headphone outputs, dual digital audio outputs●ADC type volume controlList of items included in package(please check to make sure that all items are included)1)USB A-Type C cable 1pc2)Spare foot pad 4pcs3)Quick user guide 1pc4)Warranty card 1pc(Note: The products, accessories, user interface and other illustrations in the manual are schematic and are for reference only. Due to product updates and upgrades, the actual product and schematic diagram may be slightly different. Please refer to the actual product.)2、Ports and indicators explained:①2.5mm balanced headphone output interface:Connect a 2.5mm earphone to this jack, balance the boost function will be started up automatically, which can improve the output power by about 50%.②3.5mm single-ended headphone output interface:Connect a3.5mm headset to this jack③Bass boost switch:When the switch is turned to the left, bass boost is OFF; and switch to the right, the bass boost is ON;④Low/high gain switch: When the switch is turned to the left, it means low gain, the switch to the right means high gain, and the high gain can be adjusted based on different types of headphones;⑤RGB indicator: This light is located next to the power/volume knob. While playing music, the indicator will display different colors according to the sampling rate.⑥Power/Volume knob: Turn the knob clockwise to stop and turn the power on, then continue to rotate to increase the volume. Turn counterclockwise to decrease the volume, continue to rotate and hear the beep and turn off the power. When the power is off, the white dot on the knob points to the RGB light;⑦Linear output: Directly driven by OPA1612, to ensure the high quality of sound reproduction, suitable for speakers, amps, decoders, etc.;⑧USB mode selection switch: When the switch is set to 1.0, it is USB Audio 1.0 drive-free mode, when the switch is dialed to 2.0, it represents USB Audio 2.0 drive mode;⑨Type C USB interface: Connect the computer (Windows system or OS system) to get power to K3. The audio input must use this port;⑩COAX OUT: Coaxial output port, this digital output port is used to connect speakers, amplifiers or decoders with coaxial input;⑪OPT OUT: Optical output port for connecting speakers, amplifiers or decoders with optical input.3, the usage stepsStep 1, select the appropriate USB mode and connect to the computer with the data cable●USB Audio 1.0, decoding sampling rate can reach 96k/24bit, noneed to driveAfter connecting the data cable, turn the power/volume knob clockwise until you hear a click and the device turns on.Select the K3 device on the computer side.●USB Audio 2.0, decoding sampling rate can reach 384k/DSD256,driver needs to be install in Windows.After connecting the data cable, turn the power/volume knob clockwise until you hear a click and turn the device on.For the MAC computer, there is no need to install the driver, but need to select K3 as sound device in Mac.For Windows system computers, please go to FiiO official website to download and install USB driver, download link /q1mkiifaq, driver installation tutorial please see Appendix 1 of this document, select K3 as output device on the computer.●How to select K3 as sound device:For example, Windows 7 system, right click on the desktop taskbar volume icon, then select the playback device to enter the "sound" management interface, finally Choose speaker “FiiO Q-series” as default.note:✧USB mode(1.0 to 2.0) switch needs to re-plugged and connectedto the computer✧Because K3 needs power from the source, and power supply anddata translate share the same slot, it is designed for desktopcomputers or notebooks. Mobile devices are not recommended.✧When the phone is turned on or plugged in, the indicator lightwill flash then keep ON.✧When K3 is turned off or disconnected, the indicator will be off. Step 2, select output jack according to the usage sceneScene 1: Connect to the headset using a 2.5mm or 3.5mm portnote:✧When both headphone jack and a BAL jack are plugged in, only theBAL jack will be valid;✧If you want to use the 3.5mm headphone jack, please unplug the2.5mm balanced jack device;Scene 2: Connect to active speaker or amplifier with a 3.5mm audio cablenote:line out is controlled by the power/volume knob and can work with2.5mm/3.5mm output at the same time ; but recommend to eject the2.5mm/3.5mm headphones while using the line out.Scene 3: Connect to the amplifier with coaxial inputnote:✧The coaxial output supports up to 192k sampling rate and DOPoutput of DSD64. If the device does not support, please adjust the audio output settings of the PC player;✧Power/volume knob adjustment is invalid to the coaxial outputvolume.Scene 4: Connect to the device with optical input portnote:✧The coaxial output supports up to 192k sampling rate and DOPoutput of DSD64. If the device does not support, please adjust the audio output settings of the PC player;✧Power/volume knob adjustment is invalid to the optical outputvolume.Step 3, play the song on the computer using the music app First select K3 as the output device in the playback settings of the playback software. Take FB2000 as an example. Appendix document 2 is for reference. Then play the music and adjust the power/volume knob tothe appropriate volume to enjoy the music.note:✧It is recommended to adjust the volume of the computer to themaximum. Control the output volume of the unit by adjusting the volume knob.●When playing songs with different sampling rates, the indicatorlight will change to display a specific color accordingly.Playing the music with 48KHz sample rate or below, it will display blue;Playing the music with sample rate above 48KHz, it will display yellow;When playing a DSD track, it will display green.●BassWith the bass boost function switch on, there will be a strong bass effect when playing music.●GainThe maximum output with high gain is 6dB higher than the low gain, which is suitable for higher impedance headphones.Please change the gain switch according to the following steps safely:Turn off K3 first ---- turn the gain switch to the high gain position ---- turn on the unit then gradually adjust to appropriate volume.note:Switching to high gain during use will increase the output power suddenly, which may damage your headphones and hurt your ears.5, safety instructions★When the system is abnormal, try to re-plug in the USB cable.★Before using, please adjust it to appropriate volume (the LINE OUT volume can be adjusted).★To avoid pop sound that can hurt your ears, it is not recommended to wear headphones before plugging the headphones.★Do not repair by yourself, disassemble or put the product in a place with water★When using headphones, you will not be able to hear the external environment. For your personal safety, please do use headphones in a dangerous environment.★Switching to high gain during use will increase the output power suddenly, which may damage your headphones and hurt your ears.6, troubleshootingThe following are some of the problems that may occur during the use and some solutions you could try. If you encounter an unsolvable problem, please contact FiiO customer service center(****************).Fault 1: No sound output●Check whether this unit is turned on.●Check whether the latest driver is downloaded on the official website and installed correctly.●Check whether Control Panel\All Control Panel Items \Sound shows "FiiO Q series"●Check whether the ‘FiiO Q series’ in the "playback device" is the default device●Check whether the headset is plugged in totally.●Check whether the volume is too low, increase the volume of the connected device or adjust the volume knob of K3 to increase the volume of the unit.Fault2: Small sound●When using a high-impedance earphone, it is recommended to set the GAIN switch to “H”.●You can increase the volume of the connected device or adjust the volume knob of K3 to increase the volume of the unit.●In-ear earphone and headphones are recommended for PO or BAL output, and insertion of line output may result in less sound7, Specification listNote: Specifications are subject to change and are subject to change without notice.8, learn moreTo learn more about FiiO products, please go to .Appendix 1: How to install driverNote: Please install the driver for K3 as follows (take win7 32-bit system as an example)First visit driver download link to download the official latest driver, as shown below:After the download is complete, unzip it,then double-click"FiiO_USB_DAC_Driver-V4.47.0.exe" to drive the application installer.After running the program, follow the steps below:You can customize which disk to install on, or you can install it on the C drive as default. If the default C drive is installed, click "install"During the installation process, you may encounter 2-3 anti-virus software interception. You need to manually select “Allow this operation” or “Allow all operations of the program”. “Allow loading” (this process is very important if you block the operation or Blocking loading will lead to failed driver installation)Appendix 2, FB2000 choose K3 operation tutorialOpen FB2000, select menu "Library - Configuration" to enter the parameter option setting interface, as below:The "Play" - "Output" device can be selected, for example, KS: K3, click "Apply", and then click "Confirm", as shown below:After selecting the output device, return to the main interface, select and play a song. Adjust it to appropriate volume, plug in your headphone and enjoy the music.To play DSD songs, you can choose the following output:。
目录第一章产品概述 (1)1.产品简介 (1)2.产品功能 (1)2.1 系统主界面 (1)2.2功能介绍 (2)第二章基本功能 (3)1.GPS导航 (3)2.音乐 (6)3.电子书 (9)4.图片浏览 (10)5.电影播放 (12)6.倒车后视 (13)第三章蓝牙功能 (14)1.蓝牙设置 (14)2.蓝牙通行码 (15)3.蓝牙连接 (16)4.拨号界面 (17)5.通话界面 (18)6.蓝牙音乐控制器 (19)第四章系统设置 (21)1.GPS设置 (21)2.音量控制 (21)3.GPS监视 (22)4.触摸校准 (23)5.通用设置 (24)6.系统信息 (25)7.LOGO设置 (25)8.屏幕调整 (26)9.亮度控制 (26)10.蓝牙设置 (27)附录:导航板技术规格 (1)1.接口引脚定义 (1)2.引脚功能描述 (3)3.技术规格 (5)第一章产品概述1.产品简介本产品是集导航、娱乐于一体的车载多媒体导航系统。
除导航功能外还支持音频/视频播放、电子书、图片浏览、蓝牙电话、倒车后视等功能。
2.产品功能2.1 系统主界面主界面为左右移动界面,包含两个界面,如图:2.2功能介绍导航支持实时GPS导航蓝牙支持与蓝牙手机连接进行免提通话音乐支持WMA、MP3等格式的音频文件电子书支持TXT格式文本阅读图片支持JPG、GIF、BMP、PNG等格式图片的浏览电影支持WMV、AVI、MP4等文件格式的视频文件设置包含导航设置、音量控制、背景光、系统信息、触摸屏校准、LOGO设置、屏幕调整、蓝牙设置等功能。
此外,本导航系统还可选配倒车后视功能。
第二章基本功能1. GPS导航设备开启后,首次进入导航软件,必须先对导航软件的路径进行相关设置。
径设置界面,如下图:b.点选,可以在启动时自动运行所选的导航软件。
然后点击,进入到导航设置的路径选择界面,如下图:c.在这个界面下,显示了所有的文件夹和可执行文件(EXE文件),您可以将不同版本的地图拷入SD卡中,在该界面下选择相应地图的“EXE”文件。
关于车载智能导航的使用手册在现代社会,车载智能导航已成为我们驾车出行的得力助手。
它能够帮助我们更轻松、更准确地到达目的地,节省时间和精力。
然而,要充分发挥车载智能导航的功能,正确的使用方法至关重要。
下面,就让我们一起来详细了解一下车载智能导航的使用方法。
一、车载智能导航的基本组成车载智能导航系统通常由显示屏、操作按钮、GPS 接收器、地图数据存储装置以及语音提示系统等部分组成。
显示屏用于显示地图、路线规划和相关的导航信息。
操作按钮可以让您方便地进行各种操作,如输入目的地、调整音量等。
GPS 接收器负责接收卫星信号,以确定车辆的当前位置。
地图数据存储装置则存储了详细的地图信息,包括道路、地标和兴趣点等。
语音提示系统会在必要时为您提供语音导航指示,让您在驾驶过程中无需分心查看屏幕。
二、开机与系统设置在您启动车辆后,车载智能导航通常会自动开机。
如果没有自动开机,您可以通过按下导航设备上的电源按钮来启动它。
首次使用车载智能导航时,您需要进行一些基本的系统设置,例如选择语言、单位(公里/英里)、时间格式等。
在系统设置中,您还可以调整音量、屏幕亮度、地图显示模式等,以适应您的个人喜好和驾驶环境。
三、目的地输入输入目的地是使用车载智能导航的关键步骤。
常见的输入方式有以下几种:1、地址输入您可以通过触摸屏或操作按钮,依次输入目的地的省、市、区、街道、门牌号等详细地址信息。
2、兴趣点输入如果您要前往某个特定的兴趣点,如商场、加油站、酒店等,可以在导航系统的兴趣点数据库中进行搜索。
输入关键词后,系统会列出相关的兴趣点供您选择。
3、交叉路口输入如果您只知道目的地附近的交叉路口,您可以输入两个道路的名称来确定目的地。
4、坐标输入对于一些特殊的地点,您可能知道其精确的经纬度坐标,通过输入坐标可以准确地设置目的地。
四、路线规划输入目的地后,车载智能导航会为您规划出一条或多条可行的路线。
一般来说,系统会默认提供最快、最短或最经济的路线选项。