ProE 配置文件生成器 v1.2
- 格式:doc
- 大小:20.00 KB
- 文档页数:4

Proe Config全部配置文件說明(完整版)关于配置文件选项为配置文件输入所需的设置,可以预设环境选项和其它全局设置。
要设置配置文件选项,使用「选项」对话框(「实用工具」>「选项」)。
本帮助模块含有一个按字母顺序显示每一选项或相关选项组的配置选项列表:•配置选项名称。
•相关变量或值。
选项的缺省值显示为斜体。
•简单说明。
accuracy_lower_bound 数值(在1.0e-6和1.0e-4之间)输入一个精确值来覆盖缺省下限0.0001。
上限固定为0.01add_java_class_path <搜索路径>此选项涉及到有关JAVA环境变量CLASSPATH的选项值,它用于查找J-Link程序中使用的类。
可在同一行上指定多个搜索路径,在UNIX中用「:」隔开,在WindowsNT中用「;」隔开。
设定此选项后,激活第一个J-Link应用程序时才会生效add_weld_mp yes, noyes - 系统在计算质量属性时,包括焊接。
no - 系统在计算质量属性时,排除焊缝。
allow_anatomic_features yes, no将此配置文件现象设置为yes,使得下列选项可用:「扭曲」菜单中:「局部拉伸」、「半径圆顶」、「截面圆盖」、「耳」、「唇」。
「实体」菜单中:「开槽」、「轴肩」、「凸缘」、「退刀槽」。
「基准」菜单中:「计算」。
allow_cycle_optimize yes, no在18.0以前的版本中,有一个孔加工序列参数,允许用户优化孔加工序列CL-数据的循环输出。
自版本18.0以来,该参数不再有效。
yes - 使该参数在序列中可见no - 该参数在序列中不可见allow_move_attach_in_dtl_move yes, no确定绘图模式中的「移动」和「移动附属」命令是(yes) 否(no) 一起执行allow_move_view_with_move yes, no设置为「yes」时,可以使用「绘图」模式中的「移动」命令,移动绘图视图。

proe工程图配置文件proe工程图配置文件(2011-04-16 09:16:17)转载标签:杂谈原文地址:proe工程图配置文件作者:gudao工程图配置文件*.dtl常用选项及使用详解工程图配置文件是出工程图所必需了解掌握的知识。
不可否认的是,论坛工程图版的求助帖超过一半与工程图配置文件设置有关。
可见工程图配置文件的重要性。
工程图配置文件*.dtl使用上比系统配置文件config.pro要简单一些。
所以先将一些常用选项列出,供大家参考。
配置文件使用方面的内容放在后面讲解。
先讲述的内容目录如下:一、工程图配置文件常用选项及说明二、工程图配置文件使用详解1、创建工程图配置文件*.dtl 2、工程图配置文件选项的查找3、工程图配置文件的选项设置与修改4、工程图配置文件的正确调用一、工程图配置文件常用选项及说明drawing_units mm(前面为选项,空格后为值,下同)此项设置所有绘图参数的单位,比如后面的文字大小、箭头大小等选项,是以mm为单位的,先要设置这个选项。
drawing_text_height 3.5设置缺省文本的缺省高度,如注释中的文字,标注中的数值大小。
text_width_factor 0.7设置文本的高度和宽度的比例,按国标应使用长仿宋体,应为0.7。
但此项设置对于windows 系统自带的仿宋体无效。
broken_view_offset 3设置破断视图两破断线之间的距离detail_circle_line_style phantomfont设置详细视图(局部放大图)的边界线的线型,影响打印的粗细projection_type first_angle设置视图的投影方向为第一角法(国标要求用第一角法,日本等国用第三角法)view_scale_denominator 3600 view_scale_format ratio_colon上面两项互相影响一起设置,设置比例的显示方式以小数、比值、或分数方式。
proe配置文件--config.proPROE的配置文件让不少初学者感到烦恼,尽管不少教材里都会提到关于PROE的配置文件。
但大多数显得过于理论化,而不便于初学者理解,可操作性不强。
本文力求以通俗的语言结合实际运用向大家介绍PROE的配置文件,希望能给各位带来帮助。
配置文件是PROE的一大特色,却也常常把初学者弄得一头雾水、云里雾里。
掌握各种配置文件的使用是很有好处的,可以提高工作效率、减少不必要的麻烦,也有利于标准化、团队合作等等。
同时也是从初学者到进阶提高的必经之路。
所以,还是要静下心来,好好看一看。
当然,我所说的掌握不是让你死记硬背,也不是让你记熟哪个选项起什么作用,哪个配置文件怎么做。
我们所要做的只是对各种配置文件的作用和基本使用方法要有所了解,然后根据自己的需求来做配置。
下面以proe wildfire3.0m120中文版为蓝本,(其实对于大多数版本都适用)依次为大家介绍以下内容:一、配置文件是什么东西?二、系统配置文件config.pro(一)config.pro文件在哪里?(二)config.pro文件怎样才起作用?(三)config.pro文件怎么编辑,怎么加选项?(四)关于config.pro中的快捷键(五)为什么有些选项设了还是不起作用?(六)怎么查找config.pro的选项?(七)别人说的选项我的怎么没有?(八)配置文件的加载顺序(九)为什么我的PROE 总是和别人不一样?总是莫名其妙的退出?(十)怎么用别人的config.pro文件?(十一)config.pro常用的一些选项一、配置文件是什么东西?首先,要建立一个概念,PROE里的所有设置,都是通过配置文件来完成的。
打个比方,在AUTO CAD里,新安装完软件后,我们就会把自己常用的一些工具条调出来,在窗口摆放好位置,设好十字光标大小,右键设置等等直到把整个AUTO CAD调成自己想要的样子,然后退出程序。
再次运行AUTO CAD时,我们会发现之前设置都还有效。

ug心得体会篇一:UG软件的学习心得与体会UG软件的学习心得与体会:UG软件是一套集cad、cam、caE于一身的大型软件,其功能强大,使用该软件进行设计,能直观、准确地反映零、组件的形状、装配关系,可以使产品开发完全实现设计、工艺、制造的无纸化生产,并可使产品设计、工装设计、工装制造等工作并行开展,大大缩短了生产周期,非常有利于新品试制及多品种产品的设计、开发、制造。
在新品开发期间,能通过其强大的功能及时检查尺寸干涉、计算重量及相关特性,提高产品的设计质量,对复杂结构产品装配工艺、焊接工艺中工序的合理安排有着非常好的指导性。
因此,该工具提供了一个强有力的新品开发手段.通过对UG软件的学习和研究,掌握其使用技能,不仅可以设计简明电扇清洁器,解决了上学期课题研究遗留的一大难题,而且用UG来设计创意产品,将自己的梦想设计出来是一件非常具有诱惑力的事。
通过多年的学习和摸索后大致总结了以下几点。
一、在建模时需要注意的地方:1.层的分配层的分配当然应根据需要来制定规范,我在这里提供一个参考:层号几何体分类1-199curves,Sketches,SolidGeometry200Flatpattern(wrieframe)模型(线框)201-239open(optionalforrefdata,plattomgeometry)开放用于参考数据,阴影几何体项240增加到绘图面的绘图几何体241-248open(绘图项)249Partslistcrosshatchingboundarylines剖面线文件表250格式251文件列表252版本信息253GRiP使用限制254-256开放2.坐标系在最后完成的产品中只使用一次的应按绝对坐标建立模型,如将被多次应用则按自身的装配定位点为原点建立模型。
零件相对acS原点位置是由其整体形状和应用方法决定的,一般是将过acS原点的XY平面作为零件的配合面,z平面垂直于配合面。

!=========================================================!Standard Pro/ENGINEER Wildfire V4.0 config.pro(Win 2000/XP/Vista)!Additional options are in the config.sup Nebulae Studio,By Kyle,2007,7,7!===================================================================!路径template_solidpart D:\MONLibs\Template\Part.prttemplate_designasm D:\MONLibs\Template\Assembly.asmtemplate_drawing D:\MONLibs\Template\A4H.drwdrawing_setup_file D:\MONLibs\Template\metric.dtlpro_material_dir D:\MONLibs\Materialspro_library_dir D:\MONLibs\pro_catalog_dir D:\MONLibs\PROTKDAT D:\MONLibs\protk.dat!trail_dir D:\Work\trail!pro_font_dir C:\WINNT\Fontssave_objects changed! When updating or loading this file on a new 2000 machine verify! the names of all directories.! It is assumed that P:\ is mapped to a dir such as c:\ptc\pro_share!========================================================================== !===================================================================!Environment!=================================================================== company_name Nebulae Design Says Ltd.display_full_object_path yesenable_absolute_accuracy YESflip_arrow_scale 1.5info_output_mode choosemeasure_sig_figures 8! Change to UNIT_MM if working in millimeterspro_unit_length UNIT_MM! Change to UNIT_KILOGRAM if working in kilograms.pro_unit_mass UNIT_KILOGRAMpro_unit_sys mmnsspin_center_display noshade_surface_feat yessave_full_top_level_display nosave_triangles_flag nographics opengldefault_font 10,Tahoma,regular!=================================================================== ! Directories & Files! Pls. see the config.sup which are the path specific settings.! Note that some settings cannot accept environment variables.! File Storage & Retrieval!=================================================================== disable_search_path_check yesfile_open_default_folder working_directorymodel_rename_template _n1rename_drawings_with_object bothsave_model_display shading_highsave_objects changedprompt_on_exit yes!Assembly=========================================================== allow_redo_intersections yescomp_assemble_start constrain_in_windowfix_refs_to_intersections yesfreeze_failed_assy_comp yescreate_temp_interfaces yescan_snap_to_missing_ref yesauto_assembly_with_layouts yesenable_advance_collision yescomp_assemble_with_interface from_listassem_placement_ignore_units yesconvert_to_wf3_replace yescontinue_From_oos turecopy_geometry_method references!Casting & Mold Design============================================== default_shrink_formula asmeshow_all_mold_layout_buttons yes!color============================================================== number_user_colors 128!=================================================================== ! Import/Export¡GData Exchange!=================================================================== intf_out_auto_layer_ids yes!====2D Exchangeauto_associate_dimensions yescopy_dxf_dim_pict yesdxf_block_to_pro_symbol yesdxf_out_drawing_scale yesexplode_iges_dimension_note yesfix_autocad_iges_text_scale yesiges_in_assoc_dim_geom_21 yesiges_in_dwg_color yesiges_in_group_to_dwg_layer yesiges_out_dwg_color yesiges_out_ent_as_bspline trueintf_in_dwg_view 3d_viewsintf_out_layer part_layerintf_out_text_length adjustedcollect_dims_in_active_layer yes!====3D Exchangefix_boundaries_on_import yesiges_in_106_f2_as_spline yesiges_out_assembly_default_mode all_partsintf_in_extract_profiles allintf_in_layer_asm_dialog yesintf_out_as_bezier yesintf3d_in_close_open_boundaries yestopobus_enable yesinterface_quality 2cri_grafting_enable yes!====Web Publishwww_tree_location inweb_browser_homepage about:blank!================================================================= ! Dimensions and Tolerances Setup!================================================================= allow_rfs_default_gtols_always yesang_dim_in_screen yesdefault_dec_places 2dim_offscreen_limit 1.0mark_approximate_dims yesparenthesize_ref_dim yes! Set to the most common tolerance type which appears on your drawings.tol_mode NOMINALtolerance_standard ansi!================================================================= ! Drawing Mode!================================================================= allow_move_view_with_move yesallow_refs_to_geom_reps_in_drws yesautobuildz_enabled yeschamfer_45deg_dim_text iso/dincreate_drawing_dims_only yesdefault_draw_scale 1disp_trimetric_dwg_mode_view nodisplay_dwg_sketch_constraint yesdraw_points_in_model_units yeshighlight_new_dims yeshlr_for_quilts yesremember_last_get_point_option yessave_display yessave_drawing_picture_file bothselection_of_removed_entities yestodays_date_note_format %dd-%Mmm-%yyyydrawing_shaded_view_dpi 300!================================================================ ! Features!================================================================ allow_anatomic_features yesfeature_create_auto_begin yesfeature_create_auto_ok yescopy_set_datum_attr yes!================================================================ ! Default Layers!================================================================ ! Part and assembly layers (00_COMPONENTS layer is in assemblies only):def_layer LAYER_ASSEM_MEMBER 00_COMPONENTSdef_layer LAYER_DATUM 01_ALL_PLANESdef_layer LAYER_CSYS 02_ALL_CSYSdef_layer LAYER_AXIS 03_ALL_AXESdef_layer LAYER_POINT 04_ALL_POINTSdef_layer layer_curvedef_layer LAYER_SURFACE 06_ALL_SURFSdef_layer layer_quilt!================================================================ ! Manufacturing!================================================================ nccheck_type nccheckshade_mfg_ref_models no!================================================================ ! User Interface (Graphics Display & Appearance)!================================================================ axis_display nodatum_display nodatum_point_display nodatum_point_tag_display nodisplay_coordinate_sys noedge_display_quality normalfasthlr yesframes_per_sec yesmin_animation_steps 10orientation user_defaultspin_control dragspin_with_part_entities yesx_angle -50y_angle -20prehighlight_tree yessummary_help yesstart_appmgr yesretain_display_memory yesquery_bin_start yespick_aperture_radius 7nt_cache_dirs yesenable_popup_help yesiconify_entire_pro yeskbd_cmd_abbreviation offkeep_info_datums yeslogical_objects yesread_parameters_of_excluded yessave_scene_with_file yessave_texture_with_model yesshow_selected_item_id yes!=============================================================== ! Photorender!=============================================================== photorender_preview_scale 0.5force_new_file_options_dialog yestexture yes!=============================================================== ! Printing & Plotting!=============================================================== delete_after_plotting yesplotter HP LaserJet 5000 PSplotter_command WINDOWS_PRINT_MANAGERuse_8_plotter_pens yespen1_line_weight 2pen2_line_weight 1pen4_line_weight 1pen5_line_weight 1pen6_line_weight 2pen7_line_weight 2pen8_line_weight 3plot_linestyle_scale 1plot_proceed_dialog yesplot_to_scale_full_window yespostscript_compression yesraster_plot_dpi 300use_software_linefonts yesvariable_plots_in_inches no!=============================================================== ! Simulation!=============================================================== sim_max_memory_usage 1024!=============================================================== ! Sketcher!=============================================================== section_color defaultsketcher_dec_places 2sketcher_default_font_kerning yessketcher_undo_reorient_view yes!=============================================================== ! System!=============================================================== trail_delay 200enable_tree_indep yes!=============================================================== ! User Interface (General Behavior)!=============================================================== button_name_in_help yesfonts_size smallnative_kbd_macros yesreserved_menu_space 1set_menu_width 13thermo_position_hint no_window_overlapvisible_message_lines 2! Language Interfacedialog_translation YEShelp_translation YESmenu_translation bothmake_parameters_from_fmt_tables yesdraw_models_read_only no!=============================================================== !Others!=============================================================== multiple_skeletons_allowed yesenable_offset_fan_curve yespipe_3d_bend_theor_int_pts yesallow_workpiece_silhouette yesgtol_dim_placement under_valueuse_temp_dir_for_inst yesinfo_output_format text!Hidden parameter============================================== disp_in_open_rep_create yesset_zero_curvature_color no!allow_old_style_round yestext_height_factor 40!New for V4.0parameter========================================== sketcher_dim_of_revolve_axis yessketcher_dimension_autolock yesstyle_state_transparency 75dim_inactive_components yes!================================================================ !================================================================ ! MAPKEYS!================================================================ !================================================================ mapkey 1 @MAPKEY_NAMETop view;@MAPKEY_LABELtop;\mapkey(continued) ~ Activate `main_dlg_cur` `ProCmdViewNamePick.view`1 ;\ mapkey(continued) ~ Select `nameviewlist` `nv_list`1 `TOP`;mapkey 2 @MAPKEY_NAMEBottom view;@MAPKEY_LABELbottom;\ mapkey(continued) ~ Activate `main_dlg_cur` `ProCmdViewNamePick.view`1 ;\ mapkey(continued) ~ Select `nameviewlist` `nv_list`1 `BOTTOM`;mapkey 3 @MAPKEY_NAMEFront view;@MAPKEY_LABELfront;\mapkey(continued) ~ Activate `main_dlg_cur` `ProCmdViewNamePick.view`1 ;\ mapkey(continued) ~ Select `nameviewlist` `nv_list`1 `FRONT`;mapkey 4 @MAPKEY_NAMEback view;@MAPKEY_LABELback;\mapkey(continued) ~ Activate `main_dlg_cur` `ProCmdViewNamePick.view`1 ;\ mapkey(continued) ~ Select `nameviewlist` `nv_list`1 `BACK`;!!!!color.!!Render.!Close old file.!!Repaint!! zoom!!Extrude sketch.!!Add 2D_Drawing_view!!Hide you selecting.!!Hide or show main_tree.!!In ASM,add a part with freedom.!!In Asm,open a part you choose.!============================================================================== =!ccl_mapkeys!============================================================================== =!------------------------!---------------------------------!------------------------------!Display!---------------------------------!export!------------------------------!Measure!------------------------!------------------------------------! public!!-----------------------------! 2Dsketch_reference! Save Status!!-----------------------------! Sweep!------------------------------!-----------------------------------! Change Background !intf3d_ug_install_dir C:\Program Files\UGS\NX 5.0\UGIIintf_ug_version nx5mapkey 5 @MAPKEY_NAMELeft view;@MAPKEY_LABELleft;\mapkey(continued) ~ Activate `main_dlg_cur` `ProCmdViewNamePick.view`1 ;\ mapkey(continued) ~ Select `nameviewlist` `nv_list`1 `LEFT`;mapkey 6 @MAPKEY_NAMERight view;@MAPKEY_LABELright;\mapkey(continued) ~ Activate `main_dlg_cur` `ProCmdViewNamePick.view`1 ;\ mapkey(continued) ~ Select `nameviewlist` `nv_list`1 `RIGHT`;mapkey rg ~ Activate `main_dlg_cur` `ProCmdViewRepaint.edit_t`;mapkey a @MAPKEY_LABEL(Placement)a;~ Enter `main_dlg_cur` `dashInst0.gP`;\ mapkey(continued) ~ Exit `main_dlg_cur` `dashInst0.gP`;\mapkey(continued) ~ Activate `main_dlg_cur` `chkbn.extrev_1_placement.0`1 ;\ mapkey(continued) ~ Activate `extrev_1_placement.0.0` `PH.Sketch`;mapkey 1 ~ Activate `main_dlg_cur` `51flyChildTb` \mapkey(continued) `ProCmdViewNamePick.51flyC`;~ Command `ProCmdViewNamePick` 1 ;\ mapkey(continued) ~ Select `nameviewlist` `nv_list`1 `TOP`;mapkey 2 ~ Command `ProCmdViewNamePick` 1 ;\mapkey(continued) ~ Select `nameviewlist` `nv_list`1 `BOTTOM`;mapkey 3 ~ Command `ProCmdViewNamePick` 1 ;\mapkey(continued) ~ Select `nameviewlist` `nv_list`1 `FRONT`;mapkey 4 ~ Command `ProCmdViewNamePick` 1 ;\mapkey(continued) ~ Select `nameviewlist` `nv_list`1 `BACK`;mapkey 5 ~ Activate `main_dlg_cur` `51flyChildTb` \mapkey(continued) `ProCmdViewNamePick.51flyC`;~ Command `ProCmdViewNamePick` 1 ;\ mapkey(continued) ~ Select `nameviewlist` `nv_list`1 `LEFT`;mapkey 6 ~ Command `ProCmdViewNamePick` 1 ;\mapkey(continued) ~ Select `nameviewlist` `nv_list`1 `RIGHT`;mapkey $F1 @MAPKEY_LABELopen;~ Select `main_dlg_cur` `MenuBar1`1 `File`;\mapkey(continued) ~ Close `main_dlg_cur` `MenuBar1`;~ Activate `main_dlg_cur` `File.psh_open`;\mapkey(continued) ~ Move `file_open` `file_open`2 -0.255541 1.022164;mapkey $F3 @MAPKEY_LABELDel-e;~ Select `main_dlg_cur` `MenuBar1`1 `File`;\mapkey(continued) ~ Close `main_dlg_cur` `MenuBar1`;\mapkey(continued) ~ Select `main_dlg_cur` `File.cb_file_erase`;\mapkey(continued) ~ Close `main_dlg_cur` `File.cb_file_erase`;\mapkey(continued) ~ Activate `main_dlg_cur` `psh_erase_not_disp`;\mapkey(continued) ~ Activate `file_erase_nd` `ok_pb`;mapkey $F4 @MAPKEY_LABELnew;~ Select `main_dlg_cur` `MenuBar1`1 `File`;\mapkey(continued) ~ Close `main_dlg_cur` `MenuBar1`;~ Activate `main_dlg_cur` `File.psh_new`; mapkey $F5 ~ Select `main_dlg_cur` `ProCmdEnvMdlDisp.mdisp`1 `Wireframe`;mapkey $F6 ~ Select `main_dlg_cur` `ProCmdEnvMdlDisp.mdisp`1 `Hidden line`;mapkey $F7 ~ Select `main_dlg_cur` `ProCmdEnvMdlDisp.mdisp`1 `No hidden`;mapkey $F8 ~ Select `main_dlg_cur` `ProCmdEnvMdlDisp.mdisp`1 `Shading`;mapkey $F9 @MAPKEY_NAMEcolor;@MAPKEY_LABELcolor;\mapkey(continued) ~ Select `main_dlg_cur` `MenuBar1`1 `View`;\mapkey(continued) ~ Select `main_dlg_cur` `MenuBar1`1 `Insert`;\mapkey(continued) ~ Select `main_dlg_cur` `MenuBar1`1 `View`;\mapkey(continued) ~ Close `main_dlg_cur` `MenuBar1`;\mapkey(continued) ~ Activate `main_dlg_cur` `View.push_view_appearances`;\mapkey(continued) ~ FocusOut `pgl_appearance_editor` `AppearanceName`;mapkey $F10 @MAPKEY_NAMErender;@MAPKEY_LABELrender;\mapkey(continued) ~ Select `main_dlg_cur` `MenuBar1`1 `View`;\mapkey(continued) ~ Close `main_dlg_cur` `MenuBar1`;\mapkey(continued) ~ Select `main_dlg_cur` `View.cb_view_mdlsetup`;\mapkey(continued) ~ Close `main_dlg_cur` `View.cb_view_mdlsetup`;\mapkey(continued) ~ Activate `main_dlg_cur` `RenderControl`;mapkey qw @MAPKEY_LABELclose;~ Select `main_dlg_cur` `MenuBar1`1 `Windows`;\ mapkey(continued) ~ Close `main_dlg_cur` `MenuBar1`;\mapkey(continued) ~ Activate `main_dlg_cur` `Windows.psh_win_close`;mapkey vd ~ Activate `main_dlg_cur` `psh_view_default`;mapkey xx @MAPKEY_NAMEtouying;@MAPKEY_LABELtouying;\mapkey(continued) ~ Select `main_dlg_cur` `MenuBar1`1 `Insert`;\mapkey(continued) ~ Select `main_dlg_cur` `Insert.cb_dwg_view`;\mapkey(continued) ~ Close `main_dlg_cur` `MenuBar1`;\mapkey(continued) ~ Close `main_dlg_cur` `Insert.cb_dwg_view`;\mapkey(continued) ~ Activate `main_dlg_cur` `psh_dwg_view_proj`;mapkey h @MAPKEY_NAMEhidden;@MAPKEY_LABELhidden;\mapkey(continued) ~ RButtonArm `main_dlg_cur` `PHTLeft.AssyTree` `node0`;\mapkey(continued) ~ PopupOver `main_dlg_cur` `ActionMenu`1 `PHTLeft.AssyTree`;\ mapkey(continued) ~ Open `main_dlg_cur` `ActionMenu`;~ Close `main_dlg_cur` `ActionMenu`;\ mapkey(continued) ~ RButtonArm `main_dlg_cur` `PHTLeft.AssyTree` `node0`;\mapkey(continued) ~ PopupOver `main_dlg_cur` `ActionMenu`1 `PHTLeft.AssyTree`;\ mapkey(continued) ~ Open `main_dlg_cur` `ActionMenu`;~ Close `main_dlg_cur` `ActionMenu`;\ mapkey(continued) ~ Activate `main_dlg_cur` `HideFeat_PushBtn`;mapkey z @MAPKEY_NAMEc;@MAPKEY_LABELz;\mapkey(continued) ~ Activate `main_dlg_cur` `resizer_button_1`0;mapkey l @MAPKEY_NAMElast part;@MAPKEY_LABELlast part;\mapkey(continued) ~ Select `main_dlg_cur` `MenuBar1`1 `Insert`;\mapkey(continued) ~ Select `main_dlg_cur` `Insert.cb_component`;\mapkey(continued) ~ Close `main_dlg_cur` `MenuBar1`;\mapkey(continued) ~ Close `main_dlg_cur` `Insert.cb_component`;\mapkey(continued) ~ Activate `main_dlg_cur` `pshCompPackage`;#ADD;mapkey o @MAPKEY_NAMEopen in asm;@MAPKEY_LABELopen;\mapkey(continued) ~ RButtonArm `main_dlg_cur` `PHTLeft.AssyTree` `node13`;\mapkey(continued) ~ PopupOver `main_dlg_cur` `ActionMenu`1 `PHTLeft.AssyTree`;\ mapkey(continued) ~ Open `main_dlg_cur` `ActionMenu`;~ Close `main_dlg_cur` `ActionMenu`;\ mapkey(continued) ~ Activate `main_dlg_cur` `OpenModel`;mapkey bb @MAPKEY_NAMEBoundary Blend Tool;@MAPKEY_LABELBoundary Blend Tool;\ mapkey(continued) ~ Select `main_dlg_cur` `MenuBar1`1 `Insert`;\mapkey(continued) ~ Select `main_dlg_cur` `Insert.cb_helic_sweep`;\mapkey(continued) ~ Close `main_dlg_cur` `Insert.cb_helic_sweep`;\mapkey(continued) ~ Close `main_dlg_cur` `MenuBar1`;\mapkey(continued) ~ Activate `main_dlg_cur` `Insert.pshFtBndBlend`;mapkey cc @MAPKEY_NAMECopy;@MAPKEY_LABELCopy;\mapkey(continued) ~ Activate `main_dlg_cur` `ProCmdEditCopy.edit_t`;\mapkey(continued) ~ Activate `main_dlg_cur` `ProCmdEditPaste.edit_t`;mapkey color_appearance @MAPKEY_NAMEColor & Appearance;\mapkey(continued) @MAPKEY_LABELColor & Appearance;~ Select `main_dlg_cur` `MenuBar1`1 `View`;\mapkey(continued) ~ Close `main_dlg_cur` `MenuBar1`;\mapkey(continued) ~ Activate `main_dlg_cur` `View.push_view_appearances`;\mapkey(continued) ~ FocusOut `pgl_appearance_editor` `AppearanceName`;mapkey delete_old_version @MAPKEY_NAMEDelete Old Version;\mapkey(continued) @MAPKEY_LABELDelete Old Version;~ Select `main_dlg_cur` `MenuBar1`1 `File`;\mapkey(continued) ~ Close `main_dlg_cur` `MenuBar1`;\mapkey(continued) ~ Select `main_dlg_cur` `File.cb_file_delete`;\mapkey(continued) ~ Close `main_dlg_cur` `File.cb_file_delete`;\mapkey(continued) ~ Activate `main_dlg_cur` `psh_purge`;;mapkey mm @MAPKEY_NAMEMove Feature;@MAPKEY_LABELMove Feature;\mapkey(continued) ~ Select `main_dlg_cur` `MenuBar1`1 `Edit`;\mapkey(continued) ~ Close `main_dlg_cur` `MenuBar1`;\mapkey(continued) ~ Activate `main_dlg_cur` `Edit.psh_dwg_copy`;\mapkey(continued) ~ Select `main_dlg_cur` `MenuBar1`1 `Edit`;\mapkey(continued) ~ Close `main_dlg_cur` `MenuBar1`;\mapkey(continued) ~ Activate `main_dlg_cur` `Edit.psh_paste_special`;mapkey pp @MAPKEY_NAMEPrevious Orientation;@MAPKEY_LABELPrevious Orientation;\ mapkey(continued) ~ Select `main_dlg_cur` `MenuBar1`1 `View`;\mapkey(continued) ~ Select `main_dlg_cur` `View.OrientationCascadeBtn`;\mapkey(continued) ~ Close `main_dlg_cur` `MenuBar1`;\mapkey(continued) ~ Close `main_dlg_cur` `View.OrientationCascadeBtn`;\mapkey(continued) ~ Activate `main_dlg_cur` `psh_view_prev`;mapkey rr @MAPKEY_NAMERound;@MAPKEY_LABELRound;\mapkey(continued) ~ Activate `main_dlg_cur` `ProCmdRound.d_feat`;mapkey ch @MAPKEY_NAMEChamfer;@MAPKEY_LABELChamfer;\mapkey(continued) ~ Activate `main_dlg_cur` `ProCmdChamferEdge.d_feat`;mapkey dh @MAPKEY_NAMEDisplay Hidden Line;@MAPKEY_LABELDisplay Hidden Line;\ mapkey(continued) ~ Select `main_dlg_cur` `MenuBar1`1 `View`;\mapkey(continued) ~ Select `main_dlg_cur` `View.OrientationCascadeBtn`;\mapkey(continued) ~ Close `main_dlg_cur` `View.OrientationCascadeBtn`;\mapkey(continued) ~ Select `main_dlg_cur` `View.HideCascadeBtn`;\mapkey(continued) ~ Close `main_dlg_cur` `View.HideCascadeBtn`;\mapkey(continued) ~ Select `main_dlg_cur` `View.StyleCascadeBtn`;\mapkey(continued) ~ Close `main_dlg_cur` `MenuBar1`;\mapkey(continued) ~ Close `main_dlg_cur` `View.StyleCascadeBtn`;\mapkey(continued) ~ Activate `main_dlg_cur` `HiddenLineBtn`;mapkey dn @MAPKEY_NAMEDisplay No Hidden Line;\mapkey(continued) @MAPKEY_LABELDisplay No Hidden Line;\mapkey(continued) ~ Select `main_dlg_cur` `MenuBar1`1 `View`;\mapkey(continued) ~ Select `main_dlg_cur` `View.HideCascadeBtn`;\mapkey(continued) ~ Close `main_dlg_cur` `View.HideCascadeBtn`;\mapkey(continued) ~ Select `main_dlg_cur` `View.StyleCascadeBtn`;\mapkey(continued) ~ Close `main_dlg_cur` `MenuBar1`;\mapkey(continued) ~ Close `main_dlg_cur` `View.StyleCascadeBtn`;\mapkey(continued) ~ Activate `main_dlg_cur` `NoHiddenBtn`;mapkey ds @MAPKEY_NAMEDisplay Shade;@MAPKEY_LABELDisplay Shade;\mapkey(continued) ~ Select `main_dlg_cur` `MenuBar1`1 `View`;\mapkey(continued) ~ Select `main_dlg_cur` `View.HideCascadeBtn`;\mapkey(continued) ~ Close `main_dlg_cur` `View.HideCascadeBtn`;\mapkey(continued) ~ Select `main_dlg_cur` `View.StyleCascadeBtn`;\mapkey(continued) ~ Close `main_dlg_cur` `MenuBar1`;\mapkey(continued) ~ Close `main_dlg_cur` `View.StyleCascadeBtn`;\mapkey(continued) ~ Activate `main_dlg_cur` `ShadedBtn`;mapkey dw @MAPKEY_NAMEDisplay Wireframe;@MAPKEY_LABELDisplay Wireframe;\ mapkey(continued) ~ Select `main_dlg_cur` `MenuBar1`1 `View`;\mapkey(continued) ~ Select `main_dlg_cur` `View.HideCascadeBtn`;\mapkey(continued) ~ Close `main_dlg_cur` `View.HideCascadeBtn`;\mapkey(continued) ~ Select `main_dlg_cur` `View.StyleCascadeBtn`;\mapkey(continued) ~ Close `main_dlg_cur` `MenuBar1`;\mapkey(continued) ~ Close `main_dlg_cur` `View.StyleCascadeBtn`;\mapkey(continued) ~ Activate `main_dlg_cur` `WireframeBtn`;mapkey dt @MAPKEY_NAMEtransparence;@MAPKEY_LABELtransparence;\mapkey(continued) ~ Command `ProCmdViewTranspShaded`;mapkey export_autocad @MAPKEY_NAMEExport to AutoCAD;\mapkey(continued) @MAPKEY_LABELExport to AutoCAD;~ Select `main_dlg_cur` `MenuBar1`1 `File`;\mapkey(continued) ~ Close `main_dlg_cur` `MenuBar1`;\mapkey(continued) ~ Activate `main_dlg_cur` `File.psh_save_as`;\mapkey(continued) ~ Open `file_saveas` `type_option`;~ Close `file_saveas` `type_option`;\ mapkey(continued) ~ Select `file_saveas` `type_option`1 `db_560`;\mapkey(continued) ~ Activate `file_saveas` `OK`;~ Activate `export_2d_dlg` `OK_Button`; mapkey export_stl @MAPKEY_NAMEExport Model to STL;\mapkey(continued) @MAPKEY_LABELExport Model to STL;~ Select `main_dlg_cur` `MenuBar1`1 `File`;\mapkey(continued) ~ Close `main_dlg_cur` `MenuBar1`;\mapkey(continued) ~ Activate `main_dlg_cur` `File.psh_save_as`;\mapkey(continued) ~ Open `file_saveas` `type_option`;~ Close `file_saveas` `type_option`;\ mapkey(continued) ~ Select `file_saveas` `type_option`1 `db_549`;\mapkey(continued) ~ Activate `file_saveas` `OK`;~ Update `export_slice` `ChordHeightPanel` `0`;\ mapkey(continued) ~ Activate `export_slice` `ChordHeightPanel`;\mapkey(continued) ~ FocusOut `export_slice` `ChordHeightPanel`;\mapkey(continued) ~ Update `export_slice` `AngleControlPanel` `0`;\mapkey(continued) ~ Activate `export_slice` `AngleControlPanel`;\mapkey(continued) ~ FocusOut `export_slice` `AngleControlPanel`;~ Activate `export_slice` `OK`; mapkey mc @MAPKEY_NAMEMeasure Diameter;@MAPKEY_LABELMeasure Diameter;\ mapkey(continued) ~ Activate `main_dlg_cur` `ProCmdDToolsMeasure.2flyCh`;\mapkey(continued) ~ Open `measure` `MsrTypeOptions`;~ Close `measure` `MsrTypeOptions`;\ mapkey(continued) ~ Select `measure` `MsrTypeOptions`1 `Diameter`;mapkey md @MAPKEY_NAMEMeasure Distance;@MAPKEY_LABELMeasure Distance;\ mapkey(continued) ~ Activate `main_dlg_cur` `ProCmdDToolsMeasure.2flyCh`;\mapkey(continued) ~ Open `measure` `MsrTypeOptions`;~ Close `measure` `MsrTypeOptions`;\ mapkey(continued) ~ Select `measure` `MsrTypeOptions`1 `Distance`;mapkey ml @MAPKEY_NAMEMeasure Length;@MAPKEY_LABELMeasure Length;\mapkey(continued) ~ Activate `main_dlg_cur` `ProCmdDToolsMeasure.2flyCh`;\mapkey(continued) ~ Open `measure` `MsrTypeOptions`;~ Close `measure` `MsrTypeOptions`;\ mapkey(continued) ~ Select `measure` `MsrTypeOptions`1 `CurveLength`;mapkey copy_feature @MAPKEY_NAMECopy Feature;@MAPKEY_LABELCopy Feature;\ mapkey(continued) ~ Select `main_dlg_cur` `MenuBar1`1 `Edit`;\mapkey(continued) ~ Close `main_dlg_cur` `MenuBar1`;\mapkey(continued) ~ Activate `main_dlg_cur` `Edit.psh_dwg_copy`;\mapkey(continued) ~ Select `main_dlg_cur` `MenuBar1`1 `Edit`;\mapkey(continued) ~ Close `main_dlg_cur` `MenuBar1`;\mapkey(continued) ~ Activate `main_dlg_cur` `Edit.psh_dwg_paste`;mapkey copy_geo_curve @MAPKEY_NAMECopy Geo Curve;@MAPKEY_LABELCopy Geo Curve;\ mapkey(continued) ~ Select `main_dlg_cur` `MenuBar1`1 `Insert`;\mapkey(continued) ~ Select `main_dlg_cur` `Insert.cb_sharedata`;\mapkey(continued) ~ Close `main_dlg_cur` `Insert.cb_sharedata`;\mapkey(continued) ~ Select `main_dlg_cur` `Insert.cb_sharedata`;\mapkey(continued) ~ Close `main_dlg_cur` `MenuBar1`;\mapkey(continued) ~ Close `main_dlg_cur` `Insert.cb_sharedata`;\mapkey(continued) ~ Activate `main_dlg_cur` `pshDataShrCopyGeom`;\mapkey(continued) ~ Select `Odui_Dlg_01` `odui_steps`1 `CURVE REFS`;\mapkey(continued) ~ Activate `Odui_Dlg_01` `redefine`;mapkey copy_geo_edge @MAPKEY_NAMECopy Geo Edge;@MAPKEY_LABELCopy Geo Edge;\ mapkey(continued) ~ Select `main_dlg_cur` `MenuBar1`1 `Insert`;\mapkey(continued) ~ Select `main_dlg_cur` `Insert.cb_sharedata`;\mapkey(continued) ~ Close `main_dlg_cur` `MenuBar1`;\mapkey(continued) ~ Close `main_dlg_cur` `Insert.cb_sharedata`;\mapkey(continued) ~ Activate `main_dlg_cur` `pshDataShrCopyGeom`;\mapkey(continued) ~ Select `Odui_Dlg_01` `odui_steps`1 `EDGE REFS`;\mapkey(continued) ~ Activate `Odui_Dlg_01` `redefine`;mapkey copy_geo_misc @MAPKEY_NAMECopy Geo Misc;@MAPKEY_LABELCopy Geo Misc;\ mapkey(continued) ~ Select `main_dlg_cur` `MenuBar1`1 `Insert`;\mapkey(continued) ~ Select `main_dlg_cur` `Insert.cb_sharedata`;\mapkey(continued) ~ Close `main_dlg_cur` `MenuBar1`;\mapkey(continued) ~ Close `main_dlg_cur` `Insert.cb_sharedata`;\mapkey(continued) ~ Activate `main_dlg_cur` `pshDataShrCopyGeom`;\mapkey(continued) ~ Select `Odui_Dlg_01` `odui_steps`1 `MISC REFS`;\mapkey(continued) ~ Activate `Odui_Dlg_01` `redefine`;mapkey copy_geo_public @MAPKEY_NAMECopy Geo Public;\mapkey(continued) @MAPKEY_LABELCopy Geo Public;~ Select `main_dlg_cur` `MenuBar1`1 `Insert`;\mapkey(continued) ~ Select `main_dlg_cur` `Insert.cb_sharedata`;\mapkey(continued) ~ Close `main_dlg_cur` `MenuBar1`;\mapkey(continued) ~ Activate `main_dlg_cur` `pshDataShrCopyGeom`;\mapkey(continued) ~ Select `Odui_Dlg_01` `odui_steps`1 `PUBLISH GEOM`;\mapkey(continued) ~ Activate `Odui_Dlg_01` `redefine`;mapkey copy_geo_surface @MAPKEY_NAMECopy Geo Surface;\mapkey(continued) @MAPKEY_LABELCopy Geo Surface;~ Select `main_dlg_cur` `MenuBar1`1 `Insert`;\mapkey(continued) ~ Select `main_dlg_cur` `Insert.cb_sharedata`;\mapkey(continued) ~ Close `main_dlg_cur` `MenuBar1`;\mapkey(continued) ~ Close `main_dlg_cur` `Insert.cb_sharedata`;\mapkey(continued) ~ Activate `main_dlg_cur` `pshDataShrCopyGeom`;\mapkey(continued) ~ Select `Odui_Dlg_01` `odui_steps`1 `SURFACE REFS`;\mapkey(continued) ~ Activate `Odui_Dlg_01` `redefine`;mapkey public_geo_curve @MAPKEY_NAMEPublic Geo Curve;\mapkey(continued) @MAPKEY_LABELPublic Geo Curve;~ Select `main_dlg_cur` `MenuBar1`1 `Insert`;\mapkey(continued) ~ Select `main_dlg_cur` `Insert.cb_sharedata`;\mapkey(continued) ~ Close `main_dlg_cur` `MenuBar1`;\mapkey(continued) ~ Close `main_dlg_cur` `Insert.cb_sharedata`;\mapkey(continued) ~ Activate `main_dlg_cur` `pshDataShrPublishGeom`;\mapkey(continued) ~ Select `Odui_Dlg_01` `odui_steps`1 `CURVE REFS`;\mapkey(continued) ~ Activate `Odui_Dlg_01` `odui_steps`1 `CURVE REFS`;mapkey public_geo_edge @MAPKEY_NAMEPublic Geo Edge;\mapkey(continued) @MAPKEY_LABELPublic Geo Edge;~ Select `main_dlg_cur` `MenuBar1`1 `Insert`;\mapkey(continued) ~ Select `main_dlg_cur` `Insert.cb_sharedata`;\mapkey(continued) ~ Close `main_dlg_cur` `MenuBar1`;\mapkey(continued) ~ Close `main_dlg_cur` `Insert.cb_sharedata`;\mapkey(continued) ~ Activate `main_dlg_cur` `pshDataShrPublishGeom`;\mapkey(continued) ~ Select `Odui_Dlg_01` `odui_steps`1 `EDGE REFS`;\mapkey(continued) ~ Activate `Odui_Dlg_01` `odui_steps`1 `EDGE REFS`;mapkey public_geo_misc @MAPKEY_NAMEPublic Geo Misc;\mapkey(continued) @MAPKEY_LABELPublic Geo Misc;~ Select `main_dlg_cur` `MenuBar1`1 `Insert`;\mapkey(continued) ~ Select `main_dlg_cur` `Insert.cb_sharedata`;\mapkey(continued) ~ Close `main_dlg_cur` `MenuBar1`;\mapkey(continued) ~ Close `main_dlg_cur` `Insert.cb_sharedata`;\mapkey(continued) ~ Activate `main_dlg_cur` `pshDataShrPublishGeom`;\mapkey(continued) ~ Select `Odui_Dlg_01` `odui_steps`1 `MISC REFS`;\mapkey(continued) ~ Activate `Odui_Dlg_01` `odui_steps`1 `MISC REFS`;mapkey public_geo_surface @MAPKEY_NAMEPublic Geo Surface;\mapkey(continued) @MAPKEY_LABELPublic Geo Surface;\mapkey(continued) ~ Select `main_dlg_cur` `MenuBar1`1 `Insert`;\mapkey(continued) ~ Select `main_dlg_cur` `Insert.cb_advanced`;\。

Proe Config配置文件PROE---config.pro---常用参数+设置方法用PROE,就一定要灵活使用“config.pro”文件来设置属于自己的系统参数,界面,为后续的设计工作添油加速。
config.pro文件可以存放在以下两个地方:(1) Pro/E 安装目录下的text 目录;(2) Pro/E 的工作目录;以鼠标右键点选Pro/E 的快捷方式图标,-→“属性”-→“快捷方式”栏的“起始位置”即为工作目录。
当使用者进入Pro/E系统时,系统会先去读取text 目录下的config.pro 档案,然后再去读取Pro/E 工作目录下的config.pro 档案:这些档案内若有重复设定的参数选项,则系统会以最后读取的数据为主(亦即以工作目录下的config.pro 档案为主)。
因此系统管理者可以先将大环境需要所规画出来的config.pro 放于Pro/E 安装目录下的text 目录底下,而使用者再将自己规画的config.pro 放于Pro/E 的内定工作目录下。
另外于text 目录底下,系统管理者还可将config.pro 更名为config.sup,如此则可强制Pro/E 的使用者使用此项设定数据,后来读取的config.pro 若有重复之参数也无法改写。
启动Pro/E 时,系统会自动加载环境设定档config.pro,若我们设定config.pro时用到某些较特殊的环境参数,例如:visible_message_line 1……则我们必须重新启动Pro/E,这些设定才会有效。
以下为常用的config.pro 参数:====================================================================== ============================================================================ ======◆清除旧版文件命令:purge 在系统窗口下输入◆如何设置图纸视角【第一,第三视角】设置方法:在工程图模式下,执行…文件‟---…属性‟----…绘图选项‟,在下列选项中选择projection_type,修改默认的…third_angle‟为…first_angle‟,然后确定。
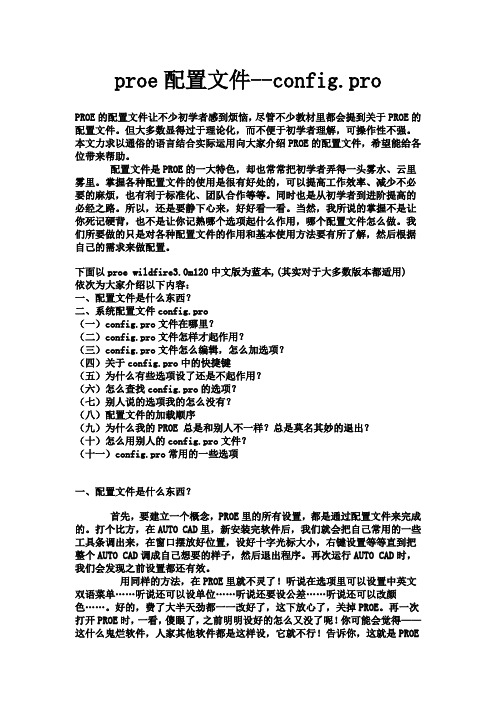
Pro/E环境和使用配置大全WildFire在启动的时候要搜索并应用如下一些常用配置文件:在选项前面有个图标,这样的图标会有三种,电脑、闪电、火柴棒。
必须注意,这三个图标意义是不同的!电脑——选项设置后要重新运行PROE后才生效。
(关闭PROE再重新打开)闪电——立即生效火柴棒——只对新建的模型、工程图等有效。
就是说,以前的建模,即使选项改了,也不会改变,只对设置生效后,后面新建的模型有效。
典型问题就是tol_mode nominal 这一项,(此项是属例外,虽然为闪电图标,但还是不可追溯选项)如果你之前没有设这一项,并做了工程图,即使后面config.pro再设好了,还是不起作用,还是显示公差。
这就是config.pro中的不可追溯选项。
当然,这样的选项是很少的。
所以我一开始就让大家设tol_mode nominalconfig.pro——系统配置文件,配置整个PROE系统gb.dtl——工程图配置文件,你可以先简单的理解为设置箭头大小,文字等标注样式。
format.dtl——工程图格式文件(可以简单的理解为图框)的配置文件。
table.pnt——打印配置文件,主要设置工程图打印时的线条粗细、颜色等。
A4.pcf——打印机类型配置文件,主要设置工程图打印出图时的比例、纸张大小等。
config.win.1——(1为流水号,每改一次自动增加)操作界面、窗口配置文件,比如说我们可以在这个文件中设置模型树窗口的大小,各种图标、工具栏、快捷键在窗口的位置等等。
Tree.cfg——模型树配置文件,主要设置在模型树窗口显示的内容、项目。
proe系统配置文件config.sup和config.pro自定义屏幕配置config.win系统颜色配置syscol.scr模型树配置tree.cfg模型外观映射表(*.dmt,*.map)绘图(drawing)选项配置文件drawing.dtl菜单定义文件 menu_def.pro下面就来说说具体的配置文件作用和用法.1. Config.sup和config.prooption Config.sup和Config.pro是proe的主配置文件,基本上所有程序级别上的配置都在config.sup 和config.pro中进行.config.sup也叫管理员配置,是一般来说config.sup中的配置是属于很少改动的基本配置,比如为某个公司定制的,那么公司内所有的人都使用这个config.sup,而每个人还可以根据自己的习惯来定制适合自己的config.pro,但是在如果config.pro中的配置选项和config.sup有冲突的情况下,proe系统会忽略config.pro的选项.通常config.pro中存放的是个人的使用mapkey比较多.config.sup一定要放在proe按装目录内下的text目录内才有用.proe启动的时候也会在启动目录上寻找config.pro并应用里面的有关配置.要修改和编辑config.sup和config.pro,最好是在WildFire 的环境下进行,如下图.菜单tools图config.1.03要添加或修改选项,只需在对话框下方的添加栏上输入要添加或修改的选项(系统会自动根据你的输入搜索选项的),然后在值栏中输入或选择选项值.接着点Add/Change按钮就可以添加或修改该选项.当所有的选项都修改或添加完了.就可以点apply来应用.如果你想作为以后的标准配置,就要点另存图标把配置文件存到你的wildfire启动目录内(名字还是config.pro).配置文件路径drawing_setup_file 指定绘图配置文件(*.dtl).最好是绝对路径system_colors_file 系统配置颜色文件(*.col)pro_colormap_path 模型外观颜色配置文件路径(*.map,*.dmt)相关路径选项pro_font_dir 指定字符路径,比如c:\winnt\font就可以使用windows 字体pro_group_dir 指定udf库的路径pro_library_dir 指定标准件库的路径pro_symbol_dir 指定自定义符号库路径pro_catalog_dir 指定分类库目录trail_dir trail文件的存放路径(就是启动proe生成的.txt.*文件)pro_texture_library 指定纹理库路径pro_material_dir 指定材料库路径dxf_export_mapping_file dxf输出使用的颜色映射文件start_model_dir 起始零件和组件目录search_path 搜索路径search_path_file 搜索路径文件模板文件单位pro_unit_length 指定长度单位系统pro_unit_mass 指定质量单位系统语言界面设置menu_translation 设定菜单语言:yes:中文,no:英文,both:中英混合help_translation 设定帮助文件语言:同上msg_translation 设定提示信息语言:同上dialog_translation 设定对话框语言:yes 中文;no 英文(不能中英混合)一般来说说,建议menu和dialog设为no(英文),help和msg设为yes(中文)几何显示tangent_edge_display 设置相切边的显示,建议用dimmed(灰色线)绘图视图allow_move_view_with_move 允许直接拖动绘图视图.特征allow_anatomic_feature 一些不常用特征autobuildZ_enabled 允许使用autobuildZ(自动2d转3d功能)模具设计经常用到的!在收藏中添加指定的文件目录browser_favorite "D:\proe5.0\lj" TEMPbrowser_favorite "D:\proe5.0\lj" mold!启动Pro/ENGINEER时,指定要载入的模型树配置文件mdl_tree_cfg_file D:\proe5.0\Creo Elements5M080\text\yanxiu.cfg!为Pro/ENGINEER进程设置缺省的绘图设置文件选项drawing_setup_file D:\proe5.0\Creo Elements5M080\text\yanxiu.dtl!指定要从磁盘中载入色彩映射 (.map) 文件的目录路径pro_colormap_path "D:\proe5.0\Creo Elements5M080\text"!指定创建轨迹文件(trail.txt)的目录路径trail_dir D:\proe5.0\lj!指定系统保存regen_backup模型的目录regen_backup_directory D:\proe5.0\lj!运行非英文版Pro/ENGINEER时,指定对话框的显示语种dialog_translation yes!指定运行非英文版Pro/ENGINEER时信息显示的语种msg_translation yes!指定运行非英文版Pro/ENGINEER时,显示简要帮助信息所用的语言help_translation yes!为新模型设置缺省的单位系统pro_unit_sys mmns!为新对象的质量设置缺省单位pro_unit_mass unit_gram!设置新对象的缺省单位pro_unit_length unit_mm!指定用作缺省的零件模板的模型template_solidpart mmns_part_solid_yanxiu.prt!指定用作缺省的asm组件模板template_designasm mmns_asm_design_yanxiu.asm!指定用作缺省的制造模具模板的模型template_mfgmold mmns_mfg_mold.mfg!指定用作缺省的钣金件零件模板的模型template_sheetmetalpart mmns_part_sheetmetal.prt!指定用作缺省绘图模板的模型template_drawing a0_drawing.drw!指定Pro/E浏览器主页的位置web_browser_homepage !在Pro/ENGINEER工作时显示时钟clock yes!启用为交换数据使用Associative Topology Bus topobus_enable yes!加载 AutobuildZ 应用程序autobuildz_enabled no!指定每次再生之前,系统是否要将当前模型备份到磁盘regen_backup_using_disk yes!对于每个Pro/E进程,用户必须设置主服务器/工作空间dm_remember_server no!输入存储历史记录的天数web_browser_history_days 0!设置"文件">"打开"的缺省目录file_open_default_folder working_directory!在窗口标题中显示完整文件名和的文件路径display_full_object_path yes!设置文本字体,不包括菜单条、菜单及其子项、弹出式菜单和帮助default_font 10, arial, bold!指定Pro/ENGINEER菜单条、菜单和所有其它子项所使用的字体menu_font 10, arial, bold!设置Pro/ENGINEER信息区域中缺省的可视信息行数visible_message_lines 2!为扩大反向箭头 (用于显示特征创建方向) 尺寸设置比例因子 (缺省值 = 1) flip_arrow_scale 3!使用旧的基于笔划的PTC字体作为缺省字体use_pre_wildfire_text_font yes!当从一个窗口改变至另一个窗口时,自动重画绘图显示auto_regen_views no!为使用"无比例"命令增加的视图设置缺省的绘图比例default_draw_scale 1.0!将图片文件嵌入绘图内部以用于预览save_drawing_picture_file embed!显示的尺寸没有公差。
完整版proe配置文件configproe配置文件config.proPROE的配置文件让不少初学者感到烦恼,尽管不少教材里都会提到关于PROE的配置文件。
但大多数显得过于理论化,而不便于初学者理解,可操作性不强。
本文力求以通俗的语言结合实际运用向大家介绍PROE的配置文件,希望能给各位带来帮助。
配置文件是PROE的一大特色,却也常常把初学者弄得一头雾水、云里雾里。
掌握各种配置文件的使用是很有好处的,可以提高工作效率、减少不必要的麻烦,也有利于标准化、团队合作等等。
同时也是从初学者到进阶提高的必经之路。
所以,还是要静下心来,好好看一看。
当然,我所说的掌握不是让你死记硬背,也不是让你记熟哪个选项起什么作用,哪个配置文件怎么做。
我们所要做的只是对各种配置文件的作用和基本使用方法要有所了解,然后根据自己的需求来做配置。
下面以proe wildfire3.0m120中文版为蓝本(其实对于大多数版本都适用) 依次为大家介绍以下内容:一、配置文件是什么东西?二、系统配置文件config.pro(一)config.pro文件在哪里?(二)config.pro文件怎样才起作用?(三)config.pro文件怎么编辑,怎么加选项?(四)关于config.pro中的快捷键(五)为什么有些选项设了还是不起作用?(六)怎么查找config.pro的选项?(七)别人说的选项我的怎么没有?(八)配置文件的加载顺序(九)为什么我的PROE 总是和别人不一样?总是莫名其妙的退出?(十)怎么用别人的config.pro文件?(十一)config.pro常用的一些选项一、配置文件是什么东西?首先,要建立一个概念,PROE里的所有设置,都是通过配置文件来完成的。
打个比方,在AUTO CAD里,新安装完软件后,我们就会把自己常用的一些工具条调出来,在窗口摆放好位置,设好十字光标大小,右键设置等等直到把整个AUTO CAD调成自己想要的样子,然后退出程序。
ProE 配置文件生成器v1.2
本程序用来生成ProE 的config.pro 配置文件。
本程序的主要作用是将不同的“轨迹文件(Trail)”转换为Proe 的映射键,本程序会自动将其转换到Config.pro 文件中。
本程序还可以分类管理不同的ProE 配置,还可以在配置中使用路径变量,方便ProE 启动目录的任意移动。
如果你移动了ProE 的启动目录,只要重新生成配置文件,里面的路径就会自动的更正过来(本程序必须和ProE的启动目录保持相对位置关系)。
在本程序中,你可以使用如下环境变量(转换时会自动处理):
%ThisDir% 表示本程序所在目录
%ParentDir% 表示本程序所在目录的父目录
%InitDir% 表示用户指定的ProE 启动目录(在界面的最上面指定)
本程序会修改ProE 启动目录下的config.pro 以添加用户指定的映射键及配置项目,在修改前,本程序会自动保存旧的config.pro 文件到Backup 目录,最多保存50 份,超过50 份后,会删除第一份,其它的往前移,然后再备份。
(尾数最大的为最后备份的文件)
“热键设置”中列出的是MapKey 目录下的所有“脚本文件”,你可以在这里为他们指定不同的按键,以便在ProE 中通过按键调用这些功能。
单击相应的条目就可以修改按键(按F2 也可以修改按键),如果不想使用某个脚本,请将其按键设置为空。
如果你嫌这里修改按键太麻烦,你可以保存一下当前设置,然后打开Config 目录下的Setting.ini 文件,直接在文件中修改,效果是一样的。
“热键设置”中的列表是可以排序的,单击“热键”或“脚本”的标题条,就可以排序了,方便查找热键。
关于“脚本文件”,其实就是文本文件,它们存放在“MapKey”目录下面,用户可以自行添加或删除。
每个“脚本文件”中只能存放一个映射键操作。
这些“脚本文件”是通过分析ProE 生成的 Trail.txt 文件后编
写出来的。
当然也可以自己录制映射键,然后再转换为“脚本文件”,你可以通过“转换为脚本”按钮直接将Config.pro 中的所有映射键转换为单独的“脚本文件”。
如果你要自己编写脚本文件,则必须遵守如下规则:
“脚本文件”中的每一行行首不能有“mapkey xxxx”或“mapkey(continued)”。
“脚本文件”中的每一条语句结尾需要保留分号字符(用来区分各条语句)。
“脚本文件”中最好一行只写一条语句,这样可以省略掉语句后面的分号字符。
“脚本文件”中的每一个映射键中的各行不能以断行符“\”结束。
“脚本文件”中的每一条语句必须在一行中写完,不能断行(本程序会处理过长的行)。
“脚本文件”中的路径字符串要用双斜杠作为分割符。
“脚本文件”中可以使用上面提到的三个路径变量。
“Config\DefMapKey.mpk”中存放的是“默认映射键”,“默认映射键”是供其它映射键调用的,不能动态指定名称。
“默认映射键”格式必须按照Config.pro 中映射键的格式来写。
编写“默认映射键”要遵守如下规则:
“默认映射键”中的每一行行首必须有“mapkey xxxx”或“mapkey(continued)”。
“默认映射键”中的每一条语句必须以分号结束。
“默认映射键”中的每一个映射键除最后一行外,其它行必须以断行符“\”结束。
“默认映射键”中的语句可以断行,以“\”作为断行符。
“默认映射键”中的路径字符串要用双斜杠作为分割符。
“默认映射键”中可以使用上面提到的三个路径变量。
如果要在“脚本文件”中调用“默认映射键”中的某个映射键,可以使用“%默认映射键按键”的方式调用。
关于“程序配置”,其实就是Config.pro 中的一些配置项目,只不过,在这里进行了分类,帮助用户更好的管理各类配置,而且在这里也可以使用上面提到的三个路径变量。
在这里列出的所有配置都会被写入到Config.pro 中。
“程序配置”文件存放在“Config”目录下的各个子目录中,不同的子目录,就是不同的配置方案,用户可以自己新建或删除配置文件。
在生成Config.pro 的过程中,所有的注释和空行都会被忽略掉。
程序界面上几个按钮的说明:
“转换为脚本”:可以将ProE 录制的映射键文件直接转换为脚本文件,映射键录制完毕并保存后,可以通过该按钮马上得到脚本。
这个转换过程是用映射键中指定的按键来作为文件名的。
你可以一次录制多个映射键,只要指定了不同的按键,就能转换为不同的脚本文件。
转换后的脚本文件存放在映射键目录下的“映射键转换结果”子目录中。
转换过程中,如果存在同名文件,则不会覆盖,会在文件名后面添加序号,然后再保存。
“打开脚本目录”:用来打开存放映射键脚本的文件夹。
方便添加、删除或移动脚本文件。
“重新载入列表”:用来搜索映射键目录中的所有脚本文件,并将他们装载到列表中。
当你添加、删除或移动了某些脚本文件后,可以通过这个按钮来刷新列表。
“检查按键”:用来检查用户指定的映射键按键是否有冲突,比如“ab”和“abc”就是冲突的按键,“abc”将不会起作用。
“生成配置文件”:用来生成Config.pro 文件,生成的Config.pro 文件存放在界面最上面指定的“ProE启动目录”中。
“保存当前设置”:用来保存用户指定的“ProE 启动目录”、“映射键按键”、“程序设置”等信息。
在“生成配置文件”前,本程序会自动保存当前设置。
压缩包内的一个小工具界面:
修正了旧版本中的一些BUG,增加了“转换为脚本”的功能,可以将录制的映射键瞬间转换为可用的脚本文件。
Config.Pro 采用了ProE 默认的UTF-8 文件格式,不会再出现乱码。
映射键按键的指定方式更简便了。
内含ProE 4.0 的所有配置项目,以及大量映射键脚本。
ProE配置文件生成器v1.2
/d/6022999 ... a133cafe153c8c73300
配置文件生成器视频教程:
/d/4dba1a3 ... d616eaf9972e56a8504。