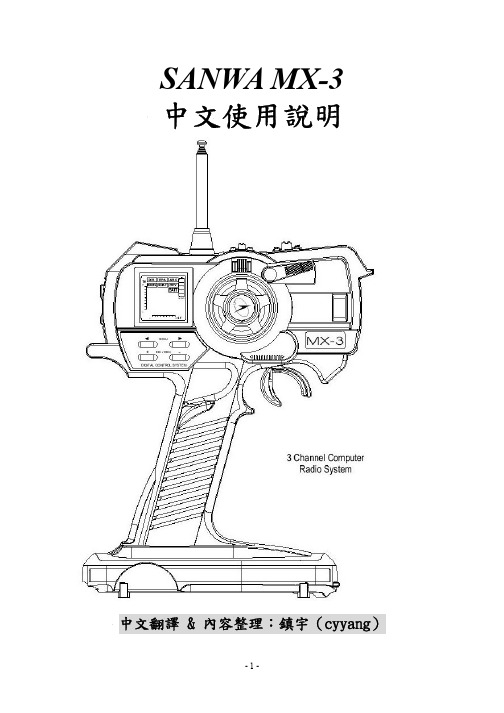
manual-dakota-mx3中文说明书
- 格式:pdf
- 大小:340.62 KB
- 文档页数:4

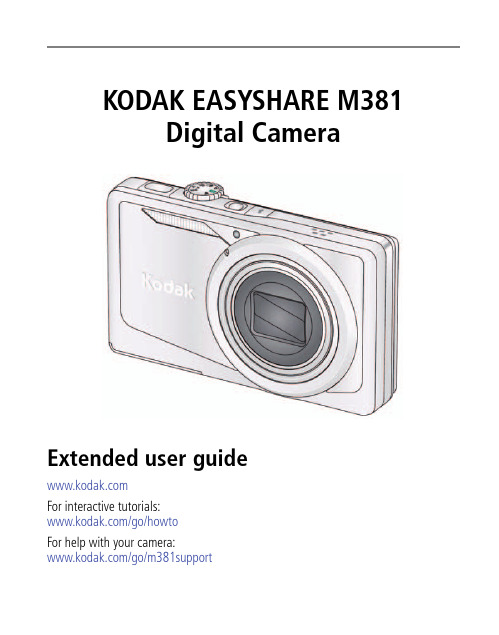
KODAK EASYSHARE M381Digital CameraExtended user guideFor interactive tutorials:/go/howtoFor help with your camera:/go/m381supportEastman Kodak CompanyRochester, New York 14650© Kodak, 2009All screen images are simulated.Kodak, EasyShare, and Perfect Touch are trademarks of Eastman Kodak Company. 4H6510_enProduct featuresFront viewShutter buttonMode dialPower button Flash button Self-timer lightLens/CoverMicro-phoneFlashProduct featuresBack viewlight(Telephoto/Wide Angle) buttonUSB/AV Out DC-In (5V)Strap postOK button SD/SDHC Card/Battery compartmentShare button Tripod socketReview buttonTable of contents1 Setting up your camera (1)Attaching the strap (1)Loading the KLIC-7003 battery (1)Charging the battery (2)Turning on the camera (3)Setting the language and date/time (3)Storing pictures on an optional SD or SDHC Card (4)2 Taking pictures/videos (5)Taking a picture (5)Using optical and digital zoom (6)Using the flash (7)Using different modes (8)Taking a video (10)Using shortcuts (10)Using the self-timer (11)Taking panoramic pictures (12)Understanding the picture-taking icons (13)3 Working with pictures/videos (14)Reviewing pictures/videos (14)Deleting pictures/videos (15)Viewing pictures/videos in different ways (16)Selecting multiple pictures/videos (16)Making a multimedia slide show (17)Using the menu button in review (19)Cropping pictures (20)Using KODAK PERFECT TOUCH Technology (20)Copying pictures/videos (21)Editing videos (21)Understanding the review icons (24)Table of contents4 Using the Menu button (25)Using the Capture tab (25)Using the Setup tab (29)5 Transferring, printing, tagging (32)Installing the software (32)Transferring pictures/videos (33)Printing pictures (34)Tagging/marking your pictures (36)6 Getting help (40)Getting help from your camera (40)Getting help on the Web (41)Troubleshooting (42)7 Appendix (46)Camera specifications (46)Care and maintenance (48)Upgrading your software and firmware (48)Storage capacities (49)Important safety instructions (49)Battery replacement, battery life (50)Limited warranty (51)Regulatory compliance (53)1Setting up your cameraIMPORTANT: For package contents, see your product package.Attaching the strapLoading the KLIC-7003 batteryFor information on replacing the battery and extending battery life, see page 50.Notched cornerSetting up your cameraCharging the batteryOther charging optionsPurchase accessories /go/m381accessoriesBattery Charging light:• Blinking: charging • Steady: finishedTurn off the camera.1Connect the KODAK USB Cable,Model U-8.2frequently, even if power remains.KODAK 5V AC Adapter (May be sold separately)Setting up your cameraTurning on the cameraSetting the language and date/timeNOTE: To change language and date/time in the future, use the Setup tab (see page29).to change current field.for previous/next field.OK to accept.At the prompt, press OK.to change.OK to accept.Language:Date/Time:Setting up your cameraStoring pictures on an optional SD or SDHC CardYour camera has internal memory. You can purchase an SD or SDHC Card to conveniently store more pictures/videos.CAUTION:A card can only be inserted one way; forcing it may causedamage. Inserting or removing a card while the camera is on may damage the pictures, the card, or the camera.Purchase accessories /go/m381accessories1Turn off the camera.2Insert or remove the optional card.3Turn on the camera.2Taking pictures/videos Taking a picture1Turn the Mode dial to Smart Capture . Thenpress the Power button to turn on the camera.2Compose the picture.3Press the Shutter button halfway to focus andset exposure. When the framing marks turn green,press the Shutter button completely down.Using the framing marks to take picturesFraming marks indicate the camera focus area. In Smart Capture mode (and in SCN modes designed for pictures of people), the camera attempts to focus on faces.halfway.completely down toTaking pictures/videosReviewing the picture/video just takenAfter you take a picture/video, the LCD briefly displays a quickview. (To exit the quickview sooner, press the Shutter button halfway.) To review pictures/videos anytime, seepage 14.Using optical and digital zoom1To zoom in, press Telephoto (T).To zoom out, press Wide Angle (W).2Take the picture.NOTE: For focus distances, see Camera Specifications starting onpage 46.To use the 5X digital zoom:■In video mode, press the Telephoto (T) button.■In picture-taking mode, press the Telephoto (T) button until the slider on the LCD is at themaximum optical zoom range. ReleaseTelephoto (T), then press it again.NOTE: Optical zoom is not available in Video mode. Digital zoom is not available in Smart Capture mode.You may notice decreased image quality when using digital zoom. The slider pauses and turns red when the picture quality reaches the limit for an acceptable 4 x 6-in. (10 x 15 cm) print.Delete the current picture/videoOK Play/pause a videoAdjust volumeTaking pictures/videosUsing the flashFlash modesFlash fires AutoWhen the lighting conditions require it.Fill (Flash On)Every time you take a picture, regardless of the lightingconditions. Use when the subject is in shadow or is“backlit” (when the light is behind the subject). In lowlight, hold the camera steady or use a tripod.NOTE: (Not available in Smart Capture mode.)Red Eye Your camera can correctred-eye using 2methods. To choose a red eye setting, see Red Eye Reduction, page 29.PreflashA preflash fires, shrinking the eye pupil, before the picture is taken.Digital Correction A preflash does not fire; the camera corrects red eye.Off NeverPress the flash button repeatedlyto scroll through flash modes.The current flash mode is shown inthe LCD status area.Taking pictures/videosUsing different modesTurn the Mode dial to the mode that best suits your subjects and surroundings.Use this mode ForSmartCapture General picture taking—it offers excellent image quality and ease of use.■Faces are detected.■The scene is analyzed for other content and for lighting.You can choose the best picture size and aspect ratio for your needs—just press the Menu button and choose Picture Size.■3:2 (the best choice when making 4 x 6 prints)■16:9 (wide screen)■4:3 (the default setting)Program Advanced picture taking—allows access to manual settings.BlurReductionReducing blur caused by camera shake or subject motion.Sport Action pictures.Panorama“Stitching” up to 3 pictures into a panoramic scene. (See page12.)Scene Point-and-shoot simplicity when taking pictures in practically anysituation. (See page9.)Video Capturing video with sound. (See page10.)Taking pictures/videosUsing Scene (SCN) modesChoose a Scene mode—for great pictures in practically any situation!1Turn the Mode dial to SCN.2Press to view scene mode descriptions.If the mode description turns off before you finish reading it, press OK.3Press OK to choose a Scene mode.SCN mode ForPortrait Full-frame portraits of people.Landscape Distant scenes.Close-up Close range. Use available light instead of flash, if possible.Flower Close-ups of flowers or other small subjects in bright light.Sunset Subjects at dusk.Backlight Subjects that are in shadow or “backlit” (when light is behind thesubject).Candle Light Subjects illuminated by candle light.Children Action pictures of children in bright light.Manner/ Museum Quiet occasions, like a wedding or lecture. Flash and sound are disabled. Place the camera on a steady surface or tripod.Text Documents. Place the camera on a steady surface or tripod. Beach Bright beach scenes.Snow Bright snow scenes.Fireworks Fireworks. Place the camera on a steady surface or tripod.Self-PortraitClose-ups of yourself. Assures proper focus and minimizes red eye. Night Portrait Reduction of red eye in night scenes or low-light conditions. Night Landscape Distant scenery at night. Flash does not fire.Panning Emphasizing horizontal motion, keeping the foreground sharp. High-ISO Low-light pictures (such as people on a stage).Taking pictures/videosTaking a video1Turn the Mode dial to Video.2Press the Shutter button completely down,then release it. To stop recording, press and releasethe Shutter button again.To review and work with videos, see page14.Using shortcutsFor quick access to the most popular functions:1Press the Info button.The shortcuts appear.2Press to access functions like Exposure Compensation, Self-timer, and Auto focus. (You’ll see different functions in different modes.)3Press to choose a setting.4To hide the shortcuts again, press .ShortcutsTaking pictures/videosUsing the self-timer Use the self-timer when you want to be included in a picture, or to ensure a steadyShutter button press. Place the camera on a tripod or flat surface.1In any picture-taking mode, press the Infobutton to show shortcuts.2Pressto highlight the self-timer icon. Pressto choose a setting:10 seconds— A picture is taken after a 10-second delay (so you have time to get into the scene). 2 seconds— A picture is taken after a 2-second delay (for a steady, shutter release on a tripod).2 shot—The first picture is taken after a 10-second delay. A second picture is taken 8 seconds later.3Compose the scene. Press the Shutter button halfway , then completely down .The camera takes the picture/pictures after the delay.NOTE: In Panoramic modes (page 12), only the 2- and 10-second options are available.Use the same procedure to take a 2- or 10-second self-timer video, but press the Shutter button completely down .1022xTaking pictures/videosTaking panoramic picturesUse panorama to “stitch” up to 3 pictures into a panoramic scene.NOTE: For best results, use a tripod. Only the panoramic picture is saved; individual pictures are not. (Exposure and white balance are set with the first picture. The flash is set to Off.)1Turn the Mode dial to .2Press to highlight Panorama Left-Right or Panorama Right-Left (dependingon the direction you want to pan), then press OK.3Take the first picture.After a quickview, the LCD displays the liveview and an “overlay” from the first picture.4Compose the second picture. Make the overlay from the first picture cover the same portion in the new picture. (You can press the Delete button to re-take a picture.)5If you are taking only 2 pictures, press OK to stitch them together.After you take 3 pictures, the pictures are automatically stitched together.NOTE: To use the self-timer 10-second or 2-second setting, see page 11.Take 2 or 3pictures.Get 1panoramicpicture.Taking pictures/videosUnderstanding the picture-taking icons Battery levelCapturemode Pictures/time remaining Zoom slider Tag name Self timer Flash modeExposure compensation FPO3Working with pictures/videosReviewing pictures/videos 1Press the Review button.2Press for previous/next picture/video.■Press the Shutter button halfway down to returnto Capture mode.■To view pictures/videos as thumbnails, see page 16.Magnifying a picture 1Press T to magnify 1X–8X.2Pressto view other parts of a picture.■Press OK to return to 1X.Playing a videoPress OK to play a video. Press OK to pause/resume.During playback:■Press to adjust the volume.■Press to play at 2X speed; press again for 4X.■Press to reverse at 2X speed; press again for 4X.4X 4X 1X 2X 2XForwardReverse Playback speedDeleting pictures/videos1Press the Review button.2Press for previous/next picture/video.3Press the Delete button.4Follow the screen prompts.NOTE: To delete protected pictures/videos, remove protection before deleting. (See Protecting pictures/videos from deletion.)Using the undo delete featureIf you accidentally delete a picture, you may be able to use Undo Delete to retrieve it. This feature is only available immediately after you delete a picture.Protecting pictures/videos from deletion1Press the Review button.picture/video.previous/next2Press for3Press the Menu button.4Press to highlight Protect, then press OK.The picture/video is protected and cannot be deleted. The Protect icon appearswith the protected picture/video.■Press the Shutter button halfway down to return to Capture mode. IMPORTANT: Your camera offers a built-in Help system. See page40.CAUTION:Formatting internal memory or an SD or SDHC Card deletes all(including protected) pictures/videos. (Formatting internalmemory also deletes email addresses and tag names. To restorethem, see EASYSHARE Software Help.)Viewing pictures/videos in different waysViewing as thumbnails (multi-up)1Press the Review button.The camera shows the last picture that was taken.2Press the Wide Angle (W) button to view pictures/videos as thumbnails. (Press it again to see more, smaller thumbnails.) To view all pictures/videos, highlight the All tab. To sort by favorites, date, or tagged pictures/videos, press and highlight theappropriate tab.3To see a single picture/video, pressto highlight it. Then press the Telephoto (T) button.■To select multiple pictures/videos, see Selecting multiple pictures/videos .■Press the Shutter button halfway down to return to Capture mode.Selecting multiple pictures/videosUse the multi-select feature when you have two or more pictures to print, transfer, delete, etc. Multi-select is used most effectively in Multi-Up mode, page 16.1Press the Review button, thenandto find a picture/video.2Press OK to select pictures/videos.A check mark appears on the picture. You can nowprint, transfer, delete, etc. the selected pictures. You can press OK a second time to remove a check mark.SelectedpicturesMaking a multimedia slide showUse Multimedia Slide Show to display your pictures/videos on the LCD. You can play all pictures/videos, or select pictures to include in the slide show. You can even save a slide show.Make a multimedia slide show that you can save1Press the Review button. Select 2-100 pictures (see page16).2Press the Menu button, then to highlight the Review tab. HighlightMultimedia Slide Show, then press OK.3Press to highlight Preview Show, then press OK.Each picture/video is displayed once. To interrupt the slide show, press OK. After the slide show plays, you may save or modify it.IMPORTANT: Your camera offers a built-in Help system. See page40.Play a multimedia slide show loopWhen you turn on Loop, the slide show is continuously repeated.1On the Multimedia Slide Show menu, press to highlight Loop, then press OK.2Press to highlight On, then press OK.3Press to highlight Preview Show, then press OK.The slide show repeats until you press OK or until the battery is exhausted.Displaying pictures/videos on a televisionYou can display pictures/videos on a television, computer monitor, or any device equipped with a video input. To connect the camera directly to a television, use an A/V cable (may be sold separately).NOTE: Ensure that the Video Out setting (NTSC or PAL) is correct (see page 30). The slide show stops if youconnect or disconnect the cable while the slide show is running. (Image quality on a television screen may not be as good as on a computer monitor or when printed.) Purchase accessories/go/m381accessoriesUsing the menu button in reviewTo use the Menu button in review:1Press the Review button, then the Menu button.2Press to highlight a tab:■Review to view and share pictures/videos■Edit to edit pictures/videos■Setup to control how your camera operates3Press to highlight a setting, then press OK.4Highlight an option, then press OK.IMPORTANT: Your camera offers a built-in Help system. See page40.Cropping picturesYou can crop a picture so that only the desired portion of the picture remains.1Press the Review button, then to find a picture to crop. 2Press the Menu button, thento highlightthe Edit tab. Highlight Crop, then press OK.3Press Telephoto (T) to zoom in, orto move the crop box. Press OK.4Follow the screen prompts.The picture is cropped. (The original is saved.) Cropped pictures cannot be cropped again on the camera. ■Press the Shutter button halfway down to return to Capture mode.IMPORTANT: Your camera offers a built-in Help system. See page 40.Using KODAK PERFECT TOUCH Technology KODAK PERFECT TOUCH Technology helps ensure better, brighter pictures. PERFECT TOUCH Technology is automatically applied to pictures taken in Smart Capture mode. (You cannot apply PERFECT TOUCH Technology to videos, panoramic pictures, orpictures to which PERFECT TOUCH Technology is already applied.)1Press the Review button, then for previous/next picture.2Press the Menu button, then to highlight the Edit tab. Highlight PERFECT TOUCH Tech, then press OK.The enhancement is previewed. Press to view other parts of the picture.3Press OK. Follow the screen prompts to replace the original picture or to save the enhanced picture as a new one.■Press the Shutter button halfway down to return to Capture mode.Picture Cropped pictureCopying pictures/videosYou can copy pictures/videos from a card to internal memory or from internal memory to a card.Copy pictures/videos:1Press the Review button.2Press the Menubutton, then to highlight the Review tab. 3Press to highlight Copy, then press OK. Highlight a choice, then press OK.NOTE:Pictures/videos are copied, not moved. To remove pictures/videos from the original location after copying, delete them (see page15).IMPORTANT: Your camera offers a built-in Help system. See page 40.Editing videosYou can do incredible things with your videos!Making a picture from a video You can choose a single frame from a video, then make a picture suitable for a 4 x 6-inch (10 x 15 cm) print.1Press the Reviewbutton, then to find a video.2Press the Menubutton, then to highlight the Edit tab. Highlight Make Picture, then press OK.3Follow the screen prompts.A picture is created. (The original video is saved.)■Press the Shutter button halfway down to return to Capture mode.IMPORTANT: Your camera offers a built-in Help system. See page 40.Video PictureTrimming a videoYou can remove an unwanted start or end from a video, saving only the desired portion.Press the Review button, thento find a video.Press the Menubutton, then to highlight the Edit tab. Highlight Trim, then press OK.3Follow the screen prompts.The video is trimmed. (You can save it as a new videoor replace the original.)■Press the Shutter button halfway down to return to Capture mode.IMPORTANT: Your camera offers a built-in Help system. See page 40.Video Trimmed videoMaking a video action printFrom a video, you can make a 9-up picture, suitable for a 4 x 6-inch (10 x 15 cm) print.1Press the Reviewbutton, then to find a video.2Press the Menu button, then to highlightthe Edit tab. Highlight Action Print, then press OK.3Highlight an option, then press OK.Auto—The camera includes the first and lastframes, then 7 equally spaced frames.Manual—Choose the first and last frames; thecamera chooses 7 frames.A 9-up picture is created.■Press the Shutter button halfway down to return to Capture mode. IMPORTANT: Your camera offers a built-in Help system. See page40.VideoUnderstanding the review iconsAdd text tag View multi-upSelect pictureEmail tagFavorite tagPrint tag/number of printsProtectedPicture/Video number Upload tagVideo durationBattery levelText tag name Play videoFPO4Using the Menu buttonYou can change settings to get the best results from your camera.1Press the Menu button.2Press to highlight a tab:■Capture/Videofor the most common picture/video-taking settings ■Setupfor other camera settings 3Pressto highlight a setting, then press OK.4Highlight an option, then press OK.NOTE: Some modes offer limited settings. Some settings remain until you change them; others, until youchange modes or turn off the camera.Using the Capture tabPress Menu,, then , and OK to access settings Capture OptionsIMPORTANT: Your camera offers a built-in Help system. See page 40.Exposure CompensationMake a picture lighter ordarker. (Available in Programand Panorama modes.) To usea shortcut, see page 10.0.0, +/-0.3, +/-0.7, +/-1.0, +/-1.3, +/-1.7, +/-2.0Picture SizeChoose a picture resolution.See Camera specifications, page 46.BurstTake up to 3 pictures in quicksuccession. (Burst is notavailable in Panorama mode.)Off On —press the Shutter button halfway to focus and set exposure. Press the Shutter button completely down and hold it to take pictures.Using the Menu buttonSelf-timerTake a picture/video after a delay, or take 2 pictures. (Also see page11.)10 seconds 2 seconds 2-shotFocus ModeSelect a large or concentrated area of focus.Auto—for general picture-taking.Macro—for sharpness and detail in pictures at close range. Use available light instead of flash, if possible. The camera automatically sets the focus distance depending on the zoom position.Infinity—for distant subjects; auto-focus framing marks are unavailable.Long Time Exposure Choose how long the shutter stays open.None0.5, 1.0, 2.0, 4.0, 8.0 secondsColor ModeChoose color tones. Unavailable in Video mode.High ColorNatural ColorLow ColorBlack & WhiteSepiaNOTE: EASYSHARE Software also lets you change a color picture to black-and-white or sepia.AF Control (Still) Choose an auto-focus setting.Continuous AF—because the camera is always focusing, there is no need to press the Shutter button halfway down to focus.Single AF—uses TTL-AF (through-the-lens auto focus) when the Shutter button is pressed halfway down.Press Menu,, then , and OK to access settings Capture OptionsIMPORTANT: Your camera offers a built-in Help system.See page40.Using the Menu buttonWhite BalanceChoose your lighting condition. (Available only in Program and Panorama modes.)Auto—automatically corrects white balance. Ideal for general picture taking.Daylight—for pictures in natural lighting. Tungsten—corrects the orange cast of incandescent light bulbs. Ideal for indoor pictures under tungsten or halogen lighting without flash.Fluorescent—corrects the green cast of fluorescent lighting. Ideal for indoor pictures under fluorescent lighting without flash.Open Shade—for pictures in shade in natural lighting.Face Detect Capture Choose if faces get focus priority.On—in SCN modes designed for pictures of people, the camera attempts to focus on faces.OffNOTE: Not available in Smart Capture mode (because face detection is always on).Exposure Metering Evaluate light levels at specific areas of a scene.Multi-Pattern—evaluates lighting conditions throughout the image to give an optimum picture exposure. Ideal for general picture taking.Center-Weight—evaluates the lighting conditions of the subject centered in the lens. Ideal for backlit subjects. Center-Spot—similar to Center-weight, except the metering is concentrated on a smaller area of the subject centered in the LCD.AF ZoneSelect a large or concentrated area of focus.Multi-Zone—evaluates 5 zones to give an even picture focus. Ideal for general picture taking.Center-Zone—evaluates the small area centered in the lens. Ideal when you need precise focus.Press Menu,, then , and OK to access settings Capture OptionsIMPORTANT: Your camera offers a built-in Help system.See page40.Using the Menu buttonVideo settingsISO SpeedControl the sensitivity of thecamera sensor.See Camera specifications, page 46.Sharpness Control picture sharpness.Sharp NormalSoftPress Menu,, , and OK to access settings Video OptionsIMPORTANT: Your camera offers a built-in Help system. See page 40.Video SizeChoose a video resolution.640 x 480 @ 30 fps (VGA) 320 x 240 @ 30 fps (QVGA)Self-timerTake a picture/video after adelay, or take 2 pictures. (Alsosee page 11.)10 seconds 2 seconds 2-shot Focus ModeSelect a large or concentratedarea of focus.Auto—for general video-taking. TBD Macro—for close range. TBDInfinity—for distant subjects. TBDVideo Blur Reduction Reduce blur caused by camera shake or subject motion.OnOff Press Menu,, then , and OK to access settings Capture OptionsIMPORTANT: Your camera offers a built-in Help system. See page 40.Using the Menu buttonUsing the Setup tabPress Menu,to highlight Setup, thenand OK to access settings Setup Options IMPORTANT: Your camera offers a built-inHelp system. See page 40.Share button Choose how pictures/videos are handled when you press the Share button (via EASYSHARE Software for WINDOWS-OS only).NOTE: Some online services limit video file sizes. Use EASYSHARE Software or choose a preferred online service.Favorite and Upload—pictures/videos aretagged as Favorites and uploaded to yourpreferred online service when you connect to yourcomputer or network.Favorite—pictures/videos are tagged asFavorites (5-star in EASYSHARE Software, on yourcomputer).Upload—pictures/videos are uploaded to yourpreferred online service when you connect to yourcomputer or network.LCD Brightness Choose LCD brightness.Power Save—Lower LCD brightness; conservespower.High Power—Higher LCD brightness; uses morepower.Image Storage Choose a storage location for pictures/videos.Auto—the camera uses the card if one is in thecamera. If not, the camera uses internal memory.Internal Memory—the camera always usesinternal memory, even if a card is installed.Set Tag Create tag names and assign them to pictures/videos. See page 36.New Tag—create a tag.Delete Tag—delete a tag.Clear All—cancel selected tags.Red Eye Reduction Choose how you want to reduce red eye.Preflash—red eye preflash fires before the picture is taken.Digital Correction—red eye preflash does notfire; the camera corrects red eye.Using the Menu buttonQuickview Briefly display a picture after it is taken.OnOffDigital Zoom Turn digital zoom on/off.OnOffOrientation Sensor Orient pictures/videos so that they are displayed with the correct side up.On—the camera rotates pictures so that allappear in the same orientation on the camera.Off—pictures are not rotated.Camera Sounds Choose sound effects, volume.Power OnFocus LockShutterErrorSelf-timerSound Volume (High, Medium, Low, Mute)Date & Time Set date and time.Video Out Choose the regional setting that lets you connect the camera to a television or other external device.NTSC—used in North America and Japan; mostcommon format.PAL—used in Europe and China.LanguageChoose your language.Reset CameraReset settings to their default.Press Menu,to highlight Setup, thenand OK to access settings Setup Options IMPORTANT: Your camera offers a built-inHelp system. See page 40.。

Einige Dienste und Anwendungen sind ggf. nicht in allen Ländern verfügbar.Details hierzu erhalten Sie beim Händler.Facebook ist eine Marke von Facebook, Inc.Google, Android, YouTube und andere Marken sind Marken von Google, Inc.© Vodafone Group 2013. Vodafone und die Vodafone-Logos sind Markender Vodafone Group. Andere Produkt- und Firmennamen, die in diesem Dokument genannt werden, können Marken ihrer jeweiligen Inhaber sein.Startbildschirm-TasteEs wird empfohlen, den Akku immer vollständig zu laden (Der PegelGoogle-Einrichtungsbildschirmüberspringen und später über Einstellungen\Konto hinzufügenAuch wenn keine SIM-Karte eingesetzt ist, können Sie auf dem Startbildschirm eine Verbindungum sich in Ihrem Google-KontoMit dieser Funktion können Sie das Telefon über Einstellungen\Schnellstart Aktivieren Sie dazu das Kontrollkästchen.a bBerühren: Kontakte öffnenBerühren: AnruflisteBerühren: Wählbildschirm öffnenDer Startbildschirm ist auf beiden Seiten des Bildschirms erweitert, sodass Ihnen mehr Platz für Anwendungen und Verknüpfungen zur Verfügung steht. Ziehen Sie den Startbildschirm nachDurch Berühren von können Sie alle terminbasierten Benachrichtigungen löschen (nur die Benachrichtigung wird gelöscht).1.2.3Suchleisteac,Bildschirmsperre mit PIN oder Passwort einrichten Berühren Sie auf dem Startbildschirm das Symbol , Bildschirmsperre einrichten\PIN oder Passwort. Erstellen Sie die PIN oder das Passwort.zum Entsperren nach rechts.Startbildschirm personalisieren1.2.5Elemente hinzufügenkönnen dem Startbildschirm Verknüpfungen, Widgets (Anwendungen)hinzufügen, indem Sie berühren. Berühren und halten Sie das Element, das Sie hinzufügen möchten, und lassen es los. Das Element wird auf dem aktuellen Startbildschirm angezeigt.ziehen es nach oben aufWenn Sie zum Startbildschirm zurückkehren möchten, berühren Sie die Startbildschirm-Taste.und wählen eine Option aus.Lautstärke einstellenLauter-/Leiser-Taste, um die Lautstärkeniedrigsten Einstellung der Lautstärke (Lautlosmodus (1)) einmal die Lauter-Taste drücken, wird der Vibrationsmodus aktiviert. Wenn Sie im Vibrationsmodus einmal die Leiser-Taste drücken, das Benachrichtigungsfeld nach unten und berühren , um den Klingelton, Medien und die Lautstärke des Klingeltons einzustellen.Die Einstellungen variieren entsprechend den Veränderungen, die Sie an den StandardeinstellungenText bearbeitenSie können den von Ihnen eingegebenen Text bearbeiten..Berühren Sie auf dem Startbildschirm das Hauptmenü und wählenGeben Sie die gewünschte Nummer direkt über die Tastatur ein oder wählen Sie unterindem Sie die entsprechendeden Anruf zu tätigen. Diegespeichert werden. Berühren Sie dazu undFalsch eingegebene Ziffern können durch das Berühren von gelöscht werden. Berühren Sie zum Beenden eines Anrufs, umLandesvorwahl und die vollständige Telefonnummer ein und berühren zum Wählen ., um deneingehenden Anruf das grüne entgegenzunehmen. Beenden Sie den Anruf durch Berühren des SymbolsWenn Sie einen eingehenden Anruf nicht entgegennehmen möchten, können Sie ihn ablehnen, indem Sie nach oben ziehen und eine Mitteilung auswählen. Der Anrufer wird direkt mit Ihrer Mailbox verbunden, um eine Nachricht zu hinterlassen.Berühren und halten SieFestlegenWenn Sie eine Sprachnachricht erhalten, wird je nach Land und Netzbetreiber das Symbol auf der Statusleiste angezeigt. Andernfalls erhalten Sie eine SMS von Ihrer Mailbox. Öffnen SieBerühren: aktuellen Anruf halten. Erneut berühren: Anruf wieder aufnehmenBerühren: aktuellen Anruf stummschalten. Erneut berühren: Stummschaltung des Anrufs Lautsprecher währendwird gehaltenden anderen Anruf eingeschaltet. Berühren Sie , um das in der Warteschleife befindlicheSie dieund wählenberühren Sie ,Warteschleife beenden und die Verbindung mit allen Anrufern zu trennen.Falls Sie einen eingehenden Anruf nicht entgegennehmen möchten, können Sie das SymbolAnrufe und EingehendeBerühren Sie zum Löschen der gesamten Anrufliste und dann .Sie können auch berühren, um die Optionen für die Kontaktliste anzuzeigen.Berühren Sie zum Speichernberühren, um den Kontakt den Favoriten hinzuzufügen (das Sternsymbol wird weiß angezeigt).berühren Sieund auf dem Bildschirm mit den Kontaktdetailsberührenberühren, um die zu löschenden Kontakte auszuwählen. Berühren Sie zum Bestätigen .Berühren Sie zum Anrufen eines Kontakts .Um eine Mitteilung an einen Kontakt zu senden, berühren Sie zum Erstellen das Symbol, um das Optionsmenü derwählenKarte den gewünschten Kontakt und zum BestätigenBerühren Sie zum Importieren/Exportieren aller Kontakte von der bzw. auf die SIM-KarteSie können Kontakte als vCard per Bluetooth, MMS, E-Mail usw. an andere Personen senden. Berühren Sie den Kontakt, den Sie senden möchten, berühren Sie und auf dem Bildschirm mit. Wählen Sie danach die gewünschte Anwendung zum Senden aus., um die Option jeweils zu aktivieren oder zu deaktivieren.und dannsynchronisierenund greifen auf, berühren Sie das zu löschende Konto und zum,,, um den Text der. einzugeben. Berühren Sie , um die Optionen zu öffnen, und anschließendum eine Betreffzeile einzufügen. Berühren SieDias anzuhängen. Berühren Sie abschließendMitteilungen verwalten4.1.2Wenn S ie e ine M itteilung e mpfangen, w ymbolangezeigt. Ziehen Sie die Statusleiste Benachrichtigungsfeldund berühren Sie die neue Mitteilung,Anwendung Mitteilungen öffnen und die Mitteilung berühren, um sie zu öffnen. Mitteilungen werden in chronologischer Reihenfolge angezeigt.Berühren Sie zum Beantworten einer Mitteilung die aktuelle Mitteilung, um den Bildschirm zum Schreiben der Mitteilung zu öffnen, geben Sie den Text ein und berühren dann ., um aus einer Konversation zur Mitteilungsliste zurückzukehren.und danndes TelefonsGmail-Konto im WebE-Mail und die,Posteingang und.E-MailPosteingangund anschließendangezeigt.Statusleiste undkönnen Sie die Zurücktaste oder oben linksjeweilsBerühren Sie dieses Kontaktbild, um die Schnellkontaktoption zu öffnen..Geben Sie das zu suchende Stichwort im Suchfeld ein und berühren Sie das Suchsymbol.Texteingabemodus und,oder alleE-Mail-Adresse des neuen Empfängers ein und berühren Sie zumSenden dann .Sie zumKonversation und wählen Sie anschließend das Label für die Konversation aus.,KonversationslisteNeben Ihrem Gmail-Konto können Sie auf dem Telefon auch andere POP3- oder IMAP-E-Mail-.Wenn die E-Mail nicht sofort gesendet werden soll, können Sie undjederzeit mit Ihren Berühren Sie , um Ihren Onlinestatus festzulegen.。
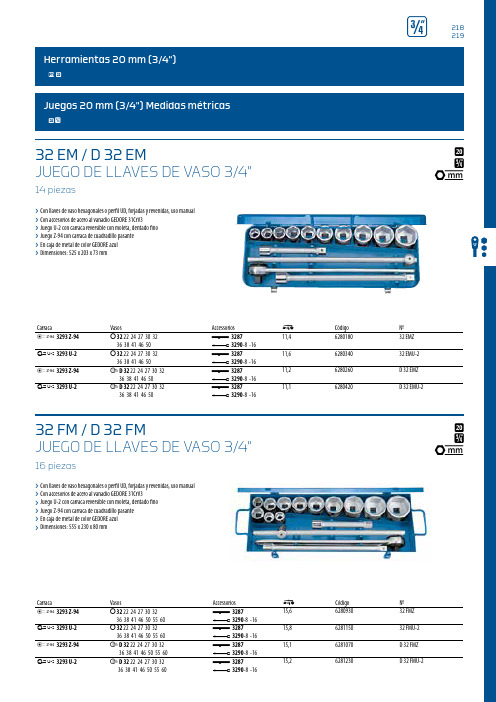
p e "p e ! "UD 32 EAJUEGO DE LLAVES DE VASO 3/4"14 piezas› C on llaves de vaso hexagonales o perfil UD, forjadas y revenidas, uso manual › C on accesorios de acero al vanadio GEDORE 31CrV3› J uego U-2 con carraca reversible con moleta, dentado fino › J uego Z-94 con carraca de cuadradillo pasante › E n caja de metal de color GEDORE azul › D imensiones: 525 x 203 x 73 mmCarracaVasosAccessorios 0Código №! 3293 Z-943 D 32 15/16 1.1/16 1.1/8 1.1/4 1.5/16 1.3/8 1.1/2 1.5/8 1.7/8 2"+ 3287' 3290-8 -1611,36280500 D 32 EAZ" 3293 U-23 D 32 15/16 1.1/16 1.1/8 1.1/4 1.5/16 1.3/8 1.1/2 1.5/8 1.7/8 2"+ 3287' 3290-8 -1611,36280690 D 32 EAU-2D 32 EMAU-2JUEGO DE LLAVES DE VASO 3/4"25 piezas› C on llaves de vaso perfil UD, forjadas y revenidas, uso manual › C on accesorios de acero al vanadio GEDORE 31CrV3 › C on carraca reversible con moleta, dentado fino › E n caja de metal de color GEDORE azul › D imensiones: 660 x 230 x 80 mmCarracaVasosAccessorios 0Código №" 3293 U-23 D 32 22 24 27 30 32 36 41 46 503 D 32 7/8 15/16 1" 1.1/16 1.1/8 1.1/4 1.5/16 1.3/8 1.1/2 1.11/16 1.7/8 2"+ 3287' 3290-8 -1618,26281310 D 32 EMAU-2... ¡A TU MEDIDA!¡Individual – preciso – hecho a medida – flexible – simplemente perfecto!› E mpezando por dimensiones personalizadas, tratamiento de superficies especiales (color y/o acabado), pasando por módulos de herramientas hechos a medida, hasta productos electrónicos con programaciones especiales o el establecimiento de intervalos de mantenimiento individuales (servicios en general, servicios de calibración ) y mucho más.› N OSOTROS desarrollamos herramientas especiales, herramientas personalizadasy/o piezas de forja de calidad para USTED . › N os ocupamos de sus problemas. › ¡Contacte con nosotros!VASOS Y ACCESORIOS›A cero al vanadio GEDORE 31CrV3, cromadoP UPUU 32LLAVE DE VASO 3/4"hexagonal›E jecución según DIN 3124, ISO 2725-1›C on cuadradillo de accionamiento interior según DIN 3120 - D 20, ISO 1174,con seguro de pasador›U so manual, moleteado en cruz›A cero al vanadio GEDORE 31CrV3, cromado* fuera de norma!L d1d2t0Código№18*51,528,336,019,00,219626988032 1819*51,529,636,019,00,225627011032 192151,532,036,019,00,228626996032 212251,533,336,019,00,232627038032 222451,535,838,019,50,267627046032 242754,539,636,024,00,271627054032 2729*54,542,036,023,50,281627062032 293057,543,338,026,00,331627070032 303257,545,838,027,00,345627089032 3233*57,547,040,026,50,392627003032 333457,548,340,026,50,404627941032 34!L d1d2t0Código№3659,550,840,028,00,448627097032 3638*59,553,340,528,00,476627100032 384162,557,144,030,50,593627119032 414665,563,344,032,50,700627127032 465068,568,348,034,50,848627135032 505568,574,653,033,01,008627143032 556068,580,853,033,01,143627151032 60D 32 (MM)LLAVE DE VASO 3/4"perfil UD›E jecución según DIN 3124, ISO 2725-1›C on cuadradillo de accionamiento interior según DIN 3120 - D 20, ISO 1174,con seguro de pasador›U so manual, moleteado en cruz›A cero al vanadio GEDORE 31CrV3, cromado* fuera de norma!L d1d2t0Código№19*51,529,636,019,00,2216272160 D 32 192151,532,036,019,00,2236289800 D 32 212251,533,336,019,00,2276272240 D 32 222451,535,838,019,50,2576272320 D 32 242754,539,636,024,00,2556272400 D 32 2729*54,542,036,023,50,2726272590 D 32 293057,543,338,026,00,3196272670 D 32 303257,545,838,027,00,3326272750 D 32 3233*57,547,040,026,50,3586277040 D 32 333659,550,840,028,00,4186272830 D 32 36!L d1d2t0Código№38*59,553,340,528,00,4416272910 D 32 384162,557,144,030,50,5586273050 D 32 414665,563,344,032,50,6416273130 D 32 465068,568,348,034,50,8006273210 D 32 505568,574,653,033,00,9616273480 D 32 556068,580,853,033,01,0526273560 D 32 60 VASOS Y ACCESORIOSITX 32 T80U3290-83290-163296MANGO ARTICULADO 3/4"› E jecución según DIN 3122, ISO 3315› P ara llaves de vaso de uso manual con cuadradillo de accionamiento segúnDIN 3120, ISO 1174, con seguro de pasador › A cero al vanadio GEDORE 31CrV3, cromadoa "a y 0Código №3/4205471,965627925032963287MANGO CORREDIZO 3/4"› E jecución según DIN 3122, ISO 3315› P ara llaves de vaso de uso manual con cuadradillo de accionamiento segúnDIN 3120, ISO 1174, con seguro de pasador › A cero al vanadio GEDORE 31CrV3, cromadoa "a y 0Código №3/4205001,161627836032873290ALARGADERA 3/4"› E jecución según DIN 3123, ISO 3316› P ara llaves de vaso de uso manual con cuadradillo de accionamiento segúnDIN 3120, ISO 1174, con seguro de pasador › A cero al vanadio GEDORE 31CrV3, cromadoa "a y 0Código №3/4202000,57462784403290-8a "a y 0Código №3/4204001,07962785203290-16VASOS Y ACCESORIOSDVV-40ZRS 3353/4“1/2“20 mm 12,5 mm 3295 ARTICULACIÓN UNIVERSAL 3/4" › E jecución según DIN 3123, ISO 3316› P ara llaves de vaso de uso manual con cuadradillo deaccionamiento según DIN 3120, ISO 1174, con seguro de pasador › A cero al vanadio GEDORE 31CrV3, cromadoa "a Q "Q y 0Código№3/4203/4201080,580627917032953219PIEZA REDUCTORA 3/4" - 1/2"› E jecución según DIN 3123, ISO 3316› P ara llaves de vaso de uso manual con cuadradillo de accionamiento segúnDIN 3120, ISO 1174, con seguro de pasador › A cero al vanadio GEDORE 31CrV3, cromadoQ "Q a "a y 0Código№3/4201/212,5560,16862780103219。

MX3正面的所有元件的位置。
MX3背面的所有元件的位置。
解锁与锁屏MX3可电源键解锁,或从Home键向屏幕内滑动解锁。
电源键可锁屏,或长按Home键锁屏,若需取消锁屏,向屏幕内滑动即可取消。
*MX2 3.2固件版本可设置双击或上滑Home键来点亮屏幕。
上滑返回任意应用中,从Home键向上滑动,可以实现返回功能。
截屏同时按住电源键和音量减键,截取屏幕内容。
下拉状态栏查看截图,或在图库中查看截图,存储在Photo文件夹。
多任务管理从屏幕底部任意位置,向屏幕滑动,可调出多任务管理。
任一程序向上滑动清除后台,向下滑动清空全部后台,长按锁定不会清除。
后台列表向右滑动,调节亮度或建立快捷访问。
锁屏启动音乐播放音乐不需解锁手机。
锁屏状态,双击Home键,调出音乐播放按钮,再次单击Home键,显示日期。
下拉悬停与跳转顶部下拉悬停是Flyme独有的为大屏手机设计的功能,在任何的列表界面,如进入“文档”,下拉列表后保持2秒,列表位置将固定,可操作到顶部条目。
网页浏览或任何长页面浏览,点击屏幕右上角,快速跳转至顶部。
列表滑块在列表中滑动右侧滑块,会显示条目的首字母,如联系人、邮件、音乐等。
文件夹重命名在桌面移动图标到另一个图标上可建立文件夹,打开文件夹,再点击文件夹名称可重命名文件夹;移动图标到最后一页右侧边缘可新建页面。
电脑连接MX3默认为MTP方式与电脑连接,支持4GB以上大文件存储,可热插拔,可设置允许电脑访问“锁定区”。
进入“设置”-“关于”-“存储”-“连接方式”可修改连接方式。
系统升级及时升级能够享受更多、更新服务。
进入“设置”-“关于”-“系统更新”,升级系统。
或登陆魅族官网-服务支持页面,也可以下载最新MX3系统,手机中点击固件包就可升级。
联系人联系人界面,从屏幕左向右滑动,调出联系人分组。
最近通话MX3将最近通话与搜索整合。
点击联系人头像可拨号,长按可呼叫前编辑,点击联系人名字可查看详情。
接听与挂断来电时,滑动接听或挂断;按音量键或单击电源键可静音;长按音量加键接听;双击电源键挂断;从Home键向屏幕内滑动,呼叫保持后台。
s16011601p 01e n1601p 01e nDesigo™ TRAFreely configurable flush-mounted room operator unit for KNX PL-LinkQMX3.P36F QMX3.P36G• Freely configurable user interface (keys and visual items) as part of Total Room Automation• Energy efficiency function ("Green Leaf ") • Room temperature measurement• Display of room temperature, control mode, scenes etc. (LCD) • Backlit display, white or blue selection• KNX PL-Link interface to the room automation station with plug & play functionality• Can be combined with different standard and design bezelsCM2N1601en_04 2016-03-24Building TechnologiesUseThe QMX3.P36... room operator unit is used as part of Desigo room automation to measure the room temperature as well as to operate the room functions. The room automation station determines the functions of both LCD display and keys. The room operator unit can be used together with the Desigo TRA room automation stations.Type summary, orderingThe following items are supplied in the package:ItemQMX3.P36F QMX3.P36G Operator unitXXBezel, titanium white Siemens DELTA-line Similar to Delta azio 120 x 80 mmBase plateCEE/VDE (type A) 3 modules landscape In plastic bag for handover to electrical installerKNX PL-Link plugX XCompatibility• The QMX3.P36... room operator unit can be used with the Desigo TRA room automation stations.• Supported bezel programsSiemens DELTA: DELTA line, DELTA miro and DELTA vita.(For the DELTA style and DELTA profil series an adapter frame for 55mm x 55mm inserts is required) Berker:(B.1, B.7Gira: Standard 55, E2, Event, EspritJung: A500, AS500, stainless steel; LS990, aluminum Merten: System MFeller: EDIZIOdue, PRESTIGE(Adapter frame for 55mm x 55mm devices is required)• Bezels from various other manufacturers can also be used (s uitability must be clarified in advance ).Product number Stock number DesignationRoom operator units QMX3.P36FS55624-H100Freely configurable flush-mounted room operator unit for KNX PL-Linkwith square white bezel CEE/VDE (type A)QMX3.P36G S55624-H101Freely configurable flush-mounted room operator unit for KNX PL-Linkwith landscape white bezel (3 modules landscape )2 / 14Mechanical design• The unit is designed for mounting in a conduit box (A) – Square CEE/VDE (type A)– Rectangular 3 modules landscape (suitability to be clarified in advance).• The base plate (B) (rectangular or landscape) contains:– A hook to attach a securing strap to protect against tampering (the strap is not provided)– an earthing plate (quick slide connector) to connect an earthing cable• One Bezel (C) is supplied:– Siemens DELTA line (square , with the QMX3.P36F) – Siemens similar to DELTA azio 120 x 180 (rectangular , with the QMX3.P36G)Bezels from various other manufacturers can also be used (suitability to be clarified in advance ).• The operator unit (D) incorporates the room temperature sensor element, keys, LCD panel, KNX PL-Link plug, tool plug, and spring clamps to hold the operator unit in the base plate.DisposalThe device is considered an electronics device for disposal in terms of European Directive 2012/19/EU and may not be disposed of as domestic garbage. • Dispose of the device through channels provided for this purpose. • Comply with all local and currently applicable laws and regulations.3 / 14Engineering notes• The room operator units offer plug & play functionality.• The room operator units receive their power from the connected room automation station via the KNX PL-Link interface.• KNX PL-Link supports plug & play functionality for pre-configured devices out of the library• For KNX PL-Link wiring (topology, allowed cables and cable length), see the Desigo installation guide, CM111043.• Normally, electrical installers only install the base plate and the KNX PL-Link plug. These two items are packed in a plastic bag for easy handover to installers.• Use the tear-off label with the barcode on the packaging / on the display and stick it on the floor plan to prepare commissioning for several room operator units per room automation station.The same barcode label with unique identifier is available on the device.Furthermore, the unique identifier (HEX number) is displayed on screen when starting the device.Mounting and installation• The room operator unit is suitable for flush mounting. • Recommended height: 1.50 m above floor.• Do not mount the unit in recesses, shelves, behind curtains or doors, or above or near heat sources.• Avoid direct solar radiation and drafts.• Seal the conduit box internally, as air currents in the conduit can affect sensor readings.• Adhere to allowed ambient conditions.Location4 / 14• The base plate contains:– A hook to attach a securing strap to protect against tampering (the strap is not provided)– An earthing plate (quick slide connector) to connect an earthing cable• The installing tube must be sealed or cold or warm air may enter the conduit box and cause faulty temperature readings by the internal sensor.• Mounting instructions are printed inside the device package and are also on the plastic bag.The operator unit may need to be dismounted from the base plate to exchange the operator unit.1. Hold bezel with one hand.2. Pull operator unit with the other hand.MountingDismounting5 / 14•For KNX PL-Link wiring (topology, allowed cables and cable length), see theDesigo TRA installation guide, CM111043.•Use the correct cables for the KNX PL-Link bus•Do not interchange the wires of the KNX PL-Link cable.– The red terminal is for KNX PL-Link +– The gray terminal is for KNX PL-Link –•Observe all local installation regulations.•Use the earthing plate (quick slide connector) to connect an earthing cable in theconduit box (in case a switch or a mains plug is in the same conduit box).STOP Caution•The unit is not protected against accidental connection to AC 230 V.•The installing tube must be sealed or cold or hot air may enter the conduit boxand cause faulty temperature readings by the internal sensor.Prerequisite for commissioningThe room automation station must be running and an application must be loaded.The application is not loaded on the room operator unit, but the room automationstation.Download of the application is done using the SSA-DNT (Pack & Go) or the ABT.For this purpose (or for service), connect the ABT to the room automation station(USB or Ethernet).Manual commissioningAll commissioning work is done via the PXC3... room automation station, using theSSA-DNT or the ABT.The ABT is never connected directly to a room operator unit.When more than one QXM3.P36... room operator unit is on the same trunk ofthe KNX PL-Link bus, manually commission is done as follows:1. Connect the SSA-DNT or the ABT to the room automation station andactivate the online commissioning function.2. Load the web page "KNX PL-Link identification".Activate the identification function.The room automation station now waits for a signal from the room operatorunit.3. On the room operator unit, simultaneously press the upper left and bottomright button for at least 5 seconds.4. The page "System info" is displayed.Go to the network function page (last line)5. Press "Prog. Mode" (first line).The display below "Prog. Mode" changes to "Enabled".The tool identifies the current room operator unit that is operated andassigns it.After the device is commissioned, programming mode is automatically reset to“disabled”. Note: Programming mode also resets to “disabled” each time thedevice restarts.InstallationLoad application on theroom automationstation6 / 14DiagnosticsPress "Conn. Test" to test the KNX PL-Link connection.A popup window shows the progress of the connection test:Reset to factory setting STOPNote! This operation resets all user preference data and configuration settings to factory default. This operation is irreversible.Press "Fact. Reset". The device is locked and reboots within 10 seconds. The room automation station deletes it from its device list. During this time, it is safe to remove the device from the network.If the room operator unit is not unplugged, it acts like a newly inserted device requiring again automated or manual configuration.Commissioning (plug & play)When only one room operator unit is connected to the KNX PL-Link bus, the unit automatically establishes communications with the room automation station, from where the functions are downloaded to the room operator unit (plug & play). The following routine is executed:Step FunctionDescription 1Splash screenThe unique serial number of the device is displayed below the company logo.2BusyDuring configuration, 6 animated dots appear in the center of the screen to indicate the device is busy.This step is skipped if the device is already configured.Note: The configuration file can be downloaded any time; as a result, these dots are displayed every time the room automation station initializes download.7 / 14Step FunctionDescription 3 Normal operationAfter startup, the device goes to normal operation(example view; picture depends on application in room automation station).4Configuration requiredWhen configuration is faulty, the default page "Initial Menu" is displayed: temperature that is measured by the local temperature sensor along with a menu for network commissioning and diagnostics.Operating notesOperation and display of the room operator unit depend on the control program on the room automation station.The display has 4 lines to display information.Texts, icons, read-only data point information, or operable data point information can be displayed.With a multi-page navigation-driven page set, the information usually is laid out in the following format: Line 1 Title/read-only data point information Line 2InformationOperable data point information (display or setpoint) Temperature, air quality, fan speed, etc. Line 3 Read-only / operable data point informationLine 4Information or navigation between several "pages"InfoOperableRead-onlyNavigationInfoOperableNavigationInfoOperableNavigation3 lines of informationList operationSingle-line operationUsability conceptMulti-page display with navigation8 / 14With a single-page page set, information is usually is laid out in the following format: Line 1 Title / read-only data point information Line 2 Operable data point informationTemperature, air quality, fan speed, etc. Line 3 Read-only/operable data point information Line 4Read-only/operable data point informationExample:Title (empty), temperature setpoint, fan speed and room operating modeThe leaf symbol / (green, red) at the top right of the device tells the user if the settings are energy-efficient or not. Pressing the upper right key resets the application to energy-efficient parameter valuesSave a changed scene by long pressing the key (approx. 3 sec).12345678 Notes• A scene can only be saved if Scene Teaching is enabled in the application.• The key event to save a scene can be freely engineered.In the default page set, it is set to “long-press key 6" (the keys are numbered left top to bottom and then right top to bottom).12345678• Lock the buttons: Press button 6 6• Unlock the buttons:Press buttons 2, 3 and 7 one after the otherSingle-page displayRoomOptiControl, Green LeafSaving scenesKey lock9 / 14A list item provides status information:• Tick : Indicates the current selection from the room automation station. A change from hourglass to tick indicates that the automation station has confirmed the modifications the user just made.• Hourglass : Indicates the progress of the selected activity.• Lock : Indicates locked entries that cannot be selected / enabled.• Floppy disk : Is only used in scene saving, and will be displayed for 1 second, then go back to "Tick".MaintenanceThe device can be cleaned with off-the shelf, solvent-free cleaning agents.Do not use mechanical aids (rough sponge or similar materials) – only a soft, damp cloth.Dismounting: see page 5.Technical data Supply voltage Operating voltage range KNX PL-Link DC 21...30 VThe room operator unit receives its power from the connected room automation station via the KNX PL-Link interfacePower consumption (from room automation station)Max.10 mA at DC 24 VSeries A: Max.12.5 mA at DC 24 V Operating data Temperature sensorMeasuring element NTC resistance sensor Measuring range 0...50 °C Measuring accuracy (5 … 30 °C) ±0.61 KMeasuring accuracy (25 °C) ±0.35 K Display Type Dot matrix LCD, resolution 96 x 128Information displayed depends on theapplication in the PXC3... room automationstation− Room temperature − Setpoint adjustment − Control mode − Manually selected fan speed − Control sequence − Scenes − etc.Ports/interfaces Type of port between room automation station and room operator unit KNX PL-Link Baud rate 9.6 kbps Standard KNX plug Wire diameter0.8 mm, max. 1.0 mm(solid conductors only)Cable type Solid conductors 2-core, twisted pairSingle cable length (from room automation station to room operator unit)<1000 mCables must comply with KNX specifications, see TRA Installation manual, CM111043 Housing protection Protection standard as per EN 60529 IP 30 Protection classInsulation protection class IIIStatus information STOPNote!10 / 14Ambient conditions IEC 721 Normal operation TransportEnvironmental conditions Class 3K5? Class 2K3?Temperature 0...50 °C – 25...70 °CHumidity < 85 % rh < 95 % rhMechanical conditions Class 3M2 Class 2M2 Standards and directives EU conformity (CE) CM2T1601xx *)compliance UL916compliance Part 15 of the FCC rulesCSA compliance C22.2 No 205 – Signal equipmentC22.2 No 0 – General Requirements RCM conformity CM2T1601en_C1 *)The product environmental declaration CM2E1601 *) contains data on environmentallycompatible product design and assessments (RoHS compliance, materialscomposition, packaging, environmental benefit, disposal)Color Front housing Titanium white similar to RAL9010 Weight QMX3.P36F QMX3.P36GOperator unit 50 g 50 gBezel, base plate 32 g 63 gPackaging 44 g 54 gTotal 126 g 167 g*) The documents can be downloaded from /bt/download.11 / 14ConnectionQMX3... room operator unit Controller, actuatorTwisted pair+ Red KNX PL-Link (positive) – Gray KNX PL-Link (negative)Wires are NOT interchangeable!The device is protected against faulty wiring, but communications does not work on interchanged wires.RJ45 plug of the tool cable1601A 021 CE+, KNX2 CE–, KNX3 N.C. 4N.C.5 Voltage 16 V 6 N.C.7 Ident'pin 8GNDConnect the ABT to load the application in the room automation station, or for service purposes:− Directly to the room automation station− To the room unit using the tool cable and the OCI702 service interface (see data sheet A6V10438951)Note: Remove the operator unit from the base plate to connect the tool cable.KNX / PL-Link plugSTOPNote!Tool plug (2.5 mm Jack)Connect the tool12 / 14DimensionsOperator unitBezel DELTA line(square)Base plate squareBezel similar to DELTA azio(rectangular)Base plate rectangular13 / 1414 / 142016 Siemens Switzerland Ltd Subject to change。
3. OEKO-TEX® MADE IN GREEN Article Definition3.10BCDEInfo entered in this section defines the label’s display on Label Check (i.e.,article name, number, description, colors)•Fields marked with *are mandatory•Rules for data completion arelisted in the MADE IN GREENStandard(chapter 4.3.3)•Click the “?” for details aboutthe field and requirementsArticle Details BA.Article nameMust include product nameand type –max 65 characters(e.g., “Acme Hooded Sweatshirt”)B.Article numberFor further ID on Label Checkand within the myOEKO-TEX®platform –max 65 characters(e.g., the product style number)Article Details (cont’d)C.Article internal remarkSpecify the manufacturer’s code (e.g., producer’s id) -to distinguish, within the myOEKO-TEX® platform, articles with the same articlenumber but different supply chains and MADE IN GREEN IDsD.EAN / SKU / IDCode should uniquely identify the product for buyers and consumers E.Select your relevant OEKO-TEX® STANDARD 100 or LEATHERSTANDARD certificate number, if availableC Women’s hooded sweatshirt made of cotton/ polyester brushed fleece, piece-dyed produced by using materials certified according to OEKO-TEX® STANDARD 100.D EArticle Details (cont’d)F.Article DescriptionMust include material composition and any other important product details (e.g., fiber contents, specific method of dyeing, finishing and/or printing processes)•The article description should be an excerpt from the STANDARD 100 certificate scope, underwhich this product was tested for harmful substances•Do NOT repeat the information from the 'Article name' field •The article description should be written as a full sentenceWomen’s hooded sweatshirt made of cotton/ polyester brushed fleece, piece-dyed produced by using materials certified according to OEKO-TEX® STANDARD 100.FArticle Details (cont’d)G.Select product classification, including category and product type (e.g., finished or semi-finished product)H.Select article material (e.g., fiber contents)I.Select specific article colors (e.g., dyed article) -or -tick ‘Raw/greige’J.Check public information(Article name, number, description and colors). Blanks will be missing from Label Check K.Click ‘Save’IGHKABC!1. 2. 3.A132 B-Options1.‘+ Add component’ –2 Options•Add a new component and details−Use if new component details are different from article detailsand may need individual editing in future−•Reuse a previous component−For already defined components <6 months old−future2.‘+Add existing component’−−You can update or enter further component details 3.‘+Add MIG label as component’−details−You can update or enter further component details1321.Super Sweats AGGood Leggings AGABCDE1Component -New (Cont’d)F.Enter component classificationincluding category and product type (e.g., finished or semi-finished product)G.Select component material (e.g., fiber contents)H.Select component colors (e.g., dyed article) -or -tick ‘Raw/greige’I.Click ‘Save’If ‘Save’ is not active, there are one or more mandatory component definition fields missingFGHIComponent -Reuse Component1.Within ‘Edit Article’ section, click ‘+Add component’A.Select the supplier (of the component that will be reused) from your supplier list (connected previously)B.Click ‘Use previously used component’C.Select the relevant component name intended to be reusedD.Note: Status changes and edits to reused components are automatically reflected in ALL connected article definitions. It is NOT possible to edit reused components individually E.Click ‘Save’Super Sweats AGSuper Sweats AGSuper Sweats AGA BCED2.TESTCERT-2-Betti02B ASuper Sweats AG TESTCERT-2-Betti03.5.1 Add ExistingComponent(Cont’d)C.If necessary, update the componentinfo pulled from the article:•Component name•Number•Description•Further component detailsD.Select relevant OEKO-TEX®STANDARD 100 or LEATHERcertificate number, if availableE.Click ‘Save’If ‘Save’ is not active, there are oneor more mandatory componentdefinition fields missing TESTCERT-2-Betti1CDE3.3ASuper Sweats AGM2SM0FB46G479Women’s sweater made of 100% cashmere knitted fabric, piece-dyed, available in several colors and sizes.-Ladies-Sweatshirts B3.6.1 Add MIG Label as ComponentC.If necessary, update the component info pulled from the predefined label:•Component name •NumberD.Select relevant OEKO-TEX® STANDARD 100 or LEATHER STANDARD certificate number, if availableE.Click ‘Save’If ‘Save’ is not active, there are one or more mandatory component definition fields missing(*mandatory information)Super Sweats AGM2SM0FB46G479Women’s sweater made of 100% cashmere knitted fabric, piece-dyed, available in several colors and sizes.-Ladies-SweatshirtsEC!Super Sweats AG Super Sweats AGAB3.7.1 Send Component RequestA.Check system’s email address for your supplierB.If necessary, enter additional addresses and click ‘+’Hint: Add your own email address to receive a copy C.Click ‘Ok’DoyouwanttosendarequestforthiscomponenttoSuperSweatsAG(**********************)?ABC3.7.2 Review Component RequestsA.Click ‘Back’ twice for ‘Article/Requests’B.Review all sent component requests and their current status•Total number of component requests sent to this supplier•‘(archived)’ suppliers were archived in ‘Supplier Management’C.Click ‘Supplier Name’ to view all component requests sent to themD.Click link to the article associated with the component requestE.If necessary, click ‘Request confirmation for this component’ to resend the component request (button appears 1 hour after request was sent)A0 / 7Good Leggins AG B(Archived)Super Sweats AG2 / 2CDEASuper Sweats AG BBD CSuper Sweats AGCBA3.9.1 EditCopied ArticleA.Update the article info pulled from the copied article: ‘Article name’, ‘Number’ and ‘Description’B.Update component info pulled fromthe copied article: ‘Component name’, ‘Number’ and ‘Description’C.Define new components,if necessaryD.Check updated article description(otherwise the incorrect text of copied article will be shown on Label Check)E.Click ‘Save’Women’s hooded sweatshirt made of cotton/ polyester brushed fleece, piece-dyed produced by using materials certified according to OEKO-TEX® STANDARD 100.Women’s hooded sweatshirt made of cotton/ polyester brushed fleece, piece-dyed produced by using materials certified according to OEKO-TEX® STANDARD 100 .Super Sweats AGSuper Sweats AGADBEC3.9.2 Confirm Component of Copied ArticleA.View new details of copiedarticle’s component including request status B.Click ‘Request confirmation for this component’ C.Check system’s email address foryour supplierD.If necessary, enter additionaladdresses and click ‘+’Hint: Add your own email address to receive a copyE.Click ‘Ok’DoyouwanttosendarequestforthiscomponenttoSuperSweatsAG(**********************)?Super Sweats AGSuper Sweats AGACD BESuper Sweats AGFBC3.11.1 Review Archived ArticleArchived articles can only be found in the ‘Archived articles’ section.A.In ‘Article / Requests’, click‘Archived articles’ to view list of archived articlesB.Click on article name for detailsC.To reactivate an archived article,click ‘Undo archiving of article’D.Click ‘Ok’ to move the article backto the active articles listSuper Sweats AGA BDCAcme Hooded Sweatshirt xA BFCDE3.12.1 Review Article’s Product LineA.Click ‘Article/Requests’ tabB.View list of defined articlesC.Click on the article name to view ‘Article Details’D.View ‘Product line’ACD***************************3.13.1 Received Component RequestsA.Login into myOEKO-TEX®B.Click on company name to navigate to product menu C.Click ‘MADE IN GREEN’D.Click ‘Articles / Requests’ tab E.Review list of received requests and their current status (unanswered / total)F.Select sender’s name to see their requestsG.Click on pending request to expand options Super Sweats AGG E B CD F3.13.2 Confirm Component Request A.View ‘Pending’ status and article details B.If necessary, add -or correct-the OEKO-TEX® certificate number for the component C.Scroll to tick box to confirmdeclaration and understandingD.Click ‘Confirm request’E.Click ‘Ok’ in the popup confirmationF.View ‘Accepted’ Status Super's Hooded SweatshirtMaking up of hooded sweatshirt made of cotton/ polyester brushed fleeceSuper's Hooded Sweatshirt Acme Hooded Sweatshirt CD AE FBSuper Sweats AGC ABD3.14.1 Indirect Component Supplier Choose your relevant supplier(s) of indirect components for this item A.Click ‘+Add component’ B.Select the relevant supplier of this component from your supplier list (connected previously in myOEKO-TEX®)Loops LTDLoops LTDImPrint, Inc AB3.14.2 Define Indirect Component (Fields marked with * are mandatory)A.Enter ‘Component name’B.Enter ‘Component number’. Specify the number provided by your supplier (e.g., order/ delivery number) so they can identify the supplied component and confirm your component request C.Select relevant OEKO-TEX® certificate number, if available D.Enter ‘Component description’E.Enter classification including category and type (e.g., finished or semi-finished product)F.Select material (e.g., fiber contents)G.Select colors or tick ‘Raw/greige’H.Click ‘Save’If ‘Save’ is not active, there are one or more mandatory component definition fields missing Super Sweats AGLoops LTDGFEDBATESTCERT2-Betti2CSuper Sweats AGLoops LTD Loops LTDABCDoyouwanttosendarequestforthiscomponenttoLoopsLTD(*****************)?DE3.15.1 Request Multiple Component Confirmations To send multiple component requests at once:A.Click ‘Request confirmation for all components’B.Click ‘Ok’Note: Any previous component requests will be resent, and the recipient's emails are not visible “Super's Hooded Sweatshirt”Loops LTDFilamina GmbHImPrint, IncABTechnical Manuals1.Application2.Connection3.Article definitionbel preparationbel renewal6.Relabel7.Advertising label B2C•OEKO-TEX® Label Check •Guide: Label Check/ ES •OEKO-TEX® Buying GuideMADE IN GREEN LinksB2B•Standard (EN)/ DE/ ZH•Implementation Examples•myOEKO-TEX® Login•myOEKO-TEX® QuickstartGuide (EN)/ ES•Infosheet(EN)/ DE•OEKO-TEX® Buying Guide•Labelling Guide/ ES/ ZHQuestions?。
MDA 3 Series • User GuideThis guide describes the installation and operation of the Extron MDA 3 Series Mini Distribution Amplifiers (MDA).FCC Class A NoticeThis equipment has been tested and found to comply with the limits for a Class A digital device, pursuant to part 15 of the FCC rules. The Class A limits provide reasonable protection against harmful interference when the equipment is operated in a commercial environment. This equipment generates, uses, and can radiate radio frequency energy and, if not installed and used in accordance with the instruction manual, may cause harmful interference to radio communications. Operation of this equipment in a residential area is likely to cause interference. This interference must be corrected at the expense of the user.Specifications AvailabilityProduct specifications are available on the Extron website, .IntroductionThe Extron MDA 3 Series are a family of eight one-input, three-output, video and audio distribution amplifiers. The MDA series distribution amplifiers (DAs) split one composite video or S-video input and/or audio input for output to multiple destinations with no loss of signal quality. The MDA are members of the Extron line of basic distribution amplifiers, switchers, and associated video accessories.The MDAs distribute composite video, S-video (luminance (Y) and chrominance (C)), and/or balanced or unbalanced audio on captive screw connectors, or unbalanced audio on RCA connectors, in the following combinations:Distribution Amplifier S-Video Composite VideoAudio (CaptiveScrew Connectors)Audio (RCAConnectors)MDA 3SV●MDA 3SVA●●MDA 3SV Dual●2MDA 3V●MDA 3AV●●MDA 3V Dual●2MDA 3A●MDA 3A RCA●The MDAs ship with external desktop 12 V power supplies that accept 100 to 240 VAC, 50 Hz or 60 Hz input.Connections, Controls, and IndicatorFigure 1 show all of the combinations of connectors that you may encounter with your MDA.Figure 1. MDA 3 Series Front and Rear PanelsS-video (MDA 3SV and MDA 3SVA)a Input connectors — Connect an S-video input to this four-pin mini DIN connector.bOut connector or Outputs (1 through 3) connectors — Connect up to three S-video devices to these four-pin mini DINconnectors.Composite Video (MDA 3V , MDA 3AV , and MDA 3V Dual)cIn connector or Input connector — Connect a composite video input to this BNC connector. On the Dual model, Input A and Input B are completely separate inputs to two separate distribution amplifiers .dOut connector or Outputs (1 through 3) connectors — Connect up to three composite video devices to these BNCconnectors. On the Dual model, the A output signals are identical to the A input, and the B output signals are identical to the B input .Audio on captive screw connectors (MDA 3AV , MDA 3SVA, MDA 3A)eAudio Input connector — Connect a balanced or unbalanced audio input to this 3.5 mm, five-pole captive screw connector. Connectors are included, but you must supply the audio cable. See figure 2 to wire a connector for the appropriate input type and impedance level. High impedance is generally over 800 ohms.Figure 2. Captive Screw Input Connector WiringfAudio Outputs (1 through 3) connectors — Connect up to three balanced or unbalanced audio devices to these 3.5 mm, five -pole captive screw connectors. Connect audio devices, such as an audio amplifier or powered speakers. See figure 4 to properly wire an output connector.Unbalanced Stereo OutputBalanced Stereo OutputFigure 4. Captive Screw Connector Wiring for Audio OutputgBal(anced)/Unbal(anced) DIP switches — For each balanced audio output, set the associated DIP switch to the Balanced (up) position. For each unbalanced audio output, set the associated DIP switch to the Unbalanced (down) position.The balanced or unbalanced nature of the audio output is determined by the output connector wiring, not the audio input. Each output can be balanced or unbalanced independently of the other two outputs.68-607-01Rev. E 10 13Extron Headquarters+800.633.9876 Inside USA/Canada OnlyExtron USA - West Extron USA - East +1.714.491.1500 +1.919.850.1000+1.714.491.1517 FAX +1.919.850.1001 FAXExtron Europe+800.3987.6673Inside Europe Only +31.33.453.4040+31.33.453.4050 FAXExtron Asia +65.6383.4400+65.6383.4664 FAX Extron Japan +81.3.3511.7655+81.3.3511.7656 FAXExtron China +86.21.3760.1568+86.21.3760.1566 FAXExtron Middle East +971.4.299.1800+971.4.299.1880 FAXExtron Korea +82.2.3444.1571+82.2.3444.1575 FAXExtron India+1800.3070.3777(Inside India Only)+91.80.3055.3777+91.80.3055.3737 FAXPower (All Models)hPower connector — Plug the external 12 VDC power supply into this two-pole captive screw connector. The power supply is included with the unit. Figure 5 shows how to wire the connector.Orange Captive ScrewConnectorSECTION A–ATie WrapFigure 5. Power Connector WiringAs an alternative, an Extron P/S 100 Universal 12 VDC Power Supply can power multiple MDAs or other Extron 12 VDC devices using only one AC power connector.iPower LED — When lit, this LED indicates power is applied to the MDA.Figure 6. MDA 3 Series Front Panel (All Models)。