ubifs文件系统挂载及同步
- 格式:docx
- 大小:22.27 KB
- 文档页数:12


UBI文件系统的移植作者:piaozhiye86@首次做UBIFS的移植,不足之处欢迎批评指正。
2010-7-15自从linux2.6.27以后的内核版本都支持UBI文件系统了,新版本的uboot已经支持UBIFS了。
软件平台VMwareFedora-10使用源码:linux-2.6.30.4.tar.bz2u-boot-2010.06-rc1.tar.bz2硬件环境mini2440—64M NAND关于uboot的移植可以参考《嵌入式Linux之我行》中uboot的移植,那里写得比较详细。
我也是参考了其中的文章。
1、uboot的UBI的移植关于uboot的UBI的移植几乎没有说明介绍,移植首先要保证你的flash驱动能够跑起来,我是在nand flash 上跑的UBI。
刚开始的时候我也没有什么头绪,只能够从uboot的readme开始查找一些蛛丝马迹。
- MTD Support (mtdparts command, UBI support)CONFIG_MTD_DEVICEAdds the MTD device infrastructure from the Linux kernel.Needed for mtdparts command support.CONFIG_MTD_PARTITIONSAdds the MTD partitioning infrastructure from the Linuxkernel. Needed for UBI support.因此呢,要UBI支持首先得要MTD支持,因此在配置文件中要添加以上两项的定义。
要移植UBI还要添加:#define CONFIG_CMD_UBIFS#define CONFIG_CMD_UBI总的关于UBI的部分是以下几个宏/****MTD Support (mtdparts command, UBI support)****/#if 1#define CONFIG_MTD_DEVICE 1#define CONFIG_MTD_PARTITIONS 1#define CONFIG_CMD_MTDPARTS#define CONFIG_CMD_UBIFS#define CONFIG_CMD_UBI#define CONFIG_LZO 1#define CONFIG_RBTREE 1#endif同时呢要给NAND建立个默认的分区。

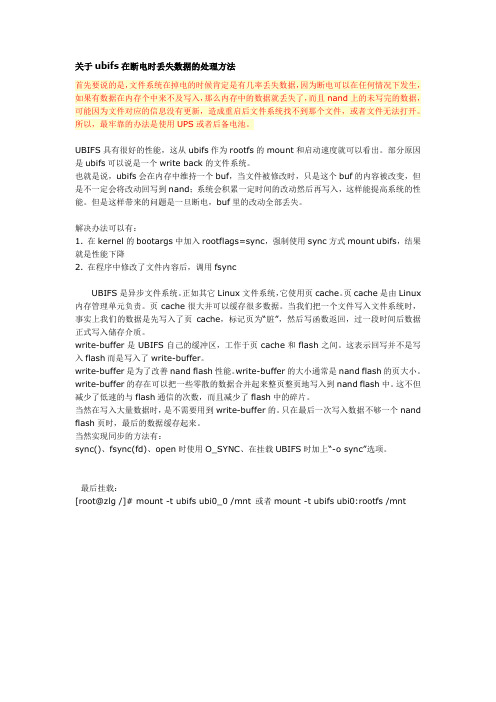
关于ubifs在断电时丢失数据的处理方法首先要说的是,文件系统在掉电的时候肯定是有几率丢失数据,因为断电可以在任何情况下发生,如果有数据在内存个中来不及写入,那么内存中的数据就丢失了,而且nand上的未写完的数据,可能因为文件对应的信息没有更新,造成重启后文件系统找不到那个文件,或者文件无法打开。
所以,最牢靠的办法是使用UPS或者后备电池。
UBIFS具有很好的性能,这从ubifs作为rootfs的mount和启动速度就可以看出。
部分原因是ubifs可以说是一个write back的文件系统。
也就是说,ubifs会在内存中维持一个buf,当文件被修改时,只是这个buf的内容被改变,但是不一定会将改动回写到nand;系统会积累一定时间的改动然后再写入,这样能提高系统的性能。
但是这样带来的问题是一旦断电,buf里的改动全部丢失。
解决办法可以有:1. 在kernel的bootargs中加入rootflags=sync,强制使用sync方式mount ubifs,结果就是性能下降2. 在程序中修改了文件内容后,调用fsyncUBIFS是异步文件系统。
正如其它Linux文件系统,它使用页cache。
页cache是由Linux 内存管理单元负责。
页cache很大并可以缓存很多数据。
当我们把一个文件写入文件系统时,事实上我们的数据是先写入了页cache,标记页为“脏”,然后写函数返回,过一段时间后数据正式写入储存介质。
write-buffer是UBIFS自己的缓冲区,工作于页cache和flash之间。
这表示回写并不是写入flash而是写入了write-buffer。
write-buffer是为了改善nand flash性能。
write-buffer的大小通常是nand flash的页大小。
write-buffer的存在可以把一些零散的数据合并起来整页整页地写入到nand flash中。
这不但减少了低速的与flash通信的次数,而且减少了flash中的碎片。

ubifs文件系统挂载及同步UBIFS分区制作及UBIFS烧写和启动 (转载)相关命令工具ubiattach version 1.0 - a tool to attach MTD device to UB I.Usage: ubiattach[-m ] [-d ][--mtdn=] [--devn ]Example 1: ubiattach /dev/ubi_ctrl -m 0 - attach MTD device 0 (mtd0) to UBIExample 2: ubiattach /dev/ubi_ctrl -m 0 -d 3 - attach MTD device 0 (mtd0) to UBI andand create UBI device number 3 (ubi3)-d, --devn= the number to assign to the newly created UBI device(the number is assigned automatically if this is not specified)-m, --mtdn= MTD device number to attach-O, --vid-hdr-offset VID header offset (do not specify this unless you really know what you do and the optimal defaults will be used)-h, --help print help m essage-V, --version print program v ersionubimkvol version 1.0 - a tool to create UBI volumes.Usage: ubimkvol [-h] [-a ] [-n ] [-N ] [-s ] [-S ] [-t ] [-V] [-m] [--alignment=][--vol _id=] [--name=] [--size=] [--lebs=] [--type=] [--help] [--version] [--maxavsize]Example: ubimkvol/dev/ubi0 -s 20MiB -N config_data - create a 20 Megabytes volumenamed "config_data" on UBI device /dev/ubi0.-a, --alignment= volume alignment (default is 1)-n, --vol_id= UBI volume ID, if not spec ified, the volume ID will be assigned automatically-N, --name= volume name-s, --size= volume size volume size in bytes, kilobytes (KiB) or megabytes (MiB)-S, --lebs= alternative way to give vo lume size in logicaleraseblocks-m, --maxavsize set volume size to maximum available size -t, --type= volume type (dynamic, static), default is dynamic -h, -?, --help print help message-V, --version print program versi onThe following is a compatibility option which is deprecated, do not use it-d, --devn= UBI device number - m ay be used instead of the UBIdevice node name in which case the utility assumesthat the device node is "/dev/ubi"ubidetach version 1.0 - a tool to remove UBI devices (deta ch MTD devices from UBI)Usage: ubidetach [-d ] [-m ] [--devn ] [--mtdn=]Example 1: ubidetach /dev/ubi_ctrl -d 2 - delete UBI device 2 (ubi2)Example 2: ubidetach /dev/ubi_ctrl -m 0 - detach MTD device 0 (mtd0)-d, --devn= UBI device number to delete-m, --mtdn= or altrnatively, MTD device number to detach - this will delete corresponding UBI device-h, --help print help m essage-V, --version print program v ersionubiformat version 1.0 - a tool to format MTD devices andflash UBI imagesUsage: ubiformat [-h] [-V] [-y] [-q] [-v][-x ] [-E ] [-s ] [-O ] [-n][--help] [--version] [--yes] [--verbose] [--quiet][--ec=] [--vid-hdr-offset=][--ubi-ver=] [--no-volume-table]Example 1: ubiformat /dev/mtd0 -y - format MTD device number 0 and donot ask questions.Example 2: ubiformat /dev/mtd0 -q -e 0 - format MTD device number 0,be quiet and force erase counter value 0.-s, --sub-page-size= minimum input/output unit used fo r UBIheaders, e.g. sub-page size in case of NANDflash (equivalent to the minimum input/outputunit size by default)-O, --vid-hdr-offset= offset if the VID header from s tart of thephysical eraseblock (default is the nextminimum I/O unit or sub-page after the ECheader)-n, --no-volume-table only erase all eraseblock a nd preserve erasecounters, do not write empty volume table-f, --flash-image= flash image file-e, --erase-counter= use as the erase counter value for alleraseblocks-y, --yes assume the answer is "yes" for all questionthis program would otherwise ask-q, --quiet suppress progress p ercentage information-v, --verbose be verbose-x, --ubi-ver= UBI version number to put to EC headers(default is 1)-h, -?, --help print help message-V, --version print program version使用实例将一个MTD分区挂载为UBIFS格式●flash_eraseall /dev/mtd5 //擦除mtd5●ubiattach /dev/ubi_ctrl -m 5 -d 0 //UBI和mtd5关联->ubi0●ubimkvol /dev/ubi0 -n 0 -N rootfs0 -s 256MiB //创建分区ubi0_0设定volume 大小●mount -t ubifs ubi0_0 /mnt/ubi或mount -t ubifs ubi0:rootfs0 /mnt/ubi //挂载烧写UBIFS文件系统映像U-Boot烧写ubifs:(mmc)#mmcinit#fatload mmc 0:1 81000000 ubi.img#nand unlock#nand ecc sw#nand erase 680000 7980000#nand write.i 81000000 680000 $(filesize)NFS文件系统上烧写法一,使用ubiformat工具./ubiformat -q /dev/mtd5 -f ubi.img法二,不必烧写映像,将ROOTFS打包,解压到UBIFSubiattach /dev/ubi_ctrl -m 5 -d 0ubimkvol /dev/ubi0 -n 0 -N rootfs -s 128MiBmount -t ubifs ubi0_0 /mnt/ubi0tar -jxv -C /mnt/ubi0 rootfs.tar.bz2umount /mnt/ubi0UBI文件系统启动设置UBIFS文件系统作为根文件系统启动的参数#setenv bootargs console=ttyAM0,115200n8 ubi.mtd=5 root=ubi0:root fs rootfstype=ubifs init=linuxrc# setenv bootcmd nand read.i 80300000 280000 200000\;bootm 80 300000UBIFS一、UBIFS 简介由IBM、nokia工程师Thomas Gleixner,Artem Bityutskiy等人于2006年发起,致力于开发性能卓越、扩展性高的FLASH专用文件系统,以解决当前嵌入式环境下以FLASH作为MTD设备使用时的技术瓶颈,开发背景:FLASH特性:FLASH是一类电可擦出可编程存储体,在使用方式上与硬磁盘最大不同是:FLASH文件系统所必须的关键技术:1. 由于FLASH的“先擦除后写”的特性决定,必须(或者说所被公认为)采用异地更新策略(out-of-place update)。

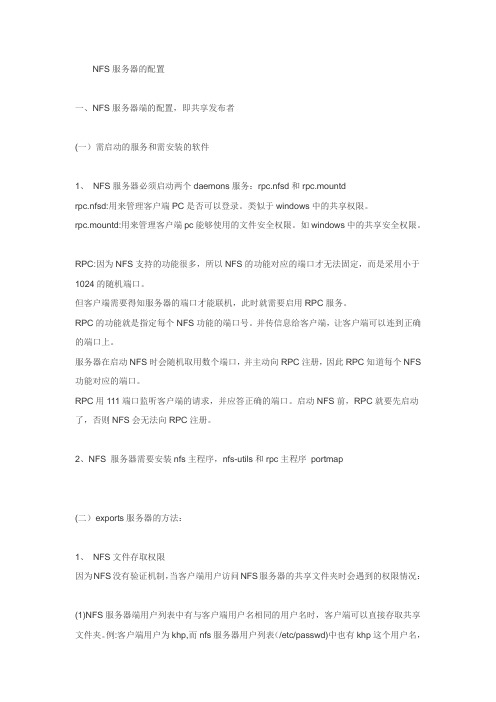
NFS服务器的配置一、NFS服务器端的配置,即共享发布者(一)需启动的服务和需安装的软件1、NFS服务器必须启动两个daemons服务:rpc.nfsd和rpc.mountdrpc.nfsd:用来管理客户端PC是否可以登录。
类似于windows中的共享权限。
rpc.mountd:用来管理客户端pc能够使用的文件安全权限。
如windows中的共享安全权限。
RPC:因为NFS支持的功能很多,所以NFS的功能对应的端口才无法固定,而是采用小于1024的随机端口。
但客户端需要得知服务器的端口才能联机,此时就需要启用RPC服务。
RPC的功能就是指定每个NFS功能的端口号。
并传信息给客户端,让客户端可以连到正确的端口上。
服务器在启动NFS时会随机取用数个端口,并主动向RPC注册,因此RPC知道每个NFS 功能对应的端口。
RPC用111端口监听客户端的请求,并应答正确的端口。
启动NFS前,RPC就要先启动了,否则NFS会无法向RPC注册。
2、NFS 服务器需要安装nfs主程序,nfs-utils和rpc主程序portmap(二)exports服务器的方法:1、NFS文件存取权限因为NFS没有验证机制,当客户端用户访问NFS服务器的共享文件夹时会遇到的权限情况:(1)NFS服务器端用户列表中有与客户端用户名相同的用户名时,客户端可以直接存取共享文件夹。
例:客户端用户为khp,而nfs服务器用户列表(/etc/passwd)中也有khp这个用户名,则将拥有KHP权限。
(2)当访问NFS服务器的客户端用户UID与服务器端UID相同,但用户名却不相同时,客户端将拥有与服务器端UID 相同但不同用户的权限。
例:客户端为501UID,用户名为khp的帐号访问NFS服务器。
NFS服务器用户列表中(/etc/passwd)有uid为501 ,但用户名为pla的用户,所以客户端khp用户可以拥有NFS 服务器pla相同权限。
(3)如果客户端用户UID在NFS服务器端用户列表中不存在时,则以匿名用户的权限访问。
ubi文件系统原理
UBI文件系统(UBIFS)是一个用于嵌入式设备的日志结构文件系统。
它的设计目标是提供高性能、高可靠性和可扩展性,以适应各种嵌入式设备的需求。
UBIFS的核心思想是将闪存设备中的数据组织成一个树状结构,以提高数据的访问效率和可靠性。
这个树状结构被分为多个节点,每个节点对应一个闪存块。
每个节点中包含了数据和元数据,如文件的大小、权限等信息。
UBIFS通过使用日志技术来保证文件系统的一致性,即每次写入操作都会被记录在日志中,以便在系统崩溃或断电时能够恢复数据的完整性。
UBIFS还采用了压缩算法来节省闪存空间的使用。
它使用了一种称为UBI(Unsorted Block Images)的闪存管理层,将闪存设备划分为多个块,并对这些块进行管理和映射,从而提供了灵活的闪存管理功能。
UBIFS可以自动地在闪存设备上执行块的擦除和写入操作,以保证数据的完整性和可靠性。
UBIFS的设计还考虑了嵌入式设备的特殊需求。
它采用了一种称为UBI Fastmap的技术,可以加速文件系统的挂载过程。
此外,UBIFS 还支持闪存设备的坏块管理和wear leveling,以延长闪存设备的使用寿命。
UBIFS是一个专为嵌入式设备设计的高性能、高可靠性的日志结构
文件系统。
它通过使用树状结构、日志技术和压缩算法来提供快速、可靠的数据存储和访问功能。
无论是在智能手机、平板电脑还是其他嵌入式设备中,UBIFS都可以为用户提供优秀的文件系统体验。
它的设计理念和技术特点使得它成为嵌入式设备领域的首选文件系统之一。
autofs的用法Autofs是一个在Unix-like操作系统中用于管理文件系统挂载的程序。
它可以根据用户的工作目录自动挂载不同的文件系统。
本篇文章将详细介绍autofs的用法,包括配置文件、挂载规则、使用方法等。
一、Autofs配置文件1. /etc/auto.master:该文件定义了整个系统的挂载点配置。
示例:/mnt/home - /home/*表示将/home目录下的所有子目录挂载到/mnt/home目录下。
2. /etc/auto.nfs:该文件包含了对NFS(Network File System)服务器的挂载规则。
示例:server:/export/home - /mnt/nfshome表示将NFS服务器上的/export/home目录挂载到本地系统的/mnt/nfshome目录下。
二、Autofs挂载规则Autofs会根据当前工作目录的变化,自动判断需要挂载哪种文件系统,并执行相应的挂载操作。
以下是常见的挂载规则:1. 当当前工作目录中的文件名中包含特定前缀时,根据相应的规则挂载文件系统。
2. 当当前用户属于特定的组时,根据相应的规则挂载文件系统。
3. 当用户切换到特定的目录时,根据相应的规则挂载文件系统。
1. 启动autofs:在终端中输入命令systemctl start autofs,即可启动autofs服务。
2. 查看当前挂载情况:在终端中输入命令pwd,查看当前工作目录。
如果当前目录下有特定的文件名前缀,表示autofs正在自动挂载文件系统。
3. 手动挂载:使用mount命令手动挂载某个文件系统。
例如,要挂载NFS服务器上的文件系统,可以输入命令mount -t nfs server:/export/path /local/path。
4. 卸载文件系统:使用umount命令卸载已经挂载的文件系统。
例如,要卸载刚才挂载的文件系统,可以输入命令umount/local/path。
使⽤ubifs格式的根⽂件系统配置内核,使其⽀持ubifs⽂件系统 1)Device Drivers --->Memory Technology Device (MTD) support --->UBI - Unsorted block images --->Enable UBI 2)File systems --->Miscellaneous filesystems --->UBIFS file system support制作ubifs格式的根⽂件系统镜像先说明⼀下,板⼦上既有NorFlash,⼜有NandFlash,其中根⽂件系统和应⽤程序放在NandFlash上,uboot和kernel放在NorFlash上,⽽根⽂件系统所在的mtd设备为mtd2,分区⼤⼩为34MiBuboot kernel rootfs=34MiB app./mkfs.ubifs -v -r ./rootfs -o rootfs.img -m 2048 -e 129024 -c 272 -r:制定⽂件内容的位置 -m:页⾯⼤⼩ -e:逻辑擦除块⼤⼩ -c:最⼤的逻辑擦除块数量mkfs.ubifs -m 2048 -e 129024 -c 1984 -o rootfs.ubifs -x none-m 2048 (Minimum input/output unit size: 2048 bytes)-e 129024 (Default UBI LEB size: 129024 bytes, 126.0 KiB)-c 1984 (Amount of eraseblocks: 1984 (260046848 bytes, 248.0 MiB))-o rootfs.ubifs (output file)-x none (no compression)./ubinize -v -o rootfs.ubi -m 2048 -p 128KiB -s 2048 hi.cfg-p:物理擦除块⼤⼩-m:页⾯⼤⼩-s: 最⼩的硬件输⼊输出页⾯⼤⼩,如:k9f1208为256(上下半页访问)配置⽂件hi.cfg如下:[ubifs] mode=ubi image=rootfs.img vol_id=0 vol_size=34MiB vol_type=dynamic vol_alignment=1 vol_name=rootfs vol_flag=autoresize然后修改uboot的环境变量:setenv bootargs 'mem=288M console=ttyAMA0,115200 root=ubi0:rootfs rw rootflags=sync rootfstype=ubifs ubi.mtd=2mtdparts=hi_sfc:5M(boot),1M(picture);hinand:34M(rootfs),8M(config),86M(app)';保存环境变量,执⾏如下命令setenv ipaddr 192.168.253.132;setenv serverip 192.168.253.130;setenv ethaddr 40:61:86:67:33:47;mw.b 82000000 ff 2200000;tftp 82000000 rootfs.ubi;nand erase 0 2200000;nand write 82000000 0 $(filesize);sf probe 0;sf read 0x82000000 0x100000 0x400000;bootm 0x82000000说明:其实从上⾯的烧写命令可以看出,ubifs格式的镜像中是不包含oob信息的。
ubifs操作实例UBI文件系统简介收藏在linux-2.6.27以前,谈到Flash文件系统,大家很多时候多会想到cramfs、jffs2、yaffs2等文件系统。
它们也都是基于文件系统+mtd+flash设备的架构。
linux-2.6.27后,内核加入了一种新型的flash文件系统UBI(Unsorted Block Images)。
这里简单介绍下UBI 文件系统加入的原因,及使用方法。
我也是刚接触到这个文件系统,可能有理解不对的地方,也请指正。
一、产生的背景FLASH具有的“先擦除再写入”、坏块、“有限的读写次数”等特性,目前管理FLASH的方法主要有:1、采用MTD+FTL/NFTL(flash 转换层/nand flash转换层)+传统文件系统,如:FAT、ext2等。
FTL/NFTL的使用就是针对FLASH的特有属性,通过软件的方式来实现日志管理、坏块管理、损益均衡等技术。
但实践证明,由于知识产权、效率等各方面因素导致本方案有一定的局限性。
2、采用硬件翻译层+传统文件系统的方案。
这种方法被很多存储卡产品采用,如:SD卡、U盘等。
这种方案对于一些产品来说,成本较高。
3、采用MTD+ FLASH专用文件系统,如JFFS1/2,YAFFS1/2等。
它们大大提高了FLASH的管理能力,并被广泛应用。
JFFS2、YAFFS2等专用文件系统也存在着一些技术瓶颈,如:内存消耗大,对FLASH容量、文件系统大小、内容、访问模式等的线性依赖,损益均衡能力差或过渡损益等。
在此背景下内核加入了UBI文件系统的支持。
二、用法环境:omap3530处理器、 (128MByte 16 位NAND Flash) 、linnux-2.6.28内核1、配置内核支持UBIFSDevice Drivers --->Memory Technology Device (MTD) support --->UBI - Unsorted block images --->Enable UBI 配置mtd支持UBI接口File systems --->Miscellaneous filesystems --->UBIFS file system support配置内核支持UBIFS文件系统2、将一个MTD分区4挂载为UBIFS格式● flash_eraseall /dev/mtd4 //擦除mtd4● ubiattach /dev/ubi_ctrl -m 4 //和mtd4关联● ubimkvol /dev/ubi0 -N rootfs -s 100MiB //设定volume 大小(不是固定值,可以用工具改变)及名称● mount -t ubifs ubi0_0 /mnt/ubi或mount -t ubifs ubi0:rootfs /mnt/ubi3、制作UBIFS文件系统在制作UBI镜像时,需要首先确定以下几个参数:MTD partition size; //对应的FLASH分区大小flash physical eraseblock size; // FLASH物理擦除块大小minimum flash input/output unit size; //最小的FLASH输入输出单元大小for NAND flashes - sub-page size; //对于nand flash来说,子页大小logical eraseblock size.//逻辑擦除块大小参数可以由几种方式得到1)如果使用的是2.6.30以后的内核,这些信息可以通过工具从内核获得,如:mtdinfo –u。
UBIFS分区制作及UBIFS烧写和启动 (转载)相关命令工具ubiattach version 1.0 - a tool to attach MTD device to UB I.Usage: ubiattach <UBI control device node file name>[-m <MTD device number>] [-d <UBI device number>][--mtdn=<MTD device number>] [--devn <UBI device number>]Example 1: ubiattach /dev/ubi_ctrl -m 0 - attach MTD device 0 (mtd0) to UBIExample 2: ubiattach /dev/ubi_ctrl -m 0 -d 3 - attach MTD device 0 (mtd0) to UBI andand create UBI device number 3 (ubi3)-d, --devn=<UBI device number> the number to assign to the newly created UBI device(the number is assigned automatically if this is not specified)-m, --mtdn=<MTD device number> MTD device number to attach-O, --vid-hdr-offset VID header offset (do not specify this unless you really know what you do and the optimal defaults will be used)-h, --help print help m essage-V, --version print program v ersionubimkvol version 1.0 - a tool to create UBI volumes.Usage: ubimkvol <UBI device node file name> [-h] [-a <alignm ent>] [-n <volume ID>] [-N <name>] [-s <bytes>] [-S <LEBs>] [-t <static|dynamic>] [-V] [-m] [--alignment=<alignment>][--vol _id=<volume ID>] [--name=<name>] [--size=<bytes>] [--lebs=<LEBs>] [--type=<static|dynamic>] [--help] [--version] [--maxavsize]Example: ubimkvol/dev/ubi0 -s 20MiB -N config_data - create a 20 Megabytes volumenamed "config_data" on UBI device /dev/ubi0.-a, --alignment=<alignment> volume alignment (default is 1)-n, --vol_id=<volume ID> UBI volume ID, if not spec ified, the volume IDwill be assigned automatically-N, --name=<name> volume name-s, --size=<bytes> volume size volume size in bytes, kilobytes (KiB)or megabytes (MiB)-S, --lebs=<LEBs count> alternative way to give vo lume size in logicaleraseblocks-m, --maxavsize set volume size to maximum available size-t, --type=<static|dynamic> volume type (dynamic, static), default is dynamic-h, -?, --help print help message-V, --version print program versi onThe following is a compatibility option which is deprecated, do not use it-d, --devn=<devn> UBI device number - m ay be used instead of the UBIdevice node name in which case the utility assumesthat the device node is "/dev/ubi<devn>"ubidetach version 1.0 - a tool to remove UBI devices (deta ch MTD devices from UBI)Usage: ubidetach<UBI control device node file name> [-d <UBI device number>] [-m <MTD device number>] [--devn <UBI devic e number>] [--mtdn=<MTD device number>]Example 1: ubidetach /dev/ubi_ctrl -d 2 - delete UBI device 2 (ubi2)Example 2: ubidetach /dev/ubi_ctrl -m 0 - detach MTD device 0 (mtd0)-d, --devn=<UBI device number> UBI device number to delete-m, --mtdn=<MTD device number> or altrnatively, MTD device number to detach -this will delete corresponding UBI device-h, --help print help m essage-V, --version print program v ersionubiformat version 1.0 - a tool to format MTD devices and flash UBI imagesUsage: ubiformat <MTD device node file name> [-h] [-V] [-y] [-q] [-v][-x <num>] [-E <value>] [-s <bytes>] [-O <offs>] [-n][--help] [--version] [--yes] [--verbose] [--quiet][--ec=<value>] [--vid-hdr-offset=<offs>][--ubi-ver=<num>] [--no-volume-table]Example 1: ubiformat /dev/mtd0 -y - format MTD device number 0 and donot ask questions.Example 2: ubiformat /dev/mtd0 -q -e 0 - format MTD device number 0,be quiet and force erase counter value 0.-s, --sub-page-size=<bytes> minimum input/output unit used fo r UBIheaders, e.g. sub-page size in case of NANDflash (equivalent to the minimum input/outputunit size by default)-O, --vid-hdr-offset=<offs> offset if the VID header from s tart of thephysical eraseblock (default is the nextminimum I/O unit or sub-page after the ECheader)-n, --no-volume-table only erase all eraseblock a nd preserve erasecounters, do not write empty volume table-f, --flash-image=<file> flash image file-e, --erase-counter=<value> use <value> as the erase counter value for alleraseblocks-y, --yes assume the answer is "yes" for all questionthis program would otherwise ask-q, --quiet suppress progress p ercentage information-v, --verbose be verbose-x, --ubi-ver=<num> UBI version number to put to EC headers(default is 1)-h, -?, --help print help message-V, --version print program version使用实例将一个MTD分区挂载为UBIFS格式●flash_eraseall /dev/mtd5 //擦除mtd5●ubiattach /dev/ubi_ctrl -m 5 -d 0 //UBI和mtd5关联->ubi0●ubimkvol /dev/ubi0 -n 0 -N rootfs0 -s 256MiB //创建分区ubi0_0设定volume 大小●mount -t ubifs ubi0_0 /mnt/ubi或mount -t ubifs ubi0:rootfs0 /mnt/ubi //挂载烧写UBIFS文件系统映像U-Boot烧写ubifs:(mmc)#mmcinit#fatload mmc 0:1 81000000 ubi.img#nand unlock#nand ecc sw#nand erase 680000 7980000#nand write.i 81000000 680000 $(filesize)NFS文件系统上烧写法一,使用ubiformat工具./ubiformat -q /dev/mtd5 -f ubi.img法二,不必烧写映像,将ROOTFS打包,解压到UBIFSubiattach /dev/ubi_ctrl -m 5 -d 0ubimkvol /dev/ubi0 -n 0 -N rootfs -s 128MiBmount -t ubifs ubi0_0 /mnt/ubi0tar -jxv -C /mnt/ubi0 rootfs.tar.bz2umount /mnt/ubi0UBI文件系统启动设置UBIFS文件系统作为根文件系统启动的参数#setenv bootargs console=ttyAM0,115200n8 ubi.mtd=5 root=ubi0:root fs rootfstype=ubifs init=linuxrc# setenv bootcmd nand read.i 80300000 280000 200000\;bootm 80 300000UBIFS一、UBIFS 简介由IBM、nokia工程师Thomas Gleixner,Artem Bityutskiy等人于2006年发起,致力于开发性能卓越、扩展性高的FLASH专用文件系统,以解决当前嵌入式环境下以FLASH作为MTD设备使用时的技术瓶颈,开发背景:FLASH特性:FLASH是一类电可擦出可编程存储体,在使用方式上与硬磁盘最大不同是:FLASH文件系统所必须的关键技术:1. 由于FLASH的“先擦除后写”的特性决定,必须(或者说所被公认为)采用异地更新策略(out-of-place update)。