松下NE-BS1000水波炉中文说明书_Part1
- 格式:pdf
- 大小:18.91 MB
- 文档页数:80
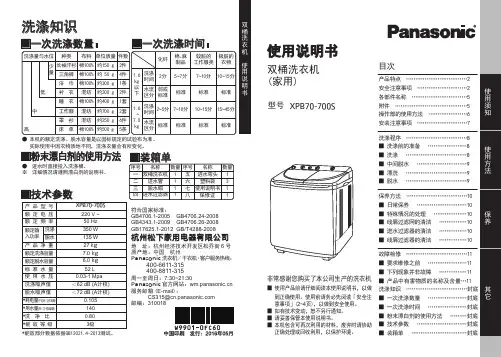
非常感谢您购买了本公司生产的洗衣机■ 使用产品前请仔细阅读本使用说明书,以做 到正确使用。
使用前请务必先阅读「安全注 意事项」(2~4页),以做到安全使用。
■ 如有技术变动,恕不另行通知。
■ 请妥善保管本使用说明书。
■ 本机包含可再次利用的材料,废弃时请协助 正确处理或回收利用,以保护环境。
双桶洗衣机(家用)使用说明书型号双桶洗衣机 使用说明书地 址:杭州经济技术开发区松乔街6号原产地:中国 杭州Panasonic 洗衣机/干衣机·客户服务热线:400-6611-315 400-8811-315周一至周日:7:30~21:30Panasonic 官方网站: 服务邮箱(E-mail ):CS315@ 邮编:杭州松下家用电器有限公司符合国家标准:GB4706.1-2005 GB4706.24-2008GB4343.1-2009 GB4706.26-2008GB17625.1-2012 GB/T4288-2008■一次洗涤数量:■粉末漂白剂的使用方法■装箱单■技术参数■一次洗涤时间:产品型号*洗 净 比*能 效 等 级额定输入功率洗涤脱水额定频率产品净重额定洗涤容量额定脱水容量标准水量使用水压 洗涤噪声值脱水噪声值*耗电量(千瓦时/工作周期)*用水量(升/工作周期)220 V ~50 Hz 0.03-1 Mpa <62 dB (A 计权)<72 dB (A 计权)27 7.0 6.0 52 L 0.105140350 W 135 W 0.80 3级额定电压洗涤知识目次产品特点 ……………………………2安全注意事项 ………………………2各部件名称 …………………………5附件 …………………………………5操作部的使用方法 …………………6安装注意事项 ………………………7洗涤程序 ……………………………8■ 洗涤前的准备 …………………8■ 洗涤 ……………………………8■ 中间脱水 ………………………9■ 漂洗 ……………………………9■ 脱水 ……………………………9保养方法 ……………………………10■ 日常保养 ………………………10■ 特殊情况的处理 ………………10■ 线屑过滤网的清洁 ……………10■ 进水过滤器的清洁 ……………10■ 线屑过滤器的清洁 ……………10故障检修 ……………………………11■ 要求维修之前 …………………11■ 下列现象并非故障 ……………11■ 产品中有害物质的名称及含量…11洗涤知识 ……………………………封底■ 一次洗涤数量 …………………封底■ 一次洗涤时间 …………………封底■ 粉末漂白剂的使用方法 ………封底■ 技术参数 ………………………封底● 本机的额定洗涤、脱水容量是以国标规定的试验布为准。
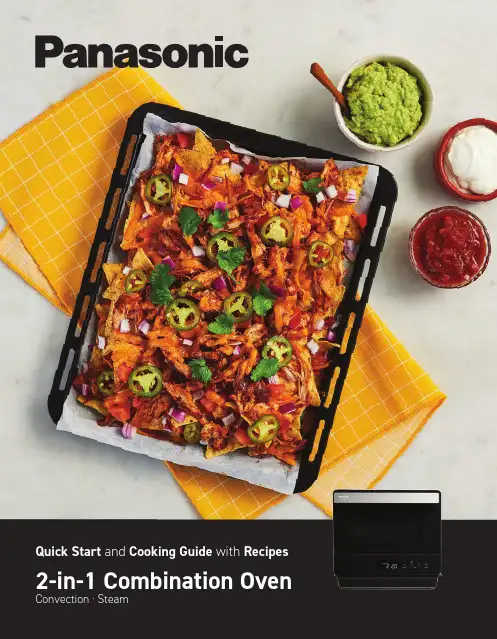
Convection · Steam2-in-1 Combination Oven Quick Start and Cooking Guide with RecipesDinner is served.Embark on your culinary journey with ease, thanks to the Panasonic 2-in-1 Combination Oven . Upgrade your meal repertoire with the power to CONVECTION and STEAM , along with several additional features.Use these two cooking methods individually or in combination to make anything from a mid-day quick bite to a decadent eight course meal. Enjoy the kind of versatility that enriches the appetite of everyone around you. It’s time for less kitchen, more cuisine. So, who’s hungry?Table of Contents Getting StartedProduct Features - SteamProduct Features - Convection BakeRecipes IntroLemon Poppy Seed LoafBreakfast MuffinsVegan Carrot CakeTuna CasseroleStuffed Portobello MushroomsLoaded PotatoesCauliflower Buffalo WingsCoconut ShrimpNachos with Shredded Barbecue ChickenDetroit Style PizzaPork DumplingsSteamed Mussels in White WineCleaning Instructions 7891112 - 1314 - 1516 - 1718 - 1920 - 2122 - 2324 - 2526 - 2728 - 2930 - 3132 - 3334 - 3536Getting Started ModeTwo modes of steam cooking:Steam-MedSteam-High StewHealthy FryFermentationConvectionSteam ConvectionAuto MenusA Accessories Placing PositionB Normal WorkingC Start/ SetD One Push FunctionE Steam System Cleaning Function, Citric Acid Cleaning FunctionF Full Water IconG Steam Shot IconH Child Safety LockI Preheat IconJ Preheat End Icon EAD BC F G H I JControl PanelIncluded AccessoriesWire Rack X 2Steam Convection BakeMetal Tray X 2(All cooking must use the metal tray.)Steam Convection BakeIntegrated Water TankThis STEAM feature allows you to add steam during cooking for up to 60 minutes. Steaming is one of the best ways to preserve nutrients and enhance the natural flavours in your dish.S t e a mPro Tips:•Steaming dough before baking will create fluffier cakes and puffs.•It’s normal for the whole oven to be covered in steam while using the STEAM function — it will go away at the end of the cooking cycle.The CONVECTION BAKE function circulates hot air throughout the oven in and around the food for fast, easy cooking. Temperature ranges from 100°C - 230°C. Preheating is optional.Convection Bake Healthy Fry Pro Tips: •Always have it pre-heated at the proper temperature. •Turn the accessories 180° halfway during cooking to ensure a more even cooking result.This function quickly circulates hot air around the food, producing crispy, brown results. Air-fried foods are healthier than deep-fried foods because they need less oil to produce a similar taste and texture. Nopre-heating required.RecipesMake the most of your 2-in-1 COMBINATION OVEN with these amazing recipes that will keep your culinary journey brimming with savoury flavours and unforgettable meals.Feast your eyes on 12 thoughtfully crafted dishes, inspired by the everyday occasions that bring us joy. Whether you’re in the mood for something fast, fresh or festive — there will always be a dish here waiting for you.Prep Time: 10 minutesCook Time: 45 minutesTotal Time: 55 minutesIngredientsLoaf1½ cup all-purpose flour2 tbsp poppy seeds1 tsp baking powder½ tsp baking soda¼ tsp salt1 cup sugar½ cup butter, room temperature 2 eggs2 lemons, zest and juice¼ cup milk1 tbsp oilIcing1 cup icing sugar2 tbsp lemon juiceOptional garnish: lemon zestPreparation•Select the Steam Conv. mode and set the temperature to 190°C. Press Start to preheat the oven.•In a medium bowl, combine flour, poppy seeds, baking powder, baking soda and salt.•In a large bowl, cream sugar and butter together with a wooden spoon. Add eggs and stir until combined. Add lemon zest and lemon juice, and milk. Slowly pour the dry mixture into the wet mixture and stir until just combined. •Grease a 9x5 loaf pan with oil and pour in batter. •Place on the lower rack position of the oven.Set the timer for 45 minutes.•Insert a toothpick to ensure that the loaf is fully cooked. Let rest in the pan for five minutes and then transfer to a cooling rack. Allow to cool completely. •In the meantime, combine icing sugar and lemon juice to make the icing.•Slowly pour the icing on top of the cooled cake, add lemon zest if required. Let sit for five minutes until the icing hardens. Serve and enjoy.Tip: Don’t get stuck with a sticky mess! Place a cookie sheet under the cooling rackbefore pouring the icing.Yield: 1 LoafLemon Poppy Seed Loaf Perfectly moist and packed with an elegant lemony flavour, this beautifully glazed poppy seed-speckled delight is not only delicious but super easyto make.STEAM CONVECTIONPrep Time: 5 minutes Cook Time: 15 minutes Total Time: 20 minutes Preparation Ingredients 1 cup whole wheat flour ¼ cup rolled oats + 2 tbsp for topping ½ tsp baking soda ¼ tsp salt ¼ tsp cinnamon 1 tbsp pumpkin seeds + 1 tbsp for topping 1 tbsp flax seeds 3 tbsp olive oil ¼ cup maple syrup 1 egg ½ cup banana, mashed 2 tbsp milk 1 tsp vanilla ½ apple, peeled, cored and diced 1 tbsp vegetable oil•Select the Steam Conv. mode and set the temperature to 190°C. Press Start/Set to preheat the oven. •In a medium bowl, mix flour, oats, baking soda, salt, cinnamon, pumpkin seeds and flax seeds. •In a big bowl, combine olive oil, maple syrup, egg, mashed banana, milk and vanilla. •Add the dry to the wet mixture and mix until just combined. Fold in the diced apple.•Oil two 6 muffin cups pans and divide the mixture evenly, filling about two-thirds of each cup. Sprinkle each muffin with the remaining oats and pumpkin seeds. Place the two trays on the two levels of the oven and bake for 15 minutes. •Let cool for five minutes in the tray and then placethe muffins on a cooling rack until fully cooled.Yield: 12 Muffins Breakfast Muffins With the hearty combination of oats, apples, bananas, pumpkin seeds, flax seeds and a touch of maple syrup, these delicious breakfast muffins make morning meals easy.Prep Time: 15 minutes Cook Time: 40 minutes Total Time: 55 minutes Preparation Ingredients Cake 2 medium carrots, shredded ½ cup applesauce ¼ cup olive oil 2 tsp cider vinegar 1 tbsp ground flax seeds 2 tbsp water 1½ cup all-purpose flour ½ cup sugar ½ tsp baking soda 1½ tsp cinnamon ¼ tsp ground nutmeg ⅛ tsp ground cloves ½ tsp salt 1 tbsp oil Icing 4 cups icing sugar ¼ cup vegan butter 4 tsp vanilla extract ¼ cup soy milk Optional garnish: carrot curls •Select the Steam Conv. mode and set the temperature to 190°C. Press Start/Set to preheat the oven. •In a large bowl, combine carrots, apple sauce, olive oil and cider vinegar. In a separate bowl, combine flax seeds and water and then add mix to large bowl and combine. •In a medium bowl, combine flour, sugar, baking soda, cinnamon, nutmeg, cloves and salt. •Mix the dry mixture with the wet mixture until just combined. •Line 2 8-inch round pans with parchment paper cut into circles. Grease the two pans with the oil. Divide the batter between the two pans, place them on the two levels of the oven and cook for 40 minutes.•Insert a toothpick to ensure the cakes are fully cooked and let them cool completelyon a cooling rack. •In the meantime, add the icing sugar, vegan butter and vanilla to a stand mixer bowl and mix with the paddle attachment on low for two minutes. Gradually add the soy milk until it reaches a smooth texture. •When the cakes are totally cooled, spread a layer of icing on the first cake, then stack the second cake on top of the first one and spread the remainingicing on top. Garnish is required.Yield: 1 Cake Vegan Carrot Cake While staying true to the beloved taste of this carroty classic, this vegan recipe has a few hidden tricks up its sleeve. By taking a slightly steamier approach, the sweet essence of the carrots brings out an unbelievably moist, rich and indulgent texture that bursts with carrot and cinnamon flavour.Prep Time: 15 minutesCook Time: 35 minutesTotal Time: 50 minutesIngredientsFilling1 lbs mini potatoes2 5oz cans chunk light tuna in water3 cups kale, chopped1 stalk celery, chopped½ cup frozen peas, thawed Sauce2 cup heavy cream½ cup dill, chopped½ tsp salt½ tsp ground sage½ tsp white pepperPreparation•Select the Steam Conv. mode and set the temperature to 190°C. Press Start/Set to preheat the oven.•Place the potatoes on the metal tray and cookfor 20 minutes.•In the meantime, combine the sauce ingredients in a pot, and reduce for five minutes, stirring frequently. •Once steamed, cut potatoes into quarters and mix with tuna, kale, celery and peas. Place the mixture in an 8x8 casserole dish and pour the sauce evenly over the top.•Select the Convection mode and set the temperature to 190°C to preheat the oven.•Bake for 15 minutes.Yield: 4 Servings Tuna CasseroleThis simple dish is a delicious andhearty combination of tuna, potatoes,kale, celery and peas, drizzled in acreamy dill sauce. The tangy notesand warm filling will make it a perfectaddition to your next summer potluck!Prep Time: 10 minutes Cook Time: 15 minutes Total Time: 25 minutesPreparationIngredients6 portobello mushroom caps 1 tbsp olive oil Salt and pepper¾ cup soft herbed spreadable cheese 2 tbsp melted butter ¼ cup panko¼ cup parsley, finely chopped 12 cherry tomatoes, sliced in half•Select the Convection mode and set thetemperature to 190°C. Press Start/Set to preheat the oven. •Clean the mushroom caps, remove the stem and place caps on a wire rack ontop of the metal tray facing up. Drizzle with olive oil and salt and pepper. Evenly divide the cheese between the caps.•In a small bowl, combine melted butter, bread crumbs and parsley. Sprinkle on top of the cheese. Place a few halved tomatoes on top. •Place on the lower level of the oven and bake for 15 minutes or until the bread crumbs are goldenand the mushrooms have softened.Yield: 6 MushroomsStuffed Portobello MushroomsWhether you serve it as a steak side or enjoy it as a vegetarian main, these Stuffed Portobello Mushrooms are a savoury experience. This dish isbrimming with luscious flavour, topped with a crunchy exterior of golden panko crumbs and juicy halved tomatoes with a layer of melted cheese.Prep Time: 15 minutesCook Time: 1 hour and 25 minutesTotal Time: 1 hour and 40 minutesIngredients2 russet potatoes4 strips of bacon, sliced ¼ inch thick½ block cream cheese¼ cup chives, choppedSalt and pepper½ cup shredded cheddarOptional garnish: sour cream, chopped chives and bacon bitsPreparation•Select the Convection mode and set the temperature to 190°C. Press Start/Set to preheat the oven.•Pierce potatoes a few times with a fork and then wrap in foil. Place them on a baking sheet and bake for 1 hour 15 minutes, or until fork tender.•In the meantime, preheat a frying pan on medium high, and cook the bacon. In a bowl, combine cream cheese, chives, bacon and salt and pepper. •When the potatoes are ready, unwrap them carefully as they will be very hot. Cut them in half, scoop out⅔ cup of potato from each side, keeping the skin whole. Add the potato to the cream cheese mixture and mash until combined.•Divide the mixture in between the four potato skins and sprinkle with cheese. Bake for an extra 10 minutes or until the cheese is melted and golden. •Garnish if required and serve immediately.Yield: 4 Halved Potatoes Loaded PotatoesA fluffy bed of creamy baked potatomash covered in a blanket of meltedcheese, sizzling bacon and sprinkledchive can only mean one thing: loadedpotatoes. Try out this classic stuffedtwice-baked potato recipe for afoolproof side dish that never failsto please.Prep Time: 10 minutesCook Time: 24 minutesTotal Time: 34 minutesIngredients1 cup all-purpose flour2 tsp paprika1 tsp black pepper2 tsp garlic powder2 tsp cumin2 tsp salt1 tsp baking powder1 head cauliflower, cut into bite size florets1 tbsp vegetable oil4 tbsp milk of choice½ cup butter1 cup hot sauceOptional garnish: serve with fresh cut vegetables and your choice of dipping saucePreparation•Select the Auto Cook Setting #14 “Teriyaki Chicken Wings” 2 levels for 24 minutes.•In a medium bowl, mix all the dry ingredients together.•Completely coat the cauliflower florets with the oil and toss them in the flour mixture until well coated. Add 4 tbsp of milk and mix well. •Place the cauliflower bites on the two parchment lined metal trays and cook for 14 minutes.•In the meantime, melt the butter and combine with the hot sauce. Brush onto the cauliflower bites and return to the oven for 10 minutes.•Serve with vegetables and your favouritedipping sauce.Yield: 4 Servings CauliflowerBuffalo WingsHands down, these Cauliflower BuffaloWings are a wing night game-changer.Addictively crispy on the outside, tenderon the inside and loaded with flavour-packed spiciness, this recipe will besavoured by all.Prep Time: 10 minutesCook Time: 12 minutesTotal Time: 22 minutesIngredients1 lbs shrimp, thawed½ cup flour1 egg½ cup coconut milk2 limes, zest and juice1½ cup unsweetened coconut flakes1 tsp ground gingerCooking sprayOptional garnish: lime, fresh herbs and cocktail saucePreparation•Select the Auto Cook Setting #10 “Fried Shrimp with Bread Crumbs” 1 level for 12 minutes. (remove with 4 minutes left on the timer). •Butterfly the shrimp: cut halfway through the back, stopping at the tail, so they’re able to stand tail up. Pat dry with paper towel.•In a shallow bowl, mix flour, egg, coconut milk, lime zest and juice to form a smooth batter.•On a plate, combine coconut flakes andground ginger.•Dip the shrimps in the batter followed by thecoconut flake mixture. Place on the baking traytail up.•Spray with cooking spray and cook for 12 minutes.•Garnish if required.Yield: 4 ServingsCoconut ShrimpAdd this tropical-inspired dish to your dinner entourage with this flavourful sweet blend of crispy coconut flakes and juicy shrimp.Prep Time: 30 minutes Cook Time: 1 hourTotal Time: 1 hour 30 minutesPreparation•In a medium bowl, combine the sauce ingredients and transfer to an 8x8 baking dish. Place chicken breast in the dish, making sure they are submerged in the sauce. •Steam for 25 minutes and once cooled slightly, shred the chicken. •Select the Convection mode and set the temperature to 190°C to preheat the oven.•Put back the shredded chicken in the oven and bake for another 25 minutes, until the sauce caramelizes.•In the meantime, procced to pickling the jalapenos. Combine all the pickling ingredients in a pot and bring to a boil. Remove from heat and add in the sliced jalapenos and allow to cool. •On a metal tray, place a layer of ½ chips, ½ the cheese, tomatoes and onions as well as half the chicken. Repeat with next layer and then sprinkle with pickled jalapenos. •Bake for 10 minutes and serve with guacamole, sour cream and cilantro if required.Yield: 8 ServingsIngredientsBBQ Shredded Chicken1 cup ketchup ¼ cup apple sauce1 tbsp apple cider vinegar 1 tsp garlic powder ½ tsp black pepper ½ tsp salt1/8 tsp ground cloves ¼ tsp cinnamon 1 tsp ground ginger 1 tbsp smoked paprika ½ tsp dried thyme ½ cup water2 chicken breastsPickled Jalapenos½ cup white vinegar ½ cup water2 cloves garlic, smashed 1 tbsp sugar 1 tsp salt3 jalapenos, sliced1 350g bag of nacho chips1½ cup shredded cheddar cheese 2 tomatoes, diced ½ red onion, diced ½ cup cilantroOptional garnish : fresh cilantroTip: You never know when the big game might go into overtime. Be sure to make a little extra Barbeque Chicken and keep a few buns handy, to enjoy as a delicious Pulled Chicken sandwich.Nachos with Shredded Barbecue ChickenFact: Not all nachos are created equal. You’ll agree after you reach into this pile of tortilla chips loaded with mouth-watering layers of shredded chicken drenched in homemade BBQ sauce, melted cheese and pickled jalapenos.Prep Time: 20 minutes Cook Time: 46 minutesTotal Time: 1 hour and 6 minutesPreparation•In a medium bowl, mix 1¼ cup flour, instant yeast, sugar, salt, garlic, and Italian herbs. Add water and 2 tbsp oil then mix with a wooden spoon until well combined. Add the flour slowly and use your hands to knead the flour into the dough until it forms a ball. •Grease a large bowl with 1 tbsp olive oil and place your dough in the bowl, making sure it is well coated in oil. Cover with plastic wrap. Place in the oven, select Auto Menu No.18, press Start/Set to ferment and let rise for 30 minutes or until doublein size. When oven beeps, remove the dough and press Start/Set to preheat.•Punch the dough and flatten it on a greased metal tray. Poke with a fork. Spoon pizza sauce all over, then layer with cheese, baby spinach, prosciutto and goat cheese. Drizzle with honey. •Place pizza in the oven and press Start/Set to bake for 14-16 minutes. •Serve immediately!Yield: 4 ServingsIngredients Dough2 - 2 ½ cups all-purpose flour, divided 1 pack instant yeast 1½ tbsp sugar ¾ tsp salt2 garlic cloves, minced ½ tsp dry Italian herbs 4 tbsp olive oil, divided ¾ cup warm waterToppings½ cup pizza sauce½ cup shredded mozzarella cheese ½ cup baby spinach3 slices prosciutto, halved ¼ cup goat cheese 2 tbsp honeyTip: If pizza night has you craving for something with a thin crust, divide the dough into two portions and double therequired toppings. Bake for 14-16 minutes.Detroit Style PizzaRenowned for its rectangular shape and signature thick crust, the Detroit Style Pizza offers the perfect landscape for those who want a little more out of their pizza. Take full advantage with this goat cheese and prosciutto with honey drizzle recipe.Prep Time: 30 minutes Cook Time: 40 minutesTotal Time: 1 hour and 10 minutesPreparation•In a medium bowl, combine ground pork, sesame oil,chili-garlic sauce, rice vinegar, soy sauce, kosher salt, black pepper and chives. •Open package of dumpling wrappers and remove one. Cover remaining wrappers with a damp kitchen towel while you fill one at a time. •Dampen inside edge of wrapper and place 2 teaspoons of filling in centre. Fold over the wrapper and pinch sides together,sealing the dumpling. Place on an oiled tray and repeat until all wrappers are filled. •Select the Auto Cook Setting #3 “Steamed Chinese Buns”. Select 2 levels and select Start/Set . Place both trays of dumplings into oven and start the cook timer. •Meanwhile, in a small bowl, whisk together the dipping sauce ingredients until well combined. •Once cooking is complete, remove from oven, garnish andserve immediately.Yield: 24 DumplingsIngredients Filling½ lb ground pork ¼ tsp sesame oil½ tsp Vietnamese chilli-garlic sauce 1½ tsp rice vinegar 2 tsp soy sauce ½ tsp kosher salt pinch black pepper3 tbsp chives, finely chopped 24 round dumpling wrappers vegetable oil for greasing trayDipping sauce6 tbsp rice vinegar 2 tsp soy sauce 3 tsp honey1 tsp fresh ginger, grated2 tsp chives, finely choppedOptional garnish: chopped chives and curly onionsPork DumplingsFeel free to use any shape of dumpling wrapper for this super easy dish. With a bit of prep, you’ll soon be able to enjoy this heap of delicious flavours.Prep Time: 15 minutes Cook Time: 25 minutes Total Time: 40 minutesIngredients1 lbs mussels4 sliced bacon, diced 2 shallots, sliced3 garlic cloves, minced ½ cup parsley, chopped ⅓ cup white winePreparation•Select the Auto Cook Setting #7 “SteamedScallops” for 17 minutes. Ensure the oven water tank is full. •Rinse the mussels well under cold water. Pick them over, pulling off any beards and discarding any mussels that are broken or gaping open.•In an 8inch Dutch oven over medium high heat,cook the bacon for four minutes or until golden coloured. Turn off the heat, mix in the shallots, garlic, parsley and white wine. Add the mussels and stir.•Place in the oven. Press Start/Set . •Serve immediately with garlic bread.Yield: 4 ServingsSteamed Mussels in White WineThis seafood delicacy is a set it and forget it dish that requires only ahandful of simple ingredients. Enjoy this eloquent ensemble of shallots, garlic, parsley and white wine that brighten and balance the delicate seafood flavours, as well as compliment the plump and juicy texture of the mussels.Tip: If any mussels do not open, do not eat them and toss immediately!Flat Interior DesignThe inside of the oven is flat, so it’s easy to clean. Andbecause the heater’s flat, a quick wipe is all it takesto clean the top. No turntable also means there’s lesswashing up for even more trouble-free cleaning.No need to remove turntable No troublesome heater tubeCleaning ProgramsFour built-in automatic cleaning programs handle tedious tasks with a touch of a button.Deodorization (Auto Menu No. 21)This function should be used to treat odors in the oven. Before maintenance(cleaning the oven), please empty the oven and wipe inside. Takes 20 minutes.Cavity Cleaning (Auto Menu No. 22)This function is suitable for cleaning a dirty oven caused by oil. Takes 30 minutes.System Cleaning (Auto Menu No. 23)After using the steam function, this function will make the water pump through thepipe into the drip tray.Citric Acid (Auto Menu No. 24)If “ ” appears in the display window after cooking, you should use citric acid to clean thewater-piping. After using citric acid to clean, rinse with water again. Takes 30 minutes.Panasonic Canada 。

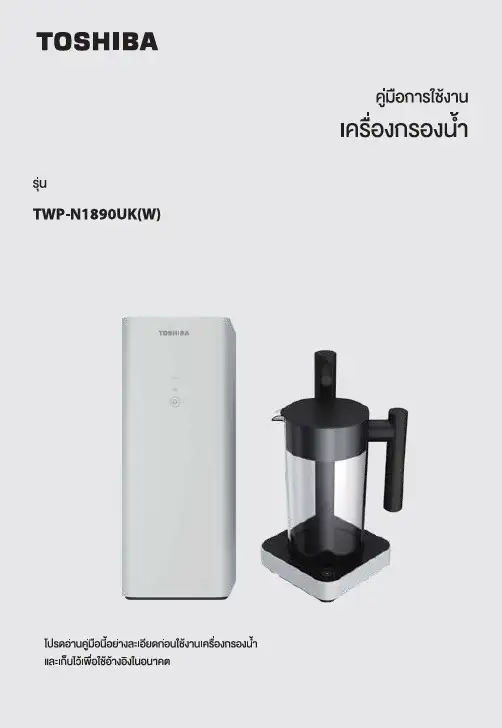
TWP-N1890UK(W)1. Safety Instruction----------------------------------------------------------------------------------------------1 1-1 Safety Instructions----------------------------------------------------------------------------------------1 1-2 Packing List------------------------------------------------------------------------------------------------52. Product Introduction-----------------------------------------------------------------------------------------5 2-1 Name of parts----------------------------------------------------------------------------------------------5 2-2 Operation panel-------------------------------------------------------------------------------------------5 2-3 Water treatment process diagram--------------------------------------------------------------------6 2-4 Electric schematic diagram-----------------------------------------------------------------------------6 2-5 How to use--------------------------------------------------------------------------------------------------73. Cleaning and maintenance--------------------------------------------------------------------------------10 3-1 Trouble shooting ----------------------------------------------------------------------------------------10 3-2 Maintenance steps---------------------------------------------------------------------------------------114.Filter introduction--------------------------------------------------------------------------------------------- 12 4-1 Filter introduction----------------------------------------------------------------------------------------12 4-2 Filter change----------------------------------------------------------------------------------------------135. Technical Parameters-----------------------------------------------------------------------------------------13 5-1 Basic parameter------------------------------------------------------------------------------------------131-1 Safety Instructions2-1 Name of parts1-2 Packing List2-2 Operation panelswitch/indicator for lter life2-4 Electric schematic diagram2-5 How to use2. Take the three-way ball valve out and install1. First, open the three-way ball valve, then-----------------------------------------------------------------------------------------------------------------------------1. Open the three-way ball valve, and then plug1. Close the three-way ball valve, and then unplug the power cord.1. First, open the three-way ball valve and turnproduced at rst. The suggestion is making 3 glasses of water rst, then, in stand-by condition for3-1 Trouble shootinguse water to wash 3-5minutesPlease cut o the water source/power supply anduse water to wash 3-5 minutes. If it did not work,water, after-sales service site will make a reservation and remind you (or you can contact with local after-sales service site) at xed period to have a maintenance for equipment and change of lter .3-2 Maintenance stepslarge-grained substance and organic and residual chlorine .up to 0.0001-0.001 micron. RO membrane lter intercept organics 112-24 months4.4-1 Filter introduction5-1 Basic parameter4-2 Filter change2. First close three-way ball valve, then 0.26 L/min0.4-0.8MPa 0.1-0.4MPa TWP-N1890UK(W)。
松下a1伺服说明书篇一:Panasonic伺服参数设定说明Panasonic(MINAS A系列)伺服參數設定說明:备注: 1、首先设置驱动器的电子齿轮比和需要马达转一圈回授的脉冲数计算方法如下:MSMA0421A通常新代控制器所设精度单位 1um/Pules (可在系统参数17中设所需精度单位)通常新代控制器所设的倍频数是4 倍(可在系统参数81~100中所设轴卡的倍频)计算公式:F= f × (Pr 46 × 2Pr 4A) / Pr 4B = 10000或(217) 注: F —电机转一圈所需的内部指令脉冲数(编码器的分辨率)f —电机转一圈所需指令脉冲数马达转一圈回授的脉冲数= 负载转一圈移动量脉冲数÷控制器内部所设的倍频 4****** ex: ******当螺杆的节距是10mm,马达选用A 型编码器分辨率,采用直传连轴器那齿轮比计算如下:负载转一圈移动量脉冲数 = 10mm÷1um/Pules =104 Pules M / N = 1 / 1F(10000) = f(10000) × { Pr 46 × 2Pr 4A ) ÷Pr 4B 把 Pr 4A = 0 1、Pr 46 = 100002、Pr 4B = 100002、设定上表中的驱动器参数,值为后面的设定值;Pr 4A、Pr 46、Pr 4B为上面公式根据实际情况计算出来的值;Pr 10、Pr 11、Pr 12先(原文来自:小草范文网:松下a1伺服说明书)不修改数值,为出厂值;3、调整机台的刚性,先进行X、Y、Z 轴的来回运动,通过自动整定调谐驱动器参数值,按加1数值增大;通常调节到机台出现震动或有声音后,降回原一级。
注意一点:调完后,需把X、Y、Z的位置增益Pr 10设成一样大;注意:齿轮比设错,编码器会无回授,同时控制器发遗失位置命令、严重追随误差警报。
使用面板设定参数的方式:1、接通驱动器电源;2、按set键按钮;3、按住MODE键按钮,到显示为:“PA_ 00”;4、按上↑、或下↓键按钮,来选择需要设定的数号,如选择10号参数,显示为:“PA_ 10”;5、按set键按钮,进入对应参数值,显示为:“ 50”;6、用左←键、上↑键、下↓键,来修改设定数值;7、修改完后,按set键按钮,确认退出;当修改完所有要修改的参数后,要执行选择EEPROM模式写入,8、按MODE键按钮,到显示为:“EE_ SET”; 9、按set键按钮,到显示为:“EEP -”; 10、按住上↑键按钮约(持续3秒钟),显示转换如下:“EEP -”→“EEP - -”→“- - - - - -”→“START” [→“FINISH”[→“Reset” [→“ERROR”“FINISH”与“Reset”写入完成;“ERROR”写入出错,须重新设定参数,后再写入;显示“Reset”需要关电源,重开电源后,设定参数值生效;常规自动增益调节:1、选择常规自动增益调节模式,初始显示“r0”;2、按SET键按钮一次,按MODE模式键切换,按钮三次,到显示为“At_no 1”;3、按上↑、下↓键来选择机器的刚性,刚性越高越好,但前提条件是机台不抖动;4、按SET键按钮,进入监视器 / 执行模式;显示为:“Atu -”;5、在监视器 / 执行模式上运作:按住上↑键按钮约3秒,直到出现显示“start”,电机开始运转,大约15秒内,电机重复5个周期,包括两圈的正转和反转。
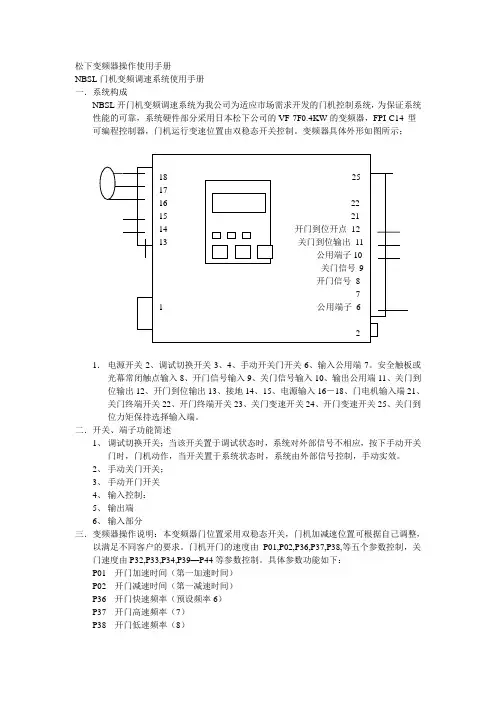
松下变频器操作使用手册NBSL门机变频调速系统使用手册一.系统构成NBSL开门机变频调速系统为我公司为适应市场需求开发的门机控制系统,为保证系统性能的可靠,系统硬件部分采用日本松下公司的VF-7F0.4KW的变频器,FPI-C14 型可编程控制器,门机运行变速位置由双稳态开关控制。
变频器具体外形如图所示;1.电源开关2、调试切换开关3、4、手动开关门开关6、输入公用端7。
安全触板或光幕常闭触点输入8、开门信号输入9、关门信号输入10、输出公用端11、关门到位输出12、开门到位输出13、接地14、15、电源输入16-18、门电机输入端21、关门终端开关22、开门终端开关23、关门变速开关24、开门变速开关25、关门到位力矩保持选择输入端。
二.开关、端子功能简述1、调试切换开关;当该开关置于调试状态时,系统对外部信号不相应,按下手动开关门时,门机动作,当开关置于系统状态时,系统由外部信号控制,手动实效。
2、手动关门开关;3、手动开门开关4、输入控制:5、输出端6、输入部分三.变频器操作说明:本变频器门位置采用双稳态开关,门机加减速位置可根据自己调整,以满足不同客户的要求。
门机开门的速度由P01,P02,P36,P37,P38,等五个参数控制,关门速度由P32,P33,P34,P39—P44等参数控制。
具体参数功能如下:P01---开门加速时间(第一加速时间)P02---开门减速时间(第一减速时间)P36---开门快速频率(预设频率6)P37---开门高速频率(7)P38---开门低速频率(8)P32---关门低速频率(2)P33---关门高速频率(3)P34---关门低速频率(4)P39---关门快速加速时间P40---关门快速减速时间P41---关门高速加速时间P42---关门高速减速时间P43---关门低速加速时间P44---关门低速减速时间注:关门快速频率P32高于高速频率P33时,P42起作用,P41不起作用。

Key features and benefits include:With a Milli-Q ® HX 7040/7080/7120/7150 SD system, you can count on a robust water purification solution that is designed to meet your laboratory’s current and future requirements.Complete, Compact, connected & CustomizableYour Pure Water Solution for up to 3000 L/day2The Milli-Q ® HX 7000 SD series represents a modern range of high-throughput water purification systems. These systems provide a complete, compact, connectedand fully-customizable pure water solution for large laboratories requiring a few hundred to up to 3000 L per day of Type 2 pure water.3• Equipment and instruments including dishwashers, autoclaves, clinical analyzers, heating baths, and environmental and humidity chambers• Taps on benches for general glassware rinsing and buffer and media preparation • Point-of-use polishers and purifications systems to obtain ultrapure waterReliably feed all your pure water needs®DispenserMilli-Q ®IQ 7000Trust in Pure ExperienceFor over 50 years, we have been the partner of choice for water purification systems and services for labscientists who need to assure the quality and reliability of results.We provide a comprehensive range of water purification systems to fit your needs, laboratory space, building configuration, and budget.• Customized solutions • Valuable advice• Comprehensive maintenance • Qualification programs • Budget planning• Remote service capabilitiesFrom conception, design and installation, through to engineering expertise and technical support services, our specialists in pure water solutions can work with you through any project for full peace of mind.PurificationA Complete Pure Water SolutionCover the full spectrum of your pure water needs. Milli-Q® HX 7000 SD systems contain an optimized sequence of state-of-the-art purification technologies, an integrated 140 L storage reservoir and distribution pump, plus remote monitoring and control capabilities.Pretreatment is tailored to yourfeed water quality.• Progard® cartridges remove particles (0.5 μm filter), free chlorine and colloids (activated carbon filter)• Anti-scaling agent protects the RO membrane from hard water• Bactericidal carbon prevents bacterial growth• Backwashing carbon filters and ultrafiltration can be added if high fouling index and/or high chlorine levels Advanced RO & patented E.R.A.® technologies yield constant flow rates while reducing water consumption and associated costs.• Advanced RO (reverse osmosis) removes 95-99% of ions, and 99% of all dissolved organics(MW >200 Da), microorganisms and particles.• E.R.A.® (Evolutive Reject Adjustment) technology takes into account feed water quality (conductivity, temperature, hardness, alkalinity, CO2) to automatically optimize water recovery (between 45% and 75%) and reduce water consumption by up to 50% compared to other RO systems of similar throughput.• Achieve constant flow and waterrecovery rates, regardless of feedwater temperature• Eliminate manual valveadjustments due to temperaturefluctuations• Reduce maintenance time andthe risk of human error• Increase RO cartridge lifetime,reducing consumables waste• Optimize your system’s uptimeand reliabilityOur patented E.R.A.® technology saves you water, time and money. 4® technology purification steps• Our patented Elix ® electrodeionization (EDI) module removes remaining ions to produce constant-quality pure water, regardless of feed water quality (conductivity, CO 2 levels) or RO cartridge performance• The module continuously self-regenerates its ion exchange resins via a small electrical field • Eliminates the need for:–Hazardous chemical regeneration procedures –Replacement of costly resins –Changing DI cartridges –Adding softeners• This reduces maintenance time and ensures low and predictable running costsUV lamps provide full bacterial control.The new Milli-Q ® HX 7000 SD series is designed to maintain the best water quality at each step in the pure water process.• During water production, a built-in 254 nm bactericidal UV lamp inactivates bacteria andreduces the need for frequent system sanitization.• Within the distribution loop, a UV lamp (option) irradiates circulating water before feeding out to instruments and equipment, or returning to the reservoir.As a result, the water’s bacterial count is reduced by a log of 4†, making it well-suited for bacteria-sensitive applications.Elix ® module: Our unique EDI technology is based on anion-permeable and cation-permeable membranes and high-quality ion-exchange resin. Water produced by the Elix ® module enters the reservoir with resistivity greater than 5 MΩ·cm @ 25 °C (typically up to 15 MΩ·cm @ 25 °C)*.*When CO 2 dissolved in feed water is less than 30 ppm.†E.g., In a well-designed and maintained distribution loop, a bacterial count of10,000 cfu/mL is reduced to 1 cfu/mL, irrespective of the system’s nominal flow rate.The Elix ® EDI module produces consistently high-quality pure water with no maintenance and at low and predictable running costs.5Purification6Pure water produced by the Milli-Q ® HX 7000 SD system meets or exceeds water quality levels described by the following organizations:European Pharmacopoeia Purified water United States Pharmacopeia Purified Water Japanese Pharmacopoeia Purified Water Chinese Pharmacopoeia Purified Water ISO ® 3696Grade 2 Water ASTM ® D1193Type II Water JIS K 0557A3 Water Chinese National Standard GB/T 6682Level 2 WaterThe Compliance Report on Milli-Q ®HX 7000 SD Series conformity to industry norms is available upon request.Minimum specifications for different water types*Organics TOC (ppb)< 200< 50< 10Pyrogens EU/mLNA NA < 0.03Particulates Particulates > 0.2 µm (units/mL)NA NA < 1Colloids Silica (ppb)< 1000< 100< 10BacteriaBacteria (cfu/mL)< 1000< 100< 1*These values are provided only as guidelines, as some specific laboratory applications may require a quality superior to the quality indicated by the norms.In an optimalconfiguration that includes an Opticap ® filter, UV lamp and a well-designed and maintained loop,product water from the Milli-Q ® HX 7000 SD system meets or exceeds relevant standards and Pharmacopeia listed above at all points of use.Storage & Distribution 7Integrated ConvenienceMilli-Q ® HX 7000 SD systems are complete with an integrated storage reservoir and distribution pump, for convenient and compact protection and circulation of your pure water.An integrated 140 L reservoir, made of high purity polyethylene, contains numerous critical designfeatures to reliably store and protect your pure water quality.• Vent filters protect again airborne contamination • Differential pressure sensors ensure accurate level sensing and prevent overflow • Hermetically sealed with no overflow to the drain prevents bacterial contamination • Automatic drain function helps with systemmaintenance and to refresh the reservoir water, ensuring high quality water even on low-use days • Sanitary sampling ports and connections provide safe and reliable water sampling and circulation to the accessory panelThe distribution pump provides a flow of up to20 L/min for a loop of up to 50 m long . This enables one Milli-Q ® HX 7000 SD system to reliably supply the pure water needs of a large laboratory or an entire floor of a building.Milli-Q ®HX 7000 SD system with distribution to a large lab or building floor.Q-POD ®dispenserOpticap ® final filtrationUVDishwasher direct feedEDS-Pak ® PolisherEnvironmental analysisBioPak ® PolisherRNase-free water, DNase-free water Buffer and Media Prep (Stem Cells)Millipak ® Filter Units HPLC, UHPLC, LC-MSBuffer and Media Prep (Microbiology)Milli-Q ® HX 7000 SD systemMilli-Q ® IQ 7000 systemAutoclaveLarge display shows waterqualities and distribution processClear, visible status of all consumablesSystem status zoneNotification zone for alertsand alarmsRemote Monitoring & ControlIntuitive OperationA superior communications interface facilitates navigation, data access and control.With its large interactive touchscreen, the system is designed for intuitive operation, with all information needed for daily operation available at a glance. Users can quickly navigate among several views to see data, including:• Production status • Storage levels • Dispensing status • System settings • Consumables status• Preventative alarms and alertsWhat can MyMilli-Q™ Remote Care help you to achieve?• Assure productivity 24/7. Access real-time systeminformation, water quality data and more fromanywhere at any time for 24/7 confidence in yourlab’s performance.• Save time. In the event you need support, yourinteraction with Milli-Q® Services is streamlinedas MyMilli-Q™ Remote Care provides our serviceorganization a secure and direct view of yoursystem information. Our service teams can remotelydiagnose and potentially repair your system, avoidingthe need to wait for a service visit.• Maximize uptime. Receive notification of alertsand alarms allowing you to promptly and remotelymanage your system, either independently or withour remote assistance.• Easier data traceability & accreditation. Auditpreparation and lab accreditation have never beenso effortless as data are automatically saved and canbe easily accessed, searched and retrieved. Chooseto download a standard Quality Report, or to createyour own tailored reports. Connectivity AssuresProductivityDiscover MyMilli-Q™ Remote Care — an online monitoring andservice capability that supports your lab’s maximum productivity.10MyMilli-Q™ Remote Care facilitates data traceability & eases accreditationWater is a reagent whose quality must bedocumented for laboratories seeking accreditation (or reaccreditation) to the ISO ® 15189:2012 standard.To facilitate compliance with worldwide regulatory organization guidelines, Milli-Q ® HX 7000 SDsystems allow for full monitoring capabilities as well as automatic e-record archiving both:• Directly in the system — data are retrievable by USB key or via your lab’s intranet connection.• In the cloud when MyMilli-Q™ Remote Care is activated.E-record archiving supports traceability of all water-related daily operations, measurements and events. It saves time and is less expensive to manage versus paper documentation, as it removes the need for daily checks of the water purification system, hand-recording of parameters in a lab book, and physically archiving years of paper data.With the user-friendly MyMilli-Q™ web interface and MyMilli-Q™ Remote Care service feature, data management is greatly simplified. Yoursystem and water data are readily accessible and rapidly searchable, graphable and reportable — from anywhere at any time.An interactive Event Traceability tool lets you view events by type and over the timeline you specify. View past events (alarms,alerts, consumable replacements,service visits, custom events)and plan for future system maintenance. Click on any event and its details are displayed in the blue banner above the timeline. In this example, a Progard ® cartridge was replaced by J.SMITH on Aug 19, 2019.The system automatically stores a fully traceable—and easily retrievable—record of service history. In addition to archiving data, MyMilli-Q™ online tool lets you streamline contract management. You’ll be able to schedule maintenance visits,manage consumable deliveries and renew your servicecontracts, all online.Water quality parameters (resistivity, temperature,TOC) are graphed over the timeline of your choice andcan be easily downloaded.11Customizable to fit your requirementsThe Milli-Q ® HX 7000 SD series is modular, allowing you to select just the options and accessories you need to meet your specific requirements and to improve water quality monitoring.The resistivity booster may be easily installed on the front of the Milli-Q ® HX 7000 SD system. Our ergonomic and patented pack-locking mechanism allows for rapid replacement when needed.The loop panel with Opticap ® filter and UV lamp, may be wall-mounted or stand-alone.Passion to Drive Your Performance Best-in-class Milli-Q® Services,now supported by MyMilli-Q™ Remote CareAt each stage of your project (conception, design and installation) to everyday use, we offer comprehensive, high quality support services that can be customized to meet your needs.• Before installation, a certified field service engineer analyzes your feed water quality.• During installation, feed water parameters are programmed into system memory to optimize water recovery and maximize system performance.• Throughout system lifetime, apply the Milli-Q®Service Plan that meets your lab’s needs, froma single annual Preventive Maintenance Visit with replacement of aging parts, to full system coverage.• Choose from a range of additional options, including qualification, calibration and verification services, scheduled consumables shipments, and sanitization.Our Milli-Q® certified field service engineers can provide:• Operator training• Technical and maintenance support• Preventive maintenance• Customized services, such as conductivity and temperature meter verification• Assistance to help you successfully performthe Installation Qualification (IQ), Operational Qualification (OQ) and maintenance program within a cGMP and/or GLP environment/milli-qservicesLog into MyMilli-Q TM online solution to streamline the care of your Milli-Q® system fleet:• Track service history & reports• Plan maintenance visits• Manage consumable deliveries• Renew service contracts• Remotely monitor, control & service your system (via the MyMilli-Q™ Remote Care feature, see pages 9-10)1213Technical AppendixMilli-Q ® HX 7000 SD seriesMilli-Q ® HX 7000 SD SeriesPanel Options===MM23334567891010101112141311718192023151621282730313229222124252421252621System DimensionsType 2 Water Purification Systems*Vent filter TANKVNT01: + 48 mmFlow Schematic of Purification Process1. Inlet valve2. Progard ® pretreatment pack3. Conductivity cell4. RO pump5. Pressure sensor6. RO cartridge7. Twin motorized valve - RO recirculation 8. RO circulation loop 9. Temperature sensor 10. Flow sensor11. 3-way automatic rinsing valve 12. Degassing unit (option)13. Elix ® module14. UV lamp (254 nm) 15. Feed by the bottom16. Tank level pressure sensors 17. Vent filter 18. 140 L tank 19. Overflow20. Return to the bottom 21. Valve22. Distribution pump23. UV lamp (254 nm; option)24. Sampling valve 25. Pressure gauge26. Opticap ® filter (0.22 μm; option)27. Automatic loop rinsing valve 28. Spring-loaded check valve 29. TOC monitor (option)30. Resistivity cell (option)31. Temperature cell (option)32. Resistivity booster (option)14Milli-Q ® HX 7000 SD Series PerformanceIn an optimal configuration that includes an Opticap ® filter, UV lamp and a well-designed and maintained loop, product water from the Milli-Q ® HX 7000 SD system meets or exceeds the relevant standards and Pharmacopeia listed on page 6 of this brochure at all points of use.Typical water quality measures with a well-designed and maintained distribution loop of 20 meters:Resistivity (@25 °C)> 1 MΩ.cm 10-15 MΩ.cm > 1 MΩ.cm > 1 MΩ.cm Conductivity (@25 °C)< 1 µS/cm 0.07-0.1 µS/cm < 1 µS/cm < 1 µS/cm Total Organic Carbon (TOC)< 50 ppb < 50 ppb < 50 ppb < 50 ppb Bacteria count --≤ 10 cfu/mL ≤ 1 cfu/mL*Dissolved silica≤ 3 ppb≤ 3 ppb≤ 3 ppb≤ 3 ppb* Sampled after Opticap ® filter.Electrical SpecificationsSystem typeVoltage & frequency Power consumption (VA)Milli-Q ® HX 7040/7080 SD220-240 VAC @ 50/60 Hz 1000120 VAC @ 60 Hz 100 VAC @ 50/60 HzMilli-Q ® HX 7120/7150 SD220-240 VAC @ 50/60 Hz 1500120 VAC @ 60 Hz 100 VAC @ 50/60 HzThe source of electrical power must be earth grounded.General SpecificationsNoise level< 50 dB at 1 meterCommunication protocol TCP/IP/CGI, embedded web server and HTML 5 embedded website*Communication ports Ethernet, USB 2.0LanguagesEnglish, French, Spanish, Portuguese, Italian, German, Russian, Chinese, Japanese* No additional software needed for remote control.System type Make-up flow rate to reservoir*Dry weight Shipping weight Operating weight Milli-Q ® HX 7040 SD 40 L/h (10.6 gal/h)97 kg (214 lb)116 kg (256 lb)247 kg (545 lb)Milli-Q ® HX 7080 SD 80 L/h (21.1 gal/h)106 kg (234 lb)125 kg (276 lb)256 kg (567 lb)Milli-Q ® HX 7120 SD 120 L/h (31.7 gal/h)114 kg (251 lb)133 kg (293 lb)264 kg (582 lb)Milli-Q ® HX 7150 SD150 L/h (39.6 gal/h)126 kg (278 lb)145 kg (320 lb)276 kg (608 lb)* Nominal flow rates ± 10% between 10 and 35 °C. Additional deviation of -3% per °C from 10 °C to 5 °C.Feed Water RequirementsPressure 2 – 6 barFlow rate> 10 L/min at 2 bar Feed water type Potable water Temperature 5 – 35 °CConductivity 10 – 2000 µS/cm at 25 °C pH4 – 10Hardness (as CaCO 3)< 300 ppm Silica concentration< 30 ppm Carbon dioxide concentration (CO 2)< 30 ppm Langelier Saturation Index (LSI)< 0.3Fouling Index (FI 5) or Silt Density Index (SDI)≤ 7(*)Total Organic Carbon (TOC)< 1 ppm Free chlorine for Milli-Q ® HX 7040 (LC), 7080 (LC), 7120, 7150 SD systems < 1.5 ppmFree chlorine for Milli-Q ® HX 7040 (HC), 7080 (HC) SD systems ≥1.5 and < 3 ppm* < 12 when the optional UF pretreatment is installed.15Part numbers (accessories, consumables, options)ZUFPREUN8Installation kit for UF Pretreatment ZLXLPTCAB External Pretreatment-XL system cable ZLXLPTFSWFlow switch for pretreatment unit Storage & DistributionTank SpecificationsMaterialHigh purity polyethylene Built-in reservoir volume (net)140 L (37 gal)Distribution Pump Performance (Centrifugal)5 LPM / 1.32 GPM 2.2 bar / 32 psi 15 LPM / 3.96 GPM 1.9 bar / 28 psi 20 LPM / 5.28 GPM1.6 bar / 23 psiPlumbing ConnectionsInlet (feed water connection)3/4” BSPLoop start/return 1 1/2” Sanitary TC Drains3/8”Merck KGaAFrankfurter Strasse 25064293 Darmstadt, Germany/labwaterFor more information on Milli-Q® HX 7000 SD, please visit: /milli-q-hxsd。
本手册是北京博电新力电气股份有限公司的出版物。
任何形式的复制均需征得北京博电新力电气股份有限公司的同意。
本手册只代表出版时的技术动态。
手册中的产品信息、说明以及所有技术数据均不具有合同约束力。
北京博电新力电气股份有限公司保留随时对技术、配置进行修改而不另行通知的权利。
北京博电新力电气股份有限公司对本手册中可能发生的错误不承担责任。
目录1.产品概述 (5)1.1产品功能和特点 (5)1.2系统配置 (6)1.3面板说明 (7)1.3.1前面板 (7)1.3.2左面板71.3.3右面板 (8)2.技术参数 (9)2.1模拟量指标 (9)2.2数字输入电压 (9)2.3数字输入电流 (9)2.4通信接口 (9)2.5FT3信号参数 (10)2.6同步信号输入参数 (10)2.7同步信号输出参数 (10)2.8安全性能 (10)2.9环境条件与影响量 (10)2.10外壳与防护 (11)2.11机械参数 (11)3.测试软件 (12)3.1概述 (12)3.2程序主界面 (12)3.3工具栏使用说明 (14)3.4参数设置说明 (15)3.5小信号谐波输出功能说明 (20)3.6FT3输出功能说明 (20)4.测试过程说明 (22)4.1PET1000N校验系统框图 (22)4.2接线 (23)4.2.1信号源接线 (23)4.2.2被测互感器接线 (23)附录A装置可能出现的异常现象 (25)附录B互感器误差限值 (26)注意事项1.本仪器为高精度测试仪器,为保证测量精度,装置开机后建议预热10分钟以上再进行测试。
2.该仪器供电电源为交流220V(50Hz,5A),请勿将直流电压或交流380V电源接入到电源输入端,否则可能会造成仪器损坏。
3.外接笔记本电脑测试进行时,笔记本与测试仪通过以太网双绞信号线连接,应保证信号线可靠连接,不要随意拉扯信号线或晃动信号线连接端。
4.仪器配套的联机软件建议运行在Windows XP或Window7操作系统下。
MILLIPORESimplicity (185)个人专用超纯水机中文使用手册厦门莱胜科技有限公司2004年5月 V1.0(以英文原版手册为准)第一章:安装拆箱Simplicity TM系统包括(如附图1):A.纯水主机一套(Simplicity TM),内含3.5公升储水桶一只。
B.英文使用手册一本。
C.排气用(新的Simpak排气用)倒钩式连接头一只D.Simpak纯化管柱一组。
E.储水桶空气过滤器一只。
F.终端过滤器(POU)Simfilter一只。
安装储水桶(如附图2)A.将储水桶装水1.将储水桶上方的安全把手(locking handle)拉起到垂直位置(A)2.以安全把手将储水桶(B)提起3.以逆时针方向旋转1/4圈,打开储水桶上方的盖子(C)4.将储水桶装满经处理过的水(如:蒸馏水、去离子水、R O水或E l i x TM水)后,重新安装回主机,并且确认已将安全把手放回原来的位置(水平位置)B.安装排气过滤器1. 在储水桶盖子内安装储水桶专用的排气过滤器(D)2. 以顺时针方向旋转1/4圈,将盖子关紧安装纯化管柱—Sim P ak(如附图3)1.按住locking tab键(A)向左方打开纯化管柱的locking handle2.将Simplicity TM主机上连接纯化管柱连接头上的2个保护盖(B)拔除3.再将Sim P ak纯化管柱上的2个保护盖(C)拔除,用几滴水润湿管柱接头上的O型圈4.把Sim P ak管柱推入使装载至主机上(D)5.确定纯化管柱的locking handle已卡紧,并就定位(E)。
纯化管柱的locking handle应该很容易扣上。
如果你必须施力才能推紧的话,这表示Sim P ak未完全就位。
Pak排气1.将连接头(如附图1、C)安装至POU(终端取水处)阀上(注:POU阀内含有O型环作为密封用,因此,请勿使用铁弗龙带缠绕在连接头的螺纹上。
)2.在出水口的下方放置容器3.将Simplicity TM给水阀门转钮扳下,打开阀门4.按下OPERATE键,使STANDBY模式切换至OPERATE模式5.当系统做出1-2公升的水后,再将阀门关闭6.若有可能,将系统留在STANDBY模式使经过一整夜的时间。
中文说明:商品简介:1.采用塑料外壳,机体小巧,自来水通过本机电解槽电解,将水变成可以直接喝对身体有益的碱性水和可用来杀菌消毒的酸性水.分别分为高/中/低三个档位.3、数码显示滤芯更换提示,饮用水音乐提示。
4、吸盘式固定安装,只需连接家中水龙头,直接放在橱柜台面即可,操作简单。
5、采用铂钛合金电解槽,使用寿命长,约可持续电解850小时(按照每日使用15升算10年以上)。
松下制造电解水机已有10多年历史,质量可靠。
6、采用中空纤维加载银活性炭组合滤芯,多级强力净化、水质净化更好、口感更好、产品质量好、信誉高。
7、滤芯更换周期:约2年。
(国内部分地区水质较差,水里沉淀物多,此情况需在机器入水口前再多加一道过滤装置,减轻机器滤芯的负担,让滤芯达到最大寿命)。
8、出水量: 2.0升/分9、进水压力:0.1~0.35Mpa。
10、适用家庭饮水、煮饭、煲汤和小型办公室的饮水。
外观时尚脱俗,设计小巧精致,厚度只有 8.4cm。
是您厨房的精美装饰品!1.可以选择5种不同的水质2.可以使用“连续模式”达到节水效果3.JIS日本工业标准规格认定的优秀的净水性能,高性能滤芯可以除去水中的13种物质:?亚硫酸?泥垢?石油碳氢化合物(Trihalomethane)?哥罗酚(chloroform)?挥发性卤化物BROMODICHLOROMETHANE?水中总三卤甲烷Dibromochloromethane?三溴甲烷Bromoform?四氯乙烯tetrachloroethylene?三氯乙烯trichloroethylene?二氯二苯三氯乙烷trichloroethane又名DDT ? CAT(农药.)?水中土霉味物质?溶解性铅规格电解离子水小知识:碱性水质可以中和体酸含极高之氢氧离子及钙离子,可以将过多的氧还原成水,减少自由基的伤害。
碱性带负电,可以平衡酸化中的正电,以达电位安定的效果。
酸性 3:清洁、洗涤煮汤、去除蔬菜涩味等酸性 5.5:洗脸、收敛 PH5.5弱酸性水,能给细嫩的肌肤最好的呵护。