意大利CLLIO音频测试系统
- 格式:doc
- 大小:729.50 KB
- 文档页数:14
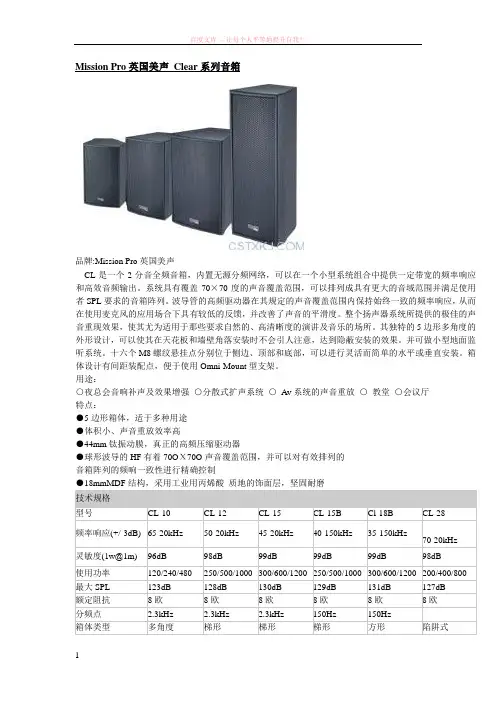
Mission Pro英国美声Clear系列音箱品牌:Mission Pro英国美声CL是一个2分音全频音箱,内置无源分频网络,可以在一个小型系统组合中提供一定带宽的频率响应和高效音频输出。
系统具有覆盖70×70度的声音覆盖范围,可以排列成具有更大的音域范围并满足使用者SPL要求的音箱阵列。
波导管的高频驱动器在其规定的声音覆盖范围内保持始终一致的频率响应,从而在使用麦克风的应用场合下具有较低的反馈,并改善了声音的平滑度。
整个扬声器系统所提供的极佳的声音重现效果,使其尤为适用于那些要求自然的、高清晰度的演讲及音乐的场所。
其独特的5边形多角度的外形设计,可以使其在天花板和墙壁角落安装时不会引人注意,达到隐蔽安装的效果。
并可做小型地面监听系统。
十六个M8螺纹悬挂点分别位于侧边、顶部和底部,可以进行灵活而简单的水平或垂直安装。
箱体设计有间距装配点,便于使用Omni-Mount型支架。
用途:○夜总会音响补声及效果增强○分散式扩声系统○Av系统的声音重放○教堂○会议厅特点:●5边形箱体,适于多种用途●体积小、声音重放效率高●44mm钛振动膜,真正的高频压缩驱动器●球形波导的HF有着70OΧ70O声音覆盖范围,并可以对有效排列的音箱阵列的频响一致性进行精确控制●18mmMDF结构,采用工业用丙烯酸质地的饰面层,坚固耐磨技术规格型号CL-10 CL-12 CL-15 CL-15B Cl-18B CL-28频率响应(+/-3dB) 65-20kHz 50-20kHz 45-20kHz 40-150kHz 35-150kHz70-20kHz灵敏度(1w@1m) 96dB 98dB 99dB 99dB 99dB 98dB使用功率120/240/480 250/500/1000 300/600/1200 250/500/1000 300/600/1200 200/400/800 最大SPL 123dB 128dB 130dB 129dB 131dB 127dB额定阻抗8欧8欧8欧8欧8欧8欧分频点 2.3kHz 2.3kHz 2.3kHz 150Hz 150Hz -箱体类型多角度梯形梯形梯形方形陷阱式饰面颜色黑色白色工业用丙烯酸涂料黑色和白色黑色和白色黑色和白色黑色白色工业用丙烯酸涂料黑色白色工业用丙烯酸涂料装配点及数量M8X16 M8X16 M8X16 M8X12 M8X12 M8X16接头SpeakonTMX2及带防护罩的接线端子SpeakonTMX2及阻抗带SpeakonTMX2及阻抗带SpeakonTMX2及阻抗带SpeakonTMX2及阻抗带SpeakonTMX2及阻抗带尺寸HXWXD(英寸)20x13.5x13 22.5x15x13 25x18x15.5 25x18x15.5 27.5x21x20 26.5x11.5x11 重量15.3kgs/33.5lbs 19.5kgs/43lbs 26.8kgs/59lbs 27.8kgs/61lbs 43kgs/95lbs 18.3kgs/40lbsMISSION PRO功率放大器●MISSION PRO公司积累了多年的专业功放和电子产品设计和生产经验,M系列功放更是MISSION PRO电子设备中的一颗璀璨明珠。
喀呖声测试标准
喀呖声(Click)测试是一种用于评估电子设备音频噪声的测试方法,通常用于音频设备、耳机、扬声器等产品的质量检测。
以下是一些常见的喀呖声测试标准:
1. IEC 60268-2:这是国际电工委员会(IEC)制定的音频设备测试标准,其中包含了喀呖声测试的要求。
该标准规定了测试信号、测试条件和测试方法,以评估音频设备在不同频率范围内的喀呖声水平。
2. ANSI/CTA-2034:这是美国国家标准协会(ANSI)和消费技术协会(CTA)共同制定的标准,适用于电视、音频设备和其他消费电子产品的喀呖声测试。
该标准规定了测试信号、测试条件和测试方法,以评估设备在不同音频频率下的喀呖声水平。
3. ITU-R BS.1770:这是国际电信联盟(ITU)制定的音频质量评估标准,其中包含了喀呖声测试的要求。
该标准提供了一种客观的方法来测量和评估音频信号中的喀呖声水平。
这些标准通常涵盖了测试信号的生成、测试设备的要求、测试环境的条件以及测试结果的报告和评估方法等方面。
通过遵循这些标准进行喀呖声测试,可以确保测试结果的准确性和可重复性,有助于评估音频设备的噪声水平和质量。
具体的喀呖声测试标准可能会因产品类型、应
用领域和地区而有所差异,因此在进行喀呖声测试时,应根据适用的标准进行选择和应用。
CLIO电声测试仪以异乎寻常的经济价位建立了电声测试系统价格性能的新标准,其兼容了目前电声测试系统所采用的MLS&Logchirp分析、Sinusoidal扫描、FFT等多达12项功能于一身,简易友好的操作界面,以及快捷的测量数据与图形导入导出功能,是满足您当前和今后声频测试需要、性能优良、适用面广的电声测试仪。
CLIO测量模式简介:MLS &Logchirp分析、Sinusoidal扫描、FFT三种不同测量方法,从三种不同的角度来显示频率响应、阻抗或其它参数等物理现象。
三种测量结果的一致性,满足所有专家技师的喜好。
其它扩展测量功能:声压电平表符合IEC61672标准线性和失真电子设备非线性失真测试交互式L-C-R电桥元器件测量抖摆表时间和频率测量频率计数器最长序列码伪随机噪音与对数啁啾声激励信号MLS & LogChirp analysis正弦扫描信号Sinusoidal Sweeps快速傅里叶FFT、实时分析RTA和“Live” 传递功能强大并精确的后处理工具:Thiele & Small参数扬声器特性ISO3382声学参数厅堂声学特性指向性分析扬声器指向性彩色扩散图、极图或3D曲线图显示瀑布图声衰减3D和彩图显示测试界面展示MLS&LOGCHIRP分析瀑布图指向性快速傅里叶&实时频谱分析正弦波分析线性与失真抖晃分析多用表喇叭T&S参数多频信号发生器平均噪声功率分析硬件PB-4281介面卡和SC-01信号分析器组成高精密的双通道A/D D/A音频分析器和您的电脑联接。
PB-4281介面卡是标准的PCI插卡,安装到您的电脑组成精密的18比特数字信号分析仪。
SC-02信号分析器供电与软件控制由USB实行,通过音频介面轻松实现宽广的输出衰减和输入增益,输入和输出环路功能可利用内部极端稳定的电压参考点,实现简单和精密的校正。
双通道不平衡输入能够转换为单声道平衡输入。
可程控幻像供电可以直接接驳Audiomatica MIC-01、MIC-02或MIC-03与SC-02的输入端。
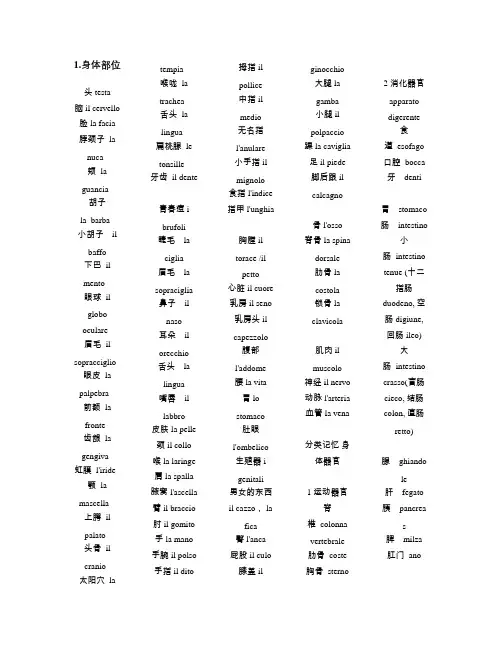
1.身体部位头 testa脑 il cervello 脸 la facia 脖颈子 lanuca颊 la guancia胡子la barba 小胡子ilbaffo下巴 ilmento眼球 ilglobo oculare眉毛 il sopracciglio眼皮 la palpebra前额 lafronte齿龈 la gengiva 虹膜 l'iride颚 la mascella上腭 ilpalato头骨 ilcranio太阳穴 latempia喉咙 latrachea舌头 lalingua扁桃腺 letonsille牙齿 il dente青春痘ibrufoli睫毛---laciglia眉毛---lasopraciglia鼻子---ilnaso耳朵---ilorecchio舌头---lalingua嘴唇---illabbro皮肤 la pelle颈 il collo喉 la laringe肩 la spalla腋窝 l'ascella臂 il braccio肘 il gomito手 la mano手腕 il polso手指 il dito拇指 ilpollice中指 ilmedio无名指l'anulare小手指 ilmignolo食指 l'indice指甲 l'unghia胸膛 iltorace /ilpetto心脏 il cuore乳房 il seno乳房头 ilcapezzolo腹部l'addome腰 la vita胃 lostomaco肚眼l'ombelico生殖器 igenitali男女的东西il cazzo, lafica臀 l'anca屁股 il culo膝盖 ilginocchio大腿 lagamba小腿 ilpolpaccio踝 la caviglia足 il piede脚后跟 ilcalcagno骨 l'osso脊骨 la spinadorsale肋骨 lacostola锁骨 laclavicola肌肉 ilmuscolo神经 il nervo动脉 l'arteria血管 la vena分类记忆身体器官1 运动器官脊椎 colonnavertebrale肋骨 coste胸骨 sterno2 消化器官apparatodigerente食道 esofago口腔 bocca牙 denti胃 stomaco肠 intestino小肠 intestinotenue (十二指肠duodeno, 空肠 digiune,回肠 ileo)大肠 intestinocrasso(盲肠cieco, 结肠colon, 直肠retto)腺 ghiandole肝 fegato胰 pancreas脾 milza肛门 ano3 呼吸系统apparato respiratorio 咽 faringe 喉 laringe 声带 cordevocali气管 trachea支气管 bronchi 肺 polmoni4 循环系统 apparato circolatorio 心脏 cuore 动脉 arteria 静脉 vena5 泌尿生殖系统apparato uro-genitale睾丸 testicolo副睾 epididimo阴囊 scroto卵巢 ovaie子宫 utero阴道 vagina阴户 vulva肾 rene膀胱 vescica尿道 uretra (尿urina)7 内分泌系统sistemaendocrino脑下垂体 ipofisi甲状腺 tiroide副甲状腺 paratiroidi肾上腺 ghiandole surrenali2.人的心理活动高兴的---contento(相近于英文happy)allegro(相近于英文cheerful)felice(相近于英文glad)难过的---triste生气的---arrabbiato愤怒的---irritato担忧的---preoccupato冷静的---tranquillo紧张的---nervoso放松的---rilassato兴奋的---eccitato着迷的---ossenssionato, fissato同情---simpatizzare喜欢---piacere讨厌---detestare可爱的---bello,piacevole可怜的---deplorabile害怕的---temere惊讶的---sorpreso尴尬的---imbarazzato满意的---soddisfato希望---sperare失望的---deluso,rattristato绝望的---disparato谦虚的---modesto骄傲的(贬)---fiero(褒)---orgoglioso友好的---amichevole热情好客的---ospitale劳累的,厌烦的---stanco认真的,严肃的,郑重的---serio认真的,仔细的---scrupoloso乐于助人的---servizievole感人的---commovente感动的---emozionato感激的,感谢的---grato感激---apprezzare怀旧的---nostalgia(觉得)无聊---annoiato(东西,事情)无聊---noioso3.表示家庭成员的词汇祖父nonno 爷爷nonnopaterno 外公 nonnomaterno祖母nonna 奶奶nonnapaterna 外婆nonnamaterna父亲padre 岳父suocero母亲madre 岳母suocera 叔叔 zio 阿姨 zia儿子figlio 女儿figlia堂/表兄弟 ilcugino兄弟fratello 小弟弟fratellino 弟弟 fratello minore 哥哥fratello maggiore / fratellone 堂/表姐妹 la cugina姐妹sorella 姐姐sorella maggiore 妹妹 sorella minore 小妹妹 sorellina 嫂子弟媳姑子姨子la cognata侄子 nipote小侄子nipotino妻子moglie 新娘sposa 夫人signora丈夫marito 新郎sposo爱人(可以叫小孩,也可以叫配偶、男(女)朋友)amore女婿 ilgenero孙子nipotino孙女nipotina亲戚 iparenti配偶il/lacompagno/a父母 Igenitori 继父 ilpadrigno 继母 lamadrigna孩子bambino 继子 ilfigliastro 继女 lafigliasra双胞胎 igemelli世代 lagenerazione5.人生大事---Gliavvenimentedella vitanascire---出生iniziare lascuola---上学fareamicizia---交友laurearsi---毕业trovare unlavoro---就业innamorarsi----恋爱sposarsi---结婚avere unbambino---生子ilmatrimonio---婚礼ilricevimento--婚礼il viaggio dinozze(laluna dimiele )蜜月andare inpensione---退休faretestamento--立遗嘱il divorzio---离婚il funerale---葬礼6.时间l'oral'una 一点钟le due 二点钟le tre 三点钟lequattro 四点钟lecinque 五点钟le sei 六点钟le sette 七点钟le otto 八点钟le nove 九点钟le dieci 十点钟le undici 十一点钟le dodici 十二点钟le cinque ecinque 五点零五分le tre edieci 三点十分le sei e unquarto 六点一刻le due e venti 二点二十分le sette e venticinque 七点二十五分le otto e mezza八点半le due meno venti 二点少20分(一点四十分)le dieci menoun quarto 十点少一刻(九点四十五分)le undicimeno dieci 十一点少十分(十点五十分)le dodicimeno cinque 十二点少五分(十一点五十五分)le otto ecinque 八点零五分le nove edieci 九点十分le quartto eunquarto 四点一刻le dieci eventi 十点二十分le dodici eventicinque十二点二十五分le cinque emezza 五点半le dodicimenoventi 十二点少二十分(十一点四十分)le otto menounquarto 八点少一刻(七点三刻)l'una menodieci 一点少十分(十二点五十分)le sette menocinque 七点少五分(六点五十五分)l'una e unquarto一点一刻le due emezza二点半le quattromeno unquarto 四点少一刻(三点三刻)le quattro eventi四点二十分Non primadelle nove 不早于上午九点Dopo le ottodi sera 晚八点以后Tra le tre e lequattro 在三点和四点之间Per quantotempo 多长时间Per due ore两个小时Dale diecialle undici 从十一点到十二点Fino allecinque 直到五点Da quando?从什么时候起Dale otto delmattino 从上午八点钟起Da mezz’ora已经半个小时了Versomezzogiorno将近中午Stamattina/stasera 今天上午/晚上Domattina/domain sera明天早晨/晚上La mattina(在)早晨il pomeriggio(在)下午。
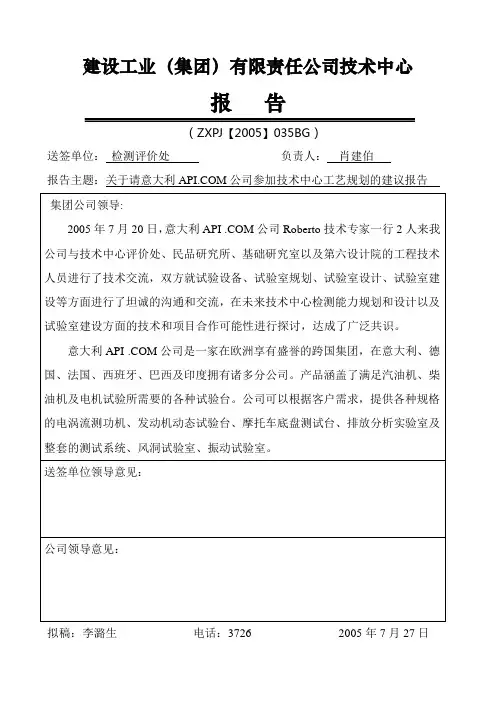
建设工业(集团)有限责任公司技术中心报告(ZXPJ【2005】035BG)送签单位:检测评价处负责人:肖建伯报告主题:关于请意大利公司参加技术中心工艺规划的建议报告拟稿:李潞生电话:3726 2005年7月27日该公司的服务范围包括设备制造、维护保养、试验室功能咨询、规划设计和项目建设、试验设备的安装调试,一直到试验室及外围设备的试运转、正式使用等全过程。
实现方式包括项目合作或交钥匙工程均可。
20多年来该公司与世界上许多知名企业进行了卓有成效的合作,汽车行业有奔驰、宝马、大众、依维柯、标致、菲来达、现代、马自达、三菱、五十铃等,摩托车行业有YAMAHA、HONDA、SUZUKI 等企业,还为德国等多个欧洲标准认证中心规划设计和建设了试验室。
并完成300多台设备的交货记录,同时能为用户提供全套项目定制化的解决方案。
在技术交流中,该公司对我公司技术中心检测中心建设规划提出了修订建议如下:1、检测中心试验大楼二层可作为通风管道的工艺层,但原天津摩托车技术中心规划的三四层不能再建,试验区域与办公区域必须分开,以避免干扰;2、建议我们一定要按本企业产品发展需求建立以研发为主、有自己特色的检测中心,具有国际竞争力的技术中心。
我们认为,天津摩托车技术中心指导着国内摩托车行业的发展,曾经为国内多家摩托车企业规划设计并建设了检测中心,代表了国内的先进水平。
但与国际接轨还远远不够,意大利API .COM公司代表了国际一流水平,我们需要以国际一流水平作为标杆来规划新的迁建技术中心的检测中心。
因此,我们建议与意大利APICOM公司合作开展技术中心的规划项目,缩短我们与国际水平的差距,在前期工艺评审讨论时请意大利APICOM公司参与,并据此确定进一步合作的可行性。

耳机测试仪,受话器测试,降噪耳机测试仪,手机音效测试仪,麦克风测试仪,
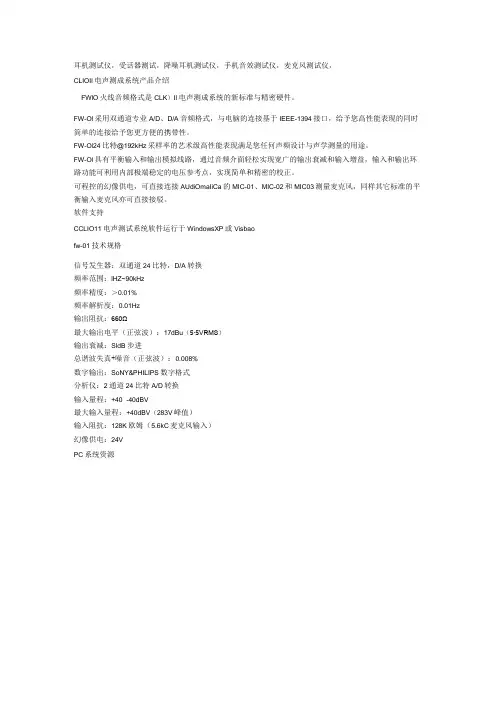
CLIOIl电声测成系统产品介绍
FWlO火线音频格式是CLK)Il电声测成系统的新标准与精密硬件。
FW-Ol采用双通道专业A/D、D/A音频格式,与电脑的连接基于IEEE-1394接口,给予您高性能表现的同时简单的连接给予您更方便的携带性。
FW-Ol24比特@192kHz采样率的艺术级高性能表现满足您任何声频设计与声学测量的用途。
FW-Ol具有平衡输入和输出模拟线路,通过音频介面轻松实现宽广的输出衰减和输入增益,输入和输出环路功能可利用内部极端稳定的电压参考点,实现简单和精密的校正。
可程控的幻像供电,可直接连接AUdiOmaIiCa的MIC-01、MIC-02和MIC03测量麦克风,同样其它标准的平衡输入麦克风亦可直接接驳。
软件支持
CCLIO11电声测试系统软件运行于WindowsXP或Visbao
fw-01技术规格
信号发生器:双通道24比特,D/A转换
频率范围:lHZ~90kHz
频率精度:>0.01%
频率解析度:0.01Hz
输出阻抗:660Ω
最大输出电平(正弦波):17dBu(5∙5VRMS)
输出衰减:SldB步进
总谐波失真+噪音(正弦波):0.008%
数字输出:SoNY&PHILIPS数字格式
分析仪:2通道24比特A/D转换
输入量程:+40÷-40dBV
最大输入量程:+40dBV(283V峰值)
输入阻抗:128K欧姆(5.6kC麦克风输入)
幻像供电:24V
PC系统资源。
CEL-63x 环境噪声测试仪HB3336-01用户手册CASELLA MEASUREMENTRegent House,Wolseley Road,Kempston,Bedford,MK42 7JY,英国。
电话: +44 (0) 1234 844 100传真: +44 (0) 1234 841 490电子邮件:*******************网站:目录目录 (2)1介绍 (2)1.1本用户手册的结构 (4)1.2安全 (6)2性能 (8)3快速参考 (9)3.1打开仪器电源 (9)3.2使用控制键 (11)3.3设置时间和日期 (12)3.4校准仪器 (12)3.5运行仪器 (15)4详细说明 (23)4.1麦克风和前置放大器 (23)4.2用户控制键 (23)4.3屏幕组 (24)4.4测量视图 (45)4.5连接 (52)5技术规格 (54)5.1一般 (54)5.2标准 (54)5.3测量范围 (55)5.4RMS 频率加权 (55)5.5倍频和 1/3 倍频测量 (55)5.6峰值测量 (55)5.7RMS 检测器 (55)5.8背景噪音 (55)5.9频率响应 (55)5.10时间加权性 (55)5.11校正过滤器 (56)5.12参考方向 (56)5.13参考环境条件 (56)5.14工作环境条件 (56)5.15温度影响 (56)5.16湿度影响 (56)5.17储藏环境条件 (56)5.18麦克风 (57)5.19校准 (57)5.20电源 (57)5.21内部时钟 (57)5.22语言 (57)5.23电磁兼容性 (58)5.24交流电源射频场影响 (58)5.25三角架的安装 (58)5.26显示器 (58)5.27内存 (58)5.28连接性 (58)5.29可用数据组 (59)5.30物理特性 (62)6保养和维护 (63)7服务和保修安排 (64)7.1检查和测试 (64)7.2终身保修条件和条款 (64)7.3维修 (65)7.4用户服务 (66)8术语表 (67)9其他信息 (70)9.1声级校准器—声级修正 (73)9.2响应特性 (74)1介绍CEL-63x 系列设备属于噪声测试仪(其中―x‖为表示型号的数字—请参阅第 54页上的图 14)。
RALLY MIC POD PLACEMENT GUIDEIn this article we explain how you can optimize the microphone pickup for Logitech’s Rally family of products in rooms of varying sizes, with different table layouts. The article includes specific guidance about the optimal placement of external mics.TABLE OF CONTENTSCHOOSING THE RIGHT VIDEO CONFERENCING SYSTEM FOR EACH ROOMMIC PODS ON THE CEILING VS. MIC PODS ON THE TABLER ALLY BAR & RALLY BAR MINIS PEAKER MODES: DEFAULT VS. SPEAKER BOOST MODETYPICAL MIC POD CONFIGURATIONSM IC POD CONFIGURATIONS FOR SPEAKER BOOST MODERALLY PLUSA CCESSORIESCHOOSING THE RIGHT VIDEO CONFERENCING SYSTEM FOR EACH ROOMWhen deciding which camera system is best for a given room, it’s important to consider a numberof factors. A combination of camera zoom performance, speaker output volume, and mic pickup range can help guide the best choice. Below are general guidelines* to follow when deciding on which Rally device to place where.• R ally Bar Mini is ideal for small to medium sized rooms that generally seat 3 to 12 people, up to18’ x 20’ (5.5 x 6m or 33 m2).• R ally Bar is ideal for medium to large rooms that generally seat up to 20 people, up to 15’ x26’ (4.5 m x 8 m or 36 m2).• R ally Plus is optimized for larger rooms that generally seat up to 46 people, up to 28’ x 40’(8.5 m x 12 m or 102 m2).* For optimal performance, follow these guidelines or test the system in individual rooms.The Rally systems are quite flexible and, with additional mic pods, can accommodate rooms of larger sizes. The built-in microphones in Rally Bar and Rally Bar Mini both support a mic pickup range upto 23 ft (7 m). However, there are situations where a room would benefit from additional microphones such as U-shaped tables or especially long tables. For these situations, Rally Bar supports up to four Rally Mic Pods, and Rally Bar Mini supports up to three.* For larger rooms, Rally Plus supports up to seven Rally Mic Pods.* See “Accessories” below for recommended products when using external mic pods.MIC PODS IN THE CEILING VS. MIC PODS ON THE TABLEAfter deciding the appropriate Rally system and number of mic pods, you may also consider whether to mount mic pods on the table or on the ceiling. Both options – mounting on a table or mountingon the ceiling – provide comparable performance,as long as the mic pods are positioned and spaced relative to one another in the same configuration and the ceiling height is 10 ft or less. With higher ceilings, space the mic pods closer together. As room acoustics can vary, testing the configuration is recommended.In most rooms, satisfactory performance can be achieved with ceiling mounted mic pods. However, in situations with atypical HVAC systems or significantly higher ceilings, several Logitech Collaboration Partners offer ceiling mic solutions for these acoustically challenging environments.RALLY BAR & RALLY BAR MINIRally Bar and Rally Bar Mini are the latest video conferencing room solutions from Logitech. These two video bars can be run as standalone appliances or as USB video bars connected to virtually any PC or Mac. See /vc for more information. SPEAKER MODES: DEFAULT VS. SPEAKER BOOST MODEWhen external mic pods are connected to Rally Bar or Rally Bar Mini, they can function in one of two modes: the default speaker mode or Speaker Boost Mode.• I n the default setting, the camera’s internalmicrophones automatically work in concertwith the external mic pods.• I n Speaker Boost Mode, only the externalmic pods function. The camera’s internalmicrophones are turned off.Speaker Boost Mode has a couple advantages over the default setup. It’s louder, for one. By default, the camera’s speaker volume is set at an appropriate level for the echo canceler. Because Speaker Boost Mode turns the internal mics off, the speaker volume can be increased by 3 decibels (dB) without creating echo.The second advantage of Speaker Boost Mode is that voices in a video meeting will sound more consistent when they’re picked up using one type of microphone (external mic pods only) rather than two (external mic pods plus internal mics within the bar). Whether you choose to use Speaker Boost Modeor the default settings depends on the size and configuration of the room. In the rest of this article we will provide diagrams for rooms optimized withand without Speaker Boost Mode.TYPICAL MIC POD CONFIGURATIONSThis section provides examples of mic pod placement when using a Rally conference camera in a default setup—without Speaker Boost Mode.In the default setup, both external mic pods and internal mics are active. The internal mics pick up voices closer to the video bar, while the external mic pods pick up voices that are farther away.The diagram below is the most basic configuration for expanding the mic pickup range. The first mic pod should be mounted 12’ (3.7 m) from the video bar to ensure sufficient mic pod range overlap. Each mic pod has a pickup range of 15’ (4.6 m) diameter.Each additional mic pod should be spaced 8 ft (2.4 m) apart as this provides the best overlapping coverage. You’ll also find that this is the spacing defined by the mic pod cable length when using Rally Mic Pod Mounts.A common configuration where two mic pods are recommended is a triangle-shaped conference table. Here the mic pods are mounted on either side of the table. This provides mic coverage not only at the table, but also to those seated along the wall or writing on a whiteboard.For U-shaped tables or classroom configurations, three mic pods1 are ideal, providing excellent mic coverage. Here again, the two mic pods closest to the video bar should be spaced no more than 12 ft (3.7 m) from the camera. A viable option for U-shaped tables is to run the system in Speaker Boost Mode (see below).MIC POD CONFIGURATIONS FOR SPEAKER BOOST MODEThis section provides examples of mic pod placement when using a Rally conference camera in Speaker Boost Mode.When using Speaker Boost Mode, only the external mic pods are active. So, while similar in configuration to a typical setup, now one additional mic pod is used nearer the video bar to pick up voices near the front of the room.Two microphone layout:Another two microphone configuration is shown below. Again, a triangle-shaped table is used; however, in this case it’s only important to pick up the voices of those seated at the table.In a scenario where there are seats along the periphery of the room or whiteboards are commonly used, an alternate layout of the mic pods enhances coverage for those away from the table. In this case, a Rally Mic Pod Extension Cables is used between the first and second mic pods to allow greater spacing.Another common configuration is three mic pods on a longer table. Again, the mic pods are spaced 8 ft (2.4 m) apart.In a U-shaped table configuration, mic pods are biased towards the front of the room to ensure appropriate coverage for those seated nearest the front of the room and facing the camera. Again, the mic pods should be spaced no more than 8 ft (2.4 m) apart.RALLY PLUSDesigned for greater flexibility in larger rooms, Rally Plus supports up to seven mic pods and seven mic pod hubs. As Rally Plus uses only external mic pods, their placement replicates what’s described above with Rally Bar and Rally Bar Mini in Speaker Boost Mode. Again, mic pods should be spaced a maximum of 8 ft (2.4 m) apart and consideration should be given to where people will be in the room, either at the conference table or also seated along the walls.With up to seven mic pods, a variety of larger configurations can be supported, such as large U-shaped tables:Or V-shaped tables:Or even simply longer tables:ACCESSORIESThere are three accessory products we recommend for any installation using external mic pods:For more information about configuring any of the Rally conference cameras and sound systems, visitRally Mic Pod Extension Cable is a 10 meter, plenum- and ECA-ratedcable that allows mic pods to be placed farther away from the video bar.Up to two extension cables can be used with Rally Bar and Rally Bar Mini,and one can be used with Rally and Rally Plus.• W ith Rally Bar and Rally Bar Mini, the two extension cables can be placed anywhere in the sequence of mic pods and extension cables. • W ith Rally and Rally Plus the extension cable must be connected to the table hub.Rally Mic Pod Hub includes three connectors and a 9.5 ft (2.9 m)cable that provides installers the flexibility to customize microphoneplacement.Note: Rally Bar supports two Mic Pod Hubs and four Mic Pods. Rally BarMini supports two Mic Pod Hubs and three Mic Pods. With Rally and RallyPlus, seven Mic Pod Hubs and seven Mic Pods can be used.Rally Mic Pod Mount secures the mic pod in a desired location on thetable or ceiling while keeping the cables hidden. Available in graphite or white.1 Rally Bar supports four Rally Mic Pods; Rally Bar Mini supports three.© 2022 Logitech. Logitech, the Logitech logo and other Logitech marks are owned by Logitech and may be registered. All other trademarks are the properties of their respective owners. Logitech assumes no responsibility for any errors that may appear in this publication. Product, pricing and feature information contained herein is subject to change without notice.Contact your reseller or contact us at /vcsales Logitech Americas 7700 Gateway Blvd.Newark, CA 94560 USALogitech Europe S.A.EPFL - Quartier de l’Innovation Daniel Borel Innovation Center CH - 1015 Lausanne。

CLIO分音器电脑测试操作步骤CLIO分音器是一种常用的测试仪器,它被广泛应用于音频测试领域。
本文将介绍使用CLIO分音器进行电脑测试的详细操作步骤。
以下是具体步骤:步骤一:准备工作1.确保CLIO分音器和计算机正确连接。
使用USB线将CLIO分音器与计算机相连。
2.打开计算机,并确保已安装好CLIO分音器的驱动程序。
如果尚未安装,请使用随附的驱动程序安装光盘进行安装。
步骤二:启动CLIO软件1.打开计算机桌面上的CLIO软件图标。
2.在CLIO软件启动后,点击菜单栏上的“File(文件)”按钮。
3.选择“New Project(新项目)”以创建一个新的测试项目。
4.在弹出的对话框中输入项目名称,并选择保存位置。
点击“OK”继续。
步骤三:设置测试参数1.在左侧的“Measurements(测量)”窗格中,选择“Electroacoustics (电声学)”选项卡。
2.点击“Add New Measurement(添加新测量)”按钮,选择要测试的参数,例如音频频率响应、失真等。
3.根据测试需求,在右侧的“Measurement Properties(测量属性)”窗格中设置测量参数,例如测试音频频率范围、输入电平等。
4.点击“Measure(测量)”按钮,可预览测试结果。
确认参数设置无误后,继续下一步。
步骤四:进行测试1.在准备好待测试设备后,连接被测设备和CLIO分音器。
2.在CLIO软件界面上方的工具栏中,点击“Start Measurement(开始测量)”按钮。
3.测试过程中,CLIO分音器将产生一系列测试信号,并通过被测设备接收反馈信号。
4.测试完成后,CLIO软件会自动将数据保存在计算机上。
步骤五:分析和导出结果1.在CLIO软件界面左侧的“Measurements(测量)”窗格中,选择要查看的测试结果。
2.在右侧的“Measurement Properties(测量属性)”窗格中,可选择不同的展示方式,例如图形、列表等。
QC 品质控制测试系统 - 线上终端测试C3版本:2.0特点效益• 在物理门限下非常快速地测量 • 高精度扫描技術• 简单门限计算,合格/不合格分类 • 自動檢測 Golden Unit – 标准参考件 • 自行開發的獨有Rub & Buzz 异音測試 (Meta Hearing 技术)• 自动重复生产线环境噪声检测 • T/S 參数 (Re, fs, Qts) • 阻抗, 频率响应 • 极性, 平均电平 • 闸性脈冲响应• 總諧波失真THD, 2nd – 5th 次失真,多音 • 驱动和悬边测试 • 線圈位置 - 毫米 • 悬边不平衡 – 百分比 % • 測試数據輸出工具 • 生產指数 (Cpk, Ppk) • 不同的操作级别(操作员、 品质控制工程师、程序员) • 高级編程版本 • 揚声器配对功具 • 自動檢測功放增益 • 測試報告产生器• 通过数字接口方便整合到生产装配线 • 中、英文操作手册特定的配置可能不包括上面列的所有特点提供100%的产品测试 确保产品的一致性比人耳听觉测试更加可靠 简易的直接的操作 生产线噪声免疫在生产进程中可以无缝整合 与Klippel R&D 分析仪系统兼容灵活可靠的解决方法满足不同 公司的需求高级编程语言提供不同编程要求应用扬声器 、耳机 、微声器 整個音頻系统 线上终端测试来料检查内容:总览 (2)硬件...............................................................................................................................................3 - 4 QC 軟件 (标準版本)....................................................................................................................5 - 7 操作模式.. (8)Rub & Buzz 异音....................................................................................错误!未定义书签。
r t i fiedBird True 2-way compact loudspeakers Flexible "Cocotte" and "Tulipe" stands Wall, ceiling or table mountingPower BirdAmplifier system with integrated subwooferKleer ® wireless HD receiverAutoPowerHorizontal, vertical or wall mounting A true, ultra-compact audio system , this system 2.1 connects to classic audio/video sources (Blu-Ray,CD, DVD...) as well as the most recent ones thanks to wireless transmission from iPod®, iPhone®, iPad® ora computer. The Bird system is a bold statement of compact and designer quality Hifi, as it is very easy toinstall and user-friendly, and can produce totally stunning sound in rooms of 60m 2 and more.• 1 Power Bird subwoofer/amplifier• 2 Bird loudspeakers• Remote control• 2 stands “Cocotte” type and 2 stands “Tulipe” type for Bird• Polyfix wall-fixing system for Power Bird• 2 x 2.5m cables for loudspeakers• Grille for hidden cables Options • Wireless iTransmitter for iPod/iPhone /iPad • Wireless USB Transmitter for Mac and PC • Wireless iDock Transmitter and charger for iPod/iPhone /iPad• Floor stand for BirdAvailable in Diamond Black and Diamond White finishes BIRD ® 2.1 SYSTEM Specification sheetDesignation : Bird Pack 2.1 Black - Bird Pack 2.1 White / Reference : Black E0310 - White E0309The 2.1 Bird system needs no configuration or set-up as it will play right out of the box (cable and mounting accessories supplied). The audio/video sources can be connected to the TV set and the sound is then redirected towards the Power Bird. In this installation, you will hear the signal that corresponds to the image on the screen. Audio sources can also be directly connected to the Power Bird and there is no need to consult the screen.The iTransmitter can be connected to an iPod/iPhone or iPad tobenefit from a wireless transmission quality in CD format WAV orAIFF type. All other formats accepted by Apple® devices (mp3,AAC) are also supported as well as web radio, games or any otherapplications. No preparation, no handling necessary, simplyconnect and it instantly plays.The USB Transmitter allows a computer to wirelessly connectto the Power Bird and transforms it into an audio server. TheUSB Transmitter is compatible with all audio formats up to 16bits/44.1kHz (CD format), with all players and even Web radio.The iDock Transmitter integrates a transmitter in its base tocharge the device’s battery while it also transfers music withoutcables.B i r d c o n n e c t i o n d i a g r a m。
NOMINAL SOUND PRESSURE LEVELCA-12A: 114 dB (10 pascals)CA-12B: 110 dB (6.3 pascals)CA-12M: 94dB (1 pascal) Ref. 20 micropascals (20µN/m2)SOUND PRESSURE LEVEL ACCURACY: ± 0.4 dB at 20°C, 101.3 kilopascals (760 mm Hg), and RH of 65%. DISTORTION: Less than 1% within temperature and humidity operatingranges.TEMPERATURE RANGE:-10 to +50°C operating.-40 to +65°C storage with battery removed. TEMPERATURE SENSITIVITY: 0 to 0.01 dB/°C max. ref. 20°C.HUMIDITY SENSITIVITY: 5 to 95% relative humidity with less than 0.1 dB change in output.ATMOSPHERIC PRESSURE SENSITIVITY: Approximately -.10 dB for each 1000 meters above sea level. See Figure 2. MAGNETIC FIELD SENSITIVITY:60 Hz, 80 A/m: + .01 dB max.400 Hz, 80 A/m: + .01 dB max.Maximum additional distortion is not more than 1%.POWER: Battery operated, 9 volt transistor battery, NEDA 1604 type. Battery will provide at least 50 hours of operation.SIZE AND WEIGHT: 10 cm (4 inches) long, 6 cm (2.4 inches) diameter, 340 grams (12 ounces).PRINCIPLES OF OPERATIONThe block diagram in Figure 1 depicts the basic operation of the instrument.The battery indicator continuously monitors the battery condition. When the indicator needle enters the red area during operation, the battery should be replaced.The precision 1 kHz oscillator is a wien-bridge type for high stability and low distortion. Automatic gain control (AGC) and temperature compensation are incorporated in the oscillator design. The oscillator AC output is precisely set at 1 V rms. The sound pressure level is then adjusted for the correct acoustical output. This method produces a very stable oscillator output over both decaying battery voltage and changing temperature.OPERATING PROCEDUREThe coupler cavity of the calibrator is designed to accept a 1-1/8 inch diameter microphone directly. The proper adaptor must be used for microphones that are smaller in diameter than the 1-1/8 inch coupler opening. See Table 1.1. If an adaptor is needed, carefully slide the adaptor onto the microphone.CAUTIONPull the adaptor onto the microphone by grasping thesides of the adaptor. Do not use the palm of the hand topush the adaptor onto the microphone as seriousdamage will possibly occur to the microphone dia-phragm due to pressure build-up!2. Slowly place the microphone (or microphone with adaptor) into the calibrator coupler.Rapid insertion or withdrawal of the microphone maydamage the microphone or the coupler transducerbecause of the rapid change of pressure on thediaphragms.3. Set the calibrator switch to "ON." Be sure that the "BATT." indicator enters the green area. If not, see BATTERY CHECK AND REPLACEMENT.4. Proceed to verify the test instrument accuracy by fol-lowing the calibration procedure specified in the instrument manual.NOTEIf the test location is more than 3000 feet (1 kilometer)above sea level, it is a good procedure to determine thecorrection for the calibrator output using the Alti-tude/Barometric Pressure Correction Chart in Figure 2.5. When calibration has been made, carefully remove the calibrator and turn it "OFF."ATMOSPHERIC PRESSURE SENSITIVITYMost acoustic calibrators, including Quest calibrators, are affected by altitude and atmospheric pressure changes. The transducer diaphragm within the calibrator coupler creates a sound as it vibrates against the air. In general, when the air is thinner (at higher elevations), a lower sound pressure level is transmitted through the less dense air to the microphone diaphragm.By either using a barometer or knowing the elevation above sea level, output corrections can be made using theAltitude/Barometric Pressure Correction Chart in Figure 2.Different microphones have different air volumes between the grid and the diaphragm. They also have diaphragms of various compliance (stiffness). Because of these conditions, the generated sound pressure level at the microphone diaphragm may vary from the nominal level of the calibrator. A correction is thus necessary for some microphones.The sound pressure level values for some common instru-mentation microphones are listed in the Microphone Correction Chart, Table 1. These numbers are valid only when using any of the three Quest calibrators (with Quest microphone adaptors if needed) to perform calibration on the listed microphones.EXAMPLES OF CALIBRATOR USEExample 1. Assume that you are calibrating the Quest 155 Precision Sound Level Meter with a 1/2" microphone (7046 or 7047) at a barometric pressure of 530 mm Hg, corresponding to an elevation of approximately 10,000 feet (3,000 meters). From the Microphone Correction Chart, use Quest adaptor Part Number 58-928. If you are using a CA-12M calibrator, the sound pressure level imparted to the microphone is 94.0 dB at sea level. Then use the Altitude/Barometric Pressure Correction Chart to correct the 94.0 dB to 93.7 dB at 10,000 feet. This is the value that the sound level meter shall read.Example 2. Assume that you are calibrating a meter with a GR P5 microphone at Denver, Colorado with an elevation of 5,200 feet (1,600 meters). Using the Microphone CorrectionChart, the proper adaptor is Quest Part Number 58-929.If you are using a CA-12B calibrator, the sound pressure level imparted to the microphone is 110.2 dB at sea level. Then use the Altitude/Barometric Pressure Correction Chart to correct the 110.2 dB to 110.0 dB at 5,200 feet. This is the value that the sound level meter shall read.For most applications, the Altitude/Barometric Pressure correction can be omitted since the maximum change at 13,000 feet is only -0.3 dB. Also, when using all Quest micro- phones with their associated adaptors, the microphone cor-rection chart is not needed since the chart value exactly agrees with the dB output stated on the calibrator.Use of microphones other than those listed in Table 1 is not recommended and should be done with caution since calibration errors could exist.BATTERY CHECK AND REPLACEMENT Each calibrator has one 9-volt transistor battery as its power source.To test the battery, turn the switch to "ON." The "BATT." indicator should go into the GREEN area, meaning that the battery is good. If the indicator remains within the RED area, the battery must be replaced.To replace the battery, first be sure that the calibrator is turned to "OFF." Then remove the two screws on the face plate. Grasp the cylinder housing and gently pull it upward. The cylinder and face plate will come off together exposing the circuit and battery. Carefully unsnap the battery clip and pull out the weak battery. Slide a new battery into the holder with the smaller snap (+) towards the transducer (see Figure 3). Then snap the battery clip onto the battery. Carefully replace the cylinder and faceplate so as not to pinch any wires. Replace the two screws.CALIBRATION ADJUSTMENTSThe Quest Calibrator was calibrated at the Quest laboratory using a type L transfer microphone with calibration traceable to the U.S. National Bureau of Standards.A Quest calibrator is very stable; but since it is used to calibrate other equipment, it should be checked periodicallyagainst laboratory standards. It is recommended that the unit be sent back to the Quest laboratory at least once each year for recalibration, or whenever there is a question about its accuracy.The unit should be shipped in a well-padded container to avoid damage in shipping.Figure 3 depicts the calibrator with the cylinder removed. Control potentiometers are indicated for adjusting the oscillator voltage and the transducer output. THESE "POTS" ARE FOR PRECISE LABORATORY CALIBRATION ONLY, AND SHOULD NOT BE READJUSTED BY THE USER.Service PolicyThe Quest product you have purchased is one of the finest acoustic instruments available. It is backed by our full one year warranty which seeks complete customer satisfaction. This is your assurance that you can expect prompt courteous service for your equipment from the entire Quest service organization.Should your Quest equipment need to be returned for repair or recalibra-tion, please contact the Service Department at (800)245-0779 (USA) or Fax (262)567-4047 for a Return Authorization Number. The RA number is valid for 30 days, and must be shown on the shipping label and purchase order/cover letter. If you are unable to return instruments in that time call for a new RA number. Send it prepaid and properly packed in the original shipping carton directly to Quest Technologies, 1060 Corporate Center Drive, Oconomowoc, WI 53066 U.S.A.Repair or replacement work done under warranty will be performed free of charge, and the instrument will be returned to you prepaid. Your copy or a photocopy of the Quest Registration Card will serve as proof of warranty should the factory require this information.If for any reason you should find it necessary to contact the factory regarding service or shipping damage, please direct your calls or letters to the attention of the Service Manager, Quest Technologies, (262) 567-9157 or (800) 245-0779. Office hours are from 7 AM to 6 PM (Central Standard Time) Monday through Friday.For service or recalibration outside the U.S.A., please contact your local Quest Dealer or fax Quest U.S.A. at 1-262-567-4047.。
来自意大利的CLIO克利奥电声测试系统应用于电脑3D多媒体、数位音响、喇叭单体、音箱、耳机、麦克风、CD、VCD、DVD、扩音器、聆听音场、无响室、PC&Notebook、蜂鸣器、等等各种电声产品的工程品质检测与噪音分析!有CLIOLite、CLIOStd、CLIOQC三种版本满足您的需要,可以使您的PC转变成一台多功能且非常实用的电声测试系统! CLIO电声测试系统:--CLIO电声测试系统(Acoustical & Eleetrical Tests)是由意大利AUDIOMATICA 公司生产的.是音响产品设计和开发不可缺少的测试设备,该系统对计算机的配置要求不高,可在/98/2000/XP下进行。
--CLIO电声测试系统由硬件和软件两部分组成,软件最新版本为WIN 7.0,硬件是一片PCI插卡使用PCI插槽. --系统可以产生正弦波方波.猝发波,白噪音,粉红噪音,最长序列信号(MLS)等测试信号,可利用MLS,正弦波,1/3倍频程和FFT傅立叶分析等方法对波测音响产品的频率和时域响应进行分析,软件分为标准版,简易版,和品管版三种版本。
--CLIO 电声测试系统的简易版(CLIO Lite)可完成频响,二次.三次谐波失真,阻抗,扬声器,THIELE-SMALL参数.瞬时脉冲响应.电容.电感等12个项目内容的分析与测试。
--标准版(CLIO Standard)除了能完成简易版的全部测试项目外,还能作指向性极坐标.累积频谱衰减和残响等8个新项目内容进行分析测试。
--专业QC 版(CLIO QC)具备标准版的全部测试功能,还提供了传统纯音扫描信号与QC检测手段,可在线对音响产品的总谐波失真互调失真,声压级频响和阻抗特性等参数进行快速测试,并可对检测产品的不合格原因进行分析。
CLIO测试系统测试功能一览表:简易版(CLIO Lite)1~12项标准版(CLIO Standard)1~20项专业QC版(CLIO QC) 1~25项1 正弦波频率响应 2 二次、三次谐波失真(THD)曲线 3 喇叭阻抗(Impedance)曲线 4 喇叭Q(THIELE-SMALL)参数5 白噪音、粉红噪音等特定讯号(波形)产生器 6 VTVM(AC ture-rms voltsmeter)&噪音计(Sound Level Meter) 7 MLS频率响应8 暂态脉波(Impulse)响应9 能量/时间曲线(ETC) 10 即时1/3 OCTAVE分析(附IEC Standard A Curve) 11 双轨迹储存示波器(2 CH Digital Storage Oscilloscope) 12 电感与电容表(C&L Meter) 13 双轨迹FFT与总谐波失真(THD)分析14 指向性极坐标图(Polar Plot) 15 THD对应输出电压(LEVEL)或功率(POWER)特性图16 互调失真(IMD)vs.LEVEL(SMPTE,DIN,CCIF) 17 累积频谱衰减(瀑布图WATERFALL) 18 自动IASCA得分计算19 残响(RT60)分析20 即时Leq(IEC804)计算与时间记录21 提供传统纯音扫描信号与QC检测手段22 执行FFT(THD、IMD、Level、Noise、FrequencyResponse)QC检测23 执行MLS(Response)、极性(Polarity)、阻抗(Impedance)QC检测24 各项QC检测项目可任意定义,并按照程序自动测量,配合生产线自动化设备自动测试与GO/NG分类,效率最高!25 可在线对音响产品的总谐波失真互调失真,声压级频响和阻抗特性等参数进行快速测试,并可统计总测试数量及对检测产品的不良原因进行分析。
技术规格:信号发生器型式二声道16位Sigma-Delta D/A转换器频率响应10Hz~20KHz 频率精确度优于0.01% 频率分辨率0.01Hz 输出阻抗100 Ohms 最大输出位准12dBu(正弦波3.1 Vrms) 衰减+12 to -64dBu in 0.1 dBStep + mute THD+Noise 0.015% 分析仪型式二声道16位Sigma-Delta D/A转换器输入范围+30至-40dBV 输入阻抗64K Ohms Phantom 8.2V(5.6K Ohms麦克风输入阻) 标准麦克风MIC-01 型式极化电容式Condenser Electret 精确度±1dB,20Hz~10KHz ±2dB,10K~20KHz 最大位准130dBspl 平均灵敏度-35dBV/Pa(16mV/Pa) 尺寸长197/250mm 直径8mm 插卡型式PCI插卡标准配置包括:CLIO PCI插卡一张CLIO SC-01转换盒一个CLIO MODL4功放一台CLIO WINDOWS版软件一张CLIO MIC-01或MIC-02标准麦克风一支连接电缆一套1. 正弦波頻率響應( 同丹麥B&K2012 SSR Mode, 有效抑除背景噪音)2. 二、三、四、五次諧波失真( THD ) 曲線3. 喇叭阻抗( Impedance ) 曲線4. 喇叭Q ( THIELE-SMALL ) 參數5. 分頻器分頻點測試6.白噪音, 粉紅噪音等特定訊號波形產生器7. MLS 頻率響應( 同美國MLSSA 相同測試模式)8. 暫態脈波(Impluse ) 響應9. 即時1/3 OCTAVE 分析10. 示波器11. 電容、電阻、電感表( C 、R 、L Meter )12. FFT 傅利葉轉換13. 對應輸出電壓( LEVEL ) 與失真百分比(THD% )14. 內調變失真(IMD )15. 累積頻譜衰減( 瀑布圖WATERFALL )16. 可執行以下QC :( 每項檢測只需1 秒)17. 提供掃描信號、頻響曲線Frequency Respoonse, 二、三、四、五次諧波QC 檢測18. 執行MLS ( Response ),, 極性( Polarity ), 阻抗( Impedance ) QC 檢測19. 執行FFT (THD%, , Level, ) QC 檢測20. 分頻器QC 檢測21. 可任意定義上下限, 配合生產線自動測試與GO/NG 分類, 效率最高!22. 自動分類、儲存、統計與原因狀況分析DAAS ( Digital Audio Analyrer system )是德国ADM Engineering 公司专门针对音响厂家作为产品的设计、开发、质量控制,而开发的一套基于PC平台的数字音频测量分析系统。
分为DAAS3L、DAAS32Pro、DAAS4usb三个系列。
*利用40kHz,24位,数字/仿真与仿真/数位转换,产生信号与执行测试*频率与阻抗测量频率可调节分辨率*频率与阻抗曲线相位计算与自动延迟修正*声学测量线除相位修正*群延时线除相位群延时计算*瞬态响应与累积频谱衰减(瀑布图)*频率响应曲线自由音场修正*任意内部信号频率的失真测量*外来信号的失真测量*失真与频率、电平评估*互调失真测量:Tim和Dim*Thiele small参数计算*最大频率分辨率0.1Hz*可与扬声器辅助设计软件Akabak、CALSOD和LEAP配套使用*RT60与窄带噪音*自动测试宏编辑,Go/No Go 判定*可驱动指向性测试转盘进行指向性测试软件:它利用16比特或24比特D/A和A/D转换器产生测试信号并进行计算、测试界面由图形曲线、标题栏与信息栏组成,简洁直观的测试功能图形化操作菜单提示使你的测量工作得心应手:硬件:DAAS32ProPCI 4比特2通道模/数、数/模转换公用插卡前后级控制盒(含功率放大MIC幻像电源与前置放大)麦克风(15 V或48V)DAAS4usbUSB接口前后级控制盒(含功率放大MIC幻像电源与前置放大)麦克风(15 V或48V)DAAS32 pro可通过选购QC Extension软件实现频率响应、极性、阻抗、谐波失真、摩擦&蜂音、平均灵敏度的在线品管功能,并且所有的测试结果可直接生成Excel报表进行质量分析。
技术参数adm 公司所生产的DAAS数字音频分析系统是一种基于PC的测试系统,支持DOS和WINDOWS操作系统。
其良好的操作界面和强大的测试功能,是音响生产厂家必备的测试仪器。
------ DAAS (Digital Audio Analyser System) 系统,这套超级的高科技声学测试系统有着极为惊人的功能,测试范围包括无响室空间仿真,频率响应,瀑布频谱图,相位响应曲线,抗阻曲线,协波失真曲线,互调失真曲线,音压曲线,RT60,喇叭特性参数(Thiele Small 参数VAS 参数),测试电容电感值,数字贮存示波器,内建白/ 粉红噪音及低失真正弦波输出,MILLISA输出等功能,除了可用于扬声器测试,亦可广泛应用于耳机,麦克风等声学器材的研发与品管,DAAS 简化了测试程序,操作轻易,取代了所有传统的测试仪器,这套系统包含主程序和麦克风曲线校正参数,20Hz~20kHz 标准麦克风,前后级放大器及AD / DA 适配卡,超强的功能却有超值的价格。
其系列有DAAS4Pro,DAAS32Pro和DAAS4USB,利用16比特或24比特D/A和A/D 转换器产生测试信号并进行计算,测试界面由图形曲线,标题栏信息栏等组成,其简洁直观的强大测试功能还有:频率与阻抗曲线和声学测量线相位修正,瞬态响应与累积频谱衰减瀑布图,频率响应曲线自由音场修正,任意内部信号频率失真测量,失真与频率电平的评估,互调失真测量等等.美国MLSSA电声测试系统MLSSA是美国DRA LABS开发的一套功能强大,精确度高的测试系统。
它采用MLS信号(最大长度序列),它可直接获取被测系统在MLS信号激励下的脉冲响应,再通过FFT变换而得到被测系统的频域响应,因此MLSSA可获得较宽的时域。
它采用多次平均及多种时间窗选择,有效滤除噪声及反射的影响;上限频率为25KHZ的12BIT动态增益防混迭滤波器;最大65535点FFT,频率精度最大0.065HZ。
在如此完善的精度保证下,将MLSSA 应用到现有的消音室,可取得与丹麦B&K仪器近乎一致的结果。
MLSSA具有完善的QC 全检功能,频响曲线及Small参数均可实现在线全检.能满足专业开发、生产及工程的应用。
*扬声器测试工业标准*粉红-MLS及白-MLS输出*频宽:1KHZ至40KHZ可调*扬声器测试*内置PASS/FAIL判断功能*带Thiele-Small 参数选件*IEC60268-16智能话音测试*ISO3382室内声学测试*环绕立体声均衡测MLSSA的扬声器测量功能是高档扬声器开发及生产不可或缺的测量工具:<无回响频率响应测试<累积频谱衰减图<能量-时间图<时域一致性及声场中心<扬声器指向性测量<扬声器阻抗测量<失真测量(含互调失真&谐波失真)<QC判别功能<Thiels-Small参数测量选项MLSSA2000母卡:<模拟粉红滤波器:±0.1dB最大误差<粉红-最长序列码和白-最长序列码信号输出<保护输出100mA信号源<可驱动长线和低阻抗负载<高精度阻抗测量<96KHz采样率<16MHz ISA插卡扬声器测试工业标准:>Thiele-small扬声器参数>革新的3-D曲线接合方法>高噪声免疫力>完整的DCR测量功能>完善的QC Pass/Fail功能>完善的统计分析功能>摩擦音检测>残余DCR修正功能工业用标准- 粉红-MLS及白-MLS输出- 可调频宽:1KHZ至40KHZ - 扬声器测试- 内置合格/失改判断功能- IEC60268-16智能话音测试- ISO3382测试- 环绕立体声均衡测试工业用标准自1987年始,MLSSA已倍受扬声器设计及生产厂家一致推崇为行内的工业标准,并广泛被教育界、专业音响师、试音室、汽车生产商、政府部门等用作环境测试之用。