Massive_Prime中文手册一
- 格式:pdf
- 大小:1.66 MB
- 文档页数:22
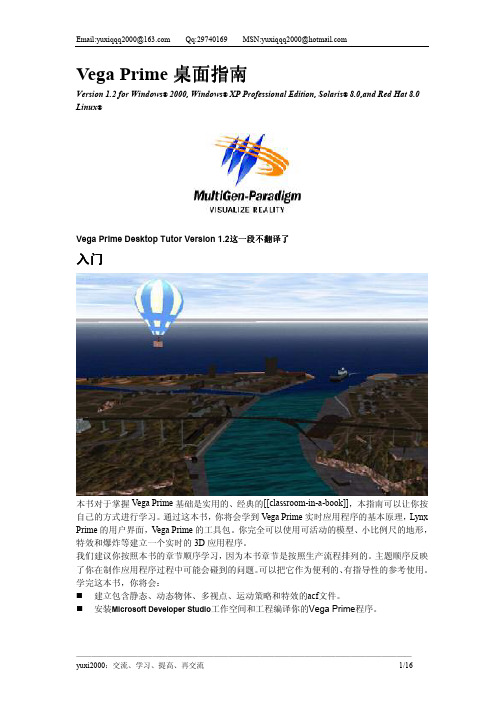
Vega Prime桌面指南Version 1.2 for Windows®2000, Windows®XP Professional Edition, Solaris®8.0,and Red Hat 8.0 Linux®Vega Prime Desktop Tutor Version 1.2这一段不翻译了入门本书对于掌握Vega Prime基础是实用的、经典的[[classroom-in-a-book]],本指南可以让你按自己的方式进行学习。
通过这本书,你将会学到Vega Prime实时应用程序的基本原理,Lynx Prime的用户界面,V ega Prime的工具包。
你完全可以使用可活动的模型、小比例尺的地形,特效和爆炸等建立一个实时的3D应用程序。
我们建议你按照本书的章节顺序学习,因为本书章节是按照生产流程排列的。
主题顺序反映了你在制作应用程序过程中可能会碰到的问题。
可以把它作为便利的、有指导性的参考使用。
学完这本书,你将会:建立包含静态、动态物体、多视点、运动策略和特效的acf文件。
安装Microsoft Developer Studio工作空间和工程编译你的Vega Prime程序。
准备请安转Vega Prime并且通过学习本书使用软件本书只包含了Windows的文件路径,如果你在Solaris or Linux上使用Vega Prime,文件的默认安装目录是/usr/local/MultiGen-Paradigm/完整的应用程序配置文件和代码位于C:\ProgramFiles\MultiGen-Paradigm\resources\tutorials\vegaprime\desktop_tutor\tornado\completed _ACF,在任意部分跳转或者检查作品结果都是很容易的。
VegaPrimeDesktopTutor1_2.pdf位于C:\ProgramFiles\Multigen-Paradigm\docs\vegaprime\pdf目录章1开始使用Vega Prime 和LynX Prime 8Vega Prime实时应用程序的组成10开始LynX Prime 11退出LynX Prime 11保存你的工作11LynX Prime用户界面探索12章2建立你的场景然后是Prime节点18增加和浏览对象19摘要28章3运动和观察移动和观测31设置观察点31建立转换33增加运动模型35增加Isectors[[???]] 36定义通道41修改窗体48摘要49章4环境设置环境52定义环境52增加灯光54摘要57章5特效增加特效60建立碎片特效61构造旋风62使用颗粒存储单位建立特效75摘要76章6运行应用程序编译和运行Tornado[[飓风]]程序78设置Visual Studio 78摘要80附录1Vega Prime API设置API 82初始化82vpApp 类83定义84配置85运行时循环85更新85停止86Vega Prime小应用程序86附录2Tornado程序检查应用程序90章1开始介绍Vega Prime是一个提供了很多类的工具集,可以让你构建高级的实时的3D应用程序。

Genesis Prime XL – EGS102 User ManualSince the tablet software updates regularly, the user manual may not cover allaspects of new features.Important Notices•The new battery will be in its best condition after being fully charged and discharged 2-3 times.•While using earphones, if the volume is excessively high it may cause hearing damage. Please adjust the volume of the player to a safe level and moderate duration of use.•Do not disconnect the tablet suddenly when formatting or uploading and downloading, which can lead to program errors.•Do not dismantle the tablet by yourself, and do not use alcohol, thinner or benzene to clean its surface.•Do not use the tablet while driving or walking.•The tablet is not moisture and water resistant. Please do not use it in a damp environment.•Do not drop or hit the tablet against a hard surface, or the screen may be damaged or cracked.•Do not upgrade the firmware by yourself. The tablet should be upgraded with the right firmware and right method offered by us. If upgrade is needed, please contact us.I. Getting Started1.1 Turn on/off1.1.1 Turn onTo start your tablet, press and hold the power key for 2 seconds. The Ematic logo indicates that the tablet is loading.Once the lock screen loads, drag the padlock icon to the right to unlock.1.1.2 Turn offWhen the tablet is on, to shut off your tablet, press and hold the power key until the System options dialog appears and tap Power Off, then your tablet will shut down dialog appears. Tap OK.1.2 Lock/unlock the screen (sleep mode)To save battery, you should put your tablet in sleep mode by turning off the LCD display. To do this, press the power key and immediately release it. Do it again to bring up the lock screen.1.3 Connect to a computer1.3.1 Connect to PC via USB cable1. Connect the tablet to your computer by USB.2. The device driver will install.You can now copy files onto the tablet just as you would with a USB flash drive. 3. Remove the USB cable when you finish transferring files.1.3.2 Connect to Mac® via USB cable1. Connect the tablet to your computer by USB.2. Go to /filetransfer on your Mac and install the Android File Transfer application.3. The Android File Transfer application will launch automatically when you connect the tablet to your computer by USB. Drag and drop files to transfer.4. Remove the USB cable when you finish transferring files.II. Your Home Screen2.1 Icons on Home ScreenYou can fill the home screen with any combination of shortcuts, widgets, and folders you like.When you power up your tablet for the first time, y ou‟ll see the main home-screen panel. This panel is typically centered; you can access additional panels on either side of the main one by swiping your finger left or right.At the bottom of the Home Screen is your Status Bar.Back – Go back to the previous screen.Home – Go back to the home screen. Hold and slide up to access Google Now™.Recent Apps – Opens a list of recent apps. Tap an app to open or swipe left/right to remove the thumbnail.Decrease VolumeIncrease VolumeMenu – Tap for more option or settings.All Apps – View all your apps.Google Search – Tap the microphone icon to search by voice.2.2 Operations on Home Screen2.2.1 Add app icon to home screenWithin the All Apps menu, touch and hold any icon for about 2 seconds, the icon will become movable and appear on the home screen.2.2.2 Remove app icon from home screenOn the main screen, touch and hold the undesired icon. Drag the item to the X and release it when it turns red.2.2.3 Add widgets to your home screenTo add a widget, tap and hold your finger on any open space on your home screen, and select Widgets from the context menu that opens. From there, select any of the available widgets. For instance, you may add an analog clock, calendar, picture frame, and other useful widgets to your Home Screen.2.2.4 How to set wallpaperTap and hold your finger on any open space on your home screen, and select Wallpapers from the context menu that opens. In the popup “Select wallpaper from” dialog, select a wallpaper from Gallery, Live wallpapers and Wallpapers.2.2.5 Find your recent appsTap in the status bar to show your recent apps. Tap a thumbnail to select the app. III. Network Connection3.1 Wi-FiWi-Fi can only be used when it connects with Wi-Fi Access Point (AP) or a free unsecured Wi-Fi hotpot.3.1.1 Turn on Wi-FiWithin the All Apps menu, tap Settings. Under Wireless & networks, tap the Wi-Fi switch to turn on and scan. Your tablet lists the networks it finds within range. Tap a network to connect. If necessary, enter the password, and tap Connect. When your tablet is connected to the network, the wireless indicator appears in the status bar.The blue lines indicate connection strength.3.1.2 Turn off Wi-FiTo turn off Wi-Fi, tap the Wi-Fi ON switch under Wireless & networks. Turn off Wi-Fi when you‟r e not using it, to extend the life of your battery between charges.3.1.3 Add a Wi-Fi networkUsers may also add a Wi-Fi network under Wi-Fi settings. Tap + in the top right corner. Enter the SSID (name) of the network. If necessary, enter security or other network configuration details. Touch Save.3.1.4 Forget a Wi-Fi networkIn the Wi-Fi settings screen, tap the name of the network. Tap “Forge t” in thedialog that opens.3.3 Portable Hotspot3.3.1 Portable Wi-Fi hotspotTap to share your tablet‟s mobile network data connection as a portable Wi-Fi hotspot.3.4 VPN settings3.4.1 Add VPN profileOpens a screen that prompts you to select the type of VPN to add. You are then prompted for VPN configuration details.IV. Internet Browsing4.1 Internet BrowsingBefore using your browser, make sure Wi-Fi is connected.On the home screen, tap the Google text field or the Chrome icon to open your browser.In the address bar, tap the text field to make the Android keyboard appear for entry of keywords or a URL.Tap and hold the text field to edit text or change input method.V. Install and Manage Apps5.1 Install and Manage AppsThis tablet is preloaded with the Google Play Store; you can search and install apps here after logging in with your Google account.VI. Multi-Media Functions6.1 MusicAfter loading your music onto your tablet, tap the Play Music icon (found by default on your home screen or by opening the All Apps menu). You‟ll be given the option of selecting by Artist, Song, Album, or custom Playlist. Tap to select. Your selection will begin to play through the tablet‟s built in speakers or through external headphones if attached via the headphone port. The media player allows you to shuffle, skip, or pause your current selection and even displays the album artwork when available.6.2 Video6.2.1 Video PlaybackYou can play videos stored on your tablet or SD card. To play, tap the Video icon. Select the video you‟d like to play.Pause or advance your video via the toolbar along the bottom of the screen.6.2.1 Video Playback by HDMIYou can connect the tablet to your HDTV using an HDMI cable. When the tablet is connected the screen will go black. You must choose and begin playing a video before connecting the HDMI cable.6.3 GalleryYou can view, show off, and even edit your digital pictures on the tablet‟s display. After loading your media, tap the Video app within the All Apps menu. Tap the desired picture to display. To scroll through your collection, swipe left or right. Tap the image to reveal the menu. By tapping the menu icons you may delete an image or share it via Picasa, Bluetooth or Gmail. You can even set images as your wallpaper or edit and add effects. 6.4 CameraTap the camera icon in the App Panel to open the camera.6.4.1 Take photosTap the blue shutter button to take a photo.You can view the photos you have taken by tapping the preview on the upperright hand corner, or you can go back to Gallery.6.4.2 Record videosTap the video camera icon to record videos.Tap the red record button to start recording and tap it again to stop recording.Videos can be viewed in the Video app.6.5 eBook readerTap the Play Books icon within the All Apps menu to open your library or buy more books.Tap an eBook to read.In reading, tap the top of the screen to reveal the sub menu where you can adjust the text size, screen brightness, jump chapters, and more.6.5.1 Download BooksWith Wi-Fi on you can download available eBooks.VII.S ettingsWithin the All Apps menu, tap the Settings icon (or found by default on your home screen).Settings include: Wi-Fi, Sound, Display, Storage, Battery, Apps, Location services, Security, Language & input, Backup & rest, Accounts, Date & time, Accessibility, and Developer options.7.1 Display SettingsUnder DEVICE, tap 'Display' to set brightness, sleep, font size, or change wallpaper.The display has a screen timeout by default set to 1 min. If the unit is left inactive for that period of time, the screen will go dark as if turned off. However, it is simply in standby mode. Press and release the power button and a screen will appear with a padlock icon. This is your lock screen. Slide the padlock to unlock the screen.7.2 Applications SettingsUnder DEVICE, tap Apps. Tap an app listed to view storage information, force stop, uninstall, or clear data.7.3 Set language & InputUnder PERSONAL, tap Language & input. You may set your language or keyboard here.7.4 Storage SettingsTo view your storage status, tap Storage under Device.Note: As software takes up your tablet memory, the total memory is usually less than the actual flash memory.7.5 Set location & securitySet up screen lock, and add or remove tablet administrators. With this setting, you are able to lock the screen with a pattern, PIN or password to avoid your tablet being used without permission.VII. B atteryVery Low BatteryFull Battery Charging BatteryIndicates that the battery is full. When the battery level becomes too low, aprompt comes up to charge your tablet.The tablet can be charged with the USB wall charger when it is on or off.Note: Please charge it by the Adaptor we supplied.The tablet may take 4-5 hours to charge to full.Tips on extending battery life1. Streaming audio or video apps will use a lot of battery life2. Disable Location services. You can turn it off from Setting s → location services.3. Switch off Wi-Fi if you ‟r e not close to a strong Wi-Fi signal for extended periods of time.4. Use a Quick Screen Timeout. You can alter this option from Setting s → Displ ay → Sleep.5. Reduce brightness to a comfortable level using a widget or at Settings → Displa y → Brightness.6. Use Web Widgets wisely. Widgets that access the Web consume more power than widgets that do not.Note:1. Only use the supplied wall charger to charge the tablet as other chargers may damage the device.2. The tablet cannot be charged via USB cable when connected to your PC.Troubleshooting1. Cannot turn on the tablet.Check the tablet ‟s power level. Please charge it before starting it. If your tablet still cannot be turned on, you may reset it before you turn it on.2.No sound from earphone.Check if volume is set to …0‟. Or earphone may be broken, please try another one.3. Loud static noise.Check if there is dust in the earphone or speaker. Check if the file is broken.4. Frozen to any operation.Please use a pin to reset and then restart your tablet.5. Screen goes dark when connected to TV via HDMI cable.The tablet supports only one-end output, so it is normal that the screen goes darkwhen connected to TV via HDMI cable. When a video playback is finished, disconnect the cable and the screen recovers.6. Application not working.Possible reasons may be that this app is not compatible with your OS or the downloaded .apk file is broken so you may need to download a full version.7. How do I delete a Google account?If an account is added, the account is shown in Accounts of Settings, where you may also add another account. To delete an undesired account, tap the account, then tap the menu icon in the upper right hand corner and choose Remove account.Limitations of Liability StatementLinks to Third Party SitesThe Ematic User Manual may contain or reference links to third-party sites, however, please be aware that Ematic is not responsible for and cannot control these other sites. Ematic makes no representations or warranties whatsoever about any other website which you may access as a result of reading this user manual, or otherwise. When you access a website that is not owned or operated by Ematic (a “non-Ematic website”), even one that may contain an Ematic logo, please understand that it is independent from Ematic, and that Ematic has no direct control over the content on such website(s). In addition, a link to any such non-Ematic website does not mean Ematic endorses or accepts any responsibility for the content, or of any functionalities or services, of such website(s). Furthermore, Ematic makes no promise, representation or warranty that any non-Ematic website you navigate to will be free of viruses, worms, Trojan horses and other items of a destructive nature. The Ematic User Manual is for your exclusive benefit and you assume all risks, losses and/or damages of whatever nature that may result arising out of your use of the Ematic User Manual.Limitation of Liability and IndemnityTo the maximum extent permitted by applicable law, Ematic shall not be liable for any damages suffered as a result of using, modifying, contributing, copying, distributing, or downloading the materials, use of the Ematic User Manual or use of any Ematic product and/or software. In no event shall Ematic be liable for any indirect, extraordinary, exemplary, punitive, special, incidental, or consequential damages (including, without limitation, loss of data, revenue, profits, use or other economic advantage) however arising, whether for breach of contract or in tort, even if Ematic has been previously advised of thepossibility of such damage. You agree that you have sole responsibility for adequate protection and backup of data and/or equipment used in connection with the product and software and will not make a claim of any nature against Ematic for lost data, inaccurate output, work delays or lost profits resulting from the use of the materials. You agree to indemnify, hold harmless and defend Ematic, together with its affiliates, parent and subsidiary entities, successors, assigns, partners, managers, members, employees, officers, directors and shareholders, from and against any and all damages, liens, liabilities, losses, demands, actions, causes of action, claims, costs and expenses (including, without limitation, reasonable attorneys‟ fees, charges and disbursements, as well as the cost of in-house counsel and appeals) arising from or related to Ematic, the use of The Ematic User Manual or any Ematic product and/or software. Some jurisdictions do not allow the exclusion or limitation of incidental or consequential damages, so the above limitation or exclusion may not apply to you.Windows™ is a registered trademark of Microsoft Corp. in the United States and other countries; Mac OS® is a registered trademark of Apple Inc.; Linux™ is a registered trademark of Linus Torvalds. Android is a trademark of Google Inc. The Android robot is reproduced or modified from work created and shared by Google and used according to terms described in the Creative Commons 3.0 Attribution License. ©2012 Google In. All rights reserved. Android, Google, Google Play, YouTube and other marks are trademarks of Google Inc. Ematic is not affiliated with Google Inc. Wi-Fi®, the Wi-Fi CERTIFIED logo, and the Wi-Fi logo are registered trademarks of the the Wi-Fi Alliance.Ematic is not affiliated with Microsoft, Apple, Inc., Linux, or Google, Inc., (including Android).This device complies with Part 15 of the FCC Rules. Operation is subject to the following two conditions: (1) this device may not cause harmful interference, and (2) this device must accept any interference received, including interference that may cause undesired operation.The Ematic brand and products are owned by Shaghal, Ltd.。

for SketchUp8 Maxwell2.5中文手册1.目录2概述2.1为什么要注解本手册?本手册包含了你所需要了解的所有信息,以便你理解使用SKETCHUP中的MAXWELL插件,它主要讲解一些MAXWELL常规性基础概念及细节,但它并不预算定期更新MAXWELL的渲染手册,该手册就在您的MAXWELL安装目录;在该手册中如果您有任何与该插件相关的参数没有在这里充分解释,请咨询联系我们,以便获得更进一步的MAXWELL渲染指导手册。
2.2我为什么必需知道怎么使用这个插件?原文费话连篇不再翻译。
下面介绍构成MAXWELL场景和渲染的完整菜单列表,实际上在SU中他们已经被优化和简化了很多:一切都是那么的简单。
2.2.1Scene Manager(场景管理器)The Scene Manager window is the single central point of access to all Maxwell-related sceneparameters.该场景管理器是唯一获得MAXWELL相关场景核心参数的窗口。
These parameters are divided into four main categories,Materials,Camera,Environment,and Output,each of which is represented in a tab in the Scene Manager.这些参数共分为四大类别:材质,照相机,环境,和输出选项,其中每个选项是代表在场景管理器中的选项卡。
2.2.2Menu&Toolbar菜单和工具栏介绍The plugin adds a custom menu and toolbar to SketchUp.这些插件均在SKETCHUP中增加了一个自定义菜单和工具Figure2.2.2:The plugin menu and toolbar.上图2.2.2为这个插件主菜单与工具栏Both of these contain the same items,which fall into three basic groups:上图的菜单栏也都作为工具栏下降至成为按钮并包括在内且项目功能相同。

Prima膝关节被动运动仪中文操作手册(2009版)目录Prima膝关节被动运动仪1. 适用症 (3)2. 临床优势 (3)3. 设备描述 (3)4. 电源连接:安全第一 (4)5. 安全 (4)6. 启动仪器 (5)7. 使用Kinetec患者衬垫套装 (5)8. 患者安放 (6)9. 脚板架位置 (6)10. 保修 (6)11. 清洁 (6)12. 销毁和回收 (7)13. 故障处理 (7)14. 技术参数 (7)15.符号使用 (8)16. 可选配件 (8)17. 保修 (10)Prima膝关节被动运动仪中文操作说明书1. 适用症●膝关节置换术●骨折(膝盖骨,胫骨,股骨,…)●关节松懈术●髋关节术,包括髋关节置换,髋关节固定,髋关节截骨术,…●韧带修复●关节镜外科(半月板切除术,髌骨切除术,…)●灼伤,化脓性关节炎,…2. 临床优势缩短外伤,炎症及关节活动度修复周期预防关节僵硬加速术后关节活动度的恢复保持关节连接面减少疼痛和水肿推动关节软骨康复缩短住院治疗时间减少止疼药物的摄入及时提供术后连续被动运动禁忌症骨癌,扭曲关节面,麻痹性偏瘫,粉碎性骨折,未受控制性传染。
该设备不适用于患者身高高于2米(6尺7寸),或者低于1.47米(4尺7寸)。
3. 设备描述KINETEC Prima Advance是款膝盖被动运动型设备,伸缩活动范围在-5°到115°之间。
A-下缘支柱B-大腿支柱C-脚板架D-控制面板E-手柄4. 电源连接:安全第一KINETEC Prima Advance是Ⅰ类B型设备。
把KINETEC Prima Advance的电源线(1)接到插座上(电压100伏-240伏,频率50/60赫兹)。
注意:在使用前:-检查外接电源插座是好的,并且接口适合关节运动器的电源线接口。
该运动器的电源线符合现行的电源线标准并含有地线。
-插头必须接到符合标准的插座上。
-插座必须配有地线。


MAG Infinite S Series Personal ComputerInfinite S B938User GuideContentsGetting Started (3)Package Contents (3)Safety & Comfort Tips (3)System Overview (4)Hardware Setup (7)Windows 11 System Operations (9)Power Management (9)Network Connections (13)System Recovery (21)F3 Hotkey Recovery (Optional) (23)Safety Instructions (24)Regulatory Notices (26)RevisionV2.1, 2023/022ContentsGetting StartedThis chapter provides you with the information on hardware setup procedures. While connecting devices, be careful in holding the devices and use a grounded wrist strap to avoid static electricity.∙Contact your place of purchase or local distributor if any of the items is damaged or missing.∙Package contents may vary by country.∙The included power cord is exclusively for this personal computer and should not be used with other products.Safety & Comfort Tips∙Choosing a good workspace is important if you have to work with your PC for a long period of time.∙Your work area should have enough illumination.∙Choose the proper desk and chair and adjust their height to fit your posture when operating.∙When sitting on the chair, sit straight and keep a good posture. Adjust the chair’s back (if available) to support your back comfortably.∙Place you feet flat and naturally on the floor, so that your knees and elbows have the proper position (about 90-degree) when operating.∙Put your hands on the desk naturally to support your wrists.∙Avoid using your PC in a place where discomfort may occur (such as on the bed).∙The PC is an electrical device. Please treat it with great care to avoid personal injury.3Getting StartedSystem OverviewInfinite S B938 (PRO H610M-G DDR4/ PRO H610M-G)4Getting Started5Getting Started6Getting Started7Getting Started Hardware Setup Connect your peripheral devices to suitable ports. ⚠Important ∙For detailed instructions on how to connect, please refer to the manuals of your peripheral devices. ∙Reference image only. Appearance will vary.Connect the power cord to the system and electrical outlet.Power Rating: 500W: 100-240V~, 50-60Hz, 7-3A⚠Important When unplugging the AC power cord, always hold the connector part of the cord. Never pull the cord directly.Switch the power supply switch to I.Press the power button to power on the system.8Getting StartedWindows 11 System Operations⚠ImportantAll information and Windows screenshots are subject to change without prior notice. Power ManagementPower management of personal computers (PCs) and monitors has the potential to save significant amounts of electricity as well as deliver environmental benefits.To be energy efficient, turn off your display or set your PC to sleep mode after a period of user inactivity.1. Right-click [Start] and select [Power Options] from the list.2. Adjust [Screen and sleep] settings and select a power mode from the list.3. To choose or customize a power plan, type control panel in the search box and select [Control Panel].4. Open up [All Control Panel Items] window. Select [Large icons] under [View by] drop-down menu.5. Select [Power Options] to continue.6. Select a power plan and fine-tune the settings by clicking [Change plan settings].7. To create your own power plan, select (Create a power plan).8. Select an existing plan and give it a new name.9. Adjust settings for your new power plan.10. T he [Shut down or sign out] menu also presents power saving options for rapid and easy management of your system power.Energy SavingsThe power management feature allows the computer to initiate a low-power or “Sleep” mode after a period of user inactivity. To take advantage of these potential energy savings, the power management feature has been preset to behave in the following ways when the system is operating on AC power:∙Turn off the display after 10 minutes∙Initiate Sleep after 30 minutesWaking the System UpThe computer shall be able to wake up from power saving mode in response to a command from any of the following:∙the power button,∙the network (Wake On LAN),∙the mouse,∙the keyboard.Energy Saving Tips:∙Turn off the monitor by pressing the monitor power button after a period of user inactivity.9Windows 11 System Operations∙Tune the settings in Power Options under Windows OS to optimize your PC’s power management.∙Install power saving software to manage your PC’s energy consumption.∙Always disconnect the AC power cord or switch the wall socket off if your PC would be left unused for a certain time to achieve zero energy consumption.12310Windows 11 System Operations4 5678910Network ConnectionsWi-Fi1. Right-click [Start] and select [Network Connections] from the list.2. Select and turn on [Wi-Fi].3. Select [Show available networks]. A list of available wireless networks pops up. Choose a connection from the list.4. To establish a new connection, select [Manage known networks].5. Select [Add network].6. Enter information for the wireless network you intend to add and click [Save] to establish a new connection.123 45 6Ethernet1. Right-click [Start] and select [Network Connections] from the list.2. Select [Ethernet].3. The [IP assignment] and [DNS server assignment] are automatically set as [Automatic (DHCP)].4. For a Static IP connection, click [Edit] of [IP assignment].5. Select [Manual].6. Switch on the [IPv4] or [IPv6].7. Type the information from your Internet Service Provider and click [Save] to establish a Static IP connection.1234 56 7Dial-up1. Right-click [Start] and select [Network Connections] from the list.2. Select [Dial-up].3. Select [Set up a new connection].4. Choose [Connect to the Internet] and click [Next].5. Select [Broadband (PPPoE)] to connect using DSL or cable that requires a user name and password.6. Type the information from your Internet Service Provider (ISP) and click [Connect] to establish your LAN connection.12356System RecoveryThe purposes for using the System Recovery Function may include:∙Restore the system back to the initial status of original manufacturer’s default settings.∙When some errors have occurred to the operating system in use.∙When the operating system is affected by virus and is not able to work normally.∙When you want to install the OS with other built-in languages.Before using the System Recovery Function, please back up the important data saved on your system drive to other storage devices.If the following solution fails to recover your system, please contact the authorized local distributor or service center for further assistance.Reset this PC1. Right-click [Start] and select [Settings] from the list.2. Select [Recovery] under [System].3. Click [Reset PC] to start the system recovery.4. The [Choose an option] screen pops up. Choose between [Keep my files] and [Remove everything] and follow the on-screen instructions to complete your system recovery.12221Windows 11 System Operations322Windows 11 System OperationsF3 Hotkey Recovery(Optional)Precautions for Using the System Recovery Function1. If your hard drive and system encountered non-recoverable problems, please use the F3 Hotkey recovery from the Hard Drive first to perform the System Recover Function.2. Before using the System Recovery Function, please back up the important data saved on your system drive to other storage devices. Recovering the system with the F3 HotkeyFollow the instructions below to continue:1. Restart the PC.2. Press the F3 hotkey on the keyboard promptly when the MSI greeting appears on the display.3. On the [Choose an option] screen, select [Troubleshoot].4. On the [Troubleshoot] screen, select [Restore MSI factory settings] to reset the system to the default settings.5. On the [RECOVERY SYSTEM] screen, select [System Partition Recovery].6. Follow the on-screen instructions to continue and complete the Recovery Function.23F3 Hotkey Recovery (Optional)Safety Instructions∙Read the safety instructions carefully and thoroughly.∙All cautions and warnings on the device or User Guide should be noted.∙Refer servicing to qualified personnel only.Power∙Make sure that the power voltage is within its safety range and has been adjustedproperly to the value of 100~240V before connecting the device to the power outlet. ∙If the power cord comes with a 3-pin plug, do not disable the protective earth pinfrom the plug. The device must be connected to an earthed mains socket-outlet.∙Please confirm the power distribution system in the installation site shall providethe circuit breaker rated 120/240V, 20A (maximum).∙Always unplug the power cord before installing any add-on card or module to thedevice.∙Always disconnect the power cord or switch the wall socket off if the device wouldbe left unused for a certain time to achieve zero energy consumption.∙Place the power cord in a way that people are unlikely to step on it. Do not placeanything on the power cord.∙If this device comes with an adapter, use only the MSI provided AC adapter approved for use with this device.BatteryPlease take special precautions if this device comes with a battery.∙Danger of explosion if battery is incorrectly replaced. Replace only with the same or equivalent type recommended by the manufacturer.∙Avoid disposal of a battery into fire or a hot oven, or mechanically crushing orcutting of a battery, which can result in an explosion.∙Avoid leaving a battery in an extremely high temperature or extremely low airpressure environment that can result in an explosion or the leakage of flammableliquid or gas.∙Do not ingest battery. If the coin/button cell battery is swallowed, it can causesevere internal burns and can lead to death. Keep new and used batteries awayfrom children.European Union:Batteries, battery packs, and accumulators should not be disposed of asunsorted household waste. Please use the public collection system toreturn, recycle, or treat them in compliance with the local regulations. BSMI:廢電池請回收For better environmental protection, waste batteries should be collectedseparately for recycling or special disposal.24Safety InstructionsCalifornia, USA:The button cell battery may contain perchlorate material and requiresspecial handling when recycled or disposed of in California.For further information please visit: https:///perchlorate/ Environment∙To reduce the possibility of heat-related injuries or of overheating the device, do not place the device on a soft, unsteady surface or obstruct its air ventilators.∙Use this device only on a hard, flat and steady surface.∙To prevent fire or shock hazard, keep this device away from humidity and high temperature.∙Do not leave the device in an unconditioned environment with a storage temperature above 60℃ or below 0℃, which may damage the device.∙The maximum operating temperature is around 35℃.∙When cleaning the device, be sure to remove the power plug. Use a piece of soft cloth rather than industrial chemical to clean the device. Never pour any liquid into the opening; that could damage the device or cause electric shock.∙Always keep strong magnetic or electrical objects away from the device.∙If any of the following situations arises, get the device checked by service personnel:• The power cord or plug is damaged.• Liquid has penetrated into the device.• The device has been exposed to moisture.• The device does not work well or you can not get it working according to the User Guide.• The device has dropped and damaged.• The device has obvious sign of breakage.25Safety Instructions26Regulatory Notices Regulatory Notices CE ConformityProducts bearing the CE marking comply with one or more of the following EU Directives as may be applicable:∙RED 2014/53/EU ∙Low Voltage Directive 2014/35/EU ∙EMC Directive 2014/30/EU∙RoHS Directive 2011/65/EU∙ErP Directive 2009/125/EC Compliance with these directives is assessed using applicable European Harmonized Standards.The point of contact for regulatory matters is MSI-Europe: Eindhoven 5706 5692 ER Son.Products with Radio Functionality (EMF)This product incorporates a radio transmitting and receiving device. For computers in normal use, a separation distance of 20 cm ensures that radio frequency exposure levels comply with EU requirements. Products designed to be operated at closer proximities, such as tablet computers, comply with applicable EU requirements in typical operating positions. Products can be operated without maintaining a separation distance unless otherwise indicated in instructions specific to the product.Restrictions for Products with Radio Functionality (selectproducts only)CAUTION : IEEE 802.11x wireless LAN with 5.15~5.35 GHz frequency band is restricted for indoor use only in all European Union member states, EFTA (Iceland, Norway, Liechtenstein), and most other European countries (e.g., Switzerland, Turkey, Republic of Serbia). Using this WLAN application outdoors might lead to interference issues with existing radioservices.Radio frequency bands and maximum power levels ∙Features: Wi-Fi 6E, BT ∙Frequency Range: 2.4 GHz: 2400~2485MHz5 GHz: 5150~5350MHz, 5470~5725MHz, 5725~5850MHz6 GHz: 5955~6415MHz∙Max Power Level: 2.4 GHz: 20dBm 5 GHz: 23dBm 6 GHz: 23dBmFCC-B Radio Frequency Interference StatementThis equipment has been tested and found to comply with the limitsfor a Class B digital device, pursuant to Part 15 of the FCC Rules.These limits are designed to provide reasonable protection againstharmful interference in a residential installation. This equipment generates, uses and can radiate radio frequency energy and, ifnot installed and used in accordance with the instruction manual, may cause harmful interference to radio communications. However, there is no guarantee that interference will not occur in a particular installation. If this equipment does cause harmful interference to radio or television reception, which can be determinedby turning the equipment off and on, the user is encouraged to try to correct the interference by one or more of the measures listed below:∙Reorient or relocate the receiving antenna.∙Increase the separation between the equipment and receiver.∙Connect the equipment into an outlet on a circuit different from that to which the receiver is connected.∙Consult the dealer or an experienced radio/television technician for help. Notice 1The changes or modifications not expressly approved by the party responsible for compliance could void the user’s authority to operate the equipment.Notice 2Shielded interface cables and AC power cord, if any, must be used in order to comply with the emission limits.This device complies with Part 15 of the FCC Rules. Operation is subject to the following two conditions:∙this device may not cause harmful interference, and∙this device must accept any interference received, including interference that may cause undesired operation.MSI Computer Corp.901 Canada Court, City of Industry, CA 91748, USA(626) 913-0828WEEE StatementUnder the European Union (“EU”) Directive on Waste Electrical and Electronic Equipment, Directive 2012/19/EU, products of “electrical and electronic equipment” cannot be discarded as municipal waste anymoreand manufacturers of covered electronic equipment will be obligated totake back such products at the end of their useful life.27Regulatory NoticesChemical Substances InformationIn compliance with chemical substances regulations, such as the EU REACH Regulation (Regulation EC No. 1907/2006 of the European Parliament and the Council), MSI provides the information of chemical substances in products at: https:///global/indexRoHS StatementJapan JIS C 0950 Material DeclarationA Japanese regulatory requirement, defined by specification JIS C 0950, mandates that manufacturers provide material declarations for certain categories of electronic products offered for sale after July 1, 2006.https:///global/Japan-JIS-C-0950-Material-Declarations India RoHSThis product complies with the “India E-waste (Management and Handling) Rule 2016” and prohibits use of lead, mercury, hexavalent chromium, polybrominated biphenyls or polybrominated diphenyl ethers in concentrations exceeding 0.1 weight % and 0.01 weight % for cadmium, except for the exemptions set in Schedule 2 of the Rule. Turkey EEE RegulationConforms to the EEE Regulations of the Republic Of Turkey Ukraine Restriction of Hazardous SubstancesThe equipment complies with requirements of the Technical Regulation, approved by the Resolution of Cabinet of Ministry of Ukraine as of 10 March 2017, № 139, in terms of restrictions for the use of certain dangerous substances in electrical and electronic equipment.Vietnam RoHSAs from December 1, 2012, all products manufactured by MSI comply with Circular 30/2011/TT-BCT temporarily regulating the permitted limits for a number of hazardous substances in electronic and electric products.28Regulatory Notices29Regulatory Notices Green Product Features∙Reduced energy consumption during use and stand-by ∙Limited use of substances harmful to the environment and health∙Easily dismantled and recycled ∙Reduced use of natural resources by encouraging recycling ∙Extended product lifetime through easy upgrades ∙Reduced solid waste production through take-back policy Environmental Policy ∙The product has been designed to enable proper reuse of parts and recycling and should not be thrown away at its end of life. ∙Users should contact the local authorized point of collection for recycling and disposing of their end-of-life products. ∙Visit the MSI website and locate a nearby distributor for further recycling information. ∙*******************************************************************disposal, take-back, recycling, and disassembly of MSI products.Upgrade and Warranty Please note that certain components preinstalled in the product may be upgradable or replaceable by user’s request. For any further information about the product users purchased, please contact the local dealer. Do not attempt to upgrade or replace any component of the product if you are not an authorized dealer or service center, since it may cause the warranty void. It is strongly recommended that you contact the authorized dealer or service center for any upgrade or replace service.Acquisition of Replaceable Parts Please be noticed that the acquisition of replaceable parts (or compatible ones) of the product users purchased in certain countries or territories may be fulfilled by the manufacturer within 5 years at most since the product has been discontinued, depending on the official regulations declared at the time. Please contact the manufacturer via https:///support/ for the detailed information aboutthe acquisition of spare parts.Copyright and Trademarks NoticeCopyright © Micro-Star Int’l Co., Ltd. All rights reserved. The MSI logo used isa registered trademark of Micro-Star Int’l Co., Ltd. All other marks and names mentioned may be trademarks of their respective owners. No warranty as to accuracy or completeness is expressed or implied. MSI reserves the right to make changes to this document without prior notice.Technical SupportIf a problem arises with your system and no solution can be obtained from the user’s manual, please contact your place of purchase or local distributor. Alternatively, please try the following help resources for further guidance. Visit the MSI website for technical guide, BIOS updates, driver updates and other information via https:///support/30Regulatory Notices。
Vega Prime培训教材Version 1.2 for Windows® 2000, Windows® XP Professional Edition, Solaris® 8.0, and Red Hat 8.0 Linux®北京华力创通科技有限公司仿真系统事业部2003年12月说明 (4)第一章开始 (6)介绍 (6)使用VP和LP (6)VP应用的组成 (7)启动LP (8)退出LP (8)保存 (9)LP的界面构成 (9)第二章创建你的场景 (13)介绍 (13)Prime连接 (13)添加和浏览物体 (14)小结 (21)第三章运动方式和观察者 (22)介绍 (22)运动和观察 (22)设置观察者 (22)创建Transforms (24)添加运动模式 (26)添加碰撞检测 (27)定义通道 (30)修改视窗 (37)小结 (38)第四章环境 (38)介绍 (38)环境设置 (39)定义环境 (39)添加光点 (41)小结 (43)第五章特效 (44)介绍 (44)添加特效 (44)制作碎片效果 (45)制作龙卷风效果 (45)为粮仓制作特效 (55)小结 (55)第六章运行应用 (55)介绍 (55)编译和运行tornado应用程序 (56)建立VC编译环境 (56)小结 (57)附录一Vega Prime API (58)介绍 (58)设置API (58)初始化 (58)vpApp类 (59)定义语句 (60)配置 (61)仿真循环 (61)仿真更新 (61)关闭 (62)VP最小的应用 (62)附录二tornado应用程序 (63)介绍 (63)程序剥析 (63)说明本书主要介绍如何掌握Vega Prime的基本用法。
您可以根据书的内容在自己的工作地点学习使用Vega Prime。
本书将介绍Vega Prime实时应用、Lynx Prime 用户界面,和Vega Prime工具箱的基本用法。
DATASHEET OverviewSynopsys PrimeWave Design Environment is a comprehensive and flexible environment for simulation and reliability analysis of analog, RF, mixed-signal design, custom-digital and memory designs within the Synopsys Custom Design Family.It delivers a seamless simulation experience around all the engines of Synopsys PrimeSim with comprehensive analysis, improved productivity, and ease of use. PrimeWave Design Environment also offers a powerful Tcl-based scripting capability enabling easy regressions across thousands of corners. It offers a unified workflow driven analysis for all Synopsys PrimeSim Reliability Analysis applications. It provides a consistent and rich verification experience across applications. Synopsys PrimeWave Design Environment offers guided analysis setup, intuitive visualization, debug, and root-causing capabilities enabling a reliability aware design methodology.Figure 1: PrimeWave Design EnvironmentUnified WorkflowDriven Environmentfor Simulation andReliability AnalysisPrimeWave Design EnvironmentKey Benefits• Unified workflow across all PrimeSim engines for all types of simulation and reliability analysis• Tightly integrated with Custom Compiler™ for analog, RF, and mixed-signal analysis or available in a command-line mode for custom-digital and memory flows• High-capacity waveform viewing capable of handling large waveform files in a multitude of file formats.• Efficient post-processing with more than a hundred built-in functions and support for HSPICE measure statements• Open environment for integration and customization• Flexible Tcl-based scripting capability for programming complex testbenches for regression and post-processing Comprehensive Environment for Analog/RF and Mixed Signal SimulationFigure 2: PrimeWave provides a comprehensive environment for analog, RF and mixed-signal simulationThe PrimeWave Design Environment is a comprehensive environment for all Synopsys simulation engines and analysis capabilities. It provides an easy-to-use simulation setup cockpit, support for grid-based job distribution and monitoring of simulation jobs, anda powerful graphical waveform viewer. Whether designing analog, mixed-signal, or RF designs on mature or advanced nodes, the PrimeWave Design Environment is a unified solution for all applications.For mixed-signal applications, the PrimeWave Design Environment offers support for both analog and digital waveforms.For RF designs such as VCOs, LNAs, and Mixers, the PrimeWave Design Environment offers built-in phase-noise, jitter, intermodulation distortion, and gain compression measurement functions.For signal integrity, the PrimeWave Design Environment supports built-in measurements for statistical eye simulations as well as specific applications such as PAM4 and DDR. With the sequential testbench feature, the PrimeWave Design Environment allows dependencies to be created between testbenches and measurements, allowing measurements from one testbench to be used in another for a specification-driven flow. The powerful parameterization capability allows any design variable or view to be transformed into a variable that the design environment can iterate through, to allow exhaustive characterization of any design.Unified Workflow Driven Environment For Reliability AnalysisFor reliability, the PrimeWave Design Environment offers a unified workflow driven setup with several features for out-of-box and customizable workflows, advanced debug, and visualizations, distributing and monitoring compute intensive jobs.203/16/23.CS1071072274-PrimeWave-Design-Environment-DS.©2023 Synopsys, Inc. All rights reserved. Synopsys is a trademark of Synopsys, Inc. in the United States and other countries. A list of Synopsys trademarks isavailable at /copyright.html . All other names mentioned herein are trademarks or registered trademarks of their respective owners.Automated Setup WizardSchematic cross-probing & annotationConsolidated view for setup/violation/waiversDesign Schematic Design SetupWaiversViolationOA View (CCK data save/restore)Figure 3: PrimeWave Design Environment offers a unified workflow driven setup with several features for customizable workflowsSome key highlights include.• Guided wizard driven setup for new users and expert mode for advanced users.• Load, visualize and cross-probe and annotate violations in the schematic and layout open access database.• Consolidated open access view saving setup, annotations, and violations.• Advanced debugging features to quickly root-cause and isolate reliability bottlenecks.Flexible and Programmable EnvironmentA modern design environment requires a robust mechanism for running batch-mode simulations, reliability analysis and regressions. The PrimeWave Design Environment is open and extensible and can be controlled in either GUI or Batch mode with scripting. The GUI is also extensible, allowing CAD teams to craft custom measurements and create bind key settings and release them across their organizations. The PrimeWave Design Environment allows any simulation setup to easily be saved as a Tcl script, allowing all the capabilities in interactive mode to be also used in batch-mode. Users can also define pre-and post-run procedures for performing calibrations and other processing of simulation data. The environment also provides flexibility to users to customize their own checks for reliability applications. It includes a rich set of open APIs that make it easy to customize the user experience.Foundry-certified, ISO26262 Compliant and Cloud Ready• The PrimeWave Design Environment supports all PrimeSim simulators for Analog, RF and Mixed Signal simulations and offers applications for full life cycle reliability verification.• PrimeSim and PrimeSim Reliability Analysis technologies are part of the ISO 26262 TCL1 certified Synopsys Custom Design tool chain and thus can be reliably used for ASIL-D applications.• PrimeSim simulation engines and PrimeSim Reliability Analysis technologies are also cloud ready with enablement andoptimization for leading public cloud platforms.For more information about Synopsys products, support services or training, visit us on the web at , contact your local sales representative or call 650.584.5000。