计网实验TCPIP Configuration
- 格式:doc
- 大小:214.00 KB
- 文档页数:9
实验报告
1、实验名称:Windows XP下TCP/IP 配置实验
2、实验目的:1、熟悉Windows XP 及网络环境;
2、熟悉IE 上网,并了解网络相关术语;
3、掌握TCP/IP 协议配置及查询方法;
3、实验环境:1、硬件环境:计算机一台,配置网卡及局
域网环境;2、软件环境:Windows XP操作系统。
4、实验记录
1)实验时间:2012.11.20
2)实验地点:山大兴隆山校区实验楼917
实验人:
实验条件:具备
3)实验步骤、结果及分析:
1、我们右键点击“网上邻居”,打开“属性”。
然后
右键单击第一个“本地连接”,打开“属性”。
双
击TCP/IP协议,看到配置方式是“自动获得IP
地址”
2、我们点击“程序”“附件”“命令提示符”,在其中输入
“ipconfig/all”,看到IP地址是10.1.0.62 子网掩码
255.255.252.0 默认网关10.1.1.1 DNS地址
202.194.15.12、
202.194.15.13
3、我们右键点击“网上邻居”,打开“属性”。
然后
右键单击第一个“本地连接”,打开“属性”。
双击TCP/IP协议,再选择“使用下面的IP地址”,输入第2步中的相关信息,验证重新配置后,网络畅通。
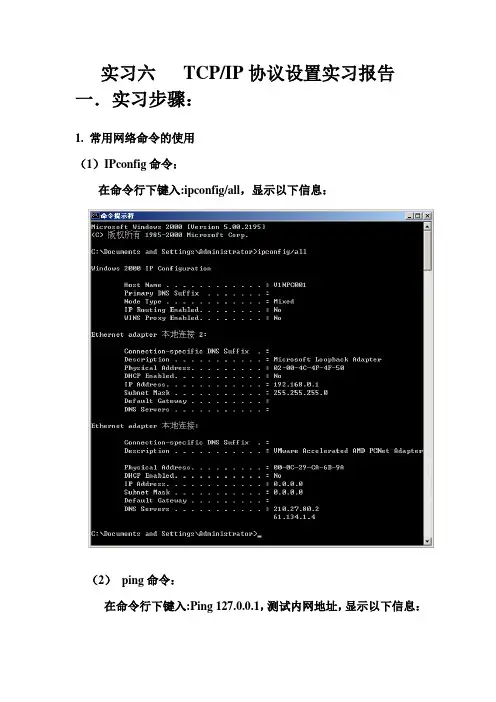
实习六TCP/IP协议设置实习报告一.实习步骤:1. 常用网络命令的使用(1)IPconfig命令:在命令行下键入:ipconfig/all,显示以下信息:(2)ping命令:在命令行下键入:Ping 127.0.0.1,测试内网地址,显示以下信息:在命令行下键入:Ping 本机IP地址,显示以下信息:Ping 一个不通的IP地址(202.117.200.200),显示以下信息:说明网络配置错误2.查看所在机器的主机名称和网络参数,了解网络基本配置中包含的协议、服务和基本参数。
(1)查看本机主机名称和工作组:(2)查看本机网络配置参数:我在桌面上建立了一个名为myfloder的文件夹,以下为设置共享:4.共享资源访问:在其他机器上打开共享文件夹:由于设定的权限为允许读取、拒绝写入,因此能够打开该文件夹的内容但无法修改,说明共享文件及设置权限成功:5.修改网络配置参数,建立小组内的局域网:(1)修改本机所属工作组:原名为CIE1N,修改名为GROUP1:(2)修改本机网络配置参数:修改的本机网络配置参数为:IP地址:192.168.100.2子网掩码:255.255.255.0默认网关:DNS服务器地址:61.150.47.1使用IPConfig命令和Ping命令测试网络配置是否正确:网络配置与设定的一致:用新设定的IP地址检测,说明网络配置成功:Ping 1个不通的IP地址:说明网络配置错误。
6.添加和删除网络协议、服务、客户端组件(1)删除Internet协议(TCP/IP)协议:删除“Internet协议(TCP/IP)”后,使用ipconfig和ping 命令测试结果如下:结论:说明网络配置错误。
(2)删除Mincrosoft 网络客户端:(3)删除Mincrosoft 网络文件和打印机共享:(4)安装nternet协议(TCP/IP)协议:设定所安装协议的属性:(5)安装Mincrosoft 网络客户端:(6)安装Mincrosoft 网络文件和打印机共享:二.实习总结:通过本次实习,我知道了用命令休止符来了解本机上的一些基本信息。
实验二TCP/IP 配置一、实验目的掌握Windows2000 系统下TCP/IP 协议的配置。
二、实验内容安装网络适配器,查看本地连接属性。
配置TCP/IP协议。
三、实验原理TCP/IP 协议是Internet 默认的网络协议。
目前流行的操作系统,无论是Unix 、Linux,还是Windows ,都把TCP/IP 协议作为默认的网络通信协议。
下面讲述Windows2000 系统下TCP/IP 协议的配置。
1.网络适配器的安装用户上网可以有多种方式,如可以通过电话线,采用ISDN,ADSL,通过双绞线、采用局域网方式,也可以通过无线方式上网。
但无论哪种方式,用户计算机中都必须增加相应的设备,以完成TCP/IP 协议栈的相应层次的功能。
如通过电话线上网需要Modem,通过有线或无线局域网上网需要相应的网络适配器。
本章主要以用户计算机通过局域网以双绞线上网为例介绍TCP/IP 协议的配置。
⑴网络适配器安装网络适配器又称网卡,是用户计算机上网的重要设备。
它大致完成TCP/IP 协议栈中网络接口层的功能,使计算机通过TCP/IP 协议访问Internet 的物质基础。
在Windows2000 操作系统中,大多数网络适配器都可被系统自动识别,Windows2000 自动安装网络适配器驱动程序,从而使适配器处于正常的工作状态。
当然也会有个别比较特殊的网络适配器,Windows2000 不能自动识别,就需要用户提供相应的驱动程序才能使适配器正常工作。
通常在用户购买网络适配器时会附带一张驱动盘,内附本适配器的安装说明及驱动程序。
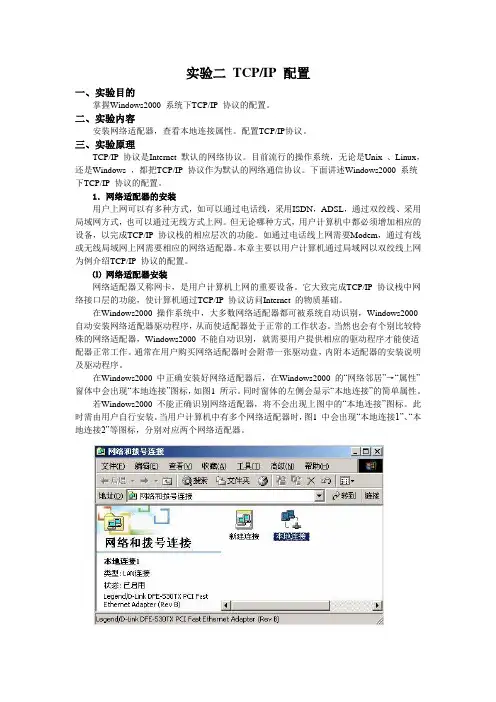
在Windows2000 中正确安装好网络适配器后,在Windows2000 的“网络邻居”→“属性”窗体中会出现“本地连接”图标,如图1 所示。
同时窗体的左侧会显示“本地连接”的简单属性。
若Windows2000 不能正确识别网络适配器,将不会出现上图中的“本地连接”图标。
此时需由用户自行安装。
实验一 Windows网络配置和TCP/IP协议配置一、实验目的服务器等网络协议配置,打印和打印和地址、网络掩码、学习在Windows系统中进行IP地址、网络掩码、DNS服务器等网络协议配置,共享的配置。
本实验在于更好地理解计算机网络设置的基本操作,掌握计算机网络配置的基本监测技术。
二、实验内容Windows的网络配置、Windows TCP/IP 协议配置、Windows打印和共享的设置三、实验环境Windows 操作系统四、实验步骤Windows的网络配置1、进入网络配置网上邻居—单击右键—属性—本地连接—右键—属性2、添加客户组件并设定属性本地连接属性—Internet协议(TCP/IP)--属性—网络属性设置3、配置文件及打印共享打印和共享的配置共享配置:新建共享;配置共享;删除共享;访问共享,共享的两种形式:显式共享和隐式共享。
文件和打印服务的配置共享:共享只能针对文件夹有能力共享文件夹的组包括ADMINISTRA TORS, POWER USERS,SERVER OPERA TORS 共享名:可以与文件夹名不一样备注:说明,用来识别共享文件夹的内容用户数限制:可以并发连接到该共享文件夹的用户数目权限:通过网络访问时才使用,默认情况下EVERYONE 完全控制,权限累积,拒绝权限优先限优先访问共享: 网上邻居:要生成浏览列表,较慢。
有可能不能显示较慢。
有可能不能显示在运行里输入UNC (统一名称惯例):\\(IP 地址)\共享文件夹名(较快)共享文件夹名(较快)映射驱动器:只能映射共享文件夹。
相当于本机的磁盘映射驱动器:只能映射共享文件夹。
相当于本机的磁盘 查看共享:查看共享:计算机管理:显式和隐式共享都可查看计算机管理:显式和隐式共享都可查看使用DOS 命令:命令:NET SHARE 查看本机共享查看本机共享网上邻居:不可以访问隐式共享网上邻居:不可以访问隐式共享打印机配置:控制面板—打印机—本地打印机和网络打印机配置4、配置计算机名称 我的电脑—右键—属性—计算机名。
实验一TCP/IP配置与测试一、实验目的及任务1、熟悉并掌握TCP/IP的基本配置。
2、掌握TCP/IP的基本测试方法。
二、实验环境与因特网连接的计算机局域网;主机操作系统为windows 2000;三、预备知识从某种程度上说,Internet/Intranet与传统网络的主要区别在于它采用了TCP/IP协议,TCP/IP通信协议是目前最完整的、被普遍接受的通信协议标准。
它可以使不同的硬件结构、不同软件操作系统的计算机之间相互通信。
TCP/IP 是一个广泛发布的公开标准,完全独立于任何硬件或软件厂商,可以运行在不同体系的计算机上。
它采用通用寻址方案,一个系统可以寻址到任何其他系统,即使在Internet这样庞大的全球网络内,寻址也是游刃有余。
主流的操作系统都支持TCP/IP协议。
微软公司的操作系统平台对TCP/IP提供了强有力的支持,其安装和配置管理都是基于图形化窗口的,只要对TCP/IP 基本知识有所了解,即使是初学者按照提示也能够很轻易地进行基本的安装配置。
TCP/IP配置完毕后,即可利用测试工具进行测试。
Windows提供了许多测试工具软件,常用的有:.Ping ,检测网络是否连通。
.Ipconfig ,显示目前TCP/IP的配置。
.Netstat ,显示目前TCP/IP网络连接与每一种协议的统计数据。
.Route ,显示路由配置信息。
.Tracert ,根踪由本机将数据包传送到目的主机所经的路由器及时间。
四、实验步骤1、在Windows2000 Server中配置TCP/IP。
(1)选择[开始]>[设置]>[控制面板]>[网络和拨号连接],打开网络和拨号连接对话框。
(2)选择[本地连接],单击鼠标右键,从弹出的快捷菜单中选择[属性]、从组件列表中选择[1nternet协议(TCP/IP)] ,单击[属性]按钮打开如图所示的对话框。
图[Internet协议(TCP/IP)属性]对话框(3)选择1P地址分配方式,这里有两种情况:如果要通过动态分配的方式获取IP地址,请选择[自动获得IP地址选项] 。
实验指导书专业班级学号姓名日期课程名称计算机网络基础实验(5)常用的TCP/IP网络命令一、实验目的:1、查看windows环境下IP地址的配置方式2、熟悉windows环境下的常用网络命令;3、掌握常用命令及其用法;4、掌握IP网络连通性测试方法。
5、利用网络命令进行一般故障的分析。
二、实验环境和准备:1、实验环境:联网的计算机网络实验室;2、实验时数:2学时;3、实验准备:1)阅读教材关于常用网络命令方面的相关内容;2)预习实验指导书,了解网络命令的基础知识。
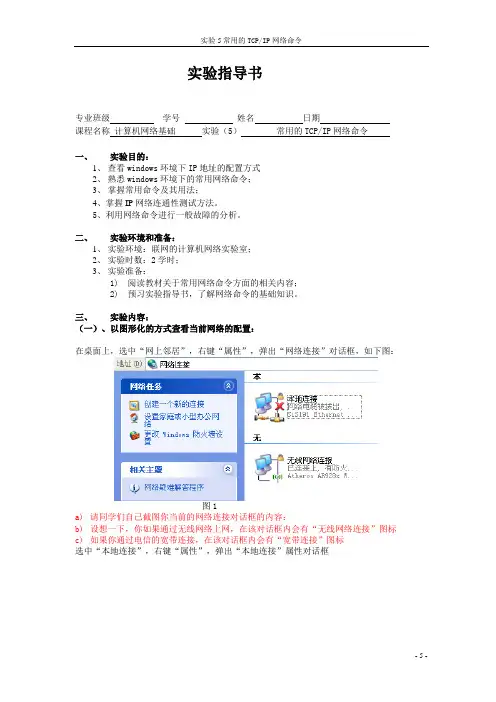
三、实验内容:(一)、以图形化的方式查看当前网络的配置:在桌面上,选中“网上邻居”,右键“属性”,弹出“网络连接”对话框,如下图:图1a)请同学们自己截图你当前的网络连接对话框的内容:b)设想一下,你如果通过无线网络上网,在该对话框内会有“无线网络连接”图标c)如果你通过电信的宽带连接,在该对话框内会有“宽带连接”图标选中“本地连接”,右键“属性”,弹出“本地连接”属性对话框d)请同学们自己截图你当前的本地连接属性对话框的内容,该本地连接已经安装的组件是,用自己的话回答:e)在上图中选中“Internet 协议(TCP/IP)”,单击属性,弹出TCP/IP的配置,如下图请同学们自己截图你当前TCP/IP的配置内容:用自己的话概括TCP/IP的配置有几种方式,分别是,在配置TCP/IP时需要指定哪些参数?f)你设想一下,若网络中采用自动获取IP地址,DHCP服务器需要配置哪些内容,各客户端的PC机才能获取上述内容?g)在下图中选中“高级”菜单,---网络标识,查看自己的工作组=网络标识是=(二)、常用网络命令简介下面这些命令的使用要在“命名提示符”窗口下进行,进入“命名提示符”窗口的方法,“开始”--→“运行”--→输入cmd1.ipconfigipconfig命令以窗口的形式显示本机IP协议的具体配置信息。
命令可以显示网络适配器的物理地址、主机的IP地址、子网掩码以及默认网关等,还可以查看主机名、DNS 服务器、节点类型等相关信息。

实验二--配置T C P I P协议本页仅作为文档页封面,使用时可以删除This document is for reference only-rar21year.March实验二配置TCP/IP协议一、实验目的了解TCP/IP协议的工作原理;掌握TCP/IP协议的安装及配置方法;掌握常用的TCP/IP网络故障诊断和排除方法;二、实验环境多台装有Windows 2008 Server的计算机。
三、实验内容及步骤1、安装TCP/IP协议控制面板—>网络连接—>本地连接—>右键调出属性面板—>添加—>协议—>选择TCP/IP协议—>开始安装2、设置TCP/IP协议右击网上邻居—>属性—>右击本地连接—>属性—>选择TCP/IP协议—>属性●设置IP地址:192.168.0.机器号+10●设置子网掩码:255.255.255.0●设置默认网关:192.168.0.1●设置DNS服务器:192.168.0.13、常用网络测试命令的使用(1)PingPing是测试网络联接状况以及信息包发送和接收状况非常有用的工具,是网络测试最常用的命令。
Ping向目标主机(地址)发送一个回送请求数据包,要求目标主机收到请求后给予答复,从而判断网络的响应时间和本机是否与目标主机(地址)联通。
如果执行Ping不成功,则可以预测故障出现在以下几个方面:网线故障,网络适配器配置不正确,IP地址不正确。
如果执行Ping成功而网络仍无法使用,那么问题很可能出在网络系统的软件配置方面,Ping成功只能保证本机与目标主机间存在一条连通的物理路径。
命令格式:参数含义:-t不停地向目标主机发送数据;直到用户按ctrl+c结束-a 以IP地址格式来显示目标主机的网络地址;-n count 指定要Ping多少次,具体次数由count来指定;-l size 指定发送到目标主机的数据包的大小。

《TCP/IP协议》实验报告学院:机械与电子信息学院专业:计算机网络技术学号:姓名:指导教师:2018年 6 月实验一Packet Tracer 6.0的使用一、实验目的通过在Packet Tracer 6.0 添加网络设备,熟悉不同的物理设备及其连接方式,掌握使用Packet Tracer 6.0构建网络的方法,掌握捕获、查看通信信息的方法。
二、实验步骤步骤1、打开Packet Tracer 6.0,添加以下网络节点:1841路由器3台,2950-24 交换机1台,PC三台,服务器1台。
步骤2、选择合适的连接线把设备连接起来。
以太网连线时,交换机与计算机或路由器等设备之间连接用直通线,交叉线用于同种设备(路由器与路由器,交换机与交换机)之间相连或计算机与路由器之间相连。
用直通线吧PC0、PC1、Router0与Switch0的任意端口连接,Router0、Router1和Router2之间需要用交叉线连接,Server0与Router2也要用交叉线连接。
如果连线类型正确,则PC与交换机之间连线上的绿灯马上会点亮。
特别的,为配置路由器,可以用控制台连线把PC2和Router1的Console 端口连接起来,也可以连接到Router1的Auxiliary端口上,但使用方法与连接到控制口时不同。
步骤3、配置设备。
PC的配置可以直接在Packet Tracer 6.0的逻辑拓补图上单击PC图标,打开设备配置窗口,单击Desktop选项卡中的IP Configuration,完成默认网关和ID地址的设置。
依次设置3台PC和服务器0的IP地址,PC0和PC1的默认网关设为192.168.1.1,服务器0的默认网关设为192.168.4.1。
单击需要配置的路由器图标,打开设备配置窗口,单击CLI选项卡,按Enter键出现命令行提示符,然后使用如下命令配置静态路由。
Router>enable #进入特权模式Router#configure terminal #全局配置Router(config)#int f0/0 #配置接口f0/0 Router(config-if)#no shutdown #开启接口Router(config-if)#ip address 192.168.1.1 255.255.255.0随着借口no shutdown 命令的输入,接口连线上的绿灯随时变亮。
实验三TCP/IP协议配置【实验目的】1.了解TCP/IP协议属性设置,掌握各种查看网络参数的方法。
2.了解IE功能及使用方法,理解IE 各项参数意义并会合理设置。
【实验属性】验证性试验。
【实验设备】计算机(带网卡)、网线、因特网。
【实验要求】1、阅读学习实验原理。
2、试验中正确使用仪器设备,独立操作。
3、试验后按规定要求写出实验报告。
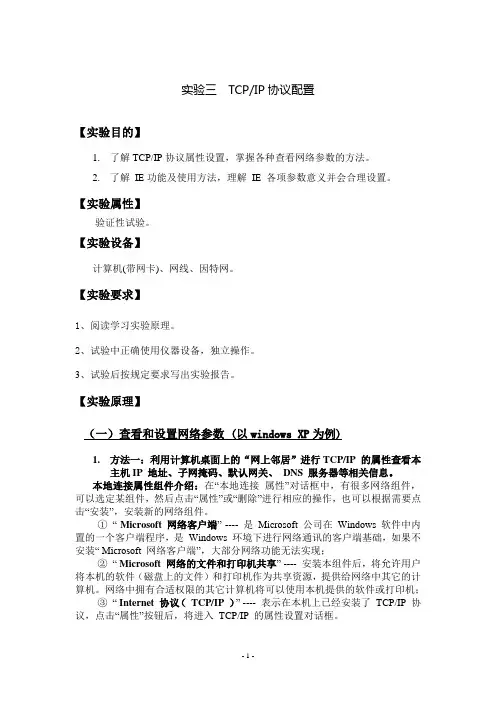
【实验原理】(一)查看和设置网络参数 (以windows XP为例)1.方法一:利用计算机桌面上的“网上邻居”进行TCP/IP 的属性查看本主机IP 地址、子网掩码、默认网关、DNS 服务器等相关信息。
本地连接属性组件介绍:在“本地连接属性”对话框中,有很多网络组件,可以选定某组件,然后点击“属性”或“删除”进行相应的操作,也可以根据需要点击“安装”,安装新的网络组件。
①“ Microsoft 网络客户端” ---- 是Microsoft 公司在Windows 软件中内置的一个客户端程序,是Windows 环境下进行网络通讯的客户端基础,如果不安装“ Microsoft 网络客户端”,大部分网络功能无法实现;②“ Microsoft 网络的文件和打印机共享” ---- 安装本组件后,将允许用户将本机的软件(磁盘上的文件)和打印机作为共享资源,提供给网络中其它的计算机。
网络中拥有合适权限的其它计算机将可以使用本机提供的软件或打印机;③“ Internet 协议(TCP/IP )” ---- 表示在本机上已经安装了TCP/IP 协议,点击“属性”按钮后,将进入TCP/IP 的属性设置对话框。
图1.1 TCP/IP 协议属性设置与查看在这个对话框中可以设置IP 地址、子网掩码、默认网关、DNS 服务器,点“高级”按钮后,还可以对IP 地址、DNS 服务、WINS 等其它内容进行高级设置。
2.方法二:利用计算机“运行”命令ipconfig /all查看计算机TCP/IP属性。
实验一TCP/IP属性设置与测试【一】实验目的1. 通过实验学习局域网接入Internet时的TCP/IP属性的设置;2. 掌握ping、ipconfig等命令的使用;3. 熟悉使用相关命令测试和验证TCP/IP配置的正确性及网络的连通性。
【二】实验要求1. 设备要求:计算机2台以上(装有Windows 2000/XP/2003操作系统、装有网卡已联网);2. 分组要求:2人一组,合作完成。
【三】实验预备知识1. IP地址、子网掩码、默认网关、DNS服务器(1)IP地址IP地址(IP Address)就是给每个连接在Internet上的主机分配的一个32bit二进制地址,为了方便人们的使用,IP地址经常被写成十进制的形式,中间使用符号“.”分开不同的字节,IP地址它就像一个人可以合法的在社会上办理银行卡、移动电话等社会活动所需要一个身份证号标识一样。
所有的IP地址都由国际组织NIC(Network Information Center)负责统一分配,目前全世界共有三个这样的网络信息中心:InterNIC(负责美国及其他地区)、ENIC(负责欧洲地区)、APNIC(负责亚太地区),我国申请IP地址要通过APNIC,APNIC的总部设在澳大利亚布里斯班。
申请时要考虑申请哪一类的IP地址,然后向国内的代理机构提出。
(2)子网掩码子网掩码(subnet mask)又叫网络掩码、地址掩码、子网络遮罩,它是一种用来指明一个IP地址的哪些位标识的是主机所在的子网以及哪些位标识的是主机的位掩码。
子网掩码不能单独存在,它必须结合IP地址一起使用。
子网掩码只有一个作用,就是将某个IP地址划分成网络地址和主机地址两部分。
(3)默认网关默认网关(Default Gateway)是一个可直接到达的IP 路由器的IP 地址,配置默认网关可以在IP 路由表中创建一个默认路径,一台主机可以有多个网关。
默认网关的意思是一台主机如果找不到可用的网关,就把数据包发给默认指定的网关,由这个网关来处理数据包,它就好像一所学校有一个大门,我们进出学校必须经过这个大门,这个大门就是我们出入的默认关口。
Test 1. TCP/IP Configuration1. Click Start and then click Run. Type the command or cmd and then press Enter.2. At the DOS prompt, type NET HELP and press Enter. You should see something like the screen below:The command you are interested in is the View command. To obtain information about it, type NET HELP VIEW, and press Enter.3. What is the purpose of NET VIEW:The NET VIEW command shows the names of the machines present on your network. Notice that it lists the names of machines on the left, in column labelled “Server name” and another column labelled “Remark”4. List the machines after you have typed NET VIEW from the command promptClose the DOS window by typing EXIT on the command line and then press Enter, or by clicking the Close button in the upper right corner of the window. Obtain the TCP/IP Configuration InformationUse the Start menu to open the Command Prompt, an MS-DOS-like window. Press Start > Programs > Accessories > Command Prompt or Start > Programs > Command Prompt.The following figure shows the Command screen. Type ipconfig and press the Enter key. The spelling of ipconfig is critical while case is not. It is short for IP Configuration.This first screen shows the IP address, subnet mask, and default gateway. The IP address and the default gateway should be in the same network or subnet, otherwise this host would not be able to communicate outside the network. In the figure the subnet mask tells us that the first three octets must be the same to be in the same network.Note: If this computer is on a LAN, the default gateway might not be seen if it is running behind a Proxy Server. Record the following information for this computer.Record the following TCP/IP information for this computer6.Compare the TCP/IP configuration of this computer to others on the LAN 7.If this computer is on a LAN, compare the information of several machines. Record a couple of the IP Addresses:1) IP sddresses 1:2) IP addresses 2:Are there any similarities?前三个字段相同,What is similar about the IP addresses?最后字段存在差异What is similar about the default gateways?完全相同The IP addresses should share the same network portion. All machines in the LAN should share the same default gateway.Check additional TCP/IP configuration informationTo see detailed information, type ipconfig /all and press Enter. The figure shows the detailed IP configuration screen.The host name, including the computer name and NetBIOS name should be displayed. Also, the DHCP server address, if used, and the date the IP lease starts and ends should be displayed. Look over the information. Entries for the DNS, used in name resolution servers, may also be present.8.Mark the Physical Address (MAC) and the NIC model (Description).9.While not a requirement, most LAN administrators try to standardize components like NICs. Therefore, it would not be surprising to find all machines share the first three Hex pairs in the adapter address. These three pairs identify the manufacturer of the adapter.10.Write down the IP addresses of any servers listed (if any):IP sddresses 1:IP addresses 2:Write down the computer Host Name:118stu-06Write down the Host Names of a couple other computers:Do all of the servers and workstations share the same network portion of the IP address as the student workstation? NOIt would not be unusual for some or all of the servers and workstations to be in another network. It means that the computer default gateway is going to forward requests to the other network.Using ping from a WorkstationAccess the command promptUse the Start menu to open the Command Prompt window. Press Start > Programs > Accessories > Command Prompt or Start > Programs > Command Prompt or Start > All Programs > Command Prompt.ping the IP address of another computerIn the window, type ping, a space, and the IP address of a computer located in your working area .11.The following figure shows the successful results of ping to this IP address. Ping uses the ICMP echo request and echo reply feature to test physical connectivity. Since ping reports on four attempts, it gives an indication of the reliability of the connection. Look over the results and verify that the ping was successful. Is the ping successful? If not, perform appropriate troubleshooting. 成功If a second networked computer is available, try to ping the IP address of the second machine.Note the results.ping the IP address of a DHCP or DNS servers12.Try to ping the IP address of any DHCP and/or DNS servers listed in the last exercise. If this works for either server, and they are not in the network, what does this indicate?Was the ping successful? 成功ping the hostname of another computerTry to ping the hostname of the computer that was recorded previously. The figure shows the successful result of the ping the hostname.Look over the results. Notice that the first line of output shows the host name, DESKTOP in the example, followed by the IP address. This means the computer was able to resolve the host name to an IP address. Without name resolution, the ping would have failed because TCP/IP only understands valid IP addresses, not names.If the ping was successful, it means that connectivity and discovery of IP addresses can be done with only a hostname. In fact, this is how many early networks communicated. If successful, then ping a hostname also shows that there is probably a WINS server working on the network. WINS servers or a local “lmhosts” file resolve computer host names to IP addresses. If the ping fails, then chances are there is no NetBIOS name to IP addresses resolution running.ping the IP address of the default gateway13.What is the IP address of your default gateway?Try to ping the IP address of the default gateway. Was it successful?成功If the ping is successful, it means there is physical connectivity to the router on the local network and probably the rest of the world.Type tracert at the command prompt, followed by a host name or IP address from your working area.tracert is TCP/IP abbreviation for trace route. The preceding figure shows the successful result when running tracert from on a LAN. The first output line shows the FQDN followed by the IP address. Therefore, a DNS server was able to resolve the name to an IP address. If you are connected on a huge network (like the Internet) there will be listings of all routers the tracert requests had to pass through to get to the destination.tracert uses the same echo requests and replies as the ping command but in a slightly different way.Each router represents a point where one network connects to another network and the packet was forwarded through.14. Tracert a website and explain what you have found.。
实习四 TCP/IP网络协议配置一、实习目的1.了解网络基本配置中包含的协议、服务、客户端,以及基本参数,并了解各种协议的作用,以及安装方法;2.掌握Windows 2000 Server支持的网络协议及参数设置方法;3.练习并掌握简单网络命令的使用。
二、实习内容1.查看所在机器的主机名称和网络属性,包括网络基本配置中包含的协议、服务、客户端,以及有关的基本参数;2.修改网络配置参数,建立小组内的局域网;3.网络协议、服务、客户端等组件的安装和卸载方法;4.常用网络命令的使用。
三、预备知识1.TCP/IP协议和IP地址的有关知识;2.Windows命令方式的有关知识。
四、实习步骤实习开始时,由任课教师将学生每10人划分为一个网络小组,并分配IP地址,练习网络参数配置,建立小组内的局域网,完成如下实习内容:1.查看所在机器的主机名称和网络参数,了解网络基本配置中包含的协议、服务和基本参数。
查看本机主机名称和工作组查看本机网络配置参数2.常用网络命令的使用(1)IPConfig(2) ping命令3.共享资源访问4.修改网络配置参数,建立小组内的局域网修改本机所属工作组修改本机网络配置参数5.添加和删除网络协议、服务、客户端组件五、实习要求1.按照实习步骤进行操作,记录操作的参数。
2.根据实习内容和实习过程的具体操作,书写实习报告。
要求写出实习内容及操作设置的具体参数,操作结果,存在的问题等内容。
六、思考问题1、在网络设置中应注意哪些问题?首先要确定网络硬件完好与齐全,即网卡要能正常工作。
启用后,要指定IP地址以免造成内部网络冲突。
2、安装网络协议共分几部分,安装时应注意的问题是什么?当我们在电脑中插上网卡后,启动Windows系统,它会自动安装上网卡的驱动程序和相关的协议。
在“网上邻居的“属性”中,打开“网络和拨号连接”窗口。
在“本地连接”上单击鼠标右键,选择“属性”。
屏幕上出现本地网络的设置窗口,上面的这一栏是当前使用网卡的型号。
Test 1. TCP/IP Configuration1. Click Start and then click Run. Type the command or cmd and then press Enter.2. At the DOS prompt, type NET HELP and press Enter. You should see something like the screen below:The command you are interested in is the View command. To obtain information about it, type NET HELP VIEW, and press Enter.3. What is the purpose of NET VIEW:The NET VIEW command shows the names of the machines present on your network. Notice that it lists the names of machines on the left, in column labelled “Server name” and another column labelled “Remark”4. List the machines after you have typed NET VIEW from the command promptClose the DOS window by typing EXIT on the command line and then press Enter, or by clicking the Close button in the upper right corner of the window.Obtain the TCP/IP Configuration InformationUse the Start menu to open the Command Prompt, an MS-DOS-like window. Press Start > Programs > Accessories > Command Prompt or Start > Programs >Command Prompt.The following figure shows the Command screen. Type ipconfig and press the Enter key. The spelling of ipconfig is critical while case is not. It is short for IP Configuration.This first screen shows the IP address, subnet mask, and default gateway. The IP address and the default gateway should be in the same network or subnet, otherwise this host would not be able to communicate outside the network. In the figure the subnet mask tells us that the first three octets must be the same to be in the same network.Note: If this computer is on a LAN, the default gateway might not be seen if it is running behind a Proxy Server. Record the following information for this computer.Record the following TCP/IP information for this computer6.Compare the TCP/IP configuration of this computer to others on the LAN 7.If this computer is on a LAN, compare the information of several machines.Record a couple of the IP Addresses:1) IP sddresses 1: 192.168.156.572) IP addresses 2: 192.168.156.66Are there any similarities?前三个字段相同,What is similar about the IP addresses?最后字段存在差异What is similar about the default gateways?完全相同The IP addresses should share the same network portion. All machines in the LAN should share the same default gateway.Check additional TCP/IP configuration informationTo see detailed information, type ipconfig /all and press Enter. The figure shows the detailed IP configuration screen.The host name, including the computer name and NetBIOS name should be displayed. Also, the DHCP server address, if used, and the date the IP lease starts and ends should be displayed. Look over the information. Entries for the DNS, used in name resolution servers, may also be present.8.Mark the Physical Address (MAC) and the NIC model (Description).9.While not a requirement, most LAN administrators try to standardize components like NICs. Therefore, it would not be surprising to find all machines share the first three Hex pairs in the adapter address. These three pairs identify the manufacturer of the adapter.10.Write down the IP addresses of any servers listed (if any):IP sddresses 1: 192.168.156.57IP addresses 2: 192.168.156.66Write down the computer Host Name:118stu-06Write down the Host Names of a couple other computers:Do all of the servers and workstations share the same network portion of the IP address as the student workstation? NOIt would not be unusual for some or all of the servers and workstations to be in another network. It means that the computer default gateway is going to forward requests to the other network.Using ping from a WorkstationAccess the command promptUse the Start menu to open the Command Prompt window. Press Start > Programs > Accessories > Command Prompt or Start > Programs > Command Prompt or Start > All Programs > Command Prompt.ping the IP address of another computerIn the window, type ping, a space, and the IP address of a computer located in your working area .11.The following figure shows the successful results of ping to this IP address.Ping uses the ICMP echo request and echo reply feature to test physical connectivity. Since ping reports on four attempts, it gives an indication of the reliability of the connection. Look over the results and verify that the ping was successful. Is the ping successful? If not, perform appropriate troubleshooting. 成功If a second networked computer is available, try to ping the IP address of the second machine.Note the results.ping the IP address of a DHCP or DNS servers12.Try to ping the IP address of any DHCP and/or DNS servers listed in the last exercise. If this works for either server, and they are not in the network, what does this indicate?Was the ping successful? 成功ping the hostname of another computerTry to ping the hostname of the computer that was recorded previously. The figure shows the successful result of the ping the hostname.Look over the results. Notice that the first line of output shows the host name, DESKTOP in the example, followed by the IP address. This means the computer was able to resolve the host name to an IP address. Without name resolution, the ping would have failed because TCP/IP only understands valid IP addresses, not names.If the ping was successful, it means that connectivity and discovery of IP addresses can be done with only a hostname. In fact, this is how many early networks communicated. If successful, then ping a hostname also shows that there is probably a WINS server working on the network. WINS servers or a local “lmhosts” file resolve computer host names to IP addresses. If the ping fails, then chances are there is no NetBIOS name to IP addresses resolution running.ping the IP address of the default gateway13.What is the IP address of your default gateway?192.168.156.254Try to ping the IP address of the default gateway. Was it successful?成功If the ping is successful, it means there is physical connectivity to the router on the local network and probably the rest of the world.Type tracert at the command prompt, followed by a host name or IP address from your working area.tracert is TCP/IP abbreviation for trace route. The preceding figure shows the successful result when running tracert from on a LAN. The first output line shows the FQDN followed by the IP address. Therefore, a DNS server was able to resolve the name to an IP address. If you are connected on a huge network (like the Internet) there will be listings of all routers the tracert requests had to pass through to get to the destination. tracert uses the same echo requests and replies as the ping command but in a slightly different way.Each router represents a point where one network connects to another network and the packet was forwarded through.14. Tracert a website and explain what you have found.。
实习4 TCP/IP网络协议配置一、实习目的1.了解网络基本配置中包含的协议、服务、客户端,以及基本参数,并了解各种协议的作用,以及安装方法;2.掌握Windows支持的网络协议及参数设置方法;3.掌握IP设置及测试;4.练习并掌握简单网络命令的使用。
二、实习内容1.查看所在机器的主机名称和网络属性,包括网络基本配置中包含的协议、服务、客户端,以及有关的基本参数;2.修改网络配置参数;3.网络协议、服务、客户端等组件的安装和卸载方法;4.IP设置及测试;5.常用网络命令的使用。
三、预备知识1.TCP/IP协议和IP地址的有关知识;2.Windows命令方式的有关知识。
①命令行简介命令行就是在Windows操作系统中打开DOS窗口(DOS Disk Operation System 磁盘操作系统),以字符串的形式执行Windows管理程序。
常用的操作系统有windows 9x/Me,NT,2000等,都是可视化的界面。
在这些系统之前的人们使用的操作系统是DOS系统。
大部分的DOS命令都已经在Windows里变成了可视化的界面,但是有一些高级的DOS命令还是要在DOS环境下来执行。
所以学习命令行对于我们熟练操作Windows系统是很有必要的。
在Windows开始菜单中:开始→运行,出现如图4-1界面。
图4-1 运行命令窗口键入“cmd”命令→回车,出现如图4-2的命令行操作界面(DOS窗口),在DOS窗口中只-1-能用键盘来操作。
图4-2命令行操作界面②命令使用及帮助命令的一般格式:命令参数,如:ping 127.0.0.1命令的语法帮助:在命令行输入命令,参数为“?”,如:ping /?3.虚拟机的基础知识。
虚拟机指通过软件模拟的具有完整硬件系统功能的、运行在一个完全隔离环境中的完整计算机系统。
通过虚拟机软件,可以在一台物理计算机上模拟出一台或多台虚拟的计算机,这些虚拟机完全就像真正的计算机那样进行工作。
计算机网络实验报告实验组号: 1-1(请如实填写) 课程: 网络技术 班级: 实验名称:实验二 实验室设备认识及TCP/IP 配置及简单网络连通性测试姓 名__________ 实 验 日 期:学 号_____________ 实验报告日期:同组人姓名_________________ 报 告 退 发: ( 订正 、 重做 )同组人学号_ _______________________ 教 师 审 批 签 字:通过 不通过实验二 实验室设备认识及TCP/IP 配置一、:实验名称: 实验室设备认识及TCP/IP 配置二、实验目的:1、熟悉实验室环境,了解实验设备2、熟悉掌握实验设备的基本使用方法3、测试验证实验环境网络拓扑,掌握TCP/IP 基本配置三、实验设备:每一实验小组提供如下实验设备1、 实验台设备:计算机两台PC1和PC2(或者PC4和PC5)2、 实验机柜设备:R1762路由器两台 S3550(S3760)三层交换机一台S2126二层交换机一台3、 实验工具及附件:网线测试仪一台 跳线若干四、实验内容及要求:1、 熟悉实验室环境,了解实验设备及相关管理设备的基本布置。
2、 熟悉网络子网以及IP 地址的划分和分配规定,熟悉实验室设备的基本配置信息。
3、 熟练掌握实验设备的基本使用方法和基本配置方法4、 测试验证网络连通性,画出本实验小组的网络拓扑图。
5、 练习常用网络测试工具软件的使用。
五、实验注意事项及要求:6、 实验中严禁在设备端口上随意插拔线缆,如果确实需要应向老师说明征求许可。
7、 以电子文档形式提交实验报告。
8、 本次实验结果保留:是 否 √六、实验具体步骤及实验结果记录:1、 画出所属实验小组的实验设备的布置示意图,并表明实验设备型号、标号:2、 测试验证本实验小组的实验拓扑,画出实验拓扑图:(参照实验室网络拓扑图PPT)3、 查看实验用计算机的独立网卡(该网卡是用来实现上网和配置网络设备用的)上的TCP/IP 基本配置信息,并记录显示结果(可以用屏幕截图的方式保存图片在实验报告的相关位置):特别提示:实验室的计算机上安装有两块物理网卡,独立网卡的功能是配置网络设备及上网用,独立网卡的配置参数(主机的IP 地址)不能修改,所有的学生机机器已经通过独立网卡连成了网络。
实验一TCP/IP配置与测试一、在实验前,你应明白的知识点:1)Ipv4地址的分配。
2)Ipv4地址的格式。
(A类,B类和C类地址)3)子网的划分,子网掩码及其作用。
4)私有的IP地址的范围。
(我们的实验将采用C类私有地址)二、实验的目的1)掌握Windows 系统IP地址配置的方法2)掌握子网掩码的作用和配置3)掌握TCP/IP基本测试方法和正确理解网络测试命令Ping,和ipconfig三、步骤:1、查看本机原始的IP设置。
并记录相关的内容2、使用ping、ipconfig命令,进入命令行方式(开始-运行-cmd)1)使用pingPing 127.0.0.1Ping 本机IP地址Ping Ping –t 127.0.0.12)使用ipconfig 命令IpconfigIpconfig /all记录所有的命令执行结果。
3)使用ARP命令,了解命令的格式,上网查找命令的用法,使用arp –a察看本机的设置.4)使用命令tracert 记录运行结果,进行初步的分析,上网查找命令使用的方式.3、对IP地址进行改变,三台机器为一个组,对计算机的IP 地址进行改变(1)IP地址的具体要求:组号网络标识号主机号1192.168.1 1,2,52192.168.2 1,2,53192.168.3 1,2,54192.168.4 1,2,55192.168.5 1,2,56192.168.6 1,2,57192.168.7 1,2,58192.168.8 1,2,5…………………………………………………………………………………………………………………………(2)子网掩码设为(255.255.255.0)工作如下:a)使用网络测试命令,确定每台计算机的网络配置正确b)同组的计算机测试是否连通?于其它组的计算机测试连同情况(3) 同组中的IP地址不变,子网掩码变为:255.255.255.252,测试同组机器的连通情况,分析结果,说明原因.实验报告须写明测试方法和记录测试过程四、考虑下列问题?1)ping 、ipconfig的命令分别可以测试网络的什么方面的情况?2)简要分析步骤3中第(3)工作的结果,并提出解释。
Test 1. TCP/IP Configuration1. Click Start and then click Run. Type the command or cmd and then press Enter.2. At the DOS prompt, type NET HELP and press Enter. You should see something like the screen below:The command you are interested in is the View command. To obtain information about it, type NET HELP VIEW, and press Enter.3. What is the purpose of NET VIEW:The NET VIEW command shows the names of the machines present on your network. Notice that it lists the names of machines on the left, in column labelled “Server name” and another column labelled “Remark”4. List the machines after you have typed NET VIEW from the command promptClose the DOS window by typing EXIT on the command line and then press Enter, or by clicking the Close button in the upper right corner of the window.Obtain the TCP/IP Configuration InformationUse the Start menu to open the Command Prompt, an MS-DOS-like window. Press Start > Programs > Accessories > Command Prompt or Start >Programs > Command Prompt.The following figure shows the Command screen. Type ipconfig and press the Enter key. The spelling of ipconfig is critical while case is not. It is short for IP Configuration.This first screen shows the IP address, subnet mask, and default gateway. The IP address and the default gateway should be in the same network or subnet, otherwise this host would not be able to communicate outside the network. In the figure the subnet mask tells us that the first three octets must be the same to be in the same network.Note: If this computer is on a LAN, the default gateway might not be seen if it is running behind a Proxy Server. Record the following information for this computer.Record the following TCP/IP information for this computer6.Compare the TCP/IP configuration of this computer to others on the LAN 7.If this computer is on a LAN, compare the information of several machines. Record a couple of the IP Addresses:1) IP sddresses 1: 192.168.156.572) IP addresses 2: 192.168.156.66Are there any similarities?前三个字段相同,What is similar about the IP addresses?最后字段存在差异What is similar about the default gateways?完全相同The IP addresses should share the same network portion. All machines in the LAN should share the same default gateway.Check additional TCP/IP configuration informationTo see detailed information, type ipconfig /all and press Enter. The figure shows the detailed IP configuration screen.The host name, including the computer name and NetBIOS name should be displayed. Also, the DHCP server address, if used, and the date the IP lease starts and ends should be displayed. Look over the information. Entries for the DNS, used in name resolution servers, may also be present.8.Mark the Physical Address (MAC) and the NIC model (Description).9.While not a requirement, most LAN administrators try to standardize components like NICs. Therefore, it would not be surprising to find all machines share the first three Hex pairs in the adapter address. These three pairs identify the manufacturer of the adapter.10.Write down the IP addresses of any servers listed (if any):IP sddresses 1: 192.168.156.57IP addresses 2: 192.168.156.66Write down the computer Host Name:118stu-06Write down the Host Names of a couple other computers:Do all of the servers and workstations share the same network portion of the IP address as the student workstation? NOIt would not be unusual for some or all of the servers and workstations to be in another network. It means that the computer default gateway is going to forward requests to the other network.Using ping from a WorkstationAccess the command promptUse the Start menu to open the Command Prompt window. Press Start > Programs > Accessories > Command Prompt or Start > Programs > Command Prompt or Start > All Programs > Command Prompt.ping the IP address of another computerIn the window, type ping, a space, and the IP address of a computer located in your working area .11.The following figure shows the successful results of ping to this IP address.Ping uses the ICMP echo request and echo reply feature to test physical connectivity. Since ping reports on four attempts, it gives an indication of the reliability of the connection. Look over the results and verify that the ping was successful. Is the ping successful? If not, perform appropriate troubleshooting. 成功If a second networked computer is available, try to ping the IP address of the second machine.Note the results.ping the IP address of a DHCP or DNS servers12.Try to ping the IP address of any DHCP and/or DNS servers listed in the last exercise. If this works for either server, and they are not in the network, what does this indicate?Was the ping successful? 成功ping the hostname of another computerTry to ping the hostname of the computer that was recorded previously. The figure shows the successful result of the ping the hostname.Look over the results. Notice that the first line of output shows the host name, DESKTOP in the example, followed by the IP address. This means the computer was able to resolve the host name to an IP address. Without name resolution, the ping would have failed because TCP/IP only understands valid IP addresses, not names.If the ping was successful, it means that connectivity and discovery of IP addresses can be done with only a hostname. In fact, this is how many early networks communicated. If successful, then ping a hostname also shows that there is probably a WINS server working on the network. WINS servers or a local “lmhosts” file resolve com puter host names to IP addresses. If the ping fails, then chances are there is no NetBIOS name to IP addresses resolution running.ping the IP address of the default gateway13.What is the IP address of your default gateway?192.168.156.254Try to ping the IP address of the default gateway. Was it successful?成功If the ping is successful, it means there is physical connectivity to the router on the local network and probably the rest of the world.Type tracert at the command prompt, followed by a host name or IP address from your working area.tracert is TCP/IP abbreviation for trace route. The preceding figure shows the successful result when running tracert from on a LAN. The first output line shows the FQDN followed by the IP address. Therefore, a DNS server was able to resolve the name to an IP address. If you are connected on a hugenetwork (like the Internet) there will be listings of all routers the tracert requests had to pass through to get to the destination.tracert uses the same echo requests and replies as the ping command but in a slightly different way.Each router represents a point where one network connects to another network and the packet was forwarded through.14. Tracert a website and explain what you have found.。