如何开启apache的server
- 格式:doc
- 大小:15.50 KB
- 文档页数:1

1.server-status查看apache 目前的运行状态,需要加载mod_status模块# 首先,在httpd.conf中增加LoadModule status_module modules/mod_status.so# 然后,在httpd.conf最后添加吐下:<location /server-status>SetHandler server-statusOrder Deny,AllowDeny from nothingAllow from all</location>## ExtendedStatus controls whether Apache will generate "full" status# information (ExtendedStatus On) or just basic information (ExtendedStatus# Off) when the "server-status" handler is called. The default is Off.# 需要将ExtendedStatus打开,如下ExtendedStatus On保存配置文件,重启apache服务输入http://192.168.1.115/server-status 回车,即可查看apache当前的运行状态输入http://192.168.0.1/server-status?refresh=5,让网页每5秒钟自动重新加载输入http://192.168.0.1/server-status?auto,返回可供监控的关键信息2.server-info查看apache 目前的具体信息,需要加载mod_info模块# 首先,在httpd.conf中增加LoadModule status_module modules/mod_info.so# 然后,在httpd.conf最后添加吐下:<Location /server-info>SetHandler server-infoOrder Deny,AllowDeny from nothingAllow from all</Location>保存配置文件,重启apache服务输入http://192.168.1.115/server-info 回车,即可查看apache的具体信息。

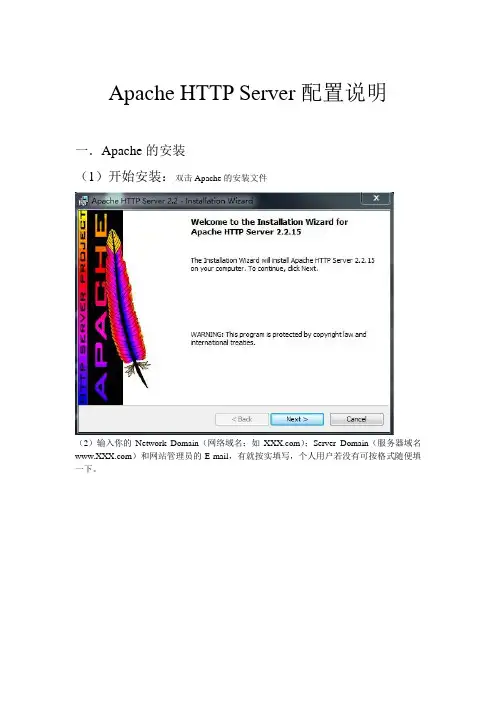
Apache HTTP Server配置说明一.Apache的安装(1)开始安装:双击Apache的安装文件(2)输入你的Network Domain(网络域名:如);Server Domain(服务器域名)和网站管理员的E-mail,有就按实填写,个人用户若没有可按格式随便填一下。
(3)到了选择安装路径,按照个人习惯选择。
(4)安装完成(5)这时,Apache已经启动了,可以在IE地址栏里输入:“http://localhost”或“http://127.0.0.1”看到默认的Apache首页。
如下图所示:以作为一项服务,随着机器的启动而自动运行。
如下图所示:二.Apache的配置Apache的核心配置文件是“Httpd.conf”,它在电脑中的位置为Apache的安装路径\Conf\,如果安装在C盘的根目录下,则该文件应该在“C:\Program Files\Apache Software Foundation\Apache2.2\conf”中:如下图所示:此外,打开Windows的“开始菜单”→“程序”→“Apache HTTP Server”→“Edit the Apache httpd.conf Configuration File”也可以。
用记事本打开Httpd.conf,可以看到这些配置文件都以文本方式存在,其中“#”为Apache 的注释符号,我们可以在记事本菜单中的编辑选项点击“查找”逐一输入下面要配置的关键字,并进行相应配置。
打开如下图所示:(1)如在配置文件中查找“DocumentRoot”以配置主页放置的目录。
配置DocumentRoot,这个语句指定你的网站路径,也就是你主页放置的目录。
你可以使用默认的,一般就是Apache安装目录下的一个子目录,当然也可以自己指定一个,需要注意,这句末尾不要加“/”。
此外,路径的分隔符在Apache Server里写成“/”例如我们可以在此处将其设定为“C:/Program Files/Apache Software Foundation/Apache2.2/htdocs”,打开主页时,默认打开的文档就直接去该目录下查找了。
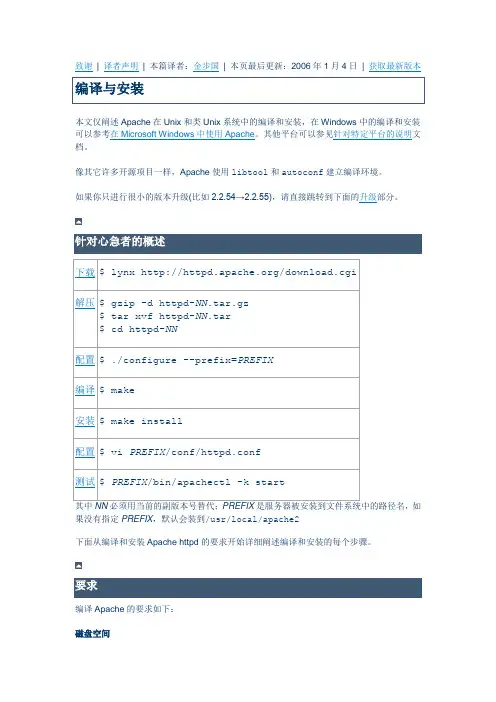
致谢| 译者声明| 本篇译者:金步国| 本页最后更新:2006年1月4日| 获取最新版本本文仅阐述Apache在Unix和类Unix系统中的编译和安装,在Windows中的编译和安装可以参考在Microsoft Windows中使用Apache。
其他平台可以参见针对特定平台的说明文档。
像其它许多开源项目一样,Apache使用libtool和autoconf建立编译环境。
如果你只进行很小的版本升级(比如2.2.54→2.2.55),请直接跳转到下面的升级部分。
针对心急者的概述其中NN必须用当前的副版本号替代;PREFIX是服务器被安装到文件系统中的路径名,如果没有指定PREFIX,默认会装到/usr/local/apache2下面从编译和安装Apache httpd的要求开始详细阐述编译和安装的每个步骤。
要求编译Apache的要求如下:磁盘空间必须保证有50MB以上的自由临时磁盘空间。
Apache安装完毕后会占据10MB左右的空间,实际的磁盘空间需求会因编译设置和是否安装第三方模块而有所不同。
ANSI-C编译器及编译环境必须装有ANSI-C编译器,推荐使用自由软件基金会(FSF)的GCC。
如果没有GCC,那么要确保使用的编译器符合ANSI标准,而且PATH中必须包含指向基本编译工具比如make的路径。
确保准确的时间由于HTTP协议的元素都会用到时间,有必要了解一下你的系统所使用的时间同步机制。
在基于网络时间协议(NTP)的系统中,一般是用ntpdate或xntpd来同步时间。
有关NTP软件的资料请参见NTP主页。
Perl 5 [可选]有些用Perl写的支持脚本,如apxs或dbmmanage,需要Perl5解释器(5.003或以上的版本就足够了)。
如果系统中存在多个Perl解释器,比如有系统提供的Perl 4,还有你自己安装的Perl 5,推荐你使用--with-perl选项来确保configure脚本使用正确的版本。
windows下怎么启动apache推荐文章win10怎么看体验指数有哪些快速查看方法热度: Win10怎么修改hosts文件方法步骤热度: win10怎么加快系统启动和关机速度热度: Win10干净启动是什么意思怎么使用热度:怎么修改Win10登录名称方法步骤热度:知道windows下作为应用程序启动apache的方法吗?下面是店铺为大家整理的windows下启动apache的方法,希望对您有所帮助! windows下启动apache的方法步骤一 Cmd打开命令行窗口,切换到apache安装目录下cd C:\MAS\TRSMAS\win31\apache\bin步骤二安装apache服务器 installed Apache serviceshttpd.exe -k install步骤三修改配置文件编辑文件:<安装目录>\conf\httpd.confwindows下启动apache的方法图2步骤四测试该服务的配置文件httpd.exe -n "MyServiceName" –twindows下启动apache的方法图3步骤五启动已安装的apache服务httpd.exe -k start步骤六测试安装结果http://localhost:portwindows下启动apache的方法图4FAQ1. 未安装服务,现象如下图示——解决方案:执行步骤一、步骤二右下角显示windows下启动apache的方法图5双击打开右下角图标,显示windows下启动apache的方法图62. 配置文件错误,现象如下图示——解决方案:执行步骤三windows下启动apache的方法图7。
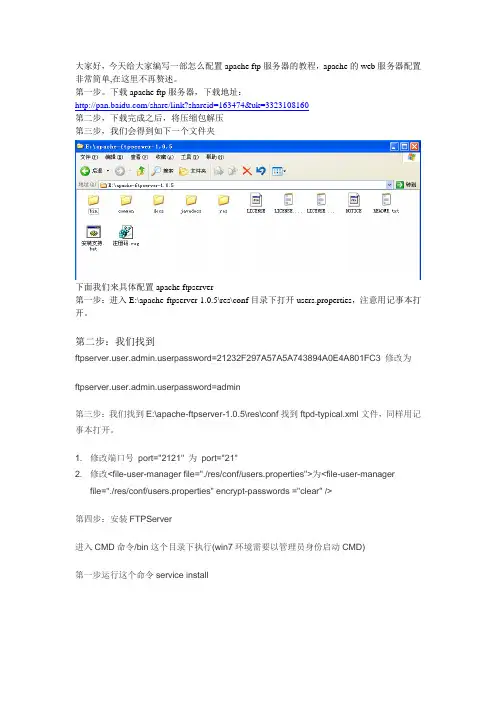
大家好,今天给大家编写一部怎么配置apache ftp服务器的教程,apache的web服务器配置非常简单,在这里不再赘述。
第一步。
下载apache ftp服务器,下载地址:/share/link?shareid=163474&uk=3323108160第二步,下载完成之后,将压缩包解压第三步,我们会得到如下一个文件夹下面我们来具体配置apache ftpserver第一步:进入E:\apache-ftpserver-1.0.5\res\conf目录下打开users.properties,注意用记事本打开。
第二步:我们找到erpassword=21232F297A57A5A743894A0E4A801FC3 修改为erpassword=admin第三步:我们找到E:\apache-ftpserver-1.0.5\res\conf找到ftpd-typical.xml文件,同样用记事本打开。
1. 修改端口号port="2121" 为port="21"2. 修改<file-user-manager file="./res/conf/users.properties">为<file-user-managerfile="./res/conf/users.properties" encrypt-passwords ="clear" />第四步:安装FTPServer进入CMD命令/bin这个目录下执行(win7环境需要以管理员身份启动CMD)第一步运行这个命令service install第二步运行ftpd.bat res/conf/ftpd-typical.xml这样就配置成功了,网上有好多五花八门的教程都不好用,我就自己总结了一下。
记得以后每次要打开apache ftpserver服务器运行上面第二步即可。
Apache服务器配置与管理教程Chapter 1:Introduction to ApacheApache is the most widely used open-source web server software. It is known for its reliability, security, and flexibility. In this chapter, we will provide a comprehensive guide on configuring and managing an Apache server.1.1 Apache Server OverviewApache server, also known as Apache HTTP Server, is developed and maintained by the Apache Software Foundation. It runs on various operating systems, including Linux, Windows, and macOS. Apache server supports multiple programming languages, such as PHP, Perl, and Python, making it a popular choice for hosting dynamic websites.1.2 Installation and SetupTo configure and manage an Apache server, the first step is to install the software. The installation procedure may vary depending on the operating system. Once the installation is complete, you need to set up the server by specifying the server name, document root, and other essential configurations.Chapter 2: Basic ConfigurationAfter setting up the Apache server, it is crucial to perform basic configurations to ensure its optimal performance and security.2.1 Server Configuration FileApache server's main configuration file is httpd.conf. In this file, you can define various settings related to server behavior, such as the port number, timeout values, and access control rules.2.2 Virtual HostsVirtual hosts allow you to host multiple websites on a single Apache server. By defining separate virtual hosts, you can assign different domain names, directories, and access restrictions for each website.2.3 Directory StructureUnderstanding the Apache server's directory structure is essential for efficient management. The root directory, also known as the document root, is where the website files are stored. Other directories include logs, modules, and configuration files.Chapter 3: Advanced ConfigurationTo optimize the Apache server's performance and enhance its functionality, advanced configurations are required.3.1 Load BalancingLoad balancing distributes incoming network traffic across multiple servers to ensure high availability and scalability. Apache providesvarious load balancing methods, such as round-robin, least connection, and IP hash.3.2 SSL/TLS ConfigurationSecure Socket Layer (SSL) or Transport Layer Security (TLS) ensures secure communication between the server and clients. Apache allows you to enable SSL/TLS by generating or purchasing an SSL certificate and configuring the server accordingly.3.3 Performance OptimizationTo improve the server's performance, there are several techniques you can employ, such as enabling caching, compressing files, and tuning the server's configuration parameters.Chapter 4: Security and Access ControlSecurity is of utmost importance when managing an Apache server. In this chapter, we will discuss various security measures and access control methods.4.1 Secure File PermissionsSetting appropriate file permissions helps prevent unauthorized access to sensitive files on the server. Apache server files should be accessible only to the necessary users and groups.4.2 Firewall ConfigurationConfiguring a firewall, such as iptables or firewalld, is essential to block unauthorized access to the server. By allowing only specific ports and IP addresses, you can enhance the server's security.4.3 Access Control ListsApache's access control lists (ACLs) allow you to define fine-grained access restrictions based on IP addresses, user agents, or other criteria. This ensures that only authorized users can access certain sections of the website.Chapter 5: Monitoring and TroubleshootingMonitoring the Apache server's performance and troubleshooting any issues is crucial for maintaining optimal functionality.5.1 Apache LogsApache logs contain valuable information about server activity, errors, and access attempts. Analyzing these logs can help identify potential security breaches, performance bottlenecks, or misconfigurations.5.2 Performance MonitoringTools like Apache JMeter or New Relic can be used to monitor the server's performance, track response times, and identify areas for improvement.5.3 Troubleshooting Common IssuesCommon issues that may arise while managing an Apache server include configuration errors, module compatibility problems, and performance degradation. Troubleshooting techniques such as examining error logs, testing configurations, and analyzing server metrics can help resolve these issues.ConclusionConfiguring and managing an Apache server requires a thorough understanding of its functionalities and best practices. By following the guidelines provided in this tutorial, you can set up a secure and efficient Apache server to host your websites. Remember to regularly update and monitor the server to ensure its continued performance and security.。

此文档阐述了如何在Microsoft Windows平台上安装、配置和运行Apache 2.2 。
如果你发现了bug,或者希望以其他方式作出贡献,请使用我们的bug报告页面。
本文档的大多数内容假定你是从一个二进制发布版安装Apache到Windows上。
如果你想自己编译Apache(可能有助于开发和跟踪bugs),参看编译Windows下的Apache。
基于当前的Windows版本状况,本文档使用到的缩写及其意义解释包括:∙Windows NT:指所有基于NT核心的Microsoft Windows操作系统的版本,包括Windows NT, Windows 2000, Windows XP, Server 2003及后续版本。
∙Windows 9x:指所有定位于家庭使用的Microsoft Windows操作系统的版本,包括 Windows 95 , Windows 98, Windows ME 。
对操作系统的要求Apache 2.2被设计为在Windows NT上运行。
它的二进制安装程序只能在x86处理器上运行,比如Intel和AMD的芯片。
Apache可能也能够运行在Windows 9x 上,但是并没有经过测试,也不建议在实际工作的系统上这样使用。
任何情况下都必须确保TCP/IP网络协议已经安装。
如果在Windows 95上运行,必须安装"Winsock2"升级补丁。
"Winsock2" for Windows 95可以在这里下载。
如果在NT 4.0上运行,建议安装Service Pack 6 ,因为Service Pack 4有众所周知的TCP/IP和Winsock完整性的问题,在以后的Service Pack中解决了这些问题。
下载 Apache for Windows关于Apache最新版本的有关信息可以在/download.cgi上找到。
那里会列出当前发行版本、所有最近的alpha和beta测试版本以及镜像web站点和匿名ftp服务器的信息。

ApachehttpServer2.4安装与配置前⾔Apache官⽹从2.2之后,不再提供windows的msi或exe安装版本,现在Apache http Server有两个分⽀2.2及2.4注意事项如果之前有安装2.2的版本,请先卸载Apache2.4下载2、选择2.4的版本,点击 (windows安装版本)3、选择前三个⽹站中的任意⼀下进⼊下载,(推荐Apache Lounge镜像站点快)4、以为例,选择需要的x86或x64进⾏下载注意事项不同的VC对应不同的vc++(简单理解为Visual Studio)版本,我的电脑上安装了VS2015所以选择VC14,如果是vs2012请选择VC11我的环境我的电脑安装了VS2015,WIN10 X64位操作系统⽂件分析解压⽂件1、下载完成后,解压出⽬录如下:2、详细的安装配置步骤可以参考图⼀中的ReadMe.txt主要的⽂件和⽬录创建服务:bin\httpd.exe管理⾯板:bin\ApacheMonitor.exe主要的配置⽂件:conf\httpd.conf⽹站根⽬录:\htdocs配置⽅法下⾯说⼀下我的简单配置步骤1、默认的安装⽬录是在C:/Apache24,找到⾃⼰的实际⽬录⽐如我的D:/Apache242、打开conf\httpd.conf把⽂件中的所有 ”c:/Apache24″替换为⾃⼰的安装⽬录,如” d:/Apache24″找到 218⾏(版本不同,可能有区别)的 ServerName ,把前⾯的 # 去掉找到 DocumentRoot ,修改⽹站的根⽬录,⽐如是 “d:/Apache24/htdocs”DocumentRoot 下⽅⼀⾏的 Directory也做相应修改修改端⼝号——“Listen:80”改为80803、以管理员⾝份运⾏CMD,进⼊Apache24\bin ⽬录(httpd.exe所在⽬录)4、输⼊ httpd.exe -k install -n "Apache24" 安装服务(注:Apache24为安装服务名称)安装完成5、⾄此,安装基本完成。
Windows环境下的Apache服务器的配置现如今,随着互联网的飞速发展,越来越多的人意识到搭建自己的网站的重要性。
而Apache服务器作为一种开源、跨平台的服务器软件,因其可靠性和稳定性受到了广大开发者的喜爱。
本文将详细介绍如何在Windows环境下配置Apache服务器。
一、下载Apache服务器软件首先,我们需要在Apache官方网站上下载适用于Windows的Apache服务器软件。
可以打开浏览器,输入“Apache官网”,进入官网下载页面。
根据自己的系统版本选择合适的软件进行下载。
二、安装Apache服务器软件下载完成后,双击安装包文件,按照提示进行软件的安装。
在安装过程中,可以根据个人的需求进行一些自定义设置,比如选择安装路径、选择是否作为系统服务等。
三、配置Apache服务器1. 打开Apache安装目录安装完成后,我们需要找到Apache服务器的安装目录。
一般来说,安装目录位于C盘的“Program Files”文件夹下的“Apache Group”文件夹中。
2. 编辑httpd.conf文件在安装目录中找到“conf”文件夹,其中包含了Apache服务器的配置文件“httpd.conf”。
使用文本编辑器(如Notepad++)打开该文件。
3. 修改监听端口在httpd.conf文件中,搜索“Listen”,找到对应的行。
默认情况下,Apache服务器监听的端口是80。
如果需要更改监听端口,可以将该行的端口号改为其他未被占用的端口。
4. 设置网站根目录在httpd.conf文件中,搜索“DocumentRoot”,找到对应的行。
该行表示网站的根目录,默认为“htdocs”。
如果需要修改网站根目录,可以将该行中的路径改为用户自定义的目录。
5. 启用Apache模块Apache服务器有许多功能强大的模块可供选择。
在httpd.conf文件中,找到“#LoadModule”开头的行。
在Windows中配置Apache阿帕奇服务器作者:baizoo 日期:2007-10-24字体大小: 小中大早有耳闻阿帕奇是一种非常优秀的服务器程序,但一直都没用到,也就没怎么在意,后来开源免费的东西接触多了,慢慢地也受到很多的影响。
最近看到了一篇题为《报告:新兴网站的技术趋势是Apache和MySQL》的文章,该文章讲到,目前Apache在新兴网站中的市场占有率已经升到50%以上,开源程序正越来越受到欢迎。
1、什么是阿帕奇(Apache Server)Apache是世界使用排名第一的Web服务器。
它可以运行在几乎所有广泛使用的计算机平台上。
百度百科:apache2、Apache与IISApache和IIS同属于WEB服务器,两者有一个人人皆知的区别:一个是开源程序,另外一个是微软的不开源程序。
Apache与IIS到底谁更有竞争力呢?有篇文章题为“Apache与IIS 的优劣对比”分析得比较透彻。
3、在Windows中配置Apache的详细步骤篇幅较长,我没做转载,需要安装配置Apache的朋友可以参考“Apache+php+mysql在windows下的安装与配置图解(最新版)”安装过程中遇到的几个问题:<1>安装好之后遇到一个错误提示:“No services installed”解决办法:运行--->cmd-->键入: d: 注释:进入D盘,由于我的apache安装在D盘键入: cd apache2 注释:进入D:\apache2\目录键入: cd bin 注释:进入D:\apache2\bin\ 目录键入: httpd.exe -k install -n apache2 注释:添加了apache这个服务了,下面我们要启动它键入: net start apache2 注释:启动apache2服务关闭服务器是:net stop apache2OK,问题解决<2>简单配置httpd.conf和IIS不一样,Apache的配置必须修改配置文件来完成,初次安装时,为了达到某些效果,我们需要修改配置文件“httpd.conf”,下面是我安装好后对httpd.conf修改的几个地方。
Apache安装、配置、启动及添加服务1 安装下载:httpd-2.4.1.zipapr-1.4.5.tar.gzapr-util-1.3.12.tar.gzpcre-8.10.zip编译:unzip httpd-2.4.1.zipcd httpd-2.4.1./configure --prefix=/usr/local/apache --enable-so异常:添加可执行权限:chmod +x *.sh安装依赖软件包:yum -y install gcc;yum -y install gcc+ gcc-c++(1)解决apr not found问题tar -zxf apr-1.4.5.tar.gzcd apr-1.4.5./configure --prefix=/usr/local/aprmake && make install(2)解决APR-util not found问题tar -zxf apr-util-1.3.12.tar.gzcd apr-util-1.3.12./configure --prefix=/usr/local/apr-util --with-apr=/usr/local/apr/bin/apr-1-configmake && make install(3)解决pcre问题unzip pcre-8.10.zipcd pcre-8.10/configure --prefix=/usr/local/pcremake && make install再次编译Apache时加上:--with-apr=/usr/local/apr--with-apr-util=/usr/local/apr-util--with-pcre=/usr/local/pcre即:./configure --prefix=/usr/local/apache --enable-so --with-apr=/usr/local/apr --with-apr-util=/usr/local/apr-util --with-pcre=/usr/local/pcre最后安装:make && make install(4)遇到usr/bin/ld: .libs/pcrecpp.o: relocation R_X86_64_32S against `.bss'can not be used when making a shared object; recompile with -fPIC.libs/pcrecpp.o:could not read symbols: Bad valuecollect2: ld returned 1 exit statusmake[1]: *** [] 错误1make[1]: Leaving directory `/usr/app/pcre-8.00'make: *** [all] 错误2解决办法:./configure --disable-shared --with-pic再次安装:make && make install2 启动cd /usr/local/apache/bin./apachectl start异常:(1)httpd: Could not reliably determine the server's fully qualified domain name进入安装目:cd /usr/local/apache/conf,编辑httpd.conf文件,搜索“#ServerName”,添加ServerName localhost:80,再重新启动即可:/usr/local/apache/bin/apachectl restart;(2)Address already in use: AH00072: make_sock: could not bind to address 0.0.0.0:80 netstat -lnp | grep 80,发现已经有进程占用80端口,kill掉,再启动Apache;3 验证在IE中打开localhost IP。
apache用法-回复“Apache用法”是指Apache HTTP Server的使用方法。
Apache HTTP Server(简称Apache)是一款广泛使用的开源Web服务器。
它的灵活性和可扩展性使得它成为许多网站和应用程序的首选服务器。
本文将会逐步介绍Apache的安装、配置和常见用法,帮助读者快速上手和充分利用Apache的功能。
第一步- 安装Apache安装Apache的第一步是下载和安装适合您操作系统的Apache安装包。
您可以从Apache官方网站上下载最新版本的安装包,并按照安装向导进行安装。
在安装过程中,您可以选择安装Apache的默认配置或者自定义配置。
完成安装后,您将在您的计算机上找到Apache的安装目录。
第二步- 配置Apache安装完成后,您需要对Apache进行一些配置,以适应您的特定需求。
Apache的主要配置文件是“httpd.conf”。
您可以通过编辑这个文件来进行配置。
下面是一些常见的配置项:1. 监听IP和端口要使Apache监听特定的IP地址和端口,使用“Listen”指令。
例如,“Listen 80”表示Apache将监听80端口的HTTP请求。
“Listen 192.168.1.1:8080”表示Apache将监听IP地址为192.168.1.1,端口为8080的HTTP请求。
2. 虚拟主机虚拟主机允许您在单个Apache实例上托管多个网站。
您可以通过在“httpd.conf”文件中使用“<VirtualHost>”指令来配置虚拟主机。
在指令块中,指定每个虚拟主机的域名、目录和其他参数。
3. 文件目录权限为了保障网站的安全性,您需要设置正确的文件和目录权限。
通过使用“<Directory>”指令,您可以为特定目录设置访问权限。
例如,“<Directory /var/www/html>”表示设置“/var/www/html”目录的访问权限。
Apache服务器配置全攻略(一)Apache服务器的设置文件位于/usr/local/apache/conf/目录下,传统上使用三个配置文件httpd.conf,access.conf和srm.conf,来配置Apache服务器的行为。
httpd.conf提供了最基本的服务器配置,是对守护程序httpd如何运行的技术描述;srm.conf是服务器的资源映射文件,告诉服务器各种文件的MIME类型,以及如何支持这些文件;access.conf用于配置服务器的访问权限,控制不同用户和计算机的访问限制;这三个配置文件控制着服务器的各个方面的特性,因此为了正常运行服务器便需要设置好这三个文件。
除了这三个设置文件之外,Apache还使用mime.types文件用于标识不同文件对应的MIME类型, magic文件设置不同MIME类型文件的一些特殊标识,使得Apache 服务器从文档后缀不能判断出文件的MIME 类型时,能通过文件内容中的这些特殊标记来判断文档的MIME类型。
bash-2.02$ ls -l /usr/local/apache/conftotal 100-rw-r--r-- 1 root wheel 348 Apr 16 16:01 access.conf-rw-r--r-- 1 root wheel 348 Feb 13 13:33 access.conf.default-rw-r--r-- 1 root wheel 30331 May 26 08:55 httpd.conf-rw-r--r-- 1 root wheel 29953 Feb 13 13:33 httpd.conf.default-rw-r--r-- 1 root wheel 12441 Apr 19 15:42 magic-rw-r--r-- 1 root wheel 12441 Feb 13 13:33 magic.default-rw-r--r-- 1 root wheel 7334 Feb 13 13:33 mime.types-rw-r--r-- 1 root wheel 383 May 13 17:01 srm.conf-rw-r--r-- 1 root wheel 357 Feb 13 13:33 srm.conf.default事实上当前版本的Apache将原来httpd.conf、srm.conf与access.conf中的所有配置参数均放在了一个配置文件httpd.conf中,只是为了与以前的版本兼容的原因(使用这三个设置文件的方式来源于NCSA-httpd),才使用三个配置文件。
★Apache(是一个开源软件)安装步骤:注:1、server name是需要DNS注册的,在本地可以填写localhost。
注:typical是典型安装,而custom是自定义安装,可以自由选择安装路径。
注:Apache Runtime是必须选择的安装。
其他的文件可以有选择性安装。
点击change按钮便可改变安装路径,然后点next按钮。
注:直接点击install按钮。
注:点击finsh安装成功。
测试是否真的成功可以在浏览器中输入以下地址:http://localhost/,如果出现It Works!表明安装成功。
★Apache官方下载和使用说明的网址:/Apache安装成功以后,是以服务的方式管理,即:在windows系统下,“服务和应用程序”一项的“服务”中可以看到因此,我们可以通过该服务来启动或关闭apache。
如果apache开始设置为“自动”启动,也可通过apache的“属性”选项来设置“手动”启动,那样就不会随着系统的启动而启动了。
Win7中打开“windows任务管理器”的快捷键是“ctrl+shift+esc”。
可以在选项“进程”中找到httpd.exe(服务名称),设置“结束进程”。
另外,通过这个工具也可以结束进程。
★经常用的管理apache的方式就是通过命令行,应用于作为控制台运行apache,即:Httpd-k strat(shutdown/restrat),分别为启动、关闭和重新启动。
测试:1、进入控制台(切换到apache的安装目录下),Apache其实就是一个软件,apache有一个非常重要的程序httpd.exe,该程序在apache安装目录的bin目录下。
注:“cd”命令为切换目录的意思,然后回车,输入“dir”意为:列出当前目录的文件及文件夹。
再回车,就会出现下图。
紧接着输入:httpd -k shutdown,再回车,Apache便会停止运行。
注:如果希望在任何目录下都可以运行我们的httpd命令,则需要做一个环境变量设置。
如何开启apache的server-status辅助分析工具
经常有人会为apache进程占用过多的服务器资源而困扰,而apache的日志又多又杂,一般的管理员很难从日志里看出结果来,如果你用的是Apache 1.3.2 及以后的版本,这时候apache的一个很好的工具可以解决您的困扰,那就是apache自带的功能----server-status。
怎样才能打开apache的server-status呢?
首先你得编译apache的一个模块,你可以检查你的配置文件(httpd.conf)中是否有LoadModule status_module modules/mod_status.so,如果有的话,说明你的apache已经加载了此模块。
或者你编译的时候加上了--enable- module=so也表明服务器支持了,其实最好的办法就是照下面的步骤,先把server-status打开,看能否使用。
如果没有这个模块该怎么添加上呢?
如果没有加载这个模块,如果您是linux服务器,那么就需要您重新编译apache 了,编译的时候加上参数--enable-module=so即可,如果你是windows系统的话,无需任何编译,只要把刚才时候说的LoadModule status_module modules/mod_status.so这句加上,如果前面有带#号,开启的话,需要将#去除。
确认你的系统有这个模块之后,下面的工作就是配置server-status了!
复制代码
<Location /server-status>
SetHandler server-status
Order Deny,Allow
Deny from all
Allow from
</Location>
ExtendedStatus On
复制代码
这是一个完整的server-status的配置
deny表示禁止的,如果你不想使用的话,可以设置为上面的设置,完全开启的话,此行整体删除即可,allow from表示可以通过那个地址访问,如果你在使用的话,可以设置为allow from all,最后一句表示的是待会访问的时候能看到详细的请求信息!
下面就可以通过url访问到server-status了,http://ip地址/server-status,你可以通过更改< Location /server-status>里面的server-status改变访问路径,比如该为<Location /discuz-status>,这样你就可以通过http://ip地址/discuz-status。
上面的ip地址是和你的Allow from设置有关,如果你这是设置为某一个指到你的ip上的域名的话,那么可以通过http://域名/discuz-status来访问!
赶快来实际操作一下吧,你就可以使用上apache的server-status了。