德国博朗180剃须刀说明书中文版
- 格式:pdf
- 大小:3.35 MB
- 文档页数:12

自动识别系统JHS-180 中文操作说明书目录1 1.1 1.22 2.1 2.1.1 2.1.2 2.2 2.2.1 2.3 2.3.1 2.3.23 3.1 3.1.1 3.1.2 3.1.3 3.1.4 3.1.5 3.2 3.2.1 3.2.2 3.2.3 3.2.4 3.3 3.3.1 3.3.2 3.3.3 3.3.4 部件名称和功能--------------------------------------------------------------------操作面板-----------------------------------------------------------------------------显示-----------------------------------------------------------------------------------基本操作-------------------------------------------------------------------------------开电源----------------------------------------------------------------------------------他船清单-------------------------------------------------------------------------------他船详细清单-------------------------------------------------------------------------关电源----------------------------------------------------------------------------------关显示----------------------------------------------------------------------------------报警-------------------------------------------------------------------------------------警戒区报警----------------------------------------------------------------------------消失目标警报-------------------------------------------------------------------------主菜单----------------------------------------------------------------------------------信息菜单-------------------------------------------------------------------------------编辑与发射----------------------------------------------------------------------------发射屏----------------------------------------------------------------------------------接收屏----------------------------------------------------------------------------------查询-------------------------------------------------------------------------------------长度范围信息-------------------------------------------------------------------------目的地设置----------------------------------------------------------------------------目的地----------------------------------------------------------------------------------航点-------------------------------------------------------------------------------------估计到达时间-------------------------------------------------------------------------航点-------------------------------------------------------------------------------------航行信息设置-------------------------------------------------------------------------航行状况信息-------------------------------------------------------------------------在船人员-------------------------------------------------------------------------------船舶和货物类型----------------------------------------------------------------------吃水深度-------------------------------------------------------------------------------11222233444455589911121213141415161616173.3.5 3.4 3.4.1 3.4.2 3.5 3.5.1 3.5.2 3.6 3.6.1 3.6.2 3.6.3 3.6.4 3.6.5 3.6.6 3.7 3.7.1 3.7.2 3.7.3 3.7.4 3.7.5 3.7.6 龙骨以上高度------------------------------------------------------------------------报警设置-------------------------------------------------------------------------------距离-------------------------------------------------------------------------------------消失物标------------------------------------------------------------------------------船队设置-------------------------------------------------------------------------------船名------------------------------------------------------------------------------------- MMSI(船舶移动识别码)-----------------------------------------------------------设置菜单-------------------------------------------------------------------------------密码设置-------------------------------------------------------------------------------信道处理设置-------------------------------------------------------------------------本船数据显示设置-------------------------------------------------------------------长距离应答设置----------------------------------------------------------------------对比度设置----------------------------------------------------------------------------重发号码设置-------------------------------------------------------------------------维护菜单-------------------------------------------------------------------------------收发状况对数显示-------------------------------------------------------------------自动识别系统报警显示-------------------------------------------------------------传感器状况显示----------------------------------------------------------------------电源开/关对数显示-------------------------------------------------------------------发射关对数显示----------------------------------------------------------------------软件版本显示-------------------------------------------------------------------------1718181818191920202123242425252526262728281.部件名称与功能1.1 操作面板(1)LCD面板更多信息参考“1.2显示”。
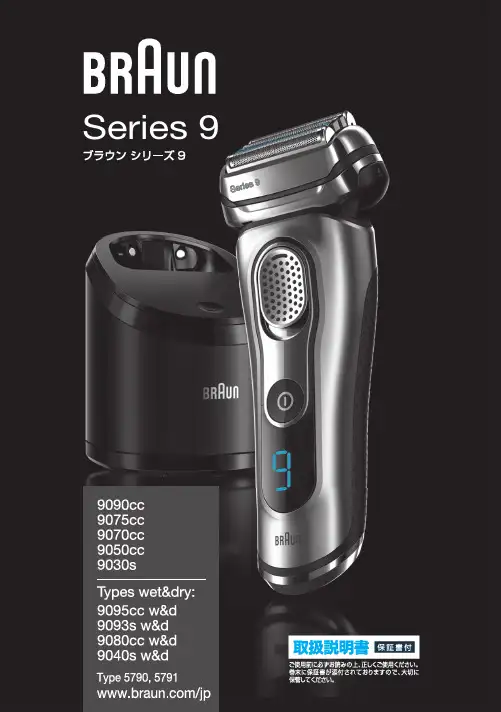
Series 9Japan/UK 97318678/III-15Series 9Serie s 99090ccSeries 9Series 9EnglishOur products are designed to meet the highest standards of quality, functionality and design. Thank you for your trust in Braun’s quality, and we hope you enjoy your new Braun shaver.Read these instructions completely, they contain safety information. Keep them for future reference.WarningYour appliance is provided with a special cord set, which has an integrated Safety Extra Low Voltage power supply. Do not exchange or tamper with any part of it, otherwise there is risk of an electric shock. Only use the special cord set provided with your appliance.The shaver is suitable for cleaningunder running tap water. Detachthe shaver from the power supplybefore cleaning it in water.Models 9095cc w&d/9093s w&d/9080cc w&d/9040s w&d only:This appliance is suitable forcleaning under running water anduse in a bath or shower. For safetyreasons it can only be operatedcordlessly.Note: Only models 9093s w&d and 9040s w&d can be used with foam or gel. Do not shave with a damaged foil or cord. This appliance can be used by children aged from 8 years and above and per-sons with reduced physical, sensory or mental capabilities or lack of experience and knowledge if they have been given supervision or instruction concerning the safe use of the appliance and under-stand the hazards involved. Children shall not play with the appliance. Clean-ing and user maintenance shall not be made by children unless they are older than 8 years and supervised.Oil bottle (not with all models)Keep out of reach of children. Do not swallow. Do not apply to eyes. Dispose of properly when empty.Clean&Charge Station (models9095cc w&d/9090cc/9080cc w&d/ 9075cc/9070cc/9050cc)To prevent the cleaning fluid from leaking, ensure that the Clean&Charge Station is placed on a flat surface. When a cleaning cartridge is installed, do not tip, move suddenly or transport the station in any way as cleaning fluid might spill out of the cartridge. Do not place the station inside a mirror cabinet, nor place it on a polished or lacquered surface. The cleaning cartridge contains a highly flammable liquid so keep it away from sources of ignition. Do not expose to direct sunlight and cigarette smoking nor store it over a radiator.Do not refill the cartridge and use only original Braun refill cartridges.1 Foil & Cutter cassette2 Cassette release buttons3 MultiHeadLock switch4 On/off switch5 Shaver display6 Long hair trimmer7 Shaver-to-stationcontacts8 Release button for long hair trimmer9 Model number of shaver10 Shaver power socket11 Special cord set12 Brush13 Hard travel casePrior to first use remove the protection foil if any from the shaver display. Connect the shaver to an electrical outlet by snapping the special cord set (11) into the power socket (10) or for cc models via the Clean&Charge Station (see Chapter «Clean&Charge Station»).Charging and basic operating information• When charging for the first time, charge continuously for 1 hour.• A full charge provides up to 50 minutes of cordless shaving time. This may vary according to your• Recommended ambient temperature for charging is 5 °C to 35 °C. The battery may not charge properly or at all under extreme low or high temperatures.• Recommended ambient temperature for shaving is 15 °C to 35 °C.• Do not expose the appliance to temperatures higher than 50 °C for extended periods of time.• When the shaver is connected to an electrical outlet, it may take some minutes until the display illuminates.Charge statusThe shaver display (5) shows the charge status of the battery when connected to an electrical outlet:• During charging the respective battery segment will blink.• When fully charged all battery segments will light up for a few seconds then the display turns off. Low chargeThe low-charge light flashes red when the battery is running low. You should be able to finish your shave. With switching off the shaver a beep sound reminds of the low charge status.Models 9095cc w&d/9093s w&d/9090cc: The last9 minutes of remaining shaving time are displayed in digits.Cleaning status (models 9095cc w&d/9090cc/ 9080cc w&d/9075cc/9070cc/9050cc)Travel lockThe lock symbol lights up when the shaver has been locked to avoid unintended starting of the motor (e.g. for storing in a suitcase).Press the on/off switch (4) to operate the shaver. Tips for a perfect dry shave1. Always shave before washing your face.2. At all times, hold the shaver at the right angle(90°) to your skin.3. Stretch your skin and shave against thedirection of your beard growth.MultiHeadLock switch (head lock)To shave hard-to-reach areas (e.g. under the nose) slide the MultiHeadLock switch (3) down to lock the shaver head. The shaver head can be locked in five positions. To change position, move the shaver head with your thumb and forefinger back or forth. It will Models 9095cc w&d/9090cc/9080cc w&d/9075cc/ 9070cc/9050cc: For automatic cleaning in theClean&Charge Station the head lock should be released. Long hair trimmerTo trim sideburns, moustache or beard press the release button (8) and slide the long hair trimmer (6) upwards.Shaving with the cord (not for models 9095cc w&d/ 9093s w&d/9080cc w&d/9040s w&d)If the shaver has run out of power (discharged), you may also shave with the shaver connected to an electrical outlet via the special cord set.Travel lock• Activation: By pressing the on/off switch (4) for3 seconds the shaver is locked. This is confirmed by a beep sound and the lock symbol in the display. Afterwards the display turns off.• Deactivation: By pressing the on/off switch for3 seconds the shaver is unlocked again.Cleaning under running water• Switch on the shaver (cordless) and rinse the shaver head under hot running water until all residues have been removed. You may use liquid soap without abrasive substances. Rinse off all foam and let the shaver run for a few more seconds.• Next, switch off the shaver, press the release buttons (2) to remove the Foil & Cutter cassette (1) and let it dry completely.• If you regularly clean the shaver under water, then apply once a week a drop of light machine oil on top of the Foil & Cutter cassette.Models 9093s w&d/9040s w&d only: The shaver should be cleaned after each foam usage. Cleaning with a brush• Switch off the shaver. Remove the Foil & Cutter cassette (1) and tap it out on a flat surface. Using the brush, clean the inner area of the pivoting head. Do not clean the cassette with the brush as this may damage it!The Foil & Cutter cassette can be attached either way. There is no impact on the shaving performance. The Clean&Charge Station has been developed for cleaning, charging, lubricating, disinfecting, drying14 Station power socket15 Lift button for cartridge exchange16 Station-to-shaver contacts17 Clean&Charge Station display17a L evel indicator17b Status light17c Cleaning program indicator (models 9095cc w&d/ 9090cc/9080cc w&d/9075cc only)18 Start button19 Cleaning cartridgeInstalling the Clean&Charge Station (see fig. D)• Remove the protection foil if any from theClean&Charge Station display.• Press the lift button (15) at the rear side of the Clean&Charge Station to lift up the housing.• Hold the cleaning cartridge (19) down on a flat, stable surface (e.g. table).• Carefully remove the lid from the cartridge.• Slide the cartridge from the rear side into the base of the station until it snaps into place.• Slowly close the housing by pushing it down until it locks.• Connect the station to an electrical outlet by snapping the special cord set (11) into the power socket (14).Charging the shaver in the Clean&Charge Station (see fig. D)Insert the shaver head with the front showing and released head lock into the cleaning station. Important: The shaver needs to be dry and free from any foam or soap residue!The contacts (7) on the back of the shaver need to align with the contacts (16) in the station. Push the shaver in the correct position. A beep sound confirms that the shaver sits properly in the station. Charging will start automatically.Cleaning the shaver (see fig. D)Station, as described above and press the start button (18).The hygiene status will be analyzed and is shownby the cleaning program indicators (17c) in the Clean&Charge Station display (models 9095cc w&d/ 9090cc/9080cc w&d/9075cc only).If status light (17b) does not shine (Clean&Charge Station switches to stand-by after ca. 10 minutes), press start button twice. Otherwise cleaning will not start. For best shaving results, we recommend cleaning after each shave.The cleaning process consists of several cycles, in which cleaning fluid is flushed through the shaver head. Depending on your Clean&Charge Station model and/or program selected, the cleaning time takes up to 3 minutes, followed by an active drying phase of about 40 minutes, during which a fan is running.Afterwards charging will resume, which is indicated in the shaver display. When the shaver is fully charged the display turns off.Cleaning programsshort economical cleaningnormal level of cleaninghigh intensive cleaningModels 9070cc/9050cc:One standard cleaning program is included. Removing the shaver from the Clean&Charge Station (see fig. E)Hold the Clean&Charge Station with one hand and tilt the shaver slightly to the front to release it. Cleaning Cartridge / Replacement (see fig. F)When the level indicator (17a) lights up permanently red, the remaining fluid in the cartridge is sufficient for about 3 more cycles. When the level indicator blinks red, the cartridge needs to be replaced (about every 3 weeks when used daily).After having pressed the lift button (15) to open the housing, wait for a few seconds before removing the used cartridge to avoid any dripping. Before discarding the used cartridge, make sure to close the openings using the lid of the new cartridge, since the used cartridge will contain contaminated cleaning solution.The hygienic cleaning cartridge contains denatured ethanol (specification see cartridge), which once opened will naturally evaporate slowly. Each cartridge, if not used daily, should be replaced after approximately 8 weeks to ensure optimal disinfection. The cleaning cartridge also contains lubricants for the shaving system, which may leave residual marks on the outer foil frame and the cleaning chamber of the Clean&Charge Station. These marks can be removed easily by wiping gently with a damp cloth. Braun recommends changing your shaver’s Foil & Cutter cassette every 18 months to maintain your shaver‘s maximum performance.Available at your dealer or Braun Service Centres:• Foil & Cutter cassette: 90S/90B• Cleaning cartridge Clean&Charge Station: CCR • Braun Shaver cleaner sprayThe cleaning cartridge can be disposed of with regular household waste.Subject to change without notice.For electric specifications, see printing on thespecial cord set.。
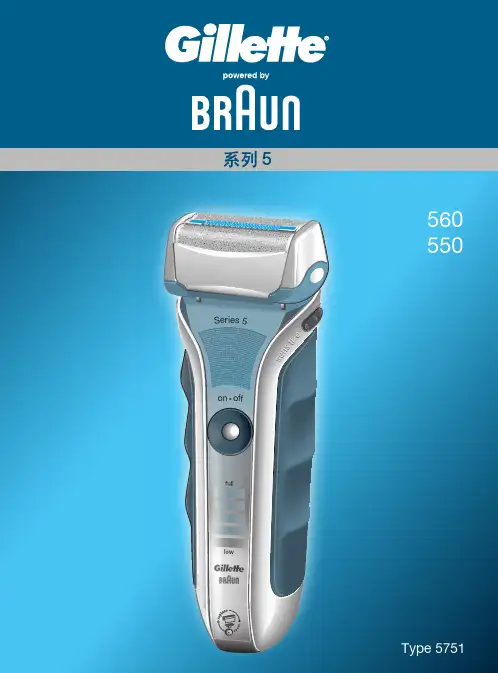
()614s h 19EngliBraun GmbHFrankfurter Straße 145 61476 Kronberg/Germany 96620210/X-13China/Korea/UKSer ies 5S e ri e s 511b5090cc112EnglishOur products are designed to meet the highest standards of quality, functionality and design. Thank you for your trust in Braun’s quality and we hope you enjoy your new Braun shaver.Please read the use instructions carefully and completely before using the appliance.Keep them for future reference.WarningYour appliance is provided with a special cord set, which has an integrated Safety Extra Low Voltage power supply. Do not exchange or tamper with any part of it, otherwise there is risk of an electric shock.Only use the special cord set provided with your appliance.Do not shave with a damaged foil or cord.The shaver is suitable forcleaning under running tabwater. Detach the shaver fromthe power supply before clean-ing it in water.Model 5040s w&d only:This appliance is suitable forcleaning under running waterand use in a bath or shower. Forsafety reasons it can only beoperated cordlessly.This appliance can be used by children aged from 8 years and above and per-sons with reduced physical, sensory or mental capabilities or lack of experience and knowledge if they have been given supervision or instruction concerning the safe use of the appliance and under-stand the hazards involved.Children shall not play with the appliance. Cleaning and user maintenance shall not be made by children unless they are older than 8 years and supervised.Oil bottle(models 5040s w&d/5030s/5020s) Keep out of reach of children. Do not swallow. Do not apply to eyes. Dispose of properly when empty.Clean&Charge Station(models 5090cc/5070cc/5050cc) To prevent the cleaning fluid from leaking, ensure that the Clean&Charge Station is placed on a flat surface. When a cleaning cartridge is installed, do not tip, move suddenly or transport the station in any way as cleaning fluid might spill out of the cartridge. Do not place the station inside a mirror cabinet, nor place it on a polished or lacquered surface.The cleaning cartridge contains a highly flammable liquid so keep it away from sources of ignition. Do not expose to direct sunlight and cigarette smoking nor store it over a radiator.Do not refill the cartridge and use only original Braun refill cartridges.1 Foil & Cutter cassette2 Cassette release button3 MultiHeadL ock switch4 On/off switch5 Shaver display6 Long hair trimmer7 Shaver-to-station contacts8a Release button for long hair trimmer8b Model number of shaver9 Shaver power socket10 Special cord set11a Brush11b Hard travel case*11c Protection cap**not with all modelsPrior to first use remove the protection foil if any from the shaver display and connect the shaver to an electrical outlet using the special cord set (10). Charging and basic operating information• A full charge provides up to 45 minutes of cordlessshaving time. This may vary according to your beard growth and environmental temperature.• Recommended ambient temperature for charging is 5 °C to 35 °C. The battery may not charge properly or at all under extreme low or high temperatures. Recommended ambient temperature for shaving is 15 °C to 35 °C.• Do not expose the appliance to temperatures higher than 50 °C for extended periods of time.• When the shaver will be connected to an electrical outlet, it may take some minutes until the display illuminates.Charge statusThe shaver display (5) shows the charge status of the battery.During charging: The battery symbol will blink. (5090cc: The respective battery segment will blink.) Fully charged (shaver is connected to an electrical outlet): The battery symbol will light up for a few seconds. (5090cc: All battery symbols will light up for a few seconds.)Low chargeThe low-charge light flashes red when the battery is running low. You should be able to finish your shave. With switching off the shaver a beep sound reminds of the low charge status.Cleaning status(models 5090cc/5070cc/5050cc only)Travel lockThe lock symbol lights up when the shaver has been locked to avoid unintended starting of the motor (e.g. for storing it in a suitcase).Press the on/off switch (4) to operate the shaver. Tips for a perfect dry shaveFor best results, Braun recommends you to follow 3 simple steps:1. Always shave before washing your face.2. At all times, hold the shaver at the right angle(90°) to your skin.3. Stretch your skin and shave against the directionof your beard growth.MultiHeadLock switch (head lock)To shave hard-to-reach areas (e.g. under the nose) slide the MultiHeadLock switch (3) down to lock the shaver head. The shaver head can be locked in five positions. To change position, move the shaver head with your thumb and forefinger back or forth. It will automatically click into the next position.To set it back into the pivoting position the MultiHeadLock switch needs to be slid up again. Models 5090cc/5070cc/5050cc: For automatic cleaning in the Clean&Charge Station the head lock should be released.Long hair trimmerTo trim sideburns, moustache or beard press the release button (8a) and slide the long hair trimmer (6) upwards.Shaving with the cord (models 5090cc/5070cc/ 5050cc/5030s/5020s only)If the shaver has run out of power (discharged), you may also shave with the shaver connected to an electrical outlet via the special cord set.Travel lock• A ctivation: By pressing the on/off switch (4) for3 seconds the shaver is locked. This is confirmed by a beep sound and the lock symbol in the display. Afterwards the display turns off.• D eactivation: By pressing the on/off switch for3 seconds the shaver is unlocked again.• S witch the shaver on (cordless) and rinse the shaver head under hot running water until all residues have been removed. You may use liquid soap without abrasive substances. Rinse off all foam and let the shaver run for a few more seconds.• N ext, switch off the shaver, press the release button (2) to remove the Foil & Cutter cassette (1) and let it dry.• I f you regularly clean the shaver under water, then once a week apply a drop of light machine oil on top of the Foil & Cutter cassette.Alternatively, you may clean the shaver with a brush:• S witch off the shaver. Remove the Foil & Cutter cassette (1) and tap it out on a flat surface. Using the brush, clean the inner area of the pivoting head. Do not clean the cassette with the brush as this may damage it!Model 5040s only:The shaver should be cleaned after each foam usage.The Clean&Charge Station has been developed for cleaning, charging, lubricating, disinfecting and storing your Braun shaver.12 Station power socket13 Lift button for cartridge exchange14 Station-to-shaver contacts15 Clean&Charge Station display15a Status light16 Start button17 Cleaning cartridgeInstalling the Clean&Charge Station (see fig. D)• Remove the protection foil from the Clean&Charge Station display.• Using the special cord set (10), connect the station power socket (12) to an electrical outlet. • Press the lift button (13) at the rear side of the Clean&Charge Station to lift up the housing.• Hold the cleaning cartridge (17) down on a flat, stable surface (e.g. table).• Carefully remove the lid from the cartridge.• Slide the cartridge from the rear side into the base of the station until it snaps into place.• Slowly close the housing by pushing it down until it locks.Charging the shaver in the Clean&Charge Station (see fig. D)Insert the shaver head down into the cleaning station. Important: The shaver needs to be dry and free from any foam or soap residue!The contacts (7) on the back of the shaver need to align with the contacts (14) in the station. Push the shaver in the correct position.A beep sound confirms that the shaver sits properly in the station. Charging will start automatically. Model 5090cc: The Clean&Charge Station analyzes«Cleaning programs» below.Cleaning the shaver(see fig. D)Station, upside down and with the front showing (with released head lock/contact alignment/beep sound). Cleaning programs5090cc: The hygiene status will be analyzed and oneshort economical cleaningnormal level of cleaninghigh intensive cleaning5070cc/5050cc: One standard cleaning program included.Start automatic cleaningStart the cleaning process by pressing the start button (16). If status light (15a) does not shine (Clean&Charge Station switches to stand-by after ca. 10 minutes), press start button twice. Otherwise cleaning will not start. For best shaving results, we recommend cleaning after each shave.Each cleaning program consists of several cycles, where cleaning fluid is flushed through the shaver head. Depending on your Clean&Charge Station model and/or program selected, the cleaning time takes up to 3 minutes. During this time the status light blinks. Leave the shaver in the station for drying.It takes several hours until remaining moisture evaporates depending on the climatic conditions. Afterwards the shaver is ready for use.After completing the cleaning and charging proce-dure, all indicators turn off.Removing the shaver from the Clean&Charge Station (see fig. E)Hold the Clean&Charge Station with one hand and tilt the shaver slightly to the front to release it. Cleaning Cartridge / Replacement (see fig. F) When the level indicator lights up permanently red, the remaining fluid in the cartridge is sufficient for about 3 more cycles. When the level indicator blinks red, the cartridge needs to be replaced - (about every 4 weeks when used daily.)After having pressed the lift button (13) to open the housing, wait for a few seconds before removingthe used cartridge to avoid any dripping. Before discarding the used cartridge, make sure to close the openings using the lid of the new cartridge, since the used cartridge will contain contaminated cleaning solution.The hygienic cleaning cartridge contains ethanol, which once opened will naturally evaporate slowly into the surrounding air. Each cartridge, if not used daily, should be replaced after approximately8 weeks to ensure optimal disinfection.The cleaning cartridge also contains lubricants for the shaving system, which may leave residual marks on the outer foil frame and the cleaning chamberof the Clean&Charge Station. These marks can be removed easily by wiping gently with a damp cloth. Braun recommends changing your shaver’sFoil & Cutter cassette every 18 months to maintain your shaver’s maximum performance.Available at your dealer or Braun Service Centres:• Foil & Cutter cassette: 52S/52B• Cleaning cartridge Clean&Charge Station: CCR •Braun Shaver cleaner spray21This product contains rechargeable batteries.In the interest of protecting the environment, please do not dispose of the product in the household waste at the end of its useful life. Disposal can take place at a Braun Service Centre or at appropriate collection points provided in your country.The cleaning cartridge can be disposed of with regular household waste.Subject to change without notice.For electric specifications, see printing on thespecial cord set.22。

博朗公司BRAUN 博朗-----设计改变生活1921年Max Braun创始德国博朗公司,目前德国博朗的产品分为六大类:电动剃须刀,女用剃毛器,美发产品,厨房小家电,蒸汽电熨斗,一秒体温计。
德国博朗所追寻的目标一向是明确,简单与平衡的线条。
德国博朗的宗旨延伸至今成为独一无二的Braun Design德国博朗设计哲学:创新,品质,实用,美观,简洁,细节,经典,环保。
成立时间:1921年由Max Braun在德国法兰克福创立营业范围:小型家电的设计、开发和制造母公司:2005年起,为美国俄亥俄州辛辛那提宝洁公司所有。
博朗是23个宝洁“十亿美元品牌”之一。
其技术中心在克朗伯格的宝洁全球卓越设备中心。
产品范围:包括各类网膜式须刀、胡须修剪工具、身体美容产品、脱毛器及女士剃须刀、手动搅拌机和头发护理产品。
市场领先的产品:全球:网膜式须刀、脱毛器、手动搅拌机最近创新产品:2010年:博朗Series 7 带OptiFoil2010年:博朗Satin Hair 5 Multistyler,结合Satin 直发和卷发器2009年:使用IONTEC 技术的博朗Satin Hair 7 发梳2008/9:Silk-épil Xpressive 干湿两用、创新灵活的旋转头,采用了使用更方便的设计2008/9:博朗bodycruZer,世界上第一个身体美容工具,结合电动修剪器和吉列刀片2007年:使用博朗离子技术的Satin Hair 系列发梳2006年:使用创新声波技术的博朗Series 7生产基地:在3个国家设有5个工厂:德国、爱尔兰、中国员工总数:2010年全球超过4000人博朗的成功史可以简单概括为:通过坚持不懈的创新、可靠的德国技术与先锋设计,从一家小工程公司发展成国际著名品牌。
博朗正在引导人们步入未来——博朗设计的产品旨在提升客户生活质量,正如其宣传标语所言:“设计改变生活”。
博朗品牌世界博朗是一个优秀的德国电器品牌。
博朗IRT6520中文说明书家用版博朗irt6500/6520/6020中文说明书产品描述1——耳套(20个/盒)2——位置探测器3——测温头4——exactemp指示灯5——更换耳套按钮6——显示屏年龄选择及记忆功能按钮8——电源键9——测温键10——电池盖11——保护盒博朗耳温计适用于所有年龄人群的体温测量和监控。
仅供家庭使用。
注意事项:若出现未明原因的焦躁、呕吐、腹泻、脱水、食欲不振或活动不适、痉挛、肌肉疼痛、发抖、脖颈酸痛、排尿疼痛等症状,不管背景指示灯亮起何种颜色、被测温者是否发烧,均请咨询医生。
若耳温计显示温度升高(irt6520型号的背景指示灯变黄或变红),请咨询医生。
本产品工作环境的温度范围为:10-40℃(50-104℉)。
切勿将本产品暴露于极限温度(50℃/122℉),切勿置于过湿环境中(>95%rh)。
本产品必须与博朗耳温计配套的耳套(lf40)使用。
儿童在服用抗生素、止痛剂或退烧药的情况下,不应仅靠体温计读数来判定其病症严重程度。
耳温计指示的温度升高可能是病情严重的信号,尤其是出现在年老衰弱、免疫力低下者或婴幼儿身上时。
当出现温度升高或当您对下列人员进行测温时,请立即接受专业咨询。
①出生3个月以下的婴儿(若温度超过37.4℃或99.4℉,请立即咨询医生);②60岁以上的病人;③糖尿病患者或免疫力低下人群;④卧床病人;⑤器官移植者;⑥发烧的症状在老年病人身上较难甚至无法发现。
本产品包含小零件,或被儿童吞食引发窒息危险。
请将本产品置于儿童接触不到的地方。
博朗耳温计使用方法1、摘掉防护盖、按电源键内部自测时,显示屏显示全部过程。
最后一次测得的温度将在显示屏显示5秒钟。
3、如果有需要,耳套指示灯将闪烁。
为获得精确读数,请确保每次测量前换上新的或干净的耳套。
将耳温计探测头插入盒子中断耳套后拔出,新的耳套便戴在探测头上。
请注意:博朗耳温计戴上耳套才能工作。
4、利用agesmart年龄选择功能按钮选择年龄,如下图所示。

篇一:博朗产品说明书全系列buran博朗系列超细干粉自动灭火装置南京燕苑博朗消防设备有限公司目录第一部分第二部分第三部分第四部分第五部分第六部分悬挂式超细干粉灭火装置1 适用范围2 技术性能3 结构和工作原理4 运输、保管注意事项5 安装注意事项6 维护注意事项7 装箱单8 售后服务悬挂式超细干粉灭火装置1 适用范围2 技术性能3 结构和工作原理4 运输、保管注意事项5 安装注意事项6 维护注意事项7 装箱单8 售后服务悬挂式超细干粉灭火装置1 适用范围2 技术性能3 结构和工作原理4 运输、保管注意事项5 安装注意事项6 维护注意事项7 装箱单8 售后服务自动温感启动器手动启动功能模块1 概述2 探测器性能特点3 主要技术指标4 安装方法5 使用方法6 维护安装注意事项备注 fzxa2.5-buran fzxa5-buran fzxa8-buran第一部分 fzxa2.5-buran悬挂式超细干粉灭火装置1 适用范围1.1 能迅速扑灭a、b、c类火灾和带电电气火灾。
如生产车间、办公室、小型仓库、商店、配电房等层高比较小的相对封闭空间及火车、船舶等交通工具消防使用。
1.2 防爆标志exibiibt32 技术性能2.1 外形尺寸(含固定架;mm)直径 ??????????????200±5高度??????????????375±52.2 灭火装置重量(kg)?????????????????????6.0±0.5 2.3 灭火超细干粉重量(kg)???????????????????2.5±0.125 2.4保护面积、体积(不密闭程度5%)2.5自动温感启动器启动温度(℃)???????????????? ≥70 2.6启动电流(a)????????????????????????≥1 2.7 检查电启动的安全电流(ma)????????????????≤150 2.8 喷射时间(秒)????????????????????????≤5 2.9 灭火时间(秒)???????????????????????≤1 2.10 使用环境温度(℃)?????????????????? -40~+50 2.11 装置启动有效期(年)?????????????????????10 2.12 可人控电启动或与火灾自动报警系统配套使用。


5612 English 17Braun GmbH Frankfurter Straße 145 61476 Kronberg/Germany c r u Z e r f a c eo i lOur products are designed to meet the highest standards of quality, functionality and design. We hope you entirely enjoy your new Braun shaver.WarningYour shaver is provided with a special cord set with an integrated Safety Extra Low Voltage power supply. Do not exchange or manipulate any part of it. Otherwise there is risk of electric shock.This appliance is not intended for use by children or persons with reduced physical, sensory or mental capabilities, unless they are given supervision by a person responsible for their safety. In general, we recommend that you keep the appliance out of reach of children. Children should be supervised to ensure that they do not play with the appliance.For usage in other body areas, please make sure that the skin is stretched. For hygienic reasons, do not share this appliance with other persons.Oil bottleKeep out of reach of children. Do not swallow. Dispose of properly when empty.Description1 3-day beard comb & protective cap2 Shaver foil3 Cutter block4 Twistable trimmer4a Wide trimmer (28 mm)4b Narrow trimmer (14 mm)5 Charging light6 On/off switch7 Adjustable comb8 Beard length selector9 Special cord setChargingThe best environmental temperature for charging is between 15 °C and35 °C. Do not expose the shaver to temperatures higher than 50 °C for English• When charging for the first time or when the shaver is not used for a few months, leave the shaver to charge continuously for 4 hours.• The charging light (5) shows that the appliance is being charged. When the battery is fully charged, the charging light turns off. Intermittent blinking after a while indicates that the battery maintains its full capacity. This can also happen short term when charging after the battery was completely discharged.• A full charge provides 30 minutes of cordless shaving time depending on your beard growth.• Once the shaver is completely charged, discharge the shaver through normal use. Then recharge to full capacity. Subsequent charges will take about 1 hour.• Maximum battery capacity will only be reached after several charging/ discharging cycles.• 5-minute quick charge is sufficient for a shave.ShavingFirst, remove the adjustable comb (7): Using your thumbs, press against theside clips of the adjustable comb so that they swing off in the direction of the arrows (a). Activate the on/off switch (6). The floating foil frame automatically adapts to your skin surface for a close, smooth shave.For best results:• Always shave before washing your face.• At all times, hold the shaver at right angles (90°) to the skin (b).• Stretch the skin and shave against the direction of beard growth.• For pre-shaving after a few days of not having shaved, use the wide trimmer (4a) to pre-cut long hairs. For a close, smooth shave, finish with the foil.• To maintain 100% shaving performance, replace your foil and cutter block at least every 18 months or when worn.StyleUsing the twistable trimmerThe wide trimmer (4a) evenly cuts and trims large areas (c). It is ideal for shaping sideburns, moustaches and partial short beards. The wide trimmerstretching the skin, guide the wide trimmer against the direction of hair growth.The narrow trimmer (4b) precisely defines lines and edges (d), being ideal for precise contouring.To use the narrow trimmer, push up the twistable trimmer and turn it 180°. Frequent use of the twistable trimmer will reduce the battery capacity.TrimUsing the trimming attachments (1) and (7)Place the respective trimming attachment onto the shaver foil (2) alternatively on the twistable trimmer (4) and press it against the shaver housing until it snaps into place with a click (e).3-day beard comb & protective cap (1): This attachment is perfectly suited for creating a stubble look and maintaining it.• Place the attachment onto the foil (2) and push up the twistable trimmer (4). Turn on the shaver and use the appliance as shown in the illustration (e). The attachment ensures an optimum usage angle.Adjustable comb (7): This attachment is ideal for beard trimming and keeping it at a constant length.• Place the attachment onto the shaver foil (2) and set desired beard length. Press beard length selector (8) and slide it up (f) (possible length settings from top to bottom: 1.2 mm / 2.8 mm / 4.4 mm / 6 mm). Push up the twistable trimmer (4).• Press the on/off switch and trim against hair growth by guiding the transparent comb part over the skin (f).CleaningThe shaver head is suitable for cleaning under running tap water.Warning: Detach the shaver from the power supply before cleaningthe shaver head in water.Regular cleaning ensures better shaving performance. Rinsing the shaving head after each shave under running water is an easy and fast way to keep it clean:• Next, switch off the shaver, remove the shaver foil and the cutter block. Then leave the disassembled shaving parts to dry.• If you regularly clean the shaver under water, then once a week apply a drop of light machine oil onto the trimmers (4a, 4b) and shaver foil (h). Alternatively, you may clean the shaver using the brush provided (i):• Switch off the shaver. Remove the shaver foil.• Using the brush, clean the cutter block and the inner area of the shaver head. However, do not clean the shaver foil with the brush as this may damage the foil.Keeping your shaver in top shapeReplacing the shaving partsTo maintain 100% shaving performance, replace your foil and cutter block at least every 18 months or when worn. Change both parts at the same time for a closer shave with less skin irritation. (Shaver foil and cutter block: 10B)Preserving the batteriesIn order to maintain the optimum capacity of the rechargeable batteries, the shaver has to be fully discharged (by shaving) every 6 months approximately. Then recharge the shaver to full capacity.Environmental noticeThis product contains rechargeable batteries. In the interest ofprotecting the environment, please do not dispose of the product inthe household waste at the end of its useful life. Disposal can takeplace at a Braun Service Centre or at appropriate collection points provided in your country.Subject to change without notice.For electric specifications, see printing on the special cord set.。

S586, S566© 2018 Koninklijke Philips N.V.All rights reserved4222.002.7320.2 (19/10/2018)>75 % recycled paper>75 % papier recycléEnglishCongratulations on your purchase and welcome to Philips! To fully benefit from the support thatPhilips offers, register your product at /welcome . General description (Fig.1)1Protection cap2Shaving head holder3Shaving unit connector 4Handle5Battery charge indicator 6On/off button7Socket for small plug8Cutter9Guard10Retaining frame11Supply unit12Small plugNot shown: cleaning brush Important safety informationRead this important information carefully before you use theappliance and its accessories and save it for future reference. The accessories supplied may vary for different products.Danger-Keep the supply unit dry (Fig. 2).Warning -To charge the battery, only usethe detachable supply unit (HQ8505) provided with the appliance.-The supply unit contains a transformer. Do not cut off the supply unit to replace it with another plug, as this causes a hazardous situation.-This appliance can be used by children aged from 8 years and above and persons withreduced physical, sensory or mental capabilities or lack of experience and knowledge if they have been givensupervision or instructionconcerning use of the appliance in a safe way and understand the hazards involved. Children shall not play with the appliance.Cleaning and user maintenance shall not be made by children without supervision.-Always unplug the shaver before you clean it under the tap.-Always check the appliancebefore you use it. Do not use the appliance if it is damaged, as this may cause injury. Always replace a damaged part with one of the original type.-Do not open the appliance to replace the rechargeablebattery.Caution -Never use water hotter than 60°C to rinse the shaver.-Only use this appliance for its intended purpose as shown in the user manual.-For hygienic reasons, theappliance should only be used by one person.-Never use compressed air,scouring pads, abrasive cleaning agents or aggressive liquids such as petrol or acetone to clean the appliance.1-Water may drip from the bottom of the shaver when you rinse it.This is normal and notdangerous because allelectronics are enclosed in asealed power unit inside theshaver.-Do not use the supply unit in or near wall sockets that containan electric air freshener toprevent irreparable damage tothe supply unit. Electromagnetic fields (EMF) This Philips appliance complies with all applicable standards and regulations regarding exposure to electromagnetic fields.General-This shaver is waterproof (Fig. 3).It is suitable for use in the bathor shower and for cleaningunder the tap. For safetyreasons, the shaver cantherefore only be used withoutcord.-The supply unit is suitable for mains voltages ranging from 100 to 240 volts.-The supply unit transforms100-240 volts to a safe lowvoltage of less than 24 volts. ChargingNote: This appliance can only be used without cord.Charge the appliance before first use and when the display indicates that the battery is almost empty. Charging takes approx. 1 hour. A fully charged shaver provides up to 45 minutes of shaving time. Charging with the supply unit 1Make sure the shaver isswitched off.2Put the small plug in the shaver and put the supply unit in thewall socket.The display of the shaverindicates that the shaver ischarging.3After charging, remove thesupply unit from the wall socketand pull the small plug out ofthe appliance.Charge indicationsBattery lowS586: When the battery is almost empty, the bottom light of the battery charge indicator flashes orange (Fig. 5).S566: When the battery is almost empty, the battery charge indicator flashes orange.Battery chargingS586: When the appliance is charging, the bottom light of the battery charge indicator first flashes and then lights up continuously (Fig. 6). After this the second light flashes and then lights up continuously, and so on until the appliance is fully charged.S566: When the appliance is charging, the battery charge indicator flashes white.Battery fullS586: When the battery is fully charged, all lights of the battery charge indicator light up white continuously (Fig. 7).S566: When the battery is fully charged, the battery charge indicator lights up white continuously.Note: This appliance can only be used without cord.'Unplug before use' reminderS586: All lights of the battery charge indicator flash 3 times to remind you to unplug the shaver first.S566: The battery charge indicator flashes fast briefly to remind you to unplug the shaver first.Using the appliance Removing or attaching the click-on attachments1Make sure the appliance isswitched off.2Insert the lug of the attachment into the slot in the top of theappliance. Then press down theattachment to attach it to theappliance (‘click’) (Fig. 8).3Pull the attachment straight off the appliance (Fig. 9).Note: Do not twist theattachment while you pull it offthe appliance.Switching the appliance on and off1To switch the appliance on or off, press the on/off button once (Fig. 10).Skin adaptation periodYour first shaves may not bring you the result you expect and your skin may even become slightly irritated. This is normal. Your skin and beard need time to adapt to any new shaving system. To allow your skin to adapt to this new appliance, we advise you to shave regularly (at least 3 times a week) and exclusively with this appliance for a period of 3 weeks.Note: This appliance can only be used without cord.ShavingDry shaving1Switch on the appliance.2Move the shaving heads over your skin in circular movementsto catch all hairs growing indifferent directions (Fig. 11). Make sure each shaving head is fully in contact with the skin. Exertgentle pressure for a close,comfortable shave.Note: Do not press too hard, asthis can cause skin irritation.3Clean the appliance after use (see 'Cleaning andmaintenance').Wet shavingFor a more comfortable shave, you can also use this appliance on a wet face with shaving foam or shaving gel.To shave with shaving foam or shaving gel, follow the steps below: 1Apply some water to your skin. 2Apply shaving foam or shaving gel to your skin.3Rinse the shaving unit under the tap to ensure that the shavingunit glides smoothly over yourskin.4Switch on the appliance.5Move the shaving heads over your skin in circular movementsto catch all hairs growing indifferent directions (Fig. 11). Make sure each shaving head is fully in contact with the skin. Exertgentle pressure for a close,comfortable shave.Note: Do not press too hard, thiscan cause skin irritation.Note: Rinse the shaving unitregularly to ensure that itcontinues to glide smoothly over your skin.6Dry your face.7Clean the appliance after use (see 'Cleaning andmaintenance').Note: Make sure you rinse allfoam or shaving gel off theappliance.Cleaning and maintenanceCleaning the shaver under the tapClean the shaver after every use for optimal performance (see 'Cleaning and maintenance'). Always unplug and switch off the shaver before you clean it.Never use compressed air, scouring pads, abrasive cleaning agents or aggressive liquids such as petrol or acetone to clean the appliance.Be careful with hot water. Always check if the water is not too hot, to prevent burning your hands. Never dry the shaving unit with a towel or tissue, as this may damage the shaving heads.1Rinse the shaving unit under a warm tap.Note: You can also clean theshaving unit with the cleaningbrush supplied (Fig. 12).2Turn the shaver up side down and rinse the openings in thebottom of the shaving headholders. Switch on the shaverbriefly during rinsing (Fig. 13).3Open both shaving head holders (Fig. 14).4Rinse the hair chambers and shaving head holders under thetap (Fig. 15).5Carefully shake off excess water and let air dry completely.6Close the shaving head holders (Fig. 16).Thorough cleaningThe shaving unit consists of two shaving heads. Clean one shavinghead at a time by following the steps below.1Open the shaving head holder (Fig. 14).2To unlock the retaining frame, gently squeeze both sides of the retaining frame and flip openthe frame (Fig. 17).3Remove the shaving head. Each shaving head consists of a cutter and a guard (Fig. 18).Note: Do not clean more thanone cutter and guard at a time,since they are all matching sets.If you accidentally mix up thecutters and guards, it may takeseveral weeks before optimalshaving performance is restored. 4Remove the cutter from the shaving guard (Fig. 19).5Rinse both parts with water.6After cleaning, place the cutter back into the guard with thecutter legs pointing downwards(Fig. 20).7Put the shaving head back into the shaving head holder (Fig. 21).Note: Make sure that theshaving heads with theprojections fit exactly onto thehooks of the shaving headholder when placing them (Fig.23). The shaving heads suppliedwith this appliance either havenotches or projections. Bothshaving systems are the same. 8Push the retaining frame back onto the shaving head holderuntil you hear a click (Fig. 22).9Close the shaving head holder (Fig. 16).ReplacementReplacing the shaving heads For maximum shaving performance, we advise you to replace the shaving heads every two years. Replace damaged shaving heads immediately. Always replace the shaving heads with original Philips shaving heads (see 'Ordering accessories').1Switch off the appliance.2Open the shaving unit byopening both shaving headholders (Fig. 14).3To unlock the retaining frames, gently squeeze both sides of the retaining frames and flip openthe shaving heads (Fig. 17).4Remove the shaving heads from the shaving head holders (Fig.18).Throw away the used shavingheads immediately to avoidmixing them with the newshaving heads.5Place the new shaving heads in the shaving head holders.Note: Make sure that theshaving heads with theprojections fit exactly onto thehooks of the shaving headholder when placing them (Fig.23). The shaving heads suppliedwith this appliance either havenotches or projections. Bothshaving systems are the same. 6Push the retaining frames back onto the shaving head holderuntil you hear a click (Fig. 22).7Close the shaving head holders (Fig. 16).StorageAlways slide the protection cap onto the shaving unit to protect the shaving unit from dirt or damage during traveling or storage (Fig. 24). We advise you to let the appliance dry before you store it. Ordering accessoriesTo buy accessories or spare parts, visit /parts-and-accessories or go to your Philipsdealer. You can also contact the Philips Consumer Care Center in your country (see the international warranty leaflet for contact details). Available partsThe following accessories and spare parts are available:-SH30 Philips shaving heads-RQ575 Philips cleansing brush attachment-RQ563 Philips cleansing brush attachment 3-pack-HQ110 Cleaning spray-HQ8505 supply unitNote: Availability of the accessories may differ by country.Recycling-Do not throw away the productwith the normal householdwaste at the end of its life, buthand it in at an official collectionpoint for recycling. By doing this,you help to preserve theenvironment.-This product contains a built-inrechargeable battery which shallnot be disposed of with normalhousehold waste. Please takeyour product to an officialcollection point or a Philipsservice center to have aprofessional remove therechargeable battery.-Follow your country’s rules forthe separate collection ofelectrical and electronicproducts and rechargeablebatteries. Correct disposal helpsprevent negative consequencesfor the environment and humanhealth.Removing thesharp.1Disconnect the appliance fromthe wall socket and let theappliance run until the motorstops.2Insert a screwdriver under theedge of the upper front paneland remove it (Fig. 25).3Undo the screws in the top partof the shaver (Fig. 26).4Remove the cover (Fig. 27).5Insert a screwdriver under theedge of the lower front panel toremove it (Fig. 28).6Remove the inner panel with ascrewdriver (Fig. 29).7Push the inner frame out of thehousing with the screwdriver(Fig. 30).8Cut the wires from the motorwith pliers (Fig. 31) and removethe printed circuit board (Fig. 32).9Break the battery tags andremove the batteries (Fig. 33). TroubleshootingThis chapter summarizes the mostcommon problems you couldencounter with the appliance. If youare unable to solve the problemwith the information below, visit /support for a list of frequently asked questions orcontact the Consumer Care Centershaver does not work as well as it used to.shavingheadsaredamaged orworn.shavingheads (see'Replacement').Theshavingheadsare dirty.Clean theshavingheads (see'Cleaningandmaintenance').Longhairsobstructtheshavingheads.Clean theshavingheads (see'Cleaningandmaintenance').Therechargeablebattery islow.Switch offthe shaverand rechargethe battery(see'Charging').The shaver does not work when I switch it on.Therechargeablebattery isempty.Switch offthe shaverand rechargethe battery(see'Charging').shaver is connect ed to the wall socket.appliance can only be used without cord. Remove the supply unit from the wall socket and pull the small plug out of the appliance.The shaving heads do not stay in place in the shaving unit.You didnot fixtheretainingframesproperly.The retainingframes arefixedproperly ifyou hear aclick whenyou push itback ontothe shavingheads.Theshavingheadswithprojections arenotplacedproperly.Make surethat theshavingheads withtheprojectionsfit exactlyonto thehooks of theshavinghead holderwhen placingthem (Fig.23).繁體中文感謝您購買本產品。
°Cool TecType 5676 5676CT6cc CT5cc CT4cc CT4s CT3cc CT2cc CT2s613 English 18Braun GmbH Frankfurter Straße 145 61476 Kronberg/Germany 92388020/XI-12Co olT ec1236875141716a 159416b18131011a12a 12c12b 12d11b11cCT6cc CT5cc CT4cc CT3cc CT2ccCT5cc CT4cc CT4sCT6cc CT3cc CT2cc CT2s+CT4s CT2sCT5ccEnglishOur products are designed to meet the highest standards of quality, functionality and design. Thank you for your trust in Braun’s quality and we hope you enjoy your new Braun shaver.This shaver cools the skin to give you a cooling sensation for a pleasant shave.Please read the use instructions carefully and completely before using the appliance.1 Foil & Cutter cassette2 Cooling element3 Cooling on/off switch4 Shaver display5 On/off switch6 Long hair trimmer7 Shaver-to-shell/station contacts8 Release button for long hair trimmer9 M odel number10 Special cord set11a Brush11b Pouch11c Protection cap12a Charging shell12b Shell power socket12c Stand for charging shell12d Shell-to-shaver contactsFirst use and ChargingPrior to first use connect the shaver to an electrical outlet using the charging shell as described below or for models CT6cc/CT5cc/CT4cc/CT3cc/CT2cc the Clean&Charge station (see Chapter «Automatic Clean&Charge station description»).Note: The shaver can only be charged via the charging shell or the Clean&Charge station. Models CT4s/CT2s must not be used with the Clean&Charge station.Charging shell (see fig. B)• Click the charging shell (12a) onto the stand (12c - models CT4s/CT2s only). Using the special cord set (10), connect the shell power socket (12b) to an electrical outlet.• Place the shaver into the charging shell. The contacts (7) on the back of the shaver need to align with the contacts (12d) in the charging shell.A beep sound confirms that the shaver sits properly in the station.• The shaver will be automatically charged. Charging and basic operating information• A full charge provides up to 45 minutes of shaving time (up to 15 minutes with activated cooling function). This may vary according to your beard growth and environmental temperature.• Recommended ambient temperature for charging is 5 °C to 35 °C. The battery may not charge properly or at all under extreme low or high temperatures. Recommended ambient temperature for shaving is 15 °C to 35 °C.• Do not expose the appliance to temperatures higher than 50 °C for extended periods of time.• When the shaver is connected to an electrical outlet, it may take some minutes until the displayCharge statusDuring charging the symbol in the on/off switch (5)blinks green. When fully charged, it will light up for a few seconds, provided the shaver is connected to an electrical outlet.Low chargeThe symbol in the on/off switch (5) shines red when the battery is running low. You should be able to finish your shave. When switching off the shaver a beep sound reminds you of the low charge status. Cleaning StatusThe lock symbol lights up when the shaver has been locked to avoid unintended starting of the motor (e.g. for storing it in a suitcase).Using the shaver (see fig. A)Press the on/off switch (5) to operate the shaver. Tips for a perfect dry shaveFor best results, Braun recommends you to follow 3 simple steps:1. Always shave before washing your face.2. At all times, hold the shaver at right angles(90°) to your skin.3. Stretch your skin and shave against thedirection of your beard growth.CoolingNote: The cooling sensation experienced may differ from person to person. It is influenced by personal and environmental factors (e.g. skin, environmental temperature).To activate the cooling function, press the cooling switch (3) during shaving. The symbol in the cooling switch shines blue. For best cooling per-formance, we recommend to wait a few seconds after the cooling function has been activated.Then continue shaving as usual.The symbol in the cooling switch (3) starts blinking when the battery is running low and there is not enough energy left for the cooling function. You should be able to finish your shave with activated cooling function.You can deactivate the cooling function by pressingLong hair trimmerTo trim sideburns, moustache or beard, press the release button (8) and slide the long hair trimmer (6) upwards.3 seconds the shaver is locked. This is confirmed by a beep sound and the lock symbol in the display. Afterwards the display turns off.• Deactivation: By pressing the on/off switch for3 seconds the shaver is unlocked again.Manual cleaning of the shaver(see fig. C/D)The shaver is suitable for cleaning under running tap water. Detach the shaver from the power supply before cleaning it in water.• Switch the shaver on and rinse the shaver head under hot running water. You may use liquid soap without abrasive substances. Rinse off all foam and let the shaver run for a few more seconds. • Next, switch off the shaver, remove the Foil & Cutter cassette and let it dry.• If you regularly clean the shaver under water, then once a week apply a drop of light machine oil on top of the Foil & Cutter cassette.Alternatively, you may clean the shaver using a brush:• Switch off the shaver. Remove the Foil & Cutter cassette (1) and tap it out on a flat surface. Using a brush, clean the inner area of the pivoting head. Do not clean the cassette with the brush as this may damage it!Clean&Charge station(models CT6cc/CT5cc/CT4cc/CT3cc/CT2cc)The Clean&Charge station has been developed for cleaning, charging, lubricating, disinfecting and storing your Braun shaver.13 Station power socket14 Lift button for cartridge exchange15 Station-to-shaver contacts16a Level indicator16b Status light17 Start button18 Cleaning cartridgeInstalling the Clean&Charge station (see fig. E)• Remove the protection foil from the Clean&Charge station display.• Press the lift button (14) at the rear side of the Clean&Charge station to lift up the housing.• Hold the cleaning cartridge (18) down on a flat,• Carefully remove the lid from the cartridge.• Slide the cartridge from the rear side into the base of the station until it snaps into place.• Slowly close the housing by pushing it down until it locks.• Using the special cord set (10), connect the station power socket (13) to an electrical outlet.Charging the shaver in the Clean&Charge station Insert the shaver head down into the Clean&Charge station.Important: The shaver needs to be dry and free from any foam or soap residue!The contacts (7) on the back of the shaver need to align with the contacts (15) in the Clean&Charge station. Push the shaver in the correct position.A beep sound confirms that the shaver sits properly in the station. The Clean&Charge station will automatically charge the shaver.Cleaning the shaverstation, upside down and with the front showing.Start automatic cleaningStart the cleaning process by pressing the start button (17). If the status light (16b) does not shine (Clean&Charge station switches to stand-by after about 10 minutes), press the start button twice. Otherwise cleaning will not start.For best shaving results, we recommend cleaning after each shave.The cleaning program consists of several cycles, where cleaning fluid is flushed through the shaver head. The cleaning time takes 3 minutes. During this time the status light of the Clean&Charge station blinks.Leave the shaver in the station for drying. It takes several hours until remaining moisture evaporates depending on the climatic conditions. Afterwards the shaver is ready for use.After completing the cleaning and charging session, the indicators of the Clean&Charge station turn off.Removing the shaver from the Clean&Charge station (see fig. F)Hold the Clean&Charge station with one hand and tilt the shaver slightly to the front to release it.Cleaning Cartridge / Replacement (see fig. G) When the level indicator lights up permanently red, the remaining fluid in the cartridge is sufficient for about 3 more cycles. When the level indicator blinks red, the cartridge needs to be replaced After having pressed the lift button (14) to open the housing, wait for a few seconds before removing the used cartridge to avoid any dripping. Before discarding the used cartridge, make sure to close the openings using the lid of the new cartridge, since the used cartridge will contain contaminated cleaning solution.The hygienic cleaning cartridge contains ethanol or izopropanol (dependent on country – specification see cartridge), which once opened will naturally evaporate slowly into the surrounding air.Each cartridge, if not used daily, should be replaced after approximately 8 weeks to ensure optimal disinfection.The cleaning cartridge also contains lubricants, for the shaving system which may leave residual marks on the outer foil frame and the cleaning chamber of the Clean&Charge station after cleaning. These marks can be removed easily by wiping gently with a damp cloth.Braun recommends changing your shaver’s Foil & Cutter cassette every 18 months to maintain your shaver’s maximum performance.Available at your dealer or Braun Service Centres:• Foil & Cutter cassette: 40S/40B• Cleaning cartridge Clean&Charge: CCRThis product contains rechargeable batteries.In the interest of protecting the environment, please do not dispose of the product in the household waste at the end of its useful life. Disposal can take place at a Braun Service Centre or at appropriate collection points provided in your country.The cleaning cartridge can be disposed of with regular household waste.Subject to change without notice.For electrical specifications, see printing on thespecial cord set.21。
180LR, 180LGLine Laser Levels用户手册August 2016 (Simplified Chinese)© 2016 Fluke Corporation. All rights reserved. Specifications are subject to change without notice.All product names are trademarks of their respective companies.有限担保和有限责任Fluke 担保在正常使用和保养的情况下,其产品没有材料和工艺上的缺陷。
从寄送之日起,担保期为三年。
部件、产品修理和服务的担保期限为 90 天。
本担保仅限于 Fluke 授权零售商的原购买人或最终用户,并且不适用于一次性电池、电缆接头、电缆绝缘转换接头或 Fluke 认为由于误用、改装、疏忽、污染及意外或异常操作或处理引起的任何产品损坏。
Fluke 担保软件能依照功能规格正常运行 90 天,并且软件是记录在无缺陷的媒介上。
Fluke 并不担保软件毫无错误或在运行中不会中断。
Fluke 授权的零售商应仅对最终用户就新的和未使用的产品提供本担保,但无权代表Fluke 公司提供额外或不同的担保。
只有通过 Fluke 授权的销售店购买的产品或者买方已经按适用的国际价格付款才能享受 Fluke 的担保支持。
在一国购买的产品需在他国修理时,Fluke 有权向买方要求负担重大修理/零件更换费用。
Fluke 的担保为有限责任,由 Fluke 决定是否退还购买金额、免费修理或更换在担保期间退还 Fluke 授权服务中心的故障产品。
如需要保修服务,请与您就近的 Fluke 授权服务中心联系,获得退还授权信息;然后将产品寄至服务中心,并附上产品问题描述,同时预付运费和保险费(目的地离岸价格)。
Fluke 不承担运送途中发生的损坏。
在保修之后,产品将被寄回给买方并提前支付运输费(目的地交货)。
Satinelle PrestigeFor legs, body and face Ceramic discs grip fine hairs 4 body care routines+ 9 accessoriesBRE651/00Smoothness week after week Optimal hair removal in one stroke with our widest epilation head yetOur fastest ever epilator has unique ceramic discs that rotate at a greater speed than ever before and firmly grip fine and short hairs. You can now smoothen your skin before and after epilating by treating all areas of your body.Exceptional resultsEpilation head in unique ceramic material for better gripExtra-wide epilator headEasy and effortless useAward-winning design*Cordless wet and dry for use in bath or showerOpti-light helps you target and remove even the trickiest hairsFirst epilator with S-shaped handlePersonalised body and face care routinesBody exfoliation brush removes dead skin cellsBody massager to relax you and give you radiant-looking skinShaving head and trimming comb for a close shaveFacial area and delicate area cap to remove unwanted hairsIncludes massage capIncludes skin stretcherHighlightsOur fastest epilation everOur epilator head is unique in being made from a textured ceramic surface that gently extracts even the finest hairs and those 4x shorter than wax can extract. Now with faster disc rotation than ever before (2200 RPM) for our fastest hair removal.Extra-wide epilator headExtra-wide epilator head covers more skin with every stroke for faster hair removal.Award-winning design*Award-winning design* for effortless hair removalCordless wet and dry usageDesigned with an anti-slip grip, ideal for use with water. Enables a more comfortable, gentle experience in your shower or bath. You can use it cordless for best convenience.Opti-LightOpti-light helps you target and remove even the trickiest hairsBody exfoliation brushOur body exfoliation brush removes dead skin cells and helps to prevent ingrown hairs. The 48,200 hypo-allergenic, fine bristles gently yet effectively sweep away dead skin cells and stimulate the regeneration of the skin. This device will exfoliate your skin more effectively than manual treatment alone.Body massagerOur body massager gives you a relaxing treatment so you can enjoy radiant-looking skin.Shaving head and trimming combThe shaving head provides a close shave and more gentleness in all body areas. It comeswith a trimming comb to style your bikini area.Philips Green LogoPhilips Green Products can reduce costs,energy consumption and CO2 emissions. How?They offer a significant environmentalimprovement in one or more of the Philips Green Focal Areas — Energy efficiency,Packaging, Hazardous substances, Weight,Recycling and disposal and Lifetime reliability.SpecificationsAccessoriesBody MassagerBody Exfoliation Brush Facial area cap Delicate area cap Massage capSkin stretcher cap Pouch: Basic pouch Cleaning brush Luxury smart tweezers Shaving head Trimming Comb Ease of useWet and dry useOpti-lightCordlessHandle: ErgonomicPerformanceEpilation discs: Ceramic discsEpilation system: Patented epilation systemEpilator head: 30 mm, Extra wideFeaturesSpeed settings: 2 settingsPowerBattery Type: Lithium-ionUsage time: up to 40 minutesCharging: Rechargeable, 1.5-hour chargingtimeQuick chargeT echnical specificationsNumber of catching points: 32Number of discs: 17Voltage: 15 V / 5.4 WTweezing action speed 1: 64,000 per minuteTweezing action speed 2: 70,400 per minute* iF Design Award 2016© 2022 Koninklijke Philips N.V.All Rights reserved.Specifications are subject to change without notice. Trademarks are the property of Koninklijke Philips N.V. or their respective owners.Issue date 2022‑02‑20 Version: 5.1.1EAN: 08 71010 38671 28 。