ES-ST29 松下剃须刀说明书
- 格式:pdf
- 大小:4.07 MB
- 文档页数:20
自从一次点到一起惠的网页,深深被国内跟国外的差价吓一跳,从此进入海淘这个大家庭一发不可收拾,家里陆续买了很多国外产品,老妈也深深的迷上了一起惠,每次都问我一起惠上有什么好东西吗.在这里先感谢下一起惠的编辑,你们辛苦了,这次是我第一次晒单有什么不好的地方也请大家指正。
剃须刀一直是海淘的热门产品,国内外的差价也是大家喜闻乐见的,但在选择哪种剃须刀的时候是真的纠结,跟电动牙刷一样,剃须刀被三大巨头占领着市场:博朗、松下、飞利浦,博朗跟松下都是往复式的,飞利浦是旋转式,因为第一个剃须刀就是飞利浦旋转式的,99元放2节电池的那种,因为想尝试不同的方式,所以这次决定选择往复式的,当时考虑的是博朗5030、博朗W1FS、松下ST29三款,在详细的学习下...(具体详情不表述了)决定购入松下ST29(日亚畅销第一),10月27日在日亚下了单,29号送到转运仓库,11月3号下转运订单,11月25号到手,速度比较慢,运费是54,加上购入价格是6290日元,总共花费人民币387元,下面上个链接ES-ST29。
图片在家里卫生间拍的,因为那里最亮,手机拍摄,图片不佳请谅解。
首先是外观~
打开包装
下面是各个部件
机器的主体是日本制造
下面是副件
这样连接好,剃须刀立在上面充电。
充电器是中国制造
一个小刷子,外加一瓶油,应该是给剃须刀保养用,跟理发器同理。
全家福,原谅我线弄乱了。
最后讲下剃须感受:因为以前用飞利浦都要紧贴着脸,第一次用他的时候,贴的太紧导致皮肤某个毛孔出血,不过肉眼看不出来,剃须马力强劲,剃须效果的话自我感觉一流,用完非常干净,终于不用忍受飞利浦对我的折磨了,因为没用过博朗的,所以我也就没有这方面的发言权了。
晒单结束,感谢收看。

ExpertClean 7300Connected brushing made easyBuilt-in pressure sensorSmart brush head recognition3 modes, 3 intensitiesHX9610/18Everything you need for great oral healthRemoves up to 10x more plaque*Keeping up good brushing habits is tough. ExpertClean will guide you betweendentist checkups. Know when to adjust your pressure with built-in smart sensorsand use the App’s Progress Report to help you stick to your brushing routine.ExpertClean users experience improved oral healthRemoves up to 10x more plaque* for a deep cleanUp to 7x healthier gums* in just 2 weeksHard on plaque, gentle on your gumsDeepest clean while protecting your sensitive gumsStay on track with personalized guidanceGuidance to start and keep up healthy habitsLet ExpertClean adapt to your needsPersonalized brushing experienceLets you know if you're pressing too hardBrushSync automatically selects the best mode for youAlways know when to replace your brush headsEnjoy a stylish and user-friendly designSimple to charge and style to bootMakes traveling easier for youHighlightsRemoves up to 10x more plaque*Know you're getting the deepest possible clean with The C3 Premium Plaque Control brush head. The soft, flexible bristles aredesigned to curve around the contours of your teeth, giving you 4x more surface contact** and up to 10x more plaque removal from hard-to-reach spots.Up to 7x healthier gums*Focus on improving your gum health with the G3 Premium Gum Care brush head. Its smaller size and targeted gum line bristles make it the perfect way to keep this area gum disease free.People who use this brush head have up to 100% less gum inflammation* and up to 7x healthier gums in just two weeks.*Progress ReportExpertClean gives you the guidance you need to improve and maintain healthy brushing habits in between dentist checkups. Built-in smart sensors let you know when you're using too much pressure, and by connecting your brushing experience to the Sonicare app, a personalized Progress Report helps you stay on track, to see how much you've improved over time.3 modes, 3 intensitiesExpertClean comes with Clean, Gum Health and Deep Clean+ modes to take care of your brushing needs. Clean mode is for exceptional everyday cleaning, Gum Health provides a gentle yet effective clean for gums and Deep Clean+ gives you an invigorating deep clean.Three intensities allow you to choose between a higher setting to boost your clean and a lower one for more-sensitive mouths.Smart brush head recognitionSmart brush heads ensure you're using the right mode and intensity for the best possible clean. For an example, say you're using the G3Premium Gum Care brush head. Your ExpertClean's BrushSync technology will automatically sync your brush head with the Gum Health mode to help give your gums a clean bill of health.Built-in pressure sensorYou might not notice if you're brushing too hard, but your ExpertClean will. If you need to ease up, this intelligent toothbrush will make a pulsing sound. It's a heads up to let your brush head do the work. 7 out of 10 people found this feature helped them become a better brusher.BrushSync replacement reminderAll brush heads wear out over time, so you'll want to keep an eye on yours to make sure you're still getting a great clean. OurBrushSync technology tracks how long you've been using your brush head for, and how hard you've been brushing. The BrushSyncreplacement reminder on your handle and a short beep gives you a heads up when it's time to replace it.C3 Premium Plaque ControlThe C3 Premium Plaque Control brush head is designed to give you your deepest clean yet.Soft flexible sides and bristles perfectly curve around the contours of your teeth, giving you 4x more surface contact and helping target hard-to-reach spots*.Premium Gum Care brush headThe G3 Premium Gum Care brush head isdesigned to help you improve your gum health.Its smaller size and targeted gumline bristles gently and effectively clean the gum line,where gum disease commonly starts out.SpecificationsModes3 intensities: Low, Medium, HighClean: For exceptional everyday cleanGum Health: Special attention to molars Deep Clean+: For an invigorating deep clean Items includedHandle: 1 ExpertCleanBrush heads: 1 C3 Premium Plaque Control, 1 G3 Premium Gum CareTravel case: 1Charger: 1BrushSync Mode PairingC3 Premium Plaque Control: Pairs with Clean modeG3 Premium Gum Care brush head: Pairs with Gum Health modeDesign and finishingColor: Pastel pinkCleaning performancePerformance: Removes up to 10x more plaque*Health benefits: Up to 7x healthier gums*Pressure feedback: Vibrates handle to alertuserTimer: BrushPacer and SmarTimerCompatibilityAndroid compatibility: Android phones,Bluetooth 4.0 enabled tabletsiOS compatibility: iPad 3rd Gen or higher,iPhone 4S or higher, with iOS7 or higher, withiOS7 operational systemConnectivityBluetooth® wireless technology: Connectedbrushing appEase of useHandle compatibility: Easy click-on brushheadsReplacement reminder: To always ensure bestresults, reminder icon lights upHandle: Slim ergonomic designPowerVoltage: 110-220 VServiceWarranty: 2-year limited warrantySmart sensor technologyPressure sensor: Alerts when brushing toohardLocation sensor: Tracks & improves coverageScrubbing sensor: Guides to reduce scrubbingBrushSync Replacement Reminder: Alwaysknow when to, replace brush headsBrushSync Technology: Connects smart handleand, smart brush headT echnical specificationsBattery: RechargeableBattery type: Lithium IONOperating time (full to empty): 14 days**** more than a manual toothbrush* * compared to DiamondClean* ** based on two periods of two-minute brushings perday© 2021 Koninklijke Philips N.V.All Rights reserved.Specifications are subject to change without notice. Trademarks are the property of Koninklijke Philips N.V. or their respective owners.Issue date 2021‑06‑16 Version: 14.2.1。
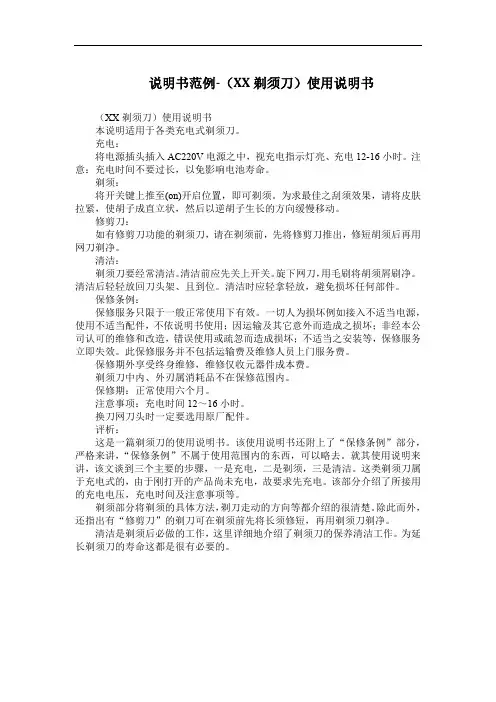
说明书范例-(XX剃须刀)使用说明书(XX剃须刀)使用说明书本说明适用于各类充电式剃须刀。
充电:将电源插头插入AC220V电源之中,视充电指示灯亮、充电12-16小时。
注意:充电时间不要过长,以免影响电池寿命。
剃须:将开关键上推至(on)开启位置,即可剃须。
为求最佳之刮须效果,请将皮肤拉紧,使胡子成直立状,然后以逆胡子生长的方向缓慢移动。
修剪刀:如有修剪刀功能的剃须刀,请在剃须前,先将修剪刀推出,修短胡须后再用网刀剃净。
清洁:剃须刀要经常清洁。
清洁前应先关上开关。
旋下网刀,用毛刷将胡须屑刷净。
清洁后轻轻放回刀头架、且到位。
清洁时应轻拿轻放,避免损坏任何部件。
保修条例:保修服务只限于一般正常使用下有效。
一切人为损坏例如接入不适当电源,使用不适当配件,不依说明书使用;因运输及其它意外而造成之损坏;非经本公司认可的维修和改造,错误使用或疏忽而造成损坏;不适当之安装等,保修服务立即失效。
此保修服务并不包括运输费及维修人员上门服务费。
保修期外享受终身维修,维修仅收元器件成本费。
剃须刀中内、外刃属消耗品不在保修范围内。
保修期:正常使用六个月。
注意事项:充电时间12~16小时。
换刀网刀头时一定要选用原厂配件。
评析:这是一篇剃须刀的使用说明书。
该使用说明书还附上了“保修条例”部分,严格来讲,“保修条例”不属于使用范围内的东西,可以略去。
就其使用说明来讲,该文谈到三个主要的步骤,一是充电,二是剃须,三是清洁。
这类剃须刀属于充电式的,由于刚打开的产品尚未充电,故要求先充电。
该部分介绍了所接用的充电电压,充电时间及注意事项等。
剃须部分将剃须的具体方法,剃刀走动的方向等都介绍的很清楚。
除此而外,还指出有“修剪刀”的剃刀可在剃须前先将长须修短,再用剃须刀剃净。
清洁是剃须后必做的工作,这里详细地介绍了剃须刀的保养清洁工作。
为延长剃须刀的寿命这都是很有必要的。

Cómo extraer la batería recargable incorporada antes de desechar laLa batería de esta afeitadora no pue-de ser sustituida por el usuario. No obstante, se puede sustituir en un centro de servicio técnico autoriza-do. El procedimiento que se descri-be a continuación sólo sirve para exponer la forma de extraer la bate-ría con vistas a desecharla de ma-nera adecuada.Asegúrese siempre de extraer la batería del cortapelo antes de des-Comment retirer la pile rechargeable intégrée avant de jeter la tondeuseégrée à cette tondeuse ne doit pas être remplacéteur. Il convient de retourner l’ap-pareil à un centre de service agr pour remplacer la pile. La procci-dessous s’applique uniquement au retrait de la pile rechargeable pour sa mise au rebut.Avant de mettre la tondeuse au rebut, assurez-vous que la pile en a été retirée.Débranchez la prise de l’adap-tateur et le cordon de la ton-Retirez la lame de la tondeuse.Retirez la vis (a), puis le couver-inférieur (b).(reportez-vous àla fig. 19)Détachez le couvercle de la molette (c), retirez la vis (d) et déconnectez la molette (e).Retirez les deux vis (f).Détachez le boîtier (g), pan-neaux avant (h) et latéraux (i),。

剃须刀说明书了解剃须刀的使用技巧和保养方法剃须刀使用技巧与保养方法剃须刀是现代男性的必备品之一,为了达到更好的剃须效果和延长剃须刀的使用寿命,正确的使用技巧和适当的保养方法十分重要。
本文将向您介绍剃须刀的使用技巧和保养方法,帮助您更好地利用剃须刀,获得令人满意的剃须体验。
一、使用技巧1. 准备工作在使用剃须刀之前,您应该先用温水洗净脸部,将胡须和皮肤软化。
这有助于减少刮胡时的不适感和皮肤刺激。
同时,您也可以使用剃须前的准备产品,如剃须泡沫或剃须膏,以增强刮胡的顺滑度。
2. 刮胡技巧使用剃须刀时,应尽量保持手稳定,选择合适的角度和刮胡方向,以避免切割皮肤。
通常来说,顺着胡须生长方向刮胡会减少皮肤刺激和刀片损坏的风险。
对于那些生长方向不一致的地方,您可以小心地逆着胡须生长方向刮胡,但刮动时要尽量避免用力过猛。
3. 保持刀片锋利一个锋利的刀片是获得顺滑剃须的关键。
定期更换刀片,一般建议每3-4周更换一次,或者当您感觉到剃须刀拉扯胡须时进行更换。
此外,刮胡后应将刀头和剃须刀的刀网清洗干净,防止积聚的胡须和泡沫堵塞刀头。
二、保养方法1. 清洗剃须刀剃须刀的清洗十分重要,可以避免细菌滋生和延长剃须刀的使用寿命。
在清洗剃须刀之前,您应关掉电源,然后将刀头和刀网拆下,用小刷子或热水冲洗刀头,以去除积聚的污垢和胡须。
请不要用热水来清洗刀网,以免损坏刀网。
2. 储存剃须刀正确的储存方式可以延长剃须刀的使用寿命。
在将剃须刀存放起来之前,确保刀头和刀网已经完全干燥。
您可以使用附带的保护盖或使用专门的剃须刀收纳盒,将剃须刀放置在干燥和通风的地方,避免阳光直射。
3. 维护剃须刀电池如果您使用的是电动剃须刀,定期检查电池的状况,避免电池耗尽影响剃须效果。
根据剃须刀的型号,您可以使用充电器或更换电池的方式来维护电池寿命。
结论通过正确的使用技巧和适当的保养方法,您可以更好地利用剃须刀,获得清爽的剃须体验。
请记住,在使用剃须刀之前,做好准备工作并充分了解自己的胡须生长方向。

Refer to the specifications (page 6) for information on operating times when using rechargeable batteries or dry-cell batteries.Using the AC adaptor(not included)Connect the AC adaptor.Conserving powerTo save power when the unit is not to be used for a long time, unplug the AC adaptor from the household AC outlet. Reprogram tracks if necessary before use.Using rechargeable batteries (not included)Obtain the optional rechargeable batteries.Make sure to recharge the batteries before using them. The unit cannot be used to charge rechargeable batter-ies other than those specially designed for it.≥Optional batteries (P-3GAVA/2B)Recharging procedure1Insert the special rechargeable bat-teries into the unit.2Connect the AC adaptor.(Refer to “Using the AC adaptor” for connectioninstructions.)Recharging starts and the “H” charging indicatorflashes on and off on the unit’s display. When therechargeable batteries fully recharge the chargingindicator disappears.3When recharging is complete, un-plug the AC adaptor from thehousehold AC outlet and the DC INjack.Note!≥Rechargeable batteries have a service life of approxi-mately 300 charge-discharge cycles. I f the operatingtime on one full charge becomes noticeably shorterthan it used to be, the battery has reached the end ofits service life and should be replaced.≥Recharging may only be performed when the unit ispowered off.≥The AC adaptor and rechargeable batteries may be-come warm while recharging is in progress. This is nota malfunction.Using the car adaptor(not included)Be sure to obtain the car adaptor (SH-CDC9), availableas an optional accessory.The car adaptor can be used to recharge the unit’s bat-teries while in the car.Using dry-cell batteries(not included)After disconnecting the AC adaptor, insert two “AA”(LR6) alkaline batteries.The procedure for inserting and removing dry-cellbatteries is identical to that for rechargeable bat-teries.Battery indicatorThis indicator flashes on and off when the batteries arealmost out of power. Power is cut off completely a shortwhile later.Rechargeable batteries:Recharge batteries.Dry-cell batteries:Replace batteries with new ones.Note!≥The length of time the unit will continue to operate be-tween when the battery indicator starts flashing andwhen the power is cut off differs depending on thetype of batteries used.≥The battery indicator may not flash if rechargeablebatteries other than those designated by Panasonicare used.This function causes the unit to ignoreshort, accidental button presses. (Thedisc lid can still be opened and closed.)The HOLD function prevents thefollowing:≥Powering on the unit accidentally(which can cause the batteries to rundown).≥Play being cut off unexpectedly in themiddle of a selection.To use the HOLD functionSet [HOLD] to the HOLD position.“(” indicationWhen the unit is in HOLD status, press-ing any button (other than the OPENbutton) causes the indication “(” toappear on the display.When the unit is powered offThe “(” indication appears onlywhen [1;] is pressed.Location of ControlsA Skip/search buttons(:, 96, 5)B DisplayC Stop/operation off button(∫, OPR OFF)D Play/pause button (1;)E Repeat button (`)F Memory/recall button(MEMORY/RECALL)G Open button (OPEN)H Headphone volume control(VOLUME)I Anti-shock button (A.SHOCK)J S-XBS button (S-XBS)K Headphone jack (Ë)L Play mode selector(RESUME, RANDOM, NORMAL)M Hold switch (HOLD)N CD release button (PUSH)O DC IN jack (K DC IN 4.5 V)Before operating the buttonsBe sure to move [HOLD] to releasethe unit from the hold mode.If the unit malfunctions or freezes during use,then disconnect the power sources (the ACadaptor and batteries).Re-connect the power source and continue op-eration.CAUTION:Use only car adaptor, Model: SH-CDC9 manufac-tured by Matsushita Electric Industrial Co.,Ltd.Battery indicatorBe sure to obtain the optional AC adaptor RP-AC46.It is available through your Panasonic dealer.Follow steps 1–6.In step 2, connect the stereo headphones to the Ëjack. (Plug in firmly.)≥Play stops automatically when all the tracks have been played.≥If the unit has been connected to the car audio system, adjust the volume level between 4 and 6 on the unit, then adjust the volume level on the system.For your reference:“)” indicationThis indication appears for about 30 seconds if [1;] is pressed when no disc is loaded in the unit or if the disc is not properly secured.“*” indicationThis indication appears for about 10 minutes when the cover is opened. (However, the indication does not ap-pear when the unit is powered off.)Note !Never insert foreign objects into the unit body.Removing discs1Press [∫,OPR OFF] to stop play and disc’s rotation.2Press [OPEN] to open the lid.3Press [PUSH] to release the disc.Do not stop the disc by hand or try to remove it before it stops rotating. This can damage CDs.Auto power off functionIf the unit is left in stop or paused status for approxi-mately 10 minutes, the unit powers itself off auto-matically in order to prevent the battery from running down.(If no disc is loaded in the unit, it powers itself off in about 30 seconds.)Repeat functionPress during play or stop mode.The setting is switched in the sequence indicated below each time [`] is pressed.1-track repeat (1 `)(-------------------------------------]One track is repeated.|v |All-track repeat (ALL `)|All the tracks on the disc are repeated |v |Cancel (no indicator is shown)======}For your reference:f [`] is pressed during program play, only the tracks in theprogram are repeated.(The indication “ALL ” is not displayed.)Changing the sound qualityPress during play or stop mode.The setting switches in the sequence indicated below each time [S-XBS] is pressed.S-XBS >Cancel (no indicator is shown)^========bS-XBS:Select this setting to boost the low-range response.Anti shock works by reading audio data and storing it in memory. The unit then fills in interruptions caused by bumps and vibrations with data from the memory up to 10 seconds worth.This unit also incorporates a powerful anti-shock mech-anism that prevents skipping caused when play speed is changed by swinging of the unit.Press during play or stop mode.!If you have pressed [A.SHOCK] when the unit is in stop mode, press [1;] to start play.When bumps continue repeatedlyThe following indicator appears on the display and sound is interrupted.∫To program the same track in the sequence more thanonceAfter step 3, press [MEMORY/RECALL] desired number of times.∫If “'” is displayedNo more tracks can be programmed.∫To con firm the contents of the programPress [MEMORY/RECALL] while the disc is playing. (The number of the programmed tracks appear on the display in se-quence.)∫To delete the entire programmed sequence Press [∫, OPR OFF].Program playUp to 24 tracks can be entered in the programmed sequence.Preparation:Put unit in stop mode.12Select the desired track.3(The indication “M ” and the programmed sequence appear on the display.)4Repeat steps 2 and 3 to program all the desired tracks.5The letters such as A in the various illustrations refer to the descriptions in the “Location of Controls ” section (see page 2).LLL65AFMEMORY/DEJS-XBSBNote !≥The anti-shock setting can be changed during play,but this may cause a slight interruption in the sound because the disc ’s rotation speed changes.≥During anti-shock operation, the disc rotates at a high-er rate than usual to collect extra audio data. This could result in a slight increase in disc rotation noise.L istening to sound with the unit con-nected to an audio systemThe anti-shock function uses digital signal compression technology. It is recommended that the anti-shock func-tion be canceled if the unit is connected to a home audio system.IA.SHOCKBBLensOpen the lid and clean the lens as shown in the fie a cotton swab to gently wipe off any finger-prints.Recommended product:Lens cleaner kit (SZZP1038C)DATE OF PURCHASE DEALER NAME DEALER ADDRESS TELEPHONE NUMBERUser memo:Resume playThis function allows you to listen from the beginning of the track where play stopped because the unit was powered off (or switched to stop mode). It is useful when listening to CDs in the car, etc.For your reference:≥I f [RESUME, RANDOM, NORMAL] is put in the[RESUME] position, the all-track repeat function will be activat-ed automatically as soon as the unit is powered on.≥If power is cut off near the end of a track (off mode), playback may resume from the beginning of the next track.≥I f the unit is powered off while a disc was playing and then a new disc is inserted, play will begin from the middle of the newdisc because the unit remembers the position where play stopped on the previous disc.ReleaseSkip playThe disc plays from the speci fic track through to the end, then play stops automatically.Preparation:Put unit in stop mode.12Select the desired track.3Random play12For your reference:≥It is also possible to press [9] while the unit is in stop modeto change the first track to be played. (All tracks are played eventually, regardless of which is played first.)≥Program play is not possible in the random mode.ReleaseL65ADRESUMELNORMAL RANDOMDL1.Damage requiring service —The unit should be serviced by quali fied service personnel if:(a)The AC power supply cord or AC adaptor hasbeen damaged; or(b)Objects or liquids have gotten into the unit; or (c)The unit has been exposed to rain; or(d)The unit does not operate normally or exhibits amarked change in performance; or(e)The unit has been dropped or the cabinet dam-aged.2.Servicing —Do not attempt to service the unit be-yond that described in these operating instructions.Refer all other servicing to authorized servicing per-sonnel.3.Replacement parts —When parts need replacing ensure the servicer uses parts speci fied by the man-ufacturer or parts that have the same characteristics as the original parts. Unauthorized substitutes may result in fire, electric shock, or other hazards.4.Safety check —After repairs or service, ask the ser-vicer to perform safety checks to con firm that the unit is in proper working condition.Product informationFor product information or assistance with product operation:Contact the Panasonic Customer Call Center at 1-800-211-7262,**************************************,or web site ().For assistance in the continental U.S.A. in obtaining re-pairs please ship the product to:Panasonic Services Company - Customer ServicenterSuite B 4900 George McVay Drive McAllen, TX 78503In Puerto Rico contact the Panasonic Sales Company.Tel. (787) 750-4300Fax. (787) 768-2910When shipping the unit carefully pack and send it pre-paid, adequately insured and preferably in the originalcarton. Include a letter detailing the complaint and pro-vide a day time phone number where you can be reached.IF REPAIR IS NEEDED DURING THE WARRANTY PERIOD THE PURCHASER WILL BE REQUIRED TO FURNISH A SAL ES RECEIPT/PROOF OF PUR-CHASE INDICATING DATE OF PURCHASE,AMOUNT PAID AND PL ACE OF PURCHASE. CUS-TOMER WIL L BE CHARGED FOR THE REPAIR OF ANY UNIT RECEIVED WITHOUT SUCH PROOF OF PURCHASE.Also, the purchaser will be responsible for shipping the unit to the above address.Panasonic Portable Audio Limited WarrantyPanasonic Consumer Electronics Company,Division of Matsushita Electric Corporation of America One Panasonic Way Secaucus, New Jersey 07094Panasonic Sales Company, Division of Matsushita Electric of Puerto Rico, Inc.Ave. 65 de Infanter ía, Km. 9.5San Gabriel Industrial Park, Carolina, Puerto Rico 00985Accessory Purchases:For Product Information, Operating Assistance, Literature Request, Dealer Locations, and all Customer Service inquiries please contact:1-800-211-PANA(7262), Monday - Friday 9 am - 9 pm, Saturday - Sunday 9 am - 7 pm, EST. Web Site: You can purchase parts, accessories or locate your nearest servicenter by visiting our Web Site.1-800-332-5368 (Customer Orders Only)Panasonic Services Company 20421 84th Avenue South, Kent, WA 98032(6 am to 5pm Monday - Friday; 6 am to 10:30 am Saturday, PST)(Visa, MasterCard, Discover Card, American Express, Check)CAUTION:This equipment has been tested and found to com-ply with the limits for a Class B digital device, pur-suant to Part 15 of the FCC Rules.These limits are designed to provide reasonable protection against harmful interference in a residen-tial installation. This equipment generates, uses and can radiate radio frequency energy and, if not installed and used in accordance with the instruc-tions, may cause harmful interference to radio com-munications. However, there is no guarantee that interference will not occur in a particular installation. I f this equipment does cause harmful interference to radio or television reception, which can be determined by turning the equipment off and on, the user is encouraged to try to correct the in-terference by one or more of the following mea-sures:≥Reorient or relocate the receiving antenna.≥ncrease the separation between the equipment and receiver.≥Connect the equipment into an outlet on a circuit different from that to which the receiver is con-nected.≥Consult the dealer or an experienced radio/TV technician for help.Any unauthorized changes or modi fications to this equipment would void the user ’s authority to oper-ate this device.This device complies with Part 15 of the FCC Rules. Operation is subject to the following two conditions: (1) This device may not cause harmful interference, and (2) this device must accept any interference received, including interference that may cause undesired operation.。
松下st29拆解教程
拆解松下st29需要的工具
工具/原料
1. 电焊工具
2. 对应的说明书,没有的去找下。
里面会大致告诉我们电池的位置和信号。
3. 工具箱,所有的工具要齐全尤其是起子
拆卸步骤
第一步:先把刀头之类的卸下,这个说明书上都有对应的知道;去掉刀头后就可以看到一些螺丝,陆陆续续打开。
第二步:然后慢慢打开机壳,试探性的打开看看,不要太急于求成,因为可能会有些螺丝我们忽略了,没开启,一个不小心掉地上了结果坏了。
因为剃须刀的小电机非常贵且脆弱。
第三步:排除马达还是电池的原因,如果马达坏了基本就彻底报废了。
如果电池原因,就看看是什么电池,到网上去买个对应的型号,然后焊接上。
有些人说我没有那些工具怎么办?首先在网上买的时候,让人配好线,拿到后用小剪刀把之前的接头处剪断,注意一定要把锡留在接头处,然后把电线的内芯烧热就能连上。
第四步:重新组装。
大家不要觉得难,很多大学工科的都学过这个国产,我老婆以前读的有机化学工程,她还自己焊接过一个电路测试器。
这个方法对其他的机型都有效。
焊的好不好就看大家自己的技术了。
自己修理会很有意思。
不过建议大家都在购买之前更加剃须刀推荐选择一些好的产品。
就可以完全避免自己换电池的问题了。
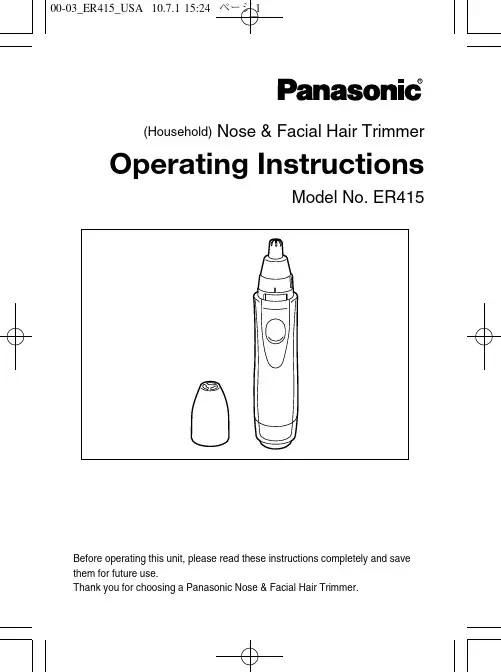
(Household)Nose & Facial Hair Trimmer Model No.ER415Operating InstructionsBefore operating this unit, please read these instructions completely and save them for future use.Thank you for choosing a Panasonic Nose & Facial Hair Trimmer.1AParts identification(See fig. 1)A Protective capB Outer bladeC Outer blade frameD Inner bladeE JointF Power switch [0/1]Slide the switch upward to turn the trimmer on.G BodyH Battery coverFor your convenience...Attach the protective cap A to the battery cover H while you trim the nose and ear hairs. CautionTo avoid the risk of personal injury, follow these instructions:A Keep this device away from the reach of children. This is not a toy.A Do not insert the trimmer futher into your nostril or ear hole than the nar-row tip of the outer blade. Do not press the trimmer forcefully.A Before each use, check the blades for damage. Do not use this device if the outer blade frame or blades are deformed or damaged.A The blades have been precision manufactured. Do not subject them to mechanical force, impact, drop, etc. Place the protective cap over the outer blade frame after each use.A This trimmer is designed only for cutting nose hair, ear hair, eye-brows, moustache, or beard. Do not use it for any other purpose.A Ensure that the switch is turned off before cleaning the blades.A Do not use solvents or thinners. Clean with a soft cloth and soapy water. Wipe dry.A Do not disassemble,modify or repair the trimmer yourself.This appliance is not intended for use by per-sons (including children) with reduced physical, sensory or mental capabilities, or lack of expe-rience and knowledge, unless they have been given supervision or instruction concerning use of the appliance by a person responsible for their safety. Children should be supervised to ensure that they do not play with the appliance. Replacing battery(See fig. 2)Turn the battery cover counter clockwise and match the line a with b Pull to remove. Insert one AA(LR6) Alkaline battery. Mount the battery with polarity as shown. To replace the battery cover, reverse the above procedure. Using your trimmerSlide the power switch to the “1” posi-tion to turn the appliance on.<Nose hair and ear hair>Carefully insert the tip of the outer blade into your nostril or ear hole to trim the nose and ear hairs. <Eyebrows, moustache, or beard> Place the tip of the outer blade against the hair (eyebrows, moustache, beard) you would like to cut. (Press the outer blade softly so as not to injure your skin.) MaintenanceBe sure that the switch is turned off before removing, replacing or cleaning the blades. To remove the outer blade frame,turn it and match the line c with d and pull upward. (See fig. 3) Detach the inner blade from the outer blade. Wipe the blades with a tissue gently to remove any cut hairs, dust, etc. If the blades are wiped strongly, they will be deformed or damaged. THE WHOLE UNIT CAN BE WASHED IN WATER.DO NOT USE BOILED WATER. Next, put the inner blade back into the outer blade. To attach the outer blade frame to the unit, match the mark c with d, and turn clockwise until it clicks in./personal-care/supportER97004153553 S0910-30316。
收到机子首次使用要先充电12个小时以上底座接上电源无绳里面放上电池无绳放到底座上就可以进行充电了发货前我们都是设置好的您收到机子充好电就可以使用了不需要进行对码操作有问题可以在线咨询或来电咨询谢谢支持1.接听电话:当有电话来的时候按通话键或者免提键即可进行通话通话完毕后按挂机键退出2.拨打电话:先按通话键或者免提键听筒有拨号音之后然后再拨您要拨打的电话号码通话完毕后按挂机键退出还可以先拨您要拨打的电话号码然后再按通话键或者免提键3.重播键:先按一下重播键然后按上翻或者下翻找到要播出的号码然后按通话键或者免提键即可播出4.对讲操作:在待机的状态下无绳屏幕都会自动分出1 和2 按一下对讲键然后再按数字键要对讲的无绳号另一个无绳的就会响铃按通话键即可通话5.电话本储存号码操作:在待机的状态下按一下确认键然后再按一下退出键然后按数字键输入要储存的姓名(只能拼音或者英文)输入完毕之后再按确认键进入输入要存储的电话号码输入完毕之后再按2次确认键确认6.删除电话本里面的电话号码:在待机的状态下按一下确认键然后再按上翻或者下翻找到您要删除的号码然后按退出键再按确认键即可删除7.进入菜单操作(以下操作都是在待机的状态下操作)(1)Ringer setting 铃声设定:按一下菜单键然后按4次下翻键然后按1次确认键然后再按1次下翻键再按确认键进入铃声选择按上翻或者下翻选择铃声按确认键确认(2)Ringer volume 铃声音量:按一下菜单键然后按4次下翻键然后按2次确认键按上翻或者下翻选择铃声音量大小OFF为关闭铃音按确认键确认(3)Set date & time 设置日期时间:按一下菜单键然后按5次下翻键然后按2次确认键进入设置如期时间直接按数字键输入按退出键可以选择上午和下午AM为上网PM为下午按确认键确认(4)Alarm 闹钟:按一下菜单键然后按5次下翻键然后按1次确认键然后再按1次下翻键再按确认键进入按上翻或者下翻选择(OFF为关闭ONCE为一次Daily/每日)再按1次确认键进入闹钟时间设置按退出键选择上午或者下午(AM为上午PM为下午)再按2次确认键进入闹钟铃声选择按确认键确认(5)Night mode 休息模式/外来电话铃声静音状态:按一下菜单键然后按3次下翻键在按2次确认键然后再按上翻或者下翻现在ON为开启静音模式OFF为关闭静音模式按确认键确认(6)LCD contrast 液晶显示对比度设置:按一次菜单键然后按8次下翻键然后再按一次确认键再按3次下翻键然后再按确认键进入按上翻或者下翻选择按确认键确认(7)Set dial mode/拨号方式音频和脉冲设置:按一次菜单键然后按8次下翻键再按1次确认键然后再按7次下翻键再按2次确认键然后按上翻或者下翻选择Tone/音频Pulse/脉冲按确认键确认(8)按键音开关设置:按一次菜单键然后按8次下翻键再按1次确认键然后按4次下翻键再按1次确认键进入选择ON为开启OFF为关闭按确认键确认(9)子机听留言:按一下菜单键然后按确认键即可听取按导航键的右箭头可以听取下一条按导航键的左箭头可以重复听取(10)设置自动应答响铃次数:按一次菜单键然后按8次下翻键再按3次确认键然后按上翻或者下翻选择2-7次按确认键确认(11)语音报号开关设置:按1次菜单键然后按下翻键至屏幕显示Talking Caller ID 时再按确认键进入然后按上翻或者下翻选择ON或者OFF ON为开OFF为关闭按确认键确认8.底座留言操作:(1)主人留言:按2次REC主人留言键听见“滴”声后开始录制录制完之后再按一下REC主人留言键即可完成。
panasonic rs—st2p剃须刀使用说明
你好,剃须刀使用常识:
1、刀头每隔四周需彻底清洁一次,取下网膜架后,在离网架5厘米处喷上专用清洁剂,稍后即可用小毛刷除去刀头里的胡渣和污浊。
2、刀头用小毛刷清洁,切勿以小毛刷清洁网膜以免损伤。
3、每次剃完后要取下网膜架,在平面上轻敲几下再重新安上。
4、每次使用后盖上网膜刀头保护盖,以防止网膜受损。
5、为了确保剃须刀的高水准效果,特别建议您最好每两年将刀头及刀网整组更换。
6、为保持机内电池的使用寿命,每半年左右将剃刀在正常使用中完全放尽电量,然后再重新充电。