CC5000中文操作说明
- 格式:pdf
- 大小:1.71 MB
- 文档页数:84
PC 5000快速使用说明一、按键功能说明Esc。
撤销选择,并回到上一屏幕。
重复按该键可返回到显示/功能屏幕。
Enter。
回车,选择选项,确认设置。
Up。
向上滚动或改变选择。
Down。
向下滚动或改变选择。
On/Off。
开/关按钮,按下可启动仪器,长按关闭仪器。
Zero。
回零按钮,当处在Display Screen(测量模式)下,按住该键2秒可将探测器回零,得到测量结果为基于相对零点的读数,再按该键返回绝对零点读数。
二、快捷参考显示/功能选择屏幕:以图表或数字形式查看VOC读数,修改仪器功能和参数查看数据:查看储存在仪器内存中的数据区域维护:创建、选择和删除区域名称数据传输:激活仪器与电脑之间进行数据传输报警:在测量模式中设置高低报警值声音:选择音频提示,包括蜂鸣声校准:选择工厂或用户校准背景灯:背景灯选择日期/时间:调整日期和时间气体选择:从内置气体表中选择气体PID灯:选择不同的PID灯单位:选择ppb、ppm、mg/m3作为测量单位校准记录内存报警:设置警报,提醒用户数据内存已满应用模式:设置健康安全模式和测量模式,健康安全模式可监测STEL和TW A,而测量模式为常规使用模式,在健康安全模式下不允许用户修改设置或参数,若尝试修改,会出现警告信息,可按Enter键继续修改三、简单操作使用说明1、按下键开机。
2、仪器进行自检。
3、自检完成后,屏幕显示显示/功能屏幕,若开机未进入该屏幕,可重复按键使进入该显示屏幕。
4、利用和键滚动选择图表显示,按Enter键确认,将以图表格式显示真实的测量结果。
可看到探测气体类型、单位、最大值保持和实时读数,按住回车键还可查看附加信息,例如警报等级和电池状态等。
5、在主屏幕上用同样的方法选择大字体显示,将以大字体数字显示真实的测量结果,方便查看。
可查看实时测量,按住回车键还可查看附加信息例如警报等级和电池状态、最大值保持等。
处于“健康安全”模式时。
按住回车键还可查看STEL和TW A警报等级和计算值。
手柄操作说明书一、任意状态下点击“F4”表示退出程序“T”会出现“Are you sure you want to leave?”你确信你要退出吗?如果要退出:选择“Y”或者“YES”会出现“Do you want to keep the receiver ON?”你想保持接收机在开机状态吗?选择“Y”或“N”。
不退出:选择“N”或者“NO、DEL”二、任意状态点击“F1”是进入帮助三、当最上一栏有1/3或1/2时,可以用”PgDn”、“PgUp”进行翻页四、当菜单中有“右箭头”时,可以用“右箭头”查看。
五、图标1 operation内容说明:1、stake out 放样2、logging采集点3、reference point输入参考点4、trajecto轨迹测量5、logging with offset坐标几何计算6、profile断面测量stake out如果没有设计点会显示:There is no point in the file.文件中没有设计点供放样?“F1”的帮助里:yes Guidance 导航O stake out with offset坐标几何计算放样S search 搜索、查找V view 查看点的坐标C creat a point 新创造一个点L creat a line 新创造一条线D distance 计算距离N next point 下一个点P configure next point定义下一个点G Geocode display显示地理码(代码)M view 2D查看平面视图Esc abadon 放弃F4 quit 退出Logging在Name中请输入采集点的名字Geocode(1)、(2)等等是输入地理码(代码)的位置Average 采集点的平均定位时间(一般1秒就可以了)Antenna 天线高Comment 备注栏“F1”帮助里F3 logging 采集记录# uncertainty display 显示精度限制阀值Esc Abandon 放弃F4 quit退出Refrence pointF1帮助中yes Guidance 导航O stake out with offset坐标几何计算放样S search 搜索、查找V view 查看点的坐标C creat a point 新创造一个点L creat a line 新创造一条线D distance 计算距离N next point 下一个点P configure next point定义下一个点G Geocode display显示地理码(代码)M view 2D查看平面视图Esc abadon 放弃F4 quit 退出Trajecto Time 按时间采集轨迹Distance 按距离采集轨迹如选择Time在Name中请输入采集点的名字Geocode(1)、(2)等等是输入地理码(代码)的位置Time 时间Antenna 天线高Comment 备注栏F 1帮助里:F3 start 开始轨迹测量# uncertainty display 显示精度限制阀值Esc Abandon 放弃F4 quit退出如选择Distance在Name中请输入采集点的名字Geocode(1)、(2)等等是输入地理码(代码)的位置Distance 距离Antenna 天线高Comment 备注栏F 1帮助里:F3 start 开始轨迹测量# uncertainty display 显示精度限制阀值Esc Abandon 放弃F4 quit退出Logging with offsetLinear 直线延长法Lateral 前方交会法Intersection 两直线相交法F1帮助里Yes Accept 接受V view 查看Del Delete 删除Clr Delete All 删除所有Esc Abandon 放弃F4 quit退出Profile 断面测量Yes Guidance 导航I Insert a point 插入一点F Insert points 插入多个点Del Delete a point 删除点Clr Delete all point删除所有点S search 搜索查找V view 查看点坐标N next point下一个点P configure next point定义下一个点G Geocode display 显示地理码M View 2D查看平面视图Esc Abandon放弃F4 quit退出图标 2 UHF receiver1、configure2、positionconfigurel里:Number 1 站号(要求参考站和流动站一致)Frequency 414.55MHz 频率(要求参考站和流动站一致)Baud rate 4800波特率Station battery 12.0V 参考站电压Level 30dB电台信号强度(0----74)Age 1S 电台数据更新率(0、1、2基本正常,逐渐增大说明电台信号丢失)Position里:Number 1 站号Easting: 500000m 东坐标Northing: 3456000m 北坐标Altitude: 3m 大地高Distance: 1798m 距离参考站距离图标 3 Files1、choose a job 选择工作项目(包含坐标转换参数及参考点refrence point和设计点target及结果点result坐标)2、choose a file 选择一个工作文件3、result point结果点4、memory查看内存5、raw data原始数据采集6、notes记事本choose a job中的帮助yes select 选择箭头所指的工作项目V view 查看C creat a job创造一个新的工作项目Esc Abandon放弃F4 quit 退出choose a file中的帮助yes select 选择箭头所指的工作文件V view 查看C creat a new file创造一个新的工作文件Esc Abandon放弃F4 quit 退出Result point 查看采集的结果点和轨迹帮助类似reference point 和target point的帮助memory 查看容量PCMICIA PC卡的容量情况Total memory 8Mb 共计Free memory 99% 7785Kb 剩余容量PALM TOP 手柄的容量情况Total memory 1912Kb 共计Free memory 44% 848Kb 剩余容量F1 帮助F List of files 文件列表Esc Abandon 放弃F 4 quit 退出RAW data 静态原始记录Status stopped 状态:停止stopped、记录recording File 11210846 文件名Period 10S 采样间隔10 S一次Antenna 3m 天线高帮助里:R Start recording 开始记录S stop recording 停止记录Esc Abandon 放弃F4 quit 退出Notes 记事本帮助里:yes Edit a note 编辑记事本C Create a note新建记事本Del Delete a note删除记事本Clr Delete all notes删除所有记事本T Transfer notes传送记事本Esc Abandon放弃F4 quit 退出图标4 SV1、oprating mode 工作模式2、position 流动站位置3、satellites 卫星状况4、sv deselection 删除卫星oprating mode 工作模式:operating mode OTF /STATIC/ZFIXED/POINT/EDGPS/GPS OTF:(on the fly)在移动中初始化(解算整周模糊度)STATIC:静态初始化(保持GPS天线不动)ZFIXED:固定Z的初始化POINT:按给定的已知点初始化EDGPS:增强型DGPSGPS:单点定位Initialization time 03:04 初始化时间Number of solution 3 解算出模糊度的个数Age of the last 00:30最后一个解出来后距现在的时间PDOP 1.8 空间精度因子Easting 500000m东坐标Northing 3456000m北坐标Altitude 4m大地高Antenna 3 m天线高帮助中F Get a point from file 从文件中得到点C Get current point 取当前点Yes Accept 重新初始化Esc Abandon 放弃F4 quit退出PositionNumber of sv’s 8 卫星数Mode LRK 状态Geodesy shcj/shcj 地理坐标系统Easting 500000m 东坐标Northing 3456000m 北坐标Altitude 3m 大地高Antenna 3m 天线高Uncertainty 容许范围Horizontal 平面精度V ertical 高程精度Max Horizontal 最大容许平面精度Max Vertical 最大容许高程精度Satellites卫星状况Sv El Azi1 34 3553 66 454 33 156卫星号高度角方位角信噪比SV Deselection 删除卫星帮助:Del select/unselect Sv 选择或不选择卫星Yes Accept selection 接受选择Esc Abandon 放弃F4 quit退出图标5 Geodesy 坐标系统1、Datum 7参数2、Projection 投影参数3、Change to WGS84 切换到WGS84大地坐标4、Local grid平面转换参数5、Height correction高程改正Datum:Name : shcj 7参数文件名A 6378245.000M 椭球长半轴1/F 298.3000000000 扁率的倒数S 0.99999814 比例因子Dx -170.076 X方向平移Dy -154.924 Y方向平移Dz -97.308 Z方向平移A x 1.666408”饶X轴旋转角度Ay 0.072624 饶Y轴旋转角度Az -8.648183 饶Z轴旋转角度ProjectionUtm shcj 投影名字Lori 0’00’00.0000’N 中央纬度Gori 121’28’01.7702’E 中央经度Eori 0.000m 东方向加常数Nori -3457140.000m 北方向加常数Ko 1.00000000000 投影比例Change to WGS84会出现:”The current geodesy will be lostThe current job will be lostAre you sure?”当前的坐标参数和工作文件会失去,切换到WGS84大地经纬度,你确定吗?Local grid平面转换参数Datum shcj 7参数名Projection shcj 投影名Grid YES 使用平面转换NO 不使用Height correction高程改Ellipsoid shcj 椭球名STANAG NOGeoid no 不使用高程模型YES 使用高程改正模型Correction yes 使用高程改正Antenna 3m 天线高图标6 tools 工具1、Area 面积计算2、Time 时间3、Geocode 地理码4、Configuration参数5、Unit单位6、Release版本Area里:F1帮助:Yes Compute计算I Insert a point插入点F Insert points插入多个点Del Delete a point删除点Clr Delete all points删除所有点S Search搜索V View查看N Next point下一个点P Configure next point配置下一个点G Geocode display显示地理码M View 2D查看平面视图Esc Abandon放弃F4 Quit退出Time里:Offset时区中国是东八区+08:00Local time当地时间Date日期UTC time格林尼治时间F1 帮助里:O Set offset设置时区T Set time设置时间D Set date设置日期Esc Abandon放弃F4 Quit退出Geocode里:F1帮助中:A Add a new geocode增加新的地理码M Modify a geocode编辑地理码Del Delete a geocote删除地理码Esc Abandon放弃F4 Quit退出Configuration里:UncertaintiesHorizontal 0.25m 平面经度范围Vertical 0.35m 高程精度范围Display Horizontal:显示精度平面Acceptance circle 0.50m 接受圈Battery alarm 11.5V电池警告电压Unit里:Length Meters: 长度单位米Angle Degrees: 角度单位度Release里:25/10/99 TOV20204TD00 RUHFV10300 RUHF表示接收电台模块10300是版本号EUHF表示参考站的电台发射模块CM08 CMPYV0020513 CM表示GPS接收模块,后边是版本号CM08 CMBLV0010109UC01 UCBNV30304 UC表示主板模块,后边是版本号UC01 UCBLV100000UC01 UCBSV200000。

快速入门说明书 (中文)快速入门说明书 (中文)简介包装清单支持入门指南注意在操作EWI5000无线电吹管前, 请注意下列事项:1. 启动EWI50002. 握持 EWI5000注意: 从/ewi5000下载EWI5000快速入门说明书以及EWI5000编辑软件的完整版本。
EWI5000 清洁布无线接收器 EWI5000 编辑软件 (下载)USB 数据线 快速入门说明书USB 电源适配器安全与保证指南关于本产品的最新信息(系统需求, 兼容性信息,等) 以及产品注册,请访问/ewi5000关于附加的产品支持服务, 请访问/support• 请勿用力咬噬电吹管吹嘴—这可能会破坏颤音传感器。
在使用过或搬运EWI5000时,使用吹嘴盖子。
• 在演奏时,请接触接地板以及八度滚筒—传感器会检测表演者的身体是否接地。
• 在使用EWI5000电吹管前、使用中以及使用后保持吹嘴清洁。
您可以使用湿布清洁吹嘴表面。
EWI5000 电吹管的电源是可充电电池。
请务必注意一下事项:• 安装:用标准十字螺丝刀(本产品不包含)将EWI5000位于耳机输出的下方的电池盖拆下,安装电池,再将电池盖装好。
• 充电: 用自带的USB线连接EWI5000的USB接口(A)与自带的USB电源适配器,电源适配器连接电源(B)或者电脑上可使用的USB接口(开机状态)。
你可以在充电状态下使用EWI5000。
• 电池电量: 您可以长按电平按键,再长按效果按键查看剩余电池电量。
电池电量示数(00–99)会在显示屏显示。
• 低电量警报: 当电池电量低时,预设LED或用户LED会闪烁,提醒你应该充电了。
• 自动关机: 当EWI5000检测到空闲时间约十分钟时,它将会自动关机。
通常情况下,在闲置时EWI5000自动关机是为了省电。
1. 确保挂带与EWI5000的挂勾相互连接。
2. 请将挂带配戴好,将EWI5000在你前方垂直持握,与握持萨克斯或单簧管一样。

jrc5000中版说明书JRC设备主要功能操作说明一、组合电台的交直流电源转换组合电台有三路电源输入:1、主配电板交流电2、应急发电机交流电3、GMDSS专用电平组合电台电源转换工作如下:主配电板交流电断掉,电台自动切换到应急发电机交流电,当主配电板和应急发电机交流电全部断掉时,电台切换到电平工作,C站和DSC进展重启,SSB需人工启动。
注意:不能对MF、HF电源和C站电源单独进展电源转换。
二、MF、HFa.DSCTEST以台6M为例1、在DSC单元上,按MENU进入菜单2、选择第11项TESTCALL3、在ADDRESS项输入ID:0041221004、按CALL键,呼叫,此时MF、HF自动转到DSC模式发射5、等待台回复,假如5分钟无回复,如此再次测试,或者更换频率在测试b。
SSBTEST以台1211频段为例:1、在RADIOTELEPHONE单元上,按MODE/CLR键,转换到TEL模式2、按CH键,输入频道1211,按ENT确认3、按ANTTUNE键进展调谐4、调节RFGAIN与VOLUME将信号和声音调制最优5、拿起话筒,按住PTT与台通话,询问我方信号质量如何6、完毕通话三.INMARSAT-Ca。
LOGIN/LOGOUT1、按住ALT+U键,调出SETUP菜单2、选择LOG-ININITIATION或者LOG-OUTINITIATION入网或退出b。
CHOSEOCEANANDCHECKSIGNAL1、在屏幕界面,按左右方向键,选择NCS/LES-INFO菜单2、选择PREFERREDOCEANREGION进入洋区选择界面3、选择适宜的洋区,入网c、PRINTERSETUP1、按ALT+U,进入SETUP菜单2、选择PERIPHERALFUNCTION项,进入功能设置菜单3、在AUTOMATICMESSAGEPRINTOUT项,可选择打开或关闭自动打印d。
CHECKID检查本机ID1、按ALT+S进入STATUS选项2、选择MESSTATUS,可查看本机ID等信息e。
CC5000E PLUS Setup Guide | 设置指南English 3简体中文 1021. Power2. Mic Pod3. Future Expansion4. Connection To Display Hub5. HDMI 1 In6. HDMI 2 In7. Meeting Room Computer USB8. Future Expansion9. Security Slot10. Power LEDWHAT’S WHATTABLE HUBEnglish 31. Speaker2. Power3. Connection To Table Hub4. HDMI 1 Out5. HDMI 2 Out6. Meeting Room Computer USB7. Camera8. Security Slot9. Remote Control Pairing10. Power LEDDISPLAY HUB4 EnglishCAMERA1. Remote control pairing button2. USB3. Status LED4. Security slot5. MIPI6. Tripod Thread7. Expansion SlotEnglish 5REMOTE1. Bluetooth pairing2. Call answer3. Call end4. Microphone mute5. Zoom in/out6. Volume up/down7. Home8. Camera pan/tilt9. Camera presetsAfter completing the installation, the system can be checked by running the diagnostic application available at Logitech com/support/Rally6 EnglishMAKE RALLY PLUSTHE DEFAULT DEVICEEnsure that RALLY PLUS is chosen as the camera, speaker and microphonein your video conferencing applications Please consult the application documentation for further instructions on how to do thisSTARTING A VIDEO CALLAfter installing RALLY PLUS and ensuring it is the default device in your video conferencing application, simply start the application in the normal manner and enjoy the benefits of improved audio and video PAIRING RALLY PLUSTO A BLUETOOTH DEVICEYou can use RALLY PLUS for audio calls when paired to a Bluetooth device To pair your Bluetooth device to RALLY PLUS, follow these simple step:1. Press and hold the Bluetooth button on the remote control until you seea flashing blue light on the camera and microphones2. Place your mobile devicein Bluetooth pairing mode and select “Logitech Rally”3. You are now ready to use RALLY PLUS for audio callsEnglish 7PAIRING A REMOTE CONTROL TO RALLY PLUSRALLY PLUS and the remote control are paired at the factory You can pair up to 5 remote controls to RALLY PLUS to make it easier to control the system in larger rooms Or, if you need to pair a remote to the camera, such as when replacing a lost remote, do the following:1. Press and hold the button onthe camera until the LED flashes2. Press and hold the button onthe Display Hub until the LED flashes 3. Press and hold the Bluetooth button on the remote control until the LEDs on both the camera and Display Hub stop flashing4. If the pairing fails, repeat from step 1 CAMERA SETTINGS APPLICATIONUse this program to control the camera pan, tilt, zoom, focus, and image quality (like brightness and contrast) from your computer The software can be downloaded from www logitech com/ support/Rally8 EnglishENHANCING RALLYThere are several optional accessories that ease installation and allow RALLY PLUSto be used in larger rooms:1. Rally Mounting Kit: Mounting brackets for the Table Hub, Display Hub, Camera and Speakers2. Extra Mic Pods: RALLY PLUScan support up to 7 Mic Pods allowing great flexibility in room size and configuration3. Mic Pod Hub: Used to branch microphone routing and run most of the Mic Pod cabling is below the table The Mic Pod Hub has 3 jacks that can be connected to a combination of Mic Pods or other Mic Pod Hubs4. TV mount: Works with one of either the Camera or Speaker mounting brackets The TV Mount can be used in pairs to mount the Camera and Speaker above and below the TV FOR MORE INFORMATION You can find additional information on RALLY PLUS including:- F AQs- S oftware to enable functionsin various application- H ow to order replacement parts and more atwww logitech com/support/RallyEnglish 91. 电源2. 麦克风3. 未来扩展4. 连接至显示器集线器5. HDMI 1 输入6. HDMI 2 输入7. 会议室电脑 USB8. 未来扩展9. 防盗锁插孔10. LED 电量指示灯硬件说明桌面集线器10 简体中文简体中文 111. 音箱2. 电源3. 连接至桌面集线器4. HDMI 1 输出5. HDMI 2 输出6. 会议室电脑 USB7. 摄像头8. 防盗锁插孔9. 远程控制配对10. LED 电量指示灯显示器集线器912 简体中文1. 遥控器配对按钮2. USB 端口3. LED 状态指示灯4. 安全槽5. MIPI 端口6. 三脚架安装螺纹7. 扩展插孔1. 蓝牙配对2. 接听通话3. 结束通话4. 麦克风静音5. 放大/缩小6. 音量增大/减小7. 主页键8. 摄像头平移/倾斜9. 摄像头预置安装完成后,可运行诊断应用程序检查系统,下载请访问 Logitech com/support/Rally。
RG-CT5000-G4系列云终端文档版本V1.0归档日期2023-04-24copyright © 2023 锐捷网络版权声明copyright © 2023 锐捷网络保留对本文档及本声明的一切权利。
未得到锐捷网络的书面许可,任何单位和个人不得以任何方式或形式对本文档的部分或全部内容进行复制、摘录、备份、修改、传播、翻译成其他语言、将其部分或全部用于商业用途。
、、和其他锐捷网络商标均为锐捷网络的商标。
本文档提及的其他所有商标或注册商标,由各自的所有人拥有。
免责声明您所购买的产品、服务或特性等应受商业合同和条款的约束,本文档中描述的部分或全部产品、服务或特性可能不在您的购买或使用范围之内。
除非合同另有约定,锐捷网络对本文档内容不做任何明示或默示的声明或保证。
由于产品版本升级或其他原因,本文档内容会不定期进行更新。
锐捷网络保留在没有任何通知或者提示的情况下对文档内容进行修改的权利。
本手册仅作为使用指导。
锐捷网络在编写本手册时已尽力保证其内容准确可靠,但并不确保手册内容完全没有错误或遗漏,本手册中的所有信息也不构成任何明示或暗示的担保。
前言读者对象本手册适合下列人员阅读●网络工程师●技术实施人员●网络管理员技术支持●锐捷网络官方网站:https://●锐捷网络官方网站服务与支持版块:https:///fw/●锐捷网络7*24h智能客服闪电兔:https://●锐捷网络7*24h技术服务热线:4008-111-000●锐捷网络售后服务工具——小锐云服:https:///special/fw/tool/xryf/●锐捷网络技术支持与反馈信箱:*********************.cn●锐捷网络文档支持与反馈信箱:**************.cn小锐云服APP 锐捷服务公众号本书约定1. 各类标志本书还采用各种醒目标志来表示在操作过程中应该特别注意的地方,这些标志的意义如下:危险表示重要安全操作指导。
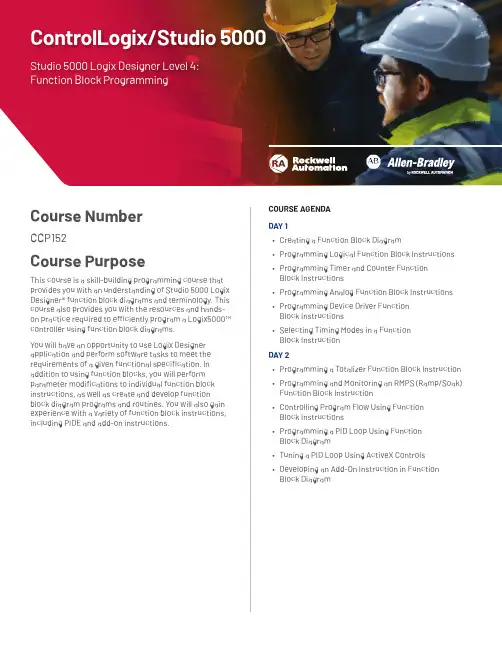
Course NumberCCP152Course PurposeThis course is a skill-building programming course that provides you with an understanding of Studio 5000 Logix Designer® function block diagrams and terminology. This COURSE AGENDADAY 1• Creating a Function Block Diagram• Programming Logical Function Block Instructions • Programming Timer and Counter FunctionBlock Instructions• Programming Analog Function Block InstructionsControlLogix/Studio 5000 Studio 5000 Logix Designer Level 4:Function Block ProgrammingWHO SHOULD ATTENDIndividuals who are responsible for developing,debugging, and programming Logix5000 controllers using the Logix Designer application with function block diagrams should attend this course.Also, individuals who use ActiveX controls in an operator interface, such as FactoryTalk® View ME software, should attend this course.PREREQUISITESTo successfully complete this course, the following prerequisites are required:• Ability to perform basic Microsoft Windows tasks • Understanding of basic measurement and control theory, including basic loop control• Completion of the Studio 5000 Logix Designer Level 3: Project Development course (Course No. CCP143)or equivalent experience STUDENT MATERIALSTo enhance and facilitate the students’ learningexperiences, the following materials are provided as part of the course package:• Student Manual– Contains the topical outlines and exercises–Used to follow presentations, take notes, and work through exercises • Studio 5000 Logix Designer and Logix5000 Procedures Guide–Provides the steps required to complete basicsoftware tasks common to all Logix5000 controllersHANDS-ON PRACTICETo gain real-world programming experience, you will be given a functional specification for a fictitious batch process mixer, where bulk ingredients are mixed to produce a product. You will be the programmer for this batch mixer and must follow the functional specification, which will be the basis for all hands-on exercises in this course.After completing all exercises, you will have developed a Logix5000 project for the fictitious batch process mixer. As you develop your project, you will be given opportunities to run it using an ABT-TDCLX3-B workstation. This programming and process-based application experience can then be transferred to your own job responsibilities.NEXT LEARNING LEVELOnce you have mastered the function block diagram skills covered in this course, you will be able to expand your Logix5000 programming knowledge by attending other Logix5000 programming courses, such as the Studio 5000 Logix Designer Level 4: Kinetix 6000 (SERCOS) Programming course (Course No. CCN145).COURSE LENGTH This is a two-day course.Allen-Bradley, FactoryTalk, Logix5000 and Studio 5000 Logix Designer are trademarks of Rockwell Automation, Inc.Trademarks not belonging to Rockwell Automation are property of their respective companies. Publication GMST10-PP190I-EN-E – January 2020 | Supersedes Publication GMST10-PP190H-EN-E – April 2018Copyright © 2020 Rockwell Automation, Inc. All Rights Reserved. Printed in USA.To be respectful of the environment, Rockwell Automation is transitioning some of its training courses to a paperless format. Students are asked tocomplete downloads and bring personal devices to these classes. A full list of digital/paperless courses is currently available through your local distributor.。
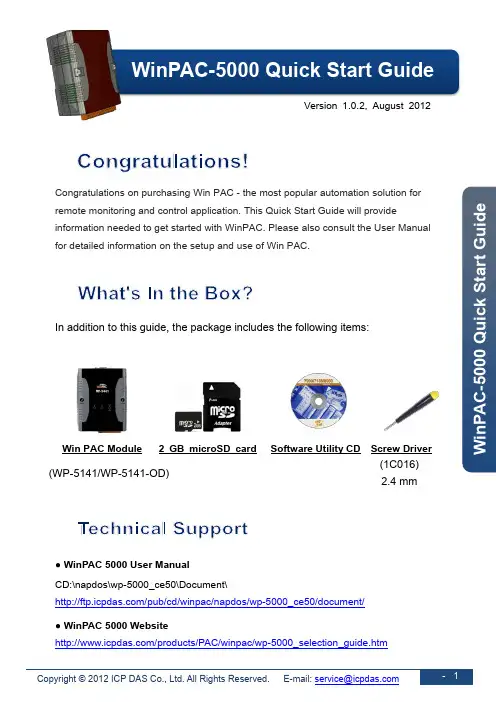
W i n P A C -5000Q u i c k S t a r t G u i d eVersion 1.0.2, August 2012Congratulations on purchasing Win PAC - the most popular automation solution forremote monitoring and control application. This Quick Start Guide will provide information needed to get started with WinPAC. Please also consult the User Manual for detailed information on the setup and use of Win PAC.In addition to this guide, the package includes the following items:Win PAC Module 2 GB microSD card Software Utility CD Screw Driver(WP-5141/WP-5141-OD)(1C016) 2.4 mm● WinPAC 5000 User Manual CD:\napdos\wp-5000_ce50\Document\/pub/cd/winpac/napdos/wp-5000_ce50/document/ ● WinPAC 5000 Website/products/PAC/winpac/wp-5000_selection_guide.htm• WinPAC-5000 Quick Start GuideW i n P A C -5000 Qu i c k S t a r t G u i d e1--------------------------------------------------------------------------------Configuring the boot modeBefore starting any installation, be sure that the switch is placed in the “0” position.2--------------------------------------------------------------------------------Connecting to PC, Monitor and Power Supplyi. Connect the mouse or keyboard to the USB port.ii. Connect the microphone and earphone to the microphone-in and earphone-out (for WP-5141-OD only).iii. Connect PC to the Ethernet port through a hub.iv. Connect the power supply (10 ~ 30 V DC ) to PWR and GND terminals. v. Connect the monitor to the VGA port.W i n P A C -5000 Qu ic k S t a r t G u id e3--------------------------------------------------------------------------------Changing the User Interface LanguageThe WinPAC Utility is a toolkit used to quickly control and manage the WinPAC.SAuto Execution…, etcStep 3: Save and Reboot theWinPACW i n P A C -5000 Q u i c k S t a r t G u i d e4--------------------------------------------------------------------------------Inserting and Wiring the I/O ModulesThe WinPAC expansion only supports XW-board series modules.For more information about the XW-board expansion module, please refer to /products/PAC/up-5000/XW-board_Selection_Guide.h tmAfter you have finished configuring your module(s), you may start to develop your own applications. For detailed instructions and more applications, pleaserefer to WinPAC-5000 User Manual.。
LED 测试+ 系统信息
运行+ 电源
报警信息
故障信息
关闭+ 维护
关报警器
复位报警/故障
进入
报警-, 故障-, 关闭-以及系统-
菜单
根据菜单有不同含义
情况1
一般情况!
情况2
保险丝完好??? –检查
情况3
保险丝完好??? –检查
情况1
没有报警
情况2
只有探测
没有喷水
情况3
探测
而且喷水正常
情况4
探测
但是喷水有故障
情况1
没有故障
情况2
至少有一处故障
情况3
至少有一处CPU故障
情况4
至少有一处漏水
情况5
至少有一处CPU故障和一处漏水
情况1没有关闭没有维护
情况2
至少有一处关闭
情况3
至少有一处维护
情况3
至少有一处关闭并且
至少有一处维护
情况1关报警器
情况2
根据菜单不同信息, 复位报警/故障
报警故障关闭系统
根据所选择菜单内容的不同,下/ -
上/ +
右
左确认/执行
取消/退出
+
1 x
1 x
1 x
1 x
1 x
1 x
1 x
1 x。
CC5000E 麦克风布署指南在本文中,我们将介绍如何在不同桌面布局、不同尺寸的会议室中优化罗技 CC5000e 系列产品的麦克风拾音效果。
本文包含关于外部麦克风最佳布署方式的具体指南。
目录为每个会议室选择合适的视频会议系统天花板上的麦克风与桌面上的麦克风C C5500E 和 CC4500E扬声器模式:默认模式与扬声器增强模式典型麦克风配置扬声器增强模式的麦克风配置CC5000E PLUS配件为每个会议室选择合适的视频会议系统在决定哪种摄像头系统最适合特定会议室时,要考虑多个因素。
您可以综合考虑摄像头变焦性能、扬声器输出音量和麦克风拾音范围,以帮助做出最佳选择。
在决定应在哪个会议室部署哪种 CC5000e 设备时,应遵循以下一般准则*。
• C C4500e是中小型会议室的理想之选,这些会议室通常可容纳 3-12 人,面积达5.5米×6米(33平方米)。
•C C5500e 是中到大型会议室的理想之选,这些会议室通常可容纳多达 20 人,面积达4.5米×8米(36平方米)。
•C C5000e Plus 专为更大会议室进行优化,这些会议室通常可容纳多达 46 人,面积达8.5米×12米(102平方米)。
* 为获得最佳性能,请遵循以下准则或在各个会议室中对系统进行测试。
CC5000e 系统非常灵活,通过配备额外的麦克风,可适应更大尺寸的会议室。
CC5500e 和 CC4500e 的内置麦克风均支持高达 7 米 的拾音范围。
但是,在某些情况下,例如使用 U 形会议桌或特长会议桌时,配备额外的麦克风会带来更好的效果。
对于这些情况,CC5500e 可支持多达四只 CC5000e 麦克风,而 CC4500e 可支持多达三只。
*对于更大的会议室,CC5000e Plus 可支持多达七只 CC5000e 麦克风。
*使用外置麦克风时,请参阅下面的“配件”来查找推荐的产品。
天花板上的麦克风与桌面上的麦克风在确定了合适的 CC5000e 系统和麦克风数量后,您可能还要考虑将麦克风安装在桌面上还是天花板上。
5000 seriesSuper automatic espresso machineEN USER MANUAL简体中文 用户手册한국어 사용 설명서EP5961, EP5960, EP5365EP5364, EP5363, EP5361EP53601English 8简体中文 27한국어 43ContentsMachine overview (Fig. 1)_____________________________________________________________________________8Introduction __________________________________________________________________________________________9Important safety information ________________________________________________________________________9Warning _______________________________________________________________________________________________9Caution _______________________________________________________________________________________________10Machines with milk carafe____________________________________________________________________________11Electromagnetic fields (EMF)________________________________________________________________________11First installation_______________________________________________________________________________________11Using the control panel ______________________________________________________________________________12AquaClean filter ______________________________________________________________________________________12Measuring water hardness ___________________________________________________________________________13Brewing drinks ________________________________________________________________________________________14Personalizing drinks __________________________________________________________________________________15Adjusting grinder settings ____________________________________________________________________________15Handling the brew group_____________________________________________________________________________16Cleaning and maintenance __________________________________________________________________________16Descaling procedure _________________________________________________________________________________20Warning icons and error codes ______________________________________________________________________21Ordering accessories _________________________________________________________________________________22Troubleshooting ______________________________________________________________________________________23Technical specifications ______________________________________________________________________________26Recycling______________________________________________________________________________________________26Warranty and support _______________________________________________________________________________26Machine overview (Fig. 1)1Control panel 19Coffee residues drawer2Adjustable coffee and milk dispensing spout20Coffee grounds container3Lid of water tank 21Drip tray cover4Lid of bean hopper 22Espresso stand tray5Lid of pre-ground coffee compartment 23Espresso stand cover6Main switch 24Hot water dispensing spout7Socket for cord 25Opening for hot water dispensing spout 8Service door 26Water tank9'Drip tray full' indicator 27AquaClean filter10Drip tray 28Milk container11Drip tray release button 29Milk dispensing unit8English12Cord 30Lid of milk dispensing unit13Grind setting knob 31Milk dispensing spout14Cover of bean hopper 32Grease tube15Bean hopper 33Cleaning brush16Brew group 34Measuring scoop17Inside of service door with contact information35Water hardness test strip 18Coffee exit ductIntroductionCongratulations on your purchase of a Philips full-automatic coffee machine! To fully benefit from the support that Philips offers, please register your product at /welcome .Read this user manual carefully before you use the machine and save it for future reference.To help you get the best out of your coffee machine, Philips offers full support in 3 different ways:1The separate quick start guide for first installation and first use.2This user manual for more detailed information.3Online support and movies: scan the QR code on the front page or visit /coffee-careNote: This machine has been tested with coffee. Although it has been carefully cleaned, there may be some coffee residues left. We guarantee, however, that the machine is absolutely new.Important safety informationThis machine is equipped with safety features. Nevertheless, read and follow the safety instructions carefully and only use the machine as described in these instructions, to avoid accidental injury or damage due to improper use of the machine. Keep this safety booklet for future reference.WarningGeneral-Check if the voltage indicated on the machine corresponds to the local mains voltage before you connect the appliance.-Connect the machine to an earthed wall socket.-Do not let the power cord hang over the edge of a table or worktop and do not let it touch hot surfaces.-To avoid the danger of electric shock, never immerse the machine, mains plug or power cord in water or any other liquid.-Do not pour liquids on the power cord connector.-To avoid the danger of burns, keep body parts away from hot water jets produced by the machine.-Do not touch hot surfaces. Use handles and knobs.9English-Switch off the machine with the main switch located on the back (if present) and remove the mains plug from the wall socket:-If a malfunction occurs.-If you are not going to use the appliance for a long time.-Before you clean the machine.-Pull at the plug, not at the power cord.-Do not touch the mains plug with wet hands.-Do not use the machine if the mains plug, the power cord or the machine itself is damaged -Do not make any modifications to the machine or its power cord.-Only have repairs carried out by a service center authorized by Philips to avoid a hazard -The machine should not be used by children.-This machine is not intended for use by persons (including children) with reduced physical, sensory or mental capabilities, or lack of experience and knowledge, unless they have been givensupervision or instruction concerning use of the machine by a person responsible for their safety.-Cleaning and user maintenance shall not be made by children.-Keep the machine and its cord out of the reach of children.-Children should be supervised to ensure that they do not play with the machine.-Never insert fingers or other objects into the coffee grinder.-Be carefull when you dispense hot water. Dispensing may be preceded by small jets of hot water.Wait until the end of the dispensing cycle before you remove the hot water dispensing spout.CautionGeneral-This machine is intended for normal household use only. It is not intended for use in environments such as staff kitchens of shops, offices, farms or other work environments.-Always put the machine on a flat and stable surface. Keep it in upright position, also during transport-Do not place the machine on a hotplate or directly next to a hot oven, heater or similar source of heat.-Only put roasted coffee beans in the bean hopper. Putting ground coffee, instant coffee, raw coffee beans or any other substance in the coffee bean hopper may cause damage to the machine.-Let the machine cool down before you insert or remove any parts. The heating surfaces may retain residual heat after use.-Never fill the water tank with warm, hot or sparkling water, as this may cause damage to the water tank and the machine.-Never use souring pads, abrasive cleaning agents or aggressive liquids such as petrol or acetone to clean the machine. Simply use a soft cloth dampened with water.-Descale your machine regularly. The machine indicates when descaling is needed. Not doing this will make your machine stop working properly. In this case, repair is not covered by your warranty.-Do not keep the machine at temperatures below 0°C/32°F. Water left in the heating system may freeze and cause damage.-Do not leave water in the water tank when you are not going to use the machine for a long period of time. The water can become contaminated. Use fresh water every time you use the machine.-Never use any accessories or parts from other manufacturers or that Philips does not specifically recommend. If you use such accessories or parts, your guarantee becomes invalid.10English-Regular cleaning and maintenance prolongs the lifetime of your machine and ensures optimum quality and taste of your coffee.-The machine is exposed continuously to moisture, coffee and scale. Therefore it is very important to regularly clean and maintain the machine as described in the user manual and shown on the website. If you do not perform these cleaning and maintenance procedures, your machineeventually may stop working. In this case repair is not covered by warranty.-Do not clean the brew group in the dishwasher and do not use washing-up liquid or a cleaning agent to clean it. This may cause the brew group to malfunction and may have a negative effect on the coffee taste.-Do not dry the brew group with a cloth to prevent fibers from collecting inside the brew group.-Never drink the solution dispensed during the descaling process.-Only put preground coffee into the preground coffee compartment. Other substances and objects may cause severe damage to the machine. In this case, repair is not covered by your warranty.-The machine shall not be placed in a cabinet when in use.Machines with milk carafeWarning-To avoid the danger of burns, be aware that dispensing may be preceded by jets of milk and steam. Wait until the end of the cycle before you remove the milk carafe.Caution-Make sure that the milk carafe is installed and the milk dispensing spout is open before you selecta milk-based coffee beverage or milk froth.-Do not put any other liquids in the milk jug/carafe than water (for cleaning) or milk.-Do not clean the milk carafe in the dishwasher.Electromagnetic fields (EMF)This machine complies with all applicable standards and regulations regarding exposure to electromagnetic fields.First installationTo prepare your coffee machine for use, you need to perform a few simple steps such as filling the water circuit and activating the AquaClean filter. These steps are shown in the separate quick start guide.For the best-tasting coffee, you need to brew 5 coffees initially to allow the machine to complete its self-adjustment.The machine has been set up to get the best taste out of your coffee beans. Therefore we advise you not to adjust the grinder settings until you have brewed 100-150 cups (approx. 1 month of usage). The machine is provided with the espresso stand, with the double function of cup support and extra drip tray to collect rinsing water.Using the control panelBelow you find an overview and description of the control panel of the machine. Some of the buttons have a double function; if applicable the navigation icons appear on the display. Use the buttons next to this icon to select or confirm your choices.Use the MENU button to select other drinks and to change settings such as the water hardness andAquaClean filterThe AquaClean filter is designed to reduce limescale deposits in your coffee machine and provide filtered water to preserve the aroma and flavor of each cup of coffee. If you use a series of 8 AquaClean filters as indicated by the machine and in this user manual, you don't have to descale your machine for up to 5000 cups. With each filter you can enjoy up to 625 cups, depending on the selected coffee varieties and the rinsing and cleaning frequencies.Preparing the AquaClean filter for activationBefore you place the AquaClean filter in the water tank, you need to prepare it for use:1Shake the filter for about 5 seconds (Fig. 2).2Immerse the filter upside down in a jug with cold water for at least 30 seconds and wait until no more air bubbles come out (Fig. 3).3Push the filter onto the filter connection to the lowest possible point (Fig. 4).Activating the AquaClean filterYou need to activate every new AquaClean filter that you use. By activating the AquaClean filter, the machine monitors the capacity of the AquaClean filter and the number of filters used. There are 3 ways to activate the AquaClean filter.1. Activating the AquaClean filter during first installationAfter switching on for the first time, the machine guides you through the first installation steps such as filling the water tank, filling the water circuit and activating the AquaClean filter. Simply follow the instructions on the screen.2. Activating the AquaClean filter when promptedNote: Replace the AquaClean filter as soon as the capacity has dropped to 0% and the filter icon flashes quickly. Replace the AquaClean filter at least every 3 months, even if the machine has not yet indicated that replacement is required.Tip: We advise you to buy a new filter when the capacity has dropped to 10% and the filter icon starts flashing slowly. This ensures that you can replace the filter when the capacity has dropped to 0%.1Press the MENU button, scroll to AQUACLEAN FILTER and press the OK button () to confirm.-The display asks if you want to activate a new filter (Fig. 5).2Press the OK button () to confirm.-The display automatically updates the number of filters used (Fig. 6).Note: If you want to replace the AquaClean filter after 8 filters have been used, you first need to descale the machine. Follow the instructions on the display.3. Activating the AquaClean filter at any other timeYou can start using the AquaClean filter at any time by following the instructions below.1Press the MENU button, select MENU and press the OK button to confirm. Scroll to AQUACLEAN FILTER. Press the OK button () to confirm.-The display shows the numbers of AquaClean filters that have been installed previously from 0 to 8 filters (Fig. 6).2Select ON on the display and press the OK button () to confirm (Fig. 7).-The display automatically updates the number of filters used (Fig. 8).-Then the 'machine ready' screen appears with the AquaClean 100% icon to indicate that the filter has been installed (Fig. 9).3Dispense 2 cups of hot water (0.5 l) to complete the activation. Discard this water.Note: In some situations the machine will tell you that you need to descale the machine before you can install and activate a new AquaClean filter. This is because your machine has to be completely limescale-free before you start to use the AquaClean filter. Follow the instructions on the screen.Measuring water hardnessUse the water hardness test strip supplied to set the water hardness. Press the MENU button, select MENU and scroll to select WATER HARDNESS.1Immerse the water hardness test strip in tap water for 1 second. Then wait for 1 minute.2Check how many squares have turned red.3Select the appropriate water hardness setting and press the OK button to confirm.Number of red squares:Value to be set1234Brewing drinksYou can select a drink by pressing one of the one-touch drink buttons or by selecting another drink in the menu.-If you want to brew two cups, press the one-touch drink button of the selected drink twice (Fig. 10).The machine automatically carries out two grinding cycles in sequence for the selected drink. You can only brew two coffee drinks at the same time.-Slide the dispensing spout up or down to adjust its height to the size of the cup or glass you are using (Fig. 11).Brewing coffee drinksBrewing coffee with beans1Fill the water tank with tap water and fill the bean hopper with beans.2To brew a coffee, press one of the one-touch drink buttons. To select another type of coffee, press the MENU button, select DRINKS, scroll down to the desired drink and press the OK button ().3To stop dispensing coffee, press the OK button ().Brewing milk-based drinks1Fill the water tank with tap water and fill the bean hopper with beans.2Remove the lid of the milk container and fill the milk container with milk (Fig. 12).Aways use milk coming directly from the fridge for optimal results.3Place the lid back onto the milk container.4If attached, remove the hot water spout from the machine (Fig. 13).5Slightly tilt the milk carafe and attach it to the machine (Fig. 14).6Open the milk dispensing spout (Fig. 15) and place a cup on the drip tray.7To brew a milk-based drink, press one of the one-touch drink buttons. To select another type of milk-based drink, press the MENU button, select DRINKS, scroll down to the desired drink and press the OK button ().8After brewing milk-based coffee beverages, the display asks you if you want to perform the quick clean procedure for the milk carafe. You have 10 seconds to activate the quick clean procedure.You can perform the quick clean procedure while leaving the milk inside the milk carafe. It is recommended to perform the quick clean procedure at least once a day. Press the OK button to confirm that you want to perform the quick clean procedure or press the escape button to perform the quick clean procedure later.Brewing coffee with pre-ground coffee1Open the lid and pour one measuring scoop of pre-ground coffee into the pre-ground coffee compartment. Then close the lid (Fig. 16).2Place a cup under the coffee dispensing spout. For smaller cups you can use the espresso stand. 3Press the AROMA STRENGTH button and select the pre-ground coffee brewing function. Press the ESPRESSO button.Note: With pre-ground coffee you can only brew one coffee at a time.Dispensing hot water1If it is not attached, attach the hot water spout to the machine (Fig. 17).2Press the MENU button. Select DRINKS, confirm and scroll to select HOT WATER.3Press the OK button to confirm. The display reminds you to install the hot water dispensing spout;press the OK button to confirm. The machine starts dispensing hot water.4To stop dispensing hot water, press the OK button.Personalizing drinksAdjusting coffee and milk volumeYou can adjust the volume of the drink brewed according to your taste and to the size of the cups. We advise you to use glass cups or cups with a ceramic-coated rim.Adjusting coffee volume1To adjust the espresso volume, press and hold the ESPRESSO button until the display shows the MEMO icon (Fig. 18).-The machine enters the programming phase and starts to brew the selected drink.2Press the OK button () when the cup contains the desired amount of espresso.-The tick on the display shows that the button is programmed: every time it is pressed, the machine brews the set espresso volume.Note: To set the volume of coffee, follow the same procedure.Adjusting volume of milk-based drinks1To set the volume for cappuccino and latte macchiato, first make sure that the milk carafe is filled with milk and attached to the machine.2Press and hold the milk-based drink button until the display shows the MEMO icon. The machines first starts dispensing milk.3Press the OK button () when the cup contains the desired amount of milk. Then the machine starts dispensing the coffee.4Press the OK button again to save the desired coffee volume.Adjusting coffee strength-To change the coffee strength, press the AROMA STRENGTH button.-Each time you press the AROMA STRENGTH button, the machine selects a higher aroma strength setting. There are 5 strengths, 1 is very mild and 5 is very strong. After setting 5, setting 1 is selected again (Fig. 19).-Note: You can also use the AROMA STRENGTH button to brew coffee with pre-ground coffee-The display shows the chosen strength. After adjusting the coffee strength, the display shows the main menu again and saves the chosen aroma strength when you brew a coffee.Adjusting grinder settingsYou can adjust the grinder settings by using the grind setting knob inside the bean container. There are 5 different grind settings you can choose from. The lower the setting, the stronger the coffee. Note: You can only adjust the grind settings when the machine is grinding coffee beans. You need to brew 2 to 3 drinks before you can taste the full difference.Caution: Do not turn the grind setting knob more than one notch at a time to prevent damage to the grinder.1Place a cup under the coffee dispensing spout.2Open the lid of the bean hopper.3Press the ESPRESSO button.4When the grinder starts grinding, press down the grind setting knob and turn it to the left or right (Fig. 20).Handling the brew groupGo to /coffee-care for detailed video instructions on how to remove, insert and clean the brew group.Removing the brew group from the machine1Switch off the machine by pressing the main switch on the back of the machine.2Remove the drip tray with the coffee grounds container.3Open the service door (Fig. 21).4Press the PUSH button (Fig. 22) and pull at the grip of the brew group to remove it from the machine (Fig. 23).5Remove the coffee residues drawer (Fig. 24).Reinserting the brew groupBefore you slide the brew group back into the machine, make sure it is in the correct position.1Check if the arrow on the yellow cylinder on the side of the brew group is aligned with the black arrow and N.-If they are not aligned, push down the lever until it is in contact with the base of the brew group (Fig. 26).2Make sure that the yellow locking hook on the other side of the brew group is in the correct position.-To position the hook correctly, push it upwards until it is in uppermost position (Fig. 28).3Place back the coffee residues drawer.4Slide the brew group back into the machine along the guiding rails on the sides (Fig. 29) until it locks into position with a click (Fig. 30). Do not press the PUSH button.5Place back the drip tray with the coffee grounds container.Cleaning and maintenanceRegular cleaning and maintenance keeps your machine in top condition and ensures good-tasting coffee for a long time, a steady coffee flow and a perfect milk froth.Consult the table on when and how to clean all detachable parts of the machine. You can find more detailed information and video instructions on /coffee-care.Cleaning tablePart description When to clean How to cleanBrew group Weekly Remove the brew group and rinse it under thetap (see 'Cleaning the brew group under the tap').Part description When to clean How to cleanMonthly Clean the brew group with the Philips coffee oilremover tablet (see 'Cleaning the brew groupwith the coffee oil remover tablets'). Go to/coffee-care for detailed videoinstructions.Lubrication of the brew group Depending on the type ofusage. Consult thelubrication table (see'Lubricating the brew group').Lubricate the brew group with the Philips grease.Go to /coffee-care for detailedvideo instructions.Milk carafe After every day of use Perform the QUICK CARAFE CLEAN as indicatedon the machine after preparing a milk-baseddrink.Daily Clean the milk carafe thoroughly (see 'Thoroughcleaning of the milk carafe').Weekly Disassemble the milk carafe and clean all partsunder the tap (see 'Weekly cleaning of the milkcarafe').Monthly Clean the milk carafe with the Philips milk circuitcleaner (see 'Monthly cleaning of the milkcarafe').Drip tray Empty the drip tray as soonas the red 'drip tray full'indicator pops up throughthe drip tray. Clean the driptray when it suits you.Remove the drip tray and rinse it under the tap with some washing-up liquid.Coffee grounds container Empty the coffee groundscontainer when prompted bythe machine. Clean it when itsuits you.Remove the coffee grounds container while themachine is switched on and rinse it under the tapwith some washing-up liquid.Water tank When it suits you.Rinse the water tank under the tapCoffee funnel Check the coffee funnelweekly to see if it is clogged.Unplug the machine and remove the brew group. Open the lid of the pre-ground coffee compartment and insert the spoon handle into the coffee funnel. Move the handle up and down until the clogged ground coffee falls down (Fig.31). Go to /coffee-care for detailed video instructions.Espresso stand Daily Empty the espresso stand and clean it under thetap or in the dishwasher.Tip: There is a cleaning calender on the last page of this user manual. Write down the dates on which you have performed a cleaning action.Cleaning the brew groupRegular cleaning of the brew group prevents coffee residues from clogging up the internal circuits. Visit /coffee-care for support videos on how to remove, insert and clean the brew group.Cleaning the brew group under the tap1Remove the brew group and the coffee residues drawer.2Rinse the coffee residues drawer and the brew group thoroughly with water. Carefully clean the upper filter (Fig. 27) of the brew group.3Let the brew group air-dry before you place it back. Do not dry the brew group with a cloth to prevent fibers from collecting inside the brew group.Cleaning the brew group with the coffee oil remover tabletsOnly use Phillips Saeco coffee oil remover tablets. Follow the instructions given in the user manual that comes with the coffee oil remover tablets.Lubricating the brew groupLubricate the brew group regularly to ensure that the moving parts continue to move smoothly. See the table below for the lubrication frequency. Visit /coffee-care for detailed video instructions.Usage frequency Nr of drinks brewed daily Lubrication frequencyLow1-5Every 4 monthsNormal6-10Every 2 monthsHeavy>10Every monthCleaning the milk carafeCarafe quick cleanYou can select the QUICK CLEAN function via the menu as described in the steps below:1Press the MENU button and select QUICK CLEAN, press the OK button to confirm.2Make sure that the milk carafe is installed and the milk froth dispensing spout is open.3Place the container under the milk froth dispensing spout.Note: Make sure the milk dispensing spout is pulled out.4Press the OK button to start dispensing hot water.Thorough cleaning of the milk carafeTo clean the milk carafe thoroughly, you have to do the following regularly:1Remove the lid of the milk dispensing unit.2Lift the milk dispensing spout out of the milk dispensing unit and remove the milk tube from the milk dispensing spout (Fig. 33).3Remove the milk tube from the milk dispensing spout.4Rinse the milk tube and milk dispensing spout with lukewarm water thoroughly.Weekly cleaning of the milk carafeThe milk dispensing spout consists of 5 components. Disassemble all components once a week and clean them under the tap. You can also clean all components, except for the milk container, in the dishwasher.1Milk tube2Rubber support3Milk frother4Milk frother connector5Housing of milk dispensing spoutDisassembling the milk dispensing spout1Press the release buttons on both sides of the top of the milk dispensing unit (1) and lift the top off the milk container (2) (Fig. 34).2Turn the milk dispensing unit upside down and hold it firmly in your hand. Pull the milk tube off the support (Fig. 35).3Press the release buttons on the milk frother and remove the milk frother from the the rubber support (Fig. 36).4Pull the milk frother connector out of the milk frother (Fig. 37).5Rinse all components under a lukewarm tap.Reassembling the milk carafe1To reassemble the milk dispensing spout, follow steps 2 to 4 of 'Disassembling the milk dispensing spout' in reverse order.2Place the milk dispensing spout back into the top of the milk carafe.3Place the top of the milk carafe back onto the milk carafe.Note: Before you place the milk dispensing spout back into the top of the milk carafe, move the pin inside the top to the correct position. If this pin is not in the correct position, you cannot place the milk dispensing spout back into the top of the milk carafe (Fig. 38).Monthly cleaning of the milk carafeOnly use Philips milk circuit cleaner for this cleaning cycle.1Pour the contents of the milk circuit cleaner sachet in the milk carafe. Then fill the milk carafe with water up to the MAX indication (Fig. 39).2Insert the milk carafe into the machine and place a container under the milk dispensing spout.3Press the MENU button, select DRINKS and scroll to MILK FROTH. Press the OK button to start dispensing the cleaning solution.4Repeat step 3 until the milk carafe is empty.5When the carafe is empty, remove the container and the milk carafe from the machine.6Rinse the milk carafe thoroughly and fill it with fresh water up to the MAX level indication.。
COMPASS 2000操作使用手册目录目录 (1)一.COMPASS概述 (7)1.COMPASS优点: (7)2.COMPASS主要具有三个主要的功能,同时还有一个功能强大的测绘工具。
(7)3.COMPASS系统还有如下功能: (8)4.COMPASS还拥有如下一些实用工具 (8)二.简要的操作指南 (9)1.To open a wellpath(打开井眼): (9)2.To view wellpath:(查看井眼) (9)3.Open another wellpath(打开其它井眼) (9)4.To Create a plan:(创建一个井的设计) [参看设计模块] (9)5.To edit a survey:(编辑测量) [参看测量模块] (9)6.To view a wellpath’s survey program:(查看井眼轨迹的测量组合) (10)7.Anticollision(防碰) [参看防碰模块]. 10 四 Compass数据结构 (10)4.1 working at the Company level (10)4.2 working at the project level (31)4.3 Working at the site level (35)4.4 Working at the Well Level (38)4.5 working at the Wellbore level (42)4.6 Working at Plan design level (42)4.7 concepts (44)五 planning module (44)6.Template模板 (52)7.Targets 靶区 (64)五.Survey测量................................................. 错误!未定义书签。
1.Open a survey 打开一个测量............. 错误!未定义书签。
数据表CC5000E 配件适合每个会议空间的配件罗技 CC4500e 、CC5500e 和 CC5000e 提供了适用于所有房间形状和大小的非凡视频协作解决方案。
简洁、通用且精心设计的 Rally 系列一体式视频会议系统和和模块化 CC5000e 系统提供了简洁的线缆管理、多种安装方式、选配麦克风和扬声器,并具有在 USB 或设备模式下进行部署的灵活性。
添加 CC5000e 配件以构建符合您需求的理想会议空间。
罗技 Rally 系列包含一整套附件,可适应各种大小和配置的房间。
多种安装配件、麦克风和扬声器选配件,为大规模会议解决方案提供十足便利。
CC5000E 麦克风借助采用 RightSound™ 技术的模块化波束成形麦克风扩展音频覆盖范围,获得清晰自然的通话声音。
自动平衡语音、抑制背景噪音并抑制振动以获得清晰的音频方便的静音控制和指示灯提供石墨灰和白色一般规格频率响应:90Hz – 16kHz灵敏度:>-27dB +/-1dB @ 1Pa麦克风数据速率输出:48 kHz拾音范围:4.5 米波束成形原理:四只全向麦克风元件形成八个声束音频处理:AEC(回声消除),VAD(语音活动检测)噪音抑制:AI 滤波器静音控制:触摸感应静音控制,带彩色 LED指示灯接口和线缆输出:2.95 米 12 针非可拆卸线缆输入:菊花链麦克风或连接到CC5000e 麦克风集线器的 12 针接口认证CC5000e 麦克风,白色:Plenum 级,符合 Eca/IEC 60332-1-2 标准CC5000e 麦克风,石墨灰:无系统要求CC5000e:最多 7 只麦克风(系统随附一只 CC5000e 麦克风)CC5000e Plus:最多 7 只麦克风(系统随附两只 CC5000e 麦克风)CC5500e:最多 4 只麦克风(作为内置麦克风阵列的补充)CC4500e:最多 3 只麦克风(作为内置麦克风阵列的补充)注意:CC5000e 麦克风不兼容独立的USB CC4900e。