自定义View
- 格式:pdf
- 大小:349.04 KB
- 文档页数:3

本文由我司收集整编,推荐下载,如有疑问,请与我司联系实现淘宝订单(比如订单生成、未支付的订单等等)自定义view 的实现2016/06/23 3231 这段时间做的三个app 会经常遇到自定义listview 进行动态的添加商品然后进行结算,在加入到购物车进行结算,结算的方式就是老三样。
首先实现的思路就是在主视图(比如fragment、activity 或者是fragmentactivity)中有个被scrollview 嵌套的linearlayout 去addview 自定义的listview,那自定义的listview是继承于linearlayout,创建完之后自身在加一下,创建view 就是这样,然后通过遍历集合数据进行动态的添加到主视图的linearlayout 中去。
代码的实现如下所示://这是自己定义的listview 就是动态添加数据的view private TextView tv_gotogive; public OrderListview(Context context, AttributeSet attrs, int defStyleAttr) { super(context, attrs, defStyleAttr); // TODO Auto-generated constructor stub this.context = context; init(); public OrderListview(Context context, AttributeSet attrs) { super(context, attrs); // TODO Auto-generated constructor stub this.context = context; init(); public OrderListview(Context context) { super(context); // TODO Auto-generated constructor stub this.context = context; init(); private void init() { // TODO Auto-generated method stub afinal = FinalBitmap.create(context); LayoutInflater inflater = (LayoutInflater) context.getSystemService(YOUT_INFLATER_SERVICE); View view = inflater.inflate(yout.orderlistview, null); listView=(ListView) view.findViewById(R.id.ll_order_list); //头部tv_time_date = (TextView) view.findViewById(_time_date); tv_time_hours = (TextView) view.findViewById(_time_hours); //底部tv_totalprice = (TextView) view.findViewById(_totalprice); tv_gotogive = (TextView) view.findViewById(_gotogive); tv_gotogive.setOnClickListener(new OnClickListener() { public void onClick(View v) { // TODO Auto-generated method stub System.out.println(“void”);this.addView(view, new。


DataGridView⾃定义控件类1public class clsWindowGird2 {3public static void Editcol(int iColumnCount, DataGridView Grid, string sCaption, string sName, int iWidth, bool bVisible, bool bEdit, DataGridViewColumnSortMode SortMode, GridColumnType ColumnType)4 {5 DataGridViewColumn column = new DataGridViewColumn();6switch (ColumnType)7 {8case GridColumnType.enCheckBox:9 column = new DataGridViewCheckBoxColumn();10 column.HeaderCell = new DataGridViewCheckBoxHeaderCell();11break;12case GridColumnType.enTextBox:13 column = new DataGridViewTextBoxColumn();//new DataGridViewTextBoxColumn();14break;15case GridColumnType.enComboBox:16 column = new DataGridViewComboBoxColumn();17break;18case GridColumnType.enButton:19 column = new DataGridViewDisableButtonColumn();20break;21case GridColumnType.enProgressBar:22 column = new DataGridViewProgressBarColumn();23break;24case GridColumnType.enDateTimePicker:25 column = new CalendarColumn();26break;27case GridColumnType.enWorkStatus:28 column = new WorkStatusColumn();29break;30case GridColumnType.enImage:31 column = new DataGridViewImageColumn();32break;33case GridColumnType.enBrighter:34 column = new BrighterColumn();35break;36case GridColumnType.enVolume:37 column = new VolumeColumn();38break;39case GridColumnType.enTrackBar:40 column = new TrackBarColumn();41break;42case GridColumnType.enTimeZone:43 column = new TimeZoneColumn();44break;45case GridColumnType.enVolumeTrackBar:46 column = new VolumeTrackBarColumn();47break;48case GridColumnType.enBrighterTrackBar:49 column = new BrighterTrackBarColumn();50break;51 }52switch (sCaption.Substring(0, 1))53 {54case"^":55 column.DefaultCellStyle.Alignment = DataGridViewContentAlignment.MiddleCenter;56break;57case"<":58 column.DefaultCellStyle.Alignment = DataGridViewContentAlignment.MiddleLeft;59break;60case">":61 column.DefaultCellStyle.Alignment = DataGridViewContentAlignment.MiddleRight;62break;63 }64 column.HeaderText = sCaption.Remove(0, 1);65 column.SortMode = SortMode;66 Grid.ColumnHeadersDefaultCellStyle.Alignment = DataGridViewContentAlignment.MiddleCenter;6768 = sName;69 column.Visible = bVisible;70 column.ReadOnly = bEdit;71//column.Width = iWidth * int.Parse(font.Size.ToString());72 column.Width = iWidth;73 Grid.Columns.Add(column);74 }75public enum GridColumnType76 {77 enTextBox = 0, //⽂本框78 enComboBox = 1,//下拉框79 enCheckBox = 2,//复选框80 enButton = 3, //按钮81 enProgressBar = 4,//进度条82 enDateTimePicker = 5, //时间框83 enWorkStatus = 6, //⼯作状态图标⽂字84 enImage = 7, //图⽚框85 enBrighter = 8,//亮度图标⽂字86 enVolume = 9, //⾳量图标⽂字87 enVolumeTrackBar = 10, //调节⾳量带滑块88 enTimeZone = 11, //⾃定义控件89 enTrackBar = 12, //滑块90 enBrighterTrackBar = 13, //滑块91 }92#region可以启⽤(禁⽤)按钮的⾃定义Grid按钮列和单元格93public class DataGridViewDisableButtonColumn : DataGridViewButtonColumn94 {95public DataGridViewDisableButtonColumn()96 {97this.CellTemplate = new DataGridViewDisableButtonCell();98 }99 }100public class DataGridViewDisableButtonCell : DataGridViewButtonCell101 {102private bool enabledValue;103public bool Enabled104 {105get106 {107return enabledValue;108 }109set110 {111 enabledValue = value;112 }113 }114115// 重写120return cell;121 }122123// 默认情况下,按钮可⽤124public DataGridViewDisableButtonCell()125 {126this.enabledValue = true;127 }128129protected override void Paint(Graphics graphics,130 Rectangle clipBounds, Rectangle cellBounds, int rowIndex,131 DataGridViewElementStates elementState, object value,132object formattedValue, string errorText,133 DataGridViewCellStyle cellStyle,134 DataGridViewAdvancedBorderStyle advancedBorderStyle,135 DataGridViewPaintParts paintParts)136 {137// 判断是否被禁⽤,如果被禁⽤,这绘制不可⽤的按钮样式138if (!this.enabledValue)139 {140//绘制背景141if ((paintParts & DataGridViewPaintParts.Background) ==142 DataGridViewPaintParts.Background)143 {144 SolidBrush cellBackground =145new SolidBrush(cellStyle.BackColor);146 graphics.FillRectangle(cellBackground, cellBounds);147 cellBackground.Dispose();148 }149150// 绘制边框151if ((paintParts & DataGridViewPaintParts.Border) ==152 DataGridViewPaintParts.Border)153 {154 PaintBorder(graphics, clipBounds, cellBounds, cellStyle,155 advancedBorderStyle);156 }157158// 计算按钮的绘制区域,⼤⼩等159 Rectangle buttonArea = cellBounds;160 Rectangle buttonAdjustment =161this.BorderWidths(advancedBorderStyle);162 buttonArea.X += buttonAdjustment.X;163 buttonArea.Y += buttonAdjustment.Y;164 buttonArea.Height -= buttonAdjustment.Height;165 buttonArea.Width -= buttonAdjustment.Width;166167// 绘制不可⽤情况下的按钮168 ButtonRenderer.DrawButton(graphics, buttonArea,169 PushButtonState.Disabled);170171// 绘制按钮⽂本172if (this.FormattedValue is String)173 {174 TextRenderer.DrawText(graphics,175 (string)this.FormattedValue,176this.DataGridView.Font,177 buttonArea, SystemColors.GrayText);178 }179 }180else181 {182// 绘制可⽤情况下的按钮183base.Paint(graphics, clipBounds, cellBounds, rowIndex,184 elementState, value, formattedValue, errorText,185 cellStyle, advancedBorderStyle, paintParts);186 }187 }188 }189#endregion;190191#region Grid添加进度条192public class DataGridViewProgressBarColumn : DataGridViewTextBoxColumn 193 {194public DataGridViewProgressBarColumn()195 {196this.CellTemplate = new DataGridViewProgressBarCell();197 }198public override DataGridViewCell CellTemplate199 {200get201 {202return base.CellTemplate;203 }204set205 {206if (!(value is DataGridViewProgressBarCell))207 {208throw new InvalidCastException("DataGridViewProgressBarCell");209 }210base.CellTemplate = value;211 }212 }213///<summary>214/// ProgressBar最⼤値215///</summary>216public int Maximum217 {218get219 {220return ((DataGridViewProgressBarCell)this.CellTemplate).Maximum;221 }222set223 {224if (this.Maximum == value)225return;226 ((DataGridViewProgressBarCell)this.CellTemplate).Maximum = value; 227228if (this.DataGridView == null)229return;230int rowCount = this.DataGridView.RowCount;231for (int i = 0; i < rowCount; i++)232 {233 DataGridViewRow r = this.DataGridView.Rows.SharedRow(i);234 ((DataGridViewProgressBarCell)r.Cells[this.Index]).Maximum = value; 235 }236 }237 }238///<summary>243get244 {245return ((DataGridViewProgressBarCell)this.CellTemplate).Mimimum;246 }247set248 {249if (this.Mimimum == value)250return;251 ((DataGridViewProgressBarCell)this.CellTemplate).Mimimum = value;252if (this.DataGridView == null)253return;254int rowCount = this.DataGridView.RowCount;255for (int i = 0; i < rowCount; i++)256 {257 DataGridViewRow r = this.DataGridView.Rows.SharedRow(i);258 ((DataGridViewProgressBarCell)r.Cells[this.Index]).Mimimum = value;259 }260 }261 }262public int BarValue263 {264get265 {266return ((DataGridViewProgressBarCell)this.CellTemplate).BarValue;267 }268set269 {270if (this.BarValue == value)271return;272 ((DataGridViewProgressBarCell)this.CellTemplate).BarValue = value;273if (this.DataGridView == null)274return;275int rowCount = this.DataGridView.RowCount;276for (int i = 0; i < rowCount; i++)277 {278 DataGridViewRow r = this.DataGridView.Rows.SharedRow(i);279 ((DataGridViewProgressBarCell)r.Cells[this.Index]).BarValue = value;280 }281 }282 }283 }284///<summary>285/// ProgressBarDataGridView286///</summary>287public class DataGridViewProgressBarCell : DataGridViewTextBoxCell288 {289public DataGridViewProgressBarCell()290 {291this.maximumValue = 100;292this.mimimumValue = 0;293 }294295296private int mValue = 0;297public int BarValue298 {299get300 {301return this.mValue;302 }303set304 {305this.mValue = value;306 }307 }308309private int maximumValue;310public int Maximum311 {312get313 {314return this.maximumValue;315 }316set317 {318this.maximumValue = value;319 }320 }321322private int mimimumValue;323public int Mimimum324 {325get326 {327return this.mimimumValue;328 }329set330 {331this.mimimumValue = value;332 }333 }334public override Type ValueType335 {336get337 {338return typeof(int);339 }340 }341public override object DefaultNewRowValue342 {343get344 {345return0;346 }347 }348public override object Clone()349 {350 DataGridViewProgressBarCell cell = (DataGridViewProgressBarCell)base.Clone(); 351 cell.Maximum = this.Maximum;352 cell.Mimimum = this.Mimimum;353return cell;354 }355356protected override void Paint(Graphics graphics,357 Rectangle clipBounds, Rectangle cellBounds,358int rowIndex, DataGridViewElementStates cellState,359object value, object formattedValue, string errorText,360 DataGridViewCellStyle cellStyle,361 DataGridViewAdvancedBorderStyle advancedBorderStyle,366 intValue = (int)value;367if (intValue < this.mimimumValue)368 intValue = this.mimimumValue;369if (intValue > this.maximumValue)370 intValue = this.maximumValue;371if (mValue != 0)372 {373 intValue = mValue;374 }375double rate = (double)(intValue - this.mimimumValue) / (this.maximumValue - this.mimimumValue);376if ((paintParts & DataGridViewPaintParts.Border) == DataGridViewPaintParts.Border)377 {378this.PaintBorder(graphics, clipBounds, cellBounds,379 cellStyle, advancedBorderStyle);380 }381 Rectangle borderRect = this.BorderWidths(advancedBorderStyle);382 Rectangle paintRect = new Rectangle(383 cellBounds.Left + borderRect.Left,384 cellBounds.Top + borderRect.Top,385 cellBounds.Width - borderRect.Right,386 cellBounds.Height - borderRect.Bottom);387bool isSelected = (cellState & DataGridViewElementStates.Selected) == DataGridViewElementStates.Selected;388 System.Drawing.Color bkColor;389if (isSelected && (paintParts & DataGridViewPaintParts.SelectionBackground) == DataGridViewPaintParts.SelectionBackground) 390 {391 bkColor = cellStyle.SelectionBackColor;392 }393else394 {395 bkColor = cellStyle.BackColor;396 }397if ((paintParts & DataGridViewPaintParts.Background) == DataGridViewPaintParts.Background)398 {399using (SolidBrush backBrush = new SolidBrush(bkColor))400 {401 graphics.FillRectangle(backBrush, paintRect);402 }403 }404 paintRect.Offset(cellStyle.Padding.Right, cellStyle.Padding.Top);405 paintRect.Width -= cellStyle.Padding.Horizontal;406 paintRect.Height -= cellStyle.Padding.Vertical;407if ((paintParts & DataGridViewPaintParts.ContentForeground) == DataGridViewPaintParts.ContentForeground)408 {409 Rectangle barBounds = new Rectangle(410 paintRect.Left, paintRect.Bottom - 3*cellBounds.Height/4,411 paintRect.Width, cellBounds.Height/2);412 barBounds.Width = (int)Math.Round(barBounds.Width * rate);413//ProgressBarRenderer.DrawHorizontalChunks(graphics, barBounds);414415 graphics.FillRectangle(System.Drawing.Brushes.Green, barBounds);416 barBounds = new Rectangle(417 paintRect.Left, paintRect.Bottom - cellBounds.Height,418 cellBounds.Width, cellBounds.Height);419 graphics.DrawRectangle(Pens.Wheat, barBounds);420//if (ProgressBarRenderer.IsSupported)421//{422////是否完全采⽤进度条的样式,此处主要修改了进度条的边框样式423////ProgressBarRenderer.DrawHorizontalBar(graphics, paintRect);424// Rectangle barBounds = new Rectangle(425// paintRect.Left, paintRect.Bottom - 9,426// paintRect.Width, 9);427// barBounds.Width = (int)Math.Round(barBounds.Width * rate);428////ProgressBarRenderer.DrawHorizontalChunks(graphics, barBounds);429430// graphics.FillRectangle(System.Drawing.Brushes.Green, barBounds);431// barBounds = new Rectangle(432// paintRect.Left, paintRect.Bottom - 9,433// cellBounds.Width, 9);434// graphics.DrawRectangle(Pens.Wheat, barBounds);435//}436//else437//{438////采⽤控件的背景⾊439// System.Drawing.SolidBrush brush = new System.Drawing.SolidBrush(bkColor);440// graphics.FillRectangle(brush, paintRect);441////graphics.FillRectangle(Brushes.White, paintRect);442////graphics.DrawRectangle(Pens.Black, paintRect);443// Rectangle barBounds = new Rectangle(444// paintRect.Left + 1, paintRect.Top + 1,445// paintRect.Width - 1, paintRect.Height - 1);446// barBounds.Width = (int)Math.Round(barBounds.Width * rate);447// graphics.FillRectangle(System.Drawing.Brushes.BurlyWood, barBounds);448//}449 }450if (this.DataGridView.CurrentCellAddress.X == this.ColumnIndex &&451this.DataGridView.CurrentCellAddress.Y == this.RowIndex &&452 (paintParts & DataGridViewPaintParts.Focus) ==453 DataGridViewPaintParts.Focus &&454this.DataGridView.Focused)455 {456457 Rectangle focusRect = paintRect;458 focusRect.Inflate(-3, -3);459 ControlPaint.DrawFocusRectangle(graphics, focusRect);460 }461if ((paintParts & DataGridViewPaintParts.ContentForeground) == DataGridViewPaintParts.ContentForeground)462 {463if (value != null)464 {465//if (Math.Round(rate * 100) > 0 && Math.Round(rate * 100) <= 100)466//{467//string txt = string.Format("{0}%", Math.Round(rate * 100));468string txt = value.ToString();469 TextFormatFlags flags = TextFormatFlags.HorizontalCenter | TextFormatFlags.VerticalCenter;470 System.Drawing.Color fColor = cellStyle.ForeColor;471 paintRect.Inflate(-2, -2);472 TextRenderer.DrawText(graphics, txt, cellStyle.Font,473 paintRect, fColor, flags);474//}475 }476 }477if ((paintParts & DataGridViewPaintParts.ErrorIcon) ==478 DataGridViewPaintParts.ErrorIcon &&479this.DataGridView.ShowCellErrors &&480 !string.IsNullOrEmpty(errorText))481 {482 Rectangle iconBounds = this.GetErrorIconBounds(483 graphics, cellStyle, rowIndex);484 iconBounds.Offset(cellBounds.X, cellBounds.Y);490491#region Grid添加⼯作状态控件492public class WorkStatusColumn : DataGridViewTextBoxColumn493 {494public WorkStatusColumn()495 {496this.CellTemplate = new WorkStatusCell();497 }498public override DataGridViewCell CellTemplate499 {500get501 {502return base.CellTemplate;503 }504set505 {506if (!(value is WorkStatusCell))507 {508throw new InvalidCastException("DataGridViewVolumeCell"); 509 }510base.CellTemplate = value;511 }512 }513///<summary>514/// ProgressBar最⼤値515///</summary>516public int Maximum517 {518get519 {520return ((WorkStatusCell)this.CellTemplate).Maximum;521 }522set523 {524if (this.Maximum == value)525return;526 ((WorkStatusCell)this.CellTemplate).Maximum = value;527528if (this.DataGridView == null)529return;530int rowCount = this.DataGridView.RowCount;531for (int i = 0; i < rowCount; i++)532 {533 DataGridViewRow r = this.DataGridView.Rows.SharedRow(i); 534 ((WorkStatusCell)r.Cells[this.Index]).Maximum = value;535 }536 }537 }538///<summary>539/// ProgressBar最⼩値540///</summary>541public int Mimimum542 {543get544 {545return ((WorkStatusCell)this.CellTemplate).Mimimum;546 }547set548 {549if (this.Mimimum == value)550return;551 ((WorkStatusCell)this.CellTemplate).Mimimum = value;552if (this.DataGridView == null)553return;554int rowCount = this.DataGridView.RowCount;555for (int i = 0; i < rowCount; i++)556 {557 DataGridViewRow r = this.DataGridView.Rows.SharedRow(i); 558 ((WorkStatusCell)r.Cells[this.Index]).Mimimum = value;559 }560 }561 }562public int BarValue563 {564get565 {566return ((WorkStatusCell)this.CellTemplate).BarValue;567 }568set569 {570if (this.BarValue == value)571return;572 ((WorkStatusCell)this.CellTemplate).BarValue = value;573if (this.DataGridView == null)574return;575int rowCount = this.DataGridView.RowCount;576for (int i = 0; i < rowCount; i++)577 {578 DataGridViewRow r = this.DataGridView.Rows.SharedRow(i); 579 ((WorkStatusCell)r.Cells[this.Index]).BarValue = value;580 }581 }582 }583 }584///<summary>585///WorkStatusCell586///</summary>587public class WorkStatusCell : DataGridViewTextBoxCell588 {589public WorkStatusCell()590 {591this.maximumValue = 1;592this.mimimumValue = 0;593 }594595596private int mValue = 0;597public int BarValue598 {599get600 {601return this.mValue;602 }603set604 {605this.mValue = value;606 }607 }613 {614return this.maximumValue;615 }616set617 {618this.maximumValue = value;619 }620 }621622private int mimimumValue;623public int Mimimum624 {625get626 {627return this.mimimumValue;628 }629set630 {631this.mimimumValue = value;632 }633 }634public override Type ValueType635 {636get637 {638return typeof(int);639 }640 }641public override object DefaultNewRowValue642 {643get644 {645return0;646 }647 }648public override object Clone()649 {650 WorkStatusCell cell = (WorkStatusCell)base.Clone();651 cell.Maximum = this.Maximum;652 cell.Mimimum = this.Mimimum;653return cell;654 }655656protected override void Paint(Graphics graphics,657 Rectangle clipBounds, Rectangle cellBounds,658int rowIndex, DataGridViewElementStates cellState,659object value, object formattedValue, string errorText,660 DataGridViewCellStyle cellStyle,661 DataGridViewAdvancedBorderStyle advancedBorderStyle,662 DataGridViewPaintParts paintParts)663 {664int intValue = 0;665if (value is int)666 intValue = (int)value;667//if (intValue < this.mimimumValue)668// intValue = this.mimimumValue;669//if (intValue > this.maximumValue)670// intValue = this.maximumValue;671if (mValue != 0)672 {673 intValue = mValue;674 }675double rate = (double)(intValue - this.mimimumValue) / (this.maximumValue - this.mimimumValue);676if ((paintParts & DataGridViewPaintParts.Border) == DataGridViewPaintParts.Border)677 {678this.PaintBorder(graphics, clipBounds, cellBounds,679 cellStyle, advancedBorderStyle);680 }681 Rectangle borderRect = this.BorderWidths(advancedBorderStyle);682 Rectangle paintRect = new Rectangle(683 cellBounds.Left + borderRect.Left,684 cellBounds.Top + borderRect.Top,685 cellBounds.Width - borderRect.Right,686 cellBounds.Height - borderRect.Bottom);687bool isSelected = (cellState & DataGridViewElementStates.Selected) == DataGridViewElementStates.Selected;688 System.Drawing.Color bkColor;689if (isSelected && (paintParts & DataGridViewPaintParts.SelectionBackground) == DataGridViewPaintParts.SelectionBackground)690 {691 bkColor = cellStyle.SelectionBackColor;692 }693else694 {695 bkColor = cellStyle.BackColor;696 }697if ((paintParts & DataGridViewPaintParts.Background) == DataGridViewPaintParts.Background)698 {699using (SolidBrush backBrush = new SolidBrush(bkColor))700 {701 graphics.FillRectangle(backBrush, paintRect);702 }703 }704 paintRect.Offset(cellStyle.Padding.Right, cellStyle.Padding.Top);705 paintRect.Width -= cellStyle.Padding.Horizontal;706 paintRect.Height -= cellStyle.Padding.Vertical;707if ((paintParts & DataGridViewPaintParts.ContentForeground) == DataGridViewPaintParts.ContentForeground)708 {709//Rectangle barBounds = new Rectangle(710// paintRect.Left, paintRect.Bottom - cellBounds.Height,711// 40, cellBounds.Height);712if (intValue == 0)713 {714//graphics.DrawImage(Properties.Resources.btncheckoff, paintRect.X+cellBounds.Size.Width/4, paintRect.Bottom - 3*cellBounds.Height / 4 , 60,15);715 graphics.DrawImage(Properties.Resources.btncheckoff, paintRect.X + cellBounds.Size.Width / 4, paintRect.Bottom - cellBounds.Height, 60, cellBounds.Size.Height); 716717 }718else719 {720//graphics.DrawImage(Properties.Resources.btncheckon, paintRect.X + cellBounds.Size.Width / 4, paintRect.Bottom - 3 * cellBounds.Height / 4, 60, 15);721 graphics.DrawImage(Properties.Resources.btncheckon, paintRect.X + cellBounds.Size.Width / 4, paintRect.Bottom - cellBounds.Height, 60, cellBounds.Size.Height); 722 }723 }724if (this.DataGridView.CurrentCellAddress.X == this.ColumnIndex &&725this.DataGridView.CurrentCellAddress.Y == this.RowIndex &&726 (paintParts & DataGridViewPaintParts.Focus) ==727 DataGridViewPaintParts.Focus &&728this.DataGridView.Focused)729 {730735if ((paintParts & DataGridViewPaintParts.ContentForeground) == DataGridViewPaintParts.ContentForeground)736 {737if (value != null)738 {739740string txt = value.ToString();741//TextFormatFlags flags = TextFormatFlags.HorizontalCenter | TextFormatFlags.VerticalCenter;742 System.Drawing.Color fColor = cellStyle.ForeColor;743 paintRect.Inflate(-2, -2);744//TextRenderer.DrawText(graphics, txt, cellStyle.Font, paintRect, fColor, flags);745 }746 }747if ((paintParts & DataGridViewPaintParts.ErrorIcon) ==748 DataGridViewPaintParts.ErrorIcon &&749this.DataGridView.ShowCellErrors &&750 !string.IsNullOrEmpty(errorText))751 {752 Rectangle iconBounds = this.GetErrorIconBounds(753 graphics, cellStyle, rowIndex);754 iconBounds.Offset(cellBounds.X, cellBounds.Y);755this.PaintErrorIcon(graphics, iconBounds, cellBounds, errorText);756 }757 }758 }759#endregion760761#region Grid添加⽇期控件762public class CalendarCell : DataGridViewTextBoxCell763 {764public CalendarCell()765 : base()766 {767//使⽤简短⽇期格式.768this.Style.Format = "HH:mm:ss";769 }770public override void InitializeEditingControl(int rowIndex, object initialFormattedValue, DataGridViewCellStyle dataGridViewCellStyle) 771 {772//将编辑控件的值设置成当前单元格的值.773base.InitializeEditingControl(rowIndex, initialFormattedValue, dataGridViewCellStyle);774//775 CalendarEditingControl ctl = DataGridView.EditingControl as CalendarEditingControl;776try777 {778 ctl.Value = (DateTime)this.Value;779 }780catch (Exception)781 {782/*当数据库中对应⽇期为空(⽐如在添加数据时),在这⾥设置⽇期的默认值。
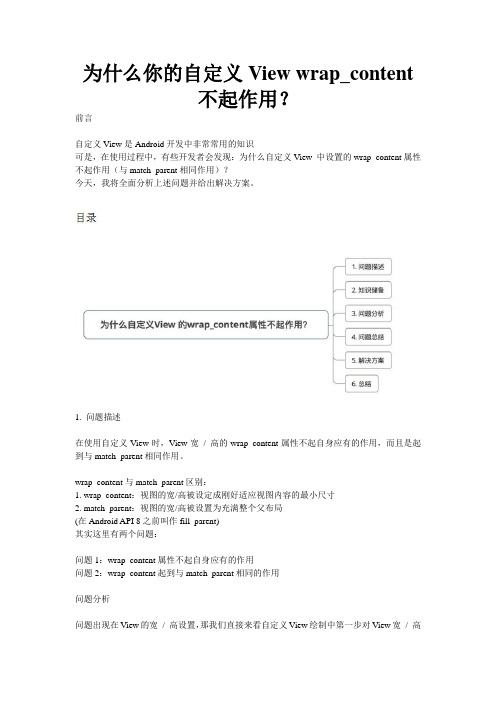
为什么你的自定义View wrap_content不起作用?前言自定义View是Android开发中非常常用的知识可是,在使用过程中,有些开发者会发现:为什么自定义View 中设置的wrap_content属性不起作用(与match_parent相同作用)?今天,我将全面分析上述问题并给出解决方案。
1. 问题描述在使用自定义View时,View宽/ 高的wrap_content属性不起自身应有的作用,而且是起到与match_parent相同作用。
wrap_content与match_parent区别:1. wrap_content:视图的宽/高被设定成刚好适应视图内容的最小尺寸2. match_parent:视图的宽/高被设置为充满整个父布局(在Android API 8之前叫作fill_parent)其实这里有两个问题:问题1:wrap_content属性不起自身应有的作用问题2:wrap_content起到与match_parent相同的作用问题分析问题出现在View的宽/ 高设置,那我们直接来看自定义View绘制中第一步对View宽/ 高设置的过程:measure过程中的onMeasure()方法onMeasure()protected void onMeasure(int widthMeasureSpec, int heightMeasureSpec) {//参数说明:View的宽/ 高测量规格//setMeasuredDimension() 用于获得View宽/高的测量值//这两个参数是通过getDefaultSize()获得的setMeasuredDimension(getDefaultSize(getSuggestedMinimumWidth(), widthMeasureSpec), getDefaultSize(getSuggestedMinimumHeight(), heightMeasureSpec));}继续往下看getDefaultSize()getDefaultSize()作用:根据View宽/高的测量规格计算View的宽/高值源码分析如下:public static int getDefaultSize(int size, int measureSpec) {//参数说明:// 第一个参数size:提供的默认大小// 第二个参数:宽/高的测量规格(含模式& 测量大小)//设置默认大小int result = size;//获取宽/高测量规格的模式& 测量大小int specMode = MeasureSpec.getMode(measureSpec);int specSize = MeasureSpec.getSize(measureSpec);switch (specMode) {// 模式为UNSPECIFIED时,使用提供的默认大小// 即第一个参数:sizecase MeasureSpec.UNSPECIFIED:result = size;break;// 模式为AT_MOST,EXACTL Y时,使用View测量后的宽/高值// 即measureSpec中的specSizecase MeasureSpec.AT_MOST:case MeasureSpec.EXACTL Y:result = specSize;break;}//返回View的宽/高值return result;}从上面发现:在getDefaultSize()的默认实现中,当View的测量模式是AT_MOST或EXACTL Y时,View 的大小都会被设置成子View MeasureSpec的specSize。

自定义view的基本流程1.自定义View的意义自定义View是开发Android应用的常见需求,它可以实现各种特殊的UI效果和交互效果。
有时候,自带的一些View无法满足我们的需求,而自定义一个View可以帮助我们实现想要的效果。
2.自定义View的基本流程要实现一个自定义View,通常需要经过以下基本流程:2.1创建自定义View类首先,我们需要创建一个自定义View的类,并继承自View或其子类,比如ImageView、TextView等。
在类中,我们可以重写onMeasure()、onLayout()和onDraw()等方法来实现自定义View的特殊行为。
2.2声明自定义View的属性如果我们希望在XML布局文件中使用自定义View,并可以在代码中设置属性值,就需要在类中声明自定义属性。
这可以通过在res/values/attrs.xml文件中定义属性集合来实现。
2.3实现自定义View的布局在onMeasure()方法中,我们可以指定自定义View在测量时占用的空间大小。
在onLayout()方法中,我们可以指定子View的位置。
2.4实现自定义View的绘制在onDraw()方法中,我们可以通过调用Canvas的API来实现自定义View的绘制效果。
例如,我们可以通过Path绘制自定义的图形,通过Paint设置绘制时的样式和颜色等。
2.5对自定义View进行测试最后,我们需要通过手动测试、单元测试、自动化UI测试等方式,对自定义View进行测试和验证。
3.自定义View的实例以下是一个简单的自定义View实例,用于显示一个可以按下和弹起的按钮:```public class MyButton extends View{private boolean isPressed=false;public MyButton(Context context){super(context);}public MyButton(Context context,AttributeSet attrs) {super(context,attrs);}@Overrideprotected void onDraw(Canvas canvas){super.onDraw(canvas);Paint paint=new Paint();paint.setColor(isPressed?Color.RED:Color.GREEN);canvas.drawRect(0,0,getWidth(),getHeight(), paint);}@Overridepublic boolean onTouchEvent(MotionEvent event){if(event.getAction()==MotionEvent.ACTION_DOWN) {isPressed=true;invalidate();return true;}else if(event.getAction()==MotionEvent.ACTION_UP){isPressed=false;invalidate();return true;}return super.onTouchEvent(event);}}```以上代码中,我们实现了一个MyButton类,当MyButton被按下时,它的背景颜色会变成红色,当MyButton被弹起时,它的背景颜色会回到绿色。
零、序一、自定义Style二、在XML中为属性声明属性值1. 在layout中定义属性2. 设置Style3. 通过Theme指定三、在运行时获取属性值1. View的第三个构造函数的第三个参数defStyle2. obtailStyledAttributes3. Example四、结论与代码下载零、序系统自带的View可以在xml中配置属性,对于写的好的Custom View同样可以在xml中配置属性,为了使自定义的View的属性可以在xml中配置,需要以下4个步骤:1.1.通过<declare-styleable>为自定义View添加属性2.在xml中为相应的属性声明属性值3.在运行时(一般为构造函数)获取属性值4.将获取到的属性值应用到View怎么将获取到的属性值应用到View就不用说了,自己定义的属性什么用处自己肯定是清楚的,所以接下来看一下前三点。
通过<declare-styleable>元素声明Custom View需要的属性即可,下面是一个例子,文件是res/values/attrs.xml<?xml version="1.0" encoding="utf-8"?><resources><declare-styleable name="Customize"><attr name="attr_one" format="string"/><attr name="attr_two" format="string"/><attr name="attr_three" format="string"/><attr name="attr_four" format="string"/></declare-styleable><attr name="CustomizeStyle" format="reference"/></resources>在上述xml中,我们声明了Customize与CustomizeSyle,Customize包含了attr_one、attr_two、attr_three与attr_four四个attribute,CustomizeStyle也是一个attribute,但是却没有声明在declare-styleable中。
WPF⾃定义TreeView控件样式,仿QQ联系⼈列表⼀、前⾔TreeView控件在项⽬中使⽤⽐较频繁,普通的TreeView并不能满⾜我们的需求。
因此我们需要滴对TreeView进⾏改造。
下⾯的内容将介绍仿QQ联系⼈TreeView样式及TreeView数据绑定⽅法。
⼆、TreeView仿QQ联系⼈列表准确的说不是仿QQ联系⼈列表,这个TreeView样式作为组织架构来使⽤更好。
废话不多说,先看效果:2.1、基本思路像这种联系⼈列表⼀般涉及到多层级数据,⽽且有很多数据是需要动态更新的,如果通过⼿动⼀条条增加数据反⽽更复杂,⽽且不⽅便。
因此为了绑定数据⽅便我们使⽤分层模板HierarchicalDataTemplate。
分层模板中存在两种样式,⼀种是分组样式,⼀种是⼈员样式。
不管是分组还是⼈员绑定的都是对象,这样我们在对象中添加⼀个属性来辨别是否为分组-IsGrouping。
默认的TreeView控件四周会有边距,因此需要设置下TreeView的样式。
另外⿏标经过和⿏标选中的背景⾊需要变化,因此还需要设置TreeViewItem的样式。
根据思路,我们需要设置三个样式,TreeView样式,TreeViewItem样式,HierarchicalDataTemplate分层模板样式。
另外为了⾃动计算下⼀级的边距,我们需要添加⼀个转换器IndentConverter。
还需要⼀个转换器需要将布尔类型的IsGrouping转换为Visibility,还需要⼀个转换器来对Visibility取反。
这样三个样式,三个转换器。
就可以实现我们上⾯的效果,另外还可以进⾏动态数据绑定。
2.2、样式代码HierarchicalDataTemplate分层模板样式代码<HierarchicalDataTemplate x:Key="ItemNode" ItemsSource="{Binding Children,Mode=TwoWay}"><Grid Background="Transparent"><Grid.Resources><convert:BoolToVisible x:Key="boolToVisible"/><convert:VisibleToReverse x:Key="visibleToReverse"/></Grid.Resources><Grid MinHeight="30" x:Name="userinfo" Background="Transparent" Margin="-5 0 0 0" Visibility="{Binding Visibility,ElementName=groupinginfo,Converter={StaticResource visibleToReverse}}"><Grid Height="50" x:Name="grid"><Border Background="#62acf9" Width="40" Height="40" CornerRadius="4" HorizontalAlignment="Left" Margin="0 0 0 0"><TextBlock Text="{Binding SurName}" FontSize="23" Foreground="White" VerticalAlignment="Center" HorizontalAlignment="Center"/></Border><TextBlock Text="{Binding Name}" Margin="50 7 0 0" FontSize="13"/><TextBlock Text="{Binding Info}" Foreground="#808080" Margin="50 30 0 0"/><TextBlock Text="{Binding Count,StringFormat={}{0}⼈}" Foreground="#808080" HorizontalAlignment="Right" VerticalAlignment="Center" Margin="0 0 5 0"/></Grid></Grid><StackPanel MinHeight="25" x:Name="groupinginfo" Orientation="Horizontal" Background="Transparent" HorizontalAlignment="Left" Visibility="{Binding IsGrouping,Converter={StaticResource boolToVisible}} <TextBlock Text="{Binding DisplayName}" Margin="3 0" VerticalAlignment="Center" HorizontalAlignment="Left"/></StackPanel></Grid></HierarchicalDataTemplate>TreeViewItem样式代码<Style x:Key="DefaultTreeViewItem" TargetType="{x:Type TreeViewItem}"><Setter Property="MinHeight" Value="25"/><Setter Property="Background" Value="Transparent"/><Setter Property="SnapsToDevicePixels" Value="True"/><Setter Property="Margin" Value="0"/><Setter Property="Template"><Setter.Value><ControlTemplate TargetType="{x:Type TreeViewItem}"><ControlTemplate.Resources><convert:IndentConverter x:Key="indentConverter"/></ControlTemplate.Resources><Grid Background="Transparent"><Grid.RowDefinitions><RowDefinition/><RowDefinition/></Grid.RowDefinitions><Border Name="itemBackground" Background="{TemplateBinding Background}"BorderBrush="{TemplateBinding BorderBrush}"BorderThickness="{TemplateBinding BorderThickness}"Padding="{TemplateBinding Padding}"><Grid Background="Transparent"><Grid x:Name="ItemRoot" Margin="{Binding Converter={StaticResource indentConverter},RelativeSource={RelativeSource TemplatedParent}}" Background="Transparent"><Grid.ColumnDefinitions><ColumnDefinition Width="16"/><ColumnDefinition Width="*"/></Grid.ColumnDefinitions><ToggleButton x:Name="Expander" HorizontalAlignment="Left" ClickMode="Press" IsChecked="{Binding IsExpanded, RelativeSource={RelativeSource TemplatedParent}}"><ToggleButton.Style><Style TargetType="{x:Type ToggleButton}"><Setter Property="Focusable" Value="False"/><Setter Property="Width" Value="16"/><Setter Property="Height" Value="16"/><Setter Property="Template"><Setter.Value><ControlTemplate TargetType="{x:Type ToggleButton}"><Border Background="Transparent" Height="16" Padding="5" Width="16"><Path x:Name="ExpandPath" Data="M0,0 L0,6 L6,0 z" Fill="#66645e" Stroke="#66645e"><Path.RenderTransform><RotateTransform Angle="135" CenterY="3" CenterX="3"/></Path.RenderTransform></Path></Border><ControlTemplate.Triggers><Trigger Property="IsChecked" Value="True"><Setter Property="RenderTransform" TargetName="ExpandPath"><Setter.Value><RotateTransform Angle="180" CenterY="3" CenterX="3"/></Setter.Value></Setter><Setter Property="Fill" TargetName="ExpandPath" Value="#66645e"/><Setter Property="Stroke" TargetName="ExpandPath" Value="#66645e"/></Trigger><Trigger Property="IsMouseOver" Value="True"><Setter Property="Stroke" TargetName="ExpandPath" Value="#66645e"/><Setter Property="Fill" TargetName="ExpandPath" Value="#66645e"/></Trigger><MultiTrigger><MultiTrigger.Conditions><Condition Property="IsMouseOver" Value="True"/><Condition Property="IsChecked" Value="True"/></MultiTrigger.Conditions><Setter Property="Stroke" TargetName="ExpandPath" Value="#66645e"/><Setter Property="Fill" TargetName="ExpandPath" Value="#66645e"/></MultiTrigger></ControlTemplate.Triggers></ControlTemplate></Setter.Value></Setter></Style></ToggleButton.Style></ToggleButton><ContentPresenter Grid.Column="1" x:Name="PART_Header" ContentSource="Header"HorizontalAlignment="Stretch"></ContentPresenter></Grid></Grid></Border><ItemsPresenter x:Name="ItemsHost" Grid.Row="1"/></Grid><ControlTemplate.Triggers><DataTrigger Binding="{Binding IsGrouping}" Value="false"><Setter Property="Visibility" TargetName="Expander" Value="Hidden"/></DataTrigger><Trigger Property="HasItems" Value="False"><Setter Property="Visibility" TargetName="Expander" Value="Collapsed"/></Trigger><Trigger Property="IsExpanded" Value="False"><Setter Property="Visibility" TargetName="ItemsHost" Value="Collapsed"/></Trigger><Trigger Property="IsSelected" Value="True"><Setter Property="Background" TargetName="itemBackground" Value="#FAE388"/></Trigger><MultiTrigger><MultiTrigger.Conditions><Condition Property="IsFocused" Value="False"/><Condition SourceName="itemBackground" Property="IsMouseOver" Value="true"/></MultiTrigger.Conditions><Setter Property="Background" Value=" #fceeb9" TargetName="itemBackground"/></MultiTrigger><Trigger Property="IsEnabled" Value="False"><Setter Property="Foreground" Value="{DynamicResource {x:Static SystemColors.GrayTextBrushKey}}"/></Trigger></ControlTemplate.Triggers></ControlTemplate></Setter></Style>TreeView样式代码<Style x:Key="DefaultTreeView" TargetType="{x:Type TreeView}"><Setter Property="ScrollViewer.CanContentScroll" Value="True"/><Setter Property="VirtualizingStackPanel.IsVirtualizing" Value="True"></Setter><Setter Property="VirtualizingStackPanel.VirtualizationMode" Value="Recycling"/><Setter Property="ScrollViewer.IsDeferredScrollingEnabled" Value="False"/><Setter Property="ItemContainerStyle" Value="{StaticResource DefaultTreeViewItem}"></Setter><Setter Property="Padding" Value="0"/><Setter Property="ItemsPanel"><Setter.Value><ItemsPanelTemplate><VirtualizingStackPanel IsItemsHost="True" Margin="0"/></ItemsPanelTemplate></Setter.Value></Setter></Style>2.3、转换器代码public class IndentConverter : IValueConverter{public object Convert(object value, Type targetType, object parameter, CultureInfo culture){double colunwidth = 10;double left = 0.0;UIElement element = value as TreeViewItem;while (element.GetType() != typeof(TreeView)){element = (UIElement)VisualTreeHelper.GetParent(element);if (element.GetType() == typeof(TreeViewItem))left += colunwidth;}return new Thickness(left, 0, 0, 0);}public object ConvertBack(object value, Type targetType, object parameter, CultureInfo culture){throw new NotImplementedException();}}public class BoolToVisible : IValueConverter{public object Convert(object value, Type targetType, object parameter, CultureInfo culture){if ((bool)value)return Visibility.Visible;elsereturn Visibility.Collapsed;}public object ConvertBack(object value, Type targetType, object parameter, CultureInfo culture){throw new NotImplementedException();}}public class VisibleToReverse : IValueConverter{public object Convert(object value, Type targetType, object parameter, CultureInfo culture){if ((Visibility)value == Visibility.Visible)return Visibility.Collapsed;elsereturn Visibility.Visible;}public object ConvertBack(object value, Type targetType, object parameter, CultureInfo culture){throw new NotImplementedException();}}2.4、引⽤⽰例<TreeView x:Name="TreeViewOrg" BorderThickness="1" BorderBrush="#BBB" Background="Transparent" Width="280" Height="500" Margin="10" ItemTemplate="{StaticResource ItemNode}" Style="{StaticResource </TreeView>2.5、初始化数据源及绑定对象public MainWindow(){InitializeComponent();OrgList = new ObservableCollection<OrgModel>(){{IsGrouping=true,DisplayName="单位名称(3/7)",Children=new ObservableCollection<OrgModel>(){new OrgModel(){IsGrouping=true,DisplayName="未分组联系⼈(2/4)",Children=new ObservableCollection<OrgModel>() {new OrgModel(){IsGrouping=false,SurName="刘",Name="刘棒",Info="我要⾛向天空!",Count=3}}}},}};TreeViewOrg.ItemsSource = OrgList;}public ObservableCollection<OrgModel> OrgList { get; set; }public class OrgModel{public bool IsGrouping { get; set; }public ObservableCollection<OrgModel> Children { get; set; }public string DisplayName { get; set; }public string SurName { get; set; }public string Name { get; set; }public string Info { get; set; }public int Count { get; set; }}所有代码已经上传到github:。
Android自定义view之仿支付宝芝麻信用仪表盘Android自定义view之仿支付宝芝麻信用仪表盘自定义view练习仿支付宝芝麻信用的仪表盘对比图:首先是自定义一些属性,可自己再添加,挺基础的,上代码[html] view plain copy<?xml version="1.0" encoding="utf-8"?><resources><declare-styleable name="RoundIndicatorView"><!--最大数值--><attr name="maxNum" format="integer"/><!--圆盘起始角度--><attr name="startAngle" format="integer"/><!--圆盘扫过的角度--><attr name="sweepAngle" format="integer"/></declare-styleable></resources>接着在构造方法里初始化自定义属性和画笔:[java] view plain copyprivate void initAttr(AttributeSet attrs) {TypedArray array =context.obtainStyledAttributes(attrs,R.styleable.RoundIndicatorView);maxNum = array.getInt(R.styleable.RoundIndicatorView_maxNum,500);startAngle =array.getInt(R.styleable.RoundIndicatorView_startAngle,160);sweepAngle =array.getInt(R.styleable.RoundIndicatorView_sweepAngle,220);//内外圆弧的宽度sweepInWidth = dp2px(8);sweepOutWidth = dp2px(3);array.recycle();}private void initPaint() {paint = new Paint(Paint.ANTI_ALIAS_FLAG);paint.setDither(true);paint.setStyle(Paint.Style.STROKE);paint.setColor(0xffffffff);paint_2 = new Paint(Paint.ANTI_ALIAS_FLAG);paint_3 = new Paint(Paint.ANTI_ALIAS_FLAG);paint_4 = new Paint(Paint.ANTI_ALIAS_FLAG); }接下来重写onMeasure,也是比较简单,对于不是确定值的直接给定300*400的大小:[java] view plain copy@Overrideprotected void onMeasure(int widthMeasureSpec, int heightMeasureSpec) {super.onMeasure(widthMeasureSpec, heightMeasureSpec);int wSize = MeasureSpec.getSize(widthMeasureSpec);int wMode = MeasureSpec.getMode(widthMeasureSpec);int hSize = MeasureSpec.getSize(heightMeasureSpec);int hMode = MeasureSpec.getMode(heightMeasureSpec);if (wMode == MeasureSpec.EXACTLY ){mWidth = wSize;}else {mWidth =dp2px(300);}if (hMode == MeasureSpec.EXACTLY ){mHeight= hSize;}else {mHeight =dp2px(400);}setMeasuredDimension(mWidth,mHeight);}核心部分onDraw来了,注意圆的半径不要在构造方法里就去设置,那时候是得不到view的宽高值的,所以我在onDraw方法里设置半径,默认就view宽度的1/4吧。
⾃定义View实现三⾓形(正三⾓,倒三⾓)⾃定义的属性如下:<declare-styleable name="TriangleView"><!--模式--><attr name="tlv_mode"><!--倒三⾓--><enum name="inverted" value="0"/><!--正三⾓--><enum name="regular" value="1"/></attr><!--颜⾊--><attr name="tlv_color" format="color|reference"/></declare-styleable>具体代码如下:import android.content.Context;import android.content.res.TypedArray;import android.graphics.Canvas;import android.graphics.Color;import android.graphics.Paint;import android.graphics.Path;import android.support.annotation.IntDef;import android.support.annotation.Nullable;import android.util.AttributeSet;import android.view.View;import ng.annotation.Retention;import ng.annotation.RetentionPolicy;/*** 三⾓形*/public class TriangleView extends View{private Paint paint;private Path path;private int color;private int mode;private final int DEFAULT_WIDTH=48;private final int DEFAULT_HEIGHT=24;private int width = 0;private int height =0;/*** 倒三⾓*/public static final int INVERTED = 0;/*** 正三⾓*/public static final int REGULAR = 1;@IntDef({INVERTED, REGULAR})@Retention(RetentionPolicy.SOURCE)public @interface ShapeMode {}public TriangleView(Context context) {this(context,null);}public TriangleView(Context context, @Nullable AttributeSet attrs) {this(context,attrs,0);}public TriangleView(Context context, @Nullable AttributeSet attrs, int defStyleAttr) {super(context, attrs, defStyleAttr);init(context,attrs);}private void init(Context context,AttributeSet attrs){TypedArray typedArray = context.obtainStyledAttributes(attrs, R.styleable.TriangleView);color = typedArray.getColor(R.styleable.TriangleView_tlv_color, Color.BLACK);mode = typedArray.getInt(R.styleable.TriangleView_tlv_mode, INVERTED);typedArray.recycle();paint = new Paint();paint.setColor(color);paint.setAntiAlias(true);paint.setStyle(Paint.Style.FILL);path= new Path();}@Overrideprotected void onMeasure(int widthMeasureSpec, int heightMeasureSpec) { super.onMeasure(widthMeasureSpec, heightMeasureSpec);width = measureSize(widthMeasureSpec, DEFAULT_WIDTH);height = measureSize(heightMeasureSpec, DEFAULT_HEIGHT);setMeasuredDimension(width, height);}private int measureSize(int measureSpec, int defaultSize) {int newSize = 0;int mode = MeasureSpec.getMode(measureSpec);int size = MeasureSpec.getSize(measureSpec);switch (mode) {case MeasureSpec.AT_MOST:newSize = Math.min(size, defaultSize);break;case MeasureSpec.EXACTLY:newSize = size;break;case MeasureSpec.UNSPECIFIED:newSize = defaultSize;break;}return newSize;}public void setColor(int color){this.color=color;paint.setColor(color);invalidate();}public void setMode(@ShapeMode int mode){this.mode=mode;invalidate();}@Overrideprotected void onDraw(Canvas canvas) {super.onDraw(canvas);drawTriangle(canvas);}private void drawTriangle(Canvas canvas) {if(mode==INVERTED) {path.moveTo(0f, 0f);path.lineTo(width, 0f);path.lineTo(width / 2.0f, height);}else {path.moveTo(width/2.0f,0f);path.lineTo(0,height);path.lineTo(width,height);}path.close();canvas.drawPath(path, paint);}}。
1.自定义view的分类:
2.具体介绍&使用场景
3.使用注意点:
3.1支持特殊属性:
支持wrap_content
如果不在onMeasure()中对wrap_content作特殊处理,那么wrap_content属性将失效支持padding&margin
如果不支持,那么padding和margin(ViewGroup情况) 的属性将失效
--对于继承View的控件,padding是在draw()中处理的
--对于继承ViewGroup的控件,padding和margin会直接影响measure和layout过程3.2多线程应直接使用post方式
View的内部本身提供了post系列的方法,完全可以替代Handler的作用,使用起来更加方便,直接
3.3避免内存泄漏:
主要针对view中含有线程或动画的情况:当view退出或不可见时,记得及时停止该view包含的线程和动画,否则会造成内存泄漏问题。
启动或停止线程/动画的方式:
a:启动线程/动画:使用view.onAttachedToWindow(),因为该方法调用的时机是当包含view的activity启动的时刻。
b:停止线程/动画:使用view.onDetachedFromWindow(),因为该方法调用的时机是当包含view的activity退出或当前view被remove的时刻
3.4处理好滑动冲突:
当view带有滑动嵌套情况时,必须要处理好滑动冲突,否则会严重影响view的显示效果4.具体实例:
4.1继承View的介绍
4.2具体步骤:
a:创建自定义view类(继承View类)
b:布局文件添加自定义View组件
c:注意点设置(处理wrap_content&padding属性自定义属性等)
4.3
a:手动支持wrap_content属性
wrap_content 视图的宽高被设定成刚好适应视图的最小尺寸
match_parent 视图的宽高延伸至充满整个父布局
解决方案:
绘制时考虑传入的padding属性值(四个方向)
在自定义view类的复写onDraw()进行设置
b:支持padding属性
padding属性:用于设置控件内容相对控件边缘的边距区别与margin属性:控件边缘相对于父控件的边缘。
c:提供自定义属性:
使用步骤:
在values目录下创建自定义属性的xml文件
在自定义view的构造方法中解析自定义属性的值 在布局文件中使用自定义属性。