博世热水器说明书
- 格式:docx
- 大小:36.86 KB
- 文档页数:2
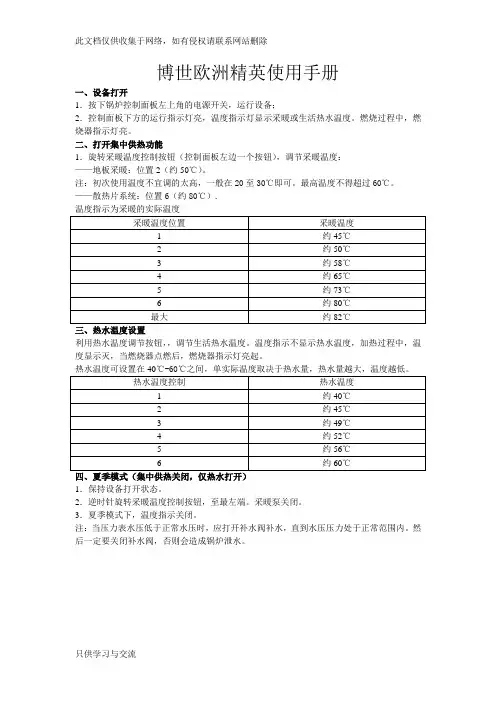
博世欧洲精英使用手册一、设备打开1.按下锅炉控制面板左上角的电源开关,运行设备;2.控制面板下方的运行指示灯亮,温度指示灯显示采暖或生活热水温度。
燃烧过程中,燃烧器指示灯亮。
二、打开集中供热功能1.旋转采暖温度控制按钮(控制面板左边一个按钮),调节采暖温度:——地板采暖:位置2(约50℃)。
注:初次使用温度不宜调的太高,一般在20至30℃即可。
最高温度不得超过60℃。
——散热片系统:位置6(约80℃).利用热水温度调节按钮,,调节生活热水温度。
温度指示不显示热水温度,加热过程中,温度显示灭,当燃烧器点燃后,燃烧器指示灯亮起。
热水温度可设置在40℃-60℃之间,单实际温度取决于热水量,热水量越大,温度越低。
四、夏季模式(集中供热关闭,仅热水打开)1.保持设备打开状态。
2.逆时针旋转采暖温度控制按钮,至最左端。
采暖泵关闭。
3.夏季模式下,温度指示关闭。
注:当压力表水压低于正常水压时,应打开补水阀补水,直到水压压力处于正常范围内。
然后一定要关闭补水阀,否则会造成锅炉泄水。
五、故障代码博世欧洲之星操作手册一、设备打开1.首先确认燃气阀门已经打开,锅炉电源插头已插上;2.按下锅炉控制面板左上角的电源开关,运行设备;3.显示屏上显示采暖的出水温度二、试运行:1.打开系统散热片的所有阀门;2.打开补水阀,生活冷水阀,注水至1到2巴的压力,然后关闭冷水阀3.散热片排气;4.打开冷水阀,将系统压力重新充注到1-2巴5.打开燃气阀三、打开集中供热功能1.热水温度可设置在45℃至82℃之间;2.若为地板采暖系统,采暖温度不得高于60℃;3.旋转控制面板左下角的采暖控制旋钮,调节采暖温度;(初次使用时不宜调太高)4.采暖类型不同,最大采暖出水温度设置不同:——地板采暖系统:2档(约50℃)四、生活热水温度设置1.调节锅炉控制面板右下角的生活热水温度调节旋钮来设置生活热水温度;2.显示屏上显示的仍是采暖出水温度3.生活热水温度可在40℃和60℃之间设置。
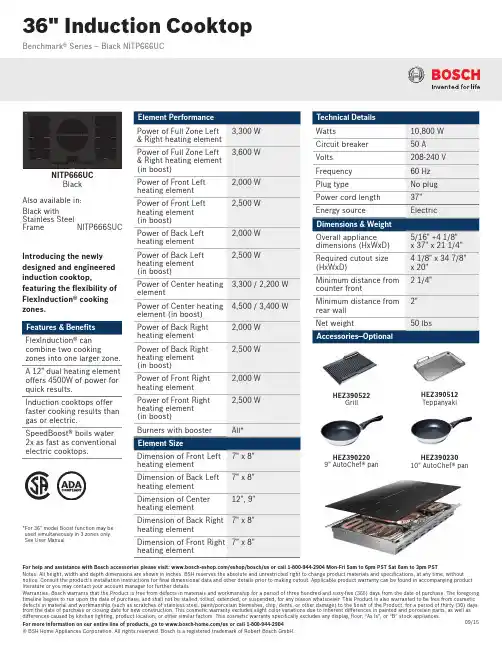
09/15For help and assistance with Bosch accessories please visit: /eshop/bosch/us or call 1-800-944-2904 Mon-Fri 5am to 6pm PST Sat 6am to 3pm PSTNotes: All height, width and depth dimensions are shown in inches. BSH reserves the absolute and unrestricted right to change product materials and specifications, at any time, without notice. Consult the product’s installation instructions for final dimensional data and other details prior to making cutout. Applicable product warranty can be found in accompanying product literature or you may contact your account manager for further details.Warranties: Bosch warrants that the Product is free from defects in materials and workmanship for a period of three hundred and sixty-five (365) days from the date of purchase. The foregoing timeline begins to run upon the date of purchase, and shall not be stalled, tolled, extended, or suspended, for any reason whatsoever. This Product is also warranted to be free from cosmetic defects in material and workmanship (such as scratches of stainless steel, paint/porcelain blemishes, chip, dents, or other damage) to the finish of the Product, for a period of thirty (30) days from the date of purchase or closing date for new construction. This cosmetic warranty excludes slight color variations due to inherent differences in painted and porcelain parts, as well as differences caused by kitchen lighting, product location, or other similar factors. This cosmetic warranty specifically excludes any display, floor, “As Is”, or “B” stock appliances.For more information on our entire line of products, go to /us or call 1-800-944-2904© BSH Home Appliances Corporation. All rights reserved. Bosch is a registered trademark of Robert Bosch GmbH.HEZ39023010" AutoChef® panHEZ3902209" AutoChef® pan Benchmark® Series – Black NITP666UC36" Induction CooktopNITP666UCBlackIntroducing the newly designed and engineered induction cooktop,featuring the flexibility of FlexInduction® cooking zones.FlexInduction® can combine two cookingzones into one larger zone.A 12" dual heating element offers 4500W of power for quick results.Induction cooktops offer faster cooking results than gas or electric.SpeedBoost® boils water 2x as fast as conventional electric cooktops.HEZ390512TeppanyakiHEZ390522GrillAlso available in:Black withStainless Steel Frame NITP666SUC* F or 36" model Boost function may be used simultaneously in 3 zones only. See User Manual.For help and assistance with Bosch accessories please visit: /eshop/bosch/us or call 1-800-944-2904 Mon-Fri 5am to 6pm PST Sat 6am to 3pm PSTNotes: All height, width and depth dimensions are shown in inches. BSH reserves the absolute and unrestricted right to change product materials and specifications, at any time, without notice. Consult the product’s installation instructions for final dimensional data and other details prior to making cutout. Applicable product warranty can be found in accompanying product literature or you may contact your account manager for further details.Warranties: Bosch warrants that the Product is free from defects in materials and workmanship for a period of three hundred and sixty-five (365) days from the date of purchase. The foregoing timeline begins to run upon the date of purchase, and shall not be stalled, tolled, extended, or suspended, for any reason whatsoever. This Product is also warranted to be free from cosmetic defects in material and workmanship (such as scratches of stainless steel, paint/porcelain blemishes, chip, dents, or other damage) to the finish of the Product, for a period of thirty (30) days from the date of purchase or closing date for new construction. This cosmetic warranty excludes slight color variations due to inherent differences in painted and porcelain parts, as well as differences caused by kitchen lighting, product location, or other similar factors. This cosmetic warranty specifically excludes any display, floor, “As Is”, or “B” stock appliances.For more information on our entire line of products, go to /us or call 1-800-944-2904© BSH Home Appliances Corporation. All rights reserved. Bosch is a registered trademark of Robert Bosch GmbH.09/15Installation Detailsair clearance 36" (~900)" (79) + fitting/conduit 1" (23)Benchmark® Series – Black NITP666UC36" Induction Cooktop。
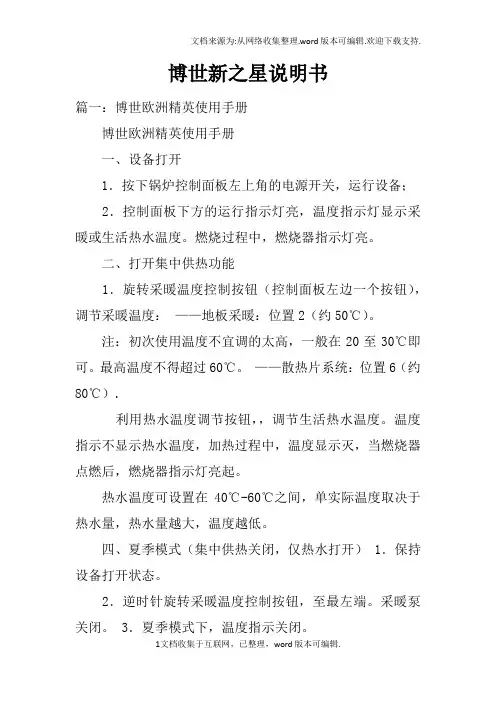
博世新之星说明书篇一:博世欧洲精英使用手册博世欧洲精英使用手册一、设备打开1.按下锅炉控制面板左上角的电源开关,运行设备;2.控制面板下方的运行指示灯亮,温度指示灯显示采暖或生活热水温度。
燃烧过程中,燃烧器指示灯亮。
二、打开集中供热功能1.旋转采暖温度控制按钮(控制面板左边一个按钮),调节采暖温度:——地板采暖:位置2(约50℃)。
注:初次使用温度不宜调的太高,一般在20至30℃即可。
最高温度不得超过60℃。
——散热片系统:位置6(约80℃).利用热水温度调节按钮,,调节生活热水温度。
温度指示不显示热水温度,加热过程中,温度显示灭,当燃烧器点燃后,燃烧器指示灯亮起。
热水温度可设置在40℃-60℃之间,单实际温度取决于热水量,热水量越大,温度越低。
四、夏季模式(集中供热关闭,仅热水打开) 1.保持设备打开状态。
2.逆时针旋转采暖温度控制按钮,至最左端。
采暖泵关闭。
3.夏季模式下,温度指示关闭。
注:当压力表水压低于正常水压时,应打开补水阀补水,直到水压压力处于正常范围内。
然后一定要关闭补水阀,否则会造成锅炉泄水。
五、故障代码博世欧洲之星操作手册一、设备打开1.首先确认燃气阀门已经打开,锅炉电源插头已插上;2.按下锅炉控制面板左上角的电源开关,运行设备; 3.显示屏上显示采暖的出水温度二、试运行:1.打开系统散热片的所有阀门;2.打开补水阀,生活冷水阀,注水至1到2巴的压力,然后关闭冷水阀 3.散热片排气;4.打开冷水阀,将系统压力重新充注到1-2巴 5.打开燃气阀三、打开集中供热功能1.热水温度可设置在45℃至82℃之间;2.若为地板采暖系统,采暖温度不得高于60℃;3.旋转控制面板左下角的采暖控制旋钮,调节采暖温度;(初次使用时不宜调太高) 4.采暖类型不同,最大采暖出水温度设置不同:——地板采暖系统:2档(约50℃)四、生活热水温度设置1.调节锅炉控制面板右下角的生活热水温度调节旋钮来设置生活热水温度; 2.显示屏上显示的仍是采暖出水温度 3.生活热水温度可在40℃和60℃之间设置。
博世欧洲精英使用手册一、设备打开1.按下锅炉控制面板左上角的电源开关,运行设备;2.控制面板下方的运行指示灯亮,温度指示灯显示采暖或生活热水温度。
燃烧过程中,燃烧器指示灯亮。
二、打开集中供热功能1.旋转采暖温度控制按钮(控制面板左边一个按钮),调节采暖温度:——地板采暖:位置2(约50℃)。
注:初次使用温度不宜调的太高,一般在20至30℃即可。
最高温度不得超过60℃。
——散热片系统:位置6(约80℃).利用热水温度调节按钮,,调节生活热水温度。
温度指示不显示热水温度,加热过程中,温度显示灭,当燃烧器点燃后,燃烧器指示灯亮起。
热水温度可设置在40℃-60℃之间,单实际温度取决于热水量,热水量越大,温度越低。
1.保持设备打开状态。
2.逆时针旋转采暖温度控制按钮,至最左端。
采暖泵关闭。
3.夏季模式下,温度指示关闭。
注:当压力表水压低于正常水压时,应打开补水阀补水,直到水压压力处于正常范围内。
然后一定要关闭补水阀,否则会造成锅炉泄水。
五、故障代码博世欧洲之星操作手册一、设备打开1.首先确认燃气阀门已经打开,锅炉电源插头已插上;2.按下锅炉控制面板左上角的电源开关,运行设备;3.显示屏上显示采暖的出水温度二、试运行:1.打开系统散热片的所有阀门;2.打开补水阀,生活冷水阀,注水至1到2巴的压力,然后关闭冷水阀3.散热片排气;4.打开冷水阀,将系统压力重新充注到1-2巴5.打开燃气阀三、打开集中供热功能1.热水温度可设置在45℃至82℃之间;2.若为地板采暖系统,采暖温度不得高于60℃;3.旋转控制面板左下角的采暖控制旋钮,调节采暖温度;(初次使用时不宜调太高)4.采暖类型不同,最大采暖出水温度设置不同:——地板采暖系统:2档(约50℃)1.调节锅炉控制面板右下角的生活热水温度调节旋钮来设置生活热水温度;2.显示屏上显示的仍是采暖出水温度3.生活热水温度可在40℃和60℃之间设置。
但水龙头的世界出水温度取决于进水量的大小,进水量越大,温度越低。
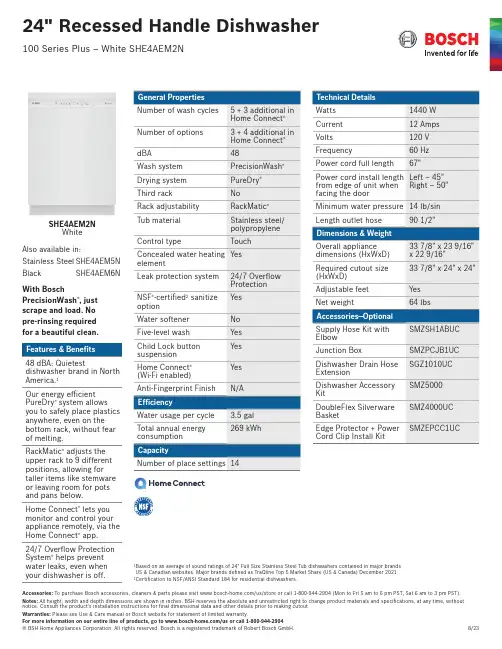
Accessories: To purchase Bosch accessories, cleaners & parts please visit /us/store or call 1-800-944-2904 (Mon to Fri 5 am to 6 pm PST, Sat 6 am to 3 pm PST).SHE4AEM2NWhiteAlso available in:Stainless Steel SHE4AEM5N BlackSHE4AEM6NWith BoschPrecisionWash ®, just scrape and load. No pre-rinsing required for a beautiful clean.48 dBA: Quietestdishwasher brand in North America.1Our energy efficient PureDry ® system allows you to safely place plastics anywhere, even on the bottom rack, without fear of melting.RackMatic ® adjusts the upper rack to 9 different positions, allowing for taller items like stemware or leaving room for pots and pans below.Home Connect ® lets you monitor and control your appliance remotely, via the Home Connect ® app.24/7 Overflow Protection System ® helps prevent water leaks, even when your dishwasher is off.1Based on an average of sound ratings of 24" Full Size Stainless Steel Tub dishwashers contained in major brands US & Canadian websites. Major brands defined as TraQline Top 5 Market Share (US & Canada) December 2021.2Certification to NSF/ANSI Standard 184 for residential dishwashers.Accessories: To purchase Bosch accessories, cleaners & parts please visit /us/store or call 1-800-944-2904 (Mon to Fri 5 am to 6 pm PST, Sat 6 am to 3 pm PST).Installation DetailsJunction box accessoryInstallation DetailsAccessories: To purchase Bosch accessories, cleaners & parts please visit /us/store or call 1-800-944-2904 (Mon to Fri 5 am to 6 pm PST, Sat 6 am to 3 pm PST).。
博世热水锅炉使用说明一、引言博世热水锅炉是一种高效、安全、环保的供暖设备,可为用户提供舒适的生活环境。
本文将详细介绍博世热水锅炉的使用方法和注意事项,以帮助用户更好地使用该设备。
二、安装及启动1. 安装:在安装博世热水锅炉前,请确保安装位置符合相关安全要求,并由专业人员进行安装。
2. 启动:连接好电源和燃气供应后,按下启动按钮,待锅炉启动完成后,可进行下一步操作。
三、温度调节1. 调节方式:博世热水锅炉配有温度调节器,可根据需要调节供暖水温度。
2. 温度范围:温度范围通常为20℃至60℃,用户可根据实际需求进行调整。
四、保养与维护1. 清洁:定期清洁锅炉内部和外表面,以确保良好的工作效果。
2. 检查:定期检查锅炉的安全阀、压力表等部件,确保其正常运转。
3. 维护:请按照说明书中的要求进行定期维护,以延长锅炉的使用寿命。
五、安全注意事项1. 燃气安全:使用前请确保燃气供应正常,避免发生燃气泄漏等安全事故。
2. 过热保护:锅炉内部设有过热保护装置,请勿操作过程中触碰锅炉表面,以免烫伤。
3. 通风要求:使用时请确保锅炉周围有良好的通风条件,避免因缺氧而发生安全事故。
六、常见问题解答1. 锅炉无法启动:请检查电源和燃气供应是否正常,并确保按下启动按钮。
2. 温度无法调节:请检查温度调节器是否正常工作,是否有异常报警信息。
3. 锅炉漏水:请检查锅炉内部是否存在漏水情况,并及时处理。
七、结语博世热水锅炉是一款优秀的供暖设备,通过本文的介绍,相信用户已经对其使用方法和注意事项有了更清晰的认识。
在使用过程中,务必要遵循安全规范,定期进行保养和维护,以确保使用效果和安全性。
如有任何疑问或问题,请及时联系博世售后服务热线,我们将竭诚为您解答。
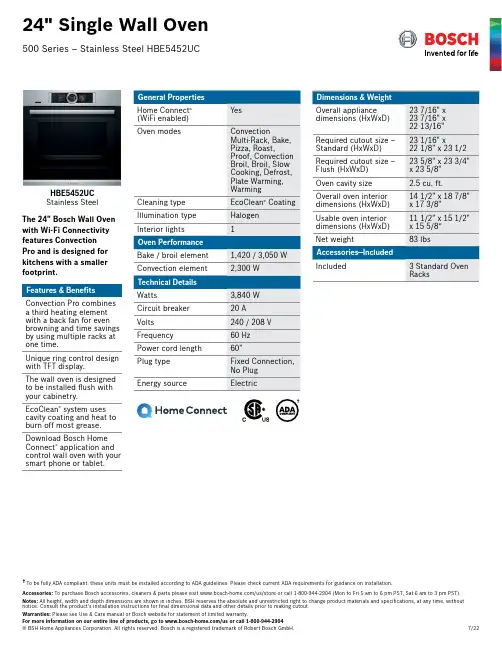
Accessories: To purchase Bosch accessories, cleaners & parts please visit /us/store or call 1-800-944-2904 (Mon to Fri 5 am to 6 pm PST, Sat 6 am to 3 pm PST).The 24" Bosch Wall Oven with Wi-Fi Connectivity features Convection Pro and is designed for kitchens with a smaller footprint.Features & Benefits Convection Pro combines a third heating element with a back fan for even browning and time savings by using multiple racks at one time.Unique ring control design with TFT display.The wall oven is designed to be installed flush with your cabinetry.EcoClean ® system uses cavity coating and heat to burn off most grease.Download Bosch Home Connect ® application and control wall oven with yoursmart phone or tablet.HBE5452UC Stainless Steel24" Single Wall Oven500 Series – Stainless Steel HBE5452UC†To be fully ADA compliant, these units must be installed according to ADA guidelines. Please check current ADA requirements for guidance on installation.†Accessories: To purchase Bosch accessories, cleaners & parts please visit /us/store or call 1-800-944-2904 (Mon to Fri 5 am to 6 pm PST, Sat 6 am to 3 pm PST).Installation DetailsExample Flush Install24" Single Wall Oven500 Series – Stainless Steel HBE5452UC" (21)" (603)"-10"(76)(915) m ay be located above or below the unit "-43" (560)。

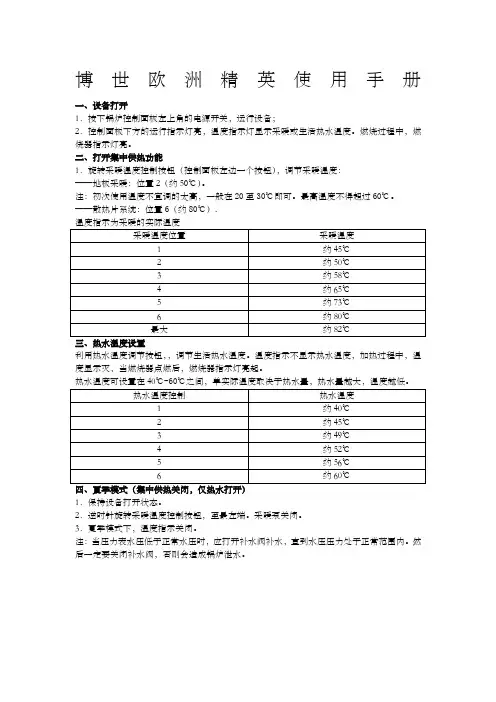
博世欧洲精英使用手册 Company Document number:WTUT-WT88Y-W8BBGB-BWYTT-19998博世欧洲精英使用手册一、设备打开1.按下锅炉控制面板左上角的电源开关,运行设备;2.控制面板下方的运行指示灯亮,温度指示灯显示采暖或生活热水温度。
燃烧过程中,燃烧器指示灯亮。
二、打开集中供热功能1.旋转采暖温度控制按钮(控制面板左边一个按钮),调节采暖温度:——地板采暖:位置2(约50℃)。
注:初次使用温度不宜调的太高,一般在20至30℃即可。
最高温度不得超过60℃。
——散热片系统:位置6(约80℃).温度指示为采暖的实际温度三、热水温度设置利用热水温度调节按钮,,调节生活热水温度。
温度指示不显示热水温度,加热过程中,温度显示灭,当燃烧器点燃后,燃烧器指示灯亮起。
热水温度可设置在40℃-60℃之间,单实际温度取决于热水量,热水量越大,温度越低。
四、夏季模式(集中供热关闭,仅热水打开)1.保持设备打开状态。
2.逆时针旋转采暖温度控制按钮,至最左端。
采暖泵关闭。
3.夏季模式下,温度指示关闭。
注:当压力表水压低于正常水压时,应打开补水阀补水,直到水压压力处于正常范围内。
然后一定要关闭补水阀,否则会造成锅炉泄水。
五、故障代码博世欧洲之星操作手册一、设备打开1.首先确认燃气阀门已经打开,锅炉电源插头已插上; 2.按下锅炉控制面板左上角的电源开关,运行设备; 3.显示屏上显示采暖的出水温度 二、试运行:1.打开系统散热片的所有阀门;2.打开补水阀,生活冷水阀,注水至1到2巴的压力,然后关闭冷水阀 3.散热片排气;4.打开冷水阀,将系统压力重新充注到1-2巴 5.打开燃气阀 三、打开集中供热功能1.热水温度可设置在45℃至82℃之间; 2.若为地板采暖系统,采暖温度不得高于60℃;3.旋转控制面板左下角的采暖控制旋钮,调节采暖温度;(初次使用时不宜调太高)4.采暖类型不同,最大采暖出水温度设置不同: ——地板采暖系统:2档(约50℃) ——散热片采暖系统:5档(约73℃)四、生活热水温度设置1.调节锅炉控制面板右下角的生活热水温度调节旋钮来设置生活热水温度;2.显示屏上显示的仍是采暖出水温度3.生活热水温度可在40℃和60℃之间设置。
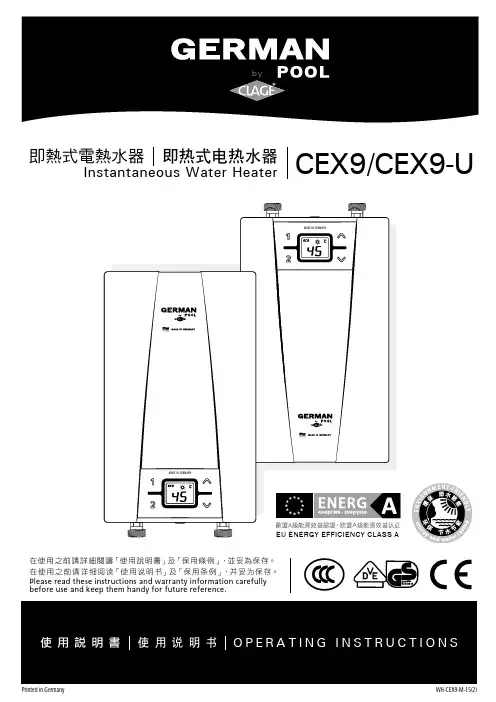
Instantaneous Water Heater即熱式電熱水器即熱式電熱水器CEX9/CEX9-Uby在使用之前請詳細閱讀「使用說明書」及「保用條例」,並妥為保存。
在使用之前請詳細閱讀「使用說明書」及「保用條例」,並妥為保存。
Please read these instructions and warranty information carefully before use and keep them handy for future reference.使用說明書使用說明書O P E R A T I N G I N S T R U C T I O N S歐盟A級能源效益認證•歐盟A級能源效益認證EU ENERGY EFFICIENCY CLASS AContents1. OverviewWhen ordering spare parts, please always specify the appliance model and serial number.Hood valve ElectronicsInlet pipeFlow sensorterminalGrommetpanel Bottom partTemperature sensor setHeating element with SDBCold and hot water connectionSafety thermal cut-out3. Description of Appliance2. Safety Instructions• Do not use the appliance until it has been correctly installed and unless it is in perfect working order.• The appliance is only suitable for domestic use and similar applications inside closed rooms, and must only be used to heat incoming water from mains supply.• The appliance must never be exposed to frost.• The appliance must be earthed at all times.• Do not remove the front cover under any circumstances before switching off the mains electrical supply to the unit.• Never make technical modifications, either to the appliance itself or the electrical leads and water pipes.• Pay attention to the fact that water temperatures in excess of approx. 43°C are perceived as hot, especially by children, and may cause a feeling of burning. Please note that the fittings and taps may be very hot when the appliance has been in use for some time.• This appliance can be used by children aged 8 years and above and persons with reduced physical, sensory or mental capabilities or lack of experience and knowledge if they have been given supervision or instruction concerning use of the appliance in a safe way and understand the hazards involved. Children shall not play with the appliance.• Cleaning and user maintenance shall not be performed by children without supervision.• The values stated on the rating plate must be observed.• In case of malfunction, disconnect the fuses immediately. In case of leaks, cut off the mains water supply instantly. Repairs must only be carried out by the customer service department or an authorised professional.Please read these instructions carefully before installing or using the appliance! Keep the instructions handy with the appliance for future use!Instruction manuals are intended for the specialist who is responsible for the installation of the appliance. Operation manuals are for the end user.The latest version of the instructions can be found online at .The instantaneous water heater CEX9/CEX9-U is a microprocessor-controlled, pressure-resistant hot water heater for a decentralised hot water supply to one or more outlets.Its electronic control regulates the heating power consumption depending on the selected outlet temperature, the respective inlet temperature and the flow rate, thus reaching the set temperature exactly to the degree and keeping it constant in case of pressure fluctuations. The required outlet temperature can be entered on a keypad and can be read off the digital display.The maximum inlet temperature can be up to 70 °C so that operation in connection with solar heating systems is possible.4. Technical Specifications6. Typical Installation5. DimensionsDimensions in mmExample of an open-outlet installation with special tap:Example of a closed-outlet installation:6. Typical Installation7. InstallationThe following regulations must be observed:• EN 806• Installation must comply with all statutory regulations, as well as those of the local electricity and water supply companies.• The rating plate and technical specifications • Only intact and appropriate tools must be used.Installation site• Appliance must only be installed in frost-free rooms. Never expose appliance to frost.• The Appliance is designed for undersink installation and has to be installed with water connectors upward.• The appliance complies with protection type IP 24.• In order to avoid thermal losses, the distance between the instantaneous water heater and the tapping point should be as small as possible.• For maintenance work, a shut-off valve should be installed in the supply line. The appliance must be accessible for maintenance work.• Copper or steel connecting pipes may be used. Plastic pipes may only be used if they conform to DIN 16893, Series 2. The hot water pipes must be thermally insulated.• The specific resistance of the water must be at least 1100 Ωcm at 15 °C. The specific resistance can be asked for with your water supply company.CEX 9 at direct connection: CEX 9 with wall mounted mixer: Supply for one sink7. InstallationMounting the appliance1. Thoroughly rinse the water supply pipes before installation to remove soiling from the pipes.2. Hold the appliance on the wall, and mark the drill lines at top and bottom, right and left,corresponding to the small notches at the edge of the appliance hood (see bottom figure). The alignment template (located on the back inside cover of this manual) may be used for this purpose alternatively.3. Connect the top and bottom marks vertically with each other (A-A).4. Connect the right and left marks horizontally with each other (B-B).5. The intersections of these lines are the drill points.6. Drill the holes using a 6 mm drill. Insert theincluded dowels and screws. The screws have to protrude 5 mm.7. Hang up the appliance into the rear hanging openings until it clicks into place.Installing the appliance1. Attach the water connection pipes to the appliance’s water connection. Use the ½ inch seals.2. Open and close the hot water tap until no more air emerges from the pipe and all air has been eliminated from the water heater.8. Electrical Connection23Only by a specialist! Please observe:• VDE 0100• The installation must comply with current IEC or national local regulations and any particular regulations, specified by the local electricity supply company • The rating plate and technical specifications • The unit must be earthed!Structural prerequisites• The appliance must be installed via a permanent connection. Heater must be earthed! A maximum cable size must be observed: 10 mm 2.• The electric wiring should not be injured. Aftermounting, the wiring must not be direct accessible.• An all-pole disconnecting device (e.g. via fuses) with a contact opening width of at least 3 mm per pole should be provided at the installation end.• To protect the appliance, a fuse element must be fitted with a tripping current commensurate with the nominal current of the appliance.Electrical connectionCheck that the power supply is switched off prior to electrical connection!Electrical connection with preinstalled power cable The appliance is to be connected with the pre-installed power cable to a terminal box. If necessary, use one of the three predetermined breaking points for the cable entry (at the right, left or bottom).Alternative:Electrical installation to a permanent connection If, in case of particular local circumstances,connecting to a permanent connection is the only possibility, continue as follows.1. Disassemble the pre-installed power cable.2. Dismantle off the power cable so that you can insert the cable with the cladding through the water splash protection sleeve up to the cord grip into the appliance.3. Lead the cable through the water splash protection sleeve into the appliance so that one can securely fix the cladding of the cable with the cord grip. If necessary, use one of the three predetermined breaking points for the cable entry (at the right, left or bottom). The protective sleeve prevents water from entering the appliance alongside the connection line. The protection sleeve has to be used!4. Mount the cord grip. The cord grip must be used!5. Strip the cables and plug them in the connecting terminals according to the wiring diagram. The appliance must be earthed.6. After successful electrical connection, fit the hood of the unit. Make sure not to jam any cables between the appliance hood and the base part of the appliance.2. Heating element3. Safety pressure cut-out4. Terminal strip5. Safety thermal cut-outWiring diagram9. Initial OperationMultiple Power System:The rated capacity (max. power consumption) is 8.8 kW / 230 V and can be reduced to 6.6 kW.Before making the electrical connection, fill the mains and the appliance with water by carefully opening and closing the hot water tap in order to vent completely. After every draining (e.g. after work on the plumbing system or following repairs to the appliance), the heater must be re-vented in this way before starting it up again.If the water heater cannot be put into operation, the temperature cut-out or the pressure cut-out may have tripped during transport. If necessary, reset the cut-out.Selection of power ratingOnly by authorised specialist, otherwise lapse of guarantee!Upon first connection of the appliance to the supply voltage, select the maximum power rating. Only after having set the power rating, the heater provides its standard operation mode.The maximum allowable power rating at installation site depends on the local situation. It is imperative to observe all data shown in the table “Technical specifications”, in particular the required cable size and fuse protection for the electrical connection. Moreover, the electrical installation must comply with the statutory regulations of the respective country and those of the local electricity supply company (Germany: DIN VDE 0100).1. Switch on the power supply to the appliance. The digital display on the appliance must light up.2. When switching on the supply voltage for thefirst time, the value “88“ flashes in the display.If not, please carefully read the below note “Reinstallation”.3. Select the maximum allowable power rating depending on the local situation via the up and down arrow keys: 8.8 or 6.6 kW (display: “66”) 230 V.4. Press key to confirm the setting. The appliance starts operating.5. Mark the set power rating on the rating plate.6. Open the hot water tap. Check the function of the appliance.7. After having set the maximum allowable power rating, the heating element will be activated after approx. 10 seconds of water flow.9. Initial OperationRemote controlThe water heater’s temperature must be limited to 55 °C, if it is connected to a shower and controlled with a remote control system. The service menu parameter “Temperature Limit “(“tL”) must be set to a value less or equal 55 °C, in consultation with the customer and the lock level must be activated.When the device is operated with preheated water, it must be ensured that this temperature is limited to 55 °C as well.ReinstallationIn case the appliance will be commissioned again under different installation conditions than duringits initial operation, it may be necessary to adapt the maximum power rating. A temporary short-circuit of the two pins, e.g. with a screwdriver acc. to EN 60900 (see figure), will reset all heater parameters to works setting and lock the heating.Value “88“ flashes in the display until the maximum power rating has been selected. This condition will maintain when activating and deactivating the supply voltage.Lock LevelThe operating mode of the appliance can be restricted. The service menu can be used to configure the appliance.Activation of the lock level1. Set required lock level in the service menu (refer to chapter “Service menu” in this installing instructions).2. Disconnect the appliance from the power supply(e.g. by switching off the fuses).3. Move the jumper on the power electronics from pin 2 to pin 1 (see figure).4. Put the appliance into operation again.Deactivation of the lock level1. Disconnect the appliance from the power supply(e.g. by switching off the fuses).2. Move jumper from pin 1 to pin 2.3. Put the appliance into operation again.As soon as you open the hot water tap, the instantaneous water heater switches onautomatically. When the tap is closed, the appliance automatically switches off.Temperature settingYou can set the required temperature gradually to a lower or higher value with the arrow keys and .The temperature changes by 1°C, in the convenience zone between 35°C and 42°C by 0.5°C, if key is pressed shortly one time. Pressing a key for a longer time changes the temperature continuously.Note: If temperature is set below 20°C with arrow key the display shows “- -” and the appliance switches off the heating function.Note: If the water heater supplies a shower and is connected to a remote control system, the maximum temperature was reduced during initial operation. This limitation cannot be exceeded.Programme buttonsThe two programme buttons allow to quickly select the preset temperature. When pressing a programme key, the preset temperature is selected and displayed. The factory setting for programme is 35°C and for programme it is 48°C. You can assign your own settings for the programme keys:• Prolonged pressing of the programme key stores the previously selected temperature. The display changes from “P1” or “P2” to the newly stored temperature value. This newly set temperature is now available to you each time you press the corresponding program key.MADE IN GERMANYDisplay of new value (e.g. 43 °C)Temperature limitationThis instantaneous water heater is equipped with an optional temperature limiting function. This scalding protection is deactivated in the factory setting.• Switch on: Select the limit temperature, then pressand simultaneously for at least 3 sec. The display briefly confirms the activation by “HI“.• Switch off: press program key andsimultaneously for at least 3 sec. The display briefly confirms the deactivation by “- -“.Note: By activation of the temperature limit also the programme keys are affected. Therefore, the fixed values of the programme keys must be checked after changing the temperature limitation.Reset to factory settingAll factory settings can be recalled:• Press and and simultaneously. The display now counts backwards from “10“ to “00“ in second intervals. The appliance is reset at value “00“ - if you stop pressing the keys earlier, you will cancel the process.Reset completedHow to save energySet the exact temperature you need on the appliance and open the hot water tap. Once you feel that the water is too hot, do not add any cold water and,instead, enter a lower temperature on the appliance. If you were to add cold water, the water already heated would cool down again and valuable energy would be wasted. Moreover, the cold water added in the tap is not covered by the control range of the electronic circuitry, with the result that temperature constancy is no longer guaranteed.ECO mode The symbol shows that the appliance works in an energy saving mode (i.e. the momentary energy consumption is subject to the selected temperature and to the flow rate in the energy saving mode.Power limitIf the full output of the instantaneous water heater does not suffice to heat the tapped quantity of water,this will be indicated byon the LCD (e.g. in winter time, when opening several taps at once). When youreduce the hot water flow rate,stops lighting because the output of the appliance is sufficient to reach the set temperature again. You can now use the full output to fill larger containers, for instance.Operation with solar systemsWhen operating with solar systems, e.g. an automatic mixing tap must ensure that the maximum inlet temperature is not exceed. If the inlet temperature exceeds the setpoint, the iconon the digital displayindicates that the heating power is switched off.Power limitVenting after maintenance workThis instantaneous water heater features an automatic air bubble protection to prevent it from inadvertently running dry. Nevertheless, the appliance must be vented before using it for the first time. Each time the appliance is emptied (e.g. after work on the plumbing system, if there is a risk of frost or following repair work), the appliance must be re-vented before it is used again.1. Disconnect the instantaneous water heater from the mains (e.g. via deactivating the fuses).2. Unscrew the jet regulator on the outlet fitting and open the cold water tap valve to rinse out the water pipe and avoid contaminating the appliance or the jet regulator.3. Open and close the hot water tap until no more air emerges from the pipe and all air has been eliminated from the water heater.4. Only then should you re-connect the power supply again (e.g. via activating the fuses) to the instantaneous water heater and screw the jet regulator back in.5. The appliance activates the heater after approx. 10 seconds of continuous water flow.Cleaning and maintenance• Plastic surfaces and fittings should only be wiped with a damp cloth. Do not use abrasive or chlorine-based cleaning agents or solvents.• For a good water supply, the outlet fittings (special tap aerators and shower heads) should be unscrewed and cleaned atregular intervals. Every three years, the electrical and plumbing components should be inspected by an authorised professional in order to ensure proper functioning and operational safety at all times.Your product was manufactured from high-quality, reusablematerials and components. Please respect in case of discarding that electrical devices should be disposed of separately from household waste at the end of their service life. Therefore, please take this device to a municipal collection point that acceptselectronic scrap. Disposing it correctly will support environmental protection and will prevent any potential negative effects on human beings and the environment that could arise frominappropriate handling of these devices at the end of their service life. Please contact your local authority for further details of your nearest designated collection point or recycling site.Business customers: If you wish to discard electronic equipment,please contact your dealer or supplier for further information.11. Environment and RecyclingThe service menu offers an overview of system parameters and is used for diagnostics.Press key and key simultaneously for at least 2 seconds to call up the service menu, the display confirms by “FL ” and by a flashing point. Using the arrow keys and , you can switch between the individual menu items.Press key to see the value of the currently selected menu. The value flashes in the display. (The values of some menus can be switched over by using the arrow keys and .) You will get back to the drop-down-menu when pressing key again. With key you will get back to the standard display (nominal value). After two minutes without any key stroke the system automatically switches back to the standard display.Individual menu items as follows:“FL”: FlowIndication of current flow rate given in l/min.“Po”: PowerIndication of current power consumption (kW).“t1”: Temp inIndication of inlet temperature (°C).“t2”: Temp outIndication of outlet temperature (°C).“CA”: Control valueIndication of calibration value of the control system. Regular range: 40 – 60. “PL”: Power limitInforms about the current maximum power rating (kW) of the appliance.“Er”: DiagnosticsIndication of the last ten diagnostic messages.The error code is indicated by the first displayed value after pressing key 1 (refer to “Abstract for Trouble-Shooting & Diagnostics” in the hood). By using the arrow keys and the last 10 error codes are displayed chronologically. Thereby the display indicates in turns the error numbers from “0” to “9” and the corresponding error. The last error will be recorded at position “0” and the former ones each shifted 1 position backwards.“LL”: Lock levelThe operating mode of the a ppliance can be restricted.Setting Options:“0” no restriction (factory setting)“1” factory reset via key (countdown) not possible, parameters can be seen,but not be modified in setup menu“2” same as “1”, additionally the setup menu cannot be opened“3” same as “2” additionally nominal value memory 1 and 2 not changeable “4” same as “3”, additionally nominal value not changeableNote: When the setting 1, 2, 3 or 4 was chosen, the system parameters can no longer be modified in the s ervice menu. In order to modify these system parameters, it is necessary to remove the jumper on the power electronics, as specified in thechapter “Deactivation of the lock level”.Flow Power Temp in Temp out Control value Power limit Diagnostics Lock level Software version Radio channel Received strength Temperature limit SignalMenu item order of “Service menu“:Menu item order of “Service menu“:“nr”: Software versionInformation about installed software version.“Ch”: Radio channel(with wireless module only)Information about the current radio channel of the water heater and its remote control.“rS”: Received strength (with wireless module only)Information about the current signal quality of the remote control as percentage. Depending on the distance between remote control and water heater the value varies between 10% and 100%.“tL”: Temperature limitThe maximum setable temperature can be reduced to any value within the temperature limit.The Lock Level must be activated by placing the jumper to enable the limitation.“IIC”: SignalInformation about the quality of the radio contactwhen a diagnostic display is connected.Flow Power Temp in Temp out Control value Power limit Diagnostics Lock level Software version Radio channel Received strength Temperature limitSignal13. Trouble-shooting and ServiceThis instantaneous water heater was manufactured conscientiouslyand checked several times before delivery. Should malfunctionsnevertheless occur, it is usually only due to a bagatelle. First attemptto switch the house fuses off and on again in order to reset theelectronics. Next, try to remedy the problem with reference to thefollowing table. In doing so, you will avoid unnecessary expense ofcustomer service assistance.Repairs must only be carried out by authorised professionals.If a fault in your appliance cannot be rectified withthe aid of this table, please contact the service organisation of your importer or the Central Customer Service Department. Please have the details of thetypeplate at hand.MADE IN GERMANYIf the connection cable is damaged, it must be replaced withan original spare cable from the manufacturer by an authorisedtechnician in order to avoid any hazards.If you cannot rectify the fault with the aid of the troubleshootingtable, please contact the customer service.Arrow key downArrow key upProgramme button 1Programme button 2Power limitReset completedUnit provides no outputDisplay of new value (e.g. 43 °C)目錄訂購零部件時,務請說明熱水器型號和序列號。
现代博士热水器使用说明书一、产品概述现代博士热水器是一款先进的家用热水设备,通过电加热方式提供热水,具有安全、高效、节能等特点。
本说明书将详细介绍热水器的安装、使用、维护和注意事项。
二、安装1. 安装环境选择:请确保安装环境通风良好,远离易燃易爆物品,避免高温、潮湿、尘土等环境。
2. 安装位置:选择安装位置时,应考虑到水源、电源、出水口的方便使用,同时要确保有足够的空间放置热水器。
3. 安装固定:使用附带的固定螺丝将热水器固定在墙面或其他坚固的支撑物上,确保安全稳固。
三、使用1. 供电:将热水器插头插入电源插座,并确保供电正常。
2. 开关机:热水器配有开关按钮,按下开关按钮即可启动热水器,再次按下即可关闭。
3. 温度调节:通过旋转温度调节钮,可以调整热水器的出水温度。
请根据需要选择合适的温度,以免烫伤。
4. 出水方式选择:热水器提供多种出水方式,可以通过控制面板上的按钮进行调整,如常温、温水、热水等。
5. 恒温保护:热水器具有智能恒温保护功能,当达到设定温度后会自动停止加热,待温度下降后会重新加热,保持恒定温度。
6. 定时功能:热水器可设置定时开关机功能,方便用户在指定时间段内使用热水。
四、维护1. 清洁:定期清洁热水器的外壳和控制面板,可使用柔软的干布擦拭,切勿使用湿布或化学溶剂清洁。
2. 水垢清除:若热水器出水口有水垢堵塞,可用软毛刷轻轻清除,切勿用硬物刮擦,以免损坏热水器。
3. 定期检查:定期检查热水器的电源线、插头和开关等部件是否正常,如发现损坏应及时更换,确保安全使用。
五、注意事项1. 使用环境:请勿将热水器安装在易燃易爆物品附近,避免发生火灾或爆炸事故。
2. 注意电源:插拔电源时,请确保手干燥,避免触电事故的发生。
3. 温度调节:使用热水时请谨慎调整出水温度,以免烫伤。
4. 定期维护:定期清洁和检查热水器,确保其正常运行和安全使用。
5. 孩童禁用:请将热水器安装在孩童无法触及的位置,避免发生意外伤害。
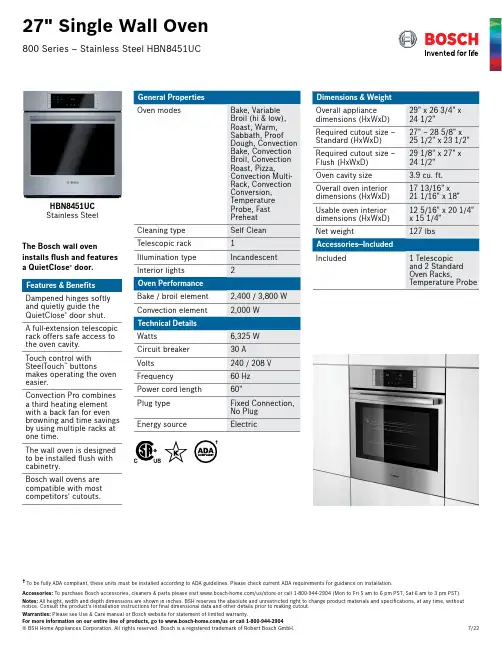
Accessories: To purchase Bosch accessories, cleaners & parts please visit /us/store or call 1-800-944-2904 (Mon to Fri 5 am to 6 pm PST, Sat 6 am to 3 pm PST).The Bosch wall oveninstalls flush and features a QuietClose ® door.Features & Benefits Dampened hinges softly and quietly guide the QuietClose ® door shut.A full-extension telescopic rack offers safe access to the oven cavity.Touch control with SteelTouch ™ buttonsmakes operating the oven easier.Convection Pro combines a third heating element with a back fan for even browning and time savings by using multiple racks at one time.The wall oven is designed to be installed flush with cabinetry.Bosch wall ovens are compatible with most competitors’ cutouts.HBN8451UCStainless Steel†To be fully ADA compliant, these units must be installed according to ADA guidelines. Please check current ADA requirements for guidance on installation.†Installation DetailsExample Flush Install Accessories: To purchase Bosch accessories, cleaners & parts please visit /us/store or call 1-800-944-2904 (Mon to Fri 5 am to 6 pm PST, Sat 6 am to 3 pm PST).Installation DetailsAccessories: To purchase Bosch accessories, cleaners & parts please visit /us/store or call 1-800-944-2904 (Mon to Fri 5 am to 6 pm PST, Sat 6 am to 3 pm PST).。
博世mr100说明书
1、使用壁挂式锅炉时先要向壁挂式锅炉注水,然后打开左下角的自来水管开关。
2、之后壁挂式锅炉下方有一个旋钮,要把这个旋钮向左转两圈,水压表的指针就会上升,正常范围在0.5到1.5之间。
3、再打开天然气开关,插入壁挂式锅炉的电源,将温度调节到50到60度之间即可。
二、使用壁挂炉应注意哪些问题
1、必须要用产品铭牌标签上指定的气体类型,天然气,人工煤气、液化石油气和沼气不可通用。
2、壁挂炉应安装到厨房或是封闭的阳台,不能安装在卫生间中。
3、排烟管道不能通向公共排烟管道,排气管外壳中的吸气孔一定要延伸到外壁外。
排气管还要从内向外倾斜,若违反上述规则就会导致潜在危险或无法正常工作。
4、若室内温度结冰,要保持壁挂炉通电通电。
即使壁挂炉关闭,只要燃气不堵塞,主循环管道不堵塞,供暖系统水压正常,防冻壁挂式锅炉的功能与水泵的防死保护将起作用。
一旦未满足这些条件,壁挂式锅炉,管道与散热器就会结冰,甚至带来安全事故。
尤其在冬季若长时间停电,断燃气,或长时间不在家,婚有可能会出现结冰的现象,所以先要把供暖系统里面的水先要排干净,才能防止出现结冰冻坏。
博世热水器说明书博世热水器使用说明书感谢您选择使用博世热水器。
在使用热水器前,请认真阅读本说明书,并按照操作要求使用,以免造成不必要的损失和危险。
一、产品概述博世热水器是一种快速加热的一氧化碳热水器,采用先进的技术和高性能的材料制造而成,具有以下特点:1. 高效节能:采用高效加热系统,热效率高达98%以上,具有极佳的节能效果。
2. 安全可靠:采用先进的安全保护措施,保证使用过程中不会出现任何安全隐患,使用更加安心。
3. 操作简单:采用智能控制系统,只需简单的按键操作即可完成各种设置和调整。
二、安装要求1. 安装地点:安装地点应平整、干燥、通风、无渗漏,并且要远离火源、易燃物品、化学品等危险物品,保证使用过程中的安全。
2. 接口要求:供水管口和排水口均应符合国家标准,安装时应注意管道接口的密封性和可靠性。
3. 电源要求:博世热水器默认220V电源,如果需要使用其他电源,请提前咨询专业人员。
三、使用方法1. 开机:接通电源后,按下电源开关,热水器进入待机状态。
2. 设置温度:按下温度调节键,可进行温度的调整,取得所需的水温。
3. 加热:当水温低于设置的温度时,热水器会自动开始加热,当水温达到预设温度后,热水器会自动停止加热。
4. 关机:当不需要使用热水器时,按下电源开关即可将热水器关闭。
四、安全提示1. 热水器使用时,请勿将热水器完全沉入水中,以免影响热水器的正常使用和造成安全隐患。
2. 在使用热水器过程中,如发现异味、泄漏、噪音等异常情况,请立即停止使用,并联系销售商或专业维修人员进行检查和处理。
3. 在安装和使用热水器过程中,请注意掌握正确的方法和操作要求,务必遵守相关安全规定和操作规程,保障使用过程中的安全。
以上内容为博世热水器的使用说明书,谢谢。
博世小厨宝说明书刚打开的水温极高,放个没几秒水温快速下降,之后由于容量限制没多久就变成冷水。
关掉一会,再打开又会出一小段比较烫的水,然后继续重复之前的过程,只是热水量更少了。
当我投诉产品的问题,要求上门检测时,负责对接的检测员(和安装工是同一人)给出的答复是,很多人反映过相同的问题,而在一种条件下是满足他们所标的5升热水量的。
即将温度调到最高,然后是可以放出5升的“热水”的。
这里面存在两个问题:一,如何定义“热水”?二,他们似乎只要水是“热”的就行,而不在乎怎么给到你(以一种极端冷热不均的方式)首先,由于冷热水的出水不均,开关旋钮不管调哪里,出水都是从很烫到凉,只是这个区间高低的区别。
所以第二个问题导致了第一个问题,到多凉的时候算是放满了5升的“热水”。
这是这款产品最大的悖论。
所以它的温度调节是没有任何温度显示的,它无法明确地告诉你它能持续稳定地放出多少升多少温度的水(因为它根本做不到)。
于是这两个问题导致了两个结果:一,当把旋钮调低的时候,热水量完全不够(它似乎觉得你不怎么需要热水,就不怎么工作了)。
二,而当你把旋钮调高的时候,刚打开的出水非常烫,达到危险的程度。
结论:温度极端不均(调高时出水温度危险),热水量有限。
解决方案:使用时必须搭配冷水,保证出水温度的适宜。
适当调小出水量,可以稍微延续一点点出“热水”的时间。
然后,在使用过程中手动调节冷热水的比例。
产品确实可以解决热水水管过长导致的前期冷水问题,却增加了很多使用上的手动调节,不是一款省心的产品。
所以也想问一下博世,做出这样的产品,你自己觉得合理吗?当你保证出水温度适宜的时候,根本没有办法保证足够的“热水输出量”,而当你需要一定量的热度时,出水温度又达到危险的程度。
我猜想这样的产品是给我们这样的普通人使用的吧?而当我们使用的时候,我们又应该如何来适应这款产品呢?还是说,5升的量就只是刷个牙而已?猜测:这款产品的加热装置可能靠近机器的出水口,导致了出水温度极高,从厂家来说,这样设置在第二次打开时,可以营造一种有能力快速加热的假象。
Ficha de información sobre el productoREGLAMENTO DELEGADO (UE) 2019/2016 DE LA COMISIÓNNombre o marca del pro-veedor (a) (b) :BoschDirección del proveedor(a)(b) :BSH Hausgeräte GmbH, Carl-Wery-Str. 34, 81739 Munich, GermanyIdentificador del modelo(a) :KGN392ICFTipo de aparato de refrigeración:Aparato de bajo nivel deruido:No Tipo de diseño:Libre instalaciónArmarios para la conserva-ción de vinos:NoOtros aparatos de refrige-ración:NoParámetros generales del producto:Parámetro Value Parámetro ValueDimensiones totales (milí-metros) (a) (b)Altura2030Volumen total (dm3 o l)363 Anchura600Profundi-dad665IEE64Clase de eficiencia ener-gética C (c)Ruido acústico aéreo emi-tido (dB(A) re 1 pW)35Clases de ruido acústicoaéreo emitido B (a)Consumo de energía anual (kWh/a)162Clase climáticaTemplado ampliado,Templado, Subtropical,tropicalTemperatura ambientemínima (°C) en la que puede funcionar el aparato de refrigeración 10 (c)Temperatura ambientemáxima (°C) en la quepuede funcionar el aparatode refrigeración43 (c)Ajuste de invierno NoParámetros del compartimento:Tipos de compartimentoParámetros del compartimento y valoresVolu-mendelcom-parti-mento(dm3 ol)Ajuste de temperaturarecomendado para conser-vación optimizada de ali-mentos (°C).Estos ajustes no contradi-rán las condiciones deconservación contempla-das en el anexo IV, cuadro3.Capacidadde congela-ción (kg/24h)Tipo dedesescar-che (deses-carcheautomático= A, deses-carchemanual =M)Despensa No----Conservación de vinos No----Conservación de vinos 2No----Conservación de vinos 3No----Compartimento bodega No----Alimentos frescos Si260.04-A Helador No----0 estrellas/Fabricación dehieloNo----1 estrella No----2 estrellas No----3 estrellas No----4 estrellas Si103.0-1810.0A Sección 2 estrellas No----Compartimento tempera-tura variable ---(en com-partimentosde 4 estre-llas) o --En compartimentos de 4 estrellasCapacidad de congelación rápida SiEn el caso de los armarios para la conserva-ción de vinos:Número de botellas de vino estándar-Parámetros de las fuentes luminosas (b)(d):Tipo de fuente luminosa LEDClase de eficiencia energética GDuración mínima de la garantía ofrecida por el proveedor (a)(b) :24 mesesInformación adicional (a) (b) :Enlace al sitio web del proveedor, en el que se encuentra la información contemplada en el punto 4 del anexo II del Reglamento (UE) 2019/2019 de la Comisión: /energylabel(a) Esta rúbrica no se considerará relevante a los efectos del artículo 2, punto 6, del Reglamento (UE) 2017/1369.(b) los cambios introducidos en estos elementos no se considerarán relevantes a efectos del artículo 4, apartado 4, del Reglamento (UE) 2017/1369.(c) si la base de datos de los productos genera automáticamente el contenido definitivo de esta casilla, el proveedor no introducirá estos datos.(d) Determinados de acuerdo con el Reglamento Delegado (UE) 2019/2015 de la Comisión.。
博世热水器说明书
博世热水器使用说明书:
1. 产品概述:
博世热水器是一种高效、环保、安全的电热水器,采用先进的技术和材料制造而成。
该产品适用于家庭、办公室等场所使用。
2. 安装说明:
(1)安装前必须检查电源电压是否符合要求,以免造成热水器故障或事故。
(2)安装时应将热水器放在固定的地面上,并确保热水器与墙壁之间有足够的安全距离。
(3)安装时必须按照说明书的要求进行,不得随意改动或拆卸。
(4)安装完成后,必须连接好电源线,并检查是否漏电、接触不良等情况。
3. 使用说明:
(1)使用前应先检查热水器的安全阀门和温控器是否正常工作。
(2)开机前先将热水器装满水,以免干烧损坏热水器。
(3)调整温度时应轻轻旋转控制旋钮,不要用力过大,以免损坏温控器。
(4)长时间未使用热水器时,应先排空水箱内的水,以免存留的水产生杂质,影响健康。
4. 维护保养:
(1)定期检查热水器的安全阀门和温控器是否正常工作。
(2)清洗热水器时应先关机,拔掉电源线,将水箱内的水倒出,然后用软布擦拭热水器外壳和水箱内壁。
(3)若发现热水器出现故障或异常现象,应及时停机维修,不得私自拆卸或修理。
5. 注意事项:
(1)热水器在使用时要远离易燃物品和高温场所。
(2)不得将热水器放置在易受潮的地方,以免电路出现故障。
(3)不得用尖锐物品抵触热水器表面,以免刮伤或损坏热水器。
(4)不得在热水器外壳上涂抹任何化学药品或腐蚀物质,以免损坏外壳表面。