Micro Cloud Foundry安装手册
- 格式:pdf
- 大小:171.50 KB
- 文档页数:4

大连微瑞B/S架构虚拟实验室软件用户机设置和插件安装手册1.IE浏览器是否能够正常使用。
如果IE浏览器被其他软件篡改导致无法正常打开或使用,请重新安装IE浏览器,建议安装IE10或IE11。
2.检查IE浏览器的设置(1)检查Cookies设置点击键盘上的Alt键,点击“工具”选项卡,之后点击“Internet选项”,如下图所示。
点击“隐私”选项卡。
点击高级选项。
确定接受所有Cookie,并且允许会话cookie。
此外,需要检查系统中安装的360等防火墙和杀毒软件中没有禁用cookie。
(2)检查安全选项点击键盘上的Alt键,点击“工具”选项卡,之后点击“Internet选项”,如下图所示。
点击“安全”选项卡。
确认没有勾选“启用保护模式”,同时,选择“中-高”安全级别。
(3)确认浏览器中未进行缩放点击IE浏览器中“显示”选项卡中“缩放”选项,确认缩放比例为100%。
3.检查显示器设置(1)确认没有进行大小缩放在显示设置中,检查“更改文本、应用和其他项目的大小”中是否为100%,不是100%则调节为100%,否则会出现显示不全的问题。
(2)确认显示器分辨率不会过低点击显示设置中的“高级显示设置”确认分辨率未选择为“1024*768”或者更低的值,对于笔记本电脑尽量选择推荐分辨率(其大于1024*768)。
本软件无法在1024*768或者更低分辨率下正常使用。
4.检查插件是否正确安装(1)确认旧版插件已经卸载在控制面板中,将“3DVIA player”卸载。
(2)安装正确的插件不要直接打开应用自动下载、安装插件。
请访问学校自己的平台或者大连微瑞体验平台,在登陆界面下载正确的插件。
点击该界面最下方“3dvia插件下载”,即可下载正确的插件,按照提示进行下载、安装即可。
5.检查鼠标选项在设置->鼠标和触摸板中,选择“其他鼠标选项”,确认“指针选项”卡中未勾选“显示指针轨迹”选项,如果勾选该选项则可能出现软件中鼠标无法正确显示的问题。

Pivotal CloudFoundry 安装部署手册文件状态:[ ] 草稿[ ] 正在修改[ ] 正式签收文件标识:当前版本:V1 作者:完成日期:签收人:签收日期:文档修改历史记录版本状态修改日期备注1.安装要求在您开始之前,确保您的系统满足以下先决条件:●vSphere 版本5.1●服务器CPU支持VT-x/EPT虚拟化●DNS服务器●CPU最低18核,内存最低33G,硬盘最低204G2.安装所需文件1 Esxi 5.1安装镜像VMware-VMvisor-Installer-5.1.0-799733.x86_64.iso2 vCenter 5.1安装镜像VMware-VIMSetup-all-5.1.0-799735.iso3 Windows 2008 R2安装镜像cn_windows_server_2008_r2_standard_enterprise_datacente r_and_web_with_sp1_x64_dvd_617598.iso4 CF安装文件pivotal-cf-1.0.0.1.ova 3.vSphere安装配置1、ESXI 安装1.挂载ISO介质。
2.在Boot Menu上选择ESXi Installer,安装ESXi3.来到欢迎安装界面,点击“Enter”,开始安装。
4.接受最终用户授权协议,按“F11”继续安装。
5.选择数据存储设备,此步骤需要小心操作。
若服务器已连接共享数据存储,在Storage Device面板上的Remote一栏上可看到共享数据存储的磁盘。
本例中使用local本地磁盘。
按F1查看该磁盘的详细信息。
6.确认无误后按“enter”,继续安装。
然后选择键盘布局。
7.输入root用户的密码。
8.安装程序会检测服务器是否具备所有的安装条件,包括hardware virtualizaion功能是否开启、驱动程序是否存在等。
检测确认后,按“F11”,开始安装。

锐捷U空间(UWS基础版)客户端文档版本V1.2归档日期2022-09-30版权声明copyright © 2022 锐捷网络保留对本文档及本声明的一切权利。
未得到锐捷网络的书面许可,任何单位和个人不得以任何方式或形式对本文档的部分或全部内容进行复制、摘录、备份、修改、传播、翻译成其他语言、将其部分或全部用于商业用途。
、、和其他锐捷网络商标均为锐捷网络的商标。
本文档提及的其他所有商标或注册商标,由各自的所有人拥有。
免责声明您所购买的产品、服务或特性等应受商业合同和条款的约束,本文档中描述的部分或全部产品、服务或特性可能不在您的购买或使用范围之内。
除非合同另有约定,锐捷网络对本文档内容不做任何明示或默示的声明或保证。
由于产品版本升级或其他原因,本文档内容会不定期进行更新。
锐捷网络保留在没有任何通知或者提示的情况下对文档内容进行修改的权利。
本手册仅作为使用指导。
锐捷网络在编写本手册时已尽力保证其内容准确可靠,但并不确保手册内容完全没有错误或遗漏,本手册中的所有信息也不构成任何明示或暗示的担保。
前言读者对象本书适合下列人员阅读●普通用户●网络管理员技术支持●锐捷网络官方网站:●锐捷网络官方网站服务与支持版块:/fw/●锐捷网络7*24h智能客服闪电兔:●锐捷网络7*24h技术服务热线:4008-111-000●锐捷网络售后服务工具——小锐云服:/special/fw/tool/xryf/●锐捷网络技术支持与反馈信箱:*********************.cn●锐捷网络文档支持与反馈信箱:**************.cn小锐云服APP 锐捷服务公众号本书约定1. 图形界面格式约定2. 各类标志本书还采用各种醒目标志来表示在操作过程中应该特别注意的地方,这些标志的意义如下:警告表示用户必须严格遵守的规则。
如果忽视此类信息,可能导致数据丢失或设备损坏。
注意表示用户必须了解的重要信息。
如果忽视此类信息,可能导致功能失效或性能降低。
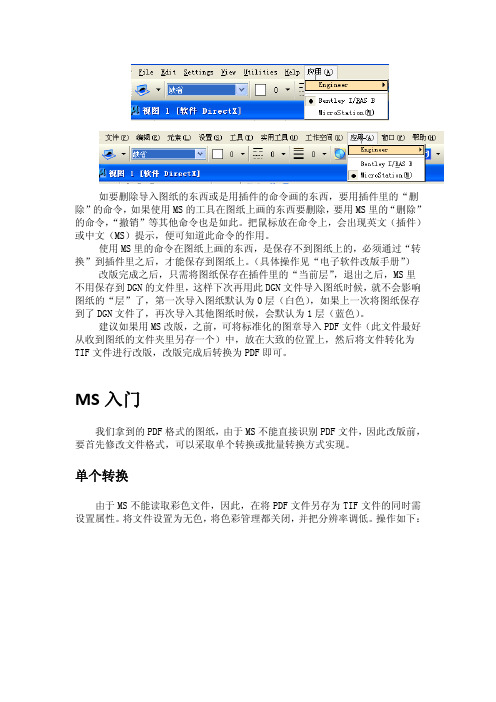
如要删除导入图纸的东西或是用插件的命令画的东西,要用插件里的“删除”的命令,如果使用MS的工具在图纸上画的东西要删除,要用MS里的“删除”的命令,“撤销”等其他命令也是如此。
把鼠标放在命令上,会出现英文(插件)或中文(MS)提示,便可知道此命令的作用。
使用MS里的命令在图纸上画的东西,是保存不到图纸上的,必须通过“转换”到插件里之后,才能保存到图纸上。
(具体操作见“电子软件改版手册”) 改版完成之后,只需将图纸保存在插件里的“当前层”,退出之后,MS里不用保存到DGN的文件里,这样下次再用此DGN文件导入图纸时候,就不会影响图纸的“层”了,第一次导入图纸默认为0层(白色),如果上一次将图纸保存到了DGN文件了,再次导入其他图纸时候,会默认为1层(蓝色)。
建议如果用MS改版,之前,可将标准化的图章导入PDF文件(此文件最好从收到图纸的文件夹里另存一个)中,放在大致的位置上,然后将文件转化为TIF文件进行改版,改版完成后转换为PDF即可。
MS入门我们拿到的PDF格式的图纸,由于MS不能直接识别PDF文件,因此改版前,要首先修改文件格式,可以采取单个转换或批量转换方式实现。
单个转换由于MS不能读取彩色文件,因此,在将PDF文件另存为TIF文件的同时需设置属性。
将文件设置为无色,将色彩管理都关闭,并把分辨率调低。
操作如下:这样,将.pdf的文件转换成.tif格式的文件,MS便可读取了。
分辨率选择为118.11选择要转化的文件存储的位置后,点击“保存”,便可在相应位置找到转化好的.tif格式的文件了。
经此工具转化的.tif格式文件中,如有彩色部分,在MS插件中是不能读取的。
读取TIF文件双击进入,点击菜单:“File”-“Attach”:弹出:点击Browse,选择要读取文件的地址,点击确定。
设置A0图框目的是为了保证打开的图纸大小与A0原图一致。
在MS界面里,按住左键后拖拽一定的区域,将该区域范围设置为A0大小的方法:打开MS,新建一个DGN 文件,画一个A0纸张大小1260mm*891mm的长方形,保存退出后即可在今后每次导入图纸时,都放置在这个固定的区域内,这样能保证每次导入的图纸的比例基本相同。


Microfocus Cobol 安装
一.安装环境检查
1.软件安装必要条件
确认小型机上AIX操作系统正确安装
/opt目录下的空闲空间大小至少有1G
拥有root权限的用户
2.软件运行条件
用户将cobol安装成功后,需要导入开发license 和运行license
二.软件安装过程
将软件解压至/opt/microfocus/cobol目录下,如果没有该目录,先创建该目录
安装完毕后,会生成/opt/microfocus/cobol/bin的目录
三.导入许可证
1.运行许可证安装
进入目录/opt/microfocus/mflmf
运行mflmadm(注意:安装前确认你的窗口是80*25字符的大小,否则程序显示的界面会发生问题)
按F3,输入序列号,按TAB键,输入KEY,在敲回车,F3;
敲F7,刷新License
敲ESC,退出
2.开发许可证安装
进入目录/opt/microfocus/cobol/aslmf
运行./apptrack
选择3,输入密码,敲回车
选择6,刷新许可证
选择9,退出
四.验证COBOL安装
编译一个COBOL程序,
compilecob test.COB
如果返回码为0,表示编译成功
验证完毕。
丛文录音服务器安装操作手册2016年1月版权说明本手册版权归深圳市丛文安全电子有限公司所有。
保留一切版权。
除了版权法允许的使用方法之外,未经事先许可,任何人不得复制、改编或翻译。
保证说明本手册所含之内容如有改变,恕不另行通知。
深圳市丛文安全电子有限公司对由于本手册的错误而引起的损害不承担责任,对由于提供或使用本手册而随带发生的损害亦不承担责任。
商标说明丛文®是深圳市丛文安全电子有限公司的注册商标。
CONWIN®是深圳市丛文安全电子有限公司的注册商标。
简介目录第1章系统功能概述 (2)1.1简介 (2)1.2功能特点 (2)1.3产品型号 (2)1.4系统结构及流程图 (2)1.5录音服务器安装流程图 (3)第2章安装录音服务器 (4)2.1安装环境 (4)硬件环境 (4)软件环境 (4)2.2硬件板卡安装 (4)硬件安装 (4)录音服务器2线/4线板卡接线方法 (4)录音服务器8线板卡接线方法 (8)2.3软件安装 (10)2.4卸载 (15)第3章录音服务器应用 (16)3.1系统功能 (16)系统设置 (16)录音设置 (16)查看语音卡安装及录音情况 (19)系统登陆与注销 (20)登陆密码管理 (21)3.2查看信息资料 (21)录音记录管理 (21)站点信息 (22)查看系统错误信息 (23)第4章报警中心启用录音服务器设置 (24)4.1启用录音服务器 (24)4.2录音并关联警情 (24)自动拨打电话关联警情 (24)手动关联相关警情 (26)查看相关的报警 (27)导出录音文件 (27)播放录音文件 (27)第5章售后服务 (29)第6章加密锁安装及升级方法 (30)简介第1章 系统功能概述1.1 简介录音服务器应用于接警中心领域,通过联网报警中心软件拨打用户电话,减少手动拨打出现的出错几率并与用户确警的电话进行全程录音,同时录音文件会与当时发生的警情自动相互关联,以备日后在查看警情的同时播放录音文件,为报警中心与公安机关留下关键有力的证据。
Micro Focus SecurityWiNC on CHASoftware Version:8.3.0Installation Guide for WiNC on Connector Hosting ApplianceDocument Release Date:February2022Software Release Date:February2022Legal NoticesMicro FocusThe Lawn22-30Old Bath RoadNewbury,Berkshire RG141QNUKhttps://Copyright Notice©Copyright2022Micro Focus or one of its affiliatesConfidential computer software.Valid license from Micro Focus required for possession,use or copying.The information contained herein is subject to change without notice.The only warranties for Micro Focus products and services are set forth in the express warranty statements accompanying such products and services.Nothing herein should be construed as constituting an additional warranty. Micro Focus shall not be liable for technical or editorial errors or omissions contained herein.No portion of this product's documentation may be reproduced or transmitted in any form or by any means,electronic or mechanical,including photocopying,recording,or information storage and retrieval systems,for any purpose other than the purchaser's internal use,without the express written permission of Micro Focus.Notwithstanding anything to the contrary in your license agreement for Micro Focus ArcSight software,you may reverse engineer and modify certain open source components of the software in accordance with the license terms for those particular components.See below for the applicable terms.ernmental Rights.For purposes of your license to Micro Focus ArcSight software,“commercial computer software”is defined at FAR2.101.If acquired by or on behalf of a civilian agency,the ernment acquires this commercial computer software and/or commercial computer software documentation and other technical data subject to the terms of the Agreement as specified in48C.F.R.12.212(Computer Software)and12.211(Technical Data)of the Federal Acquisition Regulation(“FAR”)and its successors.If acquired by or on behalf of any agency within the Department of Defense(“DOD”),the ernment acquires this commercial computer software and/or commercial computer software documentation subject to the terms of the Agreement as specified in48C.F.R.227.7202-3of the DOD FAR Supplement(“DFARS”)and its successors.This ernment Rights Section18.11is in lieu of,and supersedes,any other FAR,DFARS,or other clause or provision that addresses government rights in computer software or technical data.For information about legal notices,trademarks,disclaimers,warranties,export and other use restrictions,ernment rights,patent policy,and FIPS compliance,see https:///about/legal/. Trademark NoticesAdobe™is a trademark of Adobe Systems Incorporated.Microsoft®and Windows®are U.S.registered trademarks of Microsoft Corporation.UNIX®is a registered trademark of The Open Group.Documentation UpdatesThe title page of this document contains the following identifying information:l Software Version numberl Document Release Date,which changes each time the document is updatedl Software Release Date,which indicates the release date of this version of the softwareTo check for recent updates or to verify that you are using the most recent edition of a document,go to:https:///support-and-services/documentationSupport Phone A list of phone numbers is available on the Technical SupportPage: https:///support-contact-informationSupport Web Sitehttps:///ArcSight Product Documentationhttps:///documentation/arcsight/Contact InformationRevision HistoryContentsAbout This Guide5 Product Overview5 Prerequisites7 Windows Server VM7 Management Software7 Setting Up the Windows Server2019VM on the Appliance8 Enabling SSH on the Appliance8 Connecting to VNC to Manage the Windows VM8 Setting Up the Appliance for Windows Installation10 Installing WiNC on the Windows Server2019VM12 Installing WiNC ManuallyInstalling WiNC by Local ArcMC12 Managing the Windows Server2019VM13 Replicating a VM in Other Systems14Send Documentation Feedback15About This GuideThis guide provides information about deploying the WiNC SmartConnector on the ArcSightG10C6700CHA.Product OverviewConnector Hosting Appliance(CHA)is a hardened Linux-based hardware platform that incorporates ArcSight Management Center(ArcMC)as well as on-board hosting of SmartConnectors.For more information,see ArcSight Management Center Administrator's Guide.ArcSight SmartConnectors provide easy,scalable,and audit-quality collection of logs from event generating sources across the enterprise for real-time and forensic analysis.The SmartConnectors are optimized for remote event-collection from a large number of hosts without requiring the installation of a local agent.For more information,see ArcSight SmartConnector Users Guide.SmartConnector for Microsoft Windows Event Log–Native(WiNC)helps to deliver critical Windows monitoring features,such as Operational Windows Event Logs and event collection and event filtering from IPv6hosts.It leverages native Microsoft platform technology and provides the best support for Windows event features and capabilities(including collection for all Windows log types).For more information,see SmartConnector for Microsoft Windows Event Log-Native Configuration Guide.As the WiNC SmartConnector requires a native Windows Server platform for installation,there is now a scalable mechanism to deploy the WiNC on the Linux-based CHA hardware appliance by leveraging standard Virtual Machine(VM)technology and function-based scripting to effectively deploy and manage the WiNC running a VM on the CHA platform.Once deployed,the WiNC instance(s)can be fully monitored and managed like any other remote or embedded SmartConnector through the ArcMC User Interface.The following diagram helps you understand the WiNC on CHA installation architecture:By leveraging the CHA appliance in this way,no additional physical host system needs be provisioned for the successful deployment of the WiNC SmartConnector.It is installed into theVM hosted in the physical CHA system.PrerequisitesWindows Server VMThe ArcSight administrator is responsible for building the Windows2019Server Core VM image,hardening it,and keeping it up-to-date with OS patches and other ongoing maintenance.This document describes how to create the initial image and the functions provided in the management scripts supporting installation and overall VM management.How the image is hardened,patched and otherwise kept up-to-date is determined by the administrator according to enterprise’s requirements.The Kernel-based Virtual Machine(KVM)hypervisor hosts and manages this VM image.After the Windows Server2019VM is booted into KVM,the WiNC software is installed and configured into this VM.Management SoftwareEnsure that you have the following software applications and operating system(OS)before installing WiNC on CHA:l G10C6700CHA with RHEL7.7or RHEL7.9and ArcMC2.9.x or laterNote:If G10c6700CHA has RHEL7.7consume ArcSight_WiNC_Hosting_Appliance.8.1.Xor8.2.X build.If G10C6700has RHEL7.9consume ArcSight_WiNC_Hosting_Appliance.8.3.X build.l Windows Server2019Core image in ISO format(preferably hardened)l Windows Server2019license keyl WiNC appliance installer from Micro Focusl PuTTY or similar SSH client applicationl A VNC client application such as Tiger VNC Viewer,VNC Viewer,or TightVNC Viewer, which is used to manage the Windows VMl ArcSight SmartConnector package version7.15.0or laterSetting Up the Windows Server2019VM on the ApplianceThis section provides information for setting up the Windows Server2019as a Core VM on the appliance.Ultimately,the Windows Server2019Core VM will have WiNC SmartConnector setup.Enabling SSH on the ApplianceBefore setting up the Windows Server2019as a VM,ensure that you enable SSH access on the appliance.By default,SSH access to your appliance is disabled.For optimal security purposes, enable SSH access only when necessary.For example,when troubleshooting.To enable SSH access on your appliance:1.Log in to the ArcSight Management Center console.2.Click Administration>Setup>System Admin.3.In the left navigation pane,under System,click SSH.4.In the SSH Configuration page,under SSH Status,select Enabled.5.In the Change SSH Status dialog,select Yes.Connecting to VNC to Manage the Windows VMThis section describes about enabling Virtual Network Computing(VNC)to manage the Windows system after installation.To connect to VNC,establish an SSH session to CHA using VNC over an SSH tunnel by performing the following steps.This session is used to access the WiNC appliance subsequently: 1.Connect to your required SSH client such as PuTTY.Create a session with the CHAappliance(C6600or C6700).2.In the left pane,select Session.Enter the Hostname(or IP address)of the CHA applianceand enter22for the Port field.3.Select the Connection Type as SSH and click Open to start the SSH terminal.4.Connect and log in to the CHA as the root user.5.After logging in to the CHA,right-click the SSH window header and select Change Settingsfrom the window menu.6.In the PuTTY Configuration window,under Category,go to Connection>SSH>Tunnels.7.In the Source port field,enter5901to configure a tunnel for VNC on the port5900.8.In the Destination field,enter127.0.0.1:5900,and then click Add.The created tunnel appears in the left pane,under SSH list.Setting Up the Appliance for Windows InstallationRHEL7.7or RHEL7.9comes with the default capabilities of KVM.To manage the additional capabilities and install all the dependencies provided in the installer script:1.Log in to the appliance and download the appliance build:ArcSight_WiNC_Hosting_Appliance.8.3.0.xxxxx.0.tgz.2.Extract the ArcSight_WiNC_Hosting_Appliance.8.3.0.xxxxx.0.tgz zip zip file to the/opt directory.This directory contains the following files and folder:l arcmcConfig.ps1l Dependenciesl WiNC_CHA_Installer.sh3.Run the./WiNC_CHA_Installer.sh script.Choose option1to install the WiNC applianceand follow the instructions provided in the script.After the installation is complete,re-establish the PuTTY session.4.Connect to the the VNC viewer and complete the Windows installation.After theinstallation is complete,a VM will shut down and the VNC viewer will be disconnected automatically.Refer to"Connecting to VNC to Manage the Windows VM"on page 8for instructions.5.Open the PuTTy session and run the following command.virsh start WiNC_CHA_VM6.Open the VNC viewer and PowerShell command-line editor.Refer to"Connecting to VNCto Manage the Windows VM"on page 8for instructions.7.Run the following command and copy the.\arcmcConfig.ps1Powershell script to theWindows VM:scp root@cha_ip:/scipt_path/arcmcConfig.ps1c:\your_windows_path8.Run the the.\arcmcConfig.ps1Powershell script to configure WinRM and add therequired firewall polices.Note:The.\arcmcConfig.ps1Powershell script enables WinRM and creates the requiredfirewall policies to install the connector through ArcMC.9.After creating an image,rerun the./WiNC_CHA_Installer.sh script and choose option7to make a backup of the appliance image.The following backup file will be created:l WiNC_CHA_VM_Image.qcow2Note:If you cannot connect to the VNC viewer and encounter the following error,run theWiNC_CHA_VM script with option6that enabled VNC access mode of SElinux for Windowsappliance.After running the script,connect through the VNC viewer and launch PowerShell.The Windows setup is ready with all the configurations and is available to replicate in any other required systems.For more information,see Replicating a VM in Other Systems.Installing WiNC on the Windows Server2019VM This section provides information about installing the WiNC SmartConnector on the Window Server2019VM by using any of the following methods:Installing WiNC Manually1.Copy the WiNC Windows installer file into the/opt directory on CHA.2.Open the VNC viewer and connect to the WiNC appliance.3.On the command prompt,enter the following command to access the Windows PowerShellcommand-line editor:powershell4.Enter the following command to copy the WiNC installer from CHA to WiNC appliance:scpFor example:scp root@CHA_IP:/opt/WiNC_Installer C:\Your_Location5.You can install multiple instances of WiNC to gather local and other WiNC appliancehosted logs.For more information about installing WiNC,refer to the MS Windows Event Log–Native SmartConnector(WiNC)Configuration guide available on the Micro FocusCommunity page.Installing WiNC by Local ArcMCLocal ArcMC is the ARcMC running on the same CHA.To install the WiNC SmartConnector on the Windows Server2019VM through a local ArcMC: Go to the ArcSight Management Center console and install WiNC using the One Click/Instant deployment feature.For more information,refer to the Instant Connector Deployment section in the ArcSight Management Center Administrator's Guide,available on the Micro Focus Community page.Managing the Windows Server2019VMThe WiNC Connector Management script is a configuration file that enables you to install WiNC on CHA and also manage the Windows server VM.This section provides information about understanding all the installer script options and their capabilities.The following table provides information about the different options the script provides:Replicating a VM in Other SystemsPerform the following steps to automatically replicate the Windows setup in any targeted machine using the installer script:To prepare a package for the VM replication:1.Run the./WiNC_CHA_Installer.sh installer script.2.After setting up the Windows Server2019Core VM,rerun the WiNC_CHA_Installer.shscript and choose option7to make a back up of the VM.The backup VM image is created as WiNC_CHA_VM_Image.qcow2in the folder where you are running the WiNC_CHA_ Installer.sh script.Ensure the following files and folder are present in this folder:l Dependenciesl WiNC_CHA_Installer.shl arcmcConfig.ps1l WiNC_CHA_VM_Image.qcow23.Choose option9to exit the script.4.Create a zipped folder of the following files:l Dependenciesl WiNC_CHA_Installer.shl arcmcConfig.ps1l WiNC_CHA_VM_Image.qcow2To replicate the VM in another G10appliance:1.Copy the zipped folder to any other ArcMC appliance.2.Enable SSH on your appliance.3.Connect to VNC to Manage the Installed Windows VM.4.Unzip the folder.5.Run the./WiNC_CHA_Installer.sh installer script.6.Choose option1from the installer script to start the installation.Now,the VM is ready and available to setup the WiNC connector.Send Documentation FeedbackIf you have comments about this document,you can contact the documentation team by email. If an email client is configured on this computer,click the link above and an email window opens with the following information in the subject line:Feedback on Installation Guide for WiNC on Connector Hosting Appliance(WiNC on CHA 8.3.0)Just add your feedback to the email and click send.If no email client is available,copy the information above to a new message in a web mail client,and send your feedback to*************************************.We appreciate your feedback!。
1. In your Web browser, go to Micro Cloud Foundry.
2. Log in with your Cloud Foundry email and password. (Click sign up if you need an account.)
3. Check the box to accept the End User License Agreement, and click Accept.
4. Enter a unique domain name for your Micro Cloud Foundry. The name you enter is checked in real-time so you
can see if it is available.
5. Click Create.
Your new domain name is reserved and a configuration token is created for you.
6. Write down the configuration token. You will need it in a later step.
7. If you dont have a USB drive with Micro Cloud Foundry or you have an older version you can click download
Micro Cloud Foundry VM and save the file.
Starting the Micro Cloud Foundry Virtual Machine
** If you are using a mac, you can double click install.app to copy, extract and start the Micro Cloud Foundry VM. Otherwise:
1. Unzip/tar the compressed Micro Cloud Foundry VM micro-1.
2.0.zip. This creates the folder micro containing
the virtual machine files.
2. Start VMware Workstation, VMware Fusion, or VMware Player and open the micro/micro.vmx file.
3. Power on the virtual machine.
Configuring the Micro Cloud Foundry Virtual Machine
1. At the Welcome screen, select 1 to configure.
2. Set a password for Micro Cloud Foundry by entering and confirming the new password.
3. At the Select network: prompt, enter 1 to configure networking with DHCP.
4. At the HTTP proxy: prompt, press Enter to choose none for HTTP proxy.
If you are behind an HTTP proxy, enter the URL for the proxy server, for example http://192.168.1.125:8023.
5. Enter the configuration token from the Micro Cloud Foundry Web site.
Welcome to VMware Micro Cloud Foundry version 1.2.0
Network up
Micro Cloud Foundry not configured
1. configure
2. refresh console
3. help
4. shutdown VM
select option: 1
set password Micro Cloud Foundry VM user
Password: ********
Confirmation: ********
Password changed!
1. DHCP
2. Static
Select network: 1
HTTP proxy: |none|
Enter Micro Cloud Foundry configuration token or offline domain name: shock-throw-caption The Micro Cloud Foundry virtual machine verifies your DNS and configures the Micro Cloud.
Note
If you plan to use Micro Cloud Foundry without an Internet connection, enter a fictious domain name instead of the DNS configuration token. This is an advanced configuration option described in Using Micro Cloud Foundry.
Registering a Micro Cloud Foundry User with vmc
Registering a user creates a user account on the Micro Cloud Foundry virtual machine. You log in with this account to publish and manage applications.
In the steps that follow, appname is the domain you registered for your application at the Micro Cloud Foundry Web site. Target your Micro Cloud Foundry. In a shell, enter the following command:
$ vmc target api.appname.cloudfoundry.me
Create a new account using the vmc register command:
$ vmc register
Enter your email address.
Enter a password and confirm it when requested.
$ vmc target api.pubs.cloudfoundry.me
Successfully targeted to [http://api.pubs.cloudfoundry.me]
$ vmc register
Email: myemail@
Password: ********
Verify Password: ********
Creating New User: OK
Successfully logged into [http://api.pubs.cloudfoundry.me]
You are now ready to log in with vmc or set up SpringSource Tool Suite to deploy your applications to Micro Cloud Foundry.。