思科Catalyst2960_初始化配置
- 格式:doc
- 大小:27.00 KB
- 文档页数:2

cisco2960交换机安装配置基础-电脑资料cisco 2960 交换机安装配置基础新设备配置内容:1. interface vlan 1 的ip,gatewayconf tint vlan 1ip address xx.xx.xx.xx 255.255.255.0ip default-gateway ip-addressno shutdownexit2.en的密码3.line vty 0-4 telnet的密码4.wr存盘show interface vlan 1show run将F0/1-10端口加入到VLAN20中,对应以下命令interface range f0/1 -10switchport mode acccessswitchport access vlan 20注意,f0/1后面有个空格,然后才是-10cisco 2950 常用配置命令产品相关命令1、配置IP地址交换机要能够被网管,必须给它标识一个管理IP地址,默认情况下CISCO交换机的VLAN 1为管理VLAN,为该VLAN配上IP 地址,交换机就可以被网管了,。
命令如下:a、进入全局模式: Switch#configure terminalb、进入VLAN 1接口模式:Switch(config)#interface vlan 1c、配置管理IP地址:Switch(config-if) # ip address [A.B.C.D] [mask]如果当前VLAN 不是管理VLAN ,只需要将上面第b处命令的vlan 的号码换成管理VLAN的号码即可。
2、打开SNMP协议a、进入全局模式: Switch#configure terminalb、配置只读的Community,产品默认的只读Community名为publicSwitch(config)#snmp-server community public roc、配置可写的Community,产品默认的可写Community名为privateSwitch(config)#snmp-server community private rw3、更改SNMP的Community密码a、将设备分组,并使能支持的各种SNMP版本Switch(config)#snmp-server group qycx123 v1Switch(config)#snmp-server group qycx 123 v2cSwitch(config)#snmp-server group qycx123 v3 noauthb、分别配置只读和可写community 如:Switch(config)#snmp-server community qycx123 roSwitch(config)#snmp-server community qycx123 rw4、保存交换机配置Switch#copy run start常用命令1、设置交换机密码a、更改远程TELNNET密码Switch#configure terminalSwitch(config)#line vty 0 4Switch(config-line)#password qycx123Switch(config-line)#loginSwitch(config-line)#exitb、更改进入全局配置模式时的密码Switch#configure terminalSwitch(config)#enable secret qycx1232、创建并划分VLANa、创建VLANSwitch#vlan databaseSwitch(vlan)#vlan 99 name office(创建vlan 99 并命名为office)b、将端口划分至vlanSwitch(config)#interface fastEthernet 0/8Switch(config-if)#switchport mode accessSwitch(config-if)#switchport access vlan 99(将8号快速以太口划分至vlan 99)3、常用调试命令a、显示所有配置命令:Switch#show runb、显示所有接口状态:Switch#show ip int briefc、显示所有VLAN的信息:Switch#show vlan briefCisco之line vty线路使用Cisco的设备管理有很多种方式,如Console、HTTP、TTY、VTY或其它网管软件,但我们远程管理较为常用的一种方式肯定是VTY方式。

Cisco2960交换机的基础安装配置教程Cisco 2960交换机的基础安装配置教程的方法分类:新设备配置内容:1. interface vlan 1 的ip,gatewayconf tint vlan 1ip address xx.xx.xx.xx 255.255.255.0ip default-gateway ip-addressno shutdownexit2.en的密码3.line vty 0-4 telnet的密码4.wr存盘show interface vlan 1show run将F0/1-10端口加入到VLAN20中,对应以下命令interface range f0/1 -10switchport mode acccessswitchport access vlan 20注意,f0/1后面有个空格,然后才是-10cisco 2950 常用配置命令产品相关命令1、配置IP地址交换机要能够被网管,必须给它标识一个管理IP地址,默认情况下CISCO交换机的VLAN 1为管理VLAN,为该VLAN配上IP 地址,交换机就可以被网管了。
命令如下:a、进入全局模式: Switch#configure terminalb、进入VLAN 1接口模式:Switch(config)#interface vlan 1c、配置管理IP地址:Switch(config-if) # ip address [A.B.C.D] [mask]如果当前VLAN 不是管理VLAN ,只需要将上面第b处命令的vlan的号码换成管理VLAN的号码即可。
2、打开SNMP协议a、进入全局模式: Switch#configure terminalb、配置只读的Community,产品默认的只读Community名为publicSwitch(config)#snmp-server community public roc、配置可写的Community,产品默认的可写Community名为privateSwitch(config)#snmp-server community private rw3、更改SNMP的Community密码a、将设备分组,并使能支持的各种SNMP版本Switch(config)#snmp-server group qycx123 v1Switch(config)#snmp-server group qycx 123 v2cSwitch(config)#snmp-server group qycx123 v3 noauthb、分别配置只读和可写community 如:Switch(config)#snmp-server community qycx123 ro Switch(config)#snmp-server community qycx123 rw 4、保存交换机配置Switch#copy run start常用命令1、设置交换机密码a、更改远程TELNNET密码Switch#configure terminalSwitch(config)#line vty 0 4Switch(config-line)#password qycx123Switch(config-line)#loginSwitch(config-line)#exitb、更改进入全局配置模式时的密码Switch#configure terminalSwitch(config)#enable secret qycx1232、创建并划分VLANa、创建VLANSwitch#vlan databaseSwitch(vlan)#vlan 99 name office(创建vlan 99 并命名为office)b、将端口划分至vlanSwitch(config)#interface fastEthernet 0/8Switch(config-if)#switchport mode accessSwitch(config-if)#switchport access vlan 99(将8号快速以太口划分至vlan 99)3、常用调试命令a、显示所有配置命令:Switch#show runb、显示所有接口状态:Switch#show ip int briefc、显示所有VLAN的信息:Switch#show vlan brief 交换机支持的命令1. linux 命令:PCA login: root ;使用root用户password: linux ;口令是linux# shutdown -h now ;同init 0 关机# logout# login# ifconfig ;显示IP地址# ifconfig eth0 netmask ;设置IP地址# ifconfig eht0 netmask down ; 删除IP地址# route add 0.0.0.0 gw# route del 0.0.0.0 gw# route add default gw ;设置网关# route del default gw ;删除网关# route ;显示网关# ping# telnet2. 交换机支持的命令:交换机基本状态:switch: ;交换机的ROM状态rommon 路由器的ROM状态hostname 用户模式hostname# ;特权模式hostname(config)# ;全局配置模式hostname(config-if)# ;接口状态交换机口令设置:switch enable ;进入特权模式switch#config terminal ;进入全局配置模式switch(config)#hostname ;设置交换机的主机名switch(config)#enable secret xxx ;设置特权加密口令switch(config)#enable password xxa ;设置特权非密口令switch(config)#line console 0 ;进入控制台口switch(config-line)#line vty 0 4 ;进入虚拟终端switch(config-line)#login ;允许登录switch(config-line)#password xx ;设置登录口令xxswitch#exit ;返回命令交换机VLAN设置:switch#vlan database ;进入VLAN设置switch(vlan)#vlan 2 ;建VLAN 2switch(vlan)#no vlan 2 ;删vlan 2switch(config)#int f0/1 ;进入端口1switch(config-if)#switchport access vlan 2 ;当前端口加入vlan 2 switch(config-if)#switchport mode trunk ;设置为干线switch(config-if)#switchport trunk allowed vlan 1,2 ;设置允许的vlanswitch(config-if)#switchport trunk encap dot1q ;设置vlan 中继switch(config)#vtp domain ;设置发vtp域名switch(config)#vtp password ;设置发vtp密码switch(config)#vtp mode server ;设置发vtp模式switch(config)#vtp mode client ;设置发vtp模式交换机设置IP地址:switch(config)#interface vlan 1 ;进入vlan 1 switch(config-if)#ip address ;设置IP地址switch(config)#ip default-gateway ;设置默认网关switch#dir flash: ;查看闪存交换机显示命令:switch#write ;保存配置信息switch#show vtp ;查看vtp配置信息switch#show run ;查看当前配置信息switch#show vlan ;查看vlan配置信息switch#show interface ;查看端口信息switch#show int f0/0 ;查看指定端口信息3. 路由器支持的命令:路由器显示命令:router#show run ;显示配置信息router#show interface ;显示接口信息router#show ip route ;显示路由信息router#show cdp nei ;显示邻居信息router#reload ;重新起动路由器口令设置:router enable ;进入特权模式router#config terminal ;进入全局配置模式router(config)#hostname ;设置交换机的主机名router(config)#enable secret xxx ;设置特权加密口令router(config)#enable password xxb ;设置特权非密口令router(config)#line console 0 ;进入控制台口router(config-line)#line vty 0 4 ;进入虚拟终端router(config-line)#login ;要求口令验证router(config-line)#password xx ;设置登录口令xxrouter(config)#(Ctrl+z) ; 返回特权模式router#exit ;返回命令路由器配置:router(config)#int s0/0 ;进入Serail接口router(config-if)#no shutdown ;激活当前接口router(config-if)#clock rate 64000 ;设置同步时钟router(config-if)#ip address ;设置IP地址router(config-if)#ip address second ;设置第二个IProuter(config-if)#int f0/0.1 ;进入子接口router(config-***if.1)#ip address ;设置子接口IProuter(config-***if.1)#encapsulation dot1q ;绑定vlan中继协议router(config)#config-register 0x2142 ;跳过配置文件router(config)#config-register 0x2102 ;正常使用配置文件router#reload ;重新引导路由器文件操作:router#copy running-config startup-config ;保存配置router#copy running-config tftp ;保存配置到tftprouter#copy startup-config tftp ;开机配置存到tftprouter#copy tftp flash: ;下传文件到flashrouter#copy tftp startup-config ;下载配置文件ROM状态:Ctrl+Break ;进入ROM监控状态rommon confreg 0x2142 ;跳过配置文件rommon confreg 0x2102 ;恢复配置文件rommon reset ;重新引导rommon copy xmodem: flash: ;从console传输文件Cisco 2960设置管理地址问题我这里有个2960,准备配置管理地址,配置应该没有问题,可是就是无法连通,在此台2960上也无法Ping通网关,相关配置如下interface GigabitEthernet0/2switchport mode trunkspanning-tree link-type point-to-pointinterface Vlan241ip address 192.168.241.53 255.255.255.0no ip redirectsno ip unreachablesno ip proxy-arpno ip route-cache!ip default-gateway 192.168.241.1交换机工作正常,但是使用Show inter vlan241,发现接口处于Down状态,使用No shutdown 命令也没有用,不知道怎么回事情?是不是和VTP有关?谢谢!网友1;方法两个:1、把你见vlan号给删除,给vlan1配置ip地址2、修改你配置vlan的native vlan网友2:cisco的vlan1默认为管理vlan,只要给它配各地址就行了网友3:1.show vlan看本交换机有没有VLAN241如果没有可以手工添加上去或者启用VTP学习2.show int g0/2 trunk信息网友4:1、show vlan brief 看一下有没有这个vlan2、如果数据vlan和管理vlan分开,看看上联的trunk起来没有网友5:29交换机管理VLAN默认就是VLAN1,你的问题有两种方法: 1、取消VLAN241的IP地址interface vlan 1ip add 192.168.241.53 255.255.255.02、是将VLAN241设置成管理VLANinterface vlan 241ip add 192.168.241.53 255.255.255.0management-----------是将该VLAN设置成管理VLAN你任选一种就可以的Cisco 2960交换机中如何绑定IP与MAC地址请问:在2960交换机中如何进行端口MAC地址绑定,并同时绑定IP与MAC地址?网友1:conf tarp 192.168.1.1 0000.1001.2200 arpa fa0/1网友2:IP地址与MAC地址的关系:IP地址是根据现在的IPv4标准指定的,不受硬件限制长度4个字节。
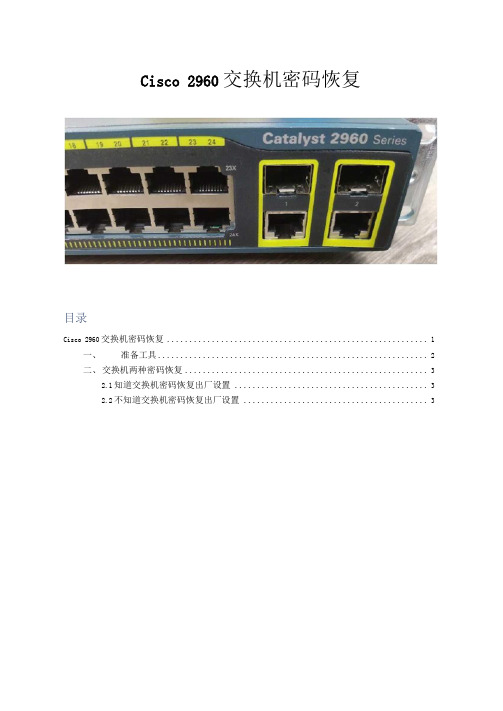
Cisco 2960交换机密码恢复目录Cisco 2960交换机密码恢复 (1)一、准备工具 (2)二、交换机两种密码恢复 (3)2.1知道交换机密码恢复出厂设置 (3)2.2不知道交换机密码恢复出厂设置 (3)、准备工具串口线,串口・USB 线USB 一端接电脑USB 口,另一端接交换机console 口: 确保电脑有串口端口(没有的需要安装usb-232驱动);"2 GZIDC-PC>••42 DVD/CD -ROM 驱般> IDE ATA/ATAPI 担制器 >B 处理器> —瞬(COM ?□ LPT)IL-?T Prolific USB-to-Serial Comm Port (COM3)IW H W — ------- 1【竺每台电脑的串旦可能忝士榜 個其他潍打痔人体溝入「彳 芦音、视频和游戏控制器i> a 鼠^OM 他指针诙通用串行总邂制器古计算机管理]本地) ,腿該工員> ©矽计划聞 >闵剰牛襲器t> fij 共享文件夹0曼本i 蝴户和■徑冃1 国鯉莒理t>去服勢和逾用程序二、交换机两种密码恢复2. 1知道交换机密码恢复出厂设置SZswitch>enablePassword:SZswitchstartup-configErasing the nvram filesystem will remove all configuration files! Continue? [confirm] 按回车[OK]Erase of nvram: completeSZswitch#*Mar 1 00:48:40.342: %SYS-7-NV_BLOCK_INIT: Initialized the geometry of nvramSZswitch#reloadSystem configuration has been modified・ Save? [yes/no]: noProceed with reload? [confirm] hl| 车Would you like to enter the initial configuration dialog? (yes/no]: noSwitch>e nSwitch#show runBuilding configuration...2. 2不知道交换机密码恢复出厂设置Cisco交换机与路由器的密码恢复是不一样的,交换机没有电源开关(也就是说接上电源就启动了),如何恢复,但又使配置文件不变呢?使用secureCRT连接E 保存会话S 目在一个标签中打开on [ 连接」I 取消实操:首先拔掉交换机电源.在把电源插进交换机,快速按交换机MODE 键然后松开就进 入了SWITCH 模式了。

catalyst2960交换机说明书
第1步请确保交换机上未连接任何设备。
第2步在“快速安装”过程中,交换机将充当一台DHCP服务器。
如果您的PC拥有静态IP地址,那么请临时更改您的PC设置使用DHCP,然后继续下一步。
第3步将交流电源线连接至交换机电源和接地交流插座,给交换机通电。
第4步按住Mode按钮直至其上方的所有LED均变成绿色。
您可
能需要按住按钮3秒以上。
Mode按钮上方的所有LED均变成绿色后,松开Mode按钮。
第5步在网络浏览器中输入IP地址10.0.0.1,然后按下Enter。
出现提示时,输入默认密码:cisco。
第6步在“快速安装”窗口中输入必填的设置。
注意所有条目均须为英文字母和数字。
第7步将交换机与PC断开,然后在您的网络中安装交换机。

Cisco 2960交换机密码恢复目录Cisco 2960交换机密码恢复 (1)一、准备工具 (2)二、交换机两种密码恢复 (3)2.1 知道交换机密码恢复出厂设置 (3)2.2 不知道交换机密码恢复出厂设置 (3)一、准备工具串口线,串口-USB线USB一端接电脑USB口,另一端接交换机console口;确保电脑有串口端口(没有的需要安装usb-232驱动);二、交换机两种密码恢复2.1 知道交换机密码恢复出厂设置SZswitch>enablePassword:SZswitch#erase startup-configErasing the nvram filesystem will remove all configuration files! Continue? [confirm] 按回车[OK]Erase of nvram: completeSZswitch#*Mar 1 00:48:40.342: %SYS-7-NV_BLOCK_INIT: Initialized the geometry of nvramSZswitch#reloadSystem configuration has been modified. Save? [yes/no]: noProceed with reload? [confirm] 回车Would you like to enter the initial configuration dialog? [yes/no]: noSwitch>enSwitch#show runBuilding configuration...2.2 不知道交换机密码恢复出厂设置Cisco交换机与路由器的密码恢复是不一样的,交换机没有电源开关(也就是说接上电源就启动了),如何恢复,但又使配置文件不变呢?使用secureCRT连接实操:首先拔掉交换机电源,在把电源插进交换机,快速按交换机MODE键然后松开就进入了SWITCH模式了。
Catalyst2960配置步骤1 、需要科技处提供VLAN _ID和IP地址,掩码,网关;2 、2960初始化的IP地址为10.0.0.1,默认启用DHCP,为了方便连接,可将计算机的IP 地址设置为10.0.0.2,掩码255.255.255.0,用一根直通线连接此计算机;3 、另一端连接交换机任意Ethernet口,按交换机上的Reset键直到Reset键左边除第2个和第3个以外所有的LED为绿色进入交换机快速设置模式;4、打开IE,在地址栏输入http://10.0.0.1,可进入交换机的快速设置界面;5、在快速设置界面上,第1行输入VLAN_ID;6、在第2行给交换机设置一个IP地址和掩码;7、第3行输入设置网关;8、第6行启用telnet;9、第7行设置telnet登录密码;10、保存设置后交换机会自动重新启动;11、在计算机IE地址栏输入http://95.*.*.*(即新分配给交换机的IP地址),可以进入交换机的设备管理界面,证明设置成功;12、在设备管理界面左边的树形菜单中,可以查看交换机到各个端口已经划分到新的VLAN 中,如果有误可telnet登录到交换机重新进行配置,如果设置不成功可以初始化交换机重新进行配置,具体方法是:按住交换机Reset键直到Reset键左边所有LED处于时亮时灭的状态,然后交换机会自动重新启动初始化为出厂设置,再重复上述步骤直到设置成功为止;13、在计算机“开始”->“运行”中输入cmd进入command窗口,在提示符后输入telnet 95.*.*.*并在接下来的password:后输入刚才设置的密码登录到交换机;14、在switch>提示符后输入enable进入特权模式;15、在switch(enable)#提示符后输入show vlan可以查看各个端口的配置情况;16、在switch(enable)#提示符后输入exit;17、交换机不能启用端口汇聚Trunk功能,设置步骤如下:在switch#提示符后输入configure在switch(config)#提示符后输入interface在switch(config-if)#提示符后输入switchport mode access在switch(config-if)#提示符后输入switchport access vlan vlan_id在switch(config-if)# 提示符后输入end。
CISCO2960交换机的基本配置1、2960交换机所需要进行的配置项目交换机的主机名、进入enable模式的密码、远程登陆的用户名和密码及设置、管理vlan 的IP地址、交换机的默认网关、交换机的端口、SNMP服务、交换机时间设置等。
这些和之前的2950交换机都是一样的,2960交换机和2950相比增加了限速等功能,由于今后客户新上架除了签署了流量合同的其他都要在交换机的端口上做限速。
2、2960交换机配置时的注意事项首先也是十分重要的一点就是,在交换机的配置没有完成前,特别是VTP模式的配置(一般情况下VTP的初始模式因配置为transparent模式)没有完成前禁止将交换机接入网络,以免使网络中的VLAN信息发生改变,因当使用console线对其进行配置。
在刚开始配置2950的时候由于还没有设置密码,处于安全方面的考虑不要将其接入网络,因使用console口对其进行配置。
交换机刚加电启动时所有的端口会进行自检,开始时每个端口上的指示灯会呈琥珀色经过一段时间后熄灭。
系统的指示等默认情况下会亮在SYST和 STAT两个灯上。
3、2960交换机的配置流程交换机启动后使用console线对其进行设置。
Console线使用的是串行接口,串行口与电脑的串行口相连(如电脑没有串行口可以使用转接器连接),RJ-45的接头和交换机的console口相连。
线连好后在windows上点击开始→程序→附件→通讯→超级终端,在跳出新建连接对话框后在名称一栏中填入想要新建的连接名称,然后确定。
接着所连接的COM 口,在COM1属性里波特率选择“9600”,数据位选择“8”,奇偶效验选择“无”,停止位选择“1”,流量控制选择“无”;或直接点击“还原默认值”,确定进入2950配置界面。
2950如第一次启动会出现对话配置模式选项,选择yes进入对话配置模式,选择no进入CLI命令行界面。
以下配置都在CLI模式下进行。
在CLI模式下交换机显示:switch>在此输入命令switch> 用户模式switch>enable 进入特权模式switch# configure terminal 进入配置模式switch(config)# 配置模式设置主机名switch(config)#hostname 主机名一般情况下主机名的设置规则是switch后面跟交换机编号,如switch20、switch21等设置enable密码switch(config)#enable secret 密码设置密码时使用secret命令,因为它比password命令有更好的安全性,密码用Password Agent软件随机生成12位包含数字和大小写字母的密码设置远程登陆的switch(config)# username 用户名privilege 权限secret 密码用户名、权限和密码在设置权限参数时一般填0,用户名统一为netmaster,密码用Password Agent软件随机生成12位包含数字和大小写字母的密码对所设置的密码switch(config)# service password-encryption进行加密设置管理vlan和switch(config)# interface vlan1 进入管理vlan的配置默认网关switch(config-if)# ip address IP地址子网掩码设置管理vlan的IP,远程登陆使用此IPswitch(config-if)#no shutdown 启用管理vlanswitch(config-if)#exit 退出管理vlan的配置switch(config)# ip default-gateway IP地址设置默认网关设置交换机端口switch(config)# interface FastEthernet 0/1 进入交换机的1号端口switch(config-if)# description uplink port 对端口进行描述,默认时交换机1号口为上连口switch(config-if)# switchport mode trunk 将上连口设为trunk模式switch(config-if)# speed 100 设置端口速率switch(config-if)# duplex full 端口设为全双工模式switch(config-if) interface range fastEthernet 0/2 -24进入端口2至端口24的配置switch(config-if-range)#shutdown 关闭这些端口,到使用时再打开设置SNMP服务switch(config)#snmp-server community 字符串RO命令允许读访问到任何提交community string为字符串的软件,字符串设置要符合长度8位以上、需包含大小写字母和数字关闭http服务switch(config)#no ip http server 由于开启http服务在全全上存在隐患,因关闭设置vty switch(config)#line vty 0 4 设置telnet为0至4共5条线路switch24(config-line)# login local 使系统在远程登录时使用本地设置的用户名和密码进行验证设置timestamps switch(config)# service timestamps debug datetimeswitch(config)# service timestamps log datetime 默认时debug/log为uptime,改为datetime debug和log 显示时间设置VTP模式switch#vlan database 进入VTP的设置switch (vlan)#vtp transparent 将VTP模式设置为transparent模式设置交换机时间switch#clock set hh:mm:ss保存交换机的设置switch#copy running-config startup-config查看交换机设置switch#show running-config 查看交换机的配置端口流量的限制交换机端口流量的限制是用policy-map来实现的。
思科2960初始化配置CONSOLE口
1. 建立PC到路由器的物理连接,用RS232 CONSOLE线(随交换机带)连接路由器CONSOLE接口和PC的COM口。
2. 在计算机上使用超级终端:打开“开始-程序-附件-通讯-超级终端—新建超级终端”,首先为新建连接设置名称。
然后,设置连接用端口,一般选择COM1,再设置连接参数,设置参数如下:每秒位数为9600,数据位为8,奇偶校
验为无,停止位为1,数据流控制为Xon/Xoff。
不可搞错了!
3. 等待30秒,回车,出现人机对话界面
Would you like to enter the initial configuration dialog? [yes/no]: 是否按提示步骤操作
% Please answer yes or no.
Would you like to enter the initial configuration dialog? [yes/no]: n 输入n(自己手工设置)
Press RETURN to get started!
Switch>. 首先看到的是用户模式
Switch>.enable 输入en(即enable)进入特权模式
Switch#conf t 进入配置模式
Enter configuration commands, one per line. End with CNTL/Z.
Switch(config)#hostname sw2950 给交换机命名
sw2950(config)#enable password Cisco 给交换机配置管理口令(明码的)sw2950(config)#line vty 0 4 给交换机开启远程管理
sw2950(config-line)#pass Cisco! 设置远程管理口令
sw2950(config-line)#login 允许远程登陆
sw2950(config-line)#exit 退出到上级目录
sw2950(config)#int vlan 1 进入vlan1 接口
sw2950(config-if)#no shut 开启此接口
1y13w: %LINK-3-UPDOWN: Interface Vlan1, changed state to up
1y13w: %LINEPROTO-5-UPDOWN: Line protocol on Interface Vlan1, changed state to up
sw2950(config-if)#ip add 192.168.1.2 255.255.255.0 设置此接口地址sw2950(config-if)#exit 退出到上一层
sw2950(config-if-range)#exit 退出到上一级目录
sw2950(config)#end 退到根目录
sw2950#wr 保存配置切记!必须保存,否则重新启动后设置丢失!
4d00h: %SYS-5-CONFIG_I: Configured from console by console
Building configuration...
[OK] (保存好了,已经生效)
设置镜像端口
sw2950>enable
password:
sw2950#conf t 进入配置模式
sw2950(config)#monitor session 1 destination interface fastEthernet0/24 sw2950(config)#monitor session 1 source interface fastEthernet0/19- 23
sw2950(config)#end
sw2950#wr 保存配置。