7寸室内机双向视频说明书(2010-1-18)
- 格式:pdf
- 大小:13.96 MB
- 文档页数:51


LM770T1/LAM770_ENG_LGEPL_MFL414889027 inch Wide TFT colorTV System/Mobile Monitor OWNER’S MANUALLAM770T1/LAM770Before connecting, operating or adjusting thisproduct, please read this instruction bookletcarefully and completely.Main features7-8 Installation9-14 Parts supplied . . . . . . . . . . . . . . . . . . . . . . . . . . . . . . .9 Before installing . . . . . . . . . . . . . . . . . . . . . . . . . . . . .9 Installation order for the stand . . . . . . . . . . . . . . . . . .10 Treatment of monitor cable . . . . . . . . . . . . . . . . . . . .11 Installation of monitor unit . . . . . . . . . . . . . . . . . . .11-12 Installation order for the stand (Rear seat monitor) . . .13 Connection of exterior units . . . . . . . . . . . . . . . . . . . .14 Parts name15-17 Front view . . . . . . . . . . . . . . . . . . . . . . . . . . . . . . . . .15 Rear view . . . . . . . . . . . . . . . . . . . . . . . . . . . . . . . . .16 Remote control . . . . . . . . . . . . . . . . . . . . . . . . . . . . .17 Battery installation . . . . . . . . . . . . . . . . . . . . . . . . . . .17 Operation18-21 Power ON/OFF . . . . . . . . . . . . . . . . . . . . . . . . . . . . .18 Mode conversion . . . . . . . . . . . . . . . . . . . . . . . . . . . .18 Adjusting the volume . . . . . . . . . . . . . . . . . . . . . . . . .18 Mute . . . . . . . . . . . . . . . . . . . . . . . . . . . . . . . . . . . . .18 To enter the FUNCTION menu . . . . . . . . . . . . . . . . .19 Adjusting FUNCTION menu . . . . . . . . . . . . . . . . . . . .19 To enter the TV SETUP menu . . . . . . . . . . . . . . . . . .20 Adjusting TV SETUP menu . . . . . . . . . . . . . . . . . .20-21 Troubleshooting22-23 Specifications242The lightning flash with arrowhead symbol, within an equilateral triangle is intended to alert the user about the presence of uninsulated dangerous voltage within the product’s enclosure that may be of sufficient magnitude to constitute a risk of electric shock.The exclamation point within an equilateral triangle is intended to alert the user to the presence of important operating and maintenance (servicing) instructions in the literature accompanying the appliance.To prevent a user or others from any physical or financial damage, please abide by the following. The following indications describe the degree of danger or damage for the misusage.To reduce the risk of fire or electric shock, do not expose this apparatus to rain or moisture.1. Read these instructions.2. Keep these instructions.3. Heed all warnings4. Follow all warnings.5. Do not use this apparatus near water.6. Clean only with dry cloth.3NoteTV function is only available for LAM770T1.NoteTV function is only available for LAM770T1.5Unplug the device during thunder storms or when not used for a long6Disposal of your old appliance1. When this crossed-out wheeled bin symbol is attached to a product,it means the product is covered by the European Directive 2002/96/EC. 2. All electrical and electronic products should be disposed of separately fromthe municipal waste stream via designated collection facilities appointed by the government or the local authorities.3. The correct disposal of your old appliance will help prevent potentialnegative consequences for the environment and human health.4. For more detailed information about disposal of your old appliance, pleasecontact your city office, waste disposal service or the shop where you purchased the product.7NoteThe LAM770T1 has three signal sources ; AV1, AV2 and TV, but theLAM770 only has two signal sources; AV1 and AV2.LAM770T1 has TV mode when press the mode convention button.The TV function will be had, but the LAM770 does not have TV mode.LAM770T1, when in TV mode , the menu button is pressed the TV tuning menu will be had the CHANNEL, BADD/ERASE, BSOUND SYSTERM, BFINE TUNE, BAUTO MEMORY and ALL RESET FUNCTIONS can be used,but the LAM770 doesn’t have the function.The remote controller is different.the LAM770T1 has 0-9 number buttons, but the LAM770 doesn’t have.The LAM770T1 has TV antenna but the LAM770 doesn’t have."89Installation At low temperature (20°C… or less) Turn on the heater for a proper temperature. (to enhance adhesive power).At high humidity (fog, rain and so on)After making adhesive side dried with a dryer,install the TV.After installing of the Stand Pulling the Monitor stand or installing the Monitor within 24 hours of the stand installation may weaken adhesive power of the stand.Before installingParts suppliedAV Cable Cigar light adapter Remote Control Section-mount cradle (Rear)Section-mount cradle(Front)Cover case101112NoteRefer to your car’s user guide.A14NoteTV function is only available for LAM770T1.When the AV Cable is insert and pulled out of the AV jack, the picture will flicker for a short moment, which is normal.Please use the appropriate jack connector for the antenna input.15161.Left/ Right Speakers Antenna (TV function is only available for LAM770T1.)3.Docking connectorNoteActual player may vary slightly from images shown.171.Remove the battery holder with fingers.2.Install the battery on the battery holder.3.Install the battery holder back into its originalposition.Notes•Use only one CR2025 (3V) lithium battery.•Remove the battery if the remote control is not used for a long period of time.•Do not leave the product in a hot or humid place.•Do not handle the battery with metallic tools.•Do not store the battery with metallic materials.•In the event of battery leakage, wipe the remote control completely clean and install a new battery.Battery installationNoteWhen power of the main system is turned on or off, the picture sometimes flicker, which is normal.NotesIf power is supplied to the main system, the TV memorizes the previous status and makesNoteWhen you turn the unit off, the current volume level is automatically memorized.19When you press the AV1/AV2 switch, thepicture will flicker for seconds, which is normal.Adjusting FUNCTION menu1. Press the v or V buttons to select a item.2. Press the b or B buttons to adjust .NoteWhen the MODE is changed between 16:9and 4:3, the picture will flicker for a second,which is normal.Item COLOR BRIGHT CONTRAST MODE ROTATE LANGUAGEVOL b Paler Weaker Darker16 : 9 n 4 : 3Rotating the menu screen.ENGLISH n RUSSIANVOL B Deeper Stronger Lighter16 : 9 n 4 : 3Rotating the menu screen.ENGLISH n RUSSIAN20repeatedly.2. Press the MENU button twice.The “TV SETUP” menu is displayed.Adjusting TV SETUP menu1. Press the v or V buttons to select a item.2. Press the b or B buttons to adjust .NoteTV function is only available for LAM770T1.SYSTEMIf the sound is abnormal, maybe the sound system setting is wrong. You can select a proper sound system as follow.PAL B/G y SECAM D/K y PAL D/K Press the b or B buttons to select a proper sound system.CHANNELPress the b or B buttons to start auto search.All active channels will be preset and stored into the memory automatically. After presetting,the TV will go to the channel before the autosearch starts.TV SETUPSYSTEM PAL B/G9438.00MHZUHF OFFCHANNEL FINE BAND SKIP MANUAL AUTOconditions. However in areas of inferior broadcast conditions where adjustment is necessary for a better picture and sound, use FINE TUNE.1. Press the v or V buttons to select theCHANNEL item.2. Press the b or B buttons to select achannel number you want to fine tune.(For example, channel 10)3. Press the v or V buttons to select the“FINE” item.4. Press the b or B buttons to fine tune till thebest possible picture and sound areobtained.BANDPress the b or B buttons to select thethe desired frequency.UHF y VHF L y VHF HSKIPPress the b or B buttons to skip a channel.MANUALPress the b or B buttons to start manual search.AUTOPress the b or B buttons to start auto search. All active channels will be preset and stored into the memory automatically. After presetting, the TV will go to the channel before the auto search starts.2122service center in this manual and we will take a proper action. (As this product is assembled in delicate parts, only a skilled technician is recommended for the disassembly of product.)Small red, blue and green points display on the screen.•LCD screen is made in a high technology. So, this may happen due to lack of pixels by 0.001% or frequent lighting up of pixels. But, it is not the reason of any trouble.Audio and Video do not work.•Check if the starting switch of a car is on ACC or ON.•Check whether a connection code is unstable or is disconnected. •This does not work while driving.Video works but Audio does not.•Check with a volume controller if the volume level is proper.•Check whether an output port for voice is connected.The corner of the screen displays on TV.•If LCD screen has been used for long dark hours, it becomes dark gradually.•If it gets dark severely, replace its exclusive fluorescent tube.Voice quality is bad while receiving TV signal.•Change the frequency in case of interference from a radio displays only in black.•Check its color by adjusting Color Set on Menu.NoteTV function is only available for LAM770T1.bad.It noises.It noises.It noises.2324P/NO : MFL41488902。

7型明装式可视室内机使用说明书目录目录产品特征 (3)设备说明 (4)设备详细说明 (4)操作 (5)常规对讲运行 (6)对讲呼叫接听 (7)对讲音量设置 (7)图像存储 (8)强制执行功能 (9)对讲呼叫结束 (9)对讲呼叫重新接听 (10)铃声关闭和重新打开 (10)开关功能 (11)门打开 (11)照明切换(仅使用开关执行器) (11)菜单栏 — 快速访问 (12)菜单栏收起或打开 .........................12铃声音量设置 .. (13)图像存储器调用 (13)摄像头调用 (14)内部呼叫 (15)自动内部呼叫装置接通或关闭 (16)自动开门装置接通或关闭 (16)设置..................... .. (18)输入页面 (20)功能 (21)管理摄像头 (21)设置图像存储器 (23)重命名对讲呼叫 (25)重命名内部呼叫 (26)重命名楼层呼叫 (27)重命名开关操作 (28)管理喜好 (29)设备 (30)激活屏幕锁定30秒 (30)铃声旋律和按键音设置 (31)2产品特征设备参数设置 (32)PIN保护 (34)执行更新 (35)进行备份 (35)信息 (36)系统版本 (36)许可协议 (36)法律声明 (36)联系方式 (36)microSD卡 (37)概述信息 (37)插入microSD卡 (39)取出microSD卡 (39)护理提示 (40)提示说明… .......................41产品特征Gira楼宇门对讲系统的7型明装式可视室内机已预装完毕,配备一个尺寸为17.78 cm (= 7") 的TFT彩色显示屏及舒适的免提功能。
这款室内机的操作通过具有触屏功能的显示屏以及五个电容式操作按键实现。
操作时只需要轻微触摸图标即可。
按键操作成功时会响起确认声响信号,可通过可选的触觉反馈(振动)关断此声响信号。

中建大厦A7会议室会议系统操作手册中国建筑股份有限责任公司2012年6月目录1系统组成: (2)1.1PA系统 (2)1.2调音台 (2)1.3音源系统 (2)1.4周边设备 (3)1.5系统电源管理系统 (3)1.6系统开关机 (3)2主要设备功能介绍 (4)2.1调音台 (4)2.2功率放大器 (5)2.3无线智能会议主机.......................................... 错误!未定义书签。
3系统操作顺序、流程及应急措施 (10)3.1电源开启部分 (10)3.2音频部分 (12)3.3矩阵信号切换 (12)3.4摄像机控制按键................................................. 错误!未定义书签。
3.5笔记本信号切换 (16)3.6摄像机信号切换 (20)3.7DVD视频信号切换 (21)3.8LED显示系统 (22)3.9电源关闭部分.................................................. 错误!未定义书签。
4应急措施 (24)5附件............................................................................ 错误!未定义书签。
1系统组成:会议室音响扩声系统作为一套专业扩声系统是由几个子系统组成的,各子系统负责不同的系统职责。
1.1 P A系统PA系统负责会议室内的扩声,由音箱、功放组成;系统包括:EAW VR21 音箱2只。
EAW CAZ1400功放1台、CAZ800功放1台、CAM160功放1台。
VEENO 无线智能会议主机1台。
1.2 调音台调音台在扩声系统中占有重要地位。
调音台英语称“MIX”为混合的意思,因此调音台在扩声系统中是将前级音源混合后再分配给不同的扩声系统,混合/分配是其主要的功能。

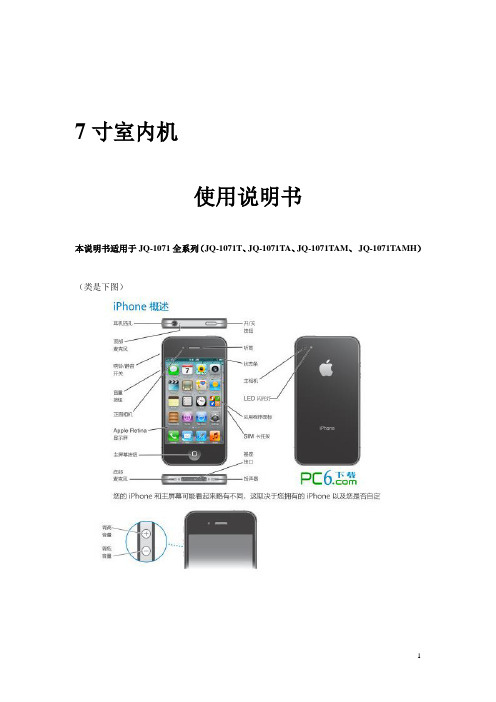
7寸室内机使用说明书本说明书适用于JQ-1071全系列(JQ-1071T、JQ-1071TA、JQ-1071TAM、JQ-1071TAMH)(类是下图)亲爱的用户:非常感谢您选购本公司此款智能楼宇对讲产品。
我们衷心希望您能从中获得长久的享受。
祝愿您从该产品中获得最好的多媒体体验!本手册中包含的所有信息在出版时都是正确的。
但由于我们不断对产品进行更新和改进,因此您设备上的软件、外观、功能可能与本手册中所描述的内容略有差别。
深圳市君和睿通科技股份有限公司7寸室内机使用说明书目录1.基本功能 (4)1.1 硬件配置 (4)1.2 软件配置 (5)2 设备描述 (3)3 君和睿通智慧小区系统简介 (3)2.1系统主要功能 (3)4室内机(家庭智能主机)使用手册 (4)3.1 上电开机 (4)3.2 主界面 (4)3.3 可视对讲 (4)3.4 安防报警 (13)3.5 智能家居(选配) (26)3.6 系统设置 (51)3.7 应用商店 (52)5 室外机使用手册 (53)4.1 主界面 (53)4.2 可视对讲 (54)4.3 密码开锁 (54)1.基本功能1.1 硬件配置1.2 软件配置2.设备描述2.1 触摸屏7”电容式触摸屏:可在触摸区域内进行点击、拖动等操作2.2 Camera摄像头:通过摄像头进行拍照、摄像等功能2.3 Power 键* 按住并保持可打开/关闭设备-- 开机:关机状态下按住“Power”键2秒左右显示开机画面后进入主菜单界面-- 关机:开机状态下按住“Power”键2秒左右。
系统会提示“关机,点击确认即可正常关机。
【注】:1.电量不足情况下,系统会自动关机(不确认带电池出厂?)2.4 充电指示•设备充电时,显示屏电池图标闪动2.4 Mic 孔• MIC语音输入2.5 TF 卡• T-Flash插槽:外接T-Flash存储卡2.5 MiniUSB• mini USB接口:用以连接电脑进行数据传输2.6 复位钮按复位钮,系统重启。
MGWSIPD-LK.18 Source 智能中控 7寸使用说明书产品概述Source 智能中控 7寸是一款带语音控制的智能中控面板。
采用7寸液晶显示屏,旋钮控制及配置高清摄像头。
内置距离传感器、光照度传感器及温湿度传感器。
该面板具备网关功能,支持多网关跨驱动控制,混合组网。
同时具备可视对讲,智慧社区等拓展功能。
支持多台Source 智能中控同时使用,具备主从网关功能,语音控制支持就近唤醒控制。
最多能够选配2个底座。
可实现对灯光、场景、窗帘、空调、地暖、新风、音乐等设备的控制。
Source 智能中控 7寸Source_Buspro底座Source_KNX底座Source_Zigbee底座01底座功能可选配的底座共有3款:Source_Zigbee底座、Source_Buspro底座、Source_KNX底座。
02Source 智能中控 7寸面板尺寸图 - 侧面 部件图 - 顶部扬声器 部件图 - 底部扬声器TF卡卡槽 螺丝孔 Reset键 温湿度传感器麦克风 手动拨片尺寸图 - 正面03部件图 - 背面(带金属支架)Source_Zigbee底座Source_KNX底座尺寸图 - 侧面 尺寸图 - 正面 部件图 - 背面交流电输继电器回路尺寸图 - 侧面 尺寸图 - 正面部件图 - 背面交流电输继电器回路Source_Buspro底座尺寸图 - 侧面 尺寸图 - 正面 部件图 - 背面交流电输继电器回路04产品信息05安装说明安装前,关闭总电源,确认线路没有带电。
步骤①:将底盒(盒深≥70mm)安装在墙上。
步骤②:用螺丝将电源底座固定在金属支架上,再将已固定到支架的底座安装到底盒里。
步骤③:将Source面板扣住金属支架上端限位卡扣,并通过面板底部锁螺丝固定。
③①②注意:• 如果只配置1个底座,安装在卡位1。
• 如果配置2个底座,分别安装在卡位1、卡位2。
• 现场如果有网线,请连接至卡位1的底座。
ABB-WelcomeM2233.-.7" Video hands-free indoor station1Safety (4)2Intended use (4)3Environment (4)3.1ABB devices (5)4Operation (6)4.1Standard operations (6)4.1.1Control elements (6)4.1.2Welcome screen and status bar (8)4.2Control actions (10)4.2.1Surveillance (10)4.2.2Intercom (11)4.2.3Calling Guard unit (12)4.2.4Switch Actuator (13)4.2.5Setting up the voice and video connections (14)4.2.6Opening the door (15)4.2.7Muting (16)4.2.8Activating the custom function (17)4.2.9Events and picture memory / history (20)4.2.10Information (24)4.2.11Inserting the SD card (25)4.2.12Settings (26)4.2.12.1Overview (26)4.2.12.2Intercom (29)4.2.12.3Switch Actuator (33)4.2.12.4Program button (35)4.2.12.5Leave Home Management (36)4.2.12.6Voice Message (38)4.2.12.7Setting Door Open Password (41)4.2.12.8Black list (42)4.2.12.9Audio Settings (44)4.2.12.10Auto Unlock (46)4.2.12.11Display Settings (48)4.2.12.12Date and Time (50)4.2.12.13Language (52)4.2.12.14Setup (53)4.2.12.15Firmware Update (55)4.3Cleaning (56)4.4Adjusting the device (57)4.4.1Terminal resistor (57)4.4.2Connection (59)5Technical data (60)6Mounting / Installation (61)6.1Requirements for the electrician (61)6.2General installation instructions (62)6.3Mounting (63)1SafetyWarningElectric voltage!Risk of death and fire due to electrical voltage of 100-240 V. – Work on the 100-240V supply system may only be performed by authorised electricians!–Disconnect the mains power supply prior to installation and/or disassembly!2 Intended useThe M2233x-x is an integral part of the ABB Welcome door communication system and operates exclusively with components from this system. The device must only be installed in dry indoor rooms.3EnvironmentConsider the protection of the environment!Used electric and electronic devices must not be disposed of with domestic waste.– The device contains valuable raw materials which can be recycled. Therefore, dispose of the device at the appropriate collecting depot.ABB-Welcome Environment3.1 ABB devicesAll packaging materials and devices from ABB bear the markings and test seals for proper disposal. Always dispose of the packaging material and electric devices and their components via the authorized collecting depots and disposal companies.ABB products meet the legal requirements, in particular the laws governing electronic and electrical devices and the REACH ordinance.(EU-Directive 2002/96/EG WEEE and 2002/95/EG RoHS)(EU-REACH ordinance and law for the implementation of the ordinance (EG)No.1907/2006)4 Operation4.1 Standard operations 4.1.1 Control elementsFig. 1 Control elements*For use of this button, please contact your electrical installer.4.1.2 Welcome screen and status barFig. 2 Status bar3 92 4 6 5 7 8 10 111 12 13 144.2 Control actions 4.2.1SurveillanceFig. 3 SurveillanceTouch this button to start to survey the default outdoor station. Only the video2 341Surveillance4.2.2IntercomFig. 4IntercomTouch this button to enter the intercom call menu . Then, the following functions are available. Set the intercom call lists in the “System setting -intercom setting“ menu first.41Intercom5 234.2.3Calling Guard unitFig. 5Calling Guard unitTouch the “Guard unit“ button to call a guard unit . Then, the following functions are available.Call Guard unit214.2.4Switch ActuatorFig. 6Switch ActuatorTouch this button to enter the switch actuator menu . Then, the following functions are available. Set actuator lists in the “system setting -switch actuator“ menu first.Switch Actuator4 1234.2.5Setting up the voice and video connectionsFig. 7Switch ActuatorThe following functions are available for setting up the voice and video connections2 3414.2.6Opening the doorFig. 8Opening the doorPress the key button to activate the door opener. Then, the following function becomes14.2.7MutingFig. 9Opening the door124.2.8 Activating the custom function123Fig. 10Activating custom functionThe program button can be configured with different functions , e.g . call to guard unit, intercom call or control switch actuator. And its default function is the release of the 2nd-lock, which is connected with terminals COM-NC-NO of an outdoor station. If no function is assigned to the program button, there will be no action after pressing this program button.Only the existing intercom call list & switch actuator list can be assigned for the program44.2.9Events and picture memory / historyFig. 11Events and picture storage / historyThe panel records all events. Press the "History" button, then the last 100 events will be1212234Fig. 12 Events and picture storage / history85 67During a call, you can take a snapshot at any time by pressing the "History" button, even when the "Automatic snapshots" function is not activated. The events and4.2.10InformationFig. 13InformationAbove items will be shown on the “Information”menu.4.2.11 Inserting the SD cardFig. 14 Inserting the SD card4.2.12Settings4.2.12.1 OverviewFig. 15OverviewFig. 16Overview of settings4 1234.2.12.2 IntercomFig. 17 Intercom4 5 1 32 6 7Pressing “Add” or “Adjust”Fig. 18 Intercom5 413214.2.12.3 Switch ActuatorFig. 19 Switch Actuator3 4 1 25 6Pressing “Add” or “Adjust”Fig. 20 Switch Actuator4 31 24.2.12.4 Program buttonFig. 21 Program button3 214.2.12.5 Leave Home ManagementFig. 22 Leave Home ManagementInformation about the settingsUser can only choose “Call forward” or “Message leaving”. Two functions can’t be activated at the same time!A warning will be given once “call transfer” or “Message Leaving” is activated.The “Leave Home Management” menu has the following functions (The function only 4 31 24.2.12.6 Voice MessageFig. 23 Voice MessageIn totally, 30 voice messages can be recorded.6 71 23 4 5Choosing the “Record a New M essage” to create a new voice message.Fig. 24 Voice MessageChoosing “Listen”→“ ▶” to play a voice message.Fig. 25 Voice Message4.2.12.7 Setting Door Open PasswordFig. 26 Setting Door Open PasswordThe “Set Door Open Password” menu has the following functions (The function only can4 3214.2.12.8 Black listFig. 27 Black listThe “Black List” menu has the following functions (The function only can be set in 4 51234.2.12.9 Audio Settings Fig. 28 Audio Settings 9 812534674.2.12.10 Auto UnlockFig. 29 Auto UnlockThe “Black List” menu has the following functions (The function only can be set in 7 6314524.2.12.11 Display SettingsFig. 30 Display Settings6 51 9 87 2344.2.12.12 Date and Time Fig. 31 Date and Time 4 376512。