安卓美化教程之全局背景透明教程
- 格式:doc
- 大小:3.43 MB
- 文档页数:4
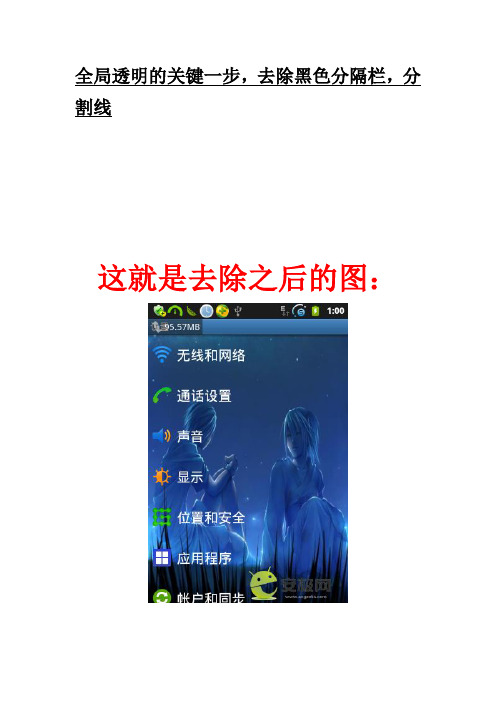
这就是去除之后的图:首先还是反编译framework-res.apk,这里要交代一下,这个教程是基于全局背景修改的基础上的,是要与全局背景修改一起修改的,反编译framework-res.apk之后,res/values/styles.xml,找到以下的代码:<stylename="Widget.TextView.ListSeparato r"parent="@style/Widget.TextView"> <itemname="textSize">15.0sp</item><itemname="textStyle">bold</item><itemname="textColor">?textColorPrimary </item><itemname="gravity">center_vertical</it em><itemname="background">@drawable/dark_h eader_dither</item><itemname="paddingLeft">5.0sp</item> <itemname="layout_width">fill_parent</i tem><itemname="layout_height">25.0dip</item >修改其中<itemname="background">@drawable/dark_h eader_dither</item>为<itemname="background">@null</item>然后再找到<stylename="Widget.TextView.ListSeparato r.SamsungSettings"parent="@style/Widget.TextView.Lis tSeparator"><itemname="textStyle">bold</item><itemname="textColor">#ffd6d6d6</item> <itemname="background">@drawable/zzz_da rk_header_dither</item>修改 <itemname="background">@drawable/zzz_da rk_header_dither</item>为 <itemname="background">@null</item>或者你用卡刷包直接刷最方便!!!好了,回编译·······然后提取新生成的framework-res.apk里面的resources.arsc,替换到原framework-res.apk。

Android系统美化教程:PS:教程中文字颜色说明:红色为文件地址(路径)或标题,蓝色为动作,深蓝色为注意事项,黄绿色为工具,浅蓝色为其他步骤:首先呢,安卓系统的图标大都在一个地方,就是system/famework/framework-res.apk中,所以主要就是针对framework-res.apk的美化。
以下美化用到的工具有:WINRAR解压,PotoShop(PS)手机端:打开system/famework找到framework-res.apk,将其复制到SD 卡,连上电脑,复制进电脑里电脑端:1.找到framework-res.apk,单击右键,选择用WINRAR打开,解压。
2.找到解压好的目录,打开framework-res/res/drawable-mdpi, 可以看到,有很多图片,安卓系统的很多图片都来自这里3.找到你要替换的图片,重命名为要替换的图片的名字,用PS修改为原图片的尺寸大小,格式如果为其他则要改为png,而且其他图片参数要尽量一致4.改好后用WINRAR打开原来的framework-res.apk,添加你改过的图片,同时更换framework-res/res/drawable-mdpi和drawable-hdpi中的图片,两文件夹图片相同,大小不一,我们的系统主要用framework-res/res/drawable-mdpi 中的图片,但是如果两文件夹图片不一,会出现一些意外结果,如无法开机,无限重启。
5.将改好的framework-res.apk复制到手机system/famework中,改权限全打钩,重启手机,你就可以看到效果了注意:1.请勿用WINRAR删除framework-res.apk中任意文件,否则无法开机!2.请备份原framework-res.apk,以免资料丢失3.注意同时更换framework-res/res/drawable-mdpi和drawable-hdpi中的图片,以免出现意外情况4.不要将framework-res/res/drawable-hdpi中的图片复制到drawable-mdpi或者drawable-ldpi中,否则美化图标会过大(即使你改小了也有部分图标过大,这是系统造成的)5.待定···下面的仅供参考(我的是原生2.2),像htc,moto等机器可以参考,但是有的图标不一样,自己多摸索技巧:1.可将原framework-res/res/drawable-mdpi复制到drawable-hdpi中,节约时间,目前尚无BUG由此引起···2.可将图标用名称方式排列,方便修改3.stat_notify系列和stat_sys系列都是通知栏的图标,即 2G 3G信号电量闹钟等图标4.statusbar_background.9.png就是传说中的通知栏背景,将此文件改透明即可实现通知栏透明5.status_bar系列为通知栏背景图标和打开通知栏的图标6.ic_menu系列为menu(菜单)图标,修改系统自带菜单图标7.ic_jog_dial_unlock.png和ic_jog_dial_vibrate_on.png分别为锁屏界面左右图标8.jog_tab_bar系列、jog_tab_left系列和jog_tab_right系列为锁屏背景图标,想透明可将其用PS改透明9.待定美化教程2----特效美化这个仍然需要用到framework-res.apk,接着上一次的美化教程1,同样进行步骤1、2,找到framework-res\res\anim看到文件夹下是不是有很多XML文档因为特效是通用的,framework-res\res\anim文件夹下的所有文件即为特效文件,将framework-res\res\anim下的所有文件替换为你所需要的文件即可,然后重复美化教程1中的第4、5步骤,即可以下送上飞来飞去特效飞来飞去特效.rar美化教程3----桌面美化(x876及v880的2.2适用)2.2的自带桌面是不是很垃圾?我知道很多同学一定是因为2.2的默认桌面垃圾才换的,而且蛋疼的桌面还不可在刷机包里集成(会意外停止),所以今天带来2.2桌面美化步骤:1.首先从system/app中找到Launcher2.apk,将这个文件提取到电脑里2.解压Launcher2.apk(解压方法参照教程1的步骤1),会发现在其中会有以下目录Launcher2/META-INF//res//AndroidManifest.xlm/classes.dex/resources.arsc我们主要用到的是Launcher2\res下的文件结构应当如下Launcher2/res/anim/drawable-mdpi其他文件夹不用管看到这两个文件夹是不是有一种熟悉的感觉?对了,接下来第三步3.文件夹目录介绍:anim:此文件夹为特效文件夹,替换可提升系统流畅度,可能可以修改进入菜单特效(有待高手研究),目前研究成果仅为去除特效drawable-mdpi:此文件夹为图片目录文件夹,可修改更好更炫的图片(风险!),注意图片必须与原图片格式、尺寸和其他信息相同,会出现一系列的差错4.将你的素材替换后重复教程1的第4第5步,大家可以到[小白美化]2.2完美版再度美化 HTC风格~~ 美化包双特效 6.17更新中下载加快进入菜单速度的修改版Launcher2其他版本的可以直接替换桌面~推荐ADW1.3.3独立版~美化教程4----开机图片美化(仅适用于2.2原生,2.3CM7不适用)上次的只是开机动画美化这次带来全套开机图片美化(除了开机第一屏)用到的工具:yaffs专家(手机端使用,可在市场下载)首先:开机第二屏(v团队Logo,建议不要修改,修改了也建议自用)步骤:1.打开2.2刷机包,找到boot.img文件,就在根目录2.解压boot.img(内核文件),手机打开yaffs专家,选择文件如图(图片有小失误:操作类型不是ramdisk,应该是boot/recovery)3.找到解压后的文件,应该有2个,选boot-ramdisk.gz.img,再次使用yaffs专家解压4.会得到一个文件夹如图5.找到一个240X400的图片,格式BMP 替换原图片,并将其命名为logo.BMP6.再次用yaffs专家将此文件压缩成boot.img7.将boot.img添加至刷机包8.大功告成~~PS:这个是自己真正没看过教程做出来的,以前自己只知道开机第一屏在boot.img中,话说论坛上好像也没有类似的教程,哈哈,首创,希望加分支持~~~~附上yaffs专家。

Android开发之Activity全透明渐变切换⽅法Activity全透明渐变切换类似于Dialog的显⽰动画效果⼀样1. 先设置Acitivity为去透明,在取消掉Activity默认的切换动画<style name="AppTheme2" parent="Theme.AppCompat.Light"><!-- Customize your theme here. --><item name="windowNoTitle">true</item><item name="colorPrimary">@color/colorPrimary</item><item name="colorPrimaryDark">@color/tabbackground</item><item name="colorAccent">@color/colorAccent</item> <item name="android:windowBackground">@color/transparent</item>//这个之时全透明<item name="android:windowIsTranslucent">true</item><item name="android:windowAnimationStyle">@style/activityanimation</item></style><style name="activityanimation" ><item name="android:activityOpenEnterAnimation">@null</item><item name="android:activityOpenExitAnimation">@null</item><item name="android:activityCloseEnterAnimation">@null</item><item name="android:activityCloseExitAnimation">@null</item></style>2. 设置渐变动画:<?xml version="1.0" encoding="utf-8"?><RelativeLayoutxmlns:android="/apk/res/android"android:id="@+id/ll"android:orientation="vertical"android:layout_width="match_parent"android:background="#000"android:layout_height="match_parent"><MyImageViewandroid:layout_width="match_parent"android:layout_height="300dp"android:layout_centerInParent="true"android:clickable="true"android:background="@mipmap/meinv"/></RelativeLayout>public class Activitytwo extends AppCompatActivity{private int tran=0x00000000;private int end=0x88000000;private RelativeLayout ll;@Overrideprotected void onCreate(@Nullable Bundle savedInstanceState) {super.onCreate(savedInstanceState);getWindow().setFlags(youtParams.FLAG_FULLSCREEN, youtParams.FLAG_FULLSCREEN); setContentView(yout.ativity);ll = (RelativeLayout) findViewById(R.id.ll);returnposition();ll.setOnClickListener(new View.OnClickListener() {@Overridepublic void onClick(View v) {finish();}});}public void returnposition(){ValueAnimator colorAnim = ObjectAnimator.ofInt(ll, "backgroundColor", tran, end);colorAnim.setDuration(300);colorAnim.setEvaluator(new ArgbEvaluator());colorAnim.start();}@Overridepublic void finish() {ValueAnimator colorAnim = ObjectAnimator.ofInt(ll, "backgroundColor", end, tran);colorAnim.setDuration(300);colorAnim.setEvaluator(new ArgbEvaluator());colorAnim.start();super.finish();}}以上这篇Android开发之Activity全透明渐变切换⽅法就是⼩编分享给⼤家的全部内容了,希望能给⼤家⼀个参考,也希望⼤家多多⽀持。

Android编程实现设置按钮背景透明与半透明及图⽚背景
透明的⽅法
本⽂实例讲述了Android编程实现设置按钮背景透明与半透明及图⽚背景透明的⽅法。
分享给⼤家供⼤家参考,具体如下:
Button或者ImageButton的背景设为透明或者半透明:
半透明
复制代码代码如下:
<Button android:background="#e0000000" ... />
透明
复制代码代码如下:
<Button android:background="#00000000" ... />
颜⾊和不透明度 (alpha) 值以⼗六进制表⽰法表⽰。
任何⼀种颜⾊的值范围都是 0 到 255(00 到 ff)。
对于 alpha,00 表⽰完全透明,ff 表⽰完全不透明。
表达式顺序是“aabbggrr”,其中“aa=alpha”(00 到 ff);“bb=blue”(00 到 ff);“gg=green”(00到 ff);“rr=red”(00 到 ff)。
例如,如果您希望对某叠加层应⽤不透明度为 50% 的蓝⾊,则应指定以下值:7fff0000
设置背景图⽚透明度(超简单),代码如下:
View v = findViewById(R.id.content);//找到你要设透明背景的layout 的id
v.getBackground().setAlpha(100);//0~255透明度值
希望本⽂所述对⼤家Android程序设计有所帮助。

AndroidStudio全屏沉浸式透明状态栏效果如何实现?1.)首先实现全屏第一种:继承主题特定主题在Android API 19以上可以使用****.TranslucentDecor***有关的主题,自带相应半透明效果,Theme.Holo.NoActionBar.TranslucentDecor和Theme.Holo.Light.NoActionBar.TranslucentDecor两种主题为新增加的,所以要新建values-v19文件夹并创建styles文件添加如下代码<style name="AppBaseTheme" parent="android:Theme.Holo.Light.NoActionBar.TranslucentDec or"><!-- Customize your theme here. --></style>第二种:在activity中采用代码的方式Android 4.4以上可以添加如下代码if (Build.VERSION.SDK_INT >= Build.VERSION_CODES.KITKAT) {//透明状态栏window.addFlags(youtParams.FLAG_TRA NSLUCENT_STATUS);//透明导航栏window.addFlags(youtParams.FLAG_TRA NSLUCENT_NAVIGATION);}Android 5.0 以上也可以使用下面的代码实现全屏if (Build.VERSION.SDK_INT >= Build.VERSION_CODES.LOLLIPOP) {window.clearFlags(youtParams.FLAG_TRANSLUCENT_STATUS|youtParams.FLAG_TRANSLUCENT_NAVIGATI ON);window.getDecorView().setSystemUiVisibility(View.SYSTEM_ UI_FLAG_LAYOUT_FULLSCREEN| View.SYSTEM_UI_FLAG_LAYOUT_HIDE_NAVIGATION| View.SYSTEM_UI_FLAG_LAYOUT_STABLE);window.addFlags(youtParams.FLAG_DR AWS_SYSTEM_BAR_BACKGROUNDS);}2.)解决状态栏占位问题第一种:主题添加如下设置<item name="android:fitsSystemWindows">true</item>第二种:activity layout根目录添加下面代码android:fitsSystemWindows="true"第三种:通过Java代码设置rootview.setFitsSystemWindows(true);3.)状态栏导航栏设置背景色4.4以上的可以采用修改contentView的背景色,或者动态添加一个view到contentView上if (Build.VERSION.SDK_INT >= Build.VERSION_CODES.KITKAT) {//透明状态栏window.addFlags(youtParams.FLAG_TRA NSLUCENT_STATUS);//透明导航栏window.addFlags(youtParams.FLAG_TRA NSLUCENT_NAVIGATION);//设置contentview为fitsSystemWindowsViewGroup contentView = (ViewGroup) findViewById(android.R.id.content);View childAt = contentView.getChildAt(0);if (childAt != null) {childAt.setFitsSystemWindows(true);}//给statusbar着色View view = new View(this);view.setLayoutParams(newyoutParams(youtParams.MATCH_PA RENT, getStatusBarHeight(this)));view.setBackgroundColor(color);contentView.addView(view);}动态获取StatusBarHeight函数如下/*** 获取状态栏高度** @param context context* @return 状态栏高度*/private static int getStatusBarHeight(Context context) {// 获得状态栏高度int resourceId = context.getResources().getIdentifier("status_bar_height", "dimen", "android");returncontext.getResources().getDimensionPixelSize(resourceId);}动态获取NavigationBarHeight函数如下/*** 获取导航栏高度** @param context context* @return 导航栏高度*/public static int getNavigationBarHeight(Context context) { int resourceId = context.getResources().getIdentifier("navigation_bar_height", "dimen", "android");returncontext.getResources().getDimensionPixelSize(resourceId);}4.)贴出整体java代码实现方式private void initWindows() {Window window = getWindow();int color = getResources().getColor(R.color.wechatBgColor);if (Build.VERSION.SDK_INT >= Build.VERSION_CODES.LOLLIPOP) {window.clearFlags(youtParams.FLAG_TR ANSLUCENT_STATUS|youtParams.FLAG_TRANSLUCENT_NAVIGATI ON);window.getDecorView().setSystemUiVisibility(View.SYSTEM_ UI_FLAG_LAYOUT_FULLSCREEN| View.SYSTEM_UI_FLAG_LAYOUT_HIDE_NAVIGATION| View.SYSTEM_UI_FLAG_LAYOUT_STABLE);window.addFlags(youtParams.FLAG_DR AWS_SYSTEM_BAR_BACKGROUNDS);//设置状态栏颜色window.setStatusBarColor(color);//设置导航栏颜色window.setNavigationBarColor(getResources().getColor(R.c olor.footerBgColor));ViewGroup contentView = ((ViewGroup) findViewById(android.R.id.content));View childAt = contentView.getChildAt(0);if (childAt != null) {childAt.setFitsSystemWindows(true);}} else if (Build.VERSION.SDK_INT >= Build.VERSION_CODES.KITKAT) {//透明状态栏window.addFlags(youtParams.FLAG_TRA NSLUCENT_STATUS);//透明导航栏window.addFlags(youtParams.FLAG_TRA NSLUCENT_NAVIGATION);//设置contentview为fitsSystemWindowsViewGroup contentView = (ViewGroup) findViewById(android.R.id.content);View childAt = contentView.getChildAt(0);if (childAt != null) {childAt.setFitsSystemWindows(true);}//给statusbar着色View view = new View(this);view.setLayoutParams(newyoutParams(youtParams.MATCH_PA RENT, getStatusBarHeight(this)));view.setBackgroundColor(color);contentView.addView(view);}if (Build.VERSION.SDK_INT >= Build.VERSION_CODES.M && useStatusBarColor) {//android6.0以后可以对状态栏文字颜色和图标进行修改getWindow().getDecorView().setSystemUiVisibility(View.SYS TEM_UI_FLAG_LAYOUT_FULLSCREEN | View.SYSTEM_UI_FLAG_LIGHT_STATUS_BAR);}}转载自:https:///whoislcj/p/6250284.html。
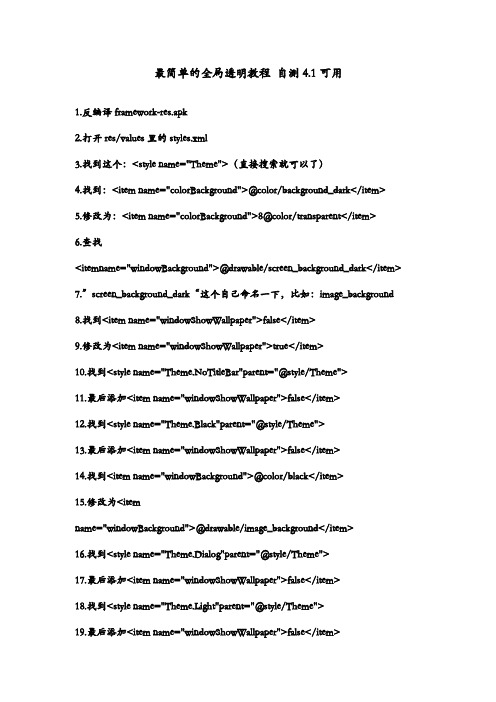
最简单的全局透明教程自测4.1可用1.反编译framework-res.apk2.打开res/values里的styles.xml3.找到这个:<style name="Theme">(直接搜索就可以了)4.找到:<item name="colorBackground">@color/background_dark</item>5.修改为:<item name="colorBackground">8@color/transparent</item>6.查找<itemname="windowBackground">@drawable/screen_background_dark</item>7.”screen_background_dark“这个自己命名一下,比如:image_background8.找到<item name="windowShowWallpaper">false</item>9.修改为<item name="windowShowWallpaper">true</item>10.找到<style name="Theme.NoTitleBar"parent="@style/Theme">11.最后添加<item name="windowShowWallpaper">false</item>12.找到<style name="Theme.Black"parent="@style/Theme">13.最后添加<item name="windowShowWallpaper">false</item>14.找到<item name="windowBackground">@color/black</item>15.修改为<itemname="windowBackground">@drawable/image_background</item>16.找到<style name="Theme.Dialog"parent="@style/Theme">17.最后添加<item name="windowShowWallpaper">false</item>18.找到<style name="Theme.Light"parent="@style/Theme">19.最后添加<item name="windowShowWallpaper">false</item>20.找到<style name="Theme.Translucent"parent="@style/Theme">21.最后添加<item name="windowShowWallpaper">false</item>22.找到<style name="Theme.NoDisplay"parent="@style/Theme">23.最后添加<item name="windowShowWallpaper">false</item>24.找到<style name="Theme.Panel"parent="@style/Theme">25.最后添加<item name="windowShowWallpaper">false</item>26.修改完成,保存27.打开/res/values/drawable.xml28.找到<item8 type="drawable"name="screen_background_dark">#ff000000</item>29.修改为<itemtype="drawable"name="screen_background_dark">#00000000</item>(通讯录拨号背景)30.把image_background.png放到反编译的文件夹里的res\drawable-hdpi30.把image_background.png放到反编译的文件夹里的res\drawable-hdpi31.回编译32.把resources.arsc替换原来的apk33.把image_background.png放到apk里的res\drawable-hdpi详情请见安智论坛,转载请注明出处。
Android给TextView设置透明背景、圆角边框第一种方法:在drawable文件夹下新建一个文件设置背景样式代码:在drawable文件夹下面新建text_view_border.xml[java]view plaincopy1.<?xml version="1.0" encoding="UTF-8"?>2.<shape xmlns:android="/apk/res/android">3.<solid android:color="#80858175" />4.<stroke android:width="1dip" android:color="#aea594" / >5.<corners android:topLeftRadius="2dp"6.android:topRightRadius="2dp"7.android:bottomRightRadius="2dp"8.android:bottomLeftRadius="2dp"/>9.</shape>在布局文件调用[java]view plaincopy1.<TextView2.android:id="@+id/tv"3.android:layout_width="wrap_content"4.android:layout_height="wrap_content"5.android:background="@drawable/text_view_border" />在类文件中调用:[java]view plaincopy.setBackgroundResource(R.drawable.text_view_border);分析:solid设置填充颜色,颜色值以#80开头表示透明stroke 设置边框宽度,颜色值corners设置圆角第二种方法:用图片设置background。
Android设置Activity背景为透明style的简单⽅法(必看)⽅法⼀:通过Theme.Translucent@android:style/Theme.Translucent@android:style/Theme.Translucent.NoTitleBar@android:style/Theme.Translucent.NoTitleBar.Fullscreen只需要在Manifest中需要透明的Activity内设置theme为以上任意⼀个就可以了<activityandroid:name="com.vixtel.simulate.MainApp"android:configChanges="keyboardHidden|orientation"android:label="@string/app_name"android:screenOrientation="portrait"android:theme="@android:style/Theme.Translucent.NoTitleBar" ><intent-filter><action android:name="android.intent.action.MAIN" /><category android:name="UNCHER" /></intent-filter></activity>⽅法⼆:⾃定义style,就像⾃定义Dialog的style⼀样,在res-values-color.xml中添加透明颜⾊值:<?xml version="1.0" encoding="UTF-8"?><resources><color name="transparent">#0000</color></resources>在res-values-styles.xml中添加如下:<style name="myTransparent"><item name="android:windowBackground">@color/transparent</item><item name="android:windowNoTitle">true</item><item name="android:windowIsTranslucent">true</item><item name="android:windowAnimationStyle">@android:style/Animation.Translucent</item></style>在Manifest中中需要透明的Activity内设置theme为我们⾃定义的即可android:theme="@style/myTransparent"运⾏程序后,就全透明了,看得见背景下的所有东西可以却都操作⽆效。
Android ROM美化教程,透明等反编译修改的方法透明下拉栏1.提取你的systemui.apk,反编2.找到\res\layout\status_bar_tracking.xml文件,搜索“View android:background”,将其等号后面改成"@drawable/status_bar_background"3.回编systemui.apk4.将新apk中的status_bar_tracking.xml文件替换到老apk中这样,你的下拉栏就变成了status_bar_background.png这张图片了,修改一张透明的status_bar_background.png扔进systemui.apk中替换原文件就好了。
在用压缩方式打开替换好的APK、直接把res拖到桌面,打开drawable-hdpi,quickpanel_quick_settings_background.png这个和quickpanel_title_background.9.png这个还有title_bar_portrait.9.png这个要改成透明或半透明都可以不一定名称都一样但是方法都一样,你们进去了就知道 statusbar_background.9.png这个是状态栏直接该透明就OK记得你改的图片大小要一样{重要}透明状态栏2.3.6看其他无视同样是修改systemui.apk。
1.反编后找到smali\com\android\systemui\statusbar\StatusBarService.smali文件2.找到new-instance v0, Landroid/view/WindowManager$LayoutParams;const/4 v1, -0x1const/16 v3, 0x7d0const/16 v4, 0x48const/4 v5, 0x2修改为new-instance v0, Landroid/view/WindowManager$LayoutParams;const/4 v1, -0x1const/16 v3, 0x7d0const/16 v4, 0x48const/4 v5, -0x33.回编4.替换classes.dex5.修改一张statusbar_background.9.png图片,处理成半透明,替换效果图全局背景教程提取完后打开“framework-res.apk\res\values\在用笔记本打开styles.xml文件按“Ctrl+F”打开查找,在“找内容”查上写入<item name="windowBackground">@drawable/screen_background_dark</item>把找到的那句改成下面这句<item name="windowBackground">@drawable/wjj_qjbg</item>继续查找<style name="Widget.ListView" parent="@style/Widget.AbsListView">得到下面这段<style name="Widget.ListView" parent="@style/Widget.AbsListView"><item name="listSelector">@drawable/list_selector_background</item><item name="cacheColorHint">?colorBackgroundCacheHint</item> ----这句<item name="divider">@drawable/divider_horizontal_dark_opaque</item></style>将上面那句<item name="cacheColorHint">?colorBackgroundCacheHint</item>换成<item name="cacheColorHint">@color/transparent</item>第三步:把一张480*800的图片命名为:“wjj_qjbg”记得是PNG格式不然就悲催了放入framework-res.apk\res\drawable-hdpi然后封包接下来就要用压缩方式打开之前没改过的framework-res.apk。
Android背景透明度设置总结⼀、写在前⾯的在需求上遇到背景设置透明度还是⽐较常见的,设置透明度有⼏种⽅式,但是不同的场景应⽤下,不同的⽅式可能会出现⼀些问题。
针对开发过程中的需求做以下总结。
⼆、先看效果图图1、图2、图3、图4介绍:图1、蓝⾊头部和输⼊框背景初始状态图2、点击按钮01,输⼊框的透明度不起作⽤,和title的透明度⼀样图3、点击按钮02,背景透明度设置正常,但是可能会对全局的背景有影响图4、点击按钮03,背景透明度设置正常,具体原因代码注释有提到三、再加上代码按钮点击public void button01(View view){// search透明度不起作⽤title.setAlpha(0.2f);search.setAlpha(0.8f);}public void button02(View view){// 在布局中多个控件同时使⽤⼀个资源的时候,这些控件会共⽤⼀个状态// 如果你改变了⼀个控件的状态,其他的控件都会接收到相同的通知title.getBackground().setAlpha(51);search.getBackground().setAlpha(153);}public void button03(View view){// 使⽤mutate()⽅法使该控件状态不定,这样不定状态的控件就不会共享⾃⼰的状态了title.getBackground().mutate().setAlpha(51);search.getBackground().mutate().setAlpha(153);}布局:<?xml version="1.0" encoding="utf-8"?><LinearLayout xmlns:android="/apk/res/android"android:orientation="vertical"android:layout_width="match_parent"android:layout_height="match_parent"><LinearLayoutandroid:id="@+id/ll_title"android:layout_width="match_parent"android:layout_height="80dp"android:gravity="center"android:background="#0000ff"android:orientation="horizontal"><EditTextandroid:id="@+id/et_search"android:layout_width="200dp"android:layout_height="60dp"android:gravity="center"android:hint="输⼊框"android:textColorHint="#ffffff"android:background="@drawable/search_title_bg"/></LinearLayout><LinearLayoutandroid:layout_width="match_parent"android:layout_height="wrap_content"android:layout_marginTop="40dp"android:orientation="horizontal"><Buttonandroid:layout_width="wrap_content"android:layout_height="wrap_content"android:text="01"android:onClick="button01"/><Buttonandroid:layout_width="wrap_content"android:layout_height="wrap_content"android:text="02"android:onClick="button02"/><Buttonandroid:layout_width="wrap_content"android:layout_height="wrap_content"android:text="03"android:onClick="button03"/></LinearLayout></LinearLayout>输⼊框背景 search_title_bg<?xml version="1.0" encoding="utf-8"?><shape xmlns:android="/apk/res/android"android:shape="rectangle"><solidandroid:color="#000000"/><cornersandroid:radius="8dp"/><strokeandroid:width="1dp"android:color="#666666"/></shape>四、写在后⾯的背景透明度设置⽐较常见,mutate()⽅法,可以解决背景透明状态设置异常的现象。
首先,要会简单的反编译,电脑有java环境,有反编译工具
反编译framework-res.apk后找到面在framework-res\res\values下找到
styles.xml
搜索:
<style name="Theme">
<item name="colorForeground">@color/bright_foreground_dark</item>
<item name="colorBackground">@color/background_dark</item>
修改为:
<style name="Theme">
<item name="colorForeground">@color/bright_foreground_dark</item>
<item name="colorBackground">@color/transparent</item>
这样就定义了系统背景透明了,然后
搜索:
<item name="expandableListPreferredChildIndicatorRight">?expandableListPreferredItemIndic atorRight</item>
<item name="windowBackground">@drawable/screen_background_dark</item>
<item name="expandableListPreferredChildIndicatorRight">?expandableListPreferredItemIndic atorRight</item>
<item name="windowBackground">@drawable/screen_background_dark</item>
改为:
<item name="expandableListPreferredChildIndicatorRight">?expandableListPreferredItemIndic atorRight</item>
<item name="windowBackground">@drawable/screen_background_隔壁的</item>
这是定义背景图片,你需要添加一个透明图片,建议弄半透明的,免得系统界面有些字看不清!
搜索:
<item name="textColorPrimaryInverseDisableOnly">@color/primary_text_light_disable_only</it em>
<item name="windowShowWallpaper">false</item>
把false改为true,这里是显示桌面壁纸,不然背景会是黑的!
搜索:
<style name="Theme.NoTitleBar" parent="@style/Theme">
<item name="windowNoTitle">true</item>
在下面一行添加:
<item name="windowShowWallpaper">false</item>
搜索:
<style name="Theme.Black" parent="@style/Theme">
<item name="colorBackground">@color/black</item>
<item name="windowBackground">@color/black</item>
改为:
<style name="Theme.Black" parent="@style/Theme">
<item name="colorBackground">@color/black</item>
<item name="windowBackground">@drawable/screen_background_隔壁的</item> <item name="windowShowWallpaper">false</item>
搜索:
<item name="progressBarStyleSmallInverse">@style/Widget.ProgressBar.Small</item>
<item name="progressBarStyleLargeInverse">@style/rge</item>
<item name="textColorPrimaryInverseDisableOnly">@color/primary_text_dark_disable_only</it em>
在下面一行添加:
<item name="windowShowWallpaper">false</item>
搜索:
<style name="Theme.Translucent" parent="@style/Theme">
<item name="windowBackground">@color/transparent</item>
<item name="windowIsTranslucent">true</item>
<item name="windowAnimationStyle">@style/Animation</item>
在下面添加:
<item name="windowShowWallpaper">false</item>
搜索:
<item name="windowNoDisplay">true</item>
<item name="windowDisablePreview">true</item>
在下面添加:
<item name="windowShowWallpaper">false</item>
搜索:
<item name="windowContentOverlay">@null</item>
<item name="backgroundDimEnabled">false</item>
添加:
<item name="windowShowWallpaper">false</item>
在\framework\framework-res\res\drawable-hdpi下添加一张图片
screen_background_abcdefg.9.png
Bingo(742538636) 13:09:30
ok!保存,回编译,在dist文件夹下找到framework-res.apk,用winrar打开
把resources.arsc拷贝到原framework-res.apk中,
在原版\framework-res\res\drawable-hdpi中添加
screen_background_abcdefg.9.png(建议ps成半透明背景图片)
保存,退出,把修改后的framework-res.apk拷贝到手机系统中覆盖,重启完成! 附件下载:
APK反编译签名.zip。