安腾HP-UX11.23安装
- 格式:doc
- 大小:892.50 KB
- 文档页数:11

HP-UX操作系统安装说明1 设置显示输出新出厂的hp rx2660机器输出默认定义到串行口,需要修改为正确的显卡,设置完保存以后不用再次设置。
1.1连接计算机所有电缆,加电,显示引导管理界面,选择‘Boot Configuration’选项。
1.2选择‘Console Configuration’选项。
1.2选择正确的显示卡输出,在其前设置“P”,其它的输出设备设置为“NC”。
一般情况主板上集成的显卡设备是“VGA Acpi(HWP0002,PNP0A03,0)/PCI(3|0)”,外加的显卡设备是“VGA Acpi(HWP0002,PNP0A03,300)/PCI(1|0)”。
设置完成后保存设置。
2 做SAS卡磁盘镜像(此步可选)如果不做镜像此步可以略高。
如果HP rx2660小机配置多块硬盘,并且没有配置raid卡,两块硬盘做镜像可以通过主板上的SAS卡进行配置。
2.1从引导菜单中选择EFI Shell (Built In)2.2回车进入shell界面,键入drvcfg –s命令。
2.3选择做镜像的SAS卡2.4选择“RAID Properties”2.4选择“RAID Properties”2.5默认“RAID DISK”为“NO”,用空格键将其改为“Yes”,键入“c”创建镜像盘,保存配置。
3做RAID卡磁盘镜像(此步可选)如果机器配置了RAID卡,用RAID卡做磁盘RAID 1或RAID 5。
3.1 在机器启动期间看屏幕提示按“F8”键,进入设置界面,根据屏幕提示操作。
3 操作系统安装3.1 准备HP-UX操作系统光盘(两张DVD),版本2007年12月份以后(HP-UX 11i V2B.11.23)。
3.2 连接计算机所有电缆,加电,把可引导的第一张DVD光盘放入光驱3.3 系统开始引导,(如果系统没有自动引导)它会转到引导菜单。
这是一个限时菜单,按任意键可以使计时器停止运行。
3.4 可以按下列步骤从EFI shell 手动进行安装。
图解HP_UX安装LSOF过程概述:HP_UX环境下LSOF软件的安装过程分为了四步:第一步:确认操作系统版本;第二步:下载对应版本的安装文件;第三步安装软件;第四步启动运行。
第一步:确认系统版本在命令行里输入命令: uname -a,查看操作系统的版本号。
由图一可以查看到操作系统是64位的HP-UX操作系统,版本号是B.11.31图 1 查看操作系统第二步:下载安装软件LSOF的下载地址: /hppd/hpux/Sysadmin 在浏览器上打开后,可以查找到目前最新的版本为lsof-4.89-ia64_64-11.31.depot.gz将安装文件下载到本机后,可以通过ftp工具,将安装文件从Windows 环境上传到HP_UX环境。
[注意:FTP工具的传输模式为Binary,二进制类型]上传到HP_UX的安装路径为,如图二所示:/usr/local/lsof/lsof-4.89-ia64_64-11.31.depot.gz图 2 安装路径如果没有lsof文件夹目录,可以在/usr/local目录下使用mkdir lsof命令建立lsof文件夹[注意:要使用root用户创建]第三步:安装LOSF软件步骤1:登录系统使用root 用户登录到HP-UX操作系统。
输入命令swinstall -s /usr/local/lsof 可进入安装程序界面(如图3)。
因为HP_UX不支持tar -xzvf命令中的z命令,所以可以不用解压直接进行安装。
图3步骤2:安装软件根据提示,按下回车键“Enter”,进入第二个界面(如图4)图4点击字母“O”键,可进行确定,进入安装程序界面(如图5)。
图5使用键盘上的方向键→↑←使光标移动到Source Depot Type选项,使用回车键“Enter”进入并选中里面的Local Tape选项,代表着本地磁盘。
然后会自动在Source Host Name..选项出现本地主机的名称为:vPar03;使用方向键→↑←来到Source Depot Path..的横线上,输入之前的安装路径/usr/local/lsof/lsof-4.89-ia64_64-11.31.depot.gz然后使用方向键→↑←将光标切回选择状态,点击“O”键选择OK,之后出现安装主页面(如图6)。
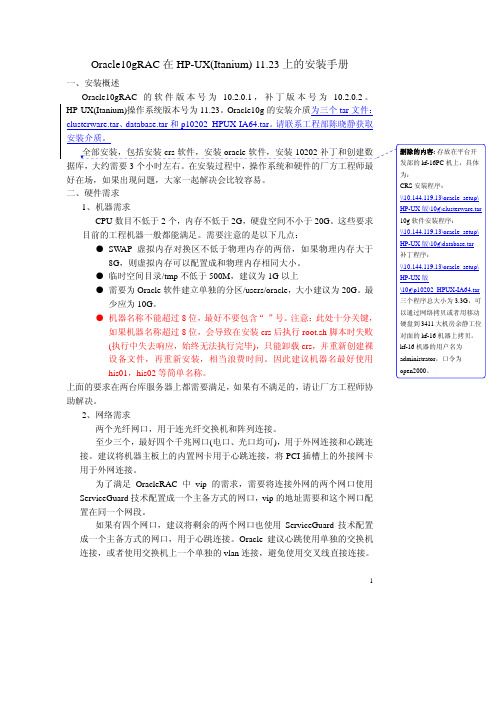
Oracle10gRAC在HP-UX(Itanium) 11.23上的安装手册一、安装概述Oracle10gRAC的软件版本号为10.2.0.1,补丁版本号为10.2.0.2。
HP-UX(Itanium)操作系统版本号为11.23。
Oracle10g的安装介质为三个tar文件:clusterware.tar、database.tar和p10202_HPUX-IA64.tar。
请联系工程部陈晓静获取上面的要求在两台库服务器上都需要满足,如果有不满足的,请让厂方工程师协助解决。
2、网络需求两个光纤网口,用于连光纤交换机和阵列连接。
至少三个,最好四个千兆网口(电口、光口均可),用于外网连接和心跳连接。
建议将机器主板上的内置网卡用于心跳连接,将PCI插槽上的外接网卡用于外网连接。
为了满足OracleRAC中vip的需求,需要将连接外网的两个网口使用ServiceGuard技术配置成一个主备方式的网口,vip的地址需要和这个网口配置在同一个网段。
如果有四个网口,建议将剩余的两个网口也使用ServiceGuard技术配置成一个主备方式的网口,用于心跳连接。
Oracle建议心跳使用单独的交换机连接,或者使用交换机上一个单独的vlan连接,避免使用交叉线直接连接。
1以下是网络连接示例图,请让厂方工程师照此配置:假设机器名为his01和his02,每台机器有四个网口和两个光纤口。
其中lan0和lan3两个网口配置成主备方式的网口,配置170.101.1的公共网段地址,lan0为主网口,lan3为备网口。
lan0和lan3分别接在公网的两台交换机A和B 上,两台公网交换机之间通过级联线连接。
lan1和lan2两个网口配置成主备方式的网口,配置10.0.0的私有网段地址,lan1为主网口,lan2为备网口。
接在一台单独交换机上。
Oracle的vip地址配置到170.101.1的网段上。
注意:● Oracle的vip地址不需要额外设置,只需要将vip的地址加入到hosts文件即可。

目录2.3.2 主机系统规划:..................................................... 错误!未定义书签。
2.3.3 EV A规划 ............................................................. 错误!未定义书签。
2.3.4 MSA规划 ............................................................ 错误!未定义书签。
2.3.5 双机规划................................................................. 错误!未定义书签。
第五章系统配置 ...................................................................... 错误!未定义书签。
5.1 SAN基本连接............................................................... 错误!未定义书签。
5.2 交换机划Zone ............................................................. 错误!未定义书签。
5.3 SFP模块........................................................................ 错误!未定义书签。
5.4 光纤线识别................................................................... 错误!未定义书签。
5.5 操作系统释放............................................................... 错误!未定义书签。

HPUX 11.23下根盘镜像全过程(上)分类:HPUX 2009-04-27 16:17 395人阅读评论(0) 收藏举报、知识准备HPUX 11.23与11.22版本配置根盘镜像的最大的不同:1. 新增加了HPSP分区;11.22系统根盘只划分了两个分区EFI/HP-UX,在11.23系统中,划分了3个分区,分别为EFI/HP-UX/HPSP.相应在使用idisk命令划分硬盘分区时使用的/tmp/partitionfile 文件中的内容也做了相应调整.2. EFI分区大小从原先的100M,增加到500M二、实验目的对一台HP rx8640机器的2号分区根盘(146GB)镜像;三、操作过程1. From HPUX, use vgdisplay to identify the disk that is in vg00. Use ioscan to find the spare disk.# vgdisplay -v --> vg00 is on /dev/dsk/c0t6d0s2# ioscan -efunC disk --> c2t6d0Class I H/W Path Driver S/W State H/W Type Description========================================================================disk 1 0/0/0/2/0.6.0 sdisk CLAIMED DEVICE HP 146 GST3146855LC/dev/dsk/c0t6d0 /dev/rdsk/c0t6d0/dev/dsk/c0t6d0s1 /dev/rdsk/c0t6d0s1/dev/dsk/c0t6d0s2 /dev/rdsk/c0t6d0s2/dev/dsk/c0t6d0s3 /dev/rdsk/c0t6d0s3Acpi(HWP0002,PNP0A03,0)/Pci(2|0)/Scsi(Pun6,Lun0)/HD(Part1,Sig0E481F42-F04C-11DC-8002-D6217B60E5 88)//EFI/HPUX/HPUX.EFIdisk 0 0/0/0/2/1.2.0 sdisk CLAIMED DEVICE Optiarc DVD RW AD-5170A/dev/dsk/c1t2d0 /dev/rdsk/c1t2d0disk 2 0/0/0/3/0.6.0 sdisk CLAIMED DEVICE HP 146 GST3146855LC/dev/dsk/c2t6d0 /dev/rdsk/c2t6d02. Create the system, OS, and service partitions.# vi /tmp/partitionfile3EFI 500MBHPUX 100%HPSP 400MB# idisk -wf /tmp/partitionfile /dev/rdsk/c2t6d0idisk version: 1.31********************** WARNING ***********************If you continue you may destroy all data on this disk.Do you wish to continue(yes/no)? yes <-- Answer "yes" and not "y"3. Create device files needed for the new partitions.# insf -eC diskinsf: Installing special files for sdisk instance 1 address 0/0/0/2/0.6.0 insf: Installing special files for sdisk instance 0 address 0/0/0/2/1.2.0 insf: Installing special files for sdisk instance 2 address 0/0/0/3/0.6.0 insf: Installing special files for sdisk instance 3 address 0/0/12/1/0/4/1.0.0 insf: Installing special files for sdisk instance 4 address 0/0/12/1/0/4/1.1.0 insf: Installing special files for sdisk instance 5 address 0/0/12/1/0/4/1.2.0 insf: Installing special files for sdisk instance 6 address 0/0/12/1/0/4/1.3.0 insf: Installing special files for sdisk instance 7 address 0/0/14/1/0/4/1.0.0 insf: Installing special files for sdisk instance 8 address 0/0/14/1/0/4/1.1.0 insf: Installing special files for sdisk instance 9 address 0/0/14/1/0/4/1.2.0 insf: Installing special files for sdisk instance 10 address 0/0/14/1/0/4/1.3.04. Verify the partition table.# idisk /dev/rdsk/c2t6d0idisk version: 1.32EFI Primary Header:Signature = EFI PARTRevision = 0x10000HeaderSize = 0x5cHeaderCRC32 = 0xe51d545dMyLbaLo = 0x1MyLbaHi = 0x0AlternateLbaLo = 0x1117732fAlternateLbaHi = 0x0FirstUsableLbaLo = 0x22FirstUsableLbaHi = 0x0LastUsableLbaLo = 0x1117730cLastUsableLbaHi = 0x0Disk GUID = 711f04da-2190-11dd-8001-d6217b60e588PartitionEntryLbaLo = 0x2PartitionEntryLbaHi = 0x0NumberOfPartitionEntries = 0xcSizeOfPartitionEntry = 0x80PartitionEntryArrayCRC32 = 0x280b786cPrimary Partition Table (in 512 byte blocks):Partition 1 (EFI):Partition Type GUID = c12a7328-f81f-11d2-ba4b-00a0c93ec93bUnique Partition GUID = 711f066a-2190-11dd-8002-d6217b60e588 Starting Lba Lo = 0x22Starting Lba Hi = 0x0Ending Lba Lo = 0xfa021Ending Lba Hi = 0x0Partition 2 (HP-UX):Partition Type GUID = 75894c1e-3aeb-11d3-b7c1-7b03a0000000 Unique Partition GUID = 711f0688-2190-11dd-8003-d6217b60e588 Starting Lba Lo = 0xfa022Starting Lba Hi = 0x0Ending Lba Lo = 0x110af30bEnding Lba Hi = 0x0Partition 3 (HPSP):Partition Type GUID = e2a1e728-32e3-11d6-a682-7b03a0000000 Unique Partition GUID = 711f06a6-2190-11dd-8004-d6217b60e588 Starting Lba Lo = 0x110af30cStarting Lba Hi = 0x0Ending Lba Lo = 0x1117730bEnding Lba Hi = 0x0EFI Alternate Header:Signature = EFI PARTRevision = 0x10000HeaderSize = 0x5cMyLbaLo = 0x1117732fMyLbaHi = 0x0AlternateLbaLo = 0x1AlternateLbaHi = 0x0FirstUsableLbaLo = 0x22FirstUsableLbaHi = 0x0LastUsableLbaLo = 0x1117730cLastUsableLbaHi = 0x0Disk GUID = 711f04da-2190-11dd-8001-d6217b60e588PartitionEntryLbaLo = 0x1117730ePartitionEntryLbaHi = 0x0NumberOfPartitionEntries = 0xcSizeOfPartitionEntry = 0x80PartitionEntryArrayCRC32 = 0x280b786cAlternate Partition Table (in 512 byte blocks):Partition 1 (EFI):Partition Type GUID = c12a7328-f81f-11d2-ba4b-00a0c93ec93b Unique Partition GUID = 711f066a-2190-11dd-8002-d6217b60e588 Starting Lba Lo = 0x22Starting Lba Hi = 0x0Ending Lba Lo = 0xfa021Ending Lba Hi = 0x0Partition 2 (HP-UX):Partition Type GUID = 75894c1e-3aeb-11d3-b7c1-7b03a0000000 Unique Partition GUID = 711f0688-2190-11dd-8003-d6217b60e588 Starting Lba Lo = 0xfa022Starting Lba Hi = 0x0Ending Lba Lo = 0x110af30bEnding Lba Hi = 0x0Partition 3 (HPSP):Partition Type GUID = e2a1e728-32e3-11d6-a682-7b03a0000000 Unique Partition GUID = 711f06a6-2190-11dd-8004-d6217b60e588 Starting Lba Lo = 0x110af30cStarting Lba Hi = 0x0Ending Lba Hi = 0x0Legacy MBR (MBR Signatures in little endian):MBR Signature = 0x6c041f71Protective MBR5. Verify that the device files were created properly.# ioscan -efnC disk --> c2t6d0 is 0/0/0/3/0.6.06. Populate the /efi/hpux/ directory in the new EFI system partition.# mkboot -e -l /dev/rdsk/c2t6d07. Change the auto file for the mirror to boot without quorum.NOTE: Using "s1"# echo "boot vmunix -lq" > /tmp/AUTO.lq# efi_cp -d /dev/rdsk/c2t6d0s1 /tmp/AUTO.lq /EFI/HPUX/AUTONOTE: We assume that if we boot from the primary, the mirror is fullyfunctional and therefore we don't need to override quorum. Your site mightrequire that both disks override quorum.8. Verify the contents of the auto file on the primary and the mirror.NOTE: Using "s1"# efi_cp -d /dev/rdsk/c0t6d0s1 -u /EFI/HPUX/AUTO /tmp/AUTO.pri# efi_cp -d /dev/rdsk/c2t6d0s1 -u /EFI/HPUX/AUTO /tmp/AUTO.alt# cat /tmp/AUTO.priboot vmunix# cat /tmp/AUTO.altboot vmunix -lq分享到:∙上一篇:HPUX下定位网卡位置∙下一篇:HPUX 11.23下根盘镜像全过程(下)HPUX 11.23下根盘镜像全过程(下)分类:HPUX 2009-04-27 16:19 300人阅读评论(0) 收藏举报9. Add the new partition to vg00.NOTE: Using "s2"# pvcreate -fB /dev/rdsk/c2t6d0s2Physical volume "/dev/rdsk/c2t6d0s2" has been successfully created.# vgextend vg00 /dev/dsk/c2t6d0s2Volume group "vg00" has been successfully extended.Volume Group configuration for /dev/vg00 has been saved in /etc/lvmconf/vg00.conf10. Mirror all logical volumes in vg00.NOTE: Using "s2"# lvextend -m 1 /dev/vg00/lvol1 /dev/dsk/c2t6d0s2The newly allocated mirrors are now being synchronized. This operation willtake some time. Please wait ....Logical volume "/dev/vg00/lvol1" has been successfully extended.Volume Group configuration for /dev/vg00 has been saved in /etc/lvmconf/vg00.conf # lvextend -m 1 /dev/vg00/lvol2 /dev/dsk/c2t6d0s2The newly allocated mirrors are now being synchronized. This operation willtake some time. Please wait ....Logical volume "/dev/vg00/lvol2" has been successfully extended.Volume Group configuration for /dev/vg00 has been saved in /etc/lvmconf/vg00.conf # lvextend -m 1 /dev/vg00/lvol3 /dev/dsk/c2t6d0s2The newly allocated mirrors are now being synchronized. This operation willtake some time. Please wait ....Logical volume "/dev/vg00/lvol3" has been successfully extended.Volume Group configuration for /dev/vg00 has been saved in /etc/lvmconf/vg00.conf # lvextend -m 1 /dev/vg00/lvol4 /dev/dsk/c2t6d0s2The newly allocated mirrors are now being synchronized. This operation willtake some time. Please wait ....Logical volume "/dev/vg00/lvol4" has been successfully extended.Volume Group configuration for /dev/vg00 has been saved in /etc/lvmconf/vg00.conf # lvextend -m 1 /dev/vg00/lvol5 /dev/dsk/c2t6d0s2The newly allocated mirrors are now being synchronized. This operation willtake some time. Please wait ....Logical volume "/dev/vg00/lvol5" has been successfully extended.Volume Group configuration for /dev/vg00 has been saved in /etc/lvmconf/vg00.conf # lvextend -m 1 /dev/vg00/lvol6 /dev/dsk/c2t6d0s2The newly allocated mirrors are now being synchronized. This operation willtake some time. Please wait ....Logical volume "/dev/vg00/lvol6" has been successfully extended.Volume Group configuration for /dev/vg00 has been saved in /etc/lvmconf/vg00.conf # lvextend -m 1 /dev/vg00/lvol7 /dev/dsk/c2t6d0s2The newly allocated mirrors are now being synchronized. This operation willtake some time. Please wait ....Logical volume "/dev/vg00/lvol7" has been successfully extended.Volume Group configuration for /dev/vg00 has been saved in /etc/lvmconf/vg00.conf # lvextend -m 1 /dev/vg00/lvol8 /dev/dsk/c2t6d0s2The newly allocated mirrors are now being synchronized. This operation willtake some time. Please wait ....Logical volume "/dev/vg00/lvol8" has been successfully extended.Volume Group configuration for /dev/vg00 has been saved in /etc/lvmconf/vg00.conf11. Add the new disk to /stand/bootconf.NOTE: Using "s2"# vi /stand/bootconfl /dev/dsk/c0t6d0s2l /dev/dsk/c2t6d0s212. Verify that the new disk was added to vg00, and the lv's are in sync.# vgdisplay -v vg00--- Volume groups ---VG Name /dev/vg00VG Write Access read/writeVG Status availableMax LV 255Cur LV 8Open LV 8Max PV 16Cur PV 2Act PV 2VGDA 4PE Size (Mbytes) 32Total PE 8692Alloc PE 2330Free PE 6362Total PVG 0Total Spare PVs 0Total Spare PVs in use 0--- Logical volumes ---LV Name /dev/vg00/lvol1LV Status available/syncd LV Size (Mbytes) 1792 Current LE 56Allocated PE 112Used PV 2LV Name /dev/vg00/lvol2LV Status available/syncd LV Size (Mbytes) 8192 Current LE 256Allocated PE 512Used PV 2LV Name /dev/vg00/lvol3LV Status available/syncd LV Size (Mbytes) 992 Current LE 31Allocated PE 62Used PV 2LV Name /dev/vg00/lvol4LV Status available/syncd LV Size (Mbytes) 512 Current LE 16Used PV 2LV Name /dev/vg00/lvol5LV Status available/syncd LV Size (Mbytes) 128 Current LE 4Allocated PE 8Used PV 2LV Name /dev/vg00/lvol6LV Status available/syncd LV Size (Mbytes) 9184 Current LE 287Allocated PE 574Used PV 2LV Name /dev/vg00/lvol7LV Status available/syncd LV Size (Mbytes) 7776 Current LE 243Allocated PE 486Used PV 2LV Name /dev/vg00/lvol8LV Status available/syncd LV Size (Mbytes) 8704 Current LE 272Allocated PE 544Used PV 2--- Physical volumes ---PV Name /dev/dsk/c0t6d0s2 PV Status available Total PE 4346Free PE 3181Proactive Polling OnPV Name /dev/dsk/c2t6d0s2PV Status availableTotal PE 4346Free PE 3181Autoswitch OnProactive Polling On13. Verify that the BDRA was updated properly. Take note of the HW paths for step 14.# lvlnboot -vBoot Definitions for Volume Group /dev/vg00:Physical Volumes belonging in Root Volume Group:/dev/dsk/c0t6d0s2 (0/0/0/2/0.6.0) -- Boot Disk/dev/dsk/c2t6d0s2 (0/0/0/3/0.6.0) -- Boot DiskBoot: lvol1 on: /dev/dsk/c0t6d0s2/dev/dsk/c2t6d0s2Root: lvol3 on: /dev/dsk/c0t6d0s2/dev/dsk/c2t6d0s2Swap: lvol2 on: /dev/dsk/c0t6d0s2/dev/dsk/c2t6d0s2Dump: lvol2 on: /dev/dsk/c0t6d0s2, 014. Add EFI primary and high availability boot path menu entries.# setboot -p 0/0/0/2/0.6.0# setboot -h 0/0/0/3/0.6.0# setboot -b on15. Verify that the primary and mirror boot paths are configured properly.# setbootPrimary bootpath : 0/0/0/2/0.6.0HA Alternate bootpath : 0/0/0/3/0.6.0Alternate bootpath : 0/0/0/1/0Autoboot is ON (enabled)16. Test the new mirror by booting off of it.# cd /# shutdown -ry 0SHUTDOWN PROGRAM05/14/08 17:19:51 EATBroadcast Message from root (console) Wed May 14 17:19:51...SYSTEM BEING BROUGHT DOWN NOW ! ! !# grep "Boot device" /var/adm/syslog/syslog.logvmunix: Boot device's HP-UX HW path is: 0/0/0/2/0.6.017. Change the boot sequence in order to boot from mirror disk /dev/dsk/c2t6d0:# setboot -p 0/0/0/3/0.6.0# setboot -h 0/0/0/2/0.6.0# setboot -b on# setbootPrimary bootpath : 0/0/0/3/0.6.0HA Alternate bootpath : 0/0/0/2/0.6.0Alternate bootpath : 0/0/0/1/0# cd /# shutdown -ry 018. Verify which disk/kernel you booted from.# grep "Boot device" /var/adm/syslog/syslog.logvmunix: Boot device's HP-UX HW path is: 0/0/0/3/0.6.0overhpux 11.23安腾做mirror步骤详细说明,见全文...HPUX 11.23与11.22版本配置根盘镜像的最大的不同:1. 新增加了HPSP分区11.22系统根盘只划分了两个分区EFI / HP-UX,在11.23系统中,划分了3个分区,分别为EFI / HP-UX / HPSP相应在使用idisk命令划分硬盘分区时使的/tmp/partitionfile 文件中的内容也做了相应调整。
目录版本说明 (2)目录 (2)1 安装前的准备工作 (3)2 安装系统 (3)1.安装前的准备工作在安装系统前,请确认如下信息:∙硬件:硬件是否已经准备好,如网线是否连接、电源是否插上、键盘(鼠标)显示器是否已与主机连接等。
∙安装介质:HPUX系统安装盘2.安装系统1.将CONSOLE连接到主机的终端口2.开启外部设备(磁盘阵列,外置光驱等)的电源;3.开启主机电源,这时系统会进行硬件自检,当控制台窗口上出现了“To discontinue, press any key within 10 seconds.”的信息时,按任意键终止系统继续执行。
4.按任意键后,系统会停止自动执行,进入交互状态。
5.将安装介质放入主机光驱中。
6.在终端上输入sea。
这个命令会使系统搜索与主机相连接的所有可以启动操作系统的设备。
系统将给出一个设备列表。
7.在设备列表中找到光驱所对应的代号,如上图中光驱的代号为P2,在终端提示行上输入boot p2 ,此时系统会提示“Interact with IPL (Y or N)?>”,输入n。
8.系统会从光盘上启动,终端上会显示硬件的总结信息,并提供了安装、启动恢复shell等选项,请选择“Install HP-UX”,然后按回车。
9.系统会提示用户选择系统安装方式的方式和安装时的用户界面方式。
使用缺省的方式,然后按OK。
10.系统会提示用户输入系统的整体配置策略,使用缺省的“HP-UXB.11.00 Default”,并按Next。
11.系统提示用户选择操作系统的环境,选择当前设置(尽管显示为”English HP-UX 11.00 CDE”,但系统会自动安装中文CDE环境),并按Next。
12.系统提示用户操作系统安装到哪个硬盘上,请选择优先级高的硬盘,即硬件路径为0/0/2/0.2.0的硬盘(Drive A1),然后按OK 及Next。
13.系统提示用户选择主交换区的大小,因主交换区的大小已预先设定为2048Mb,因此在这里无需作修改,直接按Next。
HP-UX11.0操作系统安装指南--------------------------------------------------------------------------------安装所需的介质和资料:HP-UX 11.0 Core OS Install/Update/Recovery光盘(1张)HP-UX 11.0 Support Plus光盘(1张)HP-UX 11.0 Application Software光盘(5张)1.安装前的准备:在系统的安装之前检查机器的各线连接,将机器通过网线接到hub上,并且在确保各个外设(磁带机.磁盘阵列等)加电后,然后再开机。
2.在屏幕上将看到:"Processor is booting from fist availiable deviceTo discontinue.press any keuy within 10 seconds"在10秒之内按任意键,之后屏幕将显示一9个命令集画面:Main Menu…………………………………………….Command DescriptionBoot[PRI|ALT|] Boot from specified path………………………………………………………………………………………………………………………………………………Main Menu : Enter command >3.将HP-UX11.0CoreOSInstall/Update/Recovery放入光驱或DVD,4.键入命令SEA,系统会查询硬件设备的物理路径:Main menu :Enter command >sea(例如)Path Number Device path Device TypeP0 8/4.5 Random access mediaP1 8/4.9 Random access mediaP2 ……………5.根据'device path如:8/4.5'与机器前门内标注(D250)确定光驱或DVD的路径,假设为P1 8/4.9键入命令bo p1回车:Main Menu:Enter command>bo p16 .系统会询问是否要进行交互访问,要输入 n回车Interact with IPL? > n注意: :接下来可能出现屏幕乱码现象,解决方法:按User System 键,屏幕底出现8个小亮块,最右边一块为按F8键,8个亮块发生变化,其中有一个为 ,按F5键, 进入TERMINAL CONFIGURA TIONJIEMIAN界面,将TERM MODE项的值改为EM100),然后按F1,保存设置7.系统要求选择安装方式:Welcome to the HP-UX installation/recovery process!Use the <tab> key to navigate between fields,and the arrow keysWithin e the <return/enter>key to select an item .Use the <return>or <spacebar>to pop-up a choices list.If theMenus are not clear,select the "Help" item for more information.[Install HP-UX ][Run a Recovery Shell][Advance Options ]选择[Install HP-UX],回车继续。
1-touch for HP-UX 安装配置操作手册版本历史目录第一章安装要求 (5)2.1操作系统环境要求 (5)2.2CommVault软件安装要求 (5)2.3在备份恢复HP-UX时所用到常见命令及文档 (5)1.3.1查看主机名称 (6)1.3.2 查看Ignite版本 (6)1.3.3查看Ignite安装情况 (6)1.3.4 查看操作系统版本 (7)1.3.5 查看文件系统使用空间情况 (7)1.3.6查看机器基本配置信息 (8)1.3.7查看IP配置 (9)1.3.8查看网卡信息 (10)1.3.9 Install/Uninstall Ignite软件 (13)1.3.10 Ignite详细信息介绍 (14)第二章开始安装 (14)2.1涉及主机及安装模块要求 (14)2.21-touch Server模块安装 (14)2.31-touch客户端软件安装 (15)第三章备份篇 (16)3.1系统备份前检查工作 (16)3.2配置子客户端备份 (17)第四章恢复篇 (21)4.1在CommVault软件界面上恢复操作系统镜像文件 (21)4.2在目标主机上恢复HP-UX镜像文件,恢复操作系统 (27)4.2.1 网络引导恢复第一阶段(准备异机恢复主机环境信息) (27)4.2.2网络引导恢复第二阶段(将镜像文件恢复至目标主机) (35)第一章安装要求1.1操作系统环境要求One- touch在HP-UX平台上运行,会调用操作系统的Ignite软件操作备份和恢复操作;其中针对操作系统的环境要求如下:Ignite版本要求1-touch Server和客户端版本相同;另外,在需要备份的HP-UX客户端,/var目录至少需要2G以上的剩余空间,用于存放客户端的配置信息;1.2COMMVAULT软件安装要求CommVault 1-touch for HP-UX在备份和恢复HP-UX操作系统时,会需要两个角色,即1-touch Server和需要保护的HP-UX客户端;针对不同的角色,需要安装不同的CommVault软件模块;具体要求如下:1-touch Server:✧需要安装CommVault 1-Touch Boot Server Agent;✧根据需要保护的HP-UX的客户端数量,/var空间至少保留vg00的使用空间*客户端数量相对应的空间, 例如,用户需要保留2台HP-UX客户端,每台主机VG00大概用了8G左右,那1-touch的/var空间需要具有16G左右的空间。
安腾HPUX11.23安装
插入第一张光盘,开电启动,等出现如下界面,先选择Boot Configuration→console configuration→移动到VGA一行,按Enter 键改为P(primary 为首要输出) 这样就能在显示器上输出,否则输出到串口上。
选择从光盘启动,如上图所示
让系统自动从光盘引导文件启动
选择完之后按两次回车,到以下界面:
选择install hp-ux
然后进入以下界面
SOFTWARE页不需要改任和选项。
再选择8小时时区) 设置root密码
然后在file system中改分区大小
以下根据硬盘大小146G划分的
/stand 分区是存放系统内核用的320M
/primary 是swap分区,一般为内存的2-3倍12288M
/ 20480M
/var 分区10240M
/usr 分区10240M
/tmp 分区10240 M
/opt 分区10240 M
/home 目前不用,默认大小1024M
剩余硬盘大小等装完系统后再分
Advanced中不需要改任何选项。
选择GO!继续
会提示继续安装会破坏硬盘上以前的数据,确定重新安装的话,继续GO!
安装程序开始从光盘copy文件。
11.23操作系统一共有两张安装光盘,在第一章光盘的文件copy完之后,系统会提示插入第
二张光盘。
以后安装过程不再需要手工干涉。
安装完系统之后会自动重启一次。
自动重启后会再让选择一次键盘类型。
选择完之后系统继续启动完毕。
安装完毕。
安装完系统之后,打上最新的系统补丁。
补丁文件:补丁光盘上:2007Mar1123.depot
安装方法:#mkdir /cdrom
#mount /dev/dsk/c0t0d0 /cdrom
#swinstall –s /cdrom/2007Mar1123.depot
在出现的文件列表中用选中安装文件,然后在action菜单中选择mark for install,然后再在action菜单中选择install
安装完需要重新启动。
使用系统管理工具SAM
#sam 打开SAM界面
选择accounts for users and groups来增加用户和组
选择networking and communications network interface card来更改ip 地址
更改完主机IP之后,CDE界面可能会无响应。
可从其它机器上telnet过来,用以下两个命
令来重新启动CDE界面
#/sbin/init.d/dtlogin.rc stop
#/sbin/init.d/dtlogin.rc start
看网卡地址命令:#netstat -in
选择disks and file systems→ disks and file systems(fsweb)→logic volumes→create lv来建立新的LV 在界面中将lv name(users) 和size(按实际大小填写) 添上,然后点击create即可。
选择disks and file systems→ disks and file systems(fsweb)→file systems→add vxfs将新建立的LV做成vxfs文件系统。
在界面中添上mount point,(/users)在select unused lv中将刚才创建的LV点选上。
将enable large files 前面的对勾点上,(支持大文件系统),点击add vxfs 完成。
如果要将一块新加硬盘整块做成文件系统,则在add vxfs界面中选择select unused disk,不要选择select unused lv
更改主机名:
#set_parms hostname 会提示输入新的主机名。
改完重新启动系统即可生效。
#bdf 命令察看系统安装分区
#netstat -in 看网卡
# ioscan -kfnCdisk 可看到光驱,硬盘
#shutdown –hy 0 关机
#shutdown –ry 0 重起
安腾HPUX多显卡显示
进到sam→display→x server configuration
第二块显卡图标是灰色的,选中第二块显卡,点击右键,选“add screen to configuration”
第二块显卡图标变成高亮之后退出,系统会问是否保存。
Ok即可。
系统自动重启CDE界面之后,会看到第二个显示器已经有信号了,但是鼠标还不能移动过去。
然后我们编辑/etc/X11/XF86Config这个文件
将
Section ServerLayout
Identifier “Main Layout”
Screen 0 “Screen 0-1” 0 0
Screen 1 “Screen 0-2” 0 0
InputDevice “Mouse0” “CorePointer”
InputDevice “Keyboard0” “CoreKeyboard”
EndSection
改为:
Section ServerLayout
Identifier “Main Layout”
Screen 0 “Screen 0-1” 0 0
Screen 1 “Screen 0-2” RightOf“Screen 0-1” (写成LeftOf也行)InputDevice “Mouse0” “CorePointer”
InputDevice “Keyboard0” “CoreKeyboard”
EndSection
保存退出,重启CDE即可。
#/sbin/init.d/dtlogin.rc stop
#/sbin/init.d/dtlogin.rc start
要是我想在1号屏上输入SAM,在2号屏上显示,就打
#export DISPLAY=:0.1
#sam
图形窗口就出现在第二个显示器上了。