真空除氧器操作说明书(中英文)
- 格式:doc
- 大小:94.00 KB
- 文档页数:17
SmartVacuumCleaner Instruction Manual(Household)In accordance with national standards:GB4706.1-2005GB4706.7-2014GB4706.1-2005GB4706.7-2014Model:F6SWarranty Card IncludedWe sincerely thank you for purchasing our Smart Vacuum Cleaner.The shape and color of the illustrations in this manual may be different from which of the actual product. The actual product shall prevail.Please read this instruction manual carefully before charging and using this product so as to operate correctly and extend its service life.Before all,please read[Safety Precautions]carefully before use.After reading,please keep this instruction manual for future reference.If you need to give this product to a third party,please attach this instruction manual with this product.CatalogI.Safety Precautions (2)II.Introduction (5)age (9)IV.Charging (13)V.Maintenance (14)VI.Specification (15)VII.Environmental Protection (16)VIII.Warranty Instruction (17)IX.Warranty Card (18)I.Safety Precautions1.1General Safety Regulations81.2Safety Instruction•Please read all safety precautions and instructions before operating this robot.•Please pay attention to all warnings on battery,power adapter,robot and instruction manual.•Please follow all instructions described in this manual.•All non-routine maintenance shall be the responsibility of Fushida's professional staff.•The harm and the degree of damage caused by the wrong operation are explained as follows. WarningAttention1.3About Safety Matters of ProductWarningThisAttentionThis product is for indoor use only.Avoid vacuum cleaner damage caused by inhalation of water,oil or other liquids.Before use,please tidy up the scattered wires on the ground,so asnot to interfere with the work of thevacuum cleaner.No heavy weight on the vacuumcleaner.Do not lift the vacuum cleaner by the front shell alone,as it will damage the vacuum cleaner.The charging stand should be placed against the wall.Theadapter cord should not be placed randomly onthe floor to prevent it from being wound around the bottom of thevacuum cleaner.1.4About Child SafetyChildren are not allowed touse this product alone.Children are not allowed to play with the packaging of the product,otherwise it may cause suffocation.1.5About Battery1.This product can only use the battery provided by the manufacturer;2.The battery must be taken out when the product is discarded;3.If you need to replace the battery,please contact our after-sales service department.If you use the wrong type of battery to replace it,it may cause a safety accident;4.In case of battery leakage,and if you accidentally let the liquid contact with the skin or clothing,you should immediately wipe with a dry cloth.Waste batteries should be sent to the recycle center or designated maintenance center,which cannot be thrown away.II.Introduction2.1Packing ListRobot(batteryincluded)Charging base Power adapter Instruction manual HEPA filter★Tips:*If you do not need to use the product for a long time,Please charge the machine at least every60days.2.2Product ViewRobot front viewBumperON/OFF buttonRecharge buttonOpen to take out thedust boxRobot bottom viewRight side brush Three detectors Right driving wheel Universal wheelLeft side brush Suction channelLeft driving wheel2.3Dust Box and Water Tank Installation•Take out the dust box:hold the handle and pull it out.Dust box into:dust box into the pressflat.•Water tank out:turn the machine over,hold the two sides of the tank with both hands,leftand right balance force up can be.•Water tank loading:hold both sides of the water tank with both hands,let the positioningcolumn of the water tank be aligned with the socket of the base,and press in balance.•Mop installation:after water is injected into the water tank,then the mop cloth is put intothe water tank,and then the mop cloth is flattened and pasted on the water tank.Internal structure of dust boxDust box coverHEPA filterDust boxRobot coverDust box placement zonePower adapterPower portCharging contact pinCharging contact pin2.4Clean the side brush•Clean the side brush with the cleaning brush.If there is a lot of hair on the side brush,you can use scissors to carefully cut the hair,and then clean.1.Installation steps:Align the side brush with the hole at the bottom and press down until you hear a "click"to indicate that the side brush is in place.2.Disassembly steps:Grab the bristles on both ends of the side brush and pull them out slightly.★Tips:Before each use,please check whether these side brushes have been assembled,otherwise it will affect the normal cleaning work of the vacuum cleaner.Dust box installationInstall mopAdd waterInstall the water tank into the robotDust box cover handleage*Attention:Before cleaning,it is necessary to remove the protective block at the front shell of the machine,and tidy up small objects or obstacles in the room,especially wire entanglements,to prevent them from getting stuck and winding into the bottom of the machine.3.1Application RangeRange of non-application*This product is not suitable for use in extremely hot (+60°C or above)or extremely cold (-5°C or below)environments.*This product is for indoor use only.*Do not use this product in the suspended environment without protective guard,so as to avoid the vacuum cleaner falling accidentally and causing personal injury.*Do not use this product in wet or flammable,explosive,or corrosive environments.*Do not allow this product to absorb unextinguished cigarette butts or matches.*This product cannot be used to absorb the toner used in laser printer or copier.These substances may cause fire disaster.*Do not use this product to absorb sharp objects,such as glass,nails,etc.,to avoid product damage.Protective unit Protective unitApplication rangeThe product is suitable for the following floor environment:Wooden floorUndercoat carpet Ceramic tile3.2Operating Status of Robot1.OFF statusWhen the vacuum cleaner is off,long press the""button,and the blue light will be on after the buzzer goes off.The vacuum cleaner will enter the standby mode after3secs.2.Standby statusWhen the robot is in standby state,the blue light is always on.1.If there is no operation,the vacuum cleaner will automatically shut down after5minutes of standby.2.Short press the""button once and the buzzer will go off once to indicate that the vacuum cleaner enters the automatic cleaning mode.3.Short press the""button once and the buzzer will go off once to indicate that the vacuum cleaner enters the automatic recharging mode.4.Long press the""button for3seconds,the buzzer will go off once,and the vacuum cleaner will shut down.5.Plug in the charger,the buzzer will go off once and the vacuum cleaner will enter the charging mode.3.Mobile phone WIFI connection machine operation●Download the"Tuya Smart"APP and sign up;●APP account registered successfully;●Click"Add Device"in the APP,then"Small Home Appliances",and select"Robot Vacuum"●Enter the WiFi interface,select the home WiFi account and enter the password,then click"Ok".●After starting the machine,hold down the""key for3-5seconds.After the blue light flashes,click "Flash(0.5seconds/time)"on the APP.●Enter the add device interface,connect to wifi,and pay attention to the bouncing prompts on the APP during the connection.12345674.Remote control status1.When the vacuum cleaner is off,press the“POWER”switch button on the remote controlto turn it on at distance,and the robot will enter standby mode with a beep of the buzzer. When the vacuum cleaner is in standby status,press the"POWER"button to turn it off.2.Press the“HOME”recharging button on the remote control to enter the automatic recharging mode and automatically find the charging base to charge.3.Press the“TURBO”cleaning button on the remote control to enter the automatic cleaning mode.4.Press the“WALL”edge cleaning button on the remote control to enter the edge cleaning mode.5.Press the“SPOT”spot cleaning button on the remote control to enter the spot cleaningmode,and the vacuum cleaner starts cleaning with the current point as the center.6.Press the up button on the remote control to move forward.7.Press the left button on the remote control to move left.8.Press the down button on the remote control to move backward.9.Press the right button on the remote control to move right.10.“FULLGO”repeated cleaning button.When the robot is in the charging base,long press this button for2seconds and the robot will emit two beeps to enter the automatic repeated cleaning mode with full power.When the robot is completely charged,it will automatically leave the charging base to enter the automatic cleaning mode for cleaning.In case of low battery,the robot will automatically return to the charging base for charging,so repeat twice to exit this mode.During this period,if you press other buttons to make the robot leave the charging base,the reservation function will be cancelled.11.TIMER reserved cleaning buttonWhen the robot is in the charging base,long press this button for2seconds and the robot will emit two beeps to enter the reserved automatic cleaning mode.The robot will automatically leave the charging base and enter the automatic cleaning mode after24hours from the current time.During this period,if you5.Automatic cleaningWhen the robot in the automatic cleaning status,the blue light for automatic cleaning is always on.The automatic cleaning mode is suitable for cleaning the whole home environment.The robot will clean the house according to the internal set cleaning path and automatically avoid obstacles and steps.1.Press the “”button or “”button on the robot,the buzzer willgo off once and the robot will enter standby mode.2.If the battery is low,the buzzer will go off once and the robot will enter the automatic recharging mode.3.If a fault is detected,the robot will enter the fault detected mode and give a failure alarm.4.If the charger is plugged in and the buzzer will go off once and therobot will enter the charging mode.Cleaning path in automatic cleaningmode6.Automatic recharging modeIn automatic recharging mode,the purple light flickers and the robot runs slowly for looking for the charging base,and will be automatically charged after finding it.During the search,it will turn off the vacuum motor. 1.Press the “”button or “”button on the robot,the buzzer will go off once and the robot will enterstandby mode.2.If a fault is detected,the robot will enter the fault detected mode and give a failure alarm.7.Charging modeIn charging mode,the blue and purple lights flicker alternately to indicate that the robot is in charging.After completely charged,the purple light is always on.In the charging,there are the following available function:Press the “”button on the robot,the buzzer will go off once,and the robot will leave the charging base to enter the automatic cleaning mode.8.Fault detected modeIV .Charging4.1Charging base placementIn order to facilitate the robot to find the charging base in time,it is recommended to place the charging base by the wall smoothly,and do not place anything within 2meters of the front or 1meter of the left and right.4.2Automatic chargingIn operating status,when the battery is too low,the robot will automatically start to look for the charging base and then automatically be charged after finding it.When you press the ""button on the robot,the robot will start to look for the charging base and then automatically be charged after finding it.4.3Manual chargingConnect the power adapter jack directly to the robot and then plug the charging cable into the power supply.1.Please completely charge the robot for12hours when charging for the first time.2.For daily use,please place the robot on the charging base and ensure that the charging base is connected to the power supply.3.If you do not use the vacuum cleaner for a long time,please fully charge it and then turn if off to store it ina ventilated and dry place.V.Maintenance5.1Clean the side brushPlease clean the side brush when the side brush becomes dirty.If the side brush is damaged,it can be replaced.5.2Clean the dust box and filterAfter each use,please clean the dust box and filter in time.Specific operations are shown in the following figure:★Tips:After taking out the dust box,please check whether there is any foreign object in the suction inlet and clean it.5.3Clean the sensor and charging contact pinWipe the sensor and charging contact pin gently with a cleaning tool or a soft cloth.★Tips:If there is any foreign object on the charging contact pin on the charging base,please clean it in time.VI.Specification★Note:The company reserves the right to make any technical or design changes to the product as a result of continuous improvement.The right of interpretation belongs to the company.SensorSensorCharging contact pinSensorCharging contact pinCharging contact pinVII.Environmental ProtectionElementPolybrominated PolybrominatedX:To of theproperlyVIII.Warranty InstructionAccording to the"New Three Guarantees",the warranty period of the complete machine is ONE YEAR "from the date of purchase".(The warranty is available for home use only).1.In the warranty period,as long as the fault caused by the quality of the product itself,customers can bring the completed Product Warranty Card and Purchase Invoice to the"Special Maintenance Center" around the country for free repair.2.Please keep the purchase invoice and warranty card properly as the warranty certificate.Once the invoice is altered,the warranty will become invalid.3.If the warranty period has expired,customers can contact the customer service department of the company for mail order of spare parts,or purchase from the local retailer.4.Special customer service center have the obligation to provide superior service to customers.If customers have any objection to their service quality,customers can directly complain to our customer service department.5.If the warranty period is promised in the instruction manual,the instruction manual shall prevail. No maintenance will be free under the following circumstances:1.No warranty card and valid purchase invoice.2.The complete machine and parts have exceeded the free warranty period.3.The model in the warranty card does not conform to the model of product for maintenance or the warranty card is altered.4.Fault or damage caused by failure to operate the machine as specified in the instruction manual.5.Damage caused by improper use,storage and maintenance of consumers.6.Damage caused by disassembly of other maintenance personnel(i.e.not authorized by our company).7.Fault or damage caused by accidental factors or human reasons(including operation error,liquid inlet, improper plugging,scratch,transport,collision,improper voltage input,etc.).8.Damage caused by force majeure(such as earthquake,fire disaster,lightning stroke,etc.).9.Normal and reasonable consumption or damage(such as natural consumption,wear and aging of the shell and connector parts).10.Other faults and damages not caused by quality problems of our products(including parts).Note:The customer service department of our company will still serve you warmly if the product is not within the warranty scope.IX.Warranty CardFCC Instructions:This product has been tested and found to comply with the limits for a Class B digital device,pursuant to Part15of the FCC Rules.These limits are designed to provide reasonable protection against harmful interference in a residential installation.This product generates,uses and can radiate radio frequency energy and,if not installed and used in accordance with the instructions,may cause harmful interference to radio communications.However,there is no guarantee that interference will not occur in a particular installation.If the product does cause harmful interference to radio or television reception,which can be determined by turning the equipment off and on,the user is encouraged to try to correct the interference by one or more of the following measures:-Reorient or relocate the receiving antenna.-Increase the separation between the product and receiver.-Connect the product into an outlet on a circuit different from that to which the receiveris connected.-Consult the dealer or an experienced radio/TV technicianfor help.This device complies with Part15of the FCC Rules.Operation is subject to the following two conditions:(1)this device may not cause harmful interference,and(2)this device must accept any interference received,including interference that may cause undesiredoperation.Warning:Changes or modifications not expressly approved by the party responsible for compliance could void the user’s authority to operate the product.FCC Radiation Exposure Statement:The equipment complies with FCC Radiation exposure limits set forth for uncontrolled environment.This equipment should be installed and operated with minimum distance20cm between the radiator and your body.。
除氧器操作规程范文一、目的为了保证除氧器的安全、稳定运行,达到预期的除氧效果,制定本操作规程。
二、范围本操作规程适用于所有除氧器的操作人员。
三、操作程序1.接班与交班(1)接班人员应仔细阅读前一班次的班组操作记录和运行情况,了解设备现状。
(2)交接班期间,接班人员应与前一班次的操作人员进行面对面沟通,并注意记录有关事项。
特别需要注意的事项:异常运行情况、设备维护保养、待处理的故障、交班记录填写等。
(3)交接班完成后,接班人员应亲自检查设备的运行状况和各类参数,并确保设备处于正常运行状态。
2.设备开机与停机(1)设备开机前,应检查设备各部位是否安装完好、密封良好,并仔细检查阀门、泄漏口、管道等是否存在异常。
(2)按照操作顺序逐一启动设备的主要系统或装置。
3.设备运行监测(1)监测设备各种参数,包括除氧温度、压力、流量等,确保设备运行在正常范围内。
(2)及时发现运行异常或参数波动较大时,应进行相应的调整和处理。
4.设备维护保养(1)设备维护保养包括定期检查、清洁、润滑、紧固螺栓、更换易损件等。
各项操作需按照设备维护手册和规定进行。
(2)维护保养完毕后,应填写维护保养记录,并在设备周围明显位置标识。
5.故障处理(1)对于设备发生的故障,操作人员应根据故障类型,参考设备操作手册或相关资料,按照维修流程进行处理。
(2)操作人员应及时向维修人员报告故障情况,并提供详细的故障描述和现场情况。
6.事故应急处理(1)发生设备事故时,操作人员应立即采取紧急措施,确保人身安全,并在第一时间报告上级和相关部门。
(2)在事故应急处理过程中,应与相关部门保持紧密合作,互相配合,协助进行事故调查和处理。
7.设备停机与保护(1)设备需要停机维修或更换部件时,应按照操作规程正确停机,切断电源,并进行安全防护措施。
(2)在停机期间,应设置相应的警示标识,并严禁他人开机运行设备。
8.清洁与整理操作人员在完成工作后,应将操作区域、工具和设备清洁整理干净,确保无尘、无杂物。
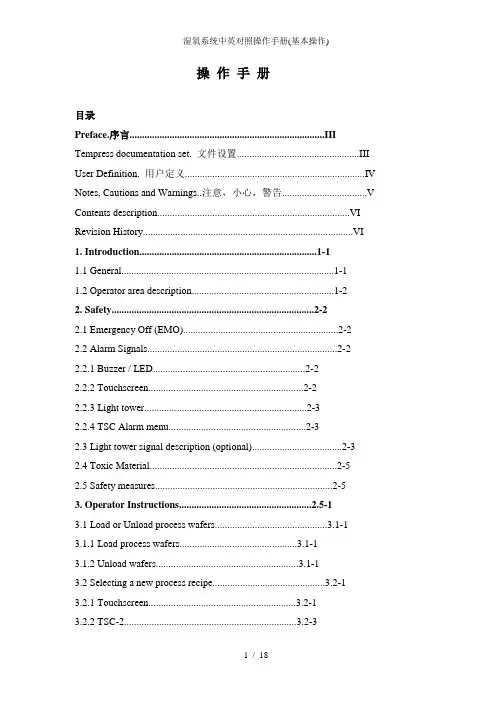
操作手册目录Preface.序言 (III)Tempress documentation set. 文件设置 (III)User Definition. 用户定义 (IV)Notes, Cautions and Warnings..注意,小心,警告 (V)Contents description (VI)Revision History (VI)1. Introduction.......................................................................1-11.1 General.....................................................................................1-11.2 Operator area description.........................................................1-22. Safety.................................................................................2-22.1 Emergency Off (EMO)..............................................................2-22.2 Alarm Signals............................................................................2-22.2.1 Buzzer / LED.............................................................2-22.2.2 Touchscreen..............................................................2-22.2.3 Light tower.................................................................2-32.2.4 TSC Alarm menu.......................................................2-32.3 Light tower signal description (optional)....................................2-32.4 Toxic Material...........................................................................2-52.5 Safety measures.......................................................................2-53. Operator Instructions.....................................................2.5-13.1 Load or Unload process wafers.............................................3.1-13.1.1 Load process wafers...............................................3.1-13.1.2 Unload wafers.........................................................3.1-13.2 Selecting a new process recipe.............................................3.2-13.2.1 Touchscreen...........................................................3.2-13.2.2 TSC-2.....................................................................3.2-33.3 Start/Continue a new process recipe.....................................3.3-1 3.3.1 Touchscreen...........................................................3.3-13.3.2 TSC-2.....................................................................3.3-23.4 Stop a running process recipe...............................................3.4-1 3.4.1 Touchscreen...........................................................3.4-13.4.2 TSC-2.....................................................................3.4-23.5 Abort a running process recipe..............................................3.5-1 3.5.1 Touchscreen...........................................................3.5-13.5.2 TSC-2.....................................................................3.5-23.6 Clear Alarms..........................................................................3.6-1 3.6.1 Required action.......................................................3.6-13.6.2 Touchscreen...........................................................3.6-13.6.3 TSC-2.....................................................................3.6-2Preface序言This set of manuals explains how to operate a Horizontal Diffusion/LPCVD furnace.这套手册是操作水平扩散炉/ LPCVD的说明。

除氧器操作规程《除氧器操作规程》一、前言除氧器是一种用于除去水中氧气的装置,它广泛应用于化工生产、水处理、食品加工等领域。
为了确保安全运行和有效的除氧效果,需要制定详细的操作规程。
二、操作流程1. 准备工作- 确保除氧器设备处于正常状态,无任何异常情况。
- 检查操作人员的工作装备,确保安全帽、工作服等配备完善。
- 确保操作人员已经接受过相关培训,并具备操作资格。
2. 启动除氧器- 按照设备启动程序,逐步启动除氧器设备。
- 监控设备运行情况,确保各项指标符合要求。
3. 运行除氧器- 在运行过程中,定期检查氧气排放口是否畅通。
- 关注氧气浓度指示器的读数,确保氧气浓度符合要求。
- 定期清理除氧器设备,防止积灰、杂物影响除氧效果。
4. 停止除氧器- 根据设备停机程序,逐步停止除氧器设备。
- 检查设备是否完全停止运行,并进行必要的维护工作。
5. 紧急情况处理- 在发生异常情况时,立即停止除氧器设备,并通知相关人员进行处置。
- 所有操作人员需严格按照应急预案进行处置,确保人员和设备的安全。
三、注意事项1. 操作人员需严格遵守操作规程,不得擅自变更操作程序。
2. 在操作过程中,如发现任何异常情况,应及时上报,不得隐瞒或掩饰。
3. 操作人员需定期接受培训,不断提升自身的操作技能和安全意识。
4. 除氧器设备的维护保养需按照相关要求进行,不得马虎处理。
四、总结除氧器是一项关键设备,其安全运行和有效运行对于生产过程至关重要。
制定详细的操作规程,严格执行操作流程,能够有效降低事故风险,确保设备稳定运行,保障生产安全。
旋膜式除氧器安装、使用说明书Rotary film type deaerator installation, operation instruction一、旋膜除氧器的设计特征one, rotary membrane deaerator design features旋膜除氧器,是一种新型热力除氧器,可用于定压、滑压、负压等方式运行,适应于各类电站锅炉、工业锅炉给水及热电厂补给水或热用户用水的除氧。
Rotary membrane deaerator, is a new type of thermal deaerator, can be used for constant pressure, sliding pressure and negative pressure means such as operation, suitable for all kinds of power station boiler, industry boiler feed water and thermal power plant supplies water or hot water users of oxygen.旋膜除氧器的设计特征是:Rotary membrane deaerator design features are:利用气体在水中的溶解特性,通过加热蒸汽,将进入除氧器的补给水、凝结水(包括各种疏水)加热到与除氧器内部压力相对应的饱和温度。
根据亨利定律和道尔顿定律,溶解水中的氧和二氧化碳等非冷凝气体自水中析出,由顶部排气管排入大气,使水中的含氧量达到规定的标准,合格的除氧水贮存在除氧器下部的水箱中,随时准备锅炉给水的需要。
Using gas in water dissolving characteristic, through the heating steam, will enter the deaerator supply water, condensate (including all kinds of hydrophobic) heating to the deaerator internal pressure corresponding saturation temperature.According to Henry's law and Dalton law, the dissolution is the water of oxygen and carbondioxide and noncondensable gas from the water precipitation, the top exhaust pipe into the atmosphere, make the water of oxygen content meet the prescribed standard, qualified oxygen water stored in the lower part of deaerator water tank, ready to boiler feed water needs.旋膜除氧器,由于具备上述技术特性,尤为适用热电厂,热电厂的补给水量大(补水率最大要求100%),补给水温低(最低要求-15℃),含氧量高(约10000ug/L)。
GA/ET-02307/8SOGEV ACSV200, SV300 BR2使用说明书(包括备件清单)适用的编号:10926/10927 : J 97 12 00001 (SV200)10930/10931 : J 97 12 00001 (SV300)95526/95527 – (JAPAN) : J 97 12 00001 (SV200)95536/95537 – (JAPAN) : J 97 12 00001 (SV300)95027 – (USA) : J 97 12 00001 (SV200)95031 – (USA) : J 97 12 00001 (SV300)操作说明书备件清单合格证的EC声明我们,LEYBOLD SA,在此郑重声明,以下规定的产品在设计、型号及流通过程中的改型方面均满足有关EEC指令的安全和健康基本要求。
如果没有我们批准而对产品做任何改变,本声明将无效。
产品结构:单级旋片泵SOGEV AC型号:UV25SV 16 – SV 25 – SV 40 – SV 65SV 100 – SV 200 – SV 300 – SV 585SV 630 – SV 750 – SV 1200和它们的改型,但不带电机交付的泵和带Eex…..电机交付的泵除外。
产品满足下述指令要求:- EEC 机械指令(89/392/EWG)和相继指令91/336/EWG- EEC 低电压指令(73/23/EWG)- EEC 电磁兼容性指令(89/336/EWG)应用协调标准:- EN 1012.1 (project 1993)292.1- EN- EN292.260204.1- EN真空泵安装和启动前,必须阅读并弄懂本使用说明书。
注意:按照最新技术标准和安全规程已经制造出SOGEV AC真空泵。
如果不能正确的安装或不能按指导正确使用,会发生危险。
在一定的运行条件下,当运转真空泵时可能出现危险状态。
如果发生这种情况,请与我们当地办事处联系。
G22CordlessVacuum CleanerInstruction Manual Please read this instruction carefullybefore using. Please make sure to keepthis instruction properly so that it canbe consulted at any time in the future.Please use it properly on the basis of fullunderstanding of this Unified national service hotline: 400-828-2055Thank you for purchasing a household cleaning appliance from the Dibea brand. Dibea adheres to the corporate philosophy of " create good products wholeheartedly" and is committed to bringing users more high-quality and high-performance household appliances.To facilitate your use, please read this instruction manual carefully to understand how to operate this product safely and correctly, and to obtain the desired results from it.This manual includes the latest information as of the printing deadline, and our company is fully responsible for revising, interpreting, and explaining this manual. Our company's strategy is to continuously modify the product, so we reserve the right to change the product after the manual is printed without prior notice.If you have any questions or suggestions about our products during use, please call our service hotline at 400-828-2055. We will be dedicated to serving you!Safety use guide ....................................................................................1-2 Introduction to product components ............................................................3-4 Instructions for use (5)① Installation of the floor brush (5)② Removal of the roller brush ………………………………………………………………6-7③ Use of accessories (8)④ Charging (9)⑤ Battery replacement (10)⑥ Cleaning the dust bin .......................................................................................10-12 Common Malfunctions and Technical Specifications (13)Table of Hazardous Substances in Product (14)After-sales Service …………………………………………………………………………………………15-16Note: Please read the instructions carefully before formal use and keep the instruction manual for future reference.Do not use outdoors in rainy weatherWarning: Safety precautions are essential when using any home appliances, including but not limited to preventing hazards such as fire, electrical short circuit, personal injury, etc.1.Please store the machine in a dry indoor area and keep it away from children.2.Children over 10 years old and individuals with physical or mental disabilities must be supervised when using the machine.3.Do not allow children under 10 years old to come into contact with the machine. Keep them away when using and maintaining the machine.e the recommended accessories included in the package. Improper use or use of non-matching accessories may cause harm to the machine and to individuals.5.Take extra caution when cleaning stairs.6.Keep the machine away from hot surfaces.7.Always keep the air intake clear and away from items such as fuzz and cloth that could clog the machine.1.Please use the batteries and charger provided in the package. Using a charger with different specifications may cause risks.2.Please do not modify the charger in any way.3.Before use, please check for any signs of damage or aging on the power cord of the charger. A damaged or tangled charger cord increases the risk of fire and short circuits.4.Please handle the power cord of the charger properly.5.Please avoid pulling the charger by the charging cable to prevent damage to the charging cable.6.Please do not pull the charger by the charging cable to remove it. Please plug and unplug the charger properly.7.Please do not store the charger by winding the charging cable around it.8.The charging cable must be kept away from heat, hot objects, or sharp objects.9.Do not replace the charging cable by yourself. If the charging cable is damaged, please contact customer service for a replacement.10.Please do not touch the charger or the entire machine with wet hands.11.Please do not store the machine outdoors or charge it outdoors.12.When cleaning and maintaining the machine, make sure that the charger has been removed from the charging plug.1.This product uses a lithium battery. Do not burn or expose it to high temperatures.2.Please use original batteries. Using the wrong type of battery may cause danger.3.The battery should not be disassembled, hit, crushed, or thrown into a fire. If serious swelling occurs, please stop using it.4.Do not disassemble or collide with the battery to avoid leakage of liquid inside the battery.5.Do not short-circuit the battery's metal contacts, which can cause a short circuit danger, and avoid burns or other personal injuries caused by the battery overheating.6.Please dispose of the battery properly according to local regulations.※ In order to reduce burns, fires, electric shocks, or any other injuries, please follow the above rules.1.Before use, please carefully inspect the product for any damage or abnormalities.2.Do not use the product if any part is damaged or defective.3.Please contact a professional after-sales or qualified repair organization to perform repairs in accordance with relevant safety regulations. Repairs performed by non-professionals may result in danger.4.Do not modify the product in any way to avoid causing personal injury.5.Please use replacement parts or spare parts provided or recommended by the manufacturer.1.This vacuum cleaner is a dry vacuum cleaner.2.This vacuum cleaner does not have waterproof function, do not vacuum water or damp waste.3.This vacuum cleaner cannot vacuum any burning or smoking waste.4.Please strictly follow the instructions for use.5.Do not use this product on cement roads, asphalt roads, and other rough surfaces.6.This vacuum cleaner is for household use only and should not be used in factories or commercial places.7.Do not use it to vacuum construction debris and heavy metal dust.Warnings:1. Please do not use water, solvent or polishing agent to clean thesurface of the appliance; Please clean with dry cloth;2. It is forbidden to soak the vacuum cleaner in water or use amachine to clean it.High/low gearbuttonBatter y releasebuttonOn/off buttonDust cupFloor brush latchFloor brushDisplay screen Aluminium tube latchAluminium tube1、 As shown in the figure, align the electric floor brush interface with the aluminium tube interface, and then gently push it. After hearing a "click", the installation is completed (when disassembling, just press and hold the latch button, and pull it down and away).2、 As shown in the figure, align the aluminium tube joint with the main body interface, and then gently push it. After hearing a "click", the installation is completed (when disassembling, just press and hold the latch button, and pull it down and away).4、 Clean sweeping brush High/low gear buttonLift the illustrated handle at the left end of the roller brush to remove the brush and1、Triangular Brush: Insert the triangular brush directly into the interface of the main unit.2、Flat Brush: Align the interface of the flat brush with the interface of the vacuum cleanerMethod 1: hanging rack Method 2: Storage rack2)Indicator light1、Green LED 1 flashing, charging/undervoltage2、If the green LED1 is always on and LED2 light flashes, it indicates charging3、If the green LED1 and LED2 are always on and LED3 light flashes, it indicates charging4、If the green LED1, LED2 and LED3 are always on, it indicates full power1)As shown in the figure, press the bottom cover button of the dust cup, and the bottom cover is suspended to expose the cyclone coneLED3LED2LED1ⅤPress the battery release buttonPull out battery to Insert the battery2) As shown in the figure, rotate the cyclone cone, and then pull it down to take out the cyclone cone3)As shown in the figure, rotate the HEPA, and then pull it upwards to take it out6)Install the HEPA according to the direction shown in the figure7)Install the cyclone cone in the direction shown in the figure8)Rotate the bottom cover of the dust bucket as shown in the figure, and hear a "click" to indicate that it is in placecreate good products wholeheartedlyCommon Machine Malfunctions and Solutions1)Before using the vacuum cleaner, please remove large and sharp objects to prevent the machine from being damaged by collision. Do not use this product to suck up flammable materials or liquids such as gasoline, cigarettes, alcohol, etc.2)When using the vacuum cleaner, please keep a safe distance from heating or hot objects such as radiators, cigarette butts, etc.3)When replacing the filter, do not overturn the machine to prevent liquid or dust from falling into the motor, which may cause malfunctions and hazards.※Common Machine Malfunctions and Solutions※Product parameters※Precautionscreate good products wholeheartedly※ Please dispose of the battery safely with following steps:Hazardous substances in the table below follow the "SJ/T 11364-2014 Requirements for Identification of Restricted Use of Hazardous Substances in Electronic and Electrical Products".Component Name○○○○×××××○○○○○○○○○○×○○○○○×○○○○○×○○○○○○○○○○The following table is prepared according to the Administrative Measures for the Use Limitation of Hazardous Substances in Electronic and Electrical ProductsHazardous Substances1)If the battery provided contains materials harmful to the environment, the battery must be removed before the product being disposed of;2)The product must be powered off when removing the battery;3)The waste battery shall be disposed safely and properly, and shall not be dumped into fire, water or soil.If the waste battery touches one’s skin or clothing, please rinse with clean water to avoid skin discomfort, and take prompt medical treatment from hospital.Lead (Pb) and its compoundsMercury (Hg) and its compoundsCadmium (Cd) and its compoundsHexavalent chromium (Cr(VI)) and its compoundsPolybrominated Biphenyls (PBB) Polybrominated Diphenyl Ethers(PBDE)Circuit board assembly ElectricalComponents Power CordBatteryMetal partsPlastic parts Accessories: indicates that the content of the harmful substance in all homogeneous materials of this component is below the limit requirements specified in “GB/T 26572 current valid version”.: indicates that the content of the hazardous substance in at least one homogeneousmaterial of the component exceeds the limit requirements specified in GB/T 26572current valid version, and there is no developed alternative in the industry at present, which complies with the environmental requirements of European Union RoHS Directive.○×Table of Hazardous Substances in ProductThis card contains detailed maintenance records and instructions for your reference in case of normal maintenance, repairs, or returns. Therefore, please keep this card safe and secure.Products".Under the following circumstances, Dibea will not be able to provide free warranty services for your machine during the warranty period:1)Damage or malfunctions caused by improper use, lack of maintenance, or other improper usage not in accordance with the instructions provided in the user manual;2)Normal wear and tear or damage to consumable parts, such as brushes, filters, and cleaning brushes;3)Damage caused by human factors or irresistible factors;4) Warranty period exceeding three packages, invalid proof of purchase such as warranty cards or invoices, or warranty card and invoice information does not match;5) Damage or malfunction caused by using Dibea products for any purposes other than normal household use;6) Damage or malfunction caused by the use of non-Dibea original accessories or parts, or repairs or modifications by non-Dibea service centers;7) Shortened battery discharge time due to battery aging or use;8) Other malfunctions and damage caused by issues not related to the product's design, manufacturing, or quality.Warranty CardWarranty ExclusionsWarranty Notice1)Starting from the purchase date, the whole machine (excluding battery, motor, and accessories), charging dock, and power adapter are covered under a 2-year warranty, while vulnerable parts (motor, battery) are covered under a 1-year warranty, and consumables (roller brush, filter, cleaning brush) are covered under a 3-month warranty. Free gifts are not covered under the warranty;2)Please keep your purchase invoice and relevant documents properly as they serve as important proof for warranty services. The warranty only applies to products purchased and used within the Chinese mainland (excluding Hong Kong, Macau, and Taiwan);3)If the product malfunctions during the warranty period and cannot be resolved by following the troubleshooting instructions in the manual, please contact our nationwide customer service hotline at 400-828-2055.4) We provide lifetime repair services for our products, but customers will be responsible for repair fees, material fees, and transportation costs if the warranty period has expired.Dear user:In order to ensure the after-sales warranty and exchange of the machine, it is recommended that you keep the packaging box for at least 30 days from the date of receipt! If your machine needs to be sent back to the factory, please follow the steps below.※ Important ReminderPreparing for shipment:Please call the customer service number at 400-828-2055 to register your information and complete the warranty card along with the machine for the return to the factory. About mailing items:Note: The important basis for warranty service is the purchase invoice and related vouchers. When repairing, the warranty basis needs to be provided. When returning the product, please send back the entire machine (including the host, accessories, and gifts), invoice, and purchase voucher together.Warranty CardYour Name:Contact Phone Number:Contact Address:Repair Date Description of Fault /Reason for FaultUsedEquipmentCompletion Dateof RepairSignature of RepairPersonnelPurchase Date:Product Model: Machine Serial Number: Invoice Number: Order Number:Suzhou Dibea Electrical Technology Co., Ltd. Address: No.19 Fuli Road, Wuzhong District, Suzhou, Jiangsu, China。
真空系统操作手册摘要:本文档旨在提供针对真空系统的操作指南。
真空系统是许多工业和科研领域中常见的系统。
正确操作真空系统至关重要,以确保系统的性能和安全性。
本手册将介绍真空系统的基本原理、操作步骤和常见故障排除方法。
第一部分:引言1.1 目的本操作手册旨在帮助用户理解和正确操作真空系统,以确保系统的安全性和性能。
1.2 读者对象本手册适用于那些需要使用真空系统的工程师、研究人员和操作人员。
1.3 背景知识读者应具备一定的真空知识和操作经验,包括真空度、真空泵和真空封接等基本概念。
第二部分:真空系统基础知识2.1 真空概念和单位介绍真空的基本概念和常用的真空单位,如Torr、Pa、mbar等。
2.2 真空系统组成介绍真空系统的基本组成部分,包括真空泵、真空容器、真空管道等。
第三部分:真空系统操作步骤3.1 准备工作准备操作所需的材料,包括真空泵、真空度测量仪器、气体供应等。
3.2 打开真空系统按照正确的顺序打开真空系统中的各个组件,并确保安全操作。
3.3 真空抽取启动真空泵,抽取系统中的气体,使系统达到所需的真空度。
3.4 真空度测量使用适当的真空度测量仪器,对系统的真空度进行测量和监测。
3.5 操作系统操作所需的附加设备和工具,如加热器、阀门等。
3.6 关闭系统按照正确的顺序关闭系统中的各个组件,包括真空泵和其他附加设备。
第四部分:真空系统故障排除方法4.1 常见故障列举常见的真空系统故障情况,如泵故障、泄露等。
4.2 故障排除步骤针对每一种故障情况,提供相应的排除步骤和建议。
第五部分:安全注意事项5.1 真空系统安全性强调真空系统操作时的安全性要求,如穿戴个人防护装备、遵循操作规程等。
5.2 真空系统维护介绍定期维护真空系统的必要性和方法,包括清洁、润滑等。
结论:通过本操作手册,读者可以全面了解真空系统的基本原理、操作步骤和故障排除方法。
正确操作真空系统对于保证系统的性能和安全性至关重要。
本手册旨在帮助读者提高对真空系统操作的理解和技能,并最大限度地减少故障发生的可能性。
真空除氧器设计使用注意事项1.除氧器及抽真空的水喷射真空泵设备,管道及管道上的所有阀门,应严密不漏,严防真空泄露,除氧设备管道系统安装完毕后,必须进行水压试验。
实验压力:真空管道系统为:0.25MPa,其它管道系统进1.25 P试验(P为工作压力),水压试验完毕后,进行保温。
2.安装前后,全部管道,设备,阀门均应进行清洗,严防渣滓阻塞。
3.软水泵进水口应安装过滤器。
4.除氧器及循环水箱,抽真空装置宜室内布置。
5.引水泵安装应低于除氧器水箱,连接管道宜少管道,弯头。
6.水喷射真空泵机组宜安装在除氧器附近,除氧器抽真空的水平吸气管应有坡度,i=0.005mm,坡向除氧器,连接管道宜少管道,弯头。
7.管道安装应考虑除氧器水箱装拆,便于除氧器检修。
8.进入循环水箱的软化水不得高于50度,进水口压力>0.25 MPa。
9.防止循环水箱水温过高,应不断补充冷却水,可以减少外溢。
10.确保除氧器软化水温度与循环水温度>6-10度是除氧器的技术关键。
11.确保除氧器在正常水位,进行水位自动调节。
12.锅炉在运行时,应调节锅炉给水泵进出及回水阀,其流量不得大于引水泵最大出水(为除氧器额定出力的1.2倍),对于继续进水锅炉,由于给水泵刚启动时,流量较大,宜选用更大规格的引水泵,如4T/H除氧器才选6T/H的引水泵。
13.为确保除氧效果,必须按设备,自控,管道系统,产品说明书,进行调试。
14.严格维护设备,仪表完整,观察真空度及除氧化验,分析原因,及时采取措施,确保水喷射真空除氧器装置正常运行。
运行操作1.检查设备,仪表完好,低位真空除氧器运行前应检查除氧器,水箱,水泵,阀门,管路,自控仪表是否严密无漏,操作灵活,正常完好。
运行前全部阀门处于关闭状态。
2.水喷射泵抽除氧器真空:将水灌满循环水箱,注入冷水调换,打开循环水泵进出口阀门,水喷射真空泵到除氧器阀门,启动循环水泵,压力>0.25MPa,抽除氧器真空度,基本和水喷射真空泵的真空度一样,观看水喷射真空泵和除氧头上的真空表读数,应对应于当时水盆是真空泵工作时循环水温的饱和压力。
JDRL型低位热力除氧器操作功能说明一、功能介绍除氧器电器控制柜具有温度自动控制、流量自动控制、自动二次加热、电源指示、声光报警、温度显示、水泵联锁、485通信输出等功能。
1.温度自动控制本系统可根据除氧器主体上安装的高灵敏温度传感器将温度信号直接送入蒸汽电动球阀,对软水进行一次除氧。
2.液位显示除氧器本身安装高灵敏液位传感器,通过控制柜液位智能仪表显示除氧器内液位,并可通过设置仪表报警参数达到高、低液位声光报警,超高水位溢流、超低水位停泵等功能。
3.流量自动控制本系统可根据除氧器主体上安装的高灵敏液位传感器将液位信号直接送入液位智能仪表,当液位低于设定值时液位智能仪表控制软水电动球阀打开,同时软水泵联锁信号闭合,软水泵启动,在保证温度的同时达到最大除氧能力;当液位高于设定值时液位智能仪表控制软水电动球阀关闭,同时软水泵连锁信号断开,软水泵停止。
4.温度显示除氧器本身安装高灵敏温度传感器,通过控制柜温度智能仪表显示除氧器内温度,并可通过设置仪表报警参数达到高、低温度声光报警功能并可通过设置加热温度报警参数完成除氧二次加热功能。
二、操作说明1.设备由于运输、安装时的震动,设备运行前应先检查各处接线端子压接是否牢固,接线是否正确,电压等级是否符合要求。
2.设备初次运行,应先用手动控制将除氧器内液位加到所要求液位(注:设备运行时,软水泵应处于运行状态),再将蒸汽调节阀适当开大,使除氧器内温度逐渐升高,待各项指标均达到要求时,再将各控制仪表转换到自动位置。
3.设备如出现报警时,应先将设备转换到手动状态,由人工进行监控,找出报警原因,并及时处理。
4.设备各仪表参数(除常用参数)在调试阶段技术人员均以设定。
如无特殊情况用户无须另外设定。
三、调试方法1.温度设定。
调出温度控制仪表SV功能,按左键进入修改状态,按上、下键修改参数,按MOD键确认。
2.液位设定。
调出液位控制仪表SV功能,按左键进入修改状态,按上、下键修改参数,按MOD键确认。
除氧器操作规程除氧器(Deoxidizer)是一种减少氧化剂或气体中氧含量的设备,通常用于提升电子活性物质,如液体金属、气体、液体等的品质。
2.工作原理除氧器通常采用催化剂或吸附剂的方式,在反应温度的条件下使氧化剂转变为更低的形式或者将氧含量降低,以提高电子物质的品质。
3.保养(1)箱体要定期检查清洁,把箱体里的灰尘和油污清除干净(2)定期检查换成件,维护好除氧器的换成件(3)定期检查启动装置,检查除氧器启动装置功能是否正常,维护好除氧器的启动装置(4)定期检查催化剂,定期检查除氧器的催化剂是否有效,是否有破损(5)定期检查温度,维护除氧器的操作温度,防止过高或过低4.操作(1)检查除氧器的供气压力,确保输出气体满足要求;(2)检查和维护好除氧器的换成件(3)检查催化剂,确保催化剂有效;(4)检查和维护好除氧器的启动装置(5)确保除氧器的温度符合要求(6)根据工作要求完成除氧器的操作(7)及时调整除氧器的换成件和催化剂,确保输出气体的质量(8)安全操作,不得超过设备的最大容量。
5.质量管理(1)定期查验除氧器,保证机器的安全(2)定期查验输出气体,确保输出气体的质量(3)定期检查除氧器的换成件和催化剂,确保催化剂的有效性(4)定期检查除氧器的工作温度,确保温度的稳定性6.安全措施(1)运行前应充分熟悉有关操作规程,确保操作人员的安全(2)操作时,一定要穿安全防护服和工作靴,防止受伤(3)定期检查接头,防止漏气(4)定期检查消防设备,确保安全性(5)禁止未经许可的人员进入设备操作区域(6)除氧器的操作必须在正确的工作条件下进行,不得超出设备的最大容量(7)应进行定期的抗震检测,确保设备安全7.总结除氧器操作规程是非常重要的,尤其是对于保证电子活性物质的品质来说,更是至关重要的。
正确的操作及维护,可以有效提高除氧器的使用寿命,提高产品的品质。
而在操作时,一定要注意安全,遵守操作规程,以防因操作不当造成不良后果。
LYSJ-water separation devicesLYSJ型油水分离器Use and installation instruction使用及说明书四川高精净化设备有限公司SICHUAN FINE PURIFICATION EQUIPMENT CORP.LTD1.SCIENTIFIC /TECHNOLOGICAL RESUIT AND PATENTModel LYSJ Oil-confining Sewage Vacuum Purifier is designed and manufactured by our company on the basiss of studying foreign experiences of oil/water separation .Sewage treated by the machine meets the national Standard GB8978 (oil content ≤5mg/L ).And treated waste water can be direcfly discharged without pollution. Sample chemical analysis by Zigong Evironment Protection Research Institute Proves that this product meets design requirements.Product patens NO:ZL 00222775.42.APPLICATIONBeing a new type of vacuum separator, this product is designed according to the national rules and codes for land, port, harbour and enterprise wast discharge. Oil content of water treated by said machine meets 10ml/L discharge standard for land ,inland river and off-shore discharge .This machine features of high efficiency, compact structure, reliable and easy operation, which finds its wide use in many fields (inland river, harbour, petroleum, chemistry, transportation and electricity-generoting) for oil–containing sewage treatment .3.STRUCTURE AND OPERATION PRINCIPLEThis machine consists of shell, vacuum room, polymolecularabsorption room, electric control box, electric plunger pump, screw pump, electric heater, heavy oil sinking room (No room for light oil)and valves.Shell is made of carbon steel, in which anti-corrosion coatings are applied.Vacuum room is provided with corrugated plate groups made of epoxy eloth-sandwitched glass tiles with same sixe and different corrugation. The group are used to aggregate and separate oil contained in water primarily.Polypropylene polymolecular material cylindrical filter cores with good absorption and long service life are mounted in polymolecular absorption room so that≤10ml/L oil content of treated water is ensured.Pumping of purifier is realized by means of screw pump and oil discharge, by means of plunger metering pump.Electric heaters are used for separating oil with higher viscosity and smooth running of separated oil in cold environment. Heaters can be operated manually or automatically.Purifier operates in following way. Density difference between oil and water and gravity separation principle is utilized. Most oil drops float up to oil accumulation room of the machine under action of density difference between oil and water. Separated oil/water enters into corrugated plate groups in vacuum room where tiny oildrops gradually aggregate to become bigger drops due to flow direction and adhesive action. Bigger oil drops flow upwards to oil accumulation room through oil accumulation port on corrugated plates. After preminary separation, sewage containing tiny oil drops (Including heavy oil) is pumped to polymolecular absorption room with polypropylene filter cores by means of screw pump. In-built polypropylene filter cores have good oil absorption and water flowability. Namely, oil has bigger passing resistance and water has less passing resistance. Therefore, tiny oil drops will be stopped at core surfaces and gradually become bigger oil drops when oil-containing sewage passes through. Two-stage filter core filtration is adopted for heavy oil separator in order to improve separation result. Under action of gravity, light oil goes up to the top of polymolecular absorption room. At the same time , core fibers form ultra-fine screen that filter out certain part of impurities. Under action of gravity, heavy oil sinks to heavy oil sinking room located at the bottom of filter cores. The room is provided with a three-point level controller. Solenoid valve will open automatically and light oil outlet solenoid valve will close as heavy oil reaches to level height. At this moment, drain pump pumps out oil from heavy oil room. Oil content of water purified by the machine is below 10mg/L or equals to 0. With increment of filter pressure and filter flow decrease, discharged water contains oil with higherconcentration. In order to prevent exceeding discharge standard of treated water(≤10 ml/L), the machine is provided with spring safety valve. In case that pressure exceeds or equals to 0.25Mpa,oil-containing sewage in polymolecular absorption room will go back sewage pool through safety valve. In this case, shut-down should be made for rinsing or changing cores.The machine oil accumulation room is provided with Japan-made oil-level pole. When light oil accumulation reaches to certain quantity (Watch from level meter glass),oil level pole sends signal to enable electric control box to start plunger pump which discharge oil into waste oil accumulation tank. After oil in the top of oil accumulation room is drained off, oil drain pump will stop automatically.The machine is provided with two oil drain pumps. One is for operation and another for stand-by. They can be changed over manually. Oil accumulation room of oil/water separator is provided with electric heater which is used to heat condensed oil in case that the machine operates in cold surrounding. Temperature of heater is controlled by switch automatically. In normal case ,the heater is not used.4.MAIN TECHANICAL DATA5.INSTALLATION5.1 Installation needs to be done according to System Drawing(System Drawing attached).5.2 Build sewage pool and remove deposits from its bottom regularly.5.3 Decide whether float switch is provided for sewage pool and interlocked with LYSJ Machine.5.4 Installation must ensure normal running.5.5 Bypass cleaning piping connected with tap water pipe should be erected before intake for sake of rinsing and easy operation. Too long pipe and more elbows are not allowed. Suction height should be below 4m to avoid affecting suction.5.6In order to prevent foreign matters from entering, check valve should be mounted at intake pipe filter (accompanied with machine) and intake of suction pipe. Make sure suction pipe is tight and noleakage occurs.6.OPERATION6.1 Check pump for correct running direction and instruments for good conditions.6.2 Close stage-1 and Stage-2 Drain.6.3 Open outlet valve of discharge water and exhaust valve at the top of absorption room.6.4Fill vacuum oil accumulation room and inlet piping with running water.6.5 Set oil drain switch to automatic position.6.6 Press down start button on control box and motor screw pump begins pumping.6.7 When water comes out from exhaust valve, close it. Now, the machine is in normal operation mode.6.8 In case of low ambient temperature or higher viscisity, heater may be used.6.9 Observe operation of motors when machine puts into operation. If abnormalities are found, shutdown should be made for inspection.6.10 Leakage of inlet piping is not allowed. Otherwise, Suction reduction or misoperation would be caused. If plunger pump is in operating mode but screw pump does not work, shutdown should be made for checking leakage .After everything is OK, fill themachine with clean water. Then start-up can be made.6.11 When full accumulated oil can be observed through level meter glass tube, but oil drain plunger pump does work automatically and the said pump can be started by setting to manual position, this means oil level pole should be dismantled for cleaning its surface. Then the machine can be started again.6.12 When spring press type safety valve is opened(gauge reading ≥0.25Mpa),shutdown needs to be made to change core of polymolecular absorption room.6.13 In case that machine is stored for a long period of time, water in the machine should be drained off and power is cut off. Moving parts of pump should be greased with oil.6.14 After the machine operates for certain period of time, the core needs to be cleaned or replaced. Cleaning can be easily done through following procedures. Open right cover plate of polymolecular absorption room. Unscrew core fixing screw. Grasp core by hand to turn two turns in same direction to take out it. After dismantled, cut off 2-3 layers of core with knife to strip off cut layers. Then rinse core in clean water. Reassembly can be made in reverse order of disassembly. If rinsed core does not work, change with new one. Spare part of core can be ordered.一、科技成果与专利我公司总结了国内外油水分离经验,针对含油废水的工况,采用先进的工艺,设计制造了LYSJ型含油污水真空分离净化机,含有一定油污的废水,注该设备处理后水中的含油油量≤5mg/L,完全符合GB8978国家排放水标准,处理后的废水可直接排放,也可回收利用。
除氧器的操作规程1.除氧器的工作原理水中溶解的氧和二氧化碳对热力设备有强烈的腐蚀作用,因此必须把它们除掉。
气体在水中的溶解度与水的温度和水面上的压力有关。
温度越高,气体在水中的溶解能力越小,水温升高到饱和温度时,水中溶解的气体就会全部放出。
水面上的气压越小,气体在水中的溶解能力也越小,水面上的气压降低到当时水温所对应的饱和气压时,或由于气压降低而使水沸腾,溶解的气体也全部放出。
2.除氧器的启动1)打开除盐水进除氧器总阀,把水液位控制50%,投用自控状态。
2)打开加热蒸汽阀,再缓慢打开减压阀前后隔离阀进行暖管疏水。
3)缓慢打开蒸汽旁路进行加热除氧。
当压力达到0.012~0.015MPa(表压)时,投入自控,将蒸汽调节阀前后隔离阀全开,同时关闭旁路阀,将压力控制在0.2MPa。
4)待除氧器水箱液位至2/3水位时,打开除氧水箱放水阀,排除锈水和杂质。
3.除氧器运行中的检查与维护1)严格控制各运行指标,发现问题及时处理和汇报。
2)各阀门应开关灵活,并在丝杆处常加油,填料处不泄露。
注意各种仪表的运行工况,发现问题及时联系有关人员处理。
4.除氧器的停运当给水泵停止运行时,除氧器也应停止运行,其步骤如下:1)关闭蒸汽调节阀前后边阀。
2)关闭除氧器进水调节阀前后边阀。
3)关闭除氧器出口阀。
4)当除氧器全停,应将汽水总阀关闭,打开有关的疏水阀,使其处于准备启动状态。
5)若需检修时应将水箱的水放掉。
6)在冬季应做好设备,阀门,管道和仪表的防冻工作。
5.除氧器的故障处理1)除氧器满水现象原因处理(1)除氧器水箱水位上升至最高水位以上当负荷降低时进水调节失灵,对水位未知监督联系有关单位配合处理(2)除氧水箱的水封动作有大量水溢出给水泵故障给水中断,调节阀动作失灵开启除氧器放水阀待水位降低至正常后关闭(3)除氧器发生水击而震动进水压力增高,加热阀开度过大;内件脱落停用进水调节系统改走旁路,查明原因后再恢复自动进水;相应调整(4)水箱水温发生变化进水调节阀故障投用正常后对各控制参数加以检查和调查2)除氧器缺水现象原因处理(1)水箱水位低进水调节阀失灵或迟钝联系调度实际是提高进水压力(2)给水泵出口压力波动,严重时泵发生抽空水处理故障,进水压力太低,进不了水,加热阀开度过大开启除氧器进水旁路阀加大进水量;相应调整;(3)进水流量减少软化水系统故障及时进行处理(4)进水调节阀失灵管路阀发生故障若水箱水位降至1/3处应立即打开旁路进水阀进水,直到正常后关闭3)除氧器水击现象原因处理(1)有时和水封击穿现象相似汽水混合不佳停止加热除氧,待水击消除后再慢慢开蒸汽除氧(2)排气管大量带水设备故障,排气阀开度过大停用检修,关小(3)除氧器有振动水击声,严重时有发生爆炸的可能进水温度过低;超负荷;进气量过大提高进水温度,降低负荷,调整操作。
1 真空除氧器 Vacuum Deaerator
说 明 书 Instruction
江苏津宜水工业装备有限公司 Jiangsu Jinyi Water Industry Equipment Co.,Ltd. 2
一、 用途 天然水中溶有多种气体,在锅炉水给水中,氧对锅炉腐蚀的危害最大.为此国家标准GB1576-85“低压锅炉水质标准”中规定2吨/时以上锅炉必须除氧.真空除氧器的出水含氧量能满足标准的要求. 真空除氧器还可以用于石油钻井回注水的除氧及水处理脱硫工艺中氢离子交换器后除二氧化碳等多种场合. Application: There are various gases dissolved in nature water; the oxygen contained in the boiler feed water may cause maximum corrosion to the boiler. So the national standard GB1576-85 "low-pressure boiler water quality standard" clearly states that all the boilers of 2 t/h or higher are required to have their feed water deaerated. The oxygen level in the treated water from the vacuum deaerator can meet the standard and requirement. The vacuum deaerators may also be used for deaeration of the return water in oil drilling industry and for CO2 removal after the hydrogen ion exchange in the desulfurization process of water treatment; 二、 原理 真空除氧的原理是基于亨利定律,即在封闭容器中,气体在水中的溶解度与该气体在水面上的分压力成正比.水在沸腾时,水面上蒸汽的分压力增加,溶解于水中的气体分压力随之减小,当水面上充满了水蒸气时,水不再具有溶解气体的能力,水中所溶解的气体就析出.从水的饱和温度特性可知,在真空状态下低温水也能沸腾. 真空除氧就是利用这一特性达到除去气体(包括氧气)的目的. Working principle: The working principle of the vacuum deaeration is based on the Henry theory, that is, in a closed container, the solubility of gases in the water is in proportion to the partial pressure of the gas on the water surface; when the water is boiling, the partial pressure of the steam on the water surface will increase, while the partial pressure of the dissolved gas will decrease accordingly; when the water surface is covered full with steam, the water will no longer have the capacity to dissolve the gas and then the dissolved gas in the water will be separated out. We can see from the saturated temperature 3
characteristics of the water that low-temperature water can also boil under vacuum condition, which is utilized by the vacuum deaerator to remove the gases including oxygen; 三、 特点 1、运转工况稳定,真空度高,使用场合广. 2、不消耗蒸汽,锅炉出力可全部利用. 3、低温的除氧水可通过换热器回收低品位的废热后再作为锅炉给水,从而收到节能效果. 4、适应性强,从负荷0-120%范围内变化时,除氧效果不受影响. 5、本除氧器除高位安装外,接上引水泵机组后还可以低位安装,便于单层布置的小锅炉房用,节省投资,管理操作维修方便. Characteristics: 1, Stable operating conditions, high level of vacuum and widespread applications; 2, No consumption of steam and all outputs from the boiler may be fully utilized. 3, The low-temperature deaerated water may be recycled as feed water to the boiler after its low-grade waste heat is recovered by the heat exchanger to save the energy; 4, High adaptability, the changes of the load within 0-120% will have no impact on the deaeration efficiency; 5, In addition to overhead installation, the deaerator may also be installed at low place after connection with the water pump, which is suitable for small boiler room with only single floor featuring low cost and easy and convenient management, operation and maintenance; 四、 技术规格 真空除氧器主要由除氧器(脱气塔与除氧水箱),水喷射真空泵机组、引水泵机组等三部分设备组成,下述为除氧器技术规格,其它设备可备阅其样本。 Technical specifications: The vacuum deaerator mainly consists of deaerator (degas tower and 4
deaerated water tank), water jet pump unit and priming pump unit. The technical specification for the deaerator is described as following, the technical specifications for the other two parts may refer to corresponding instructions; 五、 设备与附件 Equipments and accessories 1、脱气塔 脱气塔内装有铜制雾化喷头,每只喷头处理水量恒定,从而得到最佳的喷雾效果。塔内装有填料层、传质快、亲水性能好。雾化的结果大大增加了水的脱气面积,当雾化的水滴继续流经无规则堆放的填料层时,进一步加强了脱气效果。因此,虽然水在脱气塔内停留的时间很短,然而除氧效果很好。 Degassing tower: The degassing tower is provided with copper atomizing nozzles inside with stable water flow from each nozzle to achieve the best atomizing efficiency. The packing inside the tower features fast mass transfer and good hydrophilic performance. The atomization will result in the great increase of the degassing area of the water; and the degassing efficiency is further strengthened when the atomized water droplets flow through the packing layers stacked in disorder. As the result, despite the short-time retention of the water in the degassing tower, the deaeration efficiency is satisfactory; 2、除氧水箱 除氧器运行时,水箱内处于负压。因此在高位安装时,水箱出口处与锅炉给水泵进口之间的净距离不得小于11米。在低位安装时(水箱出水口与锅炉给水泵在同一高度),水箱出水口要接上引水泵机组,使负压水升压后进入锅炉给水泵,水箱上装有人孔,便于维修保养时使用。 Deaerated water tank: The water tank is in negative pressure inside when the dearator is running, so when the deaerator is to be installed at high position, the net distance between the outlet of the water tank and the inlet of the water feed pump of boiler shall be no less than 11 meters. When the deaerator is to be installed at low place (the outlet of water tank and the water feed pump of the boiler are at the same