LifeRay Portal 6学习笔记5Struts Portlet开发示例
- 格式:doc
- 大小:120.50 KB
- 文档页数:8
Liferay6Development DocumentationTABLE OF CONTENTS1.PREFACE (2)W HAT'S COVERED (2)P REREQUISITE SOFTWARE (2)A SSUMPTION (3)2.LIFERAY INSTALLATION AND CONFIGURATION (3)D OWNLOAD (3)JDK1.6I NSTALLATION (3)M Y SQL I NSTALLATION (3)T OMCAT 6 INSTALLATION AND CONFIGURATION (4)3.LIFERAY 6 DEVELOPMENT ENVIRONMENT SETUP (6)4.DEVELOPING & DEPLOYING CUSTOM PORTLET TO LIFERAY 6 (10)L IFERAY EXTEND STRUCTURE ....................................................................... 错误!未定义书签。
C REATE A NEW EMPTY L IFERAY PROJECT (10)C REATE A NEW PORTLET (12)C OMPILING &D EPLOYING PORTLET (15)5.TABLE MAINTENANCE PORTLET DEVELOPMENT (15)6.FAQ(FREQUENT ASKED QUESTIONS) (35)7.APPENDIX (36)1.PrefaceThis guide was written as a quick reference to getting started developing on the Liferay Portal 6 platform (non-bundled) for Java developer step by step.What's coveredThe following list details all of the various parts of the documentation that are covered over the course of the tutorial.Preparation, development environment setupThe basic portlet development & deployment.Logic code with MySqlPrerequisite softwareThe following prerequisite software and environment setup is assumed. You should also be reasonably comfortable using the following technologies.Java SDK 1.5+Liferay Portal 6Eclipse 3.6Ant 1.7Apache Tomcat 6.0.14MySqlAssumptionMySQL is installed2.Liferay installation and configuration DownloadDownload Liferay 6 war & sdk file from websiteWar:/projects/lportal/files/Liferay%20Portal/6.0.5/liferay-portal-6.0.5.war/downloadDependency file:/projects/lportal/files/Liferay%20Portal/6.0.5/liferay-portal-dep endencies-6.0.5.zip/downloadSDK: /downloads/Tomcat 6: /download-60.cgi ()Now we have 4 files:apache-tomcat-6.0.20.zipliferay-portal-6.0.5.war,liferay-plugins-sdk-6.0.5.zipliferay-portal-dependencies-6.0.5.zipJDK 1.6 InstallationRefer to:/technetwork/java/javase/documentation/install-windows-15 2927.htmlMySQL InstallationRefer to:/doc/refman/5.1/en/windows-install-wizard.html Tomcat 6 installation and configuration1.Unpack apache-tomcat-6.0.20.zip to your prefer directory such asC:\java\tomcat60.From now on, we shall call this path as ${TOMCAT_HOME}.Notice: we are using non-install version.2.Create and edit ${TOMCAT_HOME}/conf/Catalina/localhost/ROOT.xml3.4.Make sure your database server is installed and is working. If it's installedin a different machine, make sure that it's accessible from the one where Liferay is being installed.5.Make sure the JDBC driver for your database is accessible by Tomcat. Wewill use MySQL as database, please copy connector-java-{$version}-bin.jar to ${TOMCAT_HOME}/lib/extDownload url:/downloads/mirror.php?id=13520#mirrors6.JNDI configure, editappropriate fields above.Notice:1)You need to create a file name portal-ext.properties, the following steps willtalk about this.2)Copy jta.jar/mysql-connector-java-x.x.xx-bin.jar to${TOMCAT_HOME}/lib/ext7.Create a mail session bound to mail/MailSession. Edit${TOMCAT_HOME}/conf/Catalina/localhost/ROOT.xml and configure8.9.10.Edit ${TOMCAT_HOME}/bin/catalina.bat that Tomcat can reference the11.Delete contents ${TOMCAT_HOME}/webapps/ROOT directory. Thisundeploys the default Tomcat home page.12.Unpack liferay-portal-6.0.5.war to ${TOMCAT_HOME}/webapps/ROOT.13.Create and edit14.For supporting UTF-8 URI Encoding, edit15.Run Tomcat,point browser to http://localhost:8080. You should see thedefault Liferay home page.3.Liferay 6 development environment setup1.Eclipse 3.6 installAfter you download eclipse-jee-helios-SR1-win32.zip, unzip it to yourprefer folder or some places like c:\java\eclipse, double click eclipse.exeyou will start eclipse.2.Change the encoding for you entire workspaceAfter start eclipse, go to Preferences>General>Workspace and select UTF-8 as the Text File Encoding. This should set the encoding for all the resources in yourworkspace. Any components you create from now on using the default encoding should all match.3.Unzip the Liferay SDK to your prefer directory such as C:\liferay.Go to C:\liferay\liferay-plugins-sdk-6.0.5, create a file namedbuild.{username}.properties({username} means the name of your computer)4.5.Download Liferay6 plugin SDKSRun eclipse , click Help -> Install New Software -> Available Software Sites -> Add /tools/ide/eclipse/helios/stableClick OK button6.Checked the “Liferay Tools” site from the selection box tree(About 10minutes)7.Click next and then click Finish to begin the installing (About 15 minutes).Eclipse will ask to restart when install completed, please restart it.8.Installing Liferay6 plug-in SDKClick Window -> Preferences -> Liferay,a)Clic k “Configure installed Liferay Plugin SDKs”, then click “Add” buttonChoose you Liferay SDK installed directory such as C:\liferay\liferay-plugins-sdk-6.0.5, click “OK” buttonb)Click “Create a new Liferay runtime environment”, choose “Liferay v6.0 CE (Tomcat 6)”Click next, finished the installing.c)Click “Create a new Liferay server”Click “Finish” button completed the installing.4.Developing & Deploying Custom Portlet to Liferay 6Create a new empty Liferay project1.Create a new Liferay projectClick File -> New -> Other -> Liferay -> Liferay Plug-in Project,Click next,Input your project name: myliferayand click”Ext” as plug-in type, click finish.Once you have created the project successfully, the following directories will auto created:2.Edit project propertiesYou can find a file named “portal-ext.properties” in path:/myliferay-ext/docroot/WEB-INF/ext-impl/srcb)For Auto creating predefine table and filling initial data: (just use for initial3.Create a empty Liferay6 schema by the “jdbc.default.url” in propertiese.g.: ecatalogue4.Create a new portlet1.2.Create a Java Action file in this path:File path:3.Create a JSP file4.Struts xml file setting5.Tiles xml setting6.Portlet-ext.xml settingFile path: /myliferay/docroot/WEB-INF/ext-web/docroot/WEB-INF/portlet-ext.xml <?xml version="1.0"?><portlet-app><portlet><portlet-name>product</portlet-name><display-name>product display name</display-name> <!-- No use for others --><portlet-class>com.liferay.portlet.StrutsPortlet</portlet-class><init-param><name>view-action</name><value>/productportlet/demo</value></init-param><expiration-cache>0</expiration-cache><supports><mime-type>text/html</mime-type></supports><resource-bundle>com.liferay.portlet.StrutsResourceBundle</resource-bundle> <security-role-ref><role-name>power-user</role-name></security-role-ref><security-role-ref><role-name>user</role-name></security-role-ref></portlet></portlet-app>7.Liferay-portlet-ext.xml setting8.Liferay-display.xml settingnguage-ext_en.properties settingFile path: /myliferay-ext/docroot/WEB-INF/ext-impl/src/content/Language-ext_en.propertiesCompiling & Deploying portletNow we can deploy the basic configuration, run ant to deploy/myliferay/build.xmlStart the tomcat server and open in browserhttp://localhost:8080/Notice: http://127.0.0.1:8080/ may not work in Firefox.5.Table Maintenance Portlet DevelopmentWe will create a table and coding in this part.1.Create example table in MySql2.Create product_service.xml to generate source codeFile path:/myliferay/docroot/WEB-INF/ext-impl/src/com/accentrix/ecatalog/product/product_service.3.Create build.xml for to run the product_service.xmlRun the build file auto generate source code under below path:/myliferay/docroot/WEB-INF/ext-impl/src/com/accentrix/ecatalog/product/model/impl/myliferay/docroot/WEB-INF/ext-impl/src/com/accentrix/ecatalog/product/service/base/myliferay/docroot/WEB-INF/ext-impl/src/com/accentrix/ecatalog/product/service/impl/myliferay/docroot/WEB-INF/ext-impl/src/com/accentrix/ecatalog/product/service/persistenceNotice:a)Please noted that path must be right, otherwise will not create successfully.b)Since this class is auto generated, you should never modify it, or your changes will beoverwritten the next time you run Service Builder. Instead, all custom code should be placedin XXXLocalServiceImpl.4.Add a method to the service layer.Add the following method to to ProductLocalServiceImpl.javaFile path:/myliferay-ext/docroot/WEB-INF/ext-impl/src/com/accentrix/ecatalog/product/service/impl/ ProductLocalServiceImpl.javapackage com.accentrix.ecatalog.product.service.impl;import java.util.List;import com.accentrix.ecatalog.product.model.Product;import com.accentrix.ecatalog.product.service.base.ProductLocalServiceBaseImpl;import com.liferay.portal.kernel.exception.SystemException;/*** @author tom.wu**/public class ProductLocalServiceImpl extends ProductLocalServiceBaseImpl {public List<Product> findByName(String name, int start, int end) throws SystemException {List<Product> list = productPersistence.findByName(name, start, end);return list;}public int countByName(ng.String name) throws SystemException {int count = productPersistence.countByName(name);return count;}}5.Add ProductSearch.java for search resultFile path:/myliferay-ext/docroot/WEB-INF/ext-impl/src/com/accentrix/ecatalog/product/action/ProductSearch.javaimport java.util.HashMap;import java.util.List;import java.util.Map;import javax.portlet.PortletRequest;import javax.portlet.PortletURL;import com.accentrix.ecatalog.product.model.Product;import com.liferay.portal.kernel.dao.search.SearchContainer;import com.liferay.portlet.enterpriseadmin.search.RoleDisplayTerms;/*** @author tom.wu**/public class ProductSearch extends SearchContainer<Product> {static List<String> headerNames = new ArrayList<String>();static Map<String, String> orderableHeaders = new HashMap<String, String>();static {headerNames.add("name");headerNames.add("qty");headerNames.add("comment");}public static final String EMPTY_RESULTS_MESSAGE = "no-products-were-found";public ProductSearch(PortletRequest portletRequest, PortletURL iteratorURL) {super(portletRequest, new RoleDisplayTerms(portletRequest), new ProductSearchTerms(portletRequest), DEFAULT_CUR_PARAM, DEFAULT_DELTA, iteratorURL, headerNames, EMPTY_RESULTS_MESSAGE);}}6.Create ProductSearchTerms.java for search term query.File path:/myliferay-ext/docroot/WEB-INF/ext-impl/src/com/accentrix/ecatalog/product/action/Productimport com.liferay.portal.kernel.dao.search.DAOParamUtil;import com.liferay.portal.kernel.dao.search.DisplayTerms;/*** @author tom.wu**/public class ProductSearchTerms extends DisplayTerms {public static final String NAME = "name";public String name;public ProductSearchTerms(PortletRequest portletRequest) {super(portletRequest);// name = ParamUtil.getString(portletRequest, NAME);name = DAOParamUtil.getLike(portletRequest, NAME);}public String getName() {return name;}public void setName(String name) { = name;}}7.Update ProductAction.java (already added in second part)File path:/myliferay-ext/docroot/WEB-INF/ext-impl/src/com/accentrix/ecatalog/product/action/Productimport javax.portlet.RenderResponse;import javax.portlet.WindowState;import org.apache.struts.action.ActionForm;import org.apache.struts.action.ActionForward;import org.apache.struts.action.ActionMapping;import com.accentrix.ecatalog.product.model.Product;import com.accentrix.ecatalog.product.service.ProductLocalServiceUtil;import com.liferay.portal.kernel.dao.search.ResultRow;import com.liferay.portal.kernel.util.ParamUtil;import com.liferay.portal.struts.PortletAction;/*** @author tom.wu**/public class ProductAction extends PortletAction {public ActionForward render(ActionMapping mapping, ActionForm form, PortletConfig config, RenderRequest req, RenderResponse res) throws Exception {// search term,return all result if name is nullString name = ParamUtil.getString(req, "name");PortletURL portletURL = res.createRenderURL();portletURL.setWindowState(WindowState.MAXIMIZED);portletURL.setParameter("struts_action", "/productportlet/demo");portletURL.setParameter("name", name);// set table headerProductSearch searchContainer = new ProductSearch(req, portletURL);searchContainer.setDeltaConfigurable(false);ProductSearchTerms searchTerms = (ProductSearchTerms) searchContainer.getSearchTerms();List results = ProductLocalServiceUtil.findByName(searchTerms.getName(), searchContainer.getStart(), searchContainer.getEnd());int total = ProductLocalServiceUtil.countByName(searchTerms.getName());searchContainer.setTotal(total);searchContainer.setResults(results);List resultRows = searchContainer.getResultRows();req.setAttribute("searchContainer", searchContainer);for (int i = 0; i < results.size(); i++) {Product product = (Product) results.get(i);ResultRow row = new ResultRow(product, product.getUuid(), i);PortletURL rowURL = res.createRenderURL();rowURL.setWindowState(WindowState.MAXIMIZED);rowURL.setParameter("struts_action", "/productportlet/edit");rowURL.setParameter("redirect", searchContainer.getIteratorURL().toString());rowURL.setParameter("uuid", String.valueOf(product.getUuid()));String productName = product.getName();if (productName.length() > 10) {productName = productName.substring(0, 10) + "...";}row.addText(productName, rowURL);// namerow.addText(product.getQty() + "", rowURL);// qtyrow.addText(product.getComment(), rowURL);// commentresultRows.add(row);}if (getForward(req) != null && !getForward(req).equals("")) {return mapping.findForward(getForward(req));} else {return mapping.findForward("products");}}}8.Update products.jspFile path:/myliferay-ext/docroot/WEB-INF/ext-web/docroot/html/portlet/product/products.jsp</portlet:renderURL><aui:form action="<%= searchURL %>" method="post" name="productForm" onSubmit='<%= renderResponse.getNamespace() + "search();" %>'><aui:input name="productUuids" type="hidden" /><!-- for delete function --><aui:fieldset><aui:input inlineField="true" label="Name:" name="name" size="30" value="<%=name%>" /><aui:input align="absmiddle" border="0" inlineField="true" label="" name="search" src='<%= themeDisplay.getPathThemeImages() + "/common/search.png" %>' title="search" type="image" /></aui:fieldset><aui:button-row><aui:button type="submit" value="search" /><aui:button onClick='<%= renderResponse.getNamespace() + "addProduct();" %>' type="button"value='<%= LanguageUtil.format(pageContext, "Add Product", company.getName(), false) %>' /></aui:button-row><div class="separator"></div><liferay-ui:search-iterator searchContainer="${searchContainer}" paginate="<%= false %>" /><liferay-ui:search-paginator searchContainer="<%= searchContainer %>" /></aui:form></div><aui:script>function <portlet:namespace />addProduct() {document.<portlet:namespace/>productForm.action="<portlet:actionURLwindowState="<%=WindowState.MAXIMIZED.toString()%>"><portlet:param name="redirect" value="<%= currentURL %>" /><portlet:param name="struts_action" value="/productportlet/add" /></portlet:actionURL>";document.<portlet:namespace />productForm.submit();}function <portlet:namespace />search() {document.<portlet:namespace />productForm.submit();}</aui:script>Okay, the search function finished.9.Add ProductAddAction.javaFile path:/myliferay-ext/docroot/WEB-INF/ext-impl/src/com/accentrix/ecatalog/product/action/Product AddAction.java*/package com.accentrix.ecatalog.product.action;import javax.portlet.PortletConfig;import javax.portlet.RenderRequest;import javax.portlet.RenderResponse;import org.apache.struts.action.ActionForm;import org.apache.struts.action.ActionForward;import org.apache.struts.action.ActionMapping;import com.liferay.portal.struts.PortletAction;/*** @author tom.wu**/public class ProductAddAction extends PortletAction {public ActionForward render(ActionMapping mapping, ActionForm form, PortletConfig config, RenderRequest req, RenderResponse res) throws Exception {return mapping.findForward("product.add");}}10.Update struts-config-ext.xml11.Update tiles-defs-ext.xml12.Add product_add.jspFile path:/myliferay-ext/docroot/WEB-INF/ext-web/docroot/html/portlet/product/product_add.jsp13.Save productFile path:/myliferay-ext/docroot/WEB-INF/ext-impl/src/com/accentrix/ecatalog/product/action/Product SaveAction.java/****/package com.accentrix.ecatalog.product.action;import javax.portlet.ActionRequest;import javax.portlet.ActionResponse;import javax.portlet.PortletConfig;import javax.portlet.PortletRequest;import javax.portlet.WindowState;import org.apache.struts.action.ActionForm;import org.apache.struts.action.ActionMapping;import com.accentrix.ecatalog.product.model.Product;import com.accentrix.ecatalog.product.model.impl.ProductImpl;import com.accentrix.ecatalog.product.service.ProductLocalServiceUtil;import com.liferay.portal.kernel.servlet.SessionErrors;import com.liferay.portal.struts.PortletAction;import com.liferay.portal.theme.ThemeDisplay;import com.liferay.portal.util.WebKeys;import com.liferay.portlet.ActionRequestImpl;import com.liferay.portlet.PortletURLImpl;/*** @author tom.wu**/public class ProductSaveAction extends PortletAction {@Overridepublic void processAction(ActionMapping mapping, ActionForm form, PortletConfig portletConfig, ActionRequest actionRequest, ActionResponse actionResponse) throws Exception {try {// If you need validation,add the checking code here.// if (1 == 1) {// throw new Exception("............");// }Form fm = (Form) form;Product product = new ProductImpl();product.setName(fm.getName());product.setQty(fm.getQty());product.setComment(fm.getComment());ProductLocalServiceUtil.addProduct(product);} catch (Exception e) {SessionErrors.add(actionRequest, e.getClass().getName());setForward(actionRequest, "product.error");return;// required,otherwise will continue to next line}String url = this.getRedirctURL(portletConfig, actionRequest);super.sendRedirect(actionRequest, actionResponse, url);}protected String getRedirctURL(PortletConfig portletConfig, ActionRequest actionRequest) throws Exception { ThemeDisplay themeDisplay = (ThemeDisplay) actionRequest.getAttribute(WebKeys.THEME_DISPLAY);PortletURLImpl portletURL = new PortletURLImpl((ActionRequestImpl) actionRequest, portletConfig.getPortletName(), themeDisplay.getPlid(), PortletRequest.RENDER_PHASE);portletURL.setWindowState(WindowState.MAXIMIZED);portletURL.setParameter("struts_action", "/productportlet/demo");return portletURL.toString();}public static class Form extends ActionForm {private String uuid;private String name; // product nameprivate int qty;private String comment;public String getUuid() {return uuid;}public void setUuid(String uuid) {this.uuid = uuid;}public String getName() {return name;}public void setName(String name) { = name;}public int getQty() {return qty;}public void setQty(int qty) {this.qty = qty;}public String getComment() {return comment;}public void setComment(String comment) {ment = comment;}}}Deploy & restart server, we can test the add product function.14.Add ProductEditAction.javaFile path:/myliferay-ext/docroot/WEB-INF/ext-impl/src/com/accentrix/ecatalog/product/action/ProductEditAction.java/****/package com.accentrix.ecatalog.product.action;import javax.portlet.PortletConfig;import javax.portlet.RenderRequest;import javax.portlet.RenderResponse;import org.apache.struts.action.ActionForm;import org.apache.struts.action.ActionForward;import org.apache.struts.action.ActionMapping;import com.accentrix.ecatalog.product.model.Product;import com.accentrix.ecatalog.product.service.ProductLocalServiceUtil;import com.liferay.portal.kernel.util.ParamUtil;import com.liferay.portal.struts.PortletAction;/*** @author tom.wu**/public class ProductEditAction extends PortletAction {public ActionForward render(ActionMapping mapping, ActionForm form, PortletConfig config, RenderRequest req, RenderResponse res) throws Exception {String uuid = ParamUtil.getString(req, "uuid");// productif (uuid != null) {Product product = ProductLocalServiceUtil.getProduct(uuid);req.setAttribute("product", product);}return mapping.findForward("product.edit");}}15.Add product edit JSPFile path:/myliferay-ext/docroot/WEB-INF/ext-web/docroot/html/portlet/product/product_edit.jspProduct product = (Product) request.getAttribute("product");%><portlet:actionURL var="saveURL"><portlet:param name="struts_action" value="/productportlet/update" /></portlet:actionURL><aui:form action="<%= saveURL %>" method="post" name="productForm" onSubmit='<%= "event.preventDefault(); " + renderResponse.getNamespace() + "updateProduct();" %>'><aui:input name="redirect" type="hidden" value="<%= redirect %>" /><aui:input name="uuid" type="hidden" value="<%=product.getUuid()%>" /><liferay-ui:error exception="<%= Exception.class %>" message="exception testing..." /><aui:fieldset><aui:input name="name" label="Name:" value="<%=product.getName()%>" size="40"/><aui:input name="qty" label="Qty:" value="<%=product.getQty()%>" size="10"/><aui:input name="comment" label="Comment:" value="<%=product.getComment()%>" size="80"/> </aui:fieldset><aui:button-row><aui:button type="submit" /><aui:button onClick="<%= redirect %>" type="cancel" /></aui:button-row></aui:form><aui:script>function <portlet:namespace />updateProduct() {submitForm(document.<portlet:namespace />productForm);}</aui:script>16.Add ProductUpdate.javaFile path:/myliferay-ext/docroot/WEB-INF/ext-impl/src/com/accentrix/ecatalog/product/action/Product UpdateAction.javaimport javax.portlet.PortletConfig;import javax.portlet.PortletRequest;import javax.portlet.WindowState;import org.apache.struts.action.ActionForm;import org.apache.struts.action.ActionMapping;import com.accentrix.ecatalog.product.action.ProductSaveAction.Form;import com.accentrix.ecatalog.product.model.Product;import com.accentrix.ecatalog.product.model.impl.ProductImpl;import com.accentrix.ecatalog.product.service.ProductLocalServiceUtil;import com.liferay.portal.kernel.util.ParamUtil;import com.liferay.portal.struts.PortletAction;import com.liferay.portal.theme.ThemeDisplay;import com.liferay.portal.util.WebKeys;import com.liferay.portlet.ActionRequestImpl;import com.liferay.portlet.PortletURLImpl;/*** @author tom.wu**/public class ProductUpdateAction extends PortletAction {@Overridepublic void processAction(ActionMapping mapping, ActionForm form, PortletConfig portletConfig, ActionRequest actionRequest, ActionResponse actionResponse) throws Exception {Form fm = (Form) form;Product product = new ProductImpl();product.setUuid(fm.getUuid());product.setName(fm.getName());product.setQty(fm.getQty());product.setComment(fm.getComment());ProductLocalServiceUtil.updateProduct(product);String url = this.getRedirctURL(portletConfig, actionRequest, fm.getUuid());super.sendRedirect(actionRequest, actionResponse, url);}protected String getRedirctURL(PortletConfig portletConfig, ActionRequest actionRequest, String uuid) throws Exception {String redirect = ParamUtil.getString(actionRequest, "redirect");ThemeDisplay themeDisplay = (ThemeDisplay) actionRequest.getAttribute(WebKeys.THEME_DISPLAY);PortletURLImpl portletURL = new PortletURLImpl((ActionRequestImpl) actionRequest,17.Update struts-config-ext.xmlFile path: /myliferay-ext/docroot/WEB-INF/ext-web/docroot/WEB-INF/struts-config-ext.xml<?xml version="1.0"?><!DOCTYPE struts-config PUBLIC "-//Apache Software Foundation//DTD Struts Configuration 1.2//EN""/struts/dtds/struts-config_1_2.dtd"><struts-config><form-beans><form-bean name="productForm" type="com.accentrix.ecatalog.product.action.ProductSaveAction$Form" /></form-beans><action-mappings><action path="/productportlet/demo" type="com.accentrix.ecatalog.product.action.ProductAction" scope="request" ><forward name="products" path="products" /><forward name="product.success" path="product.success" /><forward name="product.err" path="product.err" /></action><action path="/productportlet/add" type="com.accentrix.ecatalog.product.action.ProductAddAction" scope="request"><forward name="product.add" path="product.add" /></action><action path="/productportlet/save" type="com.accentrix.ecatalog.product.action.ProductSaveAction" scope="request" name="productForm"> <forward name="product.error" path="product.add" /></action><action path="/productportlet/edit" type="com.accentrix.ecatalog.product.action.ProductEditAction" scope="request" ><forward name="product.edit" path="product.edit" /></action><action path="/productportlet/update" type="com.accentrix.ecatalog.product.action.ProductUpdateAction" scope="request" name="productForm"/> </action-mappings></struts-config>18.Add ProductDeleteAction.javaFile path:/myliferay-ext/docroot/WEB-INF/ext-impl/src/com/accentrix/ecatalog/product/action/Product。
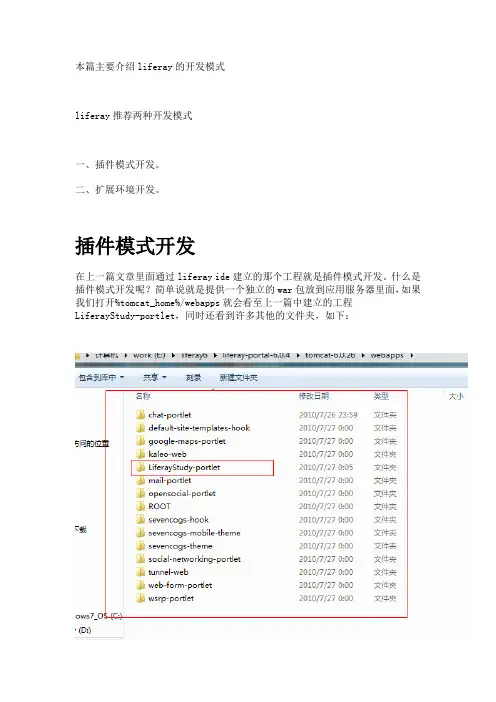
本篇主要介绍liferay的开发模式liferay推荐两种开发模式一、插件模式开发。
二、扩展环境开发。
插件模式开发在上一篇文章里面通过liferay ide建立的那个工程就是插件模式开发。
什么是插件模式开发呢?简单说就是提供一个独立的war包放到应用服务器里面,如果我们打开%tomcat_home%/webapps就会看至上一篇中建立的工程LiferayStudy-portlet,同时还看到许多其他的文件夹,如下:这些文件夹是liferay里面自带的一些插件包,如chat、google map等。
扩展环境开发Liferay 6以后的ext模式开发有了变动,在Liferay 6之前的版本中扩展环境叫做Extension Environment,从liferay 6以后这种模式叫做ext plugin。
(其实现在的开发模式可以称为一种了,都可以统称为插件开发,不过这两种模式有很大区别,还是分开来比较好)ext plugin(扩展插件)是以前使用Extension Enviroment(扩展环境)的升级版本,用来替代以前的ext开发模式。
现在的ext plugin开发可以称为一种轻量级的扩展环境,现在做扩展环境只需要使用不到10M大小liferay-plugins-sdk,而早期版本的开发要么需要自己下载Ext环境,要么需要自己从源代码里面编译一个扩展环境出来。
虽然现在的ext plugin使用的是不到10M大小的SDK,但是开发方法和运行原理和之前使用的Extension Enviroment是一样的。
看一下liferay ext plugin模式在Eclipse里面的工程目录在这里个工程里面我们写的java类文件一般在docroot/WEB-INF/ext-impl/src 目录下面,jsp文件一般在doroot/ext-web/docroot目录下面。
文件夹ext-impl、ext-lib、ext-service、ext-util-bridges 、ext-util-java、ext-util-taglib这些在部署的时候会被打成jar包,ext-web/dcroot对应的就是tomcat下面的root目录。
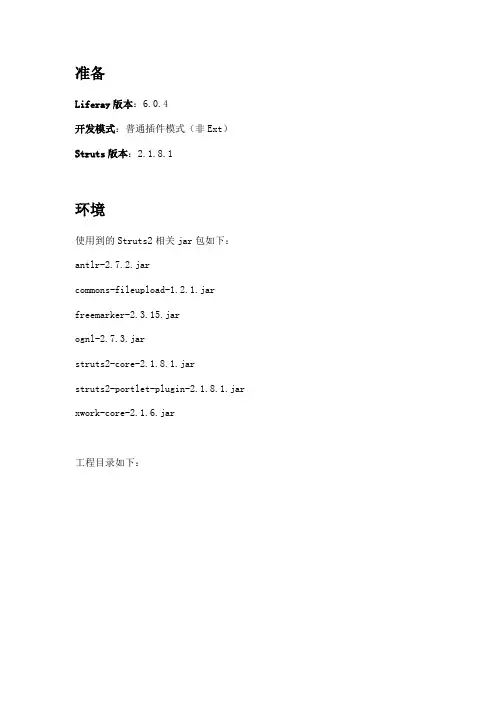
准备Liferay版本:6.0.4开发模式:普通插件模式(非Ext)Struts版本:2.1.8.1环境使用到的Struts2相关jar包如下:antlr-2.7.2.jarcommons-fileupload-1.2.1.jar freemarker-2.3.15.jarognl-2.7.3.jarstruts2-core-2.1.8.1.jarstruts2-portlet-plugin-2.1.8.1.jar xwork-core-2.1.6.jar工程目录如下:参考内容参考Struts2自带的portlet示例struts2-portlet-2.1.8.1.war,在Struts 解压包下面的apps目录里面,这个示例是基于Pluto(/pluto/)Apache的Portal实现,但开发的都是portlet,所以可以参考这个。
开发示例代码portlet.xmlXml代码1.<portlet>2.<portlet-name>StrutsPortlet</portlet-name>3.<display-name>Struts Test Portlet</display-name>4.5.<portlet-class>org.apache.struts2.portlet.dispatcher.Jsr168Dispatcher</portlet-class>6.7. <!--这里的name名字不能修改,value对应于Struts.xml文件里面的配置-->8.<init-param>9.<name>viewNamespace</name>10. <value>/strutsDemoView</value>11. </init-param>12.13. <!-- 对应Struts.xml中设置的默认action -->14. <init-param>15. <name>defaultViewAction</name>16. <value>index</value>17. </init-param>18.19. <init-param>20. <name>editNamespace</name>21. <value>/strutsDemoEdit</value>22. </init-param>23.24. <init-param>25. <name>defaultEditAction</name>26. <value>index</value>27. </init-param>28.29. <expiration-cache>0</expiration-cache>30.31. <!-- 支持view、edit,和前面的portlet一样 -->32. <supports>33. <mime-type>text/html</mime-type>34. <portlet-mode>view</portlet-mode>35. <portlet-mode>edit</portlet-mode>36. </supports>37.38. <portlet-info>39. <title>My StrutsPortlet portlet</title>40. <short-title>SP</short-title>41. <keywords>struts,portlet</keywords>42. </portlet-info>43. </portlet>liferay-portlet.xmlXml代码1.<portlet>2.<portlet-name>StrutsPortlet</portlet-name>3.<instanceable>true</instanceable>4.</portlet>liferay-display.xmlXml代码1.<portlet id="StrutsPortlet"></portlet>Struts.xmlXml代码1.<?xml version="1.0"encoding="UTF-8"?>2.<!DOCTYPE struts PUBLIC3. "-//Apache Software Foundation//DTD Struts Configuration 2.0//EN"4. "/dtds/struts-2.0.dtd">5.6.<struts>7.<package name="strutsDemoView"namespace="/strutsDemoView"extends="struts-portlet-default">8.<action name="index"method="view"class="org.huqiwen.study.StrutsDemo">9.<result name="success">/strutsDemoView/view.jsp</result>10. </action>11. <action name="portletView"method="portletView"class="org.huqiwen.study.StrutsDemo">12. <result name="view">/strutsDemoView/viewMode.jsp</result>13. </action>14. </package>15.16.17. <package name="strutsDemoEdit"namespace="/strutsDemoEdit"extends="struts-portlet-default">18. <action name="index"method="edit"class="org.huqiwen.study.StrutsDemo">19. <result name="success">/strutsDemoEdit/edit.jsp</result>20. </action>21. <action name="portleEdit"method="portletEdit"class="org.huqiwen.study.StrutsDemo">22. <result name="edit">/strutsDemoEdit/editMode.jsp</result>23. </action>24. </package>25.</struts>java文件Java代码1.import com.opensymphony.xwork2.ActionSupport;2.3.public class StrutsDemo extends ActionSupport {4.5. private static final long serialVersionUID = 1L;6.7. private String message;8.9. public String getMessage(){10. return message;11. }12. public void setMessage(String message){13. this.message=message;14. }15. public String view() throws Exception {16. message = "hello Struts2 View Portlet!";17. return SUCCESS;18. }19. public String portletView(){20. return "view";21. }22. public String edit() throws Exception {23. message = "hello Struts2 Edit Portlet!";24. return SUCCESS;25. }26. public String portletEdit(){27. return "edit";28. }29.}strutsDemoView/view.jspHtml代码1.<%@ page contentType="text/html;charset=utf-8"%>2.<%@ taglib prefix="s"uri="/struts-tags"%>3.<h2><s:property value="message"/></h2>4.<s:form action="portletView!portletView.action"method="post"namespace="view">5.<s:textfield label="名字"key="message"></s:textfield>6.<s:submit value="提交"></s:submit>7.</s:form>其他的JSP不写了,和普通的Strtus2开发一样。
Liferay Portal 6学习笔记:Liferay Portal6安装及简单设置博客分类:Liferayportalliferay企业应用准备首先到/projects/lportal/files/Liferay%20Portal/6.0.3下载liferay-plugins-sdk-6.0.3.zipliferay-portal-sql-6.0.3.zipliferay-portal-src-6.0.3.zipliferay-portal-tomcat-6.0.3.zip安装Portal 6首先来安装一下Portal,先来第一眼看一下LifeRay是什么样子的。
1、解压liferay-portal-tomcat-6.0.3.zip这个文件是Liferay绑定到tomcat下的一个版本,可以直接拿来用的(此版本带有一个HSQL数据库,所以不用连接数据库,如如连接其他数据库会在后面讲到),解压之后进入到liferay-portal-6.0.3\tomcat-6.0.26\bin目录,点击startup.bat运行tomcat,待tomcat运行后在浏览器中输入http://localhost:8080即可进入看到liferay 6。
2、登录liferay Portal在打开的浏览器中,点击右上角的login,输入帐号和密码。
在这里的输入的帐号密码为email:bruno@password:brunoliferay从5.2之后的版本中都带有一个7cogs.inc公司的示例数据库,所以这里的管理员帐号密码如上。
如果删除示例数据库,则账号密码如下:email:test@password:test3、设置语言登录之后会发现,这里的Liferay是英文的,虽然这些英文也比较简单,但还是中文看着舒服。
点击左上角的Manager-control Panel进入到Liferay的控制面板。
我们首先设置当前用户的语言,点击左边最上面的My Account,然后在右边的Miscellaneous下面找到 Display Settings,点击他。
Liferay研究(一):初步在新Tomcat下部署从现在开始,会把我最近在研究的开源Portal Liferay一些心得贴出来。
研究Liferay版本:Liferay Professional 4.0.0柯自聪兄弟写过一系列的Liferay Portal开发文章,参考/ea moi/。
所以基础性内容,本文不再细说,可参考柯自聪的文章或Blog。
(一)部署Liferay PortletLiferay简单部署一个portlet并不是很复杂,通过WEB-INF目录下的portlet.xm l、liferay-portlet.xml、liferay-display.xml描述即可。
描述portlet.xml portlet.xml用来定义Portlet的诸如部署名称、初始化参数、支持模式、re source bundle等普通的初始化信息,包括:portlet-name、display-name、portlet-class、init-param、expiration-cathe、supports、portlet-info、security-role-ref 等等。
其正式的规范请参考:/xml/ns/Portlet/Portlet-app_1_0. xsdliferay-portlet.xml 定义Portlet默认可用的用户组、默认模板、是否支持多个实例等,规范由/dtd/liferay-Portlet-app_3_5_0.dtdliferay-display.xml 定义Portlet默认的所属类别。
Liferay Portal对Portlet实行按类别管理和划分用户权限。
Liferay是基于Struts Template页面模版技术来实现页面的,所以Liferay默认提供了com.liferay.portlet.StrutsPortlet这个Portlet Class来完成Portlet处理的;当然为了简单对普通jsp页面的处理,Liferay也提供了com.liferay.portlet.JSPPortlet等其他Portlet Class。
Community(社区)1、Liferay Portal的Community(社区)概述用户手册里面是这么说的:一个社区是由有相同爱好或技术兴趣的用户组成的,一个用户可以属于任意多个的社区。
赋给某个社区的权限也会自动地赋给这个社区里的用户。
说到这里就顺便说说Liferay Portal的另外一个概念User Group, User Group的概念跟上述Community的概念完全类似,也是由一些用户组成的,并且能够继承分配给这个组的权限. 他们的不同点在于一个Community必须至少包含一个页面, 但是User Group不能有自己的页面.系统中默认有CMS, Support, Guest三个Community,另外每个Power User或者Administrator角色的用户第一次登录后, Liferay会自动地创建一个只属于这个用户的Commnunity.社区还有开放(Open)和关闭(Close)之分,开放社区就是来去自由,某个用户想来就来,想走就走.关闭社区想增加新成员,必须要通过管理员来增加.Open communities allow a user to join or leave them at any time without any type of approval from Administrators. Closed communities can only receive new users who are explicitly assigned by Administrators. These concepts will also be discussed in a later section.如果一个用户属于多个Community,选择上述的弹出功能图标中的一个【My Place】图标,会出现一个所有社区的下拉框, 选择你要的那个就可以了.上面说过,一个Community必须有自己的页面(数量不限),每个页面可以有多个Portlet. 真是说起来容易,我想自定义一下社区的页面,结果花了大半天时间.Without pages, a community is just an empty shell. All portlets in the portal are displayed on pages. They can be thought of as desktops on which you put your portlet applications. The desktops can be shared with other users or they can be restricted for your own personal use. By default, if a user is given the Power User role, that user is given a personal community that only he/she can access, and he/she has permissions to do anything in that community. Under the My Places menu, that community will appear as the user's name.社区的页面还分Public和Private, Pubilc页面可以让Guest访问(通过设置FrendlyUrl); Private页面必须登录后才能访问到A public page is a page in your community that can be accessed by guests. As long as the guest has the appropriate URL (Friendly URLs will be discussed in the next section), the guest haspermission to access any public page.A private page is a page in your community that can only be accessed by logged in users who are part of your community. If a user is not logged in (i.e., the user is a guest) or if a user does not belong to your community, then the user cannot access your private page.下面以添加一个名为My Community的社区,并自定义这个社区页面为例,说明这个问题. 具体的操作是:1、以管理员身份登录2、用Add Content功能把"Communities" Portalet添加到管理员默认的社区页面里面来.3、点击"Communities" Portalet里的"Current"链接,出现目前所有的Community(就是默认的那三个).4、点击上面的Add按钮,添加一个叫MyCommunity的社区,并把Open选项勾上.5、点击save按钮,回到社区列表页面,点击MyCommunity后面的Pages图标,出现页面编辑窗口6、因为这个社区还没有页面,所以左边只有一个光秃秃的电脑图标.在右边的Name文本框填如新的页面名称(如page1),点击"Add page"按钮.7、现在可以看到电脑图标下多了一个page1.其他的子页面也可以用类似的方法添加.8、用弹出的功能图标"路标"图标,转到MyCommunity(Public)页面,再用Add Content功能添加你想要的Portalet.这样就完成了.2、存储社区的表在Liferay Portal的数据库中的表Group_代表社区,在Liferay以前的老版本中,社区被称为组;如果Group_表中字段classNameId和字段classPk为0,则代表社区。
Liferay 6.0开发指南1. 介绍1、已有的应用集成方法:将应用重写为一个Portlet创建一个简单的Portlet整合应用(一般使用Web Service),可以使用iframe或http 代理(可以使用Liferay's WebProxy portlet)。
已有的应用要像部署门户插件一样,把WAR文件部署到应用服务器里,可以使用控制面板或直接复制的方式完成。
Liferay可以自动创建一个Portlet通过iframe集成已有应用。
2、自定义主题风格(Themes)3、自定义布局模板(Layout Templates)4、自定义或扩展门户功能:Hook plugins)Hook plugins可以用来扩展Liferay的核心功能。
5、高级扩展方式:Ext plugins扩展插件可以允许开发人员修改Liferay的核心部分,可以修改任何一个类。
扩展插件部署之后需要重新启动应用服务器。
Liferay 6.0之后用Ext plugins的开发方式替换了原来的Ext Environment开发方式,这样可以简化部署。
之前的扩展环境可以转换为一个独立的插件。
2. 插件开发工具包(THE PLUGINS SDK)2.1 安装Liferay1、下载Liferay Portal bundled with Tomcat;/downloads2、下载Plugins SDK;3、删除liferay-portal-[version]/tomcat-[tomcatversion]/webapps 除ROOT和tunnel-web目录的其他所有文件夹。
4、打开liferayportal-[version]/tomcat-[tomcat-version]/bin目录,运行startup.bat,启动Liferay。
5、http://localhost:8080,默认帐号/密码:test@/test。
6、设置环境变量ANT_HOME,将$ANT_HOME/bin加入到PATH环境变量中。
入门篇:Web应用程序开发流程(1)创建应用程序源代码目录(2)创建build.xml和build.properties文件(3)创建web应用程序部署描述符web.xml(4)编写程序的源代码(5)编译程序的源代码(6)测试web应用程序(7)创建web应用程序的发布版本轻量级J2EE构架技术(1)业务逻辑层(Bussiness Logic Layer)的作用是封装复杂的业务逻辑处理,按照表现层的调用请求执行业务逻辑并向表现层返回结果。
(spring)(2)数据持久层:是多用途、可复用以及可扩展的一组程序框架,提供了支持持久化对象的能力。
(hibernate)(3)视图表示层:提供给用户一个界面,可以是本地的,也可以是远程的。
表示层负责将业务逻辑层提供的服务展示给用户,它应知道如何处理用户的请就,如何同业务逻辑层交互,并且知道如何选择下一个视图显示给用户。
(struts)Struts提供的功能:(1)管理用户的请求,作出相应的响应。
(2)提供一个流程控制器,委派调用业务逻辑和其他上层处理。
(3)处理异常(4)装配需要显示的数据模型、(5)执行页面验证注意:不应该引入下述(1)直接与数据库通信的代码(2)系统的业务逻辑以及验证代码(3)事务处理第二章:搭建开发平台一、安装JDK 1.71、添加环境变量:在我的电脑->属性->高级->环境变量2、新建系统变量,变量名:JAVA_HOME 变量值:C:\Program Files\Java\jdk1.7.0 (JDK的安装目录)3、在原有的系统变量 Path后面加上英文分号,再添加%JAVA_HOME%\bin;%JAVA_HOME%\lib\dt.jar;%JAVA_HOME%\jre\bin; 不要删除原来的。
看清楚,它们之间的分号,是英文的分号。
4、重启电脑生效(因为添加的是系统变量,如果你的系统是win7,则不需要重启)。
4、测试JDK是否安装成功,运行->cmd ->D: 进入D盘,输入javac 看能否出来很多命令,出来则说明JDK配置成功。
注:在按照这篇文档的操作前请先按照我上一篇的文档《liferay6.0 plug-in 安装说明》中所介绍的按照liferay plug -in 插件的方法把插件安装到eclipse 中.安装好了插件后我们就可以进行plug in到开发了。
1.首先我们要新建一个plug in 工程。
在eclipse 中点击创建plug in工程的图标。
然后选择其中的liferay portlet plug-in project.2.在创建新的plug-in project页面中填入project name,例如firstPortlet,然后liferay sdk,和liferay runtime 都选择默认的设置,也就是我们上一节里设置的。
Plug-in type 选择plortlet。
然后点击下一步。
3.在下一步中是要选择dynamic web module version 和configuration,这里都选择默认的设置,然后点击finish,这样eclipse会自动的帮我们进行编译工程。
(如果你如果在操作过程中出现什么错误的话,可以试试把dynamic web module version 选择为2.4 )编译完成后我们就可以看到编译了一个项目。
选择new liferay portlet选项。
5.在new liferay protlet 页面中输入portlet class 名称,和java package 名,然后点击next。
6,在设置Portlet部署描述符中指定的细节页面中,可以设置,portlet的名称,显示名称,标题,还有portlet 模式,liferay portlet模式,是否要创建jsp,jsp所在的文件夹6。
设置完portlet的基本信息后就进入了设置portlet页面信息的页面,这里可以设置页面所用的css 和js等。
设置完这些我们就一路点击next,最后点击finish就完成了整个设置的过程。
Liferay Portal系统架构点滴原文地址: /web/guest/documentation/architecture目录Liferay Portal系统架构点滴 (1)目录 (1)I、综述 (1)II、Portlet 应用接口(JSP168) (2)III、Struts 和 Tiles (2)IV、Session EJBs、Spring和Hibernate (3)V、SAOP、RMI和Tunneling (5)VI 应用服务器 (6)I、综述用户可以通过传统的或者无线网络的方式访问portal。
开发者可以通过SOAP、RMI和自己定义的通道类访问暴露的API来操作portal。
II、Portlet 应用接口(JSP168)Liferay设计成为部署符合(JSP168)Portlet 应用接口的Portlet。
很多有用的Portlet(比如邮件、Liferay文档、日立、公告版和其他)已经跟portal绑定,而且可以作为添加自定义的Portlet的范例。
III、Struts 和 Tiles所有的HTTP和WAP请求都通过MainServlet响应,MailServlet扩展了Struts基类ActionServlet。
MainServlet处理所有的请求,使得每个请求都路由到合适的PortletAction。
想要更好的理解portal的web框架请参考Struts。
Portal的布局信息通过定制的模板管理。
想要更好的理解Tiles如何管理布局的,请参考Tile的相关文章。
IV、Session EJBs、Spring和HibernateLiferay不再依赖EBJ,可以部署在标准的servlet容器中。
所有的业务逻辑都集中在可以被Spring查找和实例化的POJO实现中。
这些实现都可以通过Spring的AOP和IOC修改或者强化。
Portal 企业版使用Session EJB包装POJO实现,以为大型网站提供所需的重量级扩展和事务支持。
Liferay6Development DocumentationTABLE OF CONTENTS1.PREFACE ............................................................................................ 错误!未定义书签。
W HAT'S COVERED.................................................................................... 错误!未定义书签。
P REREQUISITE SOFTWARE ......................................................................... 错误!未定义书签。
A SSUMPTION........................................................................................... 错误!未定义书签。
2.LIFERAY INSTALLATION AND CONFIGURATION ......................... 错误!未定义书签。
D OWNLOAD ............................................................................................ 错误!未定义书签。
JDK I NSTALLATION................................................................................ 错误!未定义书签。
M Y SQL I NSTALLATION............................................................................. 错误!未定义书签。
开发和部署一个作为WebSphere Portal V5 Portlet 的Struts 应用程序2004 年2 月01 日本文描述并举例说明了如何利用Jakarta Struts Framework(已并入IBM Struts Portlet Framework)来开发和部署一个作为Portlet 运行在IBM WebSphere Portal V5 中的的应用程序。
引言本文讨论了如何利用Struts PortletFramework 来实现一个为IBM WebSphere Portal Version 5(以下称为WebSphere Portal)编写的Portlet。
Struts 是一个Apache Jakarta项目,它为创建Web应用程序提供了一个非常流行的开放源码框架。
WebSphere Portal V5.0提供了Struts Portlet Framework 来支持把Struts 应用程序作为Portlet部署。
Struts Portlet Framework 还支持Struts 应用程序中的Portal 模式和设备。
如果您阅读了前面我们描述利用状态模式来实现Portlet的文章,您将熟悉本文使用的示例应用程序。
它遵循相同的设计原理,不过这里是使用Struts来进行开发和部署。
这个应用程序维护一个特定于登录到Portal的用户的联系人列表(地址本条目)。
联系人列表存储在数据库或内存中。
用户可以个别地查看列表中的联系人以了解更详细的信息。
Portlet的编辑模式允许用户添加、删除或修改联系人信息。
本文的重点不在于开发一个Struts Web应用程序;而在于开发一个作为Portlet 的Struts应用程序所需的的实现和配置。
您可以了解到如何利用Jakarta Struts Framework(已并入IBM Struts PortletFramework)来创建一个Portlet。
Liferay学习笔记本文主要涉及内容:修改网站的公司LOGO;增加用户;增加页面;Liferay中的Groups及用户、角色、页面组之间的关系;IE中修改文字大小对于portlet布局的影响;增加用户注册的入口;设置Liferay代理的方法;登录过程缓慢的解决方法;修改访客首页的方法。
本文所述均经作者实践,本人的环境是tomcat 5.0.28,liferay 3.6.1,jdk 1.4.2_09,mysql 5.0.6修改网站的公司LOGO:通过admin(管理)portlet,以管理员登陆应可以在左侧看到,如果没有,从下面的portlet列表中添加。
点击该portlet上的company链接,然后点logo图片下面的change链接。
上传一个200*50的图片(它的注释写的不对,如果上传250*50的图片,版面将变得混乱),然后会自动刷新,显示出这个新LOGO。
增加用户:通过admin(管理)portlet,以管理员登陆应可以在左侧看到,如果没有,从下面的portlet列表中添加。
点击该portlet上的users链接,然后在右侧输入用户的信息,然后点击add按钮,将增加一个用户,如果已配置了mail服务器,将发送一封邮件给该新增用户,里面包括一些欢迎信息及初始密码等信息。
默认的新增用户角色是Power Users 和Users。
该用户会自动本地化,登陆后看到的界面是中文的。
增加页面:通过admin(管理)portlet,以管理员登陆应可以在左侧看到,如果没有,从下面的portlet列表中添加。
点击该portlet上的group链接,选择一个要增加页面的桌面,然后点击edit pages 按钮在page name文本框内输入页面名,然后点击add new Page按钮。
在左侧的树中选择该新增的页面,然后在右侧的portlet列表中可以选择已有的portlet添加到页面上。
点击update pages按钮。
LifeRay Portal 6学习笔记5:Struts Portlet开发示例这篇所说的Struts Portlet是在Ext环境下开发的,使用liferay里面集成的Struts 1.2开发流程图本文是基于以前的在Liferay IDE里面创建的ext环境开发。
准备工作1、在ext-web目录下面创建如下目录/html/portlet/struts2、在ext-impl/src下面创建包content,并在这个包下面创建文件Language-ext_zh_CN.properties3、将tomcat/webapps/root/WEB-INF下面的liferay-display.xml文件copy 到ext环境下面的WEB-INF目录下面。
配置Portlet:portlet-ext在portlet-ext.xml里面写入如下内容Xml代码1.<portlet>2.<portlet-name>strutsdemo</portlet-name>3.<display-name>strutsdemos</display-name>4.<portlet-class>com.liferay.portlet.StrutsPortlet</portlet-class>5.<init-param>6.<name>view-action</name>7.<value>/strutsportlet/demo</value>8.</init-param>9.<expiration-cache>0</expiration-cache>10. <supports>11. <mime-type>text/html</mime-type>12. </supports>13. <resource-bundle>com.liferay.portlet.StrutsResourceBundle</resource-bundle>14. <security-role-ref>15. <role-name>power-user</role-name>16. </security-role-ref>17. <security-role-ref>18. <role-name>user</role-name>19. </security-role-ref>20.</portlet>配置Portlet实例属性:Liferay-portlet-ext在liferay-portlet-ext里面写入,如下内容Xml代码1.<portlet>2.<portlet-name>strutsdemo</portlet-name>3.<struts-path>strutsportlet</struts-path>4.<use-default-template>false</use-default-template>5.</portlet>注意:这里的Struts-path是上面配置的value里面的第一个“/”和最后一个“/”之间的内容portlet-name必须和上面的一样。
归类Portlet:liferay-display在Liferay-display里面将上面的portlet归类显示:Xml代码1.<category name="category.sample">2.<portlet id="47"/>3.<portlet id="48"/>4.<portlet id="50"/>5.<portlet id="66"/>6.<portlet id="strutsdemo"/>7.</category>将其放入示例下面,这里的归类,根据自己的需要。
国际化在这个文件Language-ext_zh_CN.properties里面写入我让要让这个portlet 显示的名字:Java代码1.javax.portlet.title.strutsdemo=strutsportlet\u793a\u4f8b这里的中文要使用native2ascii进行转义。
定义Struts页面流在struts-config-ext.xml里面写入如下内容:Xml代码1.<action path="/strutsportlet/demo"type="com.liferay.portlet.strutsdemo.StrutsAction">2.<forward name="sturts_portlet.view"path="sturts_portlet.view"/>3.<forward name="sturts_portlet.success"path="sturts_portlet.success"/>4.<forward name="sturts_portlet.err"path="sturts_portlet.err"/>5.</action>这里的path,是前面的portlet-ext.xml里面定义的。
其他的和普通Struts 一样定义title页面布局在tiles-defs-ext.xml里面写入如下内容:Xml代码1.<definition name="portlet.ext"extends="portlet"/>2.<definition name="sturts_portlet.view"extends="portlet.ext">3.<put name="portlet_content"value="/portlet/struts/view.jsp"/>4.</definition>5.<definition name="sturts_portlet.success"extends="portlet.ext">6.<put name="portlet_content"value="/portlet/struts/success.jsp"/>7.</definition>8.<definition name="sturts_portlet.err"extends="portlet.ext">9.<put name="portlet_content"value="/portlet/struts/error.jsp"/>10.</definition>这里的portlet.ext继承自portlet,也就是说portlet.ex会使用portlet.jsp 作为他的模板。
下面的这些同理。
创建view.jsp在/html/portlet/struts下面创建init.jsp文件,在里面写入如下内容:Java代码1.<%@ include file="/html/portlet/init.jsp" %>这里会报错,不用理会,因为这是通过ext环境开发的,部署后就会找到这个文件的。
创建view.jsp,内容如下:Java代码1.<%@ page contentType="text/html; charset=UTF-8" %>2.<%@ include file="/html/portlet/struts/init.jsp" %>3.4.This is the <b>LiferayStudy</b> portlet.5.<portlet:actionURL var="submitUrl">6. <portlet:param name="struts_action" value="/strutsportlet/demo" />7.</portlet:actionURL>8.<form action="<%=submitUrl%>" method="post">9.输入你的名字:<input type="text" id="name" name="name">10.<input type="submit"" value="提交">11.12.</form>portlet标签的意思,请参看Liferay Portal 6学习笔记1:Portal介绍创建Action类package com.liferay.portlet.strutsdemo;Java代码1.import javax.portlet.ActionRequest;2.import javax.portlet.ActionResponse;3.import javax.portlet.PortletConfig;4.import javax.portlet.RenderRequest;5.import javax.portlet.RenderResponse;6.7.import org.apache.struts.action.ActionForm;8.import org.apache.struts.action.ActionForward;9.import org.apache.struts.action.ActionMapping;10.11.import com.liferay.portal.struts.PortletAction;12.13.14.public class StrutsAction extends PortletAction {15.16.17. public void processAction(ActionMapping mapping, ActionFormform,18. PortletConfig config, ActionRequest req, ActionResponse res)19. throws Exception {20. String name = req.getParameter("name");21. if (null == name || "".equals(name)) {22. setForward(req, "sturts_portlet.err");23. } else {24. setForward(req, "sturts_portlet.success");25. }26. }27.28.public ActionForward render(ActionMapping mapping, ActionForm form,29. PortletConfig config, RenderRequest req, RenderResponse res)30. throws Exception {31. if (getForward(req) != null && !getForward(req).equals("")) {32. return mapping.findForward(getForward(req));33. } else {34. return mapping.findForward("sturts_portlet.view");35. }36.}37.38.}成功和错误页面不在写,可以根据自己的需要编写了部署Portlet打开Ant界面,Eclipse--》show views--》ant 添加build文件,找到Ext工程下面的build.xml文件,点击其中的Direct-deploy。