
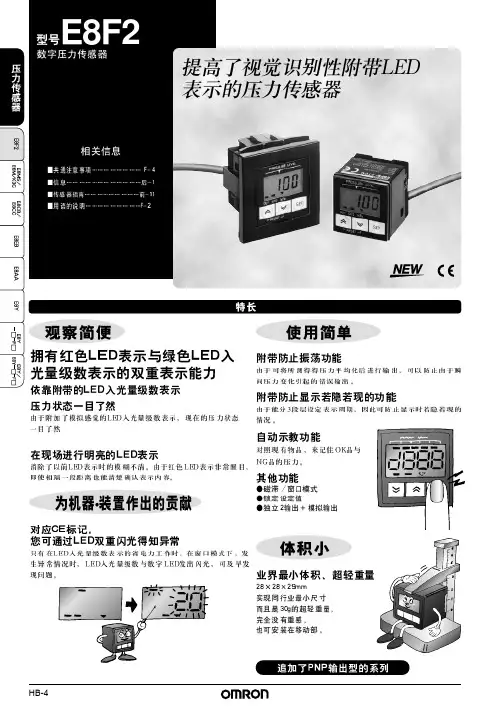
欧姆龙E2F2数字压力传感器——使用手册
- 格式:pdf
- 大小:4.70 MB
- 文档页数:18

E R 1022•Long rope s p a n s up to 125m m a ke s thi s s witch ide a l for a pplic a tion s where long rope s p a n s a re re-quired•He a vy-duty hou s ing—the die-c as t hou s ing a nd s t a inle ss s teel eye nut m a ke the ER1022 s uit a ble for dem a nding indu s tri a l a pplic a tion s•IP67 (NEMA 6) enclo s ure en a ble s the ER1022 s witch to with s t a nd w a ter w as hdown cle a ning •Integr a l E-s top—the E-s top button provide s emer-gency s topping c a p a bility a t the extreme end of the in s t a ll a tion a nd i s field s ervice a ble•T en s ion indic a tor—the ten s ion indic a tor m a ke s the s y s tem e as y to s et up a nd to m a int a in the proper rope ten s ion•4N/C sa fety cont a ct s a nd 2 N/O a uxili a ry cont a ct s sa ti s fy the mo s t dem a nding a pplic a tion s•Vibr a tion toler a nt—the s n a p-a cting s witch cont a ct s protect a g a in s t nui sa nce tripping due to vibr a tion •Long life—the ER1022 s witch i s de s igned for a min-imum of one million a ctu a tion s•Indic a tor be a con—the indic a tor be a con, a v a il a ble in 24VDC, c a n be wired to fl as h red to indic a te a tripped s witch or glow a con s t a nt green to indic a te a properly re s et s witchOper a tionBlue Re s et ButtonA blue re s et button i s provided to e as ily return the unit b a ck to it s m a chine-run po s ition a fter a ctu a tion.In s t a ll a tion H a rdw a re Av a il a bleRK Rope Ten s ion KitThe RK Rope Ten s ion Kit come s with a ll of the required h a rdw a re for mo s t in s t a ll a tion s . A s pring i s required as s hown in the in s t a ll a -tion ex a mple below.In s t a ll a tion H a rdw a reIndividu a l h a rd-w a re item s m a y be purch as ed fors pecific in s t a ll a -tion requirement s .T en s ion/GripperSpring T urnbuckle EyeboltThimbleDouble Loop ClipRope PulleyCont a ct Arr a ngement sMounting Specific a tionNote:Some in s t a ll a tion s m a y require a ER1022 on e a ch end.Ordering inform a tionRope Pull Emergency Stop SwitchAcce ss orie sE-Stop Indic a tor Be a con Cont a ct s Wiring Entry ModelIncluded Included (24 VDC) 4 N/C + 2 N/O 4 x M20ER1022-042MELL IncludedIncluded (24 VDC)4 N/C + 2 N/O4 x M20ER1022-042MELRItemModel Repl a cement Lid/LED, 24 VDC SM06-SL710Rope Kit, 5 m, St a inle ss Steel RK5Rope Kit, 10 m, St a inle ss Steel RK10Rope Kit, 20 m, St a inle ss Steel RK20Rope Kit, 50 m, St a inle ss Steel RK50Rope Only, 5 m R5M Rope Only, 10 m R10M Rope Only, 20 m R20M Rope Only, 50 m R50M Rope Only, 100 m R100M Rope Only, 126 mR126M Ten s ioner Gripper, St a inle ss Steel SM06-TG00Eye Bolt, St a inle ss Steel, 8 per p a ck SM06-EB10Double Loop Clip, St a inle ss Steel, 4 per p a ckSM06-DL20E R 1022Specific a tion sNote:The sa fety cont a ct s of the Omron STI s witche s a re de s cribed as norm a lly clo s ed (N/C)—i.e., with the rope properly ten s ioned a nd the m a chine a ble to be s t a rted.Dimen s ion sThimble, St a inle ss Steel, 4 per p a ck SM06-THSS Turnbuckle, St a inle ss Steel SM06-TB30Spring, St a inle ss Steel SM06-SP50Rope Pulley, St a inle ss Steel SM06-RPSS E-Stop Mech a ni s mSM06-ES60Electric a lCont a ct Configur a tion s 4 N/C + 2 N/O S a fety Cont a ct s 4 N/CSwitching AbilityAC: 240 V–3 A, 120 V–6 A, Inductive DC: 24 V–2.5 A, Inductive Auxili a ry Cont a ct s2 N/O M a x Switching Current/Volt/Amp 240 V/720 VA Minimum Current 5 V, 5 mA DC Electric a l Life 1,000,000 minimum LED Indic a tor Be a con 24 VDC Mech a nic a lMountingAny po s ition Mounting H a rdw a re4 x M5 s crew sActu a tor Tr a vel for Po s itive Opening See di a gr a m s on previou s p a ge M a x Rope Sp a n 125 m Oper a tion Force< 125 N Ten s ioning Force to Run Po s ition 130 N typic a lC as e M a teri a l Die-c as t a luminum a lloy Eye Nut M a teri a l St a inle ss s teel Wiring Entry 4 x M20Weight 1100 g ColorYellowMech a nic a l Life 1,000,000 minimum Environment a lProtectionIP67 (NEMA 6)Oper a ting Temper a ture -25 to 80°C Cle a ningW a ter w as hdownCompli a nceSt a nd a rd s IEC947-5-1, IEC947-5-5, EN418, UL508, BS5304Approv a l s /Li s ting sCE m a rked for a ll a pplic a ble directive s , UL a nd C-ULItemModelS a fety prec a ution sOper a ting in s truction sInstallation must be in accordance with the following steps and stated specifications and should be carried out by suitably competent personnel.Adherence to the recommended maintenance instructions forms part of the warranty.!WARNING Do not defeat, tamper, remove or bypass this unit.Severe injury to personnel could result.!WARNING1.Installation of all Safety Rope Switch systems must be in accordance with a risk assessment for the individual application. Installation must only be carried out by competent personnel and in accordance with these instructions.2.Rope support eyebolts must be fitted at 2.5m. min. to 3m. max. inter-vals along all rope lengths between switches. The rope must be supported no more than 500mm from the switch eyebolt or Safety Spring (if used). It is important that this first 500mm is not used as part of the active protection coverage.3.M5 mounting bolts must be used to fix the switches. Tightening torque for mounting bolts to ensure reliable fixing is 4Nm. Tightening torque for the lid screws, conduit entry plugs and cable glands must be 1.5Nm to ensure IP seal. Only use correct sizing glands for conduit entry and cable outside diameter.4.Tensioning of rope is achieved by use of tensioner / gripper assemblies.Upon installation, tension to mid-position as indicated by the red arrows in the viewing window of each switch. Check operation for all switches and the control circuits by puling the rope at various locations along the active protection area and resetting each switch by depressing the Blue Reset button. Ensure each time that the switches latch off and require manual resetting by depressing the Blue Reset button. Increase the sys-tem tension further, if required, depending upon the checks along the active length of coverage. If fitted with a Mushroom type E-Stop button (Red) then test and reset each switch to ensure function of control cir-cuits. Typical operational conditions for successful operation of system is less than 75N. pulling force and less than 150mm deflection of rope between eyebolt supports. If the optional LED is fitted but is not used,ensure that the conductors remain coiled and tied to the tie hole in the LED flange.5.Every week: Check correct operation of system at locations along all coverage length. Check for nominal tension setting, re-tension rope if necessary. Every 6 months: Isolate power and remove cover. Check screw terminal tightness and check for signs of moisture ingress. Never attempt to repair any switch.In the intere s t of product improvement, s pecific a tion s a re s ubject to ch a nge without notice.ALL DIMENSIONS SHOWN ARE IN MILLIMETERS.To convert millimeter s into inche s , multiply by 0.03937. T o convert gr a m s into ounce s , multiply by 0.03527.C a t. No. E51E-EN-01。


1E2E High performance in small sizes•pre-wired and M8 connector models •3mm, 4mm, 5.4mm and M5 sizes •response frequency up to 3kHzOrdering InformationSizeSensing Distance Connection Housing Material OutputOperation mode NO Operation mode NC dia 3mm shielded0.6mm pre-wired stainless steelPNP E2E-CR6B1E2E-CR6B2NPN E2E-CR6C1E2E-CR6C2dia 4mm0.8mmpre-wired PNP E2E-CR8B1E2E-CR8B2NPN E2E-CR8C1E2E-CR8C2M8 connectorPNP E2E-CR8B1-M5E2E-CR8B2-M5NPN E2E-CR8C1-M5E2E-CR8C2-M5M51mmpre-wired brassPNP E2E-X1B1E2E-X1B2NPN E2E-X1C1E2E-X1C2M8 connectorPNP E2E-X1B1-M5E2E-X1B2-M5NPN E2E-X1C1-M5E2E-X1C2-M5dia 5.4mmpre-wiredPNP E2E-C1B1E2E-C1B2NPNE2E-C1C1E2E-C1C22Inductive SensorsSpecificationsE2E-C @C @/B @, E2E-X1C @/B @ DC 3-wire ModelsNote:The response speed is an average value. Measurement conditions are as follows: standard sensing object, a distance of twice the standardsensing object, and a set distance of half the sensing distance.Size 3 dia.4 dia.M55.4 dia.TypeShieldedItemE2E-CR6C @/B @E2E-CR8C @/B @E2E-X1C @/B @E2E-C1C @/B @Sensing distance 0.6mm ±15%0.8 mm ±15% 1 mm ±15%Set distance 0 to 0.4mm0 to 0.5 mm0 to 0.7 mmDifferential travel 15% max. of sensing distanceSensing objectFerrous metal (The sensing distance decreases with non-ferrous metal, refer to Engineering Data .)Standard sensing object Iron: 3x3x1 mm Iron: 5x5x1mm Response speed (See note.)2kHz3kHzPower supply voltage (operating voltage range)12 to 24 VDC (10 to 30 VDC), ripple (p-p): 10% max.Current consumption 10mA max.17 mA max.Control output Load currentOpen-collector output, 80mA max.(at 30VDC max.)Open-collector output 100 mA max. (at 30 VDC max.)Residual voltage1 VDC max.(Load current: 80mA, Cable length: 2m)2 VDC max. (Load current: 100 mA , Cable length: 2 m)IndicatorOperation indicator (red LED)Operation mode (with sensing object approaching)C1/-B1 Models:NO C2/-B2 Models:NCFor details, refer to Timing Charts .Protection circuits Power supply reverse polarity protection, surge suppressor Ambient temperature Operating/Storage: –25°C to 70°C (with no icing or condensation)Ambient humidity Operating/Storage: 35% to 95%Temperature influence ±15% max. of sensing distance at 23︒C in the temperature range of –25°C to 70°C Voltage influence ±5% max. of sensing distance in the rated voltage range ±10%±2.5% max. of sensing distance in the rated voltage range ±15%Insulation resistance 50 M Ω min. (at 500 VDC) between current-carrying parts and case Dielectric strength 500 VAC at 50/60 Hz for 1 min between current-carrying parts and case Vibration resistance 10 to 55 Hz, 1.5-mm double amplitude for 2 hours each in X, Y, and Z directions Shock resistance 500 m/s 2 10 times each in X, Y, and Z directions Degree of protection IEC 60529: IP66IEC 60529 IP67 (Pre-wired models: JEM standard IP67g (waterproof, oil-proof))Connection method Pre-wired models (standard length 2 m), connector models Weight(packed state)Pre-wired models Approx. 60 g Connector models —Approx. 12 gApprox. 15 g —MaterialCaseStainless steel (SUS303)Brass-nickel platedSensing surface Heat-resistant ABS Clamping nuts Brass-nickel plated Toothed washerIron-zinc plated AccessoriesInstruction manual3E2E Output Circuits and Timing ChartsOutput CircuitsDC 3-wire ModelsTiming ChartsPin ArrangementE2E-CR8C @/CR8B @/X1C@/X1B@-M5 DC 3-wire ModelsIronCopperS t a inle ss s teel(S U S304) Br ass Al u min u m t = 1 mmIron S t a inle ss s teel (S U S304)Br assAl u min u mt = 1 mmS e n s i n g d i s t a n c e (m m )S ide length of s en s ing o b ject d (mm)S ide length of s en s ing o b ject d (mm)NPN Open-collector OutputBlue 3LoadBlack 4Brown 10 V100 ΩBlue 3LoadBlack 4Brown 10 VOutput100 ΩProximity sensor main circuitProximity sensor main circuit* Pin 4 is an NO contact, and pin 2 is an NC contact.* Pin 4 is an NO contact, and pin 2 is an NC contact.E2E-C/X @C @/B @NPN/PNP Open-collector OutputSensing object Control outputY es NoON OFF Operation indicator (red)ON OFF4Inductive SensorsPrecautionsMountingDo not tighten the nut with excessive force. A washer must be used with the nut.Note:The table below shows the tightening torques for part A andpart B nuts. In the previous examples, the nut is on the sensor head side (part B) and hence the tightening torque for part B applies. If this nut is in part A, the tightening torque for part A applies instead.Refer to the following to mount the E2E-CR8 and E2E-C1non-screw models.Tighten the screw to a torque of 0.2 N·m maximum to secure the E2E-CR8 and a torque of 0.4 N·m maximum to secure the E2E-C1.Effects of Surrounding MetalWhen mounting the E2E within a metal panel, ensure that the clearances given in the following table are maintained. Failure to maintain these distances may cause deterioration in the performance of the sensor.Mutual InterferenceWhen installing two or more Sensors face to face or side by side, ensure that the minimum distances given in the following table are maintained.Note:Values in parentheses apply to Sensors operating at different frequen-cies.ModelPart APart B LengthTorqueTorqueM51 N·mModel Item 3 dia. 4 dia.M5 5.4 dia.E2E-X @C @E2E-X @B @E2E-C @C @E2E-C @B @DC 3-wireShielded l 0 mm 0 mm 0 mm 0 mm d 3 mm 4 mm 5 mm 5.4 mm D 0 mm 0 mm 0 mm 0 mm m2 mm 2.4 mm3 mm3 mm n6 mm6 mm8 mm8 mmShielded Model Unshielded Model Part B Part APart B Part A8 to 21 mmM3 holeNo screw is provided with the E2E-CR8 or E2E-C1.d dia.Model Item 3 dia. 4 dia.M5 5.4 dia.E2E-X @B @E2E-X @C @E2E-C @B @E2E-C @C @DC 3-wireShielded A 20 mmB 15 mm5E2E Precautions for Safe UseThe colors in parentheses are previous wire colors.Precautions for Correct UseInstallation Power Reset TimeThe Proximity Sensor is ready to operate within 100 ms after power is supplied. If power supplies are connected to the Proximity Sensor and load respectively, be sure to supply power to the Proximity Sensor be-fore supplying power to the load.Power OFFThe Proximity Sensor may output a pulse signal when it is turned OFF. Therefore, it is recommended to turn OFF the load before turn-ing OFF the Proximity Sensor.Power Supply TransformerWhen using a DC power supply, make sure that the DC power supply has an insulated transformer. Do not use a DC power supply with an auto-transformer.Sensing ObjectMetal Coating:The sensing distances of the Proximity Sensor vary with the metal coating on sensing objects.WiringHigh-tension LinesWiring through Metal ConduitIf there is a power or high-tension line near the cable of the Proximity Sensor, wire the cable through an independent metal conduit to pre-vent against Proximity Sensor damage or malfunctioning.Cable Tractive ForceDo not pull on cables with tractive forces exceeding the following.MountingThe Proximity Sensor must not be subjected to excessive shock with a hammer when it is installed, otherwise the Proximity Sensor may be damaged or lose its water-resistivity.Environment Water ResistivityDo not use the Proximity Sensor underwater, outdoors, or in the rain.DC 3-wire ModelsSensorBrownBlackBlueLoadIncorrectDC 3-wire Models (NPN output)SensorBrownBlackBlueLoad(Load short- circuit)DC 3-wire Models (NPN output)SensorBrownBlueLoadBlackSensorBrownBlackLoadBlueIncorrectDC 3-wire ModelsSensorBrownBlueLoadIncorrectDiameterTractive force4 dia. max.30 N max.4 dia. min.50 N max.6Inductive SensorsOperating EnvironmentBe sure to use the Proximity Sensor within its operating ambient tem-perature range and do not use the Proximity Sensor outdoors so that its reliability and life expectancy can be maintained. Although the Proximity Sensor is water resistive, a cover to protect the ProximitySensor from water or water soluble machining oil is recommended so that its reliability and life expectancy can be maintained.Do not use the Proximity Sensor in an environment with chemical gas (e.g., strong alkaline or acid gasses including nitric, chromic, and con-centrated sulfuric acid gases).Connection to a PLC Required ConditionsConnection to a PLC is possible if the specifications of the PLC and the Proximity Sensor satisfy the following conditions. (The meanings of the symbols are given below.)1.The ON voltage of the PLC and the residual voltage of the Prox-imity Sensor must satisfy the following.V ON ≤ V CC – V R2.The OFF current of the PLC and the leakage current of the Prox-imity Sensor must satisfy the following.I OFF ≥ I leak(If the OFF current is not listed in the specifications, take it to be 1.3 mA.)3.The ON current of the PLC and the control output (I OUT ) of the Proximity Sensor must satisfy the following.I OUT(min) ≤ I ON ≤ I OUT(max)The ON current of the PLC will vary, however, with the power sup-ply voltage and the input impedance used as shown in the follow-ing equation.I ON = (V CC – V R – )/R INExampleIn this example, the above conditions are checked for when the PLC model is the C200H-ID212, the Proximity Sensor model is the E2E-X7D1-N, and the power supply voltage is 24 V .1.V ON (14.4 V) ≤ V CC (20.4 V) – V R (3 V) = 17.4 V: OK 2.I OFF (1.3 mA) ≥ I leak (0.8 mA): OK3.I ON = [V CC (20.4 V) – V R (3 V) – ≈4.5 mA Therefore,I OUT(min) (3 mA) ≤ I ON (4.5 mA): OKV ON : ON voltage of PLC (14.4 V)I ON : ON current of PLC (typ. 7 mA)I OFF : OFF current of PLC (1.3 mA)R IN : Input impedance of PLC (3 k Ω)V R : Output residual voltage of Proximity Sensor (3 V)I leak : Leakage current of Proximity Sensor (0.8 mA)I OUT : Control output of Proximity Sensor (3 to 100 mA)V CC : Power supply voltage (PLC: 20.4 to 26.4 V)Values in parentheses are for the following PLC model and Proximity Sensor model.PLC: C200H-ID212Proximity Sensor: E2E-X7D1-NNote:please refer to complete E2E/E2E2 datasheet for details on E2E-X7D1-NV PC V PC (4 V)]/R IN (3 k Ω)V PC : Internal residual voltage of PLC (4 V)Model Connection type Method DescriptionDC 3-wireAND (serial connection)The Sensors connected together must satisfy the following conditions.i L + (N –1) x i ≤ Upper-limit of control output of each SensorV S – N x V R ≥ Load operating voltage N: No. of SensorsV R : Residual voltage of each Sensor V S : Supply voltagei: Current consumption of the Sensor i L : Load currentIf the MY Relay, which operates at 24 VDC, is used as a load for example, a maximum of two Proximity Sensors can be connected to the load.LoadCorrect7E2E DimensionsNote:All units are in millimeters unless otherwise indicated.Pre-wired Models (Shielded)Dimensions 3 dia.4 dia.M55.4 dia.F (mm)3.3 dia.4.2 dia.5.5 dia.5.7 dia.+0.30+0.50+0.50+0.50ALL DIMENSIONS SHOWN ARE IN MILLIMETERS.To convert millimeters into inches, multiply by 0.03937. T o convert grams into ounces, multiply by 0.03527.Terms and Conditions of SaleCertain Precautions on Specifications and UseOMRON CANADA, INC. • HEAD OFFICEToronto, ON, Canada • 416.286.6465 • 866.986.6766 • OMRON ELECTRONICS DE MEXICO • HEAD OFFICEMéxico DF • 52.55.59.01.43.00 • 001.800.556.6766 •************** OMRON ELECTRONICS DE MEXICO • SALES OFFICEApodaca, N.L. • 52.81.11.56.99.20 • 001.800.556.6766 •************** OMRON ELETRÔNICA DO BRASIL LTDA • HEAD OFFICESão Paulo, SP, Brasil • 55.11.2101.6300 • .br OMRON ARGENTINA • SALES OFFICE Cono Sur • 54.11.4783.5300 OMRON CHILE • SALES OFFICE Santiago • 56.9.9917.3920 OTHER OMRON LATIN AMERICA SALES 54.11.4783.5300OMRON INDUSTRIAL AUTOMATION • THE AMERICAS HEADQUARTERSSchaumburg, IL USA • 847.843.7900 • 800.556.6766 • OMRON EUROpE B.V. • Wegalaan 67-69, NL-2132 JD, Hoofddorp, The Netherlands. •Tel: +31 (0) 23 568 13 00Fax: +31 (0) 23 568 13 88 •www.industrial.omron.euCat. No. D11E-EN-02A01/12 Note: Specifications are subject to change. © 2012 Omron Electronics LLC Printed in U.S.A.。