光刻版的设计原则(英文版)
- 格式:pdf
- 大小:98.48 KB
- 文档页数:10
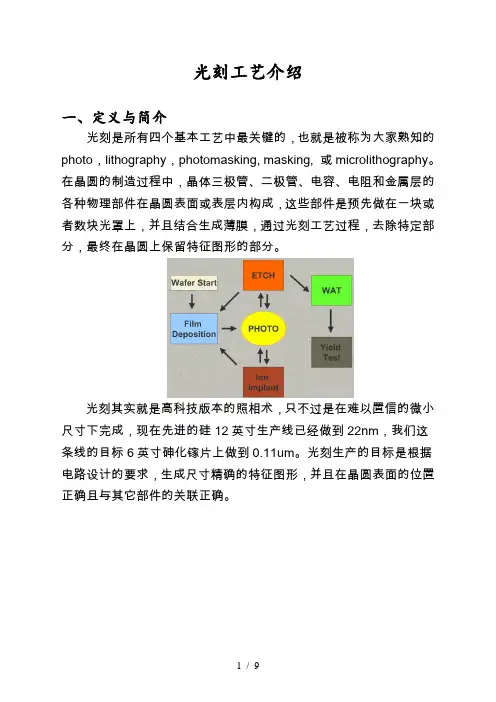
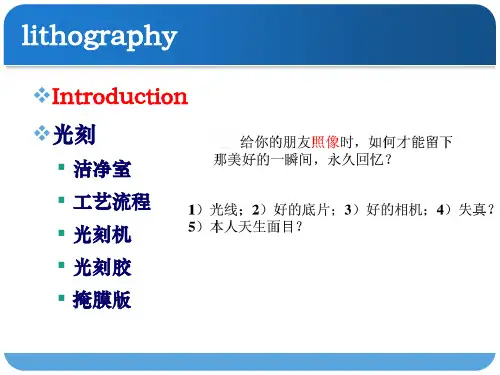
光刻工艺介绍一、定义与简介光刻是所有四个基本工艺中最关键的,也就是被称为大家熟知的photo,lithography,photomasking, masking, 或microlithography。
在晶圆的制造过程中,晶体三极管、二极管、电容、电阻和金属层的各种物理部件在晶圆表面或表层内构成,这些部件是预先做在一块或者数块光罩上,并且结合生成薄膜,通过光刻工艺过程,去除特定部分,最终在晶圆上保留特征图形的部分。
光刻其实就是高科技版本的照相术,只不过是在难以置信的微小尺寸下完成,现在先进的硅12英寸生产线已经做到22nm,我们这条线的目标6英寸砷化镓片上做到0.11um。
光刻生产的目标是根据电路设计的要求,生成尺寸精确的特征图形,并且在晶圆表面的位置正确且与其它部件的关联正确。
二、光刻工艺流程介绍光刻与照相类似,其工艺流程也类似:实际上,普通光刻工艺流程包括下面的流程:1)Substrate Pretreatment 即预处理,目的是改变晶圆表面的性质,使其能和光刻胶(PR)粘连牢固。
主要方法就是涂HMDS,在密闭腔体内晶圆下面加热到120℃,上面用喷入氮气加压的雾状HMDS,使得HMDS和晶圆表面的-OH健发生反应已除去水汽和亲水健结构,反应充分后在23℃冷板上降温。
该方法效果远比传统的热板加热除湿好。
2)Spin coat即旋转涂光刻胶,用旋转涂布法能提高光刻胶薄膜的均匀性与稳定性。
光刻胶中主要物质有树脂、溶剂、感光剂和其它添加剂,感光剂在光照下会迅速反应。
一般设备的稳定工作最高转速不超过4000rpm,而最好的工作转速在2000~3000rpm。
3)Soft Bake(Pre-bake)即软烘,目的是除去光刻胶中溶剂。
一般是在90℃的热板中完成。
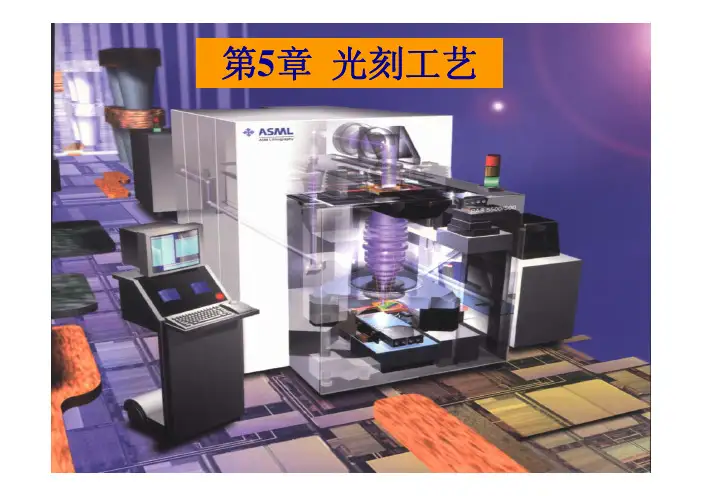
4)Exposure即曝光,这也是光刻工艺中最为重要的一步,就是用紫外线把光罩上的图形成像到晶圆表面,从而把光罩上面的图形转移到晶圆表面上的光刻胶中。


光刻工艺基础知识PHOTO (注:引用资料)光刻工艺基础知识PHOTOPHOTO 流程?答:上光阻→曝光→显影→显影后检查→CD量测→Overlay量测何为光阻?其功能为何?其分为哪两种?答:Photoresist(光阻).是一种感光的物质,其作用是将Pattern从光罩(Reticle)上传递到Wafer上的一种介质。
其分为正光阻和负光阻。
何为正光阻?答:正光阻,是光阻的一种,这种光阻的特性是将其曝光之后,感光部分的性质会改变,并在之后的显影过程中被曝光的部分被去除。
何为负光阻?答:负光阻也是光阻的一种类型,将其曝光之后,感光部分的性质被改变,但是这种光阻的特性与正光阻的特性刚好相反,其感光部分在将来的显影过程中会被留下,而没有被感光的部分则被显影过程去除。
什幺是曝光?什幺是显影?答:曝光就是通过光照射光阻,使其感光;显影就是将曝光完成后的图形处理,以将图形清晰的显现出来的过程。
何谓Photo?答:Photo=Photolithography,光刻,将图形从光罩上成象到光阻上的过程。
Photo主要流程为何?答:Photo的流程分为前处理,上光阻,Soft Bake, 曝光,PEB,显影,Hard Bake等。
何谓PHOTO区之前处理?答:在Wafer上涂布光阻之前,需要先对Wafer表面进行一系列的处理工作,以使光阻能在后面的涂布过程中能够被更可靠的涂布。
前处理主要包括Bake,HDMS等过程。
其中通过Bake将Wafer表面吸收的水分去除,然后进行HDMS工作,以使Wafer表面更容易与光阻结合。
何谓上光阻?答:上光阻是为了在Wafer表面得到厚度均匀的光阻薄膜。
光阻通过喷嘴(Nozzle)被喷涂在高速旋转的Wafer表面,并在离心力的作用下被均匀的涂布在Wafer的表面。
何谓Soft Bake?答:上完光阻之后,要进行Soft Bake,其主要目的是通过Soft Bake将光阻中的溶剂蒸发,并控制光阻的敏感度和将来的线宽,同时也将光阻中的残余内应力释放。
Design Rules for Drawing Masks using AutoCAD
Artwork Conversion Software,IncAppendix II - 2Drawing Design Rules for AutoCAD
Table of ContentsSetting up the AutoCAD Drawing Environment . . . . . . . . . . . . . . . . . . . . . . . . . . . . . . . . . . . . . . . . . . . . . .A-3Getting started on the right foot.Introduction & Research . . . . . . . . . . . . . . . . . . . . . . . . . . . . . . . . . . . . . . . . . . . . . . . . . . . . . . . . . . . . . . . . .A-3 Units and Grid Snap, Data Origin, Construction Lines . . . . . . . . . . . . . . . . . . . . . . . . . . . . . . . . . . . . . . .A-4UCSand VPOINT, Layer Names, No Hatching . . . . . . . . . . . . . . . . . . . . . . . . . . . . . . . . . . . . . . . . . . . . .A-5
Drawing Boundaries using the Polyline . . . . . . . . . . . . . . . . . . . . . . . . . . . . . . . . . . . . . . . . . . . . . . . . . . . .A-5The polyline is your best friend.Use him properly andall of your masks will come out correct the first time.Closed, Number of Vertices, No Hatching, Q&A . . . . . . . . . . . . . . . . . . . . . . . . . . . . . . . . . . . . . . . . . . . .A-5Polylines w/ Width, Solids, Lines and Arcs . . . . . . . . . . . . . . . . . . . . . . . . . . . . . . . . . . . . . . . . . . . . . . . .A-5
The Re-entrant Polyline . . . . . . . . . . . . . . . . . . . . . . . . . . . . . . . . . . . . . . . . . . . . . . . . . . . . . . . . . . . . . . . . .A-6This special case of a boundary folds back on itself and creates an empty internal area.Use it wisely.
200 Vertex Limit . . . . . . . . . . . . . . . . . . . . . . . . . . . . . . . . . . . . . . . . . . . . . . . . . . . . . . . . . . . . . . . . . . . . . . .A-6The old GDSIIspec restricted you to 200 vertices per boundary.But you may exceed this limit sometimes...
Drawing Paths using Polylines . . . . . . . . . . . . . . . . . . . . . . . . . . . . . . . . . . . . . . . . . . . . . . . . . . . . . . . . . . .A-7The polyline with width is nice to use but make sureyou know what is goin on at the ends.As tempting as it may be, Don’t close a polyline with width to form a frame.Characteristics of Paths, Drawing in AutoCAD & Path Mitering . . . . . . . . . . . . . . . . . . . . . . . . . . . . . . . . .A-7
Drawing Islands and Isolated Areas . . . . . . . . . . . . . . . . . . . . . . . . . . . . . . . . . . . . . . . . . . . . . . . . . . . . . . .A-7Don’t draw a polygon inside a polygon - how to use “paint and scratch”to handle those complex masks.Two mating boundaries & Re-entrant Boundary . . . . . . . . . . . . . . . . . . . . . . . . . . . . . . . . . . . . . . . . . . . .A-7
Text . . . . . . . . . . . . . . . . . . . . . . . . . . . . . . . . . . . . . . . . . . . . . . . . . . . . . . . . . . . . . . . . . . . . . . . . . . . . . . . .A-8What Works, What Doesn’t A mask making machine is not a laser printer - there’s no support for Postscript or True Type fonts...Supported/Unsupported Text Functions & Notes . . . . . . . . . . . . . . . . . . . . . . . . . . . . . . . . . . . . . . . . . . .A-8
Defining and Inserting Blocks . . . . . . . . . . . . . . . . . . . . . . . . . . . . . . . . . . . . . . . . . . . . . . . . . . . . . . . . . . . .A-8Blocks make repetitive data easy to handle..but please don’t rotate them and watch the scale factor.Scale, Insertion Layer & Rotation . . . . . . . . . . . . . . . . . . . . . . . . . . . . . . . . . . . . . . . . . . . . . . . . . . . . . . .A-8Block Names & Attributes . . . . . . . . . . . . . . . . . . . . . . . . . . . . . . . . . . . . . . . . . . . . . . . . . . . . . . . . . . . .A-9
MINSERTS . . . . . . . . . . . . . . . . . . . . . . . . . . . . . . . . . . . . . . . . . . . . . . . . . . . . . . . . . . . . . . . . . . . . . . . . . . .A-9AutoCAD’s multiple insertion of blocks...Rules & Reasons . . . . . . . . . . . . . . . . . . . . . . . . . . . . . . . . . . . . . . . . . . . . . . . . . . . . . . . . . . . . . . . . . .A-9
Circles and Arcs . . . . . . . . . . . . . . . . . . . . . . . . . . . . . . . . . . . . . . . . . . . . . . . . . . . . . . . . . . . . . . . . . . . . . .A-9Mask making machines don’t do arcs - they get broken down into segments.What you should know...Arc Resolution, Arc Sag, & Combining the two . . . . . . . . . . . . . . . . . . . . . . . . . . . . . . . . . . . . . . . . . . . .A-9
Creating the DXF File . . . . . . . . . . . . . . . . . . . . . . . . . . . . . . . . . . . . . . . . . . . . . . . . . . . . . . . . . . . . . . . . .A-10Purge your drawing of unecessary stuff....then DXFout.Make sure enough places of accuracy are used.Purge the Database, DXFOUT Command &Examples . . . . . . . . . . . . . . . . . . . . . . . . . . . . . . . . . . . . .A-10