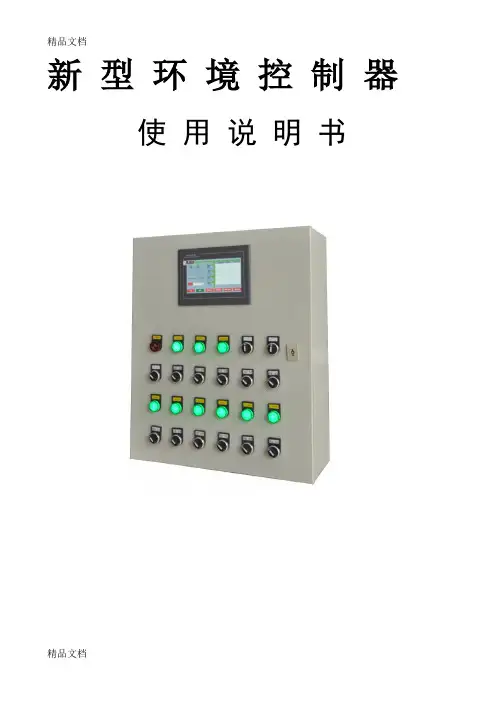
新型环境控制器使用说明书
- 格式:doc
- 大小:1.20 MB
- 文档页数:14
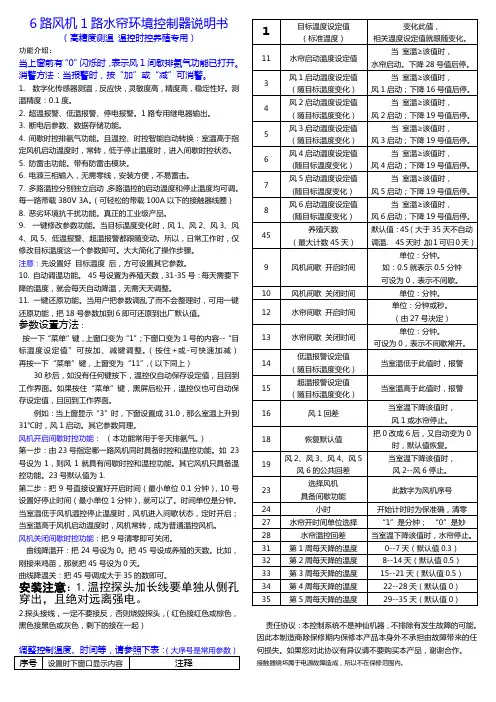
6路风机1路水帘环境控制器说明书(高精度测温温控时控养殖专用)功能介绍:当上窗前有“0”闪烁时,表示风1间歇排氨气功能已打开。
消警方法:当报警时,按“加”或“减”可消警。
1. 数字化传感器测温,反应快,灵敏度高,精度高,稳定性好。
测温精度:0.1度。
2. 超温报警、低温报警、停电报警。
1路专用继电器输出。
3. 断电后参数、数据存储功能。
4. 间歇时控排氨气功能。
且温控、时控智能自动转换:室温高于指定风机启动温度时,常转,低于停止温度时,进入间歇时控状态。
5. 防雷击功能。
带有防雷击模块。
6. 电源三相输入,无需零线,安装方便,不易雷击。
7. 多路温控分别独立启动,多路温控的启动温度和停止温度均可调。
每一路带载380V 3A。
(可轻松的带载100A以下的接触器线圈)8. 恶劣环境抗干扰功能。
真正的工业级产品。
9. 一键修改参数功能。
当目标温度变化时,风1、风2、风3、风4、风5、低温报警、超温报警都跟随变动。
所以,日常工作时,仅修改目标温度这一个参数即可。
大大简化了操作步骤。
注意:先设置好目标温度后,方可设置其它参数。
10. 自动调温功能。
45号设置为养殖天数,31-35号:每天需要下降的温度,就会每天自动降温,无需天天调整。
11. 一键还原功能。
当用户把参数调乱了而不会整理时,可用一键还原功能,把18号参数加到6即可还原到出厂默认值。
参数设置方法:按一下“菜单”键,上窗口变为“1”;下窗口变为1号的内容--“目标温度设定值”可按加、减键调整。
(按住+或-可快速加减)再按一下“菜单”键,上窗变为“11”,(以下同上)30秒后,如没有任何键按下,温控仪自动保存设定值,且回到工作界面。
如果按住“菜单”键,黑屏后松开,温控仪也可自动保存设定值,且回到工作界面。
例如:当上窗显示“3”时,下窗设置成31.0,那么室温上升到31℃时,风1启动。
其它参数同理。
风机开启间歇时控功能:(本功能常用于冬天排氨气。
)第一步:由23号指定哪一路风机同时具备时控和温控功能。
依爱3000环境控制器说明书依爱3000环境控制器是一款先进的智能设备,专为家庭和办公环境而设计。
它能够监测和调节室内温度、湿度和空气质量,以提供舒适和健康的生活环境。
本说明书将带您了解依爱3000环境控制器的功能、操作和注意事项,以便您正确使用并享受其带来的便利。
一、功能介绍:1. 温度控制:依爱3000环境控制器配备了高精度温度传感器,能够实时监测室内温度,并根据设定的温度范围进行自动调节。
您可以根据个人需求随时调整设定温度,实现个性化的温度控制。
2. 湿度调节:该环境控制器还配备了湿度传感器,可以精确监测室内湿度,并调节加湿器或除湿器以达到设定的湿度范围。
保持适宜的湿度对预防皮肤干燥、呼吸道不适等问题非常重要,尤其是在冬季或干燥的气候条件下。
3. 空气质量检测:依爱3000环境控制器拥有一套高灵敏度的空气质量检测系统,可以实时监测室内空气中的有害物质浓度,如甲醛、PM2.5等。
当空气质量低于安全标准时,环境控制器将自动启动空气净化器,确保室内空气清新健康。
4. 智能控制:依爱3000环境控制器采用先进的智能技术,通过手机App或语音助手与其连接,可以远程控制和监测室内环境。
您可以在外出前提前调节室内温度,或者在外地时随时查看室内空气质量,提前采取相应措施,让您始终享受到舒适的居住环境。
二、操作说明:1. 安装:将依爱3000环境控制器安装在墙壁上,确保它离电源插座不远。
连接电源后,按照屏幕上的指示进行相应的设置。
2. 温度调节:通过环境控制器上的调节按钮或App上的设置,您可以选择所需的温度范围。
环境控制器将根据您的设定自动调节室内温度。
3. 湿度调节:在环境控制器上选择加湿或除湿模式,并设置所需的湿度范围。
环境控制器将自动调节相应的设备以达到您设定的湿度值。
4. 空气质量监测:环境控制器会定期检测室内空气质量,并将结果显示在屏幕上或App上。
如果空气质量低于设定的安全值,环境控制器将启动空气净化器进行处理。
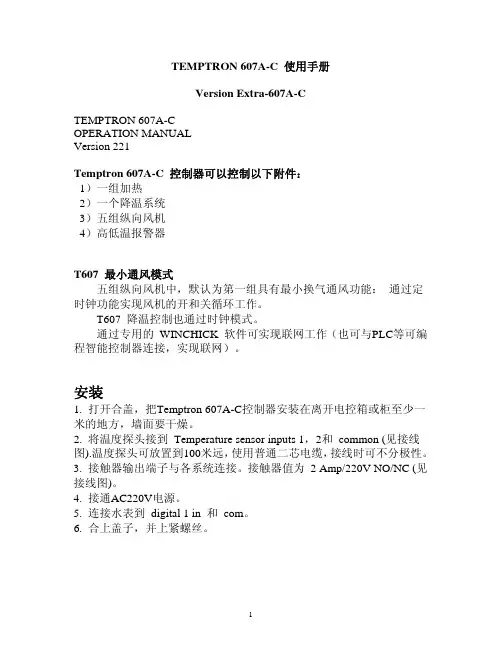
TEMPTRON 607A-C 使用手册Version Extra-607A-CTEMPTRON 607A-COPERATION MANUALVersion 221Temptron 607A-C 控制器可以控制以下附件:1)一组加热2)一个降温系统3)五组纵向风机4)高低温报警器T607 最小通风模式五组纵向风机中,默认为第一组具有最小换气通风功能:通过定时钟功能实现风机的开和关循环工作。
T607 降温控制也通过时钟模式。
通过专用的 WINCHICK 软件可实现联网工作(也可与PLC等可编程智能控制器连接,实现联网)。
安装1. 打开合盖,把Temptron 607A-C控制器安装在离开电控箱或柜至少一米的地方,墙面要干燥。
2. 将温度探头接到Temperature sensor inputs 1,2和 common (见接线图).温度探头可放置到100米远,使用普通二芯电缆,接线时可不分极性。
3. 接触器输出端子与各系统连接。
接触器值为2 Amp/220V NO/NC (见接线图)。
4. 接通AC220V电源。
5. 连接水表到digital 1 in 和 com。
6. 合上盖子,并上紧螺丝。
操作Temptron 607A-C 也可以显示两个探头的平均温度。
用户也可以查看每个探头区域的温度。
1.每次打开电源后,会看到有 “Agro Lo”字样显示出来。
此时 Temptron 607A-C 正在起始化温度探头。
2.20 秒后各探头所得到的平均温度值将显示出来。
3. 此时如果想看一号探头区的温度,就按“1”。
4. 看二号探头区的温度按“2”。
5. 如果观察湿度则按“5”。
(只有接有湿度探头时此功能才有效。
)PROGRAM 键读取系统信息用户可以读取Temptron 607A-C 上的信息。
控制面板右边的显示屏显示功能序号。
左边的显示屏上显示该功能的值。
每一个功能都有一个对应的序号,见功能值设定项。
进入某一个功能有两种方法:第一种是直接按 “DATA” 键来选择需要的功能;右边显示功能序号,左边显示该功能的值。
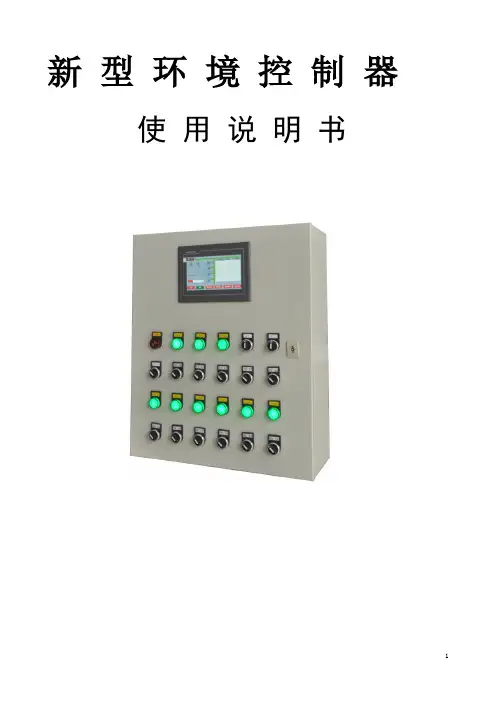
新型环境控制器使用说明书目录1.简介 (3)2.安装 (3)3.操作 (4)4.读取设定值 (5)5.修改设定值 (6)6.设置点 (6)6.1 温度设置 (6)01. 时间 (6)02. 设定温度 (7)6.2 风机设置 (7)03. 风机组1 (7)04. 风机组2 (7)05.风机组3 (7)06.风机组4 (7)07.风机组5 (7)08.风机组6 (7)09.低温保护 (7)10.定时风机组 (8)6.3侧风窗/幕帘设置 (8)11. 侧风窗角度1设定 (9)12. 侧风窗角度2设定 (9)13. 侧风窗角度3设定 (9)14. 侧风窗角度4设定 (9)15. 侧风窗角度5设定 (9)16. 侧风窗角度6设定 (9)17. 侧风窗开启延时开风机 (9)18. 最低温度保护 (9)6.4冷却系统 (10)19. 冷却温度 (10)20. 低温报警 (10)21. 高温报警 (11)22. 传感器温差设定 (11)6.6灯光控制 (12)23. 灯光控制表 (12)6.7 数据采集 (12)24. 温度采集 (12)25. 自动降温设定 (13)7.调试 (13)26.侧风窗和幕帘调试 (13)1.简介首先欢迎您使用微电脑智能环境控制器,本仪表采用先进回流焊工艺使得性能更加稳定,采用微电脑进行控制系统更加智能化,更加贴心,采用大屏幕LED触摸屏全中文显示,界面更好操作,容易上手更加易用,室温测量采用进口温度传感器,测温范围大、精度高、稳定可靠。
并且有完善的温度保护功能。
本智能控制器是一个独立的畜禽舍环境控制器,它能够控制7组风机(包括一组定时风机通风系统)、1组冷却系统(湿帘水泵)、1组灯光系统、1台风窗电机、1台幕帘电机和1组用于报警输出的继电器。
温度对鸡生产性能影响最大,在育雏期,雏鸡的抵抗力较差,必须进行人工供温。
而在育成期、产蛋期或育肥期,适宜的温度能保证鸡发挥正常的生产性能,若温度较高,则鸡的采食量下降,肉鸡增重减慢,蛋鸡蛋重减轻,产蛋率下降;而低温会使维持需要增多,料蛋比和料肉比增高。

ߜTwo Process Inputs,4 Control Outputs ߜHeat/Cool andHumidify/De-Humidify ߜ16 Field Configured Ramp/Soak Programs ߜ8 Intervals Per Program,Total 128 Intervals ߜ8 Solid State Event or Alarm Outputs ߜOptional DigitalCommunications Port ߜAnalog Bar Graph for Added Visual Indication ߜMetal Case for Noise ImmunityPR-11-2-100-1/8-9-E RTD probes, $72 each.Sold separately, see page C-8.Shown smaller than actual sizeTest Chamber ControllerCN3230 Series $1250Basic UnitNested Program Loops:4 assignable loops from any interval of one program to any interval of another program,0 to 255 times Automatic Hold:Programmable for each intervalGuaranteed Soak:Programmable for each program; deadband adjustable 0.1 to 99.99% of span Event Outputs: 8 assignable0.5 A(120 Vac) SSR outputsRamp/Soak Function Inputs:3 contact closures to digital ground for remote selection of START/CONT, HOLD, andSTOP/RESETControl Adjustments(Field Selectable)Deadband:0.01 to 25.00% of span Proportional Bands (Gain):0.1 to 999.9% of span (Indicate separate control adjustments for Heat and Cool outputs)Manual Reset (Integral):100.0 to 100.0Automatic Reset*: 0.00 to 99.9 repeats per minuteRate* (Derivative):0 to 100 sec Offset*: ±25.00% of full ON Overlap*:0.0 to 1000.1% of full ON Output Cycle Time:0.1 to 65.0 sec Control Outputs: 4 ac SSR,rated Event OutputsOutput Type:ac SSR, rated0.5 A at 120 VacAssignment:Programmed to be ON or OFF during intervals 1- to 8 and StandbyAlarm Outputs:4 alarm functions, 2 per channel; event output(ac SSR, 0.5 A at 120 Vac) used as common alarm output for any combination of the 4 alarmsProgramming logically organized into 22 PAGES of like MENU numbers,requiring only simple menu selections. The result is a specific address for each and every control adjustment or selection to be made, quick and easy programming, and no confusion! Programmed information is protected by non-volatile memory and 6 coded levels of security.In the event of a power failure, theCN3230 will retain all of the programmed parameters and program profiles. The 6 security levels require codes to access and change parameters, to prevent unauthorized or accidental access to programming.Simple front panel pushbuttons and alphanumeric cues make ramp/soak program operation and programming easy. The dual 4-digit LED displays give constant indication of channel #1 and channel #2 process variables and setpoints, while alphanumeric cues guide you through programming. Optional RS-232, RS-422, andRS485 Digital Communicationsis available and can operate without a mainframe or PC interface. Byconnecting a standard ASCII data terminal or PC to the CN3230, you can select or adjust any parameter that can be accessed from the controller's front panel. Automatic datalogging gives you a printout and/or display of up to 11 different control parameters and variables as often as every minute, or whatever time interval chosen. If several controllers are on a single line, the user can write multidrop software, or use the OMEGA®software package, CN3200-SOFT.SpecificationsControl Mode (Field Selectable): ON/OFF and PIDRamp/Soak Selections128 Interval Capacity:16 programs, 8 intervals per program Selectable Time Ranges:1 to 9999 sec; 0.1 to 999.9 min; 0.01 to 99.99 hr; selectable for each interval Linking: Programs can be linked togetherInterval Looping:3 assignable loops per program, 1 to 255 times or continuousShown with PR-11-2-100-1/8-9-ERTD probes, $72 each.Sold separately, see page C-8.P-70CN3230 Series Dual Channel Environmental Test Chamber ControllerAlarm Modes (Field Selectable for Each Alarm)Type: Non-latching, normally energized or de-energized; high and low, range 100% of span;±deviation, 0°to 250°F above/below setpointReset Differential:0.01 to 25.00% of spanON Time Delay: 0.1 to 999.9 sec OFF Time Delay:0.1 to 999.9 sec Input Sample Rate:4 samplesper secondOpen Sensor Condition:Control output OFF; display indication “OPEN”Out of Range Condition:Control output OFF; display indication “HHHH” for over-range condition;“LLLL” for under-range condition Process Analog Output OptionAssignable Functions: Any of 4control output commands, primarysetpoints, or linearized processvariable signal for both channels#1 and #2Output Signal:4 to 20 mAstandard, conversion to 1 to 5 Vdcby internal jumper change; 4 to 20mA signal referenced to instrumentcommonAccuracy: 0.2% of spanDigital Communications Option:RS-232C: Single drop, non-isolatedRS-422A/RS-485: Multi-drop,nonisolatedAutomatic Datalogging Interval:1 to 9999 minutesPower: 120 Vac, -15% to +10%,50-60 Hz; nominal powerconsumption 10 VA; power failuredetection circuitry, watchdog timersOperating Environment:0 to 55°C (30 to 130°F)up to 95% RH, non-condensingNoise RejectionCommon Mode:<±1°C (2°F) 230 Vac, 50 Hz,sensor input to instrument case(with digital filter enabled)Series Mode:<±1°C (2°F) with30 mV peak-to-peak, 60 Hz seriesmode noise (with digital filterenabled)Dimensions:96 H x 96 W x 213 mm D(3.8 x 3.8 x 8.4")Panel Cutout:92 H x 92 mm W(3.62 x 3.62")Weight:1.5 kg (3.5 lb)P-71Accuracy±1°F (<1°C)±0.5°F (0.25°C)±0.2°F (0.1°C)shown on this page. Ask your sales representative for full details covers parts, labor, and inputs, with optional 4 additional event/alarm outputs (for 8 total), 3 remote ramp/soak operation inputs, and digital communications,extends standard 1-year warranty to a total NOTIFY OPERA TOR CHAMBER ON/OFFRS232/422DIGIT ALCOMMUNICA TIONSEVENT OUTPUTSDual Element Thermocouple Probe, CPSS-18G-12-DUAL,All OMEGA probes includeCANADA www.omega.ca Laval(Quebec) 1-800-TC-OMEGA UNITED KINGDOM www. Manchester, England0800-488-488GERMANY www.omega.deDeckenpfronn, Germany************FRANCE www.omega.frGuyancourt, France088-466-342BENELUX www.omega.nl Amstelveen, NL 0800-099-33-44UNITED STATES 1-800-TC-OMEGA Stamford, CT.CZECH REPUBLIC www.omegaeng.cz Karviná, Czech Republic596-311-899TemperatureCalibrators, Connectors, General Test and MeasurementInstruments, Glass Bulb Thermometers, Handheld Instruments for Temperature Measurement, Ice Point References,Indicating Labels, Crayons, Cements and Lacquers, Infrared Temperature Measurement Instruments, Recorders Relative Humidity Measurement Instruments, RTD Probes, Elements and Assemblies, Temperature & Process Meters, Timers and Counters, Temperature and Process Controllers and Power Switching Devices, Thermistor Elements, Probes andAssemblies,Thermocouples Thermowells and Head and Well Assemblies, Transmitters, WirePressure, Strain and ForceDisplacement Transducers, Dynamic Measurement Force Sensors, Instrumentation for Pressure and Strain Measurements, Load Cells, Pressure Gauges, PressureReference Section, Pressure Switches, Pressure Transducers, Proximity Transducers, Regulators,Strain Gages, Torque Transducers, ValvespH and ConductivityConductivity Instrumentation, Dissolved OxygenInstrumentation, Environmental Instrumentation, pH Electrodes and Instruments, Water and Soil Analysis InstrumentationHeatersBand Heaters, Cartridge Heaters, Circulation Heaters, Comfort Heaters, Controllers, Meters and SwitchingDevices, Flexible Heaters, General Test and Measurement Instruments, Heater Hook-up Wire, Heating Cable Systems, Immersion Heaters, Process Air and Duct, Heaters, Radiant Heaters, Strip Heaters, Tubular HeatersFlow and LevelAir Velocity Indicators, Doppler Flowmeters, LevelMeasurement, Magnetic Flowmeters, Mass Flowmeters,Pitot Tubes, Pumps, Rotameters, Turbine and Paddle Wheel Flowmeters, Ultrasonic Flowmeters, Valves, Variable Area Flowmeters, Vortex Shedding FlowmetersData AcquisitionAuto-Dialers and Alarm Monitoring Systems, Communication Products and Converters, Data Acquisition and Analysis Software, Data LoggersPlug-in Cards, Signal Conditioners, USB, RS232, RS485 and Parallel Port Data Acquisition Systems, Wireless Transmitters and Receivers。
新型环境控制器使用说明书目录1.简介 (3)2.安装 (3)3.操作 (4)4.读取设定值 (5)5.修改设定值 (6)6.设置点 (6)6.1 温度设置 (6)01. 时间 (6)02. 设定温度 (7)6.2 风机设置 (7)03. 风机组1 (7)04. 风机组2 (7)05.风机组3 (7)06.风机组4 (7)07.风机组5 (7)08.风机组6 (7)09.低温保护 (7)10.定时风机组 (8)6.3侧风窗/幕帘设置 (8)11. 侧风窗角度1设定 (9)12. 侧风窗角度2设定 (9)13. 侧风窗角度3设定 (9)14. 侧风窗角度4设定 (9)15. 侧风窗角度5设定 (9)16. 侧风窗角度6设定 (9)17. 侧风窗开启延时开风机 (9)18. 最低温度保护 (9)6.4冷却系统 (10)19. 冷却温度 (10)20. 低温报警 (10)21. 高温报警 (11)22. 传感器温差设定 (11)6.6灯光控制 (12)23. 灯光控制表 (12)6.7 数据采集 (12)24. 温度采集 (12)25. 自动降温设定 (13)7.调试 (14)26.侧风窗和幕帘调试 (14)1.简介首先欢迎您使用微电脑智能环境控制器,本仪表采用先进回流焊工艺使得性能更加稳定,采用微电脑进行控制系统更加智能化,更加贴心,采用大屏幕LED触摸屏全中文显示,界面更好操作,容易上手更加易用,室温测量采用进口温度传感器,测温范围大、精度高、稳定可靠。
并且有完善的温度保护功能。
本智能控制器是一个独立的畜禽舍环境控制器,它能够控制7组风机(包括一组定时风机通风系统)、1组冷却系统(湿帘水泵)、1组灯光系统、1台风窗电机、1台幕帘电机和1组用于报警输出的继电器。
温度对鸡生产性能影响最大,在育雏期,雏鸡的抵抗力较差,必须进行人工供温。
而在育成期、产蛋期或育肥期,适宜的温度能保证鸡发挥正常的生产性能,若温度较高,则鸡的采食量下降,肉鸡增重减慢,蛋鸡蛋重减轻,产蛋率下降;而低温会使维持需要增多,料蛋比和料肉比增高。

第1篇一、概述猪场环控器是猪场环境控制的核心设备,其主要功能是实时监测猪舍内的温度、湿度、氨气浓度等环境参数,并通过自动调节系统实现对猪舍环境的优化控制。
为确保环控器正常运行,提高猪场养殖效益,特制定本操作规程。
二、操作步骤1. 启动环控器(1)将环控器电源插头插入电源插座,确保电源正常。
(2)打开环控器电源开关,显示屏亮起,进入系统主界面。
2. 参数设置(1)根据猪舍实际情况,设置温度、湿度、氨气浓度等环境参数的上下限值。
(2)设置报警阈值,当环境参数超出设定范围时,环控器自动报警。
(3)根据猪舍需要,设置自动调节系统,如自动调节通风、喷雾等设备。
3. 参数监测(1)在主界面查看实时监测到的环境参数,如温度、湿度、氨气浓度等。
(2)如发现异常,立即采取相应措施进行调整。
4. 系统调整(1)根据猪舍环境变化,调整参数设置,确保环境参数始终处于适宜状态。
(2)定期检查环控器设备,确保其正常运行。
5. 故障处理(1)如环控器出现故障,立即关闭电源,拔掉电源插头。
(2)检查设备电路、传感器等部件,查找故障原因。
(3)如无法自行处理,联系专业人员维修。
三、注意事项1. 环控器安装位置应避开高温、潮湿、易燃易爆等危险环境。
2. 确保环控器电源稳定,避免电压波动对设备造成损害。
3. 定期检查环控器设备,及时更换老化、损坏的部件。
4. 操作人员应熟悉环控器操作规程,确保设备正常运行。
5. 如发现环控器故障,立即采取措施,防止环境参数异常影响猪舍环境。
四、维护保养1. 每月检查环控器设备,确保其正常运行。
2. 定期清理传感器、通风口等部位,防止灰尘、杂物堵塞。
3. 如环控器出现故障,及时进行维修,确保设备正常运行。
4. 对操作人员进行定期培训,提高其环控器操作技能。
通过以上操作规程,可以有效保证猪场环控器正常运行,为猪舍提供适宜的环境,提高养殖效益。
第2篇一、前言猪场环控器是猪场环境控制的关键设备,主要用于调节猪舍内的温度、湿度、风速等环境参数,以保证猪只的健康生长。
环保设备操作说明书尊敬的用户:欢迎您购买我们的环保设备。
为了确保您能正确使用和维护设备,我们特编写此操作说明书,以指导您的操作步骤。
请仔细阅读以下内容并按照说明进行操作。
一、设备介绍我们的环保设备是一种高效的污染治理设备,主要用于处理工业废气和废水。
设备采用先进的技术和工艺,能有效去除有害物质,保护环境。
二、操作步骤1. 设备准备a. 检查设备是否安装稳固,所有连接是否紧固,确保设备的正常运行。
b. 检查设备电源是否符合要求,并接通电源。
c. 检查设备进、出口管道是否畅通,无堵塞情况。
2. 启动设备a. 确认设备连接电源后,按下启动按钮。
b. 设备将开始自检和预热,此过程需要一定时间,请耐心等待。
c. 当设备完成预热后,状态指示灯将亮起。
此时,设备已准备就绪。
3. 设置参数a. 根据所需处理废气或废水的具体要求,设置相应的参数。
参数设置通常包括温度、压力、时间等。
b. 使用设备配备的操作界面或控制面板进行参数设置,并确保设置正确。
4. 开始处理a. 将待处理的废气或废水通过管道引入设备。
b. 设备会根据预设的参数进行处理,对有害物质进行去除或转化。
c. 处理完成后,设备会将处理后的废气或废水从出口排放。
5. 关闭设备a. 当处理结束或需要停止设备时,按下停止按钮。
b. 设备会进入停止状态,释放残余压力。
c. 断开电源,并检查设备状态。
三、日常维护1. 设备清洁a. 每次使用设备后,应及时清洗设备内部,去除残留物。
b. 使用清洁剂和清洗工具,按照设备清洁步骤进行操作。
c. 清洗完成后,将设备通风至干燥状态。
2. 设备保养a. 定期对设备进行保养,包括检查设备零部件的磨损情况。
b. 如果发现设备有故障或异常情况,应及时联系售后服务进行处理。
c. 不得私自拆卸设备,以免影响设备的正常运行。
四、安全注意事项1. 在操作设备时,应佩戴相应的个人防护装备,确保自身安全。
2. 严禁在设备运行过程中触碰设备内部零部件和电源线,避免触电危险。

环境监控系统操作说明书(龙控)环境监控系统操作说明书(龙控)机房环境集中监控系统使用说明书2013年9月目录一.集中监控系统结构 .......................................................... 3 1.集中监控系统四层结构 ................................................................ ............................................ 3 2.本系统中包含主要设备及监测点 ................................................................ ............................ 5 3.监控主程序目录及备份 ............................................................................................................ 5 二.CLIENT 系统运行 (6)菜单栏介绍 ................................................................ ................................................ 6 1.1文件菜单................................................................. ......................................................... 6 1.2设计师菜单 ................................................................ ...................................................... 7 1.3监控窗口菜单 ................................................................ .................................................. 7 1.4监控管理菜单 ................................................................ .................................................. 7 1.5系统管理菜单 ................................................................ ................................................ 10 2.监控系统内容 ................................................................ . (11)2.1监控内容图示颜色说明 ................................................................ ................................ 11 2.2空调监测、UPS监测: ............................................................ ................................... 11 2.3配电监测................................................................. ....................... 错误!未定义书签。
新型控制器说明书新型控制器说明书1.引言本文档是新型控制器的详细说明书,用于向用户提供对该控制器的了解和操作指南。
本文档会详细介绍控制器的功能、使用方法、技术规范和注意事项。
2.产品概述本章节将介绍新型控制器的整体概述,包括控制器的外观特点、工作原理和功能模块。
还会提供控制器的主要优势和适用领域的介绍。
3.使用方法本章节将详细介绍新型控制器的使用方法,包括如何启动和关闭控制器、如何调整参数和设置功能选项、如何连接控制器与外部设备。
同时会提供图文并茂的操作示例和步骤说明,方便用户操作。
4.技术规范本章节将列出新型控制器的技术规范,包括尺寸、重量、电源要求、通讯接口等详细信息。
还会说明控制器的性能指标、输入输出能力以及与其他设备的兼容性。
5.故障诊断与维护本章节将介绍新型控制器的常见故障类型和解决方法,以及日常维护注意事项。
会提供故障排查流程、故障代码对照表和常见问题解答,帮助用户快速排除故障。
6.安全注意事项本章节将列出新型控制器的使用安全注意事项和警示信息,确保用户在操作过程中不会因不当使用而发生意外。
会提供控制器的安全使用指南和警示标识说明。
7.相关附件本文档涉及以下附件:- 附件1:新型控制器操作示例视频教程- 附件2:新型控制器参数配置表格- 附件3:新型控制器维护保养手册8.法律名词及注释- 法律名词1:知识产权 - 指由人类在创造过程中产生的智力成果的法律保护权利。
- 法律名词2:合规性 - 指产品、服务等在法律法规、标准和规范要求下的合法性、合适性和适用性。
∫Environment1. Water and moisture —Do not use the unit near water, such as near a bathtub or swimming pool. Avoid damp basements.2.Heat —Situate the unit away from heat sources, such as radiators.Do not situate where temperatures fall below 5o C (41o F) or rise above 35o C (95o F).Maintenance(See below for details.)Unplug the unit from the household AC outlet before cleaning.Clean with a damp cloth.Do not use abrasive pads, scouring powders, or solvents.Service1.Damage requiring service —The unit should be serviced by qualified service personnel if:(a)The AC power supply cord or the plug has been damaged; or (b)Objects or liquids have gotten into the unit; or (c)The unit has been exposed to rain; or(d)The unit does not operate normally or exhibits a marked change in performance; or(e)The unit has been dropped or the cabinet damaged.2.Servicing —Do not attempt to service the unit beyond that described in these operating instructions. Refer all other servicing to authorized ser-vicing personnel.3.Replacement parts —When parts need replacing ensure the servicer uses parts specified by the manufacturer or parts that have the same characteristics as the original parts. Unauthorized substitutes may result in fire, electric shock, or other hazards.4.Safety check —After repairs or service, ask the servicer to performsafety checks to confirm that the unit is in proper working condition.Before connecting, operating or adjusting this product, please read these instructions completely.Please keep this manual for future reference.P PC Panasonic Consumer Electronics Company, Division ofpMatsushita Electric Corporation of AmericaOne Panasonic Way Secaucus, New Jersey 07094Panasonic Sales Company, Division of Matsushita Electric of Puerto Rico, Inc. (“PSC”)Ave. 65 de Infanter ía, Km. 9.5 San Gabriel Industrial Park, Carolina,Puerto Rico 00985Panasonic Canada Inc.5770 Ambler Drive, Mississauga, Ontario L4W 2T3www.panasonic.ca©2003 Matsushita Electric Industrial Co., Ltd.Printed in ChinaRC-7200RC-7150RQTW0037-PF1202TJ0The lightning flash with arrowhead symbol, within an equilateral triangle, is intended to alert the user to the presence of uninsulated “dangerous voltage ” within the product ’s enclosure that may be of suffi-cient magnitude to constitute a risk of electric shock to persons.The exclamation point within an equilateral triangle is intended to alert the user to the presence of important operating and maintenance (servicing) instructions in the literature accompanying the ap-pliance.≥The following mark and symbols are located on the bottom of the unit.WARNING:TO REDUCE THE RISK OF FIRE, ELECTRIC SHOCK OR PRODUCT DAMAGE, DO NOT EX-POSE THIS APPARATUS TO RAIN, MOISTURE,DRIPPING OR SPLASHING AND THAT NO OB-JECTS FILLED WITH LIQUIDS, SUCH AS VASES,SHALL BE PLACED ON THE APPARATUS.Read these operating instructions carefully before using the unit. Follow the safety instructions on the unit and the safety precautions listed below.Keep these operating instructions handy for future reference.Safety1.Power source —Connect the unit to a power source of the type de-scribed in these instructions or as marked on the unit.2.Polarization —The unit is equipped with a polarized power plug whereone blade is wider than the other. This safety feature ensures that the plug fits into your household AC outlet only one way. If the plug doesn ’t fit one way, try reversing it. If the plug still doesn ’t fit, contact an electri-cian to replace the obsolete outlet. Do not attempt to defeat the safety purpose of the plug.3.Power cord protection —Route the AC power supply cord so that it will not be walked on or pinched by items placed on or against it. Never take hold of the plug or cord with wet hands. Always grasp the plug body firmly when connecting and disconnecting it.4.Overloading —When connecting the AC power supply cord, be careful not to overload the household AC outlet, extension cord, or outlet from any other device as this can result in fire or electric shock.5.Nonuse periods —Turn the unit off when it is not in use. Unplug the unit from the household AC outlet if it is not to be used for a long time.Unplug the unit during lightning storms.6.Attachments and accessories —Use only the attachments and ac-cessories recommended in these operating instructions.Installation∫Placement1.Ventilation —Situate the unit so that it receives proper ventilation. Do not install in a con fined space such as a bookcase or cabinet. Allow at least 10cm (4 inches) clearance from the rear of the unit. To prevent the risk of electric shock or fire due to overheating ensure curtains and other materi-als do not obstruct the unit ’s ventilation.2.Foreign material —Ensure objects and liquids do not get into the unit.Avoid exposing the unit to excessive smoke, dust, mechanical vibra-tion, and shock.3.Magnetism —Situate the unit away from equipment and devices that generate strong magnetic fields.4.Stacking —Do not place heavy objects on top of this unit.5.Surface —Place the unit on a flat, level surface.6.Carts and stands —Use the unit only with carts and stands recommended by the manufacturer. Move carts with care. Sudden stops, excessive force, and uneven surfaces can cause carts to overturn.7.Wall and ceiling mounting —Do not mount the unit on walls or ceil-ings unless speci fied in the instructions.To clean this unit, wipe with a soft, damp cloth.≥Never use alcohol, paint thinner or benzine to clean this unit.≥Before using a chemically treated cloth, read the instructions that came with the cloth carefully.Maintenance1.Damage requiring service —The unit should be serviced by qualified service per-sonnel if:(a)The AC power supply cord or AC adaptor has been damaged; or (b)Objects or liquids have gotten into the unit; or (c)The unit has been exposed to rain; or(d)The unit does not operate normally or exhibits a marked change in perfor-mance; or(e)The unit has been dropped or the cabinet damaged.2.Servicing —Do not attempt to service the unit beyond that described in these op-erating instructions. Refer all other servicing to authorized servicing personnel.3.Replacement parts —When parts need replacing ensure the servicer uses parts specified by the manufacturer or parts that have the same characteristics as the original parts. Unauthorized substitutes may result in fire, electric shock, or other hazards.4.Safety check —After repairs or service, ask the servicer to perform safety checks to confirm that the unit is in proper working condition.Product informationFor product information or assistance with product operation:In the U.S.A., contact the Panasonic Customer Call Center at 1-800-211-7262, or e-**********************************,orwebsite().In Canada, contact Panasonic Canada Inc. Customer Care Centre at 905-624-5505,web site (www.panasonic.ca), or an authorized Servicentre closest to you.CAUTION:This device complies with Part 15 of the FCC Rules. Operation is subject to the conditions that this device does not cause harmful interference.Any unauthorized changes or modifications to this equipment would void the user’s authority to operate this device.DATE OF PURCHASE DEALER NAME DEALER ADDRESS TELEPHONE NUMBERRadio frequency range:FM;88.0–108.0 MHz AM;525–1710 kHz Power requirement:AC;120 V, 60 HzPower consumption; 6 WBattery;9 V (one 6F22/6LR61, 006P battery)Speaker 4 cm (11⁄2 z )Dimensions (W k H k D):215k 64k 149 mm (87⁄16 z k 29⁄16z k 57⁄8 z )Mass (without battery):RC-7200 ; 781 g (1 lb. 12 oz.)RC-7150 ; 768 g (1 lb. 12 oz.).Specifications are subject to change without notice.Mass and dimensions are approximate.User memo:Power consumption in standby mode : 1.5 WTHE FOLLOWING APPLIES ONLY IN THE U.S.A.CAUTION:TO PREVENT ELECTRIC SHOCK MATCH WIDE BLADE OF PLUG TO WIDE SLOT,FULLY INSERT.The model number and serial number of this product can be found on either the back or the bottom of the unit.Please note them in the space provided below and keep for future reference.MODEL NUMBER SERIAL NUMBER Panasonic Consumer Electronics Company,Division of Matsushita Electric Corporation of America One Panasonic Way Secaucus, New Jersey 07094Panasonic Sales Company, Division of Matsushita Electric of Puerto Rico, Inc.Ave. 65 de Infantería, Km. 9.5San Gabriel Industrial Park, Carolina, Puerto Rico 00985Panasonic Audio Products Limited WarrantyLimited Warranty CoverageIf your product listed below does not work properly because of a defect in materials or workman-ship, Panasonic Consumer Electronics Company or Panasonic Sales Company (collectively re-ferred to as “the warrantor”) will, for the length of the period indicated on the chart below, which starts with the date of original purchase (“warranty period”), at its option either (a) repair your prod-uct with new or refurbished parts, or (b) replace it with a new or a refurbished product. The decision to repair or replace will be made by the warrantor.Product or Part Name Radio, Clock Radio, Radio with Tape Player or Recorder, Portable CD Player, Headphone Stereo,Tape Recorder, Speaker Rechargeable batteries(in exchange for defective item)SD Memory Card(in exchange for defective item)Parts One (1) YearTen (10) Days Ninety (90)DaysLabor One (1) Year Not ApplicableNot ApplicableDuring the “Labor” warranty period there will be no charge for labor. During the “Parts” warranty pe-riod, there will be no charge for parts. You must mail-in your product during the warranty period.This Limited Warranty excludes both parts and labor for batteries, antennas, and cosmetic parts (cabinet). This warranty only applies to products purchased and serviced in the United States or Puerto Rico. This warranty is extended only to the original purchaser of a new product which was not sold “as is”. A purchase receipt or other proof of the original purchase date is required for war-ranty service.To obtain service in the USA please contact:Panasonic Services Company, Panasonic Plus Department 20421 84th Avenue South Kent, WA 98032Tel:1-800-833-9626Fax:1-800-237-9080For assistance in Puerto Rico call Panasonic Sales Company (787)-750-4300 or fax (787)-768-2910.When shipping the unit carefully pack and send it prepaid, adequately insured and preferably in the original carton. Include a letter detailing the complaint and provide a day time phone number where you can be reached.Customer Services DirectoryLimited Warranty Limits And ExclusionsThis warranty ONLY COVERS failures due to defects in materials or workmanship, and DOES NOT COVER normal wear and tear or cosmetic damage. The warranty ALSO DOES NOT COVER damages which occurred in shipment, or failures which are caused by products not supplied by the warrantor, or failures which result from accidents, misuse, abuse, neglect, mishandling, misapplica-tion, alteration, faulty installation, set-up adjustments, misadjustment of consumer controls, improp-er maintenance, power line surge, lightning damage, modification, introduction of sand, humidity or liquids, commercial use such as hotel, office, restaurant, or other business or rental use of the pro-duct, or service by anyone other than a Factory Servicenter or other Authorized Servicer, or dam-age that is attributable to acts of God.THERE ARE NO EXPRESS WARRANTIES EXCEPT AS LISTED UNDER “LIMITED WARRAN-TY COVERAGE”.THE WARRANTOR IS NOT LIABLE FOR INCIDENTAL OR CONSEQUENTIAL DAMAGES RE-SULTING FROM THE USE OF THIS PRODUCT, OR ARISING OUT OF ANY BREACH OF THIS WARRANTY.(As examples, this excludes damages for lost time, cost of having someone remove or re-install an installed unit if applicable, travel to and from the servicer, loss of or damage tomedia or images, data or other memory or recorded content. The items listed are not exclusive, but are for illustration only.)ALL EXPRESS AND IMPLIED WARRANTIES, INCLUDING THE WARRANTY OF MER-CHANTABILITY, ARE LIMITED TO THE PERIOD OF THE LIMITED WARRANTY.Some states do not allow the exclusion or limitation of incidental or consequential damages, or limi-tations on how long an implied warranty lasts, so the exclusions may not apply to you.This warranty gives you specific legal rights and you may also have other rights which vary from state to state. If a problem with this product develops during or after the warranty period, you may contact your dealer or Servicenter. If the problem is not handled to your satisfaction, then write to the warrantor’s Consumer Affairs Department at the addresses listed for the warrantor.PARTS AND SERVICE, WHICH ARE NOT COVERED BY THIS LIMITED WARRANTY, ARE YOUR RESPONSIBILITY.1-800-332-5368 (Customer Orders Only)Panasonic Services Company 20421 84th Avenue South, Kent, WA 98032(6 am to 5 pm Monday–Friday; 6 am to 10:30 am Saturday; PST)(Visa, MasterCard, Discover Card, American Express, Check)F0502ONLY FOR U.S.A.。
新型环境控制器使用说明书目录1.简介ﻩ错误!未定义书签。
2.安装ﻩ错误!未定义书签。
3.操作ﻩ错误!未定义书签。
4.读取设定值....................................... 错误!未定义书签。
5.修改设定值ﻩ错误!未定义书签。
6.设置点........................................... 错误!未定义书签。
6.1 温度设置ﻩ错误!未定义书签。
01.时间ﻩ错误!未定义书签。
02.设定温度............................. 错误!未定义书签。
6.2风机设置................................ 错误!未定义书签。
03. 风机组1ﻩ错误!未定义书签。
04. 风机组2ﻩ错误!未定义书签。
05.风机组3 ............................... 错误!未定义书签。
06.ﻩ风机组4................................ 错误!未定义书签。
07. ............................................................................................................. 风机组5错误!未定义书签。
08.ﻩ风机组6................................ 错误!未定义书签。
09.低温保护ﻩ错误!未定义书签。
10.ﻩ定时风机组 (8)6.3侧风窗/幕帘设置........................... 错误!未定义书签。
11. 侧风窗角度1设定..................... 错误!未定义书签。
12. 侧风窗角度2设定....................... 错误!未定义书签。
13. 侧风窗角度3设定ﻩ错误!未定义书签。
14. 侧风窗角度4设定ﻩ错误!未定义书签。
15.侧风窗角度5设定.................... 错误!未定义书签。
16. 侧风窗角度6设定ﻩ错误!未定义书签。
17. 侧风窗开启延时开风机ﻩ错误!未定义书签。
18. 最低温度保护ﻩ错误!未定义书签。
6.4冷却系统ﻩ错误!未定义书签。
19. 冷却温度............................. 错误!未定义书签。
20. 低温报警ﻩ错误!未定义书签。
21. 高温报警............................. 错误!未定义书签。
22. 传感器温差设定........................ 错误!未定义书签。
6.6灯光控制.................................. 错误!未定义书签。
23. 灯光控制表ﻩ错误!未定义书签。
6.7 数据采集.................................. 错误!未定义书签。
24. 温度采集............................ 错误!未定义书签。
25. 自动降温设定ﻩ错误!未定义书签。
7.调试ﻩ错误!未定义书签。
26.侧风窗和幕帘调试ﻩ错误!未定义书签。
1.简介首先欢迎您使用微电脑智能环境控制器,本仪表采用先进回流焊工艺使得性能更加稳定,采用微电脑进行控制系统更加智能化,更加贴心,采用大屏幕LED触摸屏全中文显示,界面更好操作,容易上手更加易用,室温测量采用进口温度传感器,测温范围大、精度高、稳定可靠。
并且有完善的温度保护功能。
本智能控制器是一个独立的畜禽舍环境控制器,它能够控制7组风机(包括一组定时风机通风系统)、1组冷却系统(湿帘水泵)、1组灯光系统、1台风窗电机、1台幕帘电机和1组用于报警输出的继电器。
温度对鸡生产性能影响最大,在育雏期,雏鸡的抵抗力较差,必须进行人工供温。
而在育成期、产蛋期或育肥期,适宜的温度能保证鸡发挥正常的生产性能,若温度较高,则鸡的采食量下降,肉鸡增重减慢,蛋鸡蛋重减轻,产蛋率下降;而低温会使维持需要增多,料蛋比和料肉比增高。
采用微电脑智能环境控制器,可以精确的控制鸡舍环境温度。
根据鸡的日龄设定最佳饲养温度,通过控制风机,风窗,水泵等控制温度的变化。
并且还有曲线降温功能,可以自行设定每天降温度数,从而精确的控制鸡舍温度,提高鸡的生产性能。
在饲养过程中,光照对鸡的生长同样至关重要。
光照一方面使鸡看到采食;另一方面能促进鸡的性成熟和产蛋,不同日龄的鸡,所需要光照强度跟时间是不同的,通过本设备中的定时灯光设置可以实现灯光的自动控制。
鸡舍内的空气中有许多有害气体,如氨气、硫化氢、二氧化碳和一氧化碳。
同时浮尘中还有许多微生物。
适当的通风可改善鸡舍内的空气环境同时可降低室内的温度和多余的水汽,减少疾病的发生利于鸡群健康,同时还使室内各部位温度均匀。
设备中通过控制定时风机跟风窗,可以实现鸡舍内良好的空气环境。
智能环境控制器真正实现了鸡舍环境的自动控制,通过控制风机、风窗、幕帘、水泵等设备使鸡群每一分钟都处于最适合的养殖环境中。
从而大大地提高了饲料转化率,节约了饲养成本,进而提高了饲养的利润。
2.安装1.温控仪背面已打好四个角φ6安装孔,用φ6的自攻螺钉将温控仪安装在离电控箱1米远的干燥墙上;2.温控仪连接了2个温度传感器。
根据连接电缆长度把温度传感器放在合适的位置;3.把继电器输出连接到不同的装置上。
所有输出都是干式触点2A/220V NO/NC;4.连接一根220V的电缆到温控仪上,做好接地;3.操作为保证设备的正常运行,请务必定期于15到30天内自行进行设备检修。
1.使用前请详细阅读说明书2.检查各接线端子是否牢固。
3.检查传感器是否工作正常。
4.检测各接触器是否工作正常。
5.检测风窗和幕帘调试是否工作正常。
6.禁止关闭报警按钮,确保报警系统正常工作。
本温度智能控制器会显示所连接的温度传感器的平均温度,它也可以显示每个传感器处的温度。
每次通电以后,智能控制器校准它所连接的传感器,屏幕经过一段时间显示首页。
智能控制器首页如图1所示。
风窗幕帘参数设置图1点触屏幕下方,会出现下图2所示监控画面。
在下图中可以观察到最佳温度、实际温度、风机运行情况、侧风窗状态、报警列表信息。
图24.读取设定值在智能控制器的显示屏上可以读取所有的信息。
图3例如:如要读取温度设定,点击参数设定1出现如图3。
点击温度设定,出现如图4所示,就可以读取温度设定所有值,显示最佳温度设定、风机启动温差。
如设置最佳温度为25°,1#风机启动温度温差为1°,2#风机温度温差为2°,那么在当平均温度达到26°时,1号风机开始启动,27°时,2号风机启动,以此类推。
图45.修改设定值可以改变每一个设置点的值:1.棍据需要进入您想修改的设定值。
2.点击设定值的数字,出现修改页面。
4.核对显示屏, 3.使用键盘键入您要使用的数据,新的数据将会出现在数据显示屏上。
ﻫ看看信息是否正确。
如果正确的话,按一下“确认”按钮,设定值修改完毕,如图5所示。
图56.设置点6.1 温度设置01. 时间可以读取和修改当前时间。
在使用智能控制器前,请务必在此设定好准确的实时时间。
02. 设定温度最佳温度显示的是鸡舍内当前期望的温度。
所有的温度设定都是以这个设定温度值为基准进行设置的。
6.2 风机设置03. 风机组1风机组1设置点是一个高于最佳温度的温度差值,室内温度高于此设定温度加设定温度时,风机组1将会开启。
当风机组1运转的时候,侧风窗或幕帘将会如功能设置的一样开启到它预先设置的位置。
04. 风机组2风机组2设置点是一个高于设定温度的温度差值,室内温度高于此设定温度加设定温度时,风机组2将会开启。
当风机组2运转的时候,侧风窗或幕帘将会如功能设置的一样开启到它预先设置的位置。
05.风机组3风机组3设置点是一个高于设定温度的温度差值,室内温度高于此设定温度加设定温度时,风机组3将会开启。
当风机组3运转的时候,侧风窗或幕帘将会如功能设置的一样开启到它预先设置的位置。
06.风机组4风机组4设置点是一个高于设定温度的温度差值,室内温度高于此设定温度加设定温度时,风机组4将会开启。
当风机组4运转的时候,侧风窗或幕帘将会如功能设置的一样开启到它预先设置的位置。
07.风机组5风机组5设置点是一个高于设定温度的温度差值,室内温度高于此设定温度加设定温度时,风机组5将会开启。
当风机组5运转的时候,侧风窗或幕帘将会如功能设置的一样开启到它预先设置的位置。
08.风机组6风机组6设置点是一个高于设定温度的温度差值,室内温度高于此设定温度加设定温度时,风机组6将会开启。
当风机组6运转的时候,侧进风窗或幕帘将会如功能设置的一样开启到它预先设置的位置。
09.低温保护设定一个温度数值,当定时风机运到此阶段时,定时风机停止工作。
已保证室内温度正常。
如图7所示。
10.定时风机组定时风机组有两种运行方式,一是最小通风,二是降温。
定时风机组设置点是一个高于设定温度的温度差值,当室内温度高于此设定点温度加设定温度时,定时风机组将以降温方式工作(不停的运行)。
一旦测得室内温度低于最佳设定温度,并且当前最佳温度与实际温度的差值比设定的定时风机启动温差大时,定时风机开启,以最小通风方式工作,根据您的需要进行阶段性的转停,如图6所示。
当定时风机开关状态是绿色时,定时风机处于工作状态,为红颜色时,定时风机不工作。
图66.3侧风窗/幕帘设置定时风机开关状态在控制箱首页如图1所示,点击左上方,输入密码1后进入侧风窗/幕帘设置画面如下图7。
11.侧风窗角度1设定此处对应每次定时风机组运转时,进风窗或幕帘以百分比开启的位置。
风机组1开时对应开启风窗角度1。
12.侧风窗角度2设定此处对应每次风机组1运转时,进风窗或幕帘以百分比开启的位置。
风机组2开时对应开启风窗角度2。
13. 侧风窗角度3设定此处对应每次风机组2运转时,进风窗或幕帘以百分比开启的位置。
风机组3开时对应开启风窗角度3。
14.侧风窗角度4设定此处对应每次风机组3运转时,进风窗或幕帘以百分比开启的位置。
风机组4开时对应开启风窗角度4。
15. 侧风窗角度5设定此处对应每次风机组4运转时,进风窗或幕帘以百分比开启的位置。
风机组5开时对应开启风窗角度5。
16. 侧风窗角度6设定此处对应每次风机组5运转时,进风窗或幕帘以百分比开启的位置。
风机组6开时对应开启风窗角度6。
17.侧风窗开启延时开风机根据具体需要可以自己设定,设置延时关开风机的时间。
18. 最低温度保护当实际温度低于最低温度保护设定值时,定时风机不动作。
图76.4冷却系统19.冷却温度当前鸡舍温度达到该水泵设定启动温度时,冷却装置水泵将会开始运行。