hx8347驱动0
- 格式:doc
- 大小:117.00 KB
- 文档页数:19
要在Win10下安装OKI打印机或者OKI3400打印机驱动,最重要的是要先禁用驱动程序强制签名步骤如下:Win10系统如何禁用驱动程序强制签名?声明:请使用正版系统和软件。
在默认设置下,Win10初始化安装扫描仪、打印机、高拍仪等驱动程序,会出现提示“第三方INF不包含数字签名信息”,不允许继续安装,解决方案为禁用系统强制签名(此种方法仅在设置操作后单次有效,如需安装其他设备驱动程序,需要重复下面的步骤)。
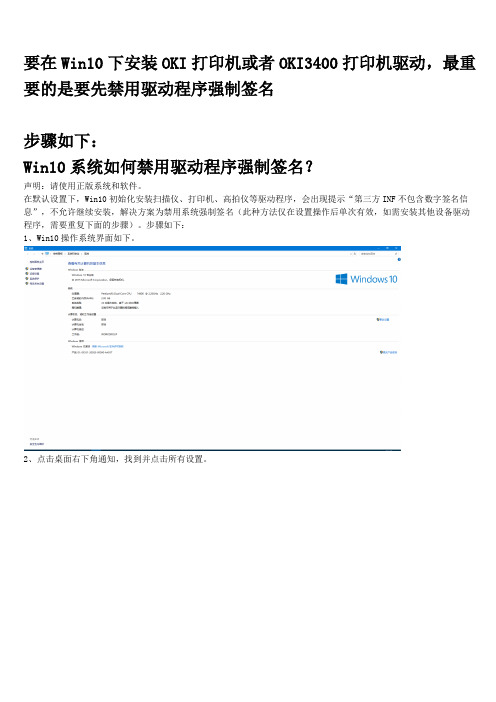
步骤如下:1、Win10操作系统界面如下。
2、点击桌面右下角通知,找到并点击所有设置。
3、在所有设置中找到并进入更新和安全。
4、找到恢复,点击高级启动下的立即重启,重启电脑。
5、重启后选择疑难解答。
7、选择Windows启动设置。
8、点击重启(这里才是要真正重启)。
9、按数字键7,选择7)禁用驱动程序强制签名。
10、再次进入操作系统。
安装OKI打印机驱动程序1.到oki官网下载oki驱动程序,以oki3400 为例,下载vista64位驱动程序C3400 windows Vista Driver X642.打开“控制面板”选择“硬和声音”3.点击“设备和打印机”4.点击“添加打印机”5.点击“我所需要的打印机未列出”6.选择“我的打印机有点老,请帮助我找到它”,或者选择手动添加打印机的方式添加,方法和Winxp、Win7相同。
7.选择“从磁盘安装“驱动程序8.找到下载的驱动程序inf文件所在文件夹9.选择对应的打印机型号,笔者的是OKI C3400.10.点击下一步,后会出现Windows安全提示框,不用理会,选择”始终安装此驱动程序软件“11.至此打印机成功安装,可以在Win10下畅快的打印了,此方法几乎试用所有在Win7下可以使用的打印机驱动但是在win10下无法安装的情况。
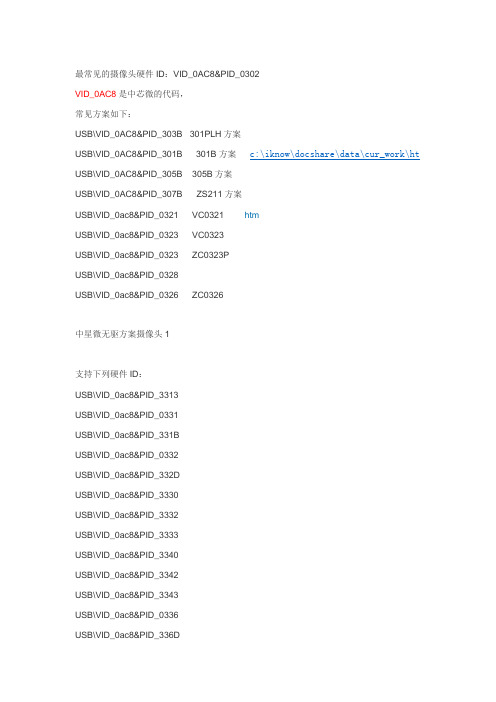
最常见的摄像头硬件ID:VID_0AC8&PID_0302VID_0AC8是中芯微的代码,常见方案如下:USB\VID_0AC8&PID_303B 301PLH方案USB\VID_0AC8&PID_301B 301B方案c:\iknow\docshare\data\cur_work\ht USB\VID_0AC8&PID_305B 305B方案USB\VID_0AC8&PID_307B ZS211方案USB\VID_0ac8&PID_0321 VC0321 htmUSB\VID_0ac8&PID_0323 VC0323USB\VID_0ac8&PID_0323 ZC0323PUSB\VID_0ac8&PID_0328USB\VID_0ac8&PID_0326 ZC0326中星微无驱方案摄像头1支持下列硬件ID:USB\VID_0ac8&PID_3313USB\VID_0ac8&PID_0331USB\VID_0ac8&PID_331BUSB\VID_0ac8&PID_0332USB\VID_0ac8&PID_332DUSB\VID_0ac8&PID_3330USB\VID_0ac8&PID_3332USB\VID_0ac8&PID_3333USB\VID_0ac8&PID_3340USB\VID_0ac8&PID_3342USB\VID_0ac8&PID_3343USB\VID_0ac8&PID_0336USB\VID_0ac8&PID_336DUSB\VID_0ac8&PID_3410 USB\VID_0ac8&PID_3420 USB\VID_0ac8&PID_3430 USB\VID_0ac8&PID_3440 USB\VID_0ac8&PID_3000中星微无驱方案2支持硬件ID:USB\VID_0ac8&PID_3313 USB\VID_0ac8&PID_0331 USB\VID_0ac8&PID_331B USB\VID_0ac8&PID_0332 USB\VID_0ac8&PID_332D USB\VID_0ac8&PID_3330 USB\VID_0ac8&PID_3332 USB\VID_0ac8&PID_3333 USB\VID_0ac8&PID_3340 USB\VID_0ac8&PID_3342 USB\VID_0ac8&PID_3343 USB\VID_0ac8&PID_336D USB\VID_0ac8&PID_3370 USB\VID_0ac8&PID_3380 USB\VID_0ac8&PID_3410 USB\VID_0ac8&PID_3420 USB\VID_0ac8&PID_3430 USB\VID_0ac8&PID_3440 USB\VID_0ac8&PID_3450 USB\VID_0ac8&PID_3460USB\VID_0ac8&PID_3470USB\VID_0ac8&PID_3480USB\VID_0ac8&PID_3490USB\VID_0ac8&PID_3610USB\VID_0ac8&PID_3016USB\VID_0ac8&PID_3000USB\VID_0ac8&PID_3630VID_0C45是台湾松翰电子Sonix出的。

Using MLNX OFED repository on SuSE Enterprise Server 12 SP5This document contains brief description on how to install MLNX OFED 4.9-7.1.0.0drivers on SLES12SP5 using “zypper” commands.Prerequisites:Make sure that the distro InfiniBand drivers are not installed on your system since these RPMs will conflict with MLNX OFED RPMs. If you have already selected these packages during Operating System Installation, please remove all packages from the pattern “InfiniBand (OFED)” using yast2..:Note: Since the removal of a pattern is not supported through “zypper”, you may have to use the “yast2” GUI to uninstall all RPMs under “InfiniBand (OFED)” pattern.Important:This repository supports the following kernel versions only:4.12.14-120-defaultIf you are using any other kernel version, please use MLNX_OFED_LINUX-4.9-7.1.0.0-sles12sp5-x86_64.iso available at and follow the instructions for building a custom iso for tainted kernels. The instructions are available in the user manual located under “docs” directory in the iso.Installation:Once you are subscribed to MLNX_OFED repository, execute the below command to install MLNX OFED:If using kernel version 4.12.14-120-default:# zypper install hpe-mlnx-ofed-defaultNote:To load the new drivers either run below command or reboot the server after MLNX OFED installation.#/etc/init.d/openibd restartUninstallation:In case all the MLNX OFED RPMs need to be uninstalled, execute the below command to make sure that all RPMs are removed:# ofed_uninstall.sh --force。

HP EliteDesk 880 G1 TWR安装XP系统及驱动的方法根据业务工作需要,最近由上级单位集中采购配发了HP EliteDesk 880 G1 TWR,此款设备属于HP产品中较为高端的商务机型,由于采用了最新的硬件平台,整机性能有了较为明显的提升。
开箱验货发现其预装操作系统为WIN7 32位,但因实际工作中各生产系统构建于WINXP平台,鉴于此,开始了改造操作系统及安装硬件驱动的征程。
一路过来可谓艰辛,最终所有问题得以解决,现将具体过程展示如下,希望对广大网友有所启发。
一、安装操作系统相信安装过win7以上版本操作系统的网友都知道,NT6.0(win7、win8、win8.1)内核操作系统的启动模式与NT5.0(win2000、winxp、win2003)内核的启动模式有本质的区别,要想在HP EliteDesk 880 G1 TWR部署winxp操作系统的关键是首先让系统内核能正确识别硬盘的工作模式,而此款设备在主板上有三种选项(IDE、AHCI、RAID);其次是找到正确的SATA硬盘驱动程序,并在系统内核检测硬件配置过程中能顺利加载上这个驱动,否则其结局是还未进行数据拷贝前就直接蓝屏(常见代码为:***STOP 0x0000007B),要解决此问题,请参阅我在百度文库中发表的“解决电脑因BIOS不能更改硬盘工作模式而导致安装XP蓝屏的问题”资料。
注意:如果要自己动手将SATA硬盘驱动集成到Windows XP SP3安装盘,请选择以下目录中的相应文件:Storage\Intel\RST\12.6\x86,根据本人经验来看,至少需要图中的①、②、③号文件。
集成驱动的工具主要有Nlite及DPs_BASE,相关的使用教程请上网搜索。
将驱动集成到操作系统安装盘的好处是在安装过程中检测硬件配置阶段不需要按F6通过软驱(现在都很难找到这样的古董设备了)加载SATA驱动。
二、安装硬件驱动下图文件夹所列内容为本人花了很多精力在网络上搜到的HP EliteDesk 880 G1 TWR驱动程序,通过生产环境中一套XP补丁加固平台的扫描、测试、漏洞修复后一切正常。

BCM94352HMB蓝牙BCM20702A0在Ubuntu 14.04下的驱动方法作者:秋忆出处:/qiuyi21/p/bcm20702a0_ubuntu.html先确认蓝牙的产商编号(idVendor)和产品编号(idProduct),Linux下可通过lsusb或usb-devices命令查看,Windows下在设备管理里查看,如下图所示。
我的蓝牙idVendor为0x13d3,idProduct为0x3404。
Broadcom的大部分蓝牙设备都需要一个产商的固件补丁(RAM patch file),Linux下叫firmware,BCM20702A0也不例外。
在电脑提供商提供的Windows驱动安装包里可以找到类似“BCM20702A1_001.002.014.1443.1479.hex”这样的文件,就是固件内存补丁了,里面保存着十六进制的文本,可以打开来看。
怎么找到自己的蓝牙设备的固件内存补丁文件呢?方法一、在Windows驱动安装包里找到驱动的信息文件(.inf),如我的是“bcbtums-win8x64-brcm.inf”。
打开查找“USB\VID_13D3&PID_3404”(产商编号和产品编号按自己的),找到类似如下信息:%AzBtModule.DeviceDesc%=RAMUSB3404, USB\VID_13D3&PID_3404然后再查找“[RAMUSB3404”,会找到类似如下信息:[RAMUSB3404.CopyList]bcbtums.sysbtwampfl.sysBCM20702A1_001.002.014.1443.1479.hex看到“.hex”的文件名了吧,就是它了。
方法二、在Windows的设备管理器里查看,如下图所示。
把“.hex”文件保存起来,等下会用到。
现在重启进入Ubuntu 14.04操作系统……Ubuntu下的操作以命令为主。
第一步,修改内核,以kernel 3.13为例。
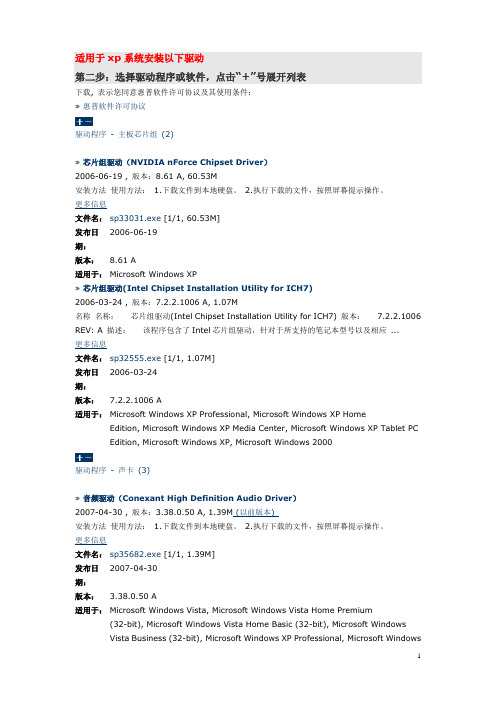
适用于xp系统安装以下驱动第二步:选择驱动程序或软件,点击“+”号展开列表下载, 表示您同意惠普软件许可协议及其使用条件:»惠普软件许可协议驱动程序- 主板芯片组(2)»芯片组驱动(NVIDIA nForce Chipset Driver)2006-06-19 , 版本:8.61 A, 60.53M安装方法使用方法: 1.下载文件到本地硬盘。
2.执行下载的文件,按照屏幕提示操作。
更多信息文件名:sp33031.exe [1/1, 60.53M]2006-06-19发布日期:版本:8.61 A适用于:Microsoft Windows XP»芯片组驱动(Intel Chipset Installation Utility for ICH7)2006-03-24 , 版本:7.2.2.1006 A, 1.07M名称名称:芯片组驱动(Intel Chipset Installation Utility for ICH7) 版本:7.2.2.1006 REV: A 描述:该程序包含了Intel芯片组驱动,针对于所支持的笔记本型号以及相应 ...更多信息文件名:sp32555.exe [1/1, 1.07M]2006-03-24发布日期:版本:7.2.2.1006 A适用于:Microsoft Windows XP Professional, Microsoft Windows XP HomeEdition, Microsoft Windows XP Media Center, Microsoft Windows XP Tablet PCEdition, Microsoft Windows XP, Microsoft Windows 2000驱动程序- 声卡(3)»音频驱动(Conexant High Definition Audio Driver)2007-04-30 , 版本:3.38.0.50 A, 1.39M (以前版本)安装方法使用方法: 1.下载文件到本地硬盘。
转载黑苹果集成显卡Intel HD Graphics 4400/4600 驱动方法Mobile, Intel, 苹果, 动态, 信息显卡支持列表:设备id设备平台0x0c26移动版0x0c16移动版0x0c06移动版0x0d26移动版HD 52000x0a26移动版超级本HD 50000x0a2e移动版HD 51000x0a16移动版超级本HD 44000x0426移动版HD 46000x0416移动版HD 46000x0406移动版HD 42000x0d22HD 52000x0412HD 4600ig-platform-id信息:平台ID名称管线数端口数固定显存(M)动态显存(M)端口类型成功案例0x0000060c SDV MobileGT133641024eDP, DVI,HDMI0x0000160c SDV MobileGT233641024eDP, DVI, HDMI部分hd46000x0000260c SDV MobileGT333641024eDP, DVI, HDMI i5-4570hd46000x00000604Mobile GT133641024eDP, DVI, HDMI0x00001604Mobile GT233641024eDP, DVI, HDMI0x00002604Mobile GT333641024eDP, DVI, HDMI0x0000260d CRWMobile GT333641024eDP, DVI, HDMI0x0000160a ULT Mobile GT233641024eDP, DVI, HDMI i5-4500uhd44000x0000260a ULTMobile GT333641024eDP, DVI, HDMI0x02001604Mobile GT211641024eDP0x0500260a ULT MobileGT333321024eDP, DP,DP0x0600260a ULT MobileGT333321024eDP, DP, DP i5-4200uhd44000x0800260a ULT MobileGT333641024eDP, DP,Thunderbolt0x08002e0a ULT reservedGT333640x0700260d CRW MobileGT334641024eDP, DP, DP,HDMI0x0300220d CRW DesktopGT233641024DP, DP, DP0x04001204Desktop GT20064256无个人建议,先尝试使用参数驱动。
SLES15-SP3 Driver User ManualDocument HistoryVersion Date Description of ChangeSLES15-SP3 December 2021 Initial release of this documentTable of ContentsChapter 1.Firmware Burning (3)Chapter 2.Port Type Management (4)2.1Port Type Management/VPI Cards Configuration (4)Chapter 3.Modules Loading and Unloading (8)Chapter 4.Important Packages and Their I nstallation (9)Chapter 5.SR-IOV Configuration (10)5.1Setting up SR-IOV (10)Chapter 6.Default RoCE Mode Setting for RDMA_CM A pplication (12)NVIDIA CONFIDENTIALChapter 1.Firmware Burning1.Check the device’s PCI address.lspci | grep Mellanox04:00.0 Ethernet controller: Mellanox Technologies MT27700 Family [ConnectX-4] 04:00.1 InfiniBand controller: Mellanox Technologies MT27700 Family [ConnectX-4] 07:00.0 Ethernet controller: Mellanox Technologies MT27710 Family [ConnectX-4 Lx] 07:00.1 Ethernet controller: Mellanox Technologies MT27710 Family [ConnectX-4 Lx] 0a:00.0 Network controller: Mellanox Technologies MT27520 Family [ConnectX-3 Pro] 21:00.0 InfiniBand controller: Mellanox Technologies MT27600 [Connect-IB]24:00.0 Ethernet controller: Mellanox Technologies MT28800 Family [ConnectX-5 Ex] 2.Identify the adapter card's PSID.# mstflint -d 81:00.0 qImage type: FS4FW Version: 16.26.4012FW Release Date: 10.12.2019Product Version: 16.26.4012Rom Info: type=UEFI version=14.19.17 cpu=AMD64type=PXE version=3.5.805 cpu=AMD64Description: UID GuidsNumberBase GUID: ec0d9a0300d42de4 8Base MAC: ec0d9ad42de4 8Image VSD: N/ADevice VSD: N/APSID: MT_0000000009Security Attributes: N/A3.Download the firmware BIN file from the Mellanox website that matches your card's PSID:https:///en-us/networking/ → Support → Support → Firmware Download4.Burn the firmware.# mstflint -d <lspci-device-id> -i <image-file> b5.Reboot your machine after the firmware burning is completed.6.Validate new firmware burned successfully:# ethtool -i ens3driver: mlx5_coreversion: 5.0-0firmware-version: 16.32.1010 (MT_0000000009)expansion-rom-version:bus-info: 0000:24:00.0supports-statistics: yessupports-test: yessupports-eeprom-access: nosupports-register-dump: nosupports-priv-flags: yesChapter 2.Port Type Management2.1Port Type Management/VPI CardsConfigurationConnectX-3 onwards adapter cards’ ports can be individually configured to work as InfiniBand or Ethernet ports. By default, ConnectX family adapter cards VPI ports are initialized as InfiniBand ports. If you wish to change the port type use the mstconfig after the driver is loaded.1.Install mstflint tools.zypper install mstflint2.Check the PCI address.spci | grep MellanoxExample:24:00.0 Ethernet controller: Mellanox Technologies MT28800 Family [ConnectX-5 Ex]e mstconfig to change the link type as desired IB -- for InfiniBand, ETH -- for E thernet. mstconfig –d <device pci> s LINK_TYPE_P1/2=<ETH|IB|VPI>Example:# mstconfig -d 00:06.0 s LINK_TYPE_P1=ETHDevice #1---------Device type: ConnectX5Name: MCX556A-EDA_AxDescription: ConnectX-5 Ex VPI adapter card; EDR IB (100Gb/s) and 100GbE; dual-port QSFP28; PCIe4.0 x16; tall bracket; ROHS R6Device: 24:00.0Configurations: Next Boot NewLINK_TYPE_P1 IB(1) ETH(2)Apply new Configuration? (y/n) [n] : yApplying... Done!-I- Please reboot machine to load new configurations.4.Reboot the machine.5.Query the device’s parameters to validate the new configuration.# mstconfig -d 00:06.0 qDevice #1:----------Device type: ConnectX5Name: MCX556A-EDA_AxDescription: ConnectX-5 Ex VPI adapter card; EDR IB (100Gb/s) and 100GbE; dual-port QSFP28; PCIe4.0 x16; tall bracket; ROHS R6Device: 24:00.0Configurations: Next BootMEMIC_BAR_SIZE 0MEMIC_SIZE_LIMIT _256KB(1)HOST_CHAINING_MODE DISABLED(0)HOST_CHAINING_DESCRIPTORS Array[0..7]HOST_CHAINING_TOTAL_BUFFER_SIZE Array[0..7]FLEX_PARSER_PROFILE_ENABLE 0FLEX_IPV4_OVER_VXLAN_PORT 0ROCE_NEXT_PROTOCOL 254ESWITCH_HAIRPIN_DESCRIPTORS Array[0..7]ESWITCH_HAIRPIN_TOT_BUFFER_SIZE Array[0..7]NON_PREFETCHABLE_PF_BAR False(0)NUM_OF_VFS 4SRIOV_EN True(1)PF_LOG_BAR_SIZE 5VF_LOG_BAR_SIZE 1NUM_PF_MSIX 63NUM_VF_MSIX 11INT_LOG_MAX_PAYLOAD_SIZE AUTOMATIC(0)SW_RECOVERY_ON_ERRORS False(0)RESET_WITH_HOST_ON_ERRORS False(0)ADVANCED_POWER_SETTINGS False(0)CQE_COMPRESSION BALANCED(0)IP_OVER_VXLAN_EN False(0)PCI_ATOMIC_MODEPCI_ATOMIC_DISABLED_EXT_ATOMIC_ ENABLED(0)LRO_LOG_TIMEOUT0 6LRO_LOG_TIMEOUT1 7LRO_LOG_TIMEOUT2 8LRO_LOG_TIMEOUT3 13LOG_DCR_HASH_TABLE_SIZE 11DCR_LIFO_SIZE 16384LINK_TYPE_P1 ETH(2) LINK_TYPE_P2 IB(1)ROCE_CC_PRIO_MASK_P1 255ROCE_CC_ALGORITHM_P1 ECN(0) ROCE_CC_PRIO_MASK_P2 255ROCE_CC_ALGORITHM_P2 ECN(0) CLAMP_TGT_RATE_AFTER_TIME_INC_P1 True(1) CLAMP_TGT_RATE_P1 False(0) RPG_TIME_RESET_P1 300RPG_BYTE_RESET_P1 32767 RPG_THRESHOLD_P1 1RPG_MAX_RATE_P1 0RPG_AI_RATE_P1 5RPG_HAI_RATE_P1 50RPG_GD_P1 11RPG_MIN_DEC_FAC_P1 50RPG_MIN_RATE_P1 1RATE_TO_SET_ON_FIRST_CNP_P1 0DCE_TCP_G_P1 1019DCE_TCP_RTT_P1 1RATE_REDUCE_MONITOR_PERIOD_P1 4INITIAL_ALPHA_VALUE_P1 1023MIN_TIME_BETWEEN_CNPS_P1 2CNP_802P_PRIO_P1 6CNP_DSCP_P1 48CLAMP_TGT_RATE_AFTER_TIME_INC_P2 True(1) CLAMP_TGT_RATE_P2 False(0) RPG_TIME_RESET_P2 300RPG_BYTE_RESET_P2 32767 RPG_THRESHOLD_P2 1RPG_MAX_RATE_P2 0RPG_AI_RATE_P2 5RPG_HAI_RATE_P2 50RPG_GD_P2 11RPG_MIN_DEC_FAC_P2 50RPG_MIN_RATE_P2 1RATE_TO_SET_ON_FIRST_CNP_P2 0DCE_TCP_G_P2 1019DCE_TCP_RTT_P2 1RATE_REDUCE_MONITOR_PERIOD_P2 4INITIAL_ALPHA_VALUE_P2 1023CNP_802P_PRIO_P2 6CNP_DSCP_P2 48LLDP_NB_DCBX_P1 False(0) LLDP_NB_RX_MODE_P1 OFF(0)LLDP_NB_TX_MODE_P1 OFF(0)LLDP_NB_DCBX_P2 False(0) LLDP_NB_RX_MODE_P2 OFF(0)LLDP_NB_TX_MODE_P2 OFF(0)DCBX_IEEE_P1 True(1) DCBX_CEE_P1 True(1) DCBX_WILLING_P1 True(1) DCBX_IEEE_P2 True(1) DCBX_CEE_P2 True(1) DCBX_WILLING_P2 True(1) KEEP_ETH_LINK_UP_P1 True(1) KEEP_IB_LINK_UP_P1 False(0) KEEP_LINK_UP_ON_BOOT_P1 False(0) KEEP_LINK_UP_ON_STANDBY_P1 False(0) KEEP_ETH_LINK_UP_P2 True(1) KEEP_IB_LINK_UP_P2 False(0) KEEP_LINK_UP_ON_BOOT_P2 False(0) KEEP_LINK_UP_ON_STANDBY_P2 False(0) NUM_OF_VL_P1 4_VLs(3) NUM_OF_TC_P1 _8_TCs(0) NUM_OF_PFC_P1 8NUM_OF_VL_P2 _4_VLs(3) NUM_OF_TC_P2 _8_TCs(0) NUM_OF_PFC_P2 8DUP_MAC_ACTION_P1 LAST_CFG(0) SRIOV_IB_ROUTING_MODE_P1 LID(1)IB_ROUTING_MODE_P1 LID(1)DUP_MAC_ACTION_P2 LAST_CFG(0) SRIOV_IB_ROUTING_MODE_P2 LID(1)IB_ROUTING_MODE_P2 LID(1)PCI_WR_ORDERING per_mkey(0) MULTI_PORT_VHCA_EN False(0) PORT_OWNER True(1)ALLOW_RD_COUNTERS True(1)RENEG_ON_CHANGE True(1)TRACER_ENABLE IPv4(0)IP_VER 0BOOT_UNDI_NETWORK_WAIT False(0) UEFI_HII_EN False(0) BOOT_DBG_LOG DISABLED(0) UEFI_LOGS 1BOOT_VLAN PXE(1)LEGACY_BOOT_PROTOCOL NONE(0)BOOT_LACP_DIS False(0)BOOT_VLAN_EN 0BOOT_PKEY False(0)EXP_ROM_PXE_ENABLE True(1)IBM_TUNNELED_ATOMIC_EN False(0)IBM_AS_NOTIFY_EN False(0)ADVANCED_PCI_SETTINGS False(0)SAFE_MODE_THRESHOLD 10SAFE_MODE_ENABLE True(1)****************************************************************** Chapter 3.Modules Loading and UnloadingNVIDIA modules for ConnectX-3/ConnectX-3 Pro are:④mlx4_en, mlx4_core, mlx4_ibNVIDIA modules for ConnectX-4/ConnectX-4 Lx/ConnectX-5 are:④mlx5_core, mlx5_ibTo unload the driver, you need to first unload mlx*_en/ mlx*_ib and then the m lx*_core module.④To load and unload the modules, use the commands below:•Loading the driver: modprobe <module name>modprobe mlx5_ib•Unloading the driver: modprobe –r <module name>modprobe –r mlx5_ibChapter 4.Important Packages and TheirInstallationTable 4-1. PackagesPackage Name Descriptionrdma-core RDMA core userspace libraries and daemonlibibmad5OpenFabrics Alliance InfiniBand MAD library (Low layer InfiniBand diagnostic andmanagement programs)opensm OpenIB InfiniBand Subnet Manager and management utilitiesibutils OpenIB NVIDIA InfiniBand Diagnostic Toolsinfiniband-diags OpenFabrics Alliance InfiniBand Diagnostic Toolsperftest IB Performance Testsmstflint NVIDIA firmware burning and diagnistics toolTo install the packages above run:# zypper install <packages names>Chapter 5.SR-IOV Configuration5.1Setting up SR-IOV1.Download mstflint tools.# zypper install mstflint2.Check the device’s PCIlspci | grep MellanoxExample:24:00.0 Ethernet controller: Mellanox Technologies MT28800 Family [ConnectX-5 Ex] 3.Check if SR-IOV is enabled in the firmware.mstconfig -d <device pci> qExample:# mstconfig -d 00:06.0 qDevice #1:Device type: ConnectX3ProPCI device: 00:06.0Configurations: CurrentSRIOV_EN True(1)NUM_OF_VFS 8LINK_TYPE_P1 ETH(2)LINK_TYPE_P2 IB(1)LOG_BAR_SIZE 3BOOT_PKEY_P1 0BOOT_PKEY_P2 0BOOT_OPTION_ROM_EN_P1 True(1)BOOT_VLAN_EN_P1 False(0)BOOT_RETRY_CNT_P1 0LEGACY_BOOT_PROTOCOL_P1 PXE(1)BOOT_VLAN_P1 1BOOT_OPTION_ROM_EN_P2 True(1)BOOT_VLAN_EN_P2 False(0)BOOT_RETRY_CNT_P2 0LEGACY_BOOT_PROTOCOL_P2 PXE(1)BOOT_VLAN_P2 1 IP_VER_P1 IPv4(0) IP_VER_P2 IPv4(0)4. Enable SR-IOV: mstconfig –d <device pci> s SRIOV_EN=<False|True>5. Configure the needed number of VFs.mstconfig –d <device pci> s NUM_OF_VFS=<NUM>6. [mlx4 devices only] Edit the file /etc/modprobe.d/mlx4.conf: options mlx4_core num_vfs=[needed num of VFs] port_type_array=[1/2Example: options mlx4_core num_vfs=8 port_type_array=1,17. [mlx5 devices only] Write to the sysfs file the number of needed VFs.echo [num_vfs] > /sys/class/infiniband/mlx5_0/device/sriov_numvfs8. Reboot the driver.9. Load the driver and verify that the VFs were created.lspci | grep mellanoxExample: 24:00.0 Ethernet controller: Mellanox Technologies MT28800 Family [ConnectX-5 Ex] 24:00.1 Infiniband controller: Mellanox Technologies MT28800 F amily [ConnectX-5 Ex] 24:00.2 Ethernet controller: Mellanox Technologies MT28800 Family [ConnectX-5 Ex Virtual Function] 24:00.3 Ethernet controller: Mellanox Technologies MT28800 Family [ConnectX-5 Ex Virtual Function]24:00.4 Ethernet controller: Mellanox Technologies MT28800 Family [ConnectX-5 Ex Virtual Function] 24:00.5 Ethernet controller: Mellanox Technologies MT28800 Family [ConnectX-5 Ex Virtual Function]For further information, refer to section Setting Up SR-IOV MLNX_OFED User Manual.Note : This file will be generated only if IOMMU is set in grub configuration. (by adding “intel_iommu=on” to /etc/default/grub).Chapter 6.Default RoCE Mode Setting forRDMA_CM A pplication1.Create a directory for the mlx4/mlx5 device.mkdir -p /sys/kernel/config/rdma_cm/mlx4_0/2.Validate what is the used RoCE mode in the default_roce_mode configfs file.# cat /sys/kernel/config/rdma_cm/mlx4_0/ports/1/default_roce_mode IB/RoCE v13.Change the default RoCE mode,④For RoCE v1: IB/RoCE v1# echo "IB/RoCE v1" >/sys/kernel/config/rdma_cm/mlx4_0/ports/1/default_roce_mode# cat /sys/kernel/config/rdma_cm/mlx4_0/ports/1/default_roce_mode IB/RoCE v1④For RoCE v2: RoCE v2# echo "RoCE v2" >/sys/kernel/config/rdma_cm/mlx4_0/ports/1/default_roce_mode# cat /sys/kernel/config/rdma_cm/mlx4_0/ports/1/default_roce_modeRoCE v2NoticeThis document is provided for information purposes only and shall not be regarded as a warranty of a certain functionality, condition, or quality of a product. Neither NVIDIA Corporation nor any of its direct or indirect subsidiaries and affiliates (collectively: “NVIDIA”) make any representations or warranties, expressed or implied, as to the accuracy or completeness of the information contained in this document and assumes no responsibility for any errors contained herein. NVIDIA shall have no liability for the consequences or use of such information or for any infringement of patents or other rights of third parties that may result from its use. This document is not a commitment to develop, release, or deliver any Material (defined below), code, or functionality.NVIDIA reserves the right to make corrections, modifications, enhancements, improvements, and any other changes to this document, at any time without notice. Customer should obtain the latest relevant information before placing orders and should verify that such information is current and complete.NVIDIA products are sold subject to the NVIDIA standard terms and conditions of sale supplied at the time of order acknowledgement, unless otherwise agreed in an individual sales agreement signed by authorized representatives of NVIDIA and customer (“Terms of Sale”). NVIDIA hereby expressly objects to applying any customer general terms and conditions with regards to the purchase of the NVIDIA product referenced in this document. No contractual obligations are formed either directly or indirectly by this document.NVIDIA products are not designed, authorized, or warranted to be suitable for use in medical, military, aircraft, space, or life support equipment, nor in applications where failure or malfunction of the NVIDIA product can reasonably be expected to result in personal injury, death, or property or environmental damage. NVIDIA accepts no liability for inclusion and/or use of NVIDIA products in such equipment or applications and therefore such inclusion and/or use is at customer’s own risk.NVIDIA makes no representation or warranty that products based on this document will be suitable for any specified use. Testing of all parameters of each product is not necessarily performed by NVIDIA. It is customer’s sole responsibility to evaluate and determine the applicability of any information contained in this document, ensure the product is suitable and fit for the application planned by customer, and perform the necessary testing for the application in order to avoid a default of the application or the product. Weaknesses in customer’s product designs may affect the quality and reliability of the NVIDIA product and may result in additional or different conditions and/or requirements beyond those contained in this document. NVIDIA accepts no liability related to any default, damage, costs, or problem which may be based on or attributable to: (i) the use of the NVIDIA product in any manner that is contrary to this document or (ii) customer product designs.No license, either expressed or implied, is granted under any NVIDIA patent right, copyright, or other NVIDIA intellectual property right under this document. Information published by NVIDIA regarding third-party products or services does not constitute a license from NVIDIA to use such products or services or a warranty or endorsement thereof. Use of such information may require a license from a third party under the patents or other intellectual property rights of the third party, or a license from NVIDIA under the patents or other intellectual property rights of NVIDIA.Reproduction of information in this document is permissible only if approved in advance by NVIDIA in writing, reproduced without alteration and in full compliance with all applicable export laws and regulations, and accompanied by all associated conditions, limitations, and notices.THIS DOCUMENT AND ALL NVIDIA DESIGN SPECIFICATIONS, REFERENCE BOARDS, FILES, DRAWINGS, DIAGNOSTICS, LISTS, AND OTHER DOCUMENTS (TOGETHER AND SEPARATELY, “MATERIALS”) ARE BEING PROVIDED “AS IS.” NVIDIA MAKES NO WARRANTIES, EXPRESSED, IMPLIED, STATUTORY, OR OTHERWISE WITH RESPECT TO THE MATERIALS, AND EXPRESSLY DISCLAIMS ALL IMPLIED WARRANTIES OF NONINFRINGEMENT, MERCHANTABILITY, AND FITNESS FOR A PARTICULAR PURPOSE. TO THE EXTENT NOT PROHIBITED BY LAW, IN NO EVENT WILL NVIDIA BE LIABLE FOR ANY DAMAGES, INCLUDING WITHOUT LIMITATION ANY DIRECT, INDIRECT, SPECIAL, INCIDENTAL, PUNITIVE, OR CONSEQUENTIAL DAMAGES, HOWEVER CAUSED AND REGARDLESS OF THE THEORY OF LIABILITY, ARISING OUT OF ANY USE OF THIS DOCUMENT, EVEN IF NVIDIA HAS BEEN ADVISED OF THE POSSIBILITY OF SUCH DAMAGES. Notwithstanding any damages that customer might incur for any reason whatsoever, NVIDIA’s aggregate and cumulative liability towards customer for the products described herein shall be limited in accordance with the Terms of Sale for the product.TrademarksNVIDIA, the NVIDIA logo, and Mellanox are trademarks and/or registered trademarks of NVIDIA Corporation and/or Mellanox Technologies Ltd. in the U.S., and in other countries. Other company and product names may be trademarks of the respective companies with which they are associated.Copyright© 2021 NVIDIA Corporation & affiliates. All rights reserved.。
KX
这是kX驱动的欢迎界面,正式进入kX驱动的安装过程(如果是以后第二次的驱动安装,大家可以直接运行保存的驱动目录下的setup.exe进行安装.如果不是,建议选择其默认地址保存),点击Install继续。
出现驱动版权页,点击“√”进入下一步。
看懂提示,点击确定。
??
这个时候驱动程序安装过程会向你的VST共享目录copy一个kXi.dll的文件,使支持VST 插件的主程序可以调用kX驱动的kXAutomation,利用midi控制器给各种通道做自动化处理,点击确定,指定VST共享目录,完成(有的系统在这里会要求重启,这个时候就按要求重新启动,重启后点击setup.exe继续安装)。
面目全非的默认界面
ASIO
打开
左上的波形就是伴奏,一
DSP
MX6
??
??。
PC安装Mac OS X 10.7(黑苹果)懒人版并完美驱动pc安装macosx10.7(黑苹果)懒人版并完美驱动一、安装前的准备工作1、目前只在intel平台上安装macos成功,amd平台需要破解,在远景论坛上有相关的教程。
所有操作过程均在windows7下完成,是因为windows7的压缩卷功能很方便,不用到dos下格式化分区后才能调整分区大小。
2、需要用到的工具软件1) Eaybcd,用于安装hjmac引导工具。
2)、hjmac,引导工具,安装后用来引导macos。
3)、leopardhdinstallhelperv0。
3.该软件可以将下载的MacOS镜像写入我们准备安装MacOS的Apple系统专用的HFS+格式硬盘分区。
4)、macdrive8,在windows下安装它才能读写hfs+文件系统。
5) Mac OS映像已经过测试。
下载的10.7和10.8映像可以成功安装。
6)安装MacOS后,使用带有diskgenius的ghost CD修复引导。
7) Aida64,用于在windows下导出主板BIOS。
8) Gpu-z,用于在windows下导出图形卡的Rom。
9) Idtst和MAC用于制作图形卡驱动程序文件。
10)、kext_uuHelper_ub7,一种在Mac下安装驱动程序的工具。
二、操作过程提醒:一定要备份重要文件。
在操作过程中,我两次丢失了Windows分区。
1.为MacOS准备两个分区利用windows的磁盘管理工具,划出两个分区用来安装macos。
一个是用来刻录macos镜像的分区,大小为7200mb;一个是用来macos系统分区,7g以上。
以上两个分区,不要格式化,或者格式化为fat32,不能格式化为ntfs。
2.将MacOS映像刻录到安装分区以管理员身份启动leopardhdinstallhelperv0.3选择下载的图像,选择目标分区(7200mb分区),在三个选项之前移除挂钩,然后单击开始录制。
1. //////////2.8//////////////// 2. void INITIAL_HX8347(void) 3. { 4. //##########################################################################
5. //Gamma Set: 6. 7. Set_LCD_8B_REG(0x46,0x95); // 8. Set_LCD_8B_REG(0x47,0x51); // 9. Set_LCD_8B_REG(0x48,0x00); // 10. Set_LCD_8B_REG(0x49,0x36); // 11. Set_LCD_8B_REG(0x4A,0x11); // 12. Set_LCD_8B_REG(0x4B,0x66); // 13. Set_LCD_8B_REG(0x4C,0x14); // 14. Set_LCD_8B_REG(0x4D,0x77); // 15. Set_LCD_8B_REG(0x4E,0x13); // 16. Set_LCD_8B_REG(0x4F,0x4C); // 17. Set_LCD_8B_REG(0x50,0x46); // 18. Set_LCD_8B_REG(0x51,0x46); // 19. //##########################################################################
20. //240x320 window setting: 21. 22. Set_LCD_8B_REG(0x02,0x00); // Column address start2 23. Set_LCD_8B_REG(0x03,0x00); // Column address start1 24. 25. Set_LCD_8B_REG(0x04,0x00); // Column address end2 26. Set_LCD_8B_REG(0x05,0xEF); // Column address end1 27. 28. Set_LCD_8B_REG(0x06,0x00); // Row address start2 29. Set_LCD_8B_REG(0x07,0x00); // Row address start1 30. 31. Set_LCD_8B_REG(0x08,0x01); // Row address end2 32. Set_LCD_8B_REG(0x09,0x3F); // Row address end1 33. 34. Set_LCD_8B_REG(0x90,0x7F); // SAP=0111 1111 35. //##########################################################################
36. // Display Setting: 37. 38. Set_LCD_8B_REG(0x01,0x06); // IDMON=0, INVON=1, NORON=1, PTLON=0
39. 40. Set_LCD_8B_REG(0x16,0xC8); //MY, MX, MV, ML, BGR, TEON 41. 42. Set_LCD_8B_REG(0x23,0x95); // N_DC=1001 0101 43. Set_LCD_8B_REG(0x24,0x95); // P_DC=1001 0101 44. Set_LCD_8B_REG(0x25,0xFF); // I_DC=1111 1111 45. 46. Set_LCD_8B_REG(0x27,0x06); // N_BP=0000 0110 47. Set_LCD_8B_REG(0x28,0x06); // N_FP=0000 0110 48. Set_LCD_8B_REG(0x29,0x06); // P_BP=0000 0110 49. Set_LCD_8B_REG(0x2A,0x06); // P_FP=0000 0110 50. Set_LCD_8B_REG(0x2C,0x06); // I_BP=0000 0110 51. Set_LCD_8B_REG(0x2D,0x06); // I_FP=0000 0110 52. 53. Set_LCD_8B_REG(0x3A,0x01); // N_RTN=0000, N_NW=001 54. Set_LCD_8B_REG(0x3B,0x01); // P_RTN=0000, P_NW=001 55. Set_LCD_8B_REG(0x3C,0xF0); // I_RTN=1111, I_NW=000 56. Set_LCD_8B_REG(0x3D,0x00); // DIV=00 57. DelayX1ms(20); 58. 59. Set_LCD_8B_REG(0x10,0xA6); // SS=0,GS=0 CSEL=110 60. //##########################################################################
61. // Power Supply Setting 62. 63. Set_LCD_8B_REG(0x19,0x49); // OSCADJ=10 0000, OSD_EN=1 //60Hz 64. Set_LCD_8B_REG(0x93,0x0C); // RADJ=1100, 65. DelayX1ms(10); 66. 67. Set_LCD_8B_REG(0x20,0x40); // BT=0100 68. 69. Set_LCD_8B_REG(0x1D,0x07); // VC1=111 70. Set_LCD_8B_REG(0x1E,0x00); // VC3=000 71. Set_LCD_8B_REG(0x1F,0x04); // VRH=0100 72. 73. Set_LCD_8B_REG(0x44,0x4D); // VCM=101 0000 74. Set_LCD_8B_REG(0x45,0x11); // VDV=1 0001 75. DelayX1ms(10); 76. 77. Set_LCD_8B_REG(0x1C,0x04); // AP=100 78. DelayX1ms(20); 79. Set_LCD_8B_REG(0x43,0x80); //set VCOMG=1 80. DelayX1ms(5); 81. Set_LCD_8B_REG(0x1B,0x18); // GASENB=0, PON=1, DK=1, XDK=0, DDVDH_TRI=0, STB=0 82. DelayX1ms(40); 83. 84. Set_LCD_8B_REG(0x1B,0x10); // GASENB=0, PON=1, DK=0, XDK=0, DDVDH_TRI=0, STB=0 85. DelayX1ms(40); 86. //##########################################################################
87. // Display ON Setting 88. 89. Set_LCD_8B_REG(0x26,0x04); //GON=0, DTE=0, D=01 90. DelayX1ms(40); 91. Set_LCD_8B_REG(0x26,0x24); //GON=1, DTE=0, D=01 92. Set_LCD_8B_REG(0x26,0x2C); //GON=1, DTE=0, D=11 93. DelayX1ms(40); 94. 95. Set_LCD_8B_REG(0x26,0x3C); //GON=1, DTE=1, D=11 96. 97. Set_LCD_8B_REG(0x35,0x38); // EQS=38h 98. Set_LCD_8B_REG(0x36,0x78); // EQP=78h 99. 100. Set_LCD_8B_REG(0x3E,0x38); // SON=38h 101. 102. Set_LCD_8B_REG(0x40,0x0F); // GDON=0Fh 103. Set_LCD_8B_REG(0x41,0xF0); // GDOFF 104. //##########################################################################
105. //set spulse & rpulse 106. Set_LCD_8B_REG(0x57,0x02); // Test mode='1' 107. Set_LCD_8B_REG(0x56,0x84); // set Rpulse='1000',spulse='0100' 108. Set_LCD_8B_REG(0x57,0x00); // Test mode= '0' 109. //##########################################################################
110. } 111. void Set_LCD_8B_REG(uchar reg,uchar dat) 112. { 113. rd=1; 114. rs=0; 115. dataport=reg; 116. cs=0; 117. wr=0; 118. _nop_(); 119. wr=1; 120. rs=1; 121. dataport=dat; 122. wr=0;