
第八压力仪表2
- 格式:ppt
- 大小:4.75 MB
- 文档页数:63

e-mail:**************For latest product manuals: /en-us/pdf-manualsShop online at User’s GuideDigital Pressure Gauge DPG280 SERIESTable of ContentsSection 1 - Introduction1.1 Precautions (2)Section 2 – Setup2.1 General Dimensions (3)Section 3 – Menu and Configuration3.1 LCD and Code Description (3)3.2 Button Functionality (4)3.3 Adjust of Filter Constant (4)3.4 Power (4)3.5 Data Record (4)3.6 Peak Value (5)3.7 Troubleshooting (5)Section 4 – Software Instructions4.1 Software Instructions (6)Section 1 – Introduction1.1 Precautions•Please check the packaging and appearance after you received the product.•Please check the mode and specification of the product.Keep correct electrical connection and mounting method.•Please installation WITHOUT power.•During using, please notice the technical and operation conditions: the temperature of medium, burst pressure, power supply.•This product is a precision device, DO NOT use hard objects to touch the diaphragm or disassemble.•During installation, do not install or disassemble strongly, especially the installation of thread.•Please install or disassemble with a suitable wrench,otherwise, the damage is not in the scope of warranty.•After starting the gauge, it is a normal phenomenon to take a few minutes to keep it stable and work normally.•If the product is out of order, please contact our after-sale technical staff.•During installation, the gauge will be affected by installation stress. After installation, please zero clearing.(!!)The product damage caused by non-professional operation according to the operationregulation is not the scope by the warranty.The DPG280 is shipped with 2 AAA batteries outside of the unit. To install or replace batteries, first remove the four screws. Then remove the lid using a flat head screwdriver and the two pry slots (shown above), as needed.CAUTION: Do not apply force to keypad area on the front of the unit whenreplacing the lid. Force should only be applied on the raised edges of the unit orareas that do not contain keypad buttons or the screen.NOTE: Battery operating and storage temperatures can vary by manufacturer.The temperature rating of the replacement batteries you choose may limit the temperature to a narrower range than specified for the DPG509. Please consultthe battery manufacturer for temperature limitations.Battery life will vary based on the quality of batteries installed and combination of selected settings. Below are general guidelines to maximize battery life:•Keep the backlight off or rarely use•Select a low sampling rate•Avoid prolonged exposure to extreme temperatures2.1 General DimensionsSection 3 – Menu and Configuration3.1 LCD and Code DescriptionSection 2 – Setup3.2 Button Functionality3.3 Adjust of Filter ConstantShort press ‘back-light’and ‘ZERO’ buttons together, it shows ‘r-03',and means the filterconstant is 03. Then change the value through pressing ‘ZERO’ button, the value is between01~10. After setting, press back-light button to save and quit.Notice: The value smaller, the figure changes more quickly; the value bigger, the figurechanges more slowly and the figure more stability.3.4 Power3.5 Data Record1.On/off data record functionAfter power, short press ‘ back-light’ button, then the ‘pressure unitsign’ begin to flicker, it means the data record function is open.Press ‘back-light’ button again, then the ‘pressure unit sign’ stop flickering, it means the data record function is closed.2.Adjustment the record interval timeLong press ‘back-light’button for 3 seconds till it shows ‘FXXXX’,such as ‘F0001', it means the data record every one second. Through press ‘power’ and ‘zero’buttons to change the value. Through press ‘back-light’ button to shift different position value.After setting, press ‘unit’ button to save and quit. The value range: (1~3600) seconds.3.Date exportFirst, please install the correct software on computer.Second, contact gauge with computer through special USB-line which is in the package box.Third, operation methods.3.6 Peak ValueLong press ‘UNIT’ button for 4 seconds, the screen will show theMaximum value after last zero clearing, then press ‘UNIT’ button , it will show Minimum value, then press ‘ UNIT’ button to quit.During show Max or Min value, long press ‘ZERO’ button to clear record before, and enter a new record.3.7 Troubleshooting1.) Question: Back-light DimAnswer:Low Battery, install new battery2.) Question:Battery identification flashingAnswer: Low Battery, install new battery3.) Question:Pressure no changeAnswer:Reason Analysis:(1). Pressure port is block(2). Zero clearing with pressure applied(3). Pressure sensor damageSolutions:(1). Clear pressure connector(2). Zero clearing without pressure(3). Return factory for repair4.Question:Showing ‘E--H’Answer:Reason Analysis:(1). Over pressure(2). Pressure sensor is damagedSolutions:(1). Decrease pressure(2). Return factory for repair5.) Question:Pressure change slowlyAnswer:Sampling rate low. Sampling rate value decrease6.) Question:Pressure change slowlyAnswer:Value is beating too fast. Sampling rate value increase7.) Question:Frequent Pressure ShockAnswer: Add Buffer Tube8.) Question:High TemperatureAnswer:Add Radiator Tube1. Plugin the USB adaptor. Extract the software package to you desire folder. Click “Omega DPG280 DataCenter.exe” to start the application. “dot net Framework 4.8” should be install if the software cannot start. Thisinstallation has been placed in the drivers folder.2. Click the “search” button to list the connected pressure gauge. See the “Driver install” section if no device found.Section 4 - Software Instructions 4.1 SoftwareInstructionsⅰQuick start4. Drag the data chart to zoom in the curve, right click to zoom out.5.Click the “Export” button to export the history data.3. Select the unit and click “download” button to start the download process.2.Right click the exclamatory marked USB device and select “update driver”. Click “Browse this computer to find thedriver”. Select the “/Drivers/CH341SER” folder and click “OK” to install the driver.6.Click the “Clear” button to clea r the history data in gauge.ⅱ Diver install1.Right click the “This computer” and select “manager” **************Servicing North America:U.S.A. Omega Engineering, Inc.Headquarters: T oll-Free: 1-800-826-6342 (USA & Canada only)Customer Service: 1-800-622-2378 (USA & Canada only) Engineering Service: 1-800-872-9436 (USA & Canada only)Tel: (203) 359-1660 Fax: (203) 359-7700e-mail:**************For Other Locations Visit /worldwideThe information contained in this document is believed to be correct, but OMEGA accepts no liability for any errors it contains, and reserves the right to alter specifications without notice.WARRANTY/DISCLAIMEROMEGA ENGINEERING, INC. warrants this unit to be free of defects in materials and workmanship for a period of 13 months from date of purchase. OMEGA’s WARRANTY adds an additional one (1) month grace period to the normal one (1) year product warranty to cover handling and shipping time. This ensures that OMEGA’s customers receive maximum coverage on each product.If the unit malfunctions, it must be returned to the factory for evaluation. OMEGA’s Customer Service Department will issue an Authorized Return (AR) number immediately upon phone or written request. Upon examination by OMEGA, if the unit is found to be defective, it will be repaired or replaced at no charge. OMEGA’s WARRANTY does not apply to defects resulting from any action of the purchaser, including but not limited to mishandling, improper interfacing, operation outside of design limits, improper repair, or unauthorized modification. This WARRANTY is VOID if the unit shows evidence of having been tampered with or shows evidence of having been damaged as a result of excessive corrosion; or current, heat, moisture or vibration; improper specification; misapplication; misuse or other operating conditions outside of OMEGA’s control. Components in which wear is not warranted, include but are not limited to contact points, fuses, and triacs.OMEGA is pleased to offer suggestions on the use of its various products. However, OMEGA neither assumes responsibility for any omissions or errors nor assumes liability for any damages that result from the use of its products in accordance with information provided by OMEGA, either verbal or written. OMEGA warrants only that the parts manufactured by the company will be as specified and free of defects. OMEGA MAKES NO OTHER WARRANTIES OR REPRESENTATIONS OF ANY KIND WHATSOEVER, EXPRESSED OR IMPLIED, EXCEPT THAT OF TITLE, AND ALL IMPLIED WARRANTIES INCLUDING ANY WARRANTY OF MERCHANTABILITY AND FITNESS FOR A PARTICULAR PURPOSE ARE HEREBY DISCLAIMED. LIMITATION OF LIABILITY: The remedies of purchaser setforth herein are exclusive, and the total liability of OMEGA with respect to this order, whether based on contract, warranty, negligence, indemnification, strict liability or otherwise, shall not exceed the purchase price of the component upon which liability is based. In no event shall OMEGA be liable for consequential, incidental or special damages.CONDITIONS: Equipment sold by OMEGA is not intended to be used, nor shall it be used: (1) as a “Basic Component”under 10 CFR 21 (NRC), used in or with any nuclear installation or activity; or (2) in medical applications or used on humans. Should any Product(s) be used in or with any nuclear installation or activity, medical application, used on humans, or misused in any way, OMEGA assumes no responsibility as set forth in our basic WARRANTY / DISCLAIMER language, and, additionally, purchaser will indemnify OMEGA and hold OMEGA harmless from any liability or damage whatsoever arising out of the use of the Product(s) in such a manner.RETURN REQUESTS / INQUIRIESDirect all warranty and repair requests/inquiries to the OMEGA Customer Service Department. BEFORE RETURNING ANY PRODUCT(S) TO OMEGA, PURCHASER MUST OBTAIN AN AUTHORIZED RETURN (AR)NUMBER FROM OMEGA’SCUSTOMER SERVICE DEPARTMENT (IN ORDER TO AVOID PROCESSING DELAYS). The assigned AR number should then be marked on the outside of the return package and on any correspondence.The purchaser is responsible for shipping charges, freight, insurance and proper packaging to prevent breakage in transit.FOR WARRANTY RETURNS, please have the following information available BEFORE contacting OMEGA:1.Purchase Order number underwhich theproduct was PURCHASED,2.Model and serial number of the product under warranty, and3.Repair instructions and/or specific problemsrelative to the product.FOR NON-WARRANTY REPAIRS, consult OMEGA for currentrepair charges. Have the following information availableBEFORE contacting OMEGA:1.Purchase Order number to cover the COST of therepair,2.Model and serial number of the product, and3.Repair instructions and/or specific problemsrelative to the product.OMEGA’s policy is to make running changes, not model changes, whenever an improvement is possible. This affords our customers the latest in technology and engineering. OMEGA is a trademark of OMEGA ENGINEERING, INC.© Copyright 2018 OMEGA ENGINEERING, INC. All rights reserved. This document may not be copied, photocopied, reproduced, translated, or reduced to any electronic medium or machine-readable form, in whole or in part, without the prior written consent of OMEGA ENGINEERING, INC.UNRESTRICTED。


【导读】压力表是一种用于测量和显示压力的仪器。
该产品可以将压力转换为机械位移或电信号,并通过指针或数字显示设备来显示压力数值。
压力表广泛应用于各种领域,如工业生产、实验室测试、军事领域等。
压力表分类压力表按照测量原理可以分为机械式压力表、电子式压力表、簧管式压力表、液压式压力表等:1.机械式压力表是使用机械元件来测量压力,包括针式压力表、指示压力表、差压表等。
2.电子式压力表可以通过电子元件来测量压力,包括数字压力表、液晶压力表、显示压力表等。
3.簧管式压力表是使用弯曲的簧管来测量压力的,包括带指针的簧管压力表、簧片式电气接点压力表等。
4.液压式压力表是使用液体(一般是油)测量压力的,包括油压力表、液压表等。
压力表简介压力表用于测量流体的压力的仪器。
它广泛用于工业、化工、石油、天然气、制药、食品等领域,在实际工作中扮演着非常重要的角色。
压力表的结构一般包括可测量压力的感受器件、传感器、电路板、指针指示器或数字显示屏等部分。
感受器件是压力表最核心的部分,其工作原理一般是将被测压力转换为机械变形或电输出信号,经过传感器电路放大处理后输出到指针或显示屏上。
根据测量范围和精度的不同,压力表的类型也多种多样,比如机械压力表、电子压力表、数字压力表、差压表等。
在选择压力表时,需要根据具体的测量场合和测量要求来选择不同类型的压力表。
压力表原理压力表的原理:压力表的原理是利用弹性元件(如弹簧、液柱)或电传感器(如铂电阻、压电晶体)等,在被测压力作用下发生形变或产生电信号,再通过一定的机构将其转化为指示压力的仪表。
基本原理为:根据变形原理测量被测介质的压力。
当介质中的压力改变时,它就会引起弹性元件或电传感器的变形,由变形引起的机械或电信号再经过各种处理转换为压力信号并指示在压力表上。
压力表用途1.工业领域:压力表广泛应用于各种工业领域,如石油化工、制药、食品加工等。
它可以用于监测和控制流体系统中的压力,保证生产过程的安全和稳定性。
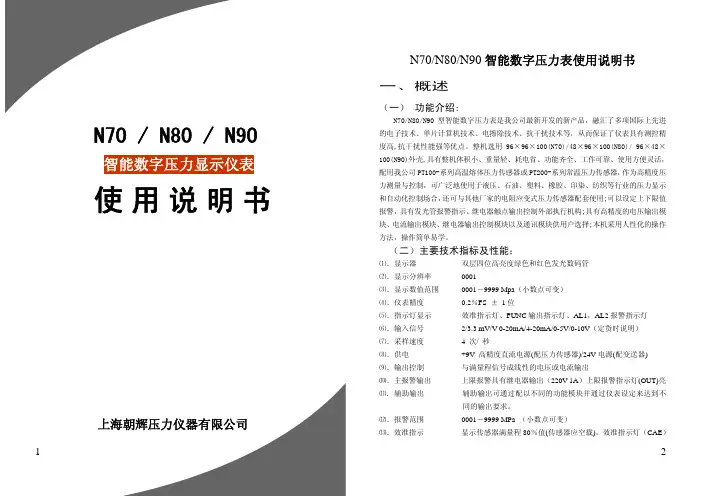
智能数字压力显示仪表上海朝辉压力仪器有限公司N70 / N80 / N90 使用 说 明书N70/N80/N90智能数字压力表使用说明书一、概述(一) 功能介绍:N70/N80/N90型智能数字压力表是我公司最新开发的新产品,融汇了多项国际上先进的电子技术、单片计算机技术、电擦除技术、抗干扰技术等,从而保证了仪表具有测控精度高,抗干扰性能强等优点。
整机选用96×96×100(N70)/48×96×100(N80)/ 96×48×100(N90)外壳,具有整机体积小、重量轻、耗电省、功能齐全、工作可靠、使用方便灵活,配用我公司PT100-系列高温熔体压力传感器或PT200-系列常温压力传感器,作为高精度压力测量与控制,可广泛地使用于液压、石油、塑料、橡胶、印染、纺织等行业的压力显示和自动化控制场合,还可与其他厂家的电阻应变式压力传感器配套使用;可以设定上下限值报警,具有发光管报警指示、继电器触点输出控制外部执行机构;具有高精度的电压输出模块、电流输出模块、继电器输出控制模块以及通讯模块供用户选择;本机采用人性化的操作方法,操作简单易学。
(二)主要技术指标及性能:⑴.显示器 双层四位高亮度绿色和红色发光数码管 ⑵.显示分辨率 0001⑶.显示数值范围 0001-9999 Mpa (小数点可变) ⑷.仪表精度 0.2%FS ± 1位⑸.指示灯显示 效准指示灯、FUNC 输出指示灯、AL1,AL2报警指示灯 ⑹.输入信号 2/3.3 mV/V 0-20mA/4-20mA/0-5V/0-10V (定货时说明) ⑺.采样速度 4 次/ 秒⑻.供电 +9V 高精度直流电源(配压力传感器)/24V 电源(配变送器) ⑼.输出控制 与满量程信号成线性的电压或电流输出⑽.主报警输出 上限报警具有继电器输出(220V 1A )上限报警指示灯(OUT)亮 ⑾. 辅助输出 辅助输出可通过配以不同的功能模块并通过仪表设定来达到不同的输出要求。