aix使用教程
- 格式:ppt
- 大小:1.54 MB
- 文档页数:131

AIX命令的基本操作1.创建文件的3种方法(本次所有的试验均在/test下进行)2.显示文件列表(ls命令的使用)常用的参数选项(a b d i l R s)ls的初步使用利用通配符显示文件既要使用“*”通配符,有能避免列出子目录中的文件,可以使用“-d”选项列出隐藏文件(“-b”以八进制数字的形式列出文件名中不可见的特殊字符)递归的列出文件(ls -l *与ls -lR 的区别)3.显示文件的内容使用cat命令显示文件利用重定向合并小文件为大文件使用more 命令分页显示文件使用pg命令分页显示文件(n $[不是s] +n -n q Q)使用head 命令显示文件前几行内容(默认是10行)使用tail 命令显示文件最后几行内容(默认值是10行)tail [+- number [lbcf]] [file]"+"表示从文件的起始位置开始计算。
“-”表示从文件的结束位置开始就算。
Tail -f somelogfile 监控不断增长的文件4.复制文件(为了避免将同名的文件重写,cp时尽量使用-i)5.移动文件Mv -fi 源文件目标文件(“f“强制移动或改名,”i“目标文件(目录)存在会取得用户认可)Mv和basename命令的使用6.删除文件rm [-r][-f][-i] [file] (”-r“用于递归地删除目录及目录中的文件,”-i“以交互方式执行文件的删除,”-f" 表示强制删除文件。
)要谨慎使用文件名通配符“*”。
7.确定文件内容的类型8.建立链接和符号链接文件(-n 链接是个存在的文件不会被重写,默认的;-f 强制与-n相反;-s 符号链接用于不同文件系统;不用表示硬链接只能用于同一文件系统。
)9.显示当前工作目录PWD和改换目录CD(参看上面)10.创建目录11.移动和复制目录CPIO的使用find dir1 -print | cpio -padmuv dir2 12.删除目录(要慎用-r)13.比较文件之间的差别diff14.检索文件find(见shell)15.文件目录的安全机制显示文件的访问权限修改文件目录的访问权限(用户类型:u g o a访问权限:r w x)设置文件目录访问权限其它访问权限的设置Umask 022有效用户ID和有效组ID改变文件的属主和组chown –R16.文件的内容检索利用grep检索文件内容grep [-i][-n][-v] string file(i忽略大小写n行号v 不包含string)使用grep进行过滤使用grep检索多个文件检索不包含特定字符串的文本行(-v)在grep中使用正则表达式(^ $ . […] [^…] * .* \)17 进程管理ps命令的使用18.监控用户使用who命令查询系统中的用户。

AIX基础教程(1)AIX基础教程 (1)AIX操作系统概述⼀、AIX的性能和特点:1、短⼩强⼲的内核和丰富的核外系统程序AIX的设计者对系统的内核进⾏了精⼼设计,使之既简短⼜强⼲,可常驻内存。
把凡是能从内核中分离出来的部分都从中分离出来,被分离出来的部分均按核外系统程序对待。
2、良好的⽤户界⾯AIX向⽤户提供的界⾯功能齐备,使⽤⽅便。
其中包括:命令是⽤户通过键盘和显⽰终端与系统进⾏交互会话的界⾯。
系统调⽤命令是供⽤户在编写应⽤程序时使⽤的界⾯。
X-WINDOWS 是系统与⽤户之间的图形界⾯环境。
3、可装卸⽂件卷的⽂件系统AIX的整个⽂件系统由⼀个基本⽂件系统和若⼲个可装卸的⼦⽂件系统构成,它允许⽤户根据需要把⾃⼰的⽂件卷装⼊并与基本⽂件系统连接起来,不需要时可以拆卸下来。
AIX的这种特点既便于扩⼤⽂件存储空间,⼜有利于安全和保密。
4、⽂件、⽬录和各种I/O设备均作为⽂件统⼀处理为了⽅便⽤户使⽤,AIX将普通数据⽂件、⽬录⽂件和I/O设备均以⽂件论之,三者使⽤相同的保护机制,在⽤户⾯前它们具有相同的语法和语义。
5、性能良好的⽹络环境AIX为⽤户提供了良好的⽹络环境,主要包括:⼀组⽹络通信协议,例如TCP/IP。
⼀组⽹络通信⼯具,例如mail, write,wall,talk等。
⼀组⽹络编程接⼝,例如TLI(Transport Layer Interface)和Socket等。
6、完善的安全机制AIX具有完善的多级安全/保密机制,其中⽤户级机制的⼀些基本内容包括:AIX将其⽤户分为普通⽤户和特权(超级)⽤户,它们各⾃享有不同的权限。
AIX为每⼀个⽤户都建⽴⼀个户头,称之为⽤户帐户。
系统通过⽤户帐户来组织和记录各⽤户在系统中的活动,并将其限制在⼀定的活动范围之内。
AIX要求每⼀个⽤户必须⽤合法的⽤户名、正确的⼝令进⾏注册,并将每⼀个⽤户都归划到某⼀个特定的⽤户组中。
AIX要求每⼀个⽤户必须按照⾃⼰拥有的权限对⽂件/⽬录进⾏访问,不符合权限规定的访问不被系统所接受。

AIX操作系统概述2、两个或多个命令可以在同一行输入,中间以分号;隔开。
3、命令作业放在后台执行,在命令最后加上符号&。
7、创建命令别名时用alias Name=String,例如$alias dir="/usr/bin/ls -alF"。
使用AIX系统6、目录换名mv SourceDirectory TargetDirectory7、目录拷贝cp SourceDirectory TargetDirectory五、文件管理1、文件拷贝cp SourceFile TargetFilecp SourceFile TargetDirectory2、文件删除rm File3、文件链接ln SourceFile TargetFile4、文件移动/换名mv SourceFile TargetFile or TargetDirectory5、显示文件内容morepgcatheadtail6、文件查找find / -name .profile -printfind . -perm 0600 -printfind . -ctime 1 -printfind . -inum 2145 -printfind . -user abc -print六、改变文件/目录属性每一个文件或目录都有一个属主、一个组名和一组存取权限、访问时间等等。
1、改变文件或目录的最近访问时间touch2、改变文件或目录的属主chown3、改变文件或目录的属组chgrp4、改变文件或目录的存取权chmodchmod g+w Filechmod u+r Filechmod u=rwx Filechmod 755 File八、进程控制1、查询进程状态psps -aps -efps -lps -u uid2、终止进程的执行kill 19160kill -9 191603、对进程的控制nohupnicesleepwait4、在指定的时间运行程序atbatchcron /usr/bin/crontabcrontab和/var/spool/cron/crontabs/ 九、退出系统和关机exitCtr + dlogoutshutdown [ -option ] [ +time message ]当shutdown不带任何参数时,机器会向连在其上的所有终端发出一条关机信息,接着在一分钟后关闭所有终端,杀掉所有在系统上运行的进程,卸除所有文件系统,最后关闭系统。

IAIX系统操作手册系统操作手册版本:5L武汉金力软件有限公司WUHAN JINLI SOFTWARE CO., LTD目录第一章AIX操作系统的安装 (5)安装介质与方式 (5)BOS(Base Operating System)安装 (5)第二章AIX操作系统基本命 (8)系统的进入和退出 (8)password (8)mkdir、rm、mv和cd (8)ls (9)date (10)wc (10)who (10)finger (11)ps (11)kill (15)find (15)grep (16)第三章vi编辑器 (18)3.1vi 简介 (18)3.2vi的进入与离开 (18)3.3vi 的文本输入模式 (18)3.4vi 基本编辑命令 (19)3.5文件处理子命令 (21)第四章存储管理 (21)4.1相关术语 (21)PV (Physical V olume) (21)VG (Volume Group) (21)PP (Physical Partition) (22)LP (Logical Partition) (22)LV(Logical V olume) (22)Mirror(镜像) (22)VGDA(V olume Group Description Area,卷组描述区) (22)VGSA(V olume Group Status Area,卷组状态区) (23)4.2PV的管理 (23)硬盘安装 (23)配置一个PV (23)修改PV的属性 (24)删除一个PV (24)4.3VG的管理 (24)创建一个VG (24)删除一个VG (25)4.4LV的管理 (27)增加一个LV (27)修改LV的属性 (28)删除一个LV (31)第五章RS6000 更换硬盘的过程 (32)HDISK0和HDISK1做成MIRROR,是ROOTVG (32)先做系统备份 (32)查看HDISK0的S/N,P/N号等,在换盘的时候做对照 (33)查看所有硬盘(包括逻辑盘)的状态# lsdev -Cc disk (33)停HACMP (34)把HDISK0从ROOTVG中不做MIRROW (34)关机 (34)开机 (34)把HDISK0加到ROOTVG中并做镜像 (35)重启动2号机 (35)关闭1号机的HACMP (35)重启动1号机 (35)启动1号机的HACMP (35)启动2号机的HACMP (35)第六章HACMP安装配置 (36)准备工作 (36)检测连8port卡的TTY (37)使用AIX安装CD安装文件 (37)修改电源管理 (38)Netscape安装和配置 (38)安装HACMP/ES软件 (38)安装最新的AIX和HACMP补丁 (38)SSA微码升级 (39)设置主机名 (39)为所有网卡绑定boot或standby的IP地址 (39)创建VG、LV和FS (40)修改系统参数 (41)重启两台机器 (41)配置HACMP (41)HA测试(一):启动和关闭 (43)HA测试(二):本机IP接管 (44)HA测试(三):资源接管 (44)第七章模拟硬盘更换 (46)预做方案 (46)查看硬盘信息 (46)把要更换硬盘从VG中拿掉 (46)关机 (46)准备工作 (46)拆机箱 (46)更换硬盘 (47)查看硬盘 (47)改PV (47)做镜像 (47)把另一块盘18G拿掉 (47)关机 (48)更换硬盘 (48)开机 (48)查看硬盘信息 (48)改PV (48)做镜像 (48)起服务 (48)英迈强人 (48)第二方案 (50)把把机器的前面板拆下 (50)查看硬盘信息,看哪个盘是干什么用的 (50)把要更换硬盘从VG中拿掉 (50)把硬盘做成PV (51)lspv查看硬盘情况 (51)把硬盘加到VG中 (51)把18G硬盘数据复制到36G上, (51)取下另一18G硬盘 (51)把硬盘做成PV (51)做镜像 (51)检查,OK (52)第一章AIX操作系统的安装安装介质与方式AIX操作系统的安装可以:1)通过Tape安装。

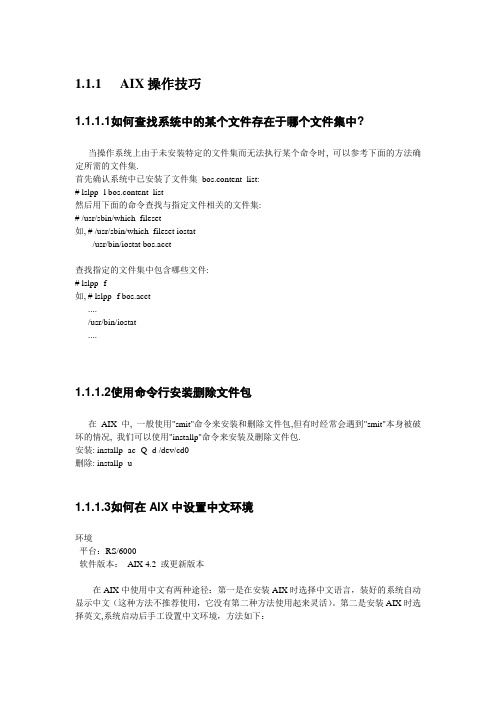
1.1.1AIX操作技巧1.1.1.1 如何查找系统中的某个文件存在于哪个文件集中?当操作系统上由于未安装特定的文件集而无法执行某个命令时, 可以参考下面的方法确定所需的文件集.首先确认系统中已安装了文件集bos.content_list:# lslpp -l bos.content_list然后用下面的命令查找与指定文件相关的文件集:# /usr/sbin/which_fileset如, # /usr/sbin/which_fileset iostat/usr/bin/iostat bos.acct查找指定的文件集中包含哪些文件:# lslpp -f如, # lslpp -f bos.acct..../usr/bin/iostat....1.1.1.2 使用命令行安装删除文件包在AIX 中, 一般使用"smit"命令来安装和删除文件包,但有时经常会遇到"smit"本身被破坏的情况, 我们可以使用"installp"命令来安装及删除文件包.安装: installp -ac -Q -d /dev/cd0删除: installp -u1.1.1.3 如何在AIX中设置中文环境环境平台:RS/6000软件版本:AIX 4.2 或更新版本在AIX中使用中文有两种途径:第一是在安装AIX时选择中文语言,装好的系统自动显示中文(这种方法不推荐使用,它没有第二种方法使用起来灵活)。
第二是安装AIX时选择英文,系统启动后手工设置中文环境,方法如下:1. 将AIX系统盘的第一张光盘放入光驱;2. 运行命令:smitty--> System Environments--> Manage Languange Environment--> Change/Show Primary Language Environment--> Change/Show Cultural Convention, Language, or Keyboard在随后显示的菜单中将光标分别移到以下字段:Primary CULTURAL ConventionPrimary LANGUAGE translationPrimary KEYBOARD按下,从弹出的菜单中选择“IBM-eucCN”将上述字段改为简体中文,按下回车键后系统自动从光盘安装中文环境软件包。
AIX Installation Quick Start GuideVersion 7.2Quick Start GuideThis guide gets you started with a typical installation for the AIX Version 7.2 operating system.Product overviewUse these steps to install the Base Operating System (BOS) for AIX®from physical DVD media. The steps guide you through a new installation, also called an overwrite installation.1Step 1: Completing the prerequisitesPrepare for a new and complete overwrite:v Ensure that you have at least 4 GB of memory and a minimum of 20 GB of physical disk space. For additional release information, see the AIX Release Notes®that correspond to the level of your AIX operating system.v Ensure that your hardware installation is complete, including all external devices. See the documentation that is provided with your system unit for installation instructions.v Verify that your system is set to boot from the device in which the installation media is loaded. See the hardware documentation that accompanied your system for instructions about setting the boot device.v If your system must communicate with other systems and access their resources, make sure that you have the following information before you proceed with the installation:–Network interface–Host name–IP address–Network mask–Name server–Domain name–Gateway2Step 2: Preparing your system for installationFollow these steps to prepare your system for installation:1.Insert the AIX Volume 1 media into the media device.2.Shut down your system. If your system is running, turn it off by following these steps:v Log in as the root user.v Type the following command:shutdown-Fv If your system does not automatically turn off, place the power switch in the Off (0) position.Do not turn on the system unit until instructed to do so in Step 4: Booting from your installation media.3.Ensure that all external devices attached to the system (such as CD-ROM drives, tape drives, DVD drives, andterminals) are turned on. You must turn on the external devices first so that the system unit can identify eachperipheral device during the startup (boot) process.IBM®3Step 3: Setting up an ASCII terminalIf you have not set up ASCII terminal, set the communications, keyboard, and display options. Use the following criteriaand your terminal reference documentation to set the communications, keyboard, and display options. The following settings are typical, but your terminal might have different option names and settings than those listed here:Communication Options:Options SettingsLine speed(baud rate)9600Word Length(bits per character)8Parity no(none)Number of stop bits1Interface RS-232C(or RS-422A)Line control IPRTSKeyboard and display options:Options SettingsScreen normalRow and Column24x80Scroll jumpAuto LF(line feed)offLine Wrap onForcing Insert line(or both)Tab fieldOperating Mode echoTurnaround Character CREnter returnReturn new lineNew Line CRSend pageInsert Character space4Step 4: Booting from your installation mediaFollow this procedure for booting from your installation media:1.Turn on the system unit power switch.2.When the system beeps twice, press 5 on your ASCII terminal. The word keyboard is shown when the beeps occur.3.If you have more than one console, each one might display a panel that directs you to press a key to identify yoursystem console. A different key is specified for each console that is displayed on this panel. If this panel opens, press the specified key only on the console that you want to use for the installation. (The system console is the keyboard and display device that is used for installation and system administration.)4.Select the language that you prefer to use during installation, and press Enter.5Step 5: Verifying the installation settingsFollow this procedure to verify your installation settings:1.Display the installation settings before you install the BOS, by typing 2 in the Choice field to select 2 Change/Show2.Verify the default installation settings from the Overwrite Installation and Settings panel.3.If the installation and system settings are correct, type 0 in the Choice field and press Enter. Confirm that theselections on the installation summary panel are correct, and press Enter to begin the BOS installation. The system automatically reboots after the system installation is complete. Go to Step 9: Finishing the BOS installation.If your installation settings are not correct, or if you want to change the installation settings, go to Step 6. Changing the installation settings.6Step 6: Optional: Changing the installation settingsTo change the installation settings, complete the following steps:1.2.When the Change Method of Installation panel is displayed, type 1 for New and Complete Overwrite Installation andpress Enter.When the Change Disk(s) Where You Want to Install panel is displayed, you can change the destination disk for the3.If the default settings shown are correct, type 0 in the Choice field and press Enter.To change the destination disk, complete the following steps:a.Type the number for each disk where you want to install the BOS in the Choice field and press Enter. Do not pressEnter a final time until you finish selecting all disks. If you must deselect a disk, type its number a second time andpress Enter.b.To finish selecting disks, type 0 in the Choice field and press Enter. The Installation and Settings panel is displayedwith the selected disks listed under System Settings.7Step 7: Changing Primary Language EnvironmentTo change the primary language that is used by this installation:1.Type 2 Primary Language Environment®Settings in the Choice field on the Installation and Settings panel.2.Select the appropriate set of cultural convention, language, and keyboard options. Most of the options are apredefined combination; however, you can define your own combination of options.3.To select a predefined Primary Language Environment, type the corresponding number in the Choice field and pressEnter.To configure your own Primary Language Environment, complete the following steps:a.Select More Choices.b.Page through the choices and select the Create Your Own Combination option.c.On the Set Primary Cultural Convention panel, type the corresponding number in the Choice field and press Enter.d.On the Set Primary Language panel, type the number in the Choice field that corresponds to your choice for theprimary language and press Enter.e.On the Set Keyboard panel, type the number in the Choice field that corresponds to the keyboard that is attachedto the system and press Enter.8Step 8: Verifying BOS installation settingsTo verify your BOS installation settings:1.2.Press Enter to begin the BOS installation.9Step 9: Finishing the BOS installationAfter the base runtime environment is installed, status information is displayed about other software that is beinginstalled. The system automatically reboots.The Installation Assistant guides you through the configuration tasks.Related informationFor more information about installing AIX, see the following resources:v For additional release information, see the AIX Release Notes that corresponds to your level of the AIX operatingsystem in the IBM®Knowledge Center (/support/knowledgecenter/ssw_aix_72/com.ibm.aix.base/ releasenotes_kickoff.htm).v For more detailed installation documentation, see the AIX Version 7.2 installation and migration topic collection in the IBM Knowledge Center (/support/knowledgecenter/ssw_aix_72/com.ibm.aix.install/insgdrf-kickoff.htm).AIX Version 7.2 Licensed Materials - Property of IBM. © Copyright IBM Corp. 2015. U.S. Government Users Restricted Rights - Use, duplication or disclosure restricted by GSA ADP Schedule Contract with IBM Corp.IBM, the IBM logo, and ®are trademarks or registered trademarks of International Business Machines Corp., registered in many jurisdictions worldwide. Other product and service names might be trademarks of IBM or other companies. A current list of IBM trademarks is available on the web at “Copyright and trademark information” (/legal/copytrade.shtml).Document Number:SA23-2267-03Printed in USA。
一、Aix简介Aix是Unix操作系统的版本之一,主要应用在IBM RISC 6000系列小型机上。
其他的Unix ,如SUN的Solaris ,HP Unix以及Linux等等。
目前Aix系统的版本有Aix 4.x Aix5.x等。
它们之间只是版本不同,但内核都是一样的,操作命令机本上也相同。
版本高的会新增一些命令,都是向下兼容的。
二、Aix使用入门对于大多数用户来说,对于Aix的访问都是通过telnet的方法来登录到RS6000上,当然是以不同的身份了。
把本地机器作为RS6000的一个终端,来完成对R S6000的操作。
这实际上是Unix的一大特点,Unix本身就是设计成一个多任务、多用户的并发系统。
2.1登录(login)2.1.1 RS6000的登录许多用户可以同时使用Unix系统,为了让系统知道用户是谁以及可以使用什么资源,用户在使用之前必须向系统表明自己的身份。
另外,U nix认为用户是通过终端或在PC上运行方针软件与其通讯。
Unix系统和用户终端之间必须建立传输信息的连接。
通常把建立通讯连接和表明用户身份的过程称为登录( login) .2.1.1.1 RS6000的开机直接按Power键。
RS6000启动、自检。
包括对硬件的自检,系统的初始化。
2.1.1.2登录默认的情况下,系统会进入Xwindows环境下,也就是所谓的CDE环境(Common Desktop Environment)即公共桌面环境。
这样Aix启动后将直接显示CDE注册界面,输入用户名和口令后即进入CDE操作环境。
通常在RISC6000端都是以r oot身份(管理员身份)登录的。
2.1.2客户端的登录客户端主要是通过执行telnet命令,并且输入合法的用户名和密码,登录到服务器端。
比如:在客户端执行telnet 192.168.0.161 (假设为RS6000的IP) ,会出现如下的登录提示:AIX Version 4(C) Copyrights by IBM and by others 1982, 1996.login:然后输入用户名,如:long ,回车后,会出现输入密码的提示:long's Password:2.1.3成功登录之后成功登录之后,系统将显示一些消息,如上一次用户登录的时间、有关系统信息的消息(称为当日消息),以及一些通知用户是否有mail 的消息。
AIX的基本操作进入和退出系统1.在字符界面环境下进入和退出系统●进入系统login:rootroot's Password:(the password does not appear)●退出系统$ <ctrl-d>或$ exit或$ logout2. 在图形界面环境下进入和退出系统3.口令口令的创建和修改$ passwdChanging password for team01team01's Old password:(the password does not appear)team01's New password:(the password does not appear)Enter the new password again:(the password does not appear)AIX命令的格式$ command option(s) argument(s)●command 命令本身;●option (s) 命令选项,可以同时有多个,选项均以符号“-“开始;●argument (s) 命令参数,可以同时有多个。
文件和目录操作1.文件类型●普通文件包括用户和系统的各种文本文件、代码文件、程序文件和数据文件等等。
●目录包括文件和子目录信息,目录采用倒树状结构。
●特殊文件表示物理或逻辑设备,这些文件存放在 /dev 目录下面。
2.文件及目录名称●文件或目录名称最多可以由255个字符组成,包括大写字母、小写字母、数字字符、#、@ 和 _ 等字符。
●文件或目录名称中不可以含有空格,不可以包含以下字符:* > < / 、 & ! [ ] $ \' “,不可以用有 + ! - 号作为文件和目录名称的首字符,不可使用与系统命令相同的名称,AIX严格区分文件或目录名称中的大小写。
3. 目录操作● pwd 显示当前目录$ pwd示例:$ pwd/home/user● cd 改变当前目录$ cd dir_name● mkdir 创建新目录$ mkdir dir_name● rmdir 删除目录$ rmdir dir_name● ls 显示目录$ ls4. 文件操作● cp 复制文件$ cp source_target● mv 文件更名或移动$ mv source_target● ln 连接文件$ ln source_target示例:$ ls -l运行结果如下:total 4drwxr-xr-x 4 huateng staff 512 Jul 23 15:09 info-rw------- 1 huateng staff 630 Aug 06 10:44 mbox-rw-r--r-- 1 huateng staff 28 Aug 04 16:52---x------ 1 huateng staff 3 Jul 31 16:49 testfile $ ln -s$ ls -l运行结果如下:total 5drwxr-xr-x 4 huateng staff 512 Jul 23 15:09 info-rw------- 1 huateng staff 630 Aug 06 10:44 mbox-rw-r--r-- 1 huateng staff 28 Aug 04 16:52lrwxrwxrwx 1 huateng staff 9 Aug 11 13:31 >---x------ 1 huateng staff 3 Jul 31 16:49 testfile● cat 显示文件内容$ cat file_name使用cat 命令时,所显示的文件应为纯文本文件,否则可能造成终端显示的混乱。